Flutter实战:从零实现俄罗斯方块(二)CustomPaint绘制游戏画面
文章目录
- Flutter实战:从零实现俄罗斯方块(二)CustomPaint绘制游戏画面
-
- 摘要
- 前言
- 一、CustomPaint是什么?
-
- [1.1 为什么游戏需要CustomPaint?](#1.1 为什么游戏需要CustomPaint?)
- [1.2 Canvas和Paint的基本概念](#1.2 Canvas和Paint的基本概念)
- [1.3 CustomPainter怎么写?](#1.3 CustomPainter怎么写?)
- 二、绘制游戏棋盘
-
- [2.1 创建GameBoardPainter类](#2.1 创建GameBoardPainter类)
- [2.2 先画背景和网格](#2.2 先画背景和网格)
- [2.3 画已经固定的方块](#2.3 画已经固定的方块)
- [2.4 画当前下落的方块](#2.4 画当前下落的方块)
- 三、绘制下一个方块预览
-
- [3.1 NextPiecePainter实现](#3.1 NextPiecePainter实现)
- [3.2 如何让方块居中显示?](#3.2 如何让方块居中显示?)
- 四、让画面更好看:颜色和特效
-
- [4.1 方块颜色系统](#4.1 方块颜色系统)
- [4.2 边框和高亮效果](#4.2 边框和高亮效果)
- [4.3 半透明效果怎么实现?](#4.3 半透明效果怎么实现?)
- 五、绘制性能优化
-
- [5.1 shouldRepaint的正确用法](#5.1 shouldRepaint的正确用法)
- [5.2 控制重绘频率](#5.2 控制重绘频率)
- [5.3 缓存Paint对象](#5.3 缓存Paint对象)
- 六、完整的游戏界面布局
-
- [6.1 响应式布局设计](#6.1 响应式布局设计)
- [6.2 控制按钮的实现](#6.2 控制按钮的实现)
- [6.3 游戏结束界面](#6.3 游戏结束界面)
- 七、游戏完成总结
- 参考资料
- 社区支持
摘要
这是我用Flutter开发俄罗斯方块游戏的第二篇文章,主要讲解如何用CustomPaint把上一篇设计的游戏数据渲染成可玩的游戏画面。我会分享我学习CustomPaint的过程,包括如何绘制游戏棋盘、如何绘制不同颜色的方块、如何实现方块预览功能,以及如何优化绘制性能。到这篇文章结束时,一个完整的俄罗斯方块游戏就基本完成了!
关键词:Flutter、CustomPaint、Canvas、游戏绘制、OpenHarmony、俄罗斯方块
前言
在上一篇文章中,我设计好了俄罗斯方块游戏的核心数据结构和算法。但光有逻辑还不够,游戏需要画面才能玩!
我最开始想的是直接用Flutter的常规Widget(Container、Row、Column)来拼凑游戏画面,但很快就发现不太合适:
- 游戏棋盘需要绘制20×10=200个格子
- 方块位置需要实时更新
- 需要精确控制每个像素的颜色
这时候我了解到Flutter有个CustomPaint Widget,可以直接在Canvas上绘制,非常适合游戏开发。这篇文章我就记录我学习CustomPaint的过程。
系列说明:这是Flutter俄罗斯方块游戏开发系列教程的第2篇(共3篇)。本文完成后,游戏核心功能已全部实现。
一、CustomPaint是什么?
1.1 为什么游戏需要CustomPaint?
我先解释一下为什么普通的Widget不够用。
普通Widget的问题:
dart
// 如果用Container表示每个格子
Column(
  children: [
    for (int y = 0; y < 20; y++)
      Row(
        children: [
          for (int x = 0; x < 10; x++)
            Container(
              width: 20,
              height: 20,
              color: board[y][x] != 0 ? Colors.blue : Colors.grey,
            ),
        ],
      ),
  ],
)
这样做有几个问题:
- 性能差:200个Container嵌套,每次更新都要重建整个Widget树
- 不灵活:很难实现特殊效果(渐变、边框、阴影)
- 代码复杂:大量的嵌套结构,难以维护
CustomPaint的优势:
| 方面 | 普通Widget | CustomPaint |
|---|---|---|
| 性能 | 较慢(需要重建Widget树) | 快速(直接绘制到Canvas) |
| 灵活性 | 受限 | 完全控制每个像素 |
| 代码复杂度 | 高(大量嵌套) | 低(集中绘制逻辑) |
| 适用场景 | UI界面 | 游戏画面、图表 |
1.2 Canvas和Paint的基本概念
Canvas:就像一块画布,提供了各种绘制方法。
Paint:就像画笔,定义了颜色、线条粗细、样式等属性。
dart
// 基本使用
void paint(Canvas canvas, Size size) {
  final paint = Paint()
    ..color = Colors.blue      // 蓝色
    ..style = PaintingStyle.fill  // 填充模式
    ..strokeWidth = 2.0;        // 线宽2像素

  // 在Canvas上画一个矩形
  canvas.drawRect(Rect.fromLTWH(10, 10, 50, 50), paint);
}常用Canvas方法:
dart
canvas.drawRect(rect, paint);      // 画矩形
canvas.drawCircle(center, radius, paint);  // 画圆形
canvas.drawLine(p1, p2, paint);    // 画线条
canvas.drawPath(path, paint);      // 画路径
1.3 CustomPainter怎么写?
CustomPainter是自定义绘制的基类,需要实现两个方法:
dart
class GameBoardPainter extends CustomPainter {
  // 1. 构造函数:接收需要绘制的数据
  final List<List<int>> board;
  GameBoardPainter(this.board);

  // 2. paint方法:在这里实现绘制逻辑
  @override
  void paint(Canvas canvas, Size size) {
    // 绘制代码...
  }

  // 3. shouldRepaint方法:决定是否需要重绘
  @override
  bool shouldRepaint(covariant CustomPainter oldDelegate) {
    return true;  // true表示需要重绘
  }
}
使用CustomPaint Widget:
dart
CustomPaint(
  size: Size(300, 600),  // 指定绘制区域大小
  painter: GameBoardPainter(board),  // 传入自定义Painter
)
二、绘制游戏棋盘
2.1 创建GameBoardPainter类
我先创建一个专门绘制游戏棋盘的Painter:
dart
class GameBoardPainter extends CustomPainter {
  final List<List<int>> board;        // 棋盘数据
  final List<List<int>>? currentPiece; // 当前下落的方块
  final int currentX;                  // 当前方块的X坐标
  final int currentY;                  // 当前方块的Y坐标

  GameBoardPainter(
    this.board, {
    this.currentPiece,
    this.currentX = 0,
    this.currentY = 0,
  });

  @override
  void paint(Canvas canvas, Size size) {
    // 绘制逻辑在下几节实现
  }

  @override
  bool shouldRepaint(covariant CustomPainter oldDelegate) => true;
}
2.2 先画背景和网格
我先把背景和网格线画好:
dart
@override
void paint(Canvas canvas, Size size) {
  // 计算每个格子的尺寸
  final cellWidth = size.width / board[0].length;   // 例如:300/10 = 30
  final cellHeight = size.height / board.length;    // 例如:600/20 = 30

  // 1. 画深灰色背景
  final bgPaint = Paint()..color = Colors.grey[900]!;
  canvas.drawRect(
    Rect.fromLTWH(0, 0, size.width, size.height),
    bgPaint,
  );

  // 2. 画网格线
  final gridPaint = Paint()
    ..color = Colors.grey[800]!
    ..style = PaintingStyle.stroke
    ..strokeWidth = 0.5;

  for (int y = 0; y < board.length; y++) {
    for (int x = 0; x < board[y].length; x++) {
      final rect = Rect.fromLTWH(
        x * cellWidth,
        y * cellHeight,
        cellWidth,
        cellHeight,
      );
      canvas.drawRect(rect, gridPaint);
    }
  }
}
效果图 (想象一下):
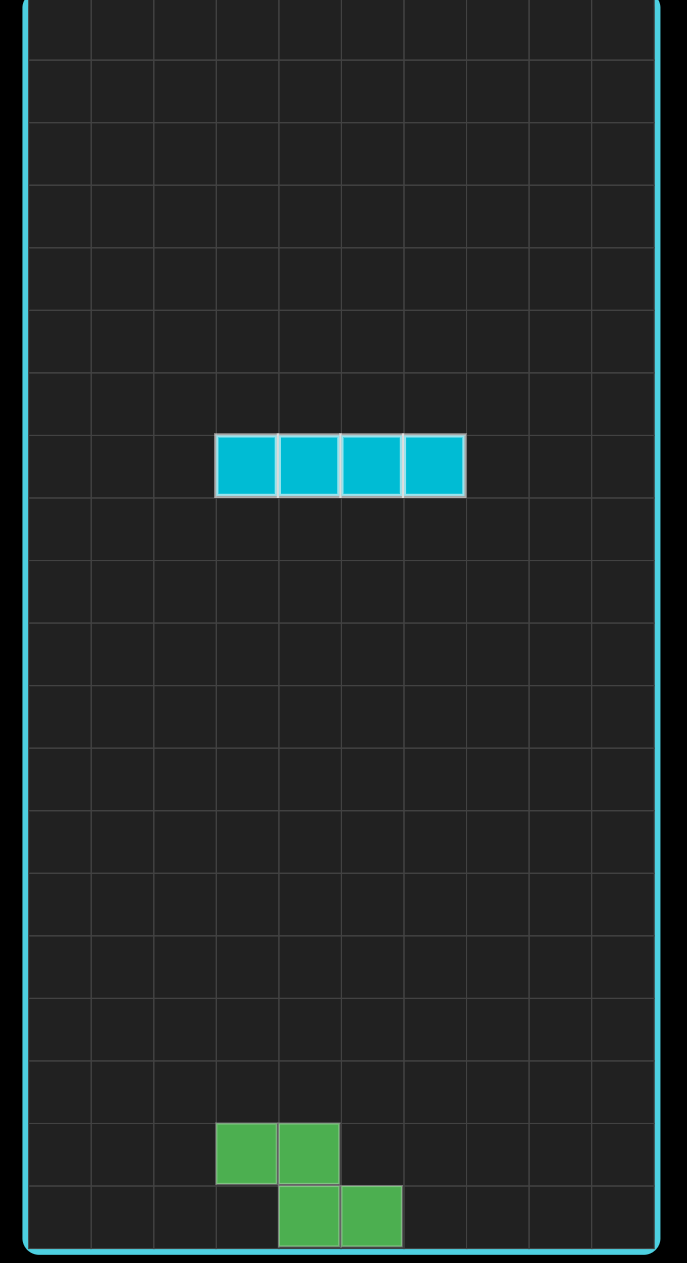
2.3 画已经固定的方块
接下来画已经固定在棋盘上的方块:
dart
// 在paint方法中继续添加...

// 3. 画已固定的方块
for (int y = 0; y < board.length; y++) {
  for (int x = 0; x < board[y].length; x++) {
    if (board[y][x] != 0) {  // 如果该位置有方块
      final rect = Rect.fromLTWH(
        x * cellWidth,
        y * cellHeight,
        cellWidth - 1,  // 减1留出小间隙
        cellHeight - 1,
      );

      // 填充颜色
      final cellPaint = Paint()
        ..color = _getColor(board[y][x])
        ..style = PaintingStyle.fill;
      canvas.drawRect(rect, cellPaint);

      // 画半透明白色边框(增加立体感)
      final borderPaint = Paint()
        ..color = Colors.white.withValues(alpha: 0.3)
        ..style = PaintingStyle.stroke
        ..strokeWidth = 1;
      canvas.drawRect(rect, borderPaint);
    }
  }
}

// 颜色映射函数
Color _getColor(int value) {
  switch (value) {
    case 1: return Colors.cyan;    // I
    case 2: return Colors.blue;    // O
    case 3: return Colors.orange;  // T
    case 4: return Colors.yellow;  // S
    case 5: return Colors.green;   // Z
    case 6: return Colors.purple;  // J
    case 7: return Colors.red;     // L
    default: return Colors.transparent;
  }
}
2.4 画当前下落的方块
当前下落的方块不在board数组里,需要单独画:
dart
// 4. 画当前下落的方块
if (currentPiece != null) {
  for (int py = 0; py < currentPiece!.length; py++) {
    for (int px = 0; px < currentPiece![py].length; px++) {
      if (currentPiece![py][px] != 0) {
        // 计算在棋盘上的绝对位置
        final boardX = currentX + px;
        final boardY = currentY + py;

        // 边界检查
        if (boardY >= 0 && boardY < board.length &&
            boardX >= 0 && boardX < board[0].length) {
          final rect = Rect.fromLTWH(
            boardX * cellWidth,
            boardY * cellHeight,
            cellWidth - 1,
            cellHeight - 1,
          );

          // 填充颜色
          final cellPaint = Paint()
            ..color = _getColor(currentPiece![py][px])
            ..style = PaintingStyle.fill;
          canvas.drawRect(rect, cellPaint);

          // 画更亮的边框(突出当前方块)
          final borderPaint = Paint()
            ..color = Colors.white.withValues(alpha: 0.6)  // 更亮
            ..style = PaintingStyle.stroke
            ..strokeWidth = 2;  // 更粗
          canvas.drawRect(rect, borderPaint);
        }
      }
    }
  }
}视觉效果对比:
- 已固定的方块:边框透明度0.3,线宽1像素
- 当前方块:边框透明度0.6,线宽2像素
这样一眼就能看出哪个是正在操作的方块!
三、绘制下一个方块预览
3.1 NextPiecePainter实现
游戏右侧需要显示下一个方块预览,我创建了一个专门的Painter:
dart
class NextPiecePainter extends CustomPainter {
  final List<List<int>>? piece;

  NextPiecePainter(this.piece);

  @override
  void paint(Canvas canvas, Size size) {
    if (piece == null) return;

    final cellSize = 18.0;  // 固定格子大小

    // 绘制方块
    for (int y = 0; y < piece!.length; y++) {
      for (int x = 0; x < piece![y].length; x++) {
        if (piece![y][x] != 0) {
          final rect = Rect.fromLTWH(
            x * cellSize,
            y * cellSize,
            cellSize - 2,
            cellSize - 2,
          );

          // 填充
          final paint = Paint()
            ..color = _getColor(piece![y][x])
            ..style = PaintingStyle.fill;
          canvas.drawRect(rect, paint);

          // 边框
          final borderPaint = Paint()
            ..color = Colors.white.withValues(alpha: 0.3)
            ..style = PaintingStyle.stroke
            ..strokeWidth = 1;
          canvas.drawRect(rect, borderPaint);
        }
      }
    }
  }

  Color _getColor(int value) {
    // 同上面的颜色映射
  }

  @override
  bool shouldRepaint(covariant CustomPainter oldDelegate) => true;
}
3.2 如何让方块居中显示?
不同方块尺寸不同(2×2到4×4),需要居中显示:
dart
@override
void paint(Canvas canvas, Size size) {
  if (piece == null) return;

  final cellSize = 18.0;

  // 计算居中偏移量
  final offsetX = (size.width - piece![0].length * cellSize) / 2;
  final offsetY = (size.height - piece!.length * cellSize) / 2;

  for (int y = 0; y < piece!.length; y++) {
    for (int x = 0; x < piece![y].length; x++) {
      if (piece![y][x] != 0) {
        final rect = Rect.fromLTWH(
          offsetX + x * cellSize,  // 加上偏移量
          offsetY + y * cellSize,
          cellSize - 2,
          cellSize - 2,
        );
        // 绘制...
      }
    }
  }
}
四、让画面更好看:颜色和特效
4.1 方块颜色系统
我使用了经典俄罗斯方块的配色方案:
dart
Color _getColor(int value) {
  const colors = {
    1: Color(0xFF00BCD4),  // I - 青色
    2: Color(0xFF2196F3),  // O - 蓝色
    3: Color(0xFFFF9800),  // T - 橙色
    4: Color(0xFFFFEB3B),  // S - 黄色
    5: Color(0xFF4CAF50),  // Z - 绿色
    6: Color(0xFF9C27B0),  // J - 紫色
    7: Color(0xFFF44336),  // L - 红色
  };
  return colors[value] ?? Colors.transparent;
}颜色方案对比:
| 方案 | 优点 | 缺点 |
|---|---|---|
| 经典配色 | 玩家熟悉 | 可能单调 |
| 霓虹配色 | 视觉冲击强 | 不适合长时间玩 |
| 柔和配色 | 护眼 | 缺乏对比度 |
我选择了经典配色,因为大家最熟悉。
4.2 边框和高亮效果
边框让方块更有立体感:
dart
// 方案1:单色边框(当前实现)
final borderPaint = Paint()
  ..color = Colors.white.withValues(alpha: 0.6)
  ..style = PaintingStyle.stroke
  ..strokeWidth = 2;

// 方案2:渐变边框(进阶)
final gradient = LinearGradient(
  begin: Alignment.topLeft,
  end: Alignment.bottomRight,
  colors: [
    Colors.white.withValues(alpha: 0.8),
    Colors.white.withValues(alpha: 0.2),
  ],
).createShader(rect);

final borderPaint = Paint()
  ..shader = gradient
  ..style = PaintingStyle.stroke
  ..strokeWidth = 2;
4.3 半透明效果怎么实现?
Flutter提供了多种创建半透明颜色的方法:
dart
// 方法1:使用withValues(推荐)
Colors.white.withValues(alpha: 0.5)

// 方法2:使用withOpacity(已弃用)
Colors.white.withOpacity(0.5)

// 方法3:使用Color.fromARGB
Color.fromARGB(128, 255, 255, 255)

// 方法4:使用Color.fromRGBO
Color.fromRGBO(255, 255, 255, 0.5)我推荐用withValues,因为它是新的API。
透明度速查表:
| Alpha值 | 效果 | 用途 |
|---|---|---|
| 0.0 | 完全透明 | 不可见 |
| 0.3 | 微弱 | 固定方块边框 |
| 0.6 | 明显 | 当前方块边框 |
| 1.0 | 不透明 | 方块填充 |
五、绘制性能优化
5.1 shouldRepaint的正确用法
我一开始写成总是返回true,这样性能不好:
dart
//  不好:每次都重绘
@override
bool shouldRepaint(covariant CustomPainter oldDelegate) {
  return true;
}

//  好:只在数据变化时重绘
@override
bool shouldRepaint(covariant GameBoardPainter oldDelegate) {
  return board != oldDelegate.board ||
         currentPiece != oldDelegate.currentPiece ||
         currentX != oldDelegate.currentX ||
         currentY != oldDelegate.currentY;
}
5.2 控制重绘频率
游戏需要频繁更新,但可以优化:
dart
// 在游戏逻辑中
void tick() {
  if (gameOver || paused) return;

  bool changed = false;

  if (!_checkCollision(_currentX, _currentY + 1, _currentPiece!)) {
    _currentY++;
    changed = true;
  } else {
    _mergePiece();
    changed = true;
  }

  // 只有数据真正变化时才通知UI更新
  if (changed) {
    updateCallback();
  }
}
5.3 缓存Paint对象
Paint对象可以复用:
dart
class GameBoardPainter extends CustomPainter {
  // 静态缓存Paint对象
  static final _gridPaint = Paint()
    ..color = Colors.grey[800]!
    ..style = PaintingStyle.stroke
    ..strokeWidth = 0.5;

  @override
  void paint(Canvas canvas, Size size) {
    // 直接使用缓存的Paint
    canvas.drawRect(rect, _gridPaint);
  }
}
六、完整的游戏界面布局
6.1 响应式布局设计
我用了LayoutBuilder实现响应式:
dart
LayoutBuilder(
  builder: (context, constraints) {
    final isSmallScreen = constraints.maxWidth < 700;
    final boardSize = isSmallScreen ? 250.0 : 300.0;

    return isSmallScreen
        ? Column(  // 小屏幕:垂直布局
            children: [
              CustomPaint(...),  // 游戏棋盘
              ScorePanel(),      // 分数
              Controls(),        // 按钮
            ],
          )
        : Row(     // 大屏幕:水平布局
            children: [
              CustomPaint(...),  // 游戏棋盘
              Column(            // 侧边栏
                children: [
                  ScorePanel(),
                  NextPiecePanel(),
                  Controls(),
                ],
              ),
            ],
          );
  },
)
6.2 控制按钮的实现
dart
Widget _buildControlButton(String label, double size, VoidCallback onPressed) {
  return SizedBox(
    width: size,
    height: size,
    child: ElevatedButton(
      onPressed: onPressed,
      style: ElevatedButton.styleFrom(
        backgroundColor: Colors.cyan[700],
        shape: RoundedRectangleBorder(
          borderRadius: BorderRadius.circular(8),
        ),
      ),
      child: FittedBox(
        child: Text(
          label,
          style: const TextStyle(
            fontSize: 20,
            color: Colors.white,
            fontWeight: FontWeight.bold,
          ),
        ),
      ),
    ),
  );
}
6.3 游戏结束界面
dart
if (_game.gameOver)
  Container(
    color: Colors.black.withValues(alpha: 0.85),
    child: Center(
      child: Column(
        children: [
          Text('GAME OVER', style: TextStyle(fontSize: 32, color: Colors.red)),
          Text('Score: ${_game.score}'),
          ElevatedButton(
            onPressed: () {
              _game.reset();
              setState(() {});
            },
            child: Text('Play Again'),
          ),
        ],
      ),
    ),
  )
七、游戏完成总结
到这篇文章为止,一个完整的俄罗斯方块游戏就基本完成了!
已完成的功能
- 数据结构:方块、棋盘、游戏状态
- 核心算法:碰撞检测、旋转、消行
- 游戏绘制:CustomPaint绘制棋盘和方块
- 交互控制:键盘和触摸按钮控制
- 游戏循环:Timer驱动的游戏主循环
- 计分系统:分数、等级、最高分
- UI界面:响应式布局、暂停、游戏结束
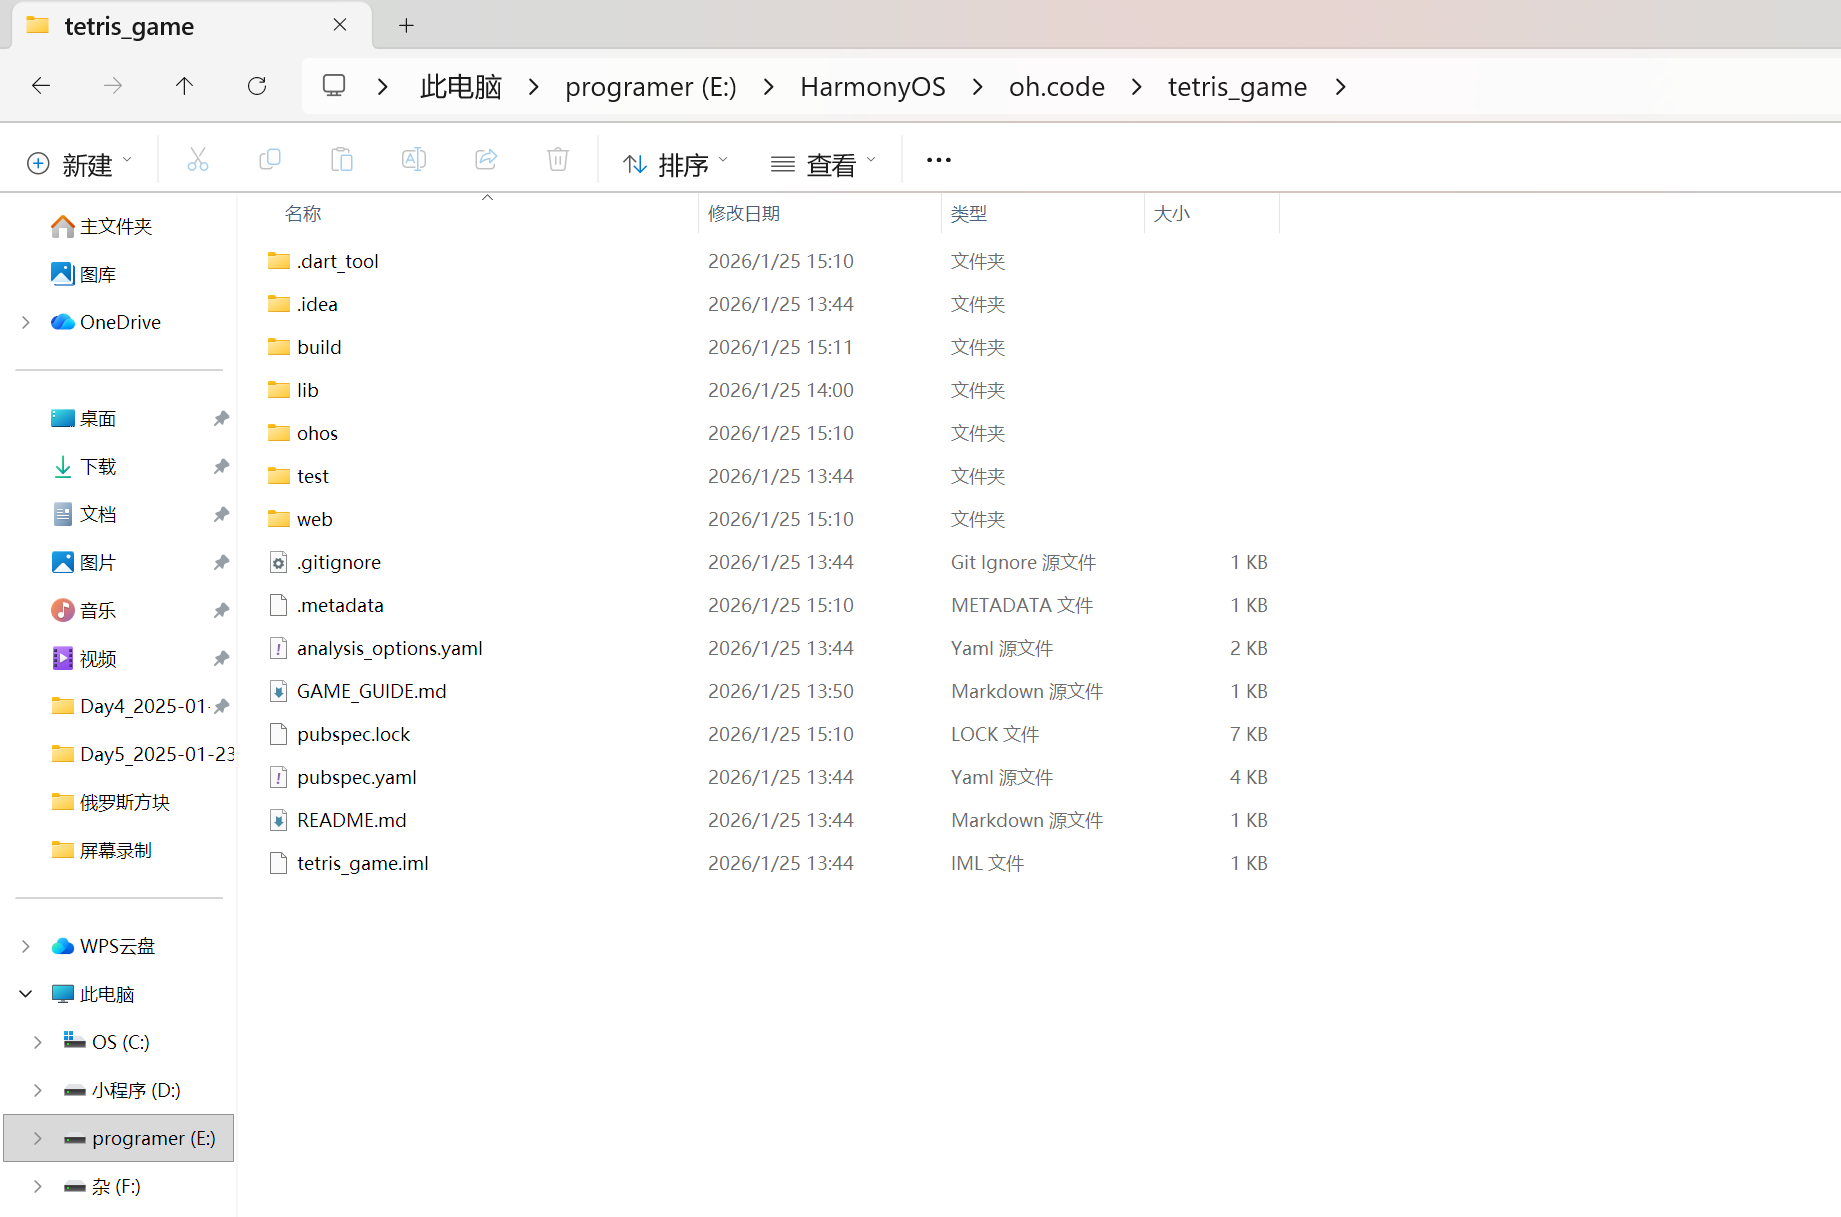
项目结构
后续优化方向
虽然游戏已经可以玩了,但还可以优化:
- 性能优化:使用DevTools分析性能瓶颈
- 代码优化:算法优化、异步处理
- APK构建:混淆、压缩、签名
这些内容我会在下一篇文章中详细讲解。
系列说明:这是Flutter俄罗斯方块游戏开发系列教程的第2篇(共4篇)。到本文为止,游戏核心功能已全部实现。第3篇将介绍交互控制的细节,第4篇将讲解性能优化和部署流程。
参考资料
社区支持
欢迎加入开源鸿蒙跨平台社区:
- 社区论坛 :开源鸿蒙跨平台开发者社区
- 技术交流:参与讨论,分享经验
如果本文对你有帮助,欢迎点赞、收藏、评论!