
安装 vue-croppe
<el-row :gutter="20">
                    <el-col :span="12">
                        <div>
                            <label class="form-label">封面</label><span
                                class="form-required">jpeg、png格式,建议尺寸:372x208,大小<1M</span>
                        </div>
                        <input type="file" ref="fileInput" accept="image/png,image/jpeg" @change="handleFileSelect"
                            class="file-input" style="display: none;" />
                        <div class="resourceLibrary-upload-edit" @click="$refs.fileInput.click()">
                            <img v-if="form.chapterCover" :src="form.chapterCoverImg" alt="">
                            <div :class="{ 'upload-edit-icon-container': form.chapterCover }">
                                 <div v-if="!form.chapterCover">
                                    <el-icon class="upload-edit-icon">
                                        <upload-filled />
                                    </el-icon>
                                    <p class="rupload-edit">选择文件</p>
                                </div>
                                <p v-else class="rupload-edit-icon-text">选择文件</p>
                            </div>
                        </div>
                    </el-col>

                </el-row>

const isShowCropper = ref<boolean>(false)
const userCropperRef = ref()
const handleFileSelect = (e: any) => {
    const file = e.target.files[0];
    if (!file) {
        ElMessage.warning("请选择图片");
        return;
    }
    if (!file.type.match(/image\/(png|jpg|jpeg)/)) {
        ElMessage.warning("请选择png、jpg或jpeg格式图片文件");
        return;
    }

    if (file.size > 1 * 1024 * 1024) {
        ElMessage.warning('上传文件不能大于1M')
        return
    }
    if (file) {
        const reader = new FileReader();
        reader.readAsDataURL(file);
        reader.onload = (event) => {
            // 获取图片的宽度和高度
            const result = event.target.result;
            isShowCropper.value = true;
            nextTick(() => {
                userCropperRef.value.setPreview(result);
            })

        }
    }
}
const handleConfirm = (val) => {
    form.value.chapterCoverImg =  val;
    form.value.chapterCover = val;
    isShowCropper.value = false;
}
组件
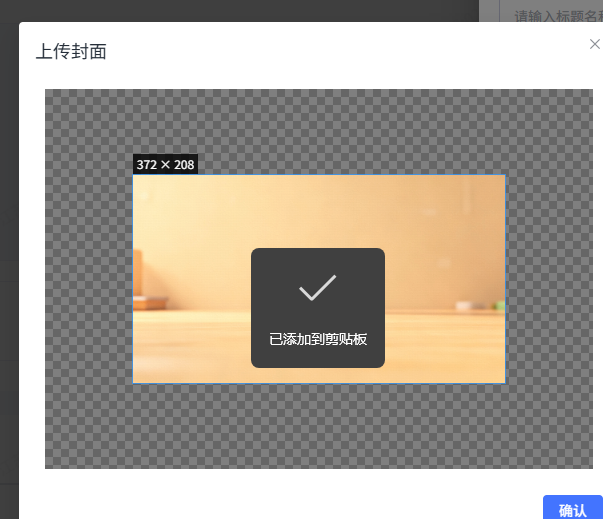
 <user-cropper ref="userCropperRef" v-if="isShowCropper" :title="'上传封面'" :wh="{
        width: 372,
        height: 208
    }" :src="form.resourceUrl" @confirm="handleConfirm" />

<template>
    <el-dialog :title="props.title" v-model="dialogVisible" width="600px">
        <div class="box_cropper">
            <vueCropper ref="cropperRef" :img="option.img" :outputSize="option.outputSize"
                :outputType="option.outputType" :canScale='option.canScale' :autoCrop='option.autoCrop'
                :autoCropWidth='option.autoCropWidth' :autoCropHeight='option.autoCropHeight'
                :canMoveBox='option.canMoveBox' :canMove='option.canMove' :centerBox='option.centerBox'
                :info='option.info' :fixedBox='option.fixedBox' :width='option.width' :height='option.height' :mode='option.mode'>
            </vueCropper>
        </div>
        <template #footer>
            <el-button type="primary" @click="handleConfirm">确认</el-button>
        </template>
    </el-dialog>
</template>

<script setup lang="ts">
import { ref, nextTick } from 'vue'
import 'vue-cropper/dist/index.css'
import { VueCropper } from 'vue-cropper'
import { uploadFile, deleteFile } from '@/api/file'
import { base64ImgtoFile } from '@/utils/index'
const dialogVisible = ref<boolean>(false)
const props = defineProps({
    title: {
        type: String,
        default: '上传头像'
    },
    wh: {
        type: Object,
        default: () => ({
            width: 300,
            height: 300
        })
    },
    cropperHeight: {
        type: Number,
        default: 0
    },
    cropperWidth: {
        type: Number,
        default: 0
    }
})
const cropperRef = ref('')
const cropper_width = ref(0) // 真实的输出图片宽度
const cropper_height = ref(0) // 真实的输出图片高度
// const cropperHeight = ref(props.wh.height+120);
const option = ref({
    img: '',
    outputType: 'png',
    canScale: true,
    autoCrop: true,
    info: true,
    autoCropWidth: props.wh.width,
    autoCropHeight: props.wh.height,
    canMoveBox: true,
    fixedBox: true,
    canMove: true,
    enlarge: 2,
    full: true,
    fixed: true,
    original: false,
    centerBox: false,
    infoTrue: true,

})
const emit = defineEmits(['confirm'])
 const setPreview = (img: string) => {
        dialogVisible.value = true
        nextTick(() => {
            // 1. 重置裁剪框尺寸
            option.value.autoCropWidth = props.wh.width
            option.value.autoCropHeight = props.wh.height

            // 2. 获取图片尺寸进行计算
            const imgData = new Image()
            imgData.src = img
            imgData.onload = () => {
                const cropRatio = props.wh.width / props.wh.height // 裁剪框比例
                const imgRatio = imgData.width / imgData.height    // 图片比例

                let modeWidth, modeHeight;

                if (imgRatio > cropRatio) {
                    // 图片比例 > 裁剪框比例 (图片更宽)
                    // --- 以宽度为基准 ---
                    modeWidth = imgData.width;
                    // 计算高度:根据裁剪框宽度计算图片应有的高度
                    modeHeight = props.wh.height;
                } else {
                    // 图片比例 <= 裁剪框比例 (图片更高或等比)
                    // --- 以高度为基准 ---
                    modeHeight = imgData.height;
                    // 计算宽度:根据裁剪框高度计算图片应有的宽度
                    modeWidth = props.wh.width;
                }
                console.log(modeWidth, modeHeight)
                option.value.mode = `${modeWidth}px ${modeHeight}px`
                option.value.width = modeWidth
                option.value.height = modeHeight
                // 图片缩放到裁剪框尺寸,不能在缩放
                option.value.canScale = false
                option.value.img = img;
            }
        })
    }

const handleConfirm = () => {
    cropperRef.value.getCropData(async (data) => {
        // 获取真实输出的图片宽高
        const img = new Image()
        img.onload = () => {
            cropper_width.value = img.width
            cropper_height.value = img.height
        }
        // 将base64转换为PNG格式的File对象
        const file = base64ImgtoFile(data)
        // 上传文件
        const { data: fileInfo } = await uploadFile(file)
        // 将上传后的图片URL传递回父组件
        emit('confirm', fileInfo.relativeUrl)
    })
}

defineExpose({
    setPreview
})
</script>
<style scoped lang="scss">
.box_cropper {
    border: 10px solid white;
    // width: 100%;
    height: 400px;
}
</style>
相关代码
···
export const base64ImgtoFile = (base64Data: string) => {
// 获取base64数据部分,去掉前缀
let byteCharacters = ''
let byteNumbers = ''
const base64String = base64Data.split(',')1
byteCharacters = atob(base64String)
byteNumbers = new Array(byteCharacters.length)
for (let i = 0; i < byteCharacters.length; i++) {
byteNumbersi = byteCharacters.charCodeAt(i)
}
const byteArray = new Uint8Array(byteNumbers)
// 创建PNG格式的Blob对象
const blob = new Blob(byteArray, { type: 'image/png' })
// 转换为File对象,添加.png扩展名
const fileName = cropped_img${Date.now()}.png
const file = new File(blob, fileName, { type: 'image/png' })
return file
}
···