
个人主页:ujainu
文章目录
-
- 引言
- [一、数据模型:定义 Alarm 实体类](#一、数据模型:定义 Alarm 实体类)
-
- [🔍 字段解析:](#🔍 字段解析:)
- [二、状态管理:_AlarmPageState 核心逻辑](#二、状态管理:_AlarmPageState 核心逻辑)
-
- [1. 初始化:启动定时检测器](#1. 初始化:启动定时检测器)
- [2. 闹钟检测逻辑:精确到分钟,避免重复](#2. 闹钟检测逻辑:精确到分钟,避免重复)
-
- [✅ 优化点:](#✅ 优化点:)
- 三、用户交互:添加、删除、开关闹钟
-
- [1. 添加闹钟:集成系统时间选择器](#1. 添加闹钟:集成系统时间选择器)
- [2. 删除闹钟:滑动删除(Dismissible)](#2. 删除闹钟:滑动删除(Dismissible))
- [3. 开关控制:Toggle 启用状态](#3. 开关控制:Toggle 启用状态)
- [四、UI 设计:Material Design 3 与主题适配](#四、UI 设计:Material Design 3 与主题适配)
-
- [1. 主题配置:亮/暗双模式](#1. 主题配置:亮/暗双模式)
- [2. 列表项样式:动态颜色适配](#2. 列表项样式:动态颜色适配)
- [3. 空状态提示:提升用户体验](#3. 空状态提示:提升用户体验)
- 五、通知与反馈:模拟闹钟响铃
- 六、内存安全与资源释放
- 七、完整代码及优化亮点总结
- 结语
引言
在移动应用开发中,闹钟(Alarm) 是最基础却又最考验细节的功能之一。它不仅要求精准的时间判断,还需具备良好的用户体验:简洁的列表、流畅的交互、可靠的触发机制,以及对深色/浅色主题的完美适配。
本文将基于 Flutter + Material Design 3 ,带您从零构建一个高保真、可运行、可扩展的闹钟应用。我们将围绕以下几个核心维度展开:
- ✅ 数据模型设计 :定义
Alarm实体; - ✅ UI 交互实现 :使用
ListView+Dismissible+Switch构建列表; - ✅ 时间选择器集成 :调用系统
showTimePicker; - ✅ 实时检测机制 :通过
Timer.periodic每秒轮询; - ✅ 通知反馈 :利用
SnackBar模拟闹钟提醒; - ✅ 内存安全与性能优化:防止内存泄漏与重复触发。
最终,我们将得到一个结构清晰、逻辑严谨、体验流畅的闹钟模块,可直接用于 OpenHarmony 或 Android/iOS 的 Flutter 项目中。
一、数据模型:定义 Alarm 实体类
一切功能的基础是数据结构 。我们首先定义 Alarm 类,用于描述一个闹钟的核心属性:
dart
class Alarm {
  final String id;
  final TimeOfDay time;
  final bool enabled;

  Alarm({required this.id, required this.time, this.enabled = true});
}
🔍 字段解析:
id:唯一标识符,用于删除、更新操作。我们使用DateTime.now().microsecondsSinceEpoch.toString()生成,确保全局唯一;time:类型为TimeOfDay,这是 Flutter 内置的时间选择器返回的标准格式,包含hour和minute,不涉及时区,适合本地闹钟;enabled:布尔值,控制闹钟是否启用。默认为true,符合用户直觉。
💡 为什么不用
DateTime?因为闹钟通常是每天重复 的,而
DateTime包含具体日期。使用TimeOfDay更语义化,也避免了跨天处理的复杂性。
二、状态管理:_AlarmPageState 核心逻辑
AlarmPage 是一个 StatefulWidget,其状态由 _AlarmPageState 管理。我们重点关注几个生命周期方法。
1. 初始化:启动定时检测器
dart
@override
void initState() {
  super.initState();
  _timer = Timer.periodic(const Duration(seconds: 1), (_) => _checkAlarms());
}- 使用
Timer.periodic创建一个每秒执行一次的定时器; - 调用
_checkAlarms()方法,检查当前时间是否匹配某个启用的闹钟。
⚠️ 注意 :此方案适用于本地演示。在生产环境中,应结合平台原生通知(如 Android AlarmManager)以保证后台唤醒能力。但在 OpenHarmony 的 Flutter 环境中,
Timer是当前可行的模拟方案。
2. 闹钟检测逻辑:精确到分钟,避免重复
dart
void _checkAlarms() {
  final now = TimeOfDay.now();
  for (final alarm in _alarms) {
    if (alarm.enabled &&
        alarm.time.hour == now.hour &&
        alarm.time.minute == now.minute &&
        DateTime.now().second == 0) { // 关键:仅在秒为 0 时触发
      _showAlarmNotification(alarm);
    }
  }
}
✅ 优化点:
- 避免重复触发 :若不加
second == 0判断,该分钟内每一秒都会触发一次,导致多次弹窗; - 性能考虑:列表较短时,遍历开销可忽略;若闹钟数量极大(>100),可考虑哈希表索引优化。
三、用户交互:添加、删除、开关闹钟
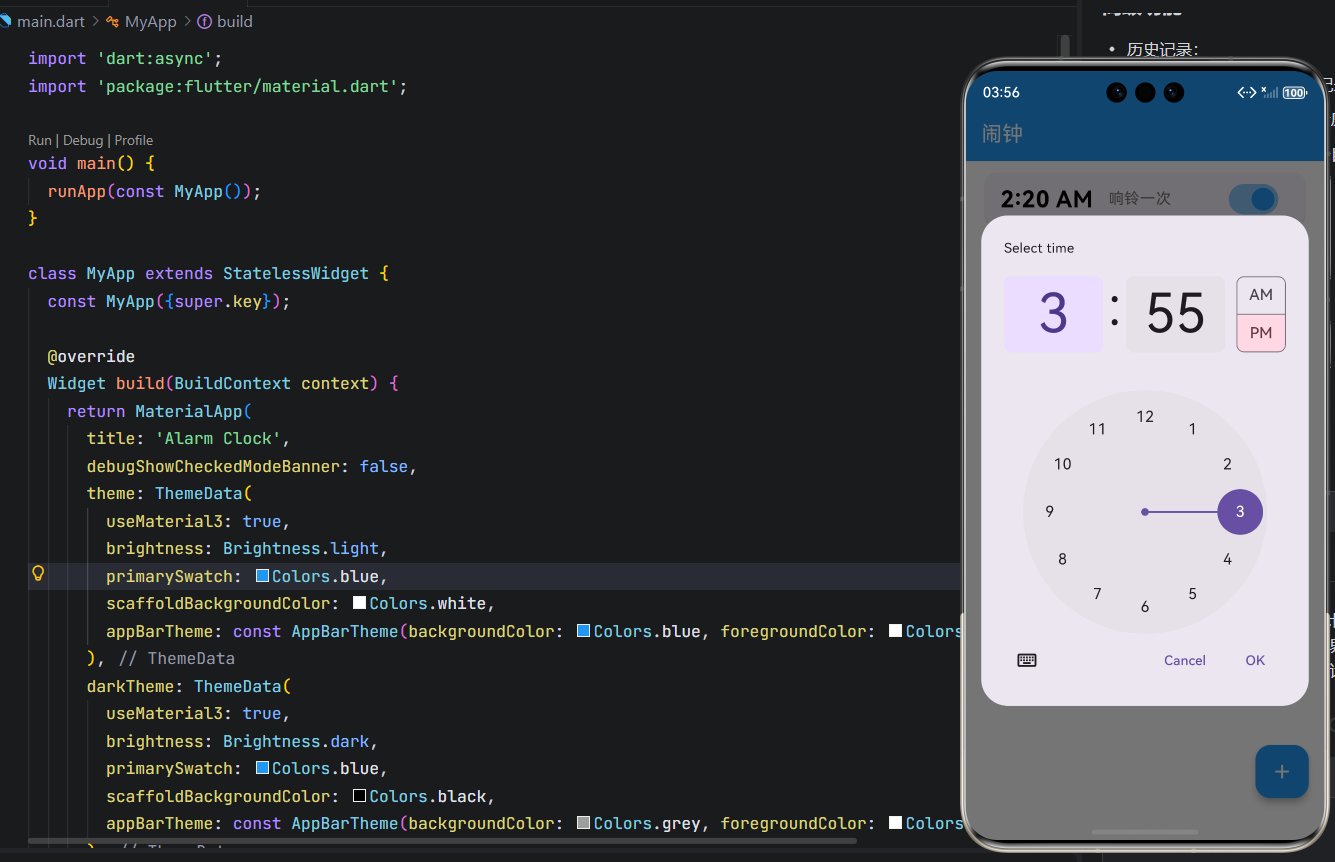
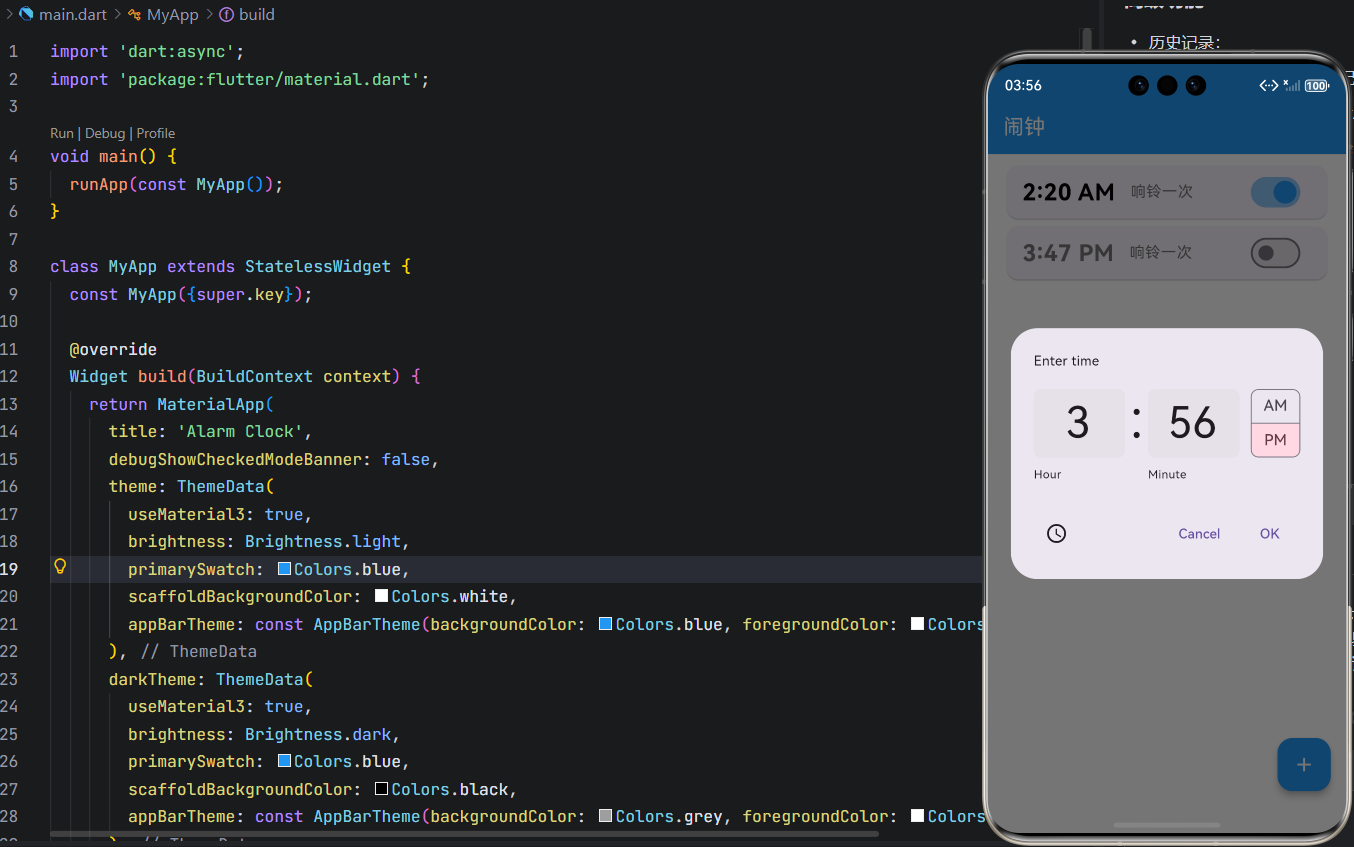
1. 添加闹钟:集成系统时间选择器
dart
void _addAlarm() async {
  final TimeOfDay? picked = await showTimePicker(
    context: context,
    initialTime: TimeOfDay.now(),
  );
  if (picked != null) {
    setState(() {
      _alarms.add(Alarm(id: DateTime.now().microsecondsSinceEpoch.toString(), time: picked));
    });
  }
}
两种闹钟添加方式:
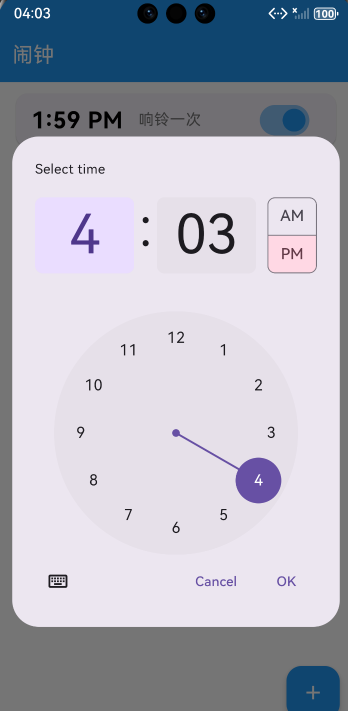
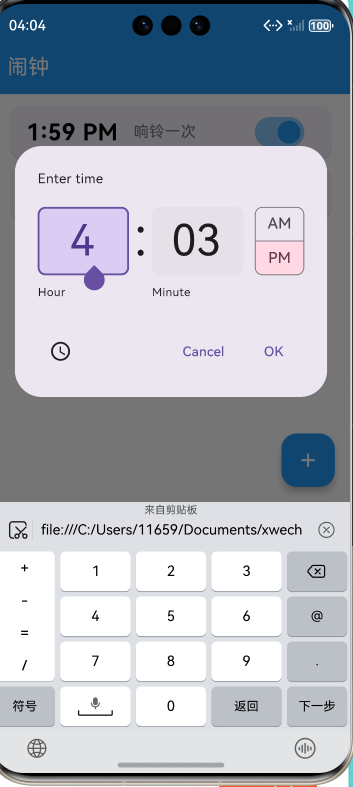
- 调用
showTimePicker弹出标准时间选择对话框; - 用户确认后,生成新
Alarm并加入列表; - 使用
setState触发 UI 重绘。
🌟 体验优化 :
initialTime设为当前时间,减少用户滚动操作。
2. 删除闹钟:滑动删除(Dismissible)
dart
Dismissible(
  key: Key(alarm.id),
  direction: DismissDirection.endToStart,
  onDismissed: (_) => _deleteAlarm(alarm.id),
  background: Container(
    alignment: Alignment.centerRight,
    padding: const EdgeInsets.only(right: 20),
    color: Colors.red,
    child: const Icon(Icons.delete, color: Colors.white),
  ),
  child: Card(...),
)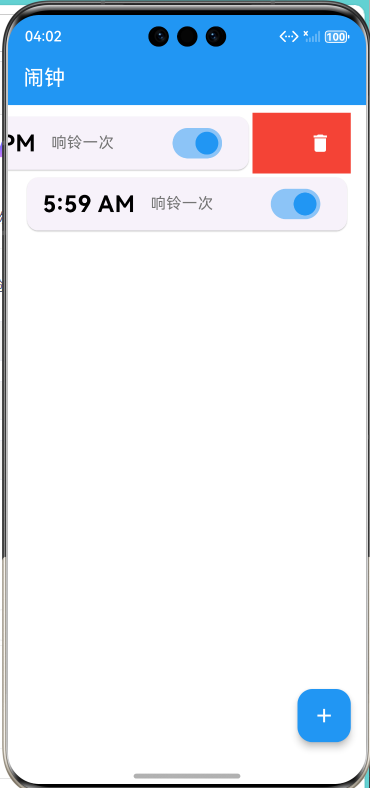
- 使用
Dismissible包裹列表项,实现左滑删除; background自定义删除背景,提升视觉反馈;key: Key(alarm.id)确保 Flutter 能正确识别每个 item。
3. 开关控制:Toggle 启用状态
dart
trailing: Switch(
  value: alarm.enabled,
  activeColor: Colors.blue,
  onChanged: (value) => _toggleAlarm(alarm.id),
),Switch控件直观表达启用/禁用状态;onChanged回调更新对应闹钟的enabled属性。
🔧 状态更新技巧 :由于
Alarm是不可变对象,我们通过重建对象实现状态变更:
dart
_alarms[index] = Alarm(
  id: alarm.id,
  time: alarm.time,
  enabled: !alarm.enabled,
);
四、UI 设计:Material Design 3 与主题适配
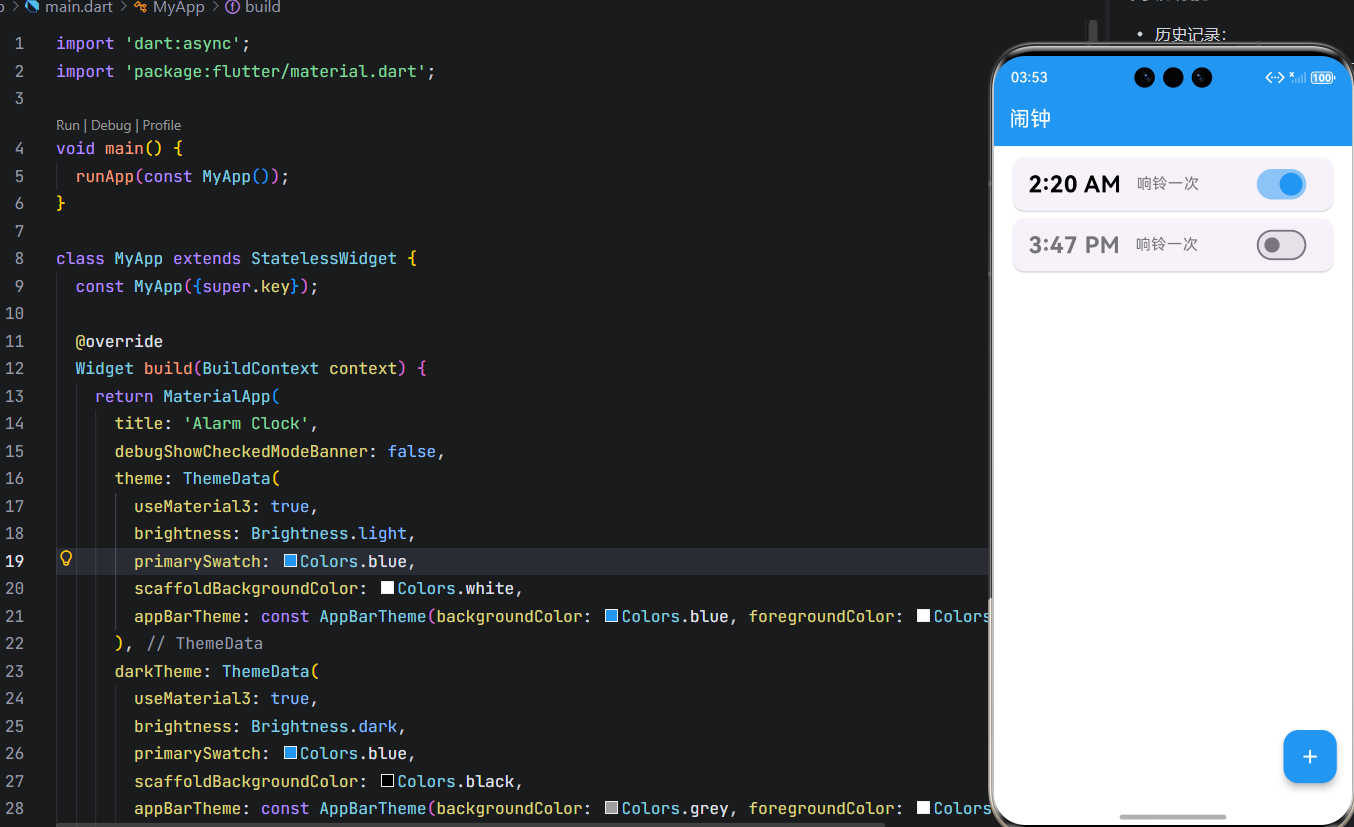
1. 主题配置:亮/暗双模式
dart
theme: ThemeData(
  useMaterial3: true,
  brightness: Brightness.light,
  scaffoldBackgroundColor: Colors.white,
  appBarTheme: const AppBarTheme(backgroundColor: Colors.blue, foregroundColor: Colors.white),
),
darkTheme: ThemeData(
  useMaterial3: true,
  brightness: Brightness.dark,
  scaffoldBackgroundColor: Colors.black,
  appBarTheme: const AppBarTheme(backgroundColor: Colors.grey, foregroundColor: Colors.white),
),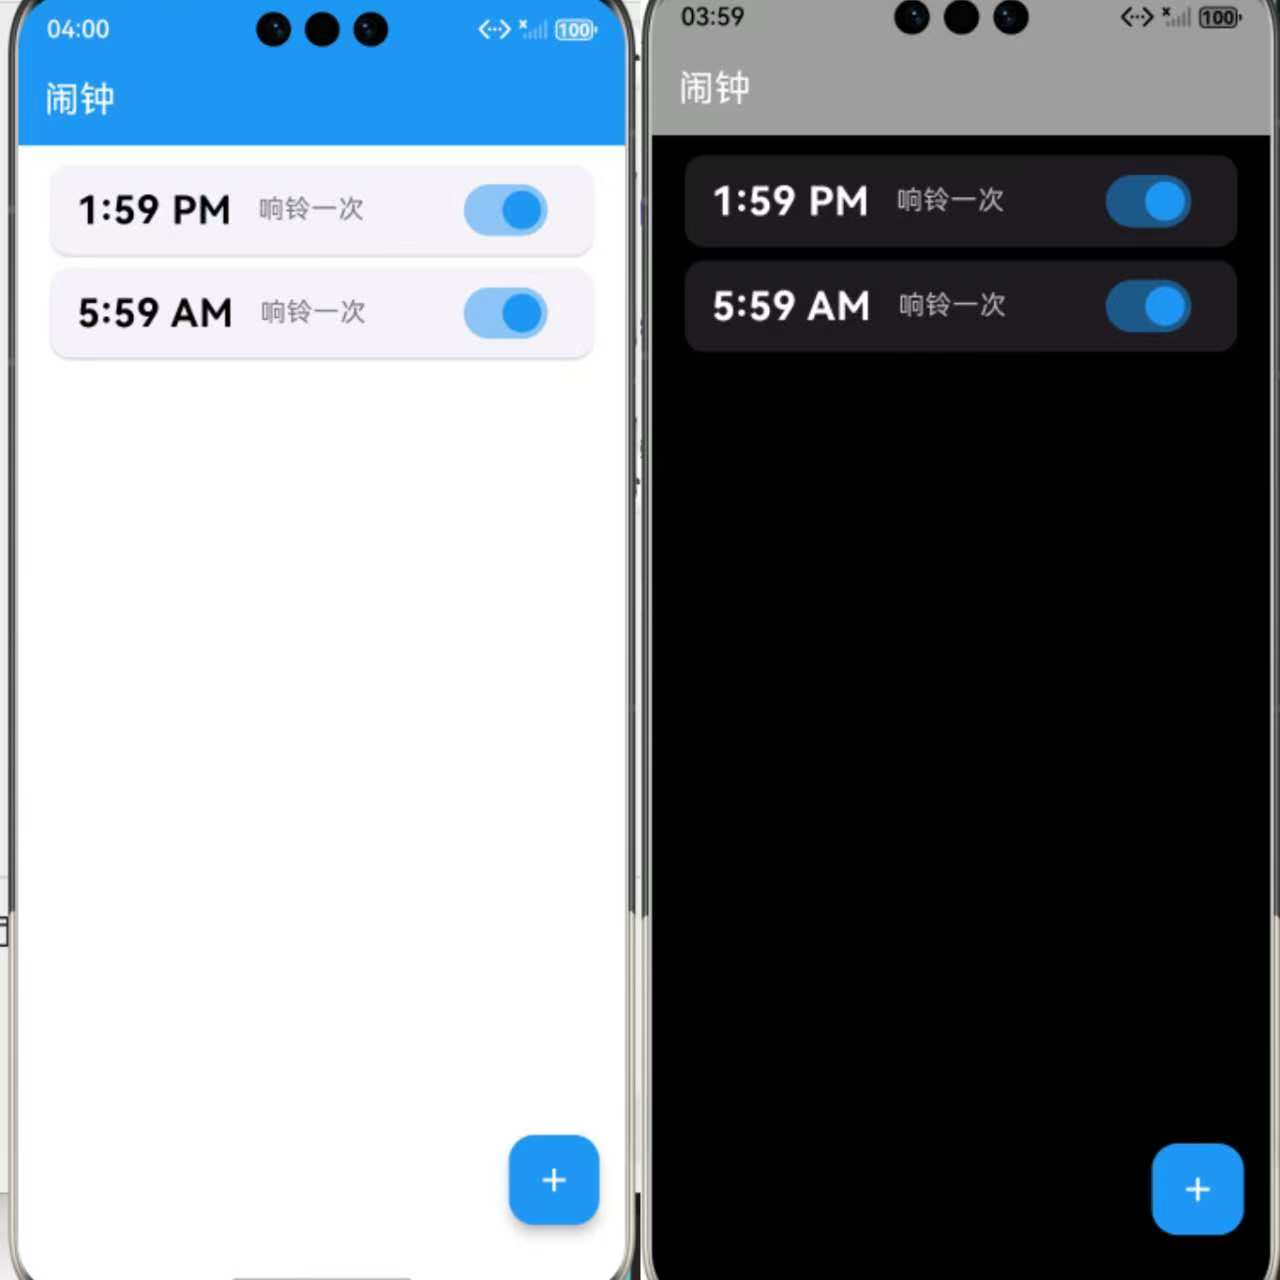
useMaterial3: true启用最新设计规范;- 分别配置
theme与darkTheme,自动响应系统设置; AppBar颜色区分,增强导航栏辨识度。
2. 列表项样式:动态颜色适配
dart
final isDark = Theme.of(context).brightness == Brightness.dark;
final activeColor = isDark ? Colors.white : Colors.black;
final inactiveColor = isDark ? Colors.grey[400]! : Colors.grey[600]!;- 根据主题动态设置文字颜色;
- 启用状态为高对比色,禁用状态为灰色,符合无障碍设计原则。
3. 空状态提示:提升用户体验
dart
body: _alarms.isEmpty
    ? Center(
        child: Column(
          mainAxisAlignment: MainAxisAlignment.center,
          children: const [
            Icon(Icons.alarm_off, size: 80, color: Colors.grey),
            SizedBox(height: 16),
            Text('暂无闹钟', style: TextStyle(fontSize: 18, color: Colors.grey)),
          ],
        ),
      )
    : ListView.builder(...)
- 当无闹钟时,显示友好提示,避免空白页面;
- 使用
Icons.alarm_off增强语义表达。
五、通知与反馈:模拟闹钟响铃
由于 Flutter 无法直接播放音频或弹出系统通知(需平台通道),我们使用 SnackBar 模拟提醒:
dart
void _showAlarmNotification(Alarm alarm) {
  ScaffoldMessenger.of(context).showSnackBar(
    SnackBar(
      content: Text('⏰ 闹钟: ${alarm.time.format(context)}'),
      duration: const Duration(seconds: 5),
      action: SnackBarAction(
        label: '关闭',
        onPressed: () => ScaffoldMessenger.of(context).hideCurrentSnackBar(),
      ),
    ),
  );
}- 显示 5 秒提醒;
- 提供"关闭"按钮,允许用户手动消除;
- 使用
ScaffoldMessenger确保在正确上下文中显示。
📌 生产环境建议 :
在真实项目中,应通过 MethodChannel 调用 OpenHarmony 的通知服务,播放铃声并显示持久化通知。
六、内存安全与资源释放
dart
@override
void dispose() {
  _timer.cancel(); // 关键!防止内存泄漏
  super.dispose();
}- 必须在
dispose中取消Timer,否则即使页面销毁,定时器仍在后台运行; - 这是 Flutter 开发中常见的内存泄漏源头,务必重视。
七、完整代码及优化亮点总结
dart
import 'dart:async';
import 'package:flutter/material.dart';

void main() {
  runApp(const MyApp());
}

class MyApp extends StatelessWidget {
  const MyApp({super.key});

  @override
  Widget build(BuildContext context) {
    return MaterialApp(
      title: 'Alarm Clock',
      debugShowCheckedModeBanner: false,
      theme: ThemeData(
        useMaterial3: true,
        brightness: Brightness.light,
        primarySwatch: Colors.blue,
        scaffoldBackgroundColor: Colors.white,
        appBarTheme: const AppBarTheme(backgroundColor: Colors.blue, foregroundColor: Colors.white),
      ),
      darkTheme: ThemeData(
        useMaterial3: true,
        brightness: Brightness.dark,
        primarySwatch: Colors.blue,
        scaffoldBackgroundColor: Colors.black,
        appBarTheme: const AppBarTheme(backgroundColor: Colors.grey, foregroundColor: Colors.white),
      ),
      home: const AlarmPage(),
    );
  }
}

class Alarm {
  final String id;
  final TimeOfDay time;
  final bool enabled;

  Alarm({required this.id, required this.time, this.enabled = true});
}

class AlarmPage extends StatefulWidget {
  const AlarmPage({super.key});

  @override
  State<AlarmPage> createState() => _AlarmPageState();
}

class _AlarmPageState extends State<AlarmPage> {
  final List<Alarm> _alarms = [];
  late Timer _timer;

  @override
  void initState() {
    super.initState();
    // 每秒检查一次是否到点
    _timer = Timer.periodic(const Duration(seconds: 1), (_) => _checkAlarms());
  }

  void _checkAlarms() {
    final now = TimeOfDay.now();
    for (final alarm in _alarms) {
      if (alarm.enabled &&
          alarm.time.hour == now.hour &&
          alarm.time.minute == now.minute &&
          DateTime.now().second == 0) { // 精确到分钟,避免重复触发
        _showAlarmNotification(alarm);
      }
    }
  }

  void _showAlarmNotification(Alarm alarm) {
    print('🔔 闹钟响了! 时间:  ${alarm.time.format(context)}');
    ScaffoldMessenger.of(context).showSnackBar(
      SnackBar(
        content: Text('⏰ 闹钟:  ${alarm.time.format(context)}'),
        duration: const Duration(seconds: 5),
        action: SnackBarAction(
          label: '关闭',
          onPressed: () {
            ScaffoldMessenger.of(context).hideCurrentSnackBar();
          },
        ),
      ),
    );
  }

  void _addAlarm() async {
    final TimeOfDay? picked = await showTimePicker(
      context: context,
      initialTime: TimeOfDay.now(),
    );
    if (picked != null) {
      setState(() {
        _alarms.add(
          Alarm(
            id: DateTime.now().microsecondsSinceEpoch.toString(),
            time: picked,
          ),
        );
      });
    }
  }

  void _deleteAlarm(String id) {
    setState(() {
      _alarms.removeWhere((alarm) => alarm.id == id);
    });
  }

  void _toggleAlarm(String id) {
    setState(() {
      final alarm = _alarms.firstWhere((a) => a.id == id);
      final index = _alarms.indexWhere((a) => a.id == id);
      if (index != -1) {
        _alarms[index] = Alarm(
          id: alarm.id,
          time: alarm.time,
          enabled: !alarm.enabled,
        );
      }
    });
  }

  @override
  void dispose() {
    _timer.cancel();
    super.dispose();
  }

  @override
  Widget build(BuildContext context) {
    return Scaffold(
      appBar: AppBar(title: const Text('闹钟')),
      body: _alarms.isEmpty
          ? Center(
              child: Column(
                mainAxisAlignment: MainAxisAlignment.center,
                children: const [
                  Icon(Icons.alarm_off, size: 80, color: Colors.grey),
                  SizedBox(height: 16),
                  Text('暂无闹钟', style: TextStyle(fontSize: 18, color: Colors.grey)),
                ],
              ),
            )
          : ListView.builder(
              padding: const EdgeInsets.symmetric(horizontal: 16, vertical: 8),
              itemCount: _alarms.length,
              itemBuilder: (context, index) {
                final alarm = _alarms[index];
                final isDark = Theme.of(context).brightness == Brightness.dark;
                final activeColor = isDark ? Colors.white : Colors.black;
                final inactiveColor = isDark ? Colors.grey[400]! : Colors.grey[600]!;

                return Dismissible(
                  key: Key(alarm.id),
                  direction: DismissDirection.endToStart,
                  onDismissed: (_) => _deleteAlarm(alarm.id),
                  background: Container(
                    alignment: Alignment.centerRight,
                    padding: const EdgeInsets.only(right: 20),
                    color: Colors.red,
                    child: const Icon(Icons.delete, color: Colors.white),
                  ),
                  child: Card(
                    child: ListTile(
                      leading: Text(
                        alarm.time.format(context),
                        style: TextStyle(
                          fontSize: 24,
                          fontWeight: FontWeight.bold,
                          color: alarm.enabled ? activeColor : inactiveColor,
                        ),
                      ),
                      title: Text(
                        '响铃一次',
                        style: TextStyle(color: inactiveColor),
                      ),
                      trailing: Switch(
                        value: alarm.enabled,
                        activeColor: Colors.blue,
                        onChanged: (value) => _toggleAlarm(alarm.id),
                      ),
                    ),
                  ),
                );
              },
            ),
      floatingActionButton: FloatingActionButton(
        onPressed: _addAlarm,
        backgroundColor: Colors.blue,
        child: const Icon(Icons.add, color: Colors.white),
      ),
    );
  }
}
运行界面:
| 功能 | 优化点 |
|---|---|
| 时间精度 | 仅在 second == 0 时触发,避免一分钟内多次提醒 |
| 主题适配 | 动态获取颜色,完美支持深色/浅色模式 |
| 交互反馈 | 滑动删除 + 开关控件 + 空状态提示 |
| 代码健壮性 | 使用唯一 ID、不可变对象、资源释放 |
| 可维护性 | 函数职责单一,逻辑清晰 |
结语
通过本文,我们不仅实现了一个功能完整的闹钟界面,更展示了 Flutter 和OpenHarmony 在状态管理、UI 构建、定时任务、主题适配 等方面的强大能力。虽然当前版本依赖 Timer 轮询,适用于演示和轻量场景,但其架构已为后续接入原生通知、持久化存储(如 shared_preferences)、重复周期设置等高级功能打下坚实基础。
未来,您可以在此基础上扩展:
- 支持每周重复(周一至周日开关);
- 添加闹钟标签(如"起床"、"会议");
- 集成铃声选择与音量控制;
- 使用
hive或sqflite持久化闹钟数据。
欢迎加入开源鸿蒙跨平台社区: https://openharmonycrossplatform.csdn.net