目录
- 前言
- 第一步:智能批量排课逻辑实现
-
- [1.1 搭建动态时段列表](#1.1 搭建动态时段列表)
- [1.2 周期预览与保存区](#1.2 周期预览与保存区)
- 第二步:核心交互逻辑
-
- [2.1 计算总课时 (`calcTotalSessions`)](#2.1 计算总课时 (
calcTotalSessions)) - [2.2. 添加排课时段 (`addScheduleSlot`)](#2.2. 添加排课时段 (
addScheduleSlot)) - [2.3 更新时段属性 (`updateScheduleSlot`)](#2.3 更新时段属性 (
updateScheduleSlot)) - [2.4 删除时段(`deleteScheduleSlot`)](#2.4 删除时段(
deleteScheduleSlot)) - [2.5. 执行自动化排课 (`executeBatchScheduling`)](#2.5. 执行自动化排课 (
executeBatchScheduling))
- [2.1 计算总课时 (`calcTotalSessions`)](#2.1 计算总课时 (
- 第三步:设置组件交互
- 第四步:功能验证
- [🌟 总结与预告](#🌟 总结与预告)
前言
在本讲的上半部分,我们完成了排课模型的建立、弹窗视图的初始化以及"周卡片"的切换交互。本篇我们将攻克最核心的两个环节:动态时段配置 与自动化排课算法。
第一步:智能批量排课逻辑实现
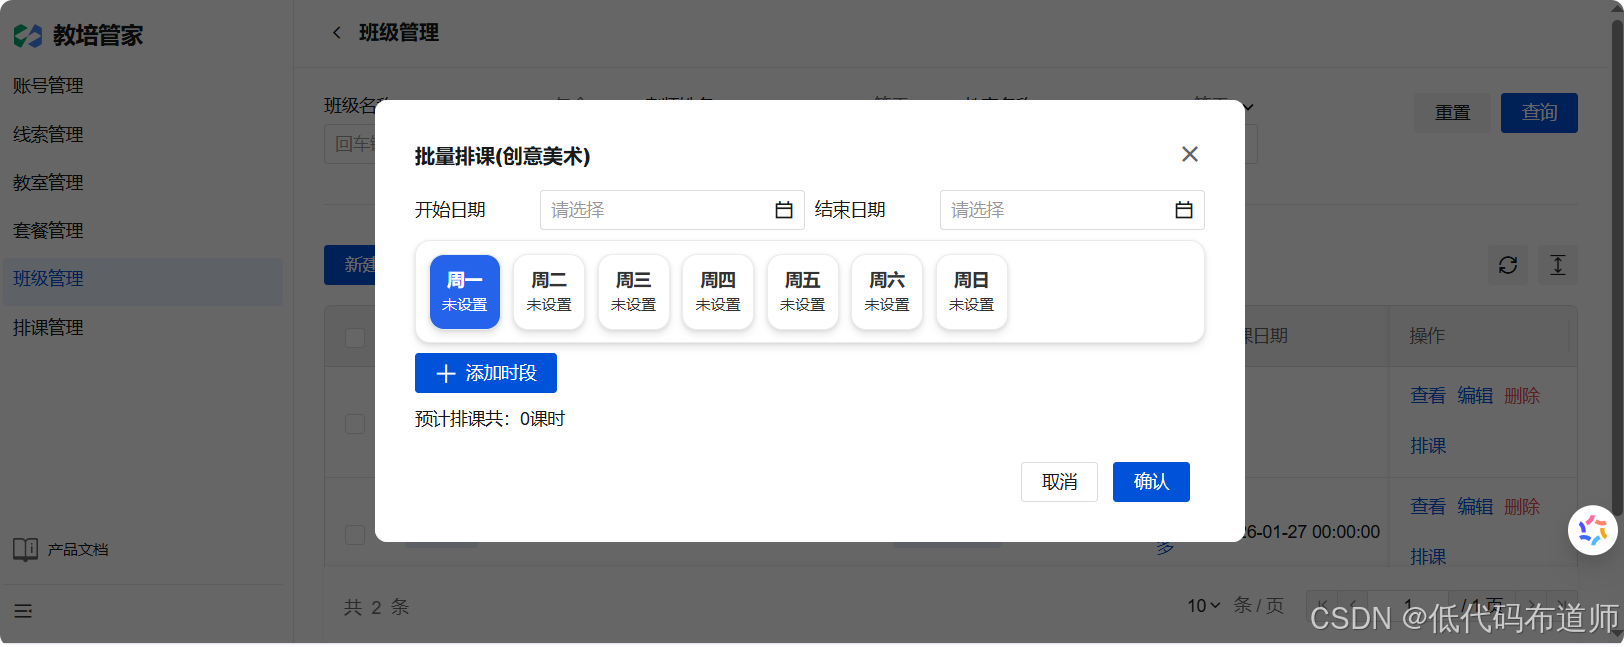
1.1 搭建动态时段列表
在用户点击某个"周卡片"后,中部区域需要展示该天已设定的所有时段。
先添加一个按钮,内容改为添加时段
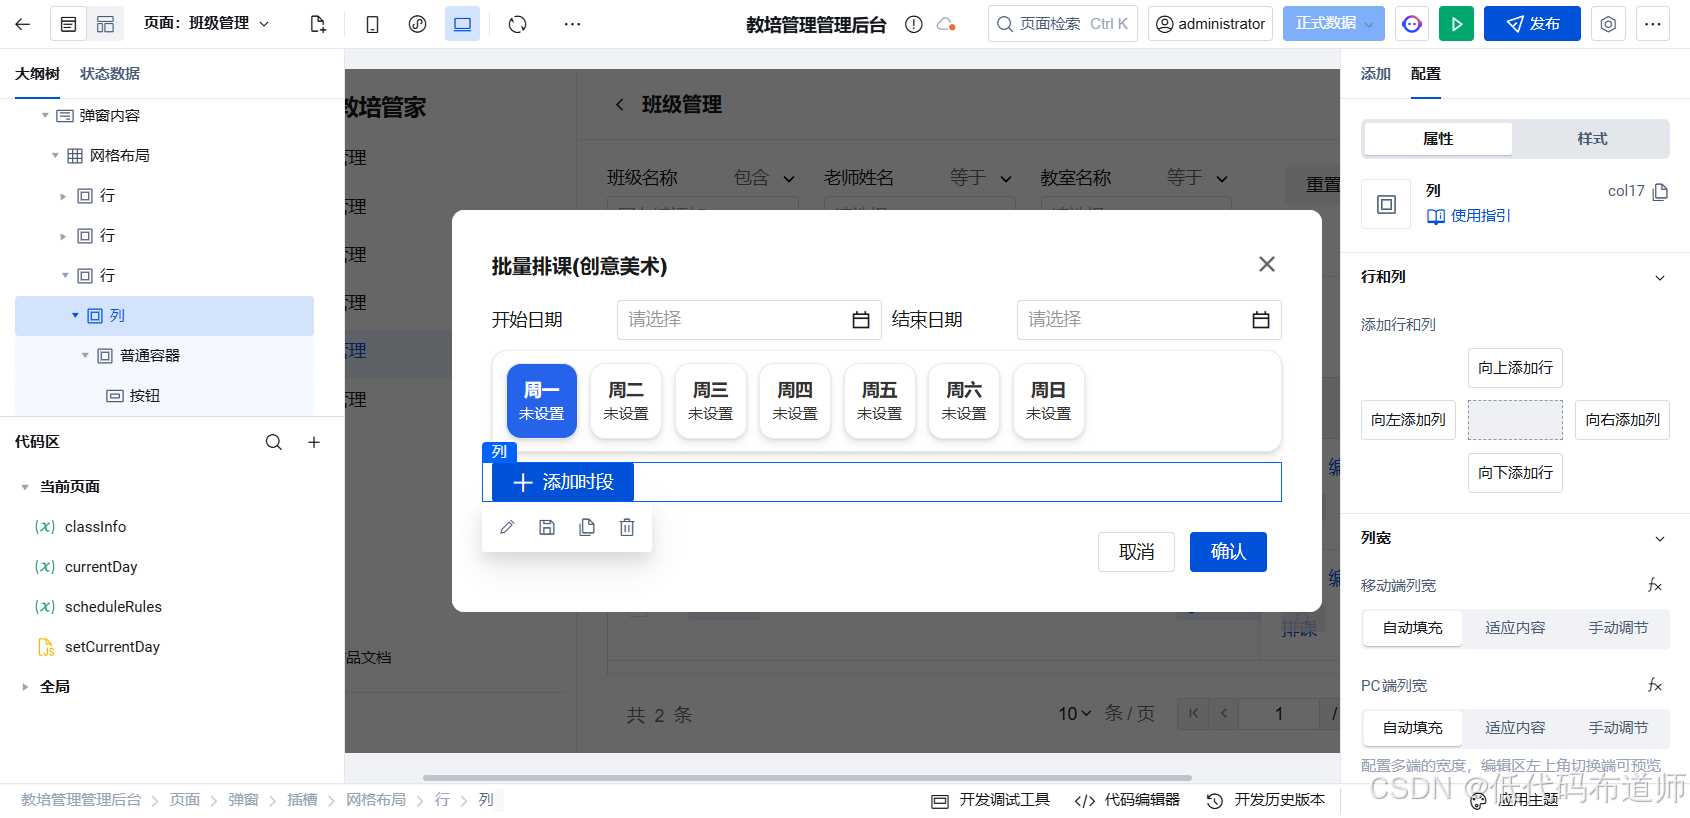
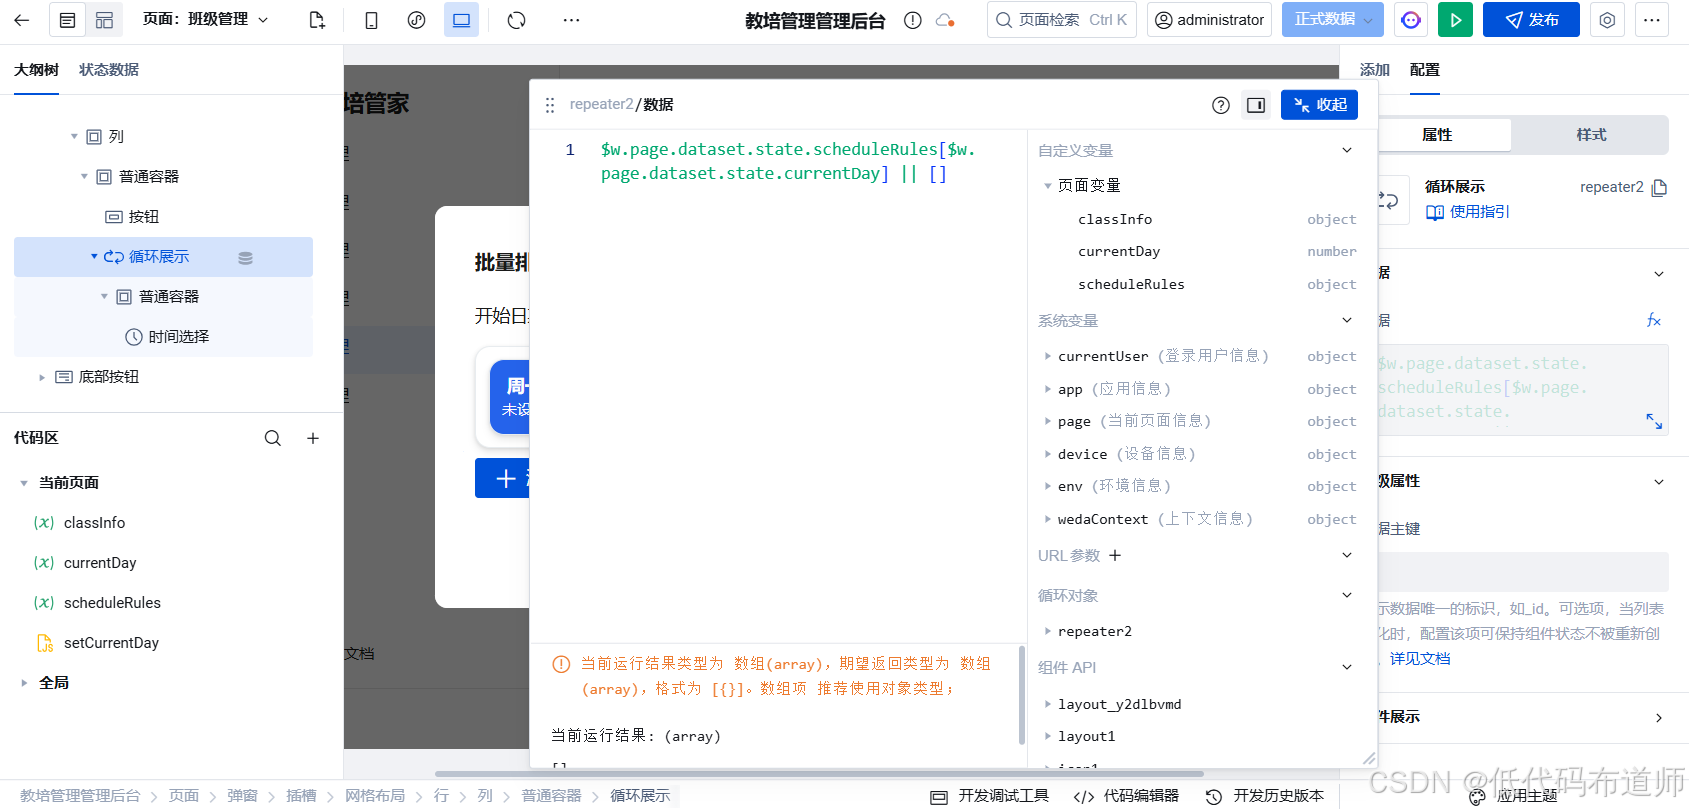
继续添加循环展示组件
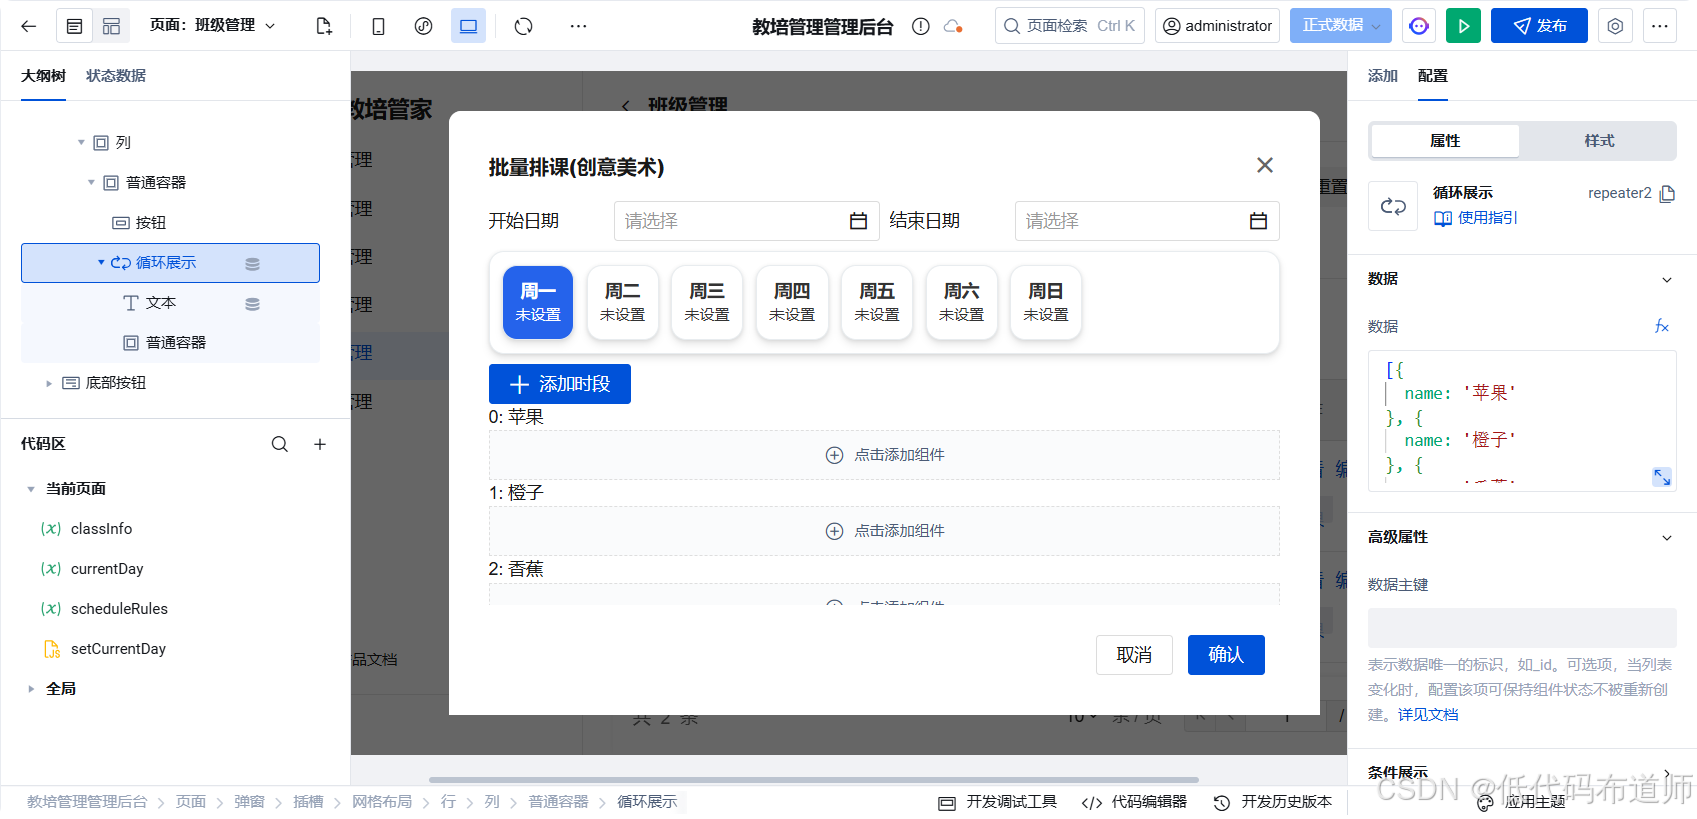
数据绑定 :数据源绑定为当前选中天的规则数组:
$w.page.dataset.state.scheduleRules[$w.page.dataset.state.currentDay] || []
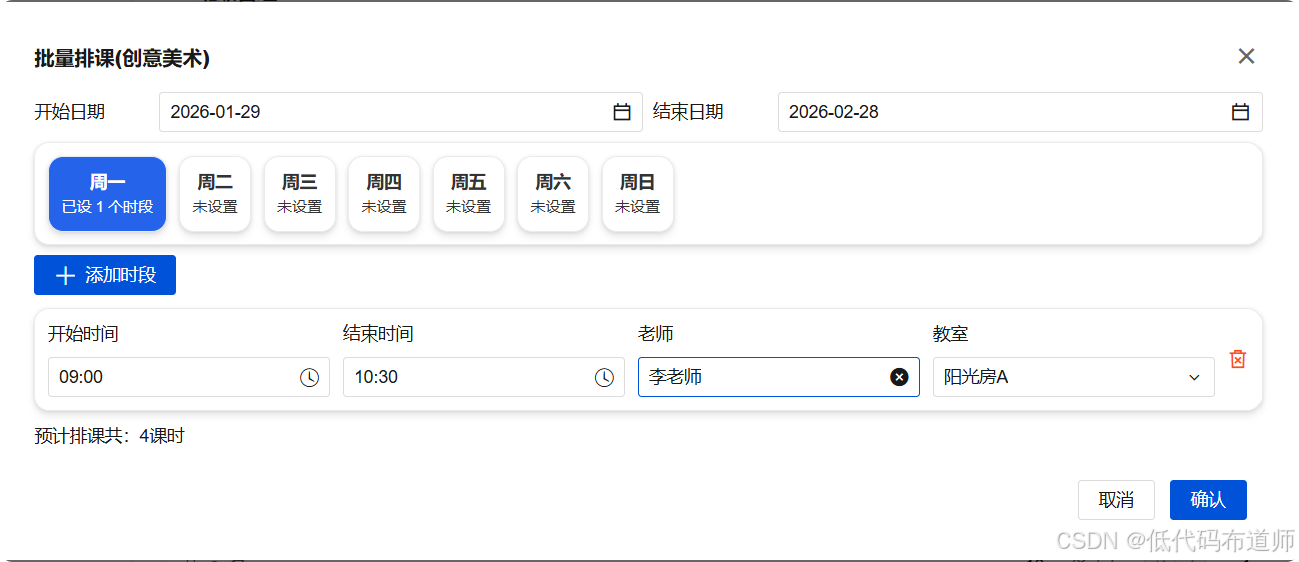
内容设计:在循环项中放入"容器",并横向排列以下组件:
- 时间选择器:绑定开始时间。
- 时间选择器:绑定结束时间。
- 下拉选择 :绑定执教老师(数据源关联
Employee)。 - 下拉选择 :绑定上课教室(数据源关联
Classroom)。 - 图标按钮:用于删除当前时段。
⚠️ 注意 :由于微搭的循环项中无法直接实现"双向绑定",我们需要通过
onChange事件调用 JS 方法来同步数据。
1.2 周期预览与保存区
在弹窗底部,我们需要展示最终的统计信息并触发保存。
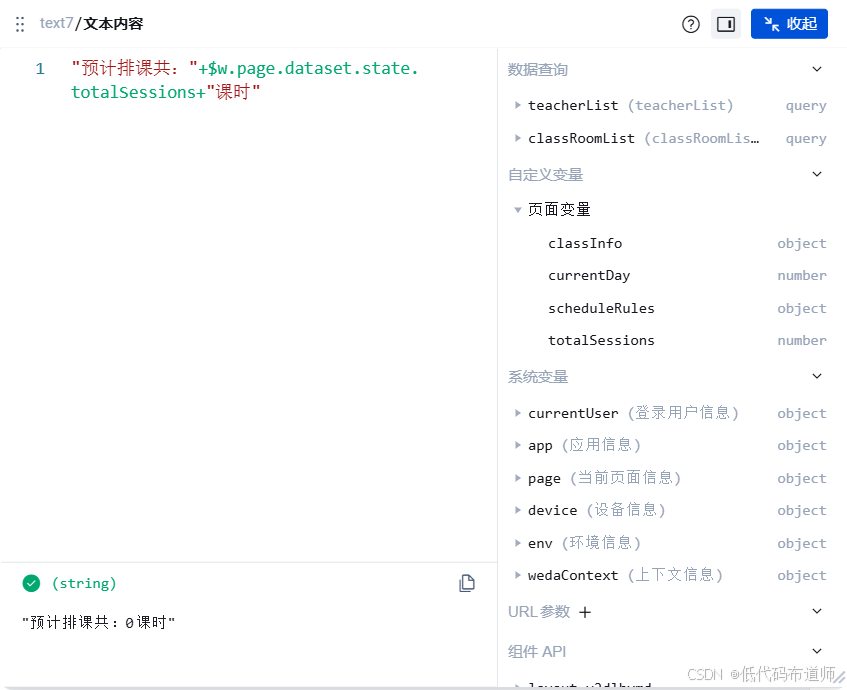
总课时预览 :添加文本组件,绑定公式计算整个周期内会生成的课节总数。
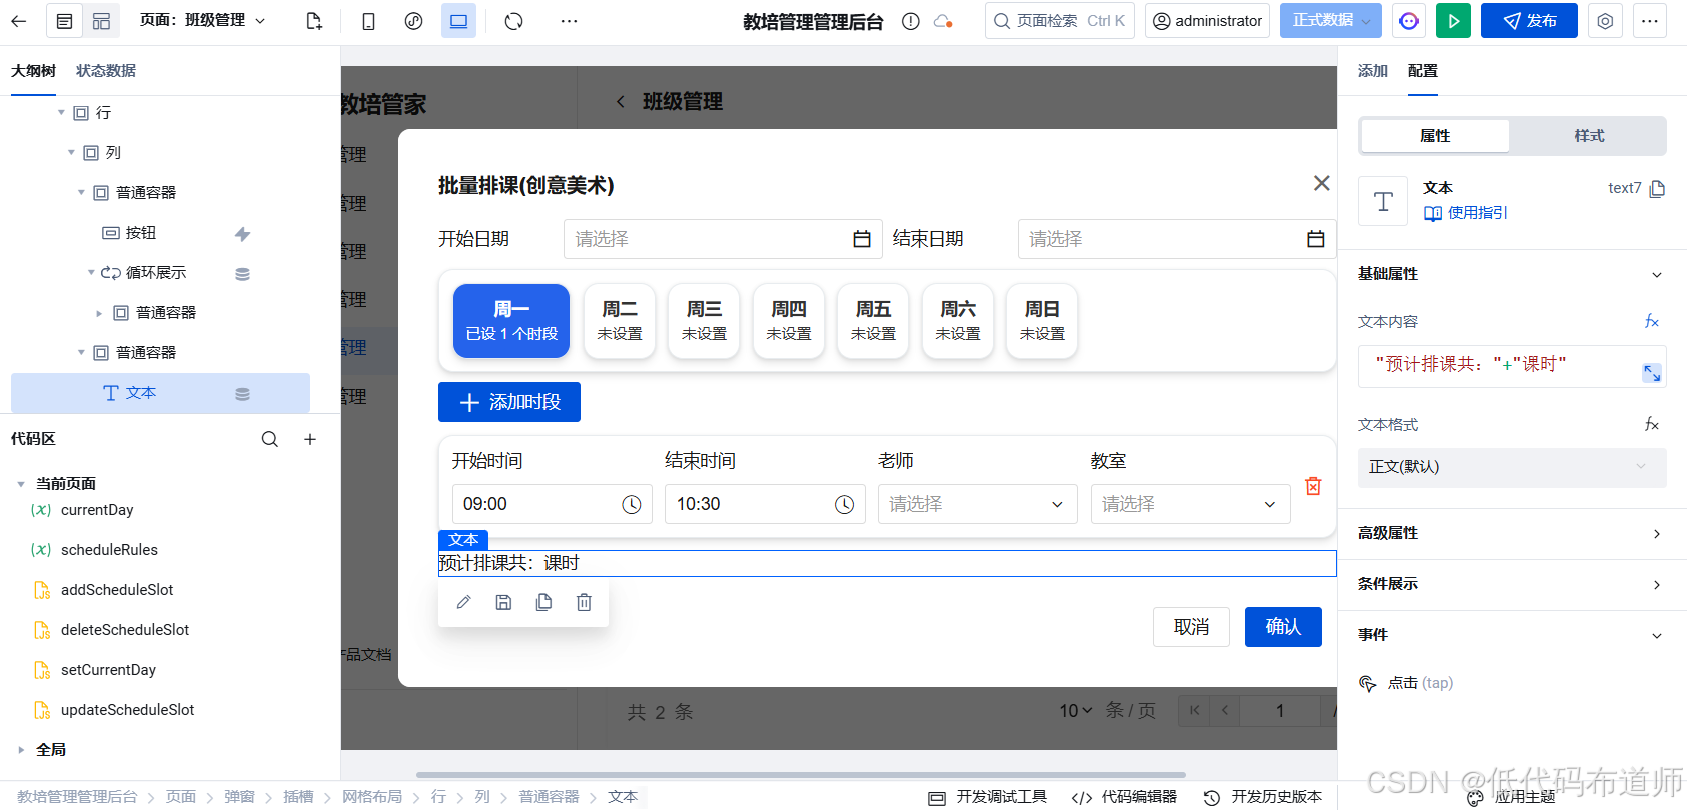
创建一个变量用来显示我们预期的排课总时长
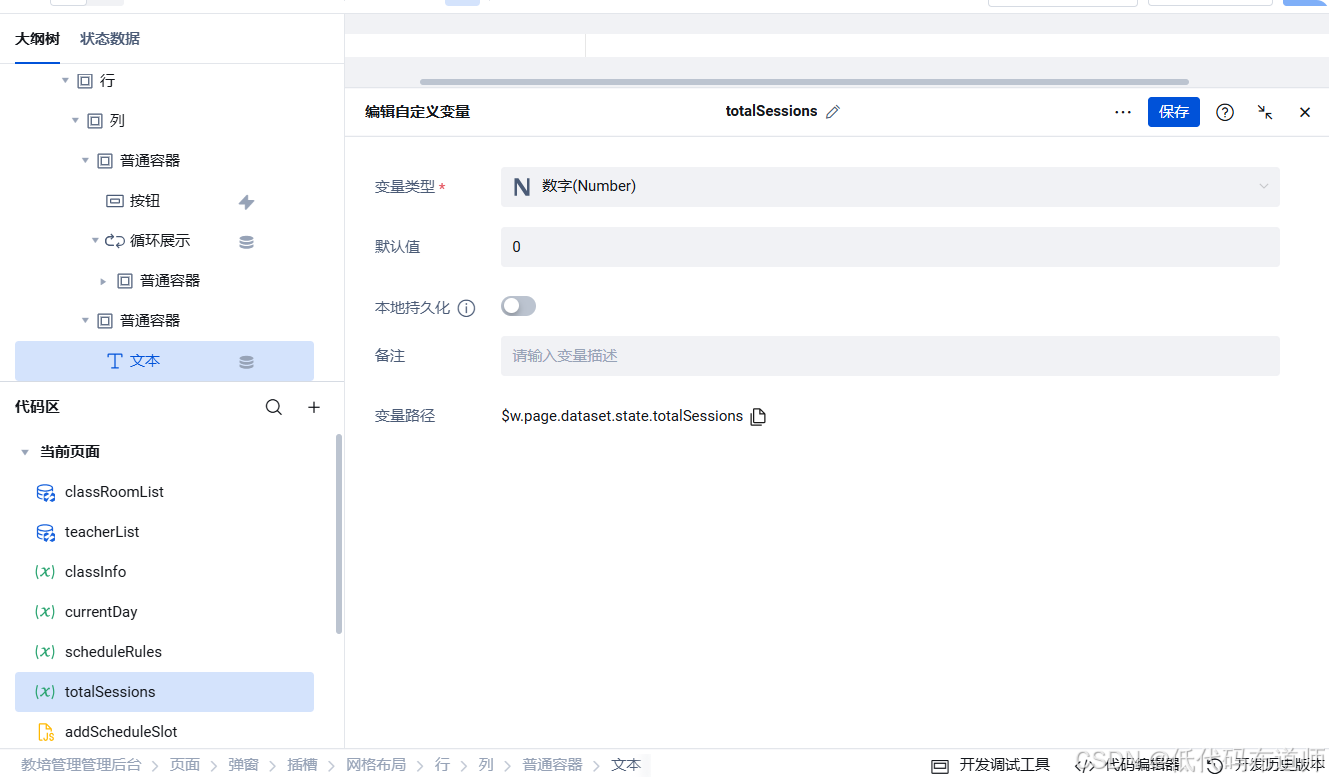
然后给文本绑定表达式显示时长
第二步:核心交互逻辑
为了驱动复杂的排课交互,我们需要在"应用属性 -> 自定义方法"中编写以下核心逻辑。
2.1 计算总课时 (calcTotalSessions)
为了保证实时预览,我们需要一个通用的计算方法,在日期范围或排课规则变化时调用。
javascript
/**
 * 根据日期范围和排课规则计算总课时
 */
export default async function({event, data}) {
  const { startDate, endDate, scheduleRules } = $w.page.dataset.state;
  if (!startDate || !endDate || !scheduleRules) {
    $w.page.dataset.state.totalSessions = 0;
    return;
  }

  let total = 0;
  let curr = new Date(startDate);
  const end = new Date(endDate);

  while (curr <= end) {
    const day = curr.getDay() === 0 ? 7 : curr.getDay();
    total += (scheduleRules[day]?.length || 0);
    curr.setDate(curr.getDate() + 1);
  }

  $w.page.dataset.state.totalSessions = total;
}
2.2. 添加排课时段 (addScheduleSlot)
点击"+ 添加时段"时,为当前选中的星期初始化数据并追加默认值。注意时间戳的处理:
javascript
/**
 * 为当前选中的天新增一个排课时段
 */
export default function({event, data}) {
 const currentDay = $w.page.dataset.state.currentDay;
  const scheduleRules = $w.page.dataset.state.scheduleRules || {};

  if (!scheduleRules[currentDay]) {
    scheduleRules[currentDay] = [];
  }

  const { teacherId, classroomId,courseType } = $w.page.dataset.state.classInfo;
  console.log(teacherId,classroomId)
  const defaultStart = 9 * 60 * 60 * 1000; // 09:00
  const defaultEnd = 10.5 * 60 * 60 * 1000; // 10:30

  scheduleRules[currentDay].push({
    id: Date.now(),
    startTime: defaultStart,
    endTime: defaultEnd,
    teacherId: teacherId?._id||"",
    classroomId: classroomId?._id||"",
    courseType:courseType|| '2'
  });

  $w.page.dataset.state.scheduleRules = { ...scheduleRules };
}
2.3 更新时段属性 (updateScheduleSlot)
当用户通过时间选择器修改时间时,微搭组件会返回该日期的时间戳(Number),我们直接同步即可:
javascript
/**
 * 更新指定时段的字段值(支持时间戳)
 */
export default function({event, data}) {
const { field, value, index } = data.target;
  const currentDay = $w.page.dataset.state.currentDay;
  const rules = $w.page.dataset.state.scheduleRules;

  // 更新对应位置的属性
  rules[currentDay][index][field] = value;

  // 必须通过重新赋值触发状态变量的响应式更新
  $w.page.dataset.state.scheduleRules = { ...rules };
}
2.4 删除时段(deleteScheduleSlot)
点击时段行末尾的删除图标时,移除当前选中的时段:
bash
export default function({event, data}) {
const { index } = data.target;
  const currentDay = $w.page.dataset.state.currentDay;
  const rules = $w.page.dataset.state.scheduleRules;

  // 从数组中移除
  rules[currentDay].splice(index, 1);

  // 重新赋值触发 UI 刷新
  $w.page.dataset.state.scheduleRules = { ...rules };

  $w.utils.showToast({ title: '已移除该时段', icon: 'success' });
}
2.5. 执行自动化排课 (executeBatchScheduling)
在处理时间戳时,我们需要将"日期"的时间戳与"时段"的时间戳(提取时分秒)进行合并计算:
javascript
export default async function ({ event, data }) {
  try {
    const scheduleRules = $w.page.dataset.state.scheduleRules;
    const startDateMs = $w.date1.value;   // 毫秒值,代表那天 00:00:00
    const endDateMs   = $w.date2.value;   // 毫秒值,代表那天 00:00:00
    const classInfo   = $w.page.dataset.state.classInfo;

    if (!startDateMs || !endDateMs) {
      throw new Error('请选择排课周期');
    }

    $w.utils.showLoading({ title: '正在生成课表...' });

    const sessions = [];
    let currentMs = startDateMs;

    // 建议:把 endDate 当天也包含进来(≤)
    while (currentMs <= endDateMs) {
      // 获取星期几(0=周日 → 7)
      const dateObj = new Date(currentMs);
      const dayOfWeek = dateObj.getDay() === 0 ? 7 : dateObj.getDay();

      const dayRules = scheduleRules[dayOfWeek];

      if (dayRules && Array.isArray(dayRules) && dayRules.length > 0) {
        for (const rule of dayRules) {
          // 直接使用 rule.startTime / endTime(一天内的毫秒偏移)
          const finalStart =  rule.startTime;
          const finalEnd   = rule.endTime;

          sessions.push({
            classId:    { _id: classInfo._id },
            date:       currentMs,           // 当天 00:00 的毫秒值(日期基准)
            startTime:  finalStart,          // 完整开始时间戳
            endTime:    finalEnd,            // 完整结束时间戳
            teacherId:  { _id: rule.teacherId },
            classroomId:{ _id: rule.classroomId },
            courseType: rule.courseType,
            status:     '1'
          });
        }
      }

      // +1 天(86400000 ms)
      currentMs += 86400000;
    }

    const result = await $w.cloud.callDataSource({
      dataSourceName: 'Schedule',
      methodName:    'wedaBatchCreateV2',
      params:        { data: sessions }
    });

    $w.utils.hideLoading();

    $w.utils.showModal({
      title:      '排课成功',
      content:    `已成功生成 ${result.idList?.length || 0} 节课。`,
      showCancel: false
    });

    $w.modal1.close({});
    $w.table1.refresh();

  } catch (e) {
    $w.utils.hideLoading();
    $w.utils.showToast({
      title: e.message || '生成课表失败',
      icon:  'error'
    });
  }
}
第三步:设置组件交互
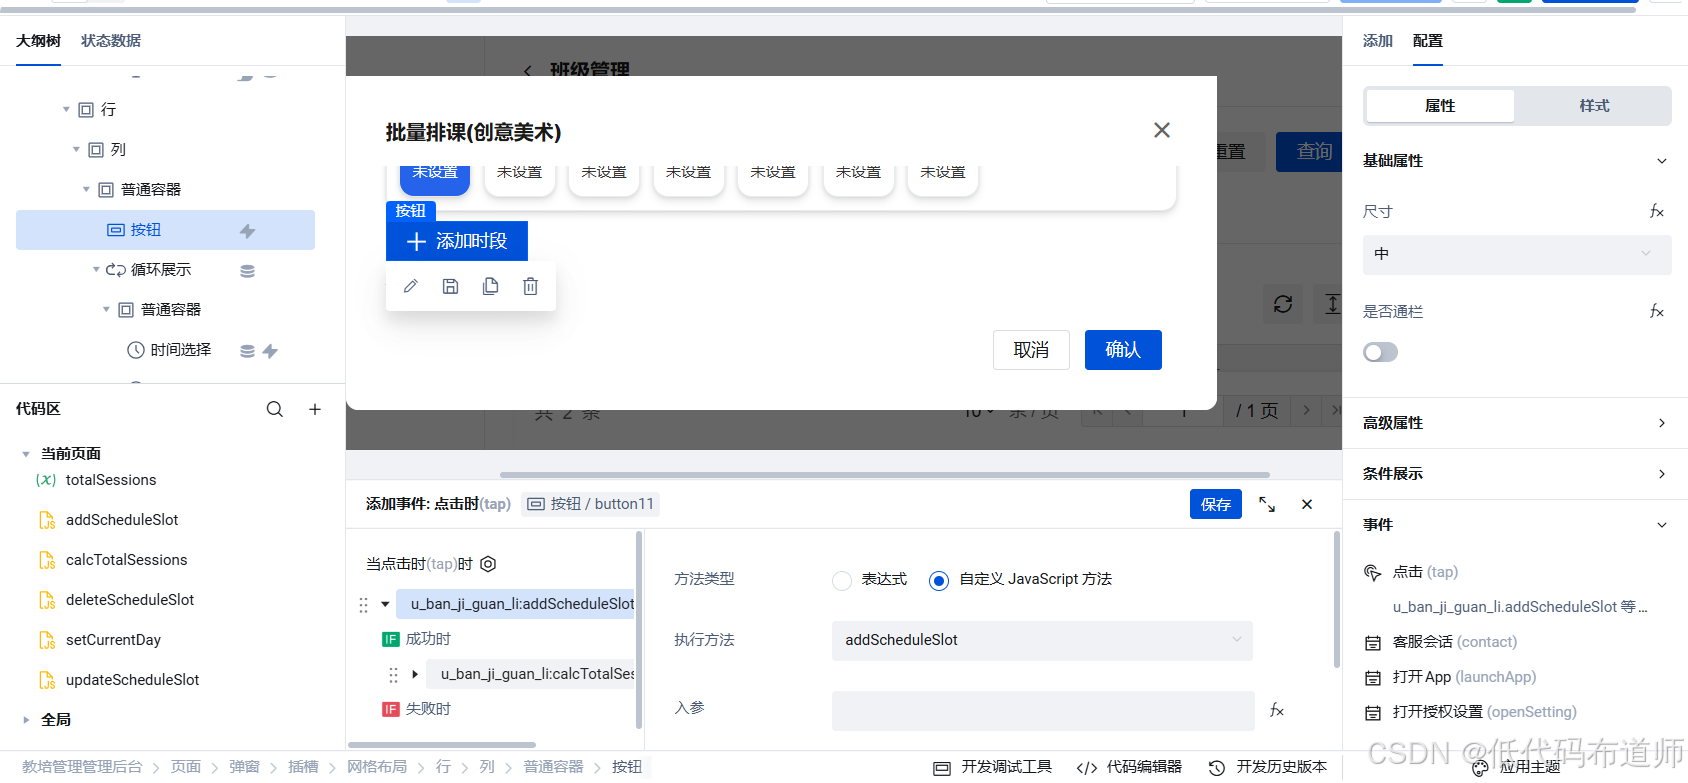
方法定义好之后,就可以给组件配置事件了。
首先给添加时段配置点击事件,先调用添加方法,接着调用计算课时
然后给删除图标定义点击事件,调用删除方法,跟一个重新计算课时的方法

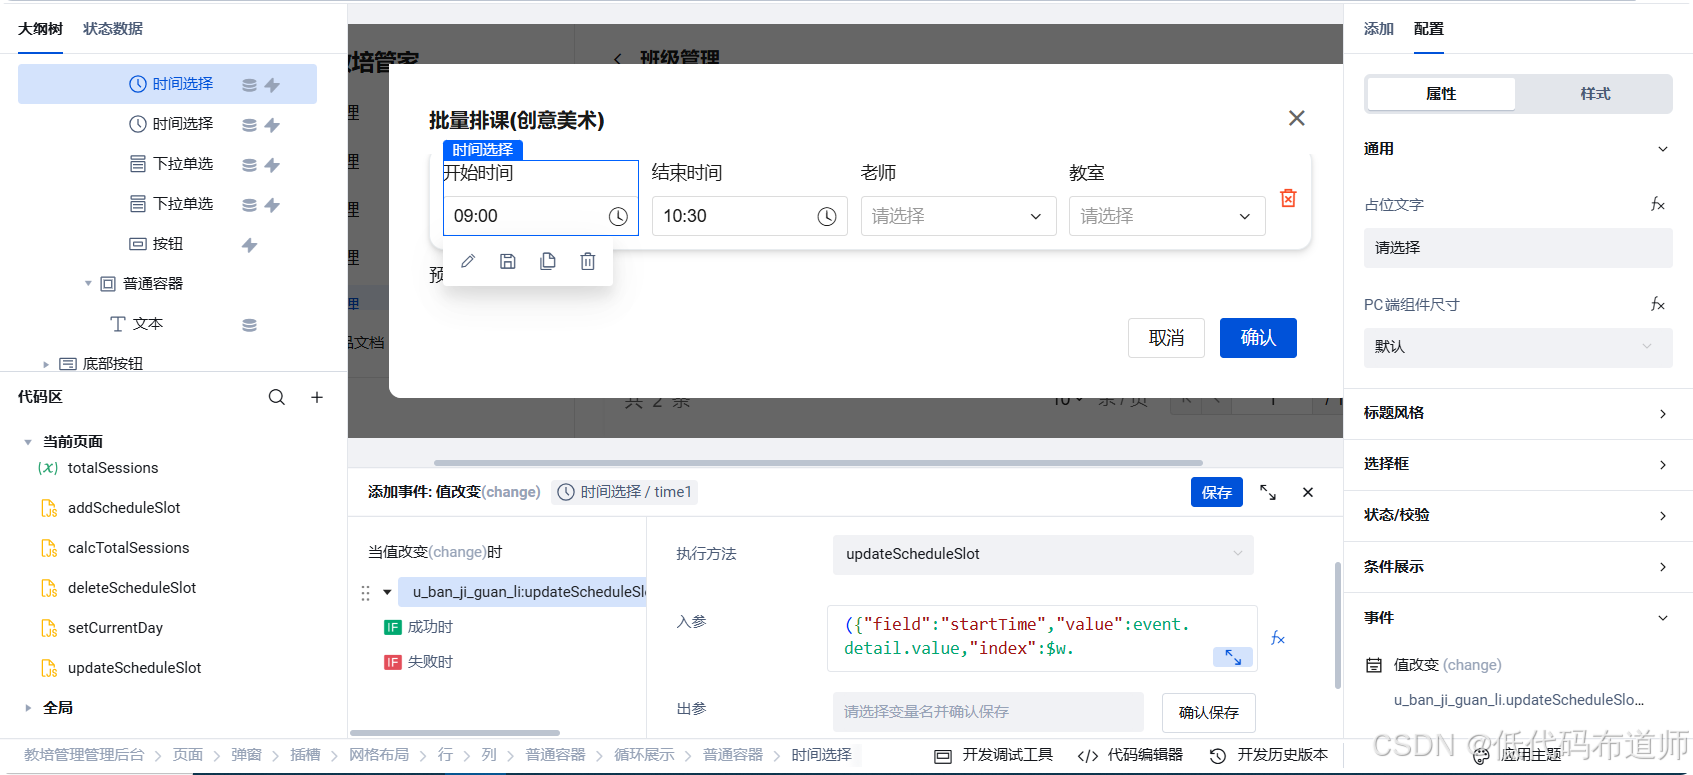
给表格里的每个组件配置值改变事件,调用我们的更新方法
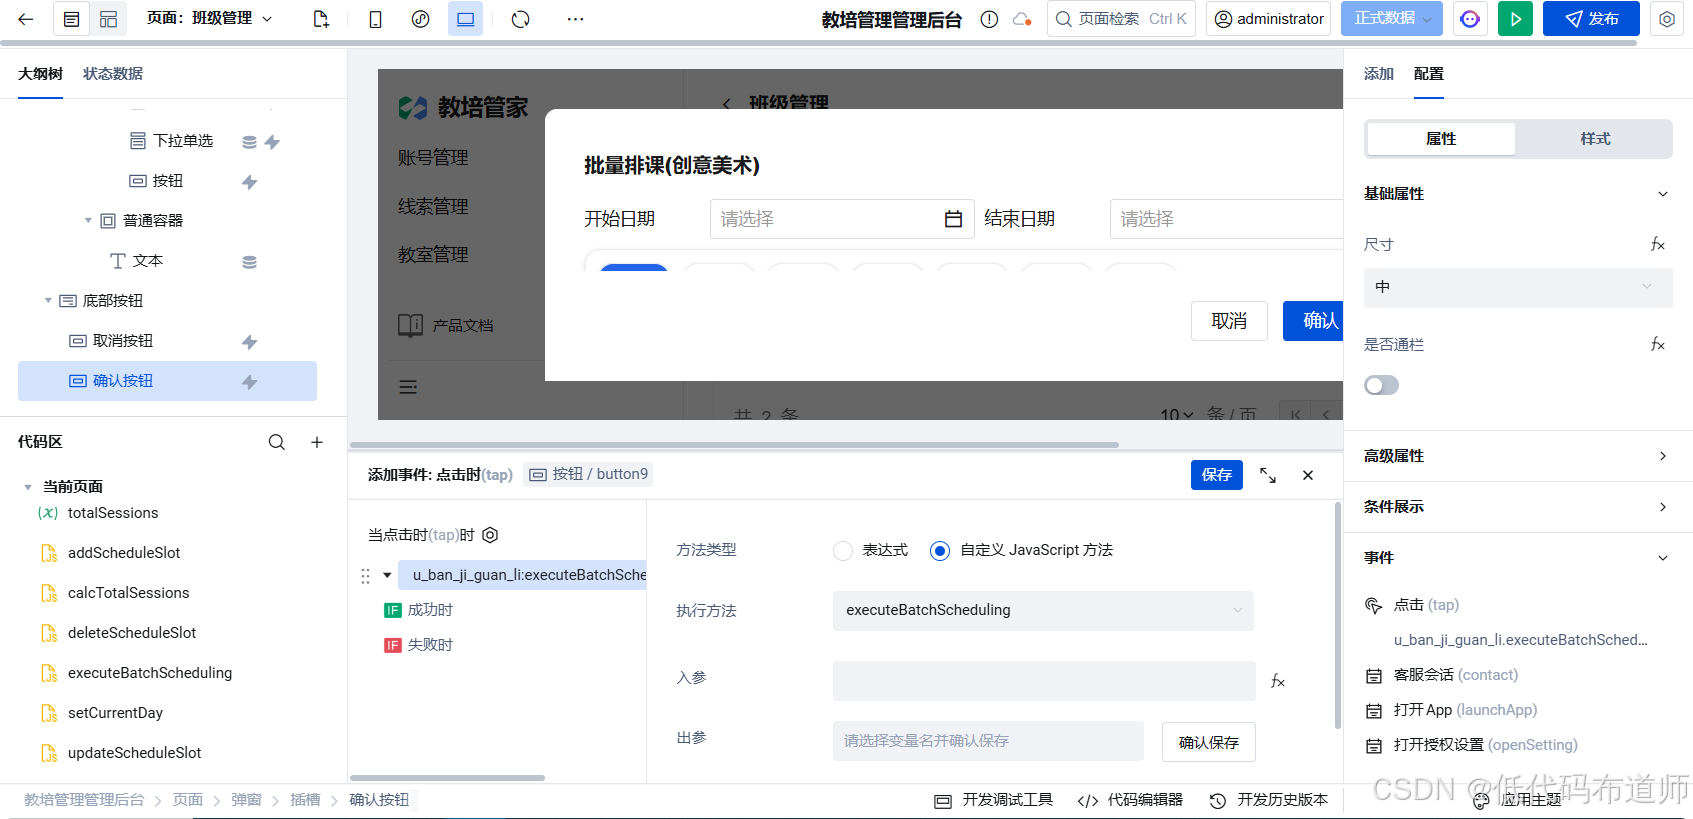
给弹窗的确认按钮添加点击事件,调用我们的批量排课方法
第四步:功能验证
- 时段动态性:点击"周三",添加两个时段,然后切换到"周五"查看是否为空,再切回"周三"确认数据是否保留。
- 默认回填:确认添加新时段时,老师和教室是否自动回填为该班级的默认配置。
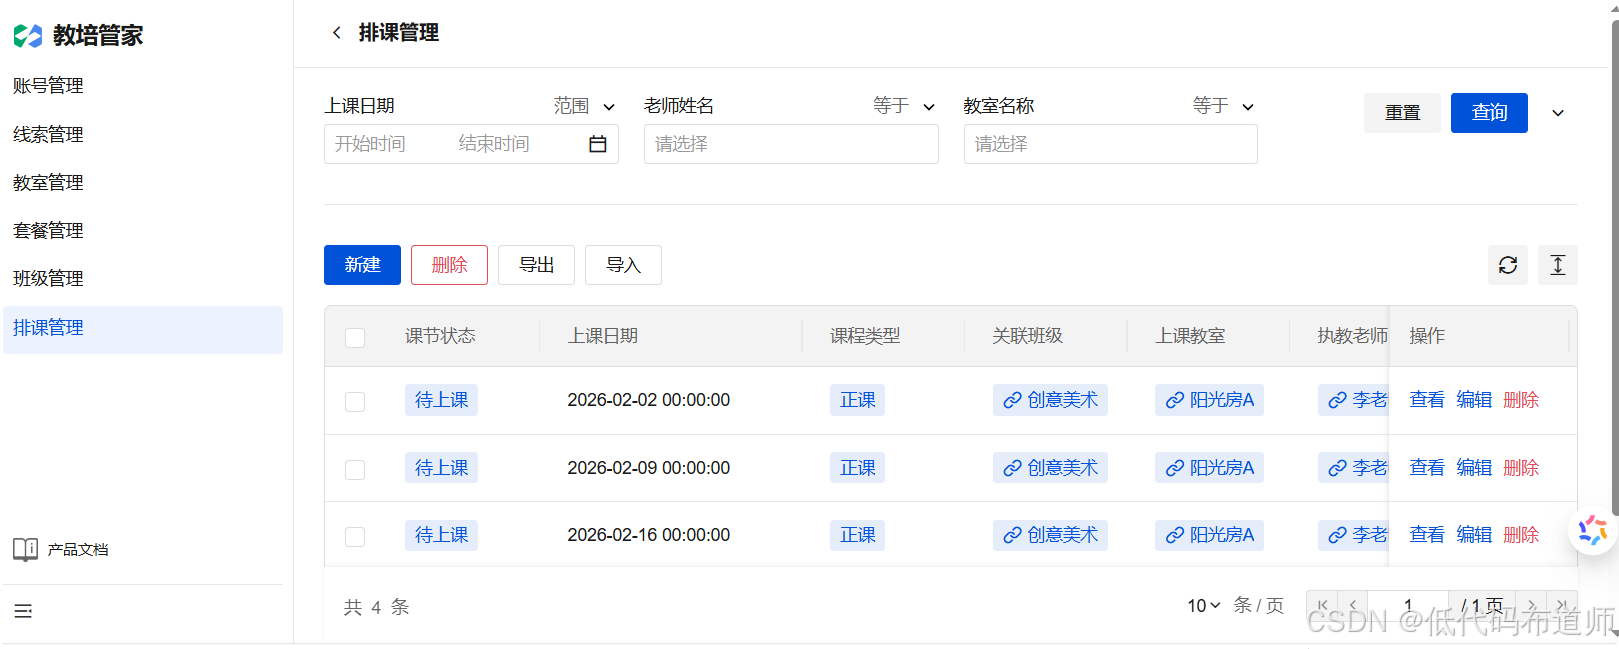
- 生成结果:选择一个月的时间范围,点击保存,进入"排课管理"页面查看生成的记录是否准确对应周三的所有时段。
🌟 总结与预告
通过这两篇的学习,我们实现了一个极具专业感的"智能排课向导"。这不仅是简单的增删改查,更是将**业务逻辑(排课规则)转化为生产数据(课节记录)**的典型案例。
下一讲: 《连接家校------家长端注册、登录与身份绑定》。我们将进入小程序的开发,学习如何通过手机号验证码实现家长的快速注册,并完成学员信息的关联绑定。