📚 目录
- [1. 概述](#1. 概述)
- [2. 引入三方库](#2. 引入三方库)
- [3. 目录结构](#3. 目录结构)
- [4. 从零开始实现](#4. 从零开始实现)
- [5. 核心代码详解](#5. 核心代码详解)
- [6. 常见错误与解决方案](#6. 常见错误与解决方案)
- [7. 进阶功能](#7. 进阶功能)
- [8. 总结](#8. 总结)
1. 概述
1.1 什么是 Table Calendar?
table_calendar 是一个功能强大的 Flutter 日历组件库,提供了:
- ✅ 美观的日历界面(Material Design 风格)
- ✅ 日期选择功能
- ✅ 自定义标记和样式
- ✅ 多格式支持(月视图、周视图、2周视图)
- ✅ 事件标记和自定义构建器
1.2 在本项目中的应用
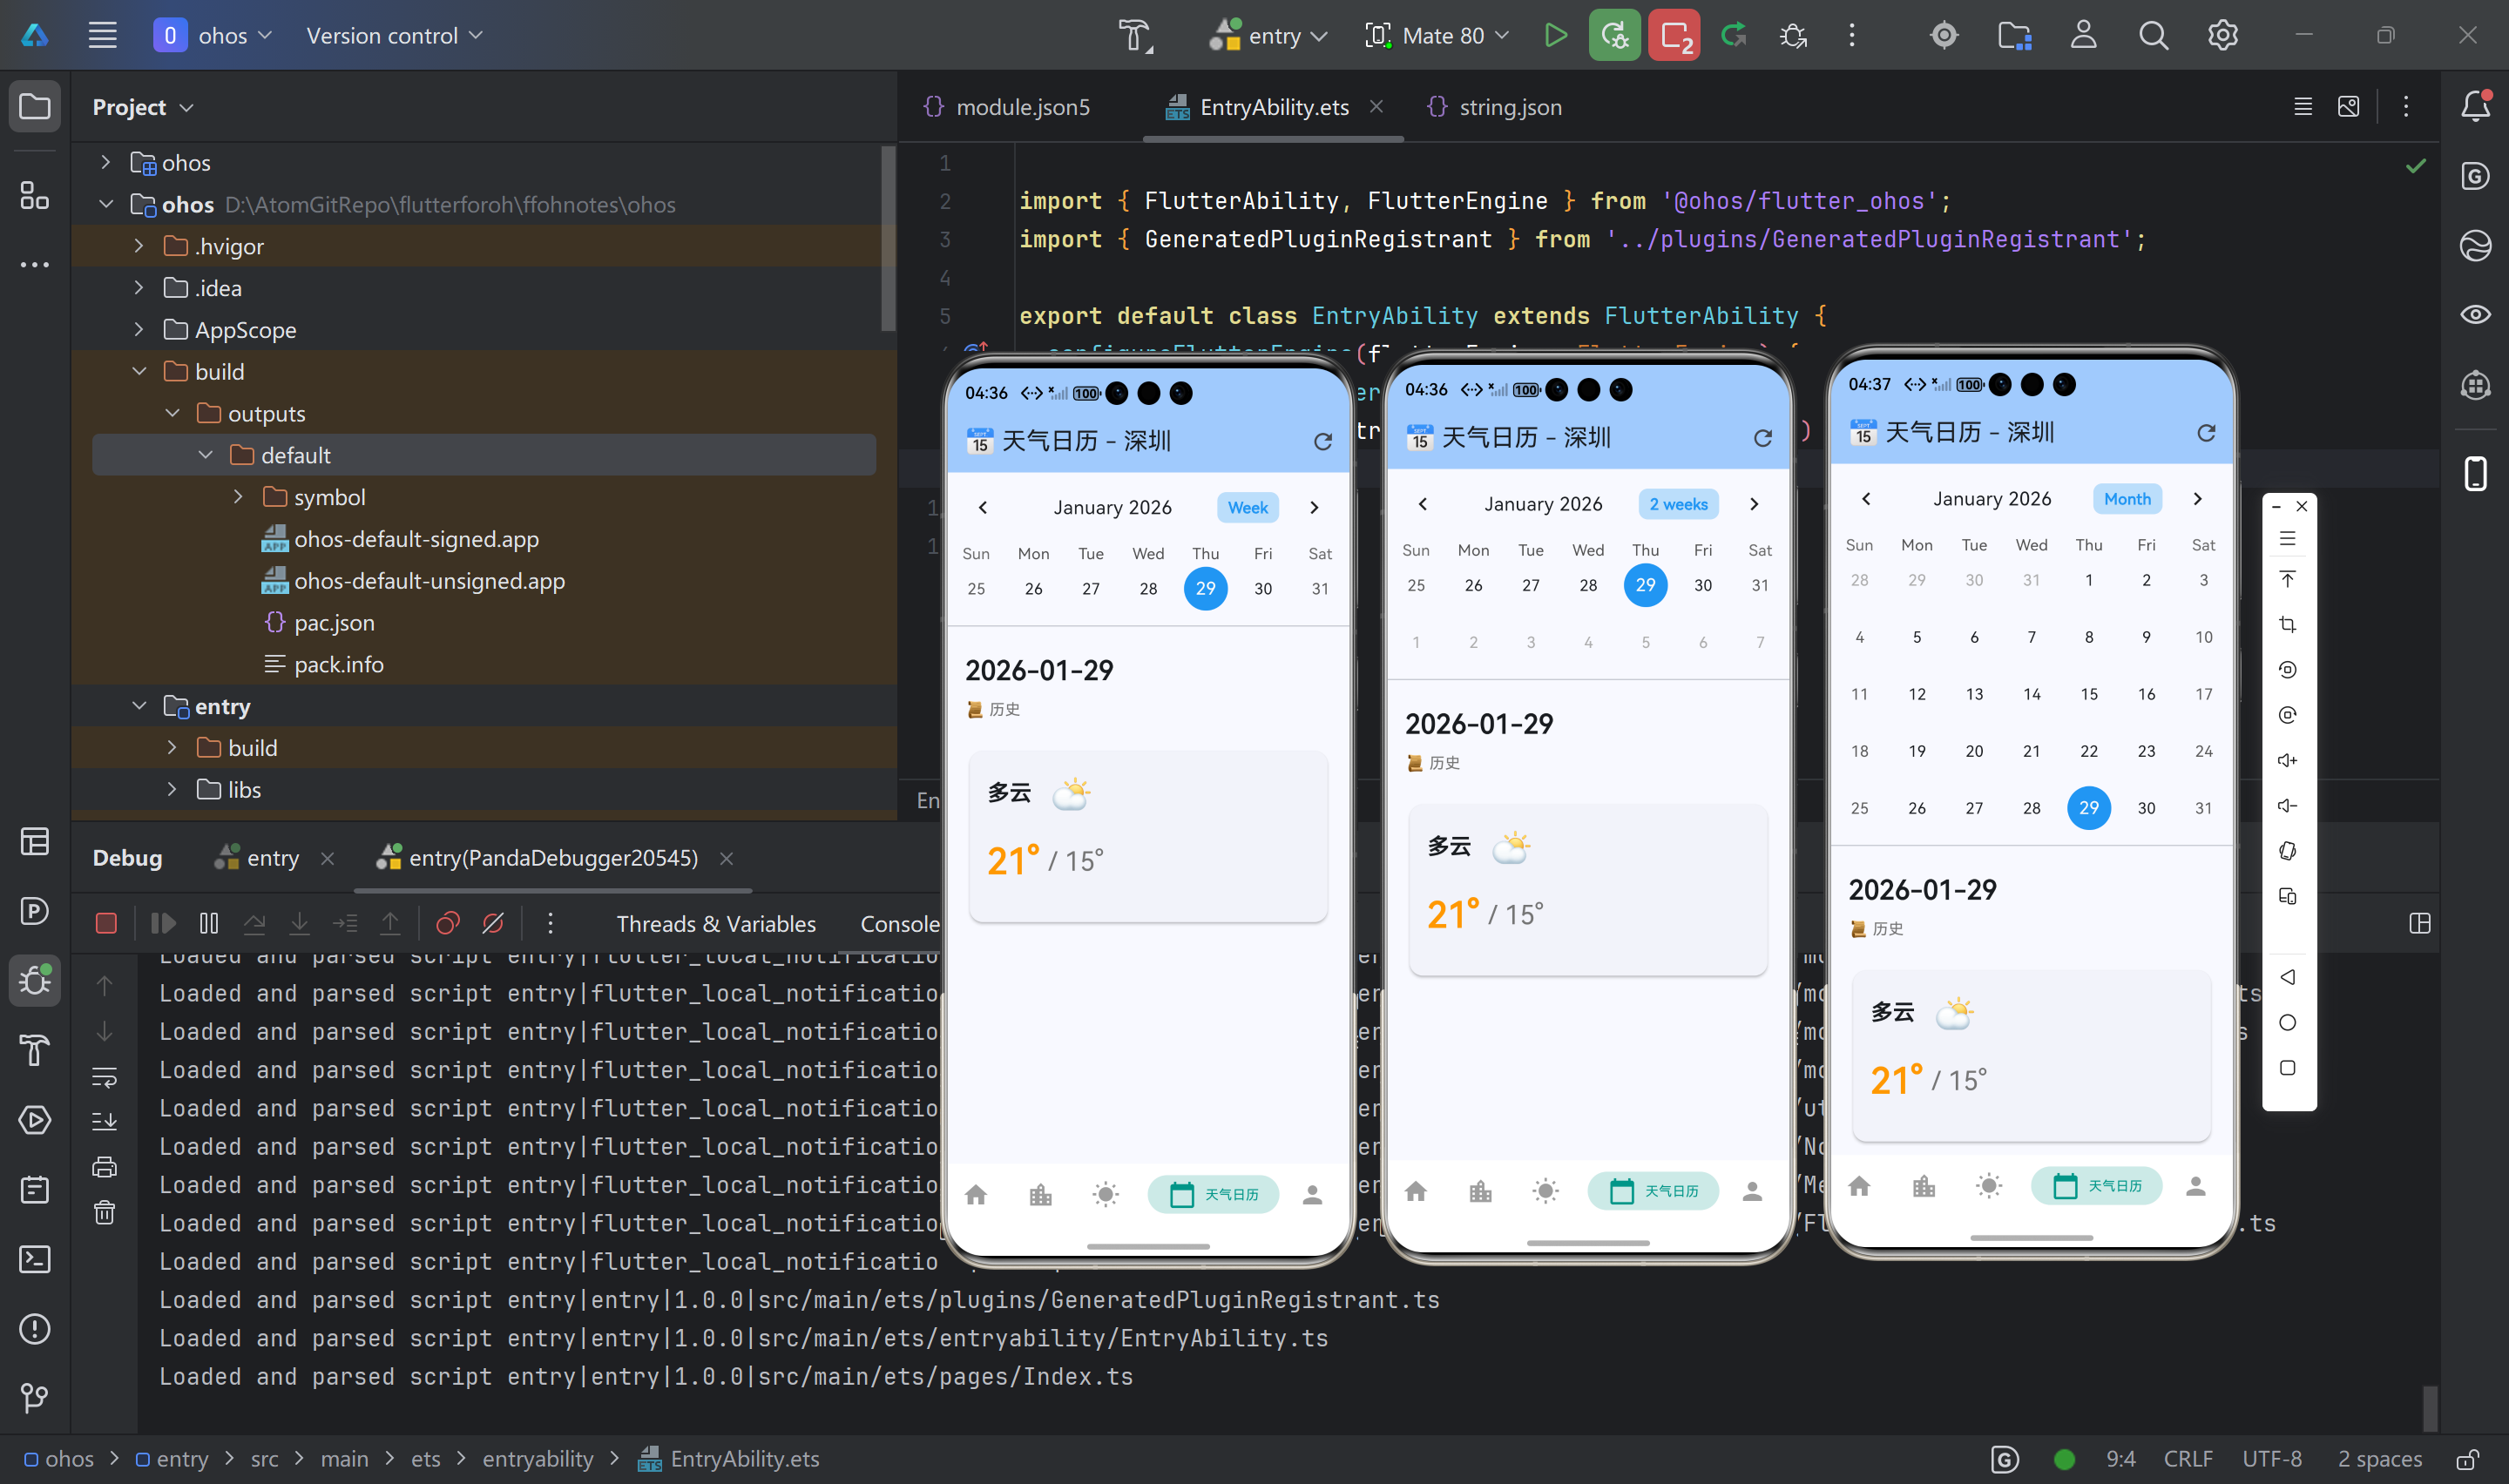
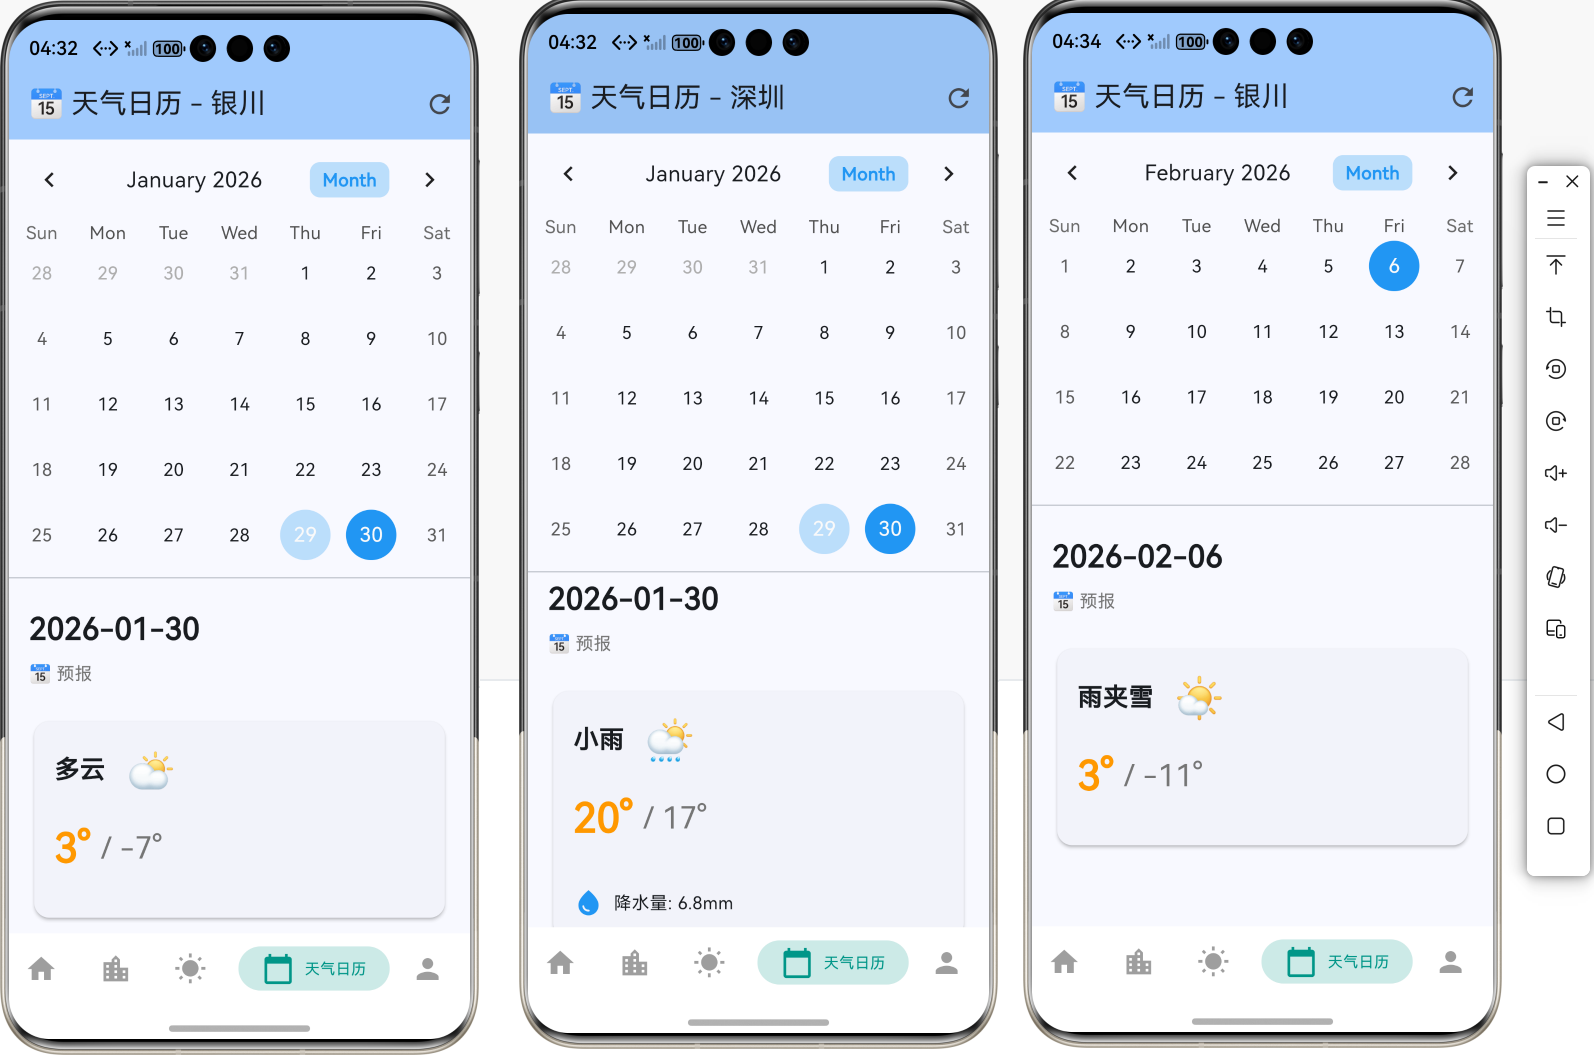
我们使用 table_calendar 实现一个个性化天气日历,功能包括:
- 📅 查看历史天气:显示近30天的历史天气数据
- 🔮 查看未来预报:显示未来15天的天气预报
- 🎯 智能标注:自动标注降水💧、高温🔥、预警🚨等特殊天气
- 🔍 详情查看:点击日期查看详细天气信息
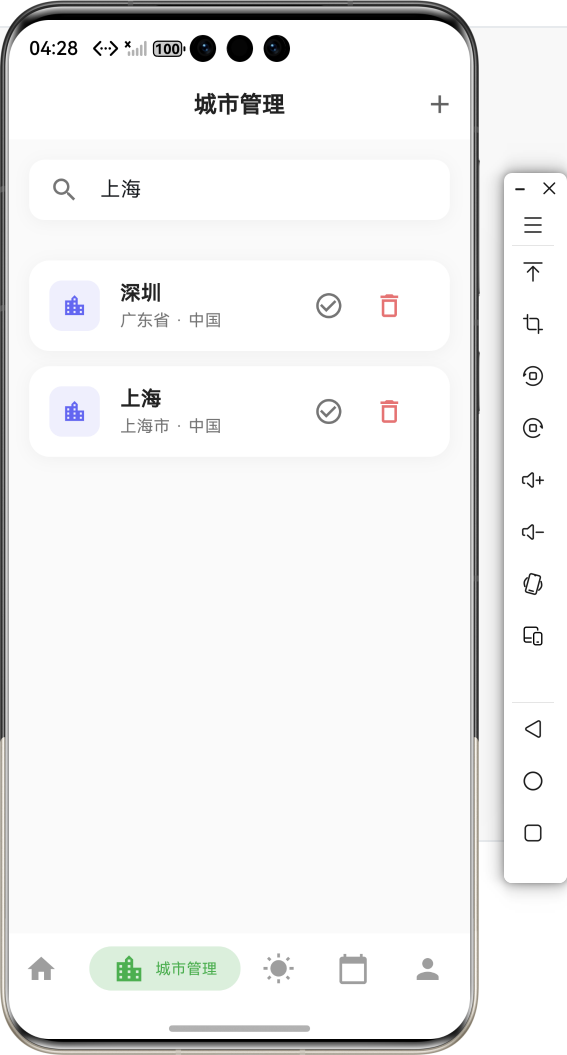
- 🌍 多城市支持:自动读取当前城市,支持切换城市
1.3 功能流程图
📱 用户打开天气日历
📍 加载当前城市
📡 加载天气数据
🔮 获取未来15天预报
📜 获取历史30天数据
⚠️ 获取天气预警
💾 存储到缓存
🏷️ 生成日历标注
📅 显示日历和标记
👆 用户选择日期
📊 显示天气详情
显示温度/天气/标注/预警
2. 引入三方库
2.1 添加依赖
在 pubspec.yaml 文件的 dependencies 部分添加:
yaml
dependencies:
  flutter:
    sdk: flutter

  # 日历组件
  table_calendar: ^3.1.2

  # # 用于存储城市信息,需要引入鸿蒙化的依赖
  shared_preferences:
    git:
      url: "https://gitcode.com/openharmony-tpc/flutter_packages.git"
      path: "packages/shared_preferences/shared_preferences"
2.2 安装依赖
在项目根目录运行:
bash
flutter pub get2.3 依赖说明
| 依赖包 | 版本 | 用途 |
|---|---|---|
table_calendar |
^3.1.2 | 日历组件核心库,提供日历UI和交互功能 |
shared_preferences |
^2.2.2 | 用于读取当前城市信息 |
3. 目录结构
3.1 项目结构
lib/
├── screens/
│   └── weather_calendar_page.dart    # 天气日历页面(主要文件)
├── models/
│   ├── weather_models.dart           # 天气数据模型
│   └── weather_alert_model.dart      # 预警数据模型
├── services/
│   ├── weather_service.dart          # 天气服务(API调用)
│   └── weather_alert_service.dart    # 预警服务
└── main.dart                         # 应用入口
3.2 文件说明
-
weather_calendar_page.dart:天气日历页面的主要实现文件- 包含日历组件
- 天气数据加载和显示
- 日历标注功能
- 预警详情显示
-
weather_models.dart:天气数据模型Daily:每日天气预报数据DailyForecastResponse:天气预报响应
-
weather_alert_model.dart:预警数据模型WeatherAlert:天气预警数据MarkerType:标注类型枚举CalendarMarker:日历标注数据
-
weather_service.dart:天气服务getDailyForecast():获取天气预报- 支持 3d、7d、10d、15d、30d 预报
-
weather_alert_service.dart:预警服务getWeatherAlerts():获取天气预警列表
4. 从零开始实现
4.1 步骤1:创建页面文件
创建 lib/screens/weather_calendar_page.dart 文件,先搭建基础结构:
dart
import 'package:flutter/material.dart';
import 'package:flutter/foundation.dart';
import 'package:table_calendar/table_calendar.dart';
import 'package:shared_preferences/shared_preferences.dart';
import '../api/weather_service.dart';
import '../models/weather_models.dart';
import '../models/weather_alert_model.dart';
import '../services/weather_alert_service.dart';

/// 天气日历页面
class WeatherCalendarPage extends StatefulWidget {
  const WeatherCalendarPage({super.key});

  @override
  State<WeatherCalendarPage> createState() => _WeatherCalendarPageState();
}

class _WeatherCalendarPageState extends State<WeatherCalendarPage> {
  // 服务实例
  final WeatherService _weatherService = WeatherService();
  final WeatherAlertService _alertService = WeatherAlertService();

  // 日历状态
  late ValueNotifier<List<DateTime>> _selectedDays;
  DateTime _focusedDay = DateTime.now();
  DateTime _selectedDay = DateTime.now();
  CalendarFormat _calendarFormat = CalendarFormat.month;

  // 当前城市
  String _currentCityId = '101010100';
  String _currentCityName = '北京';

  // 数据缓存
  final Map<String, DailyForecastResponse> _forecastCache = {};
  final Map<String, Map<String, dynamic>> _historicalCache = {};
  final Map<String, List<WeatherAlert>> _alertCache = {};

  // 标注数据
  final Map<DateTime, List<CalendarMarker>> _markers = {};

  // 加载状态
  bool _isLoading = false;

  @override
  void initState() {
    super.initState();
    _selectedDays = ValueNotifier([]);
    _weatherService.init();
    _loadCurrentCity();
    _loadWeatherData();
  }

  @override
  void dispose() {
    _selectedDays.dispose();
    super.dispose();
  }

  @override
  Widget build(BuildContext context) {
    return Scaffold(
      appBar: AppBar(
        title: Text('📅 天气日历 - $_currentCityName'),
        actions: [
          IconButton(
            icon: const Icon(Icons.refresh),
            onPressed: _loadWeatherData,
            tooltip: '刷新天气数据',
          ),
        ],
      ),
      body: _isLoading
          ? const Center(child: CircularProgressIndicator())
          : RefreshIndicator(
              onRefresh: _loadWeatherData,
              child: Column(
                children: [
                  _buildCalendar(),
                  const Divider(),
                  Expanded(child: _buildWeatherDetail()),
                ],
              ),
            ),
    );
  }

  // 后续步骤会逐步实现这些方法
  Widget _buildCalendar() {
    return const SizedBox.shrink();
  }

  Widget _buildWeatherDetail() {
    return const SizedBox.shrink();
  }
}
💡 新手提示:
StatefulWidget用于需要状态管理的页面initState()在页面创建时调用,适合初始化数据dispose()在页面销毁时调用,用于释放资源
4.2 步骤2:实现城市加载
添加加载当前城市的方法:
dart
/// 加载当前城市
Future<void> _loadCurrentCity() async {
  try {
    final prefs = await SharedPreferences.getInstance();
    final cityId = prefs.getString('current_location_id');
    final cityName = prefs.getString('current_city_name');

    if (cityId != null && cityName != null) {
      setState(() {
        _currentCityId = cityId;
        _currentCityName = cityName;
      });
    }
  } catch (e) {
    debugPrint('加载当前城市失败: $e');
  }
}
💡 新手提示:
SharedPreferences用于存储简单的键值对数据setState()用于更新UI,必须调用才能看到变化debugPrint()用于调试输出,不会影响生产环境
4.3 步骤3:实现数据加载
添加天气数据加载方法:
dart
/// 加载天气数据(主方法)
Future<void> _loadWeatherData() async {
  setState(() {
    _isLoading = true;
  });

  try {
    // 并行加载三种数据
    await Future.wait([
      _loadForecast(),           // 未来15天预报
      _loadHistoricalWeather(),  // 历史30天数据
      _loadWeatherAlerts(),      // 天气预警
    ]);

    // 生成标注
    _generateMarkers();
  } catch (e) {
    debugPrint('加载天气数据失败: $e');
  } finally {
    setState(() {
      _isLoading = false;
    });
  }
}

/// 加载未来15天预报
Future<void> _loadForecast() async {
  try {
    final forecast = await _weatherService.getDailyForecast(
      _currentCityId,
      days: '15d',
    );

    setState(() {
      _forecastCache[_currentCityId] = forecast;
    });
  } catch (e) {
    debugPrint('加载预报失败: $e');
  }
}

/// 加载近30天历史天气
Future<void> _loadHistoricalWeather() async {
  try {
    // 注意:和风天气API可能需要付费版本才能获取历史天气
    // 这里使用模拟数据作为示例
    final now = DateTime.now();
    final historicalData = <String, Map<String, dynamic>>{};

    for (int i = 1; i <= 30; i++) {
      final date = now.subtract(Duration(days: i));
      final dateKey = _formatDate(date);

      // 模拟历史天气数据
      historicalData[dateKey] = {
        'tempMax': 20 + (i % 10),
        'tempMin': 10 + (i % 8),
        'textDay': ['晴', '多云', '阴', '小雨'][i % 4],
        'precip': i % 5 == 0 ? 5.0 + (i % 3) : 0.0,
      };
    }

    setState(() {
      _historicalCache[_currentCityId] = historicalData;
    });
  } catch (e) {
    debugPrint('加载历史天气失败: $e');
  }
}

/// 加载天气预警
Future<void> _loadWeatherAlerts() async {
  try {
    final alerts = await _alertService.getWeatherAlerts(_currentCityId);
    setState(() {
      _alertCache[_currentCityId] = alerts;
    });
    debugPrint('加载天气预警成功: ${alerts.length} 条');
  } catch (e) {
    debugPrint('加载天气预警失败: $e');
  }
}

/// 格式化日期为字符串(YYYY-MM-DD)
String _formatDate(DateTime date) {
  return '${date.year}-${date.month.toString().padLeft(2, '0')}-${date.day.toString().padLeft(2, '0')}';
}
💡 新手提示:
Future.wait()可以并行执行多个异步操作,提高效率- 使用
try-catch捕获错误,避免应用崩溃 finally块确保无论成功失败都会执行(如关闭加载状态)
4.4 步骤4:实现日历组件
实现 _buildCalendar() 方法:
dart
/// 构建日历组件
Widget _buildCalendar() {
  return TableCalendar(
    // 设置日历显示范围(前后各一年)
    firstDay: DateTime.now().subtract(const Duration(days: 365)),
    lastDay: DateTime.now().add(const Duration(days: 365)),

    // 当前聚焦的日期
    focusedDay: _focusedDay,

    // 判断日期是否被选中
    selectedDayPredicate: (day) => isSameDay(_selectedDay, day),

    // 日历格式(月/周/2周)
    calendarFormat: _calendarFormat,

    // 格式切换回调
    onFormatChanged: (format) {
      setState(() {
        _calendarFormat = format;
      });
    },

    // 日期选择回调
    onDaySelected: (selectedDay, focusedDay) {
      setState(() {
        _selectedDay = selectedDay;
        _focusedDay = focusedDay;
      });
    },

    // 页面切换回调
    onPageChanged: (focusedDay) {
      setState(() {
        _focusedDay = focusedDay;
      });
    },

    // 自定义标记构建器
    calendarBuilders: CalendarBuilders(
      markerBuilder: (context, date, events) {
        final markers = _markers[date];
        if (markers == null || markers.isEmpty) {
          return null; // 没有标记时返回 null
        }

        // 显示标记(小圆点)
        return Positioned(
          bottom: 1,
          child: Row(
            mainAxisSize: MainAxisSize.min,
            children: markers.map((marker) {
              // 根据标记类型选择颜色
              Color markerColor;
              switch (marker.type) {
                case MarkerType.precipitation:
                  markerColor = Colors.blue;  // 蓝色:降水
                  break;
                case MarkerType.highTemperature:
                  markerColor = Colors.red;   // 红色:高温
                  break;
                case MarkerType.alert:
                  markerColor = Colors.orange; // 橙色:预警
                  break;
              }

              return Container(
                margin: const EdgeInsets.symmetric(horizontal: 1),
                width: 6,
                height: 6,
                decoration: BoxDecoration(
                  shape: BoxShape.circle,
                  color: markerColor,
                ),
              );
            }).toList(),
          ),
        );
      },
    ),

    // 日历样式
    calendarStyle: CalendarStyle(
      todayDecoration: BoxDecoration(
        color: Colors.blue.shade100,
        shape: BoxShape.circle,
      ),
      selectedDecoration: BoxDecoration(
        color: Colors.blue,
        shape: BoxShape.circle,
      ),
      markerDecoration: const BoxDecoration(
        color: Colors.transparent,
      ),
    ),

    // 头部样式
    headerStyle: HeaderStyle(
      formatButtonVisible: true,  // 显示格式切换按钮
      titleCentered: true,         // 标题居中
      formatButtonShowsNext: false,
      formatButtonDecoration: BoxDecoration(
        color: Colors.blue.shade100,
        borderRadius: BorderRadius.circular(8),
      ),
      formatButtonTextStyle: const TextStyle(
        color: Colors.blue,
        fontWeight: FontWeight.bold,
      ),
    ),
  );
}
💡 新手提示:
isSameDay()是table_calendar提供的工具函数,用于比较两个日期是否为同一天Positioned用于在日历单元格中定位标记markerBuilder返回null表示该日期没有标记
4.5 步骤5:实现标注生成
添加 _generateMarkers() 方法:
dart
/// 生成日历标注
void _generateMarkers() {
  _markers.clear(); // 清空现有标注

  // 1. 处理预报数据
  final forecast = _forecastCache[_currentCityId];
  if (forecast?.daily != null) {
    for (final day in forecast!.daily!) {
      if (day.fxDate == null) continue;

      try {
        final date = DateTime.parse(day.fxDate!);
        final markers = <CalendarMarker>[];

        // 检查降水
        if (day.precip != null && day.precip!.isNotEmpty) {
          final precipValue = double.tryParse(day.precip!);
          if (precipValue != null && precipValue > 0) {
            markers.add(CalendarMarker(
              type: MarkerType.precipitation,
              date: date,
            ));
          }
        }

        // 检查高温(温度 > 35度)
        if (day.tempMax != null && day.tempMax!.isNotEmpty) {
          final tempMaxValue = int.tryParse(day.tempMax!);
          if (tempMaxValue != null && tempMaxValue > 35) {
            markers.add(CalendarMarker(
              type: MarkerType.highTemperature,
              date: date,
            ));
          }
        }

        if (markers.isNotEmpty) {
          _markers[date] = markers;
        }
      } catch (e) {
        debugPrint('解析日期失败: ${day.fxDate}, error: $e');
      }
    }
  }

  // 2. 处理历史数据(逻辑类似)
  final historical = _historicalCache[_currentCityId];
  if (historical != null) {
    historical.forEach((dateKey, data) {
      try {
        final date = DateTime.parse(dateKey);
        final markers = <CalendarMarker>[];

        if (data['precip'] != null && data['precip'] > 0) {
          markers.add(CalendarMarker(
            type: MarkerType.precipitation,
            date: date,
          ));
        }

        if (data['tempMax'] != null && data['tempMax'] > 35) {
          markers.add(CalendarMarker(
            type: MarkerType.highTemperature,
            date: date,
          ));
        }

        if (markers.isNotEmpty) {
          _markers[date] = markers;
        }
      } catch (e) {
        debugPrint('解析历史日期失败: $dateKey, error: $e');
      }
    });
  }

  // 3. 处理预警数据
  final alerts = _alertCache[_currentCityId] ?? [];
  for (final alert in alerts) {
    // 预警可能跨多天,需要标记预警期间的所有日期
    final startDate = DateTime(
      alert.startTime.year,
      alert.startTime.month,
      alert.startTime.day,
    );
    final endDate = DateTime(
      alert.endTime.year,
      alert.endTime.month,
      alert.endTime.day,
    );

    var currentDate = startDate;
    while (!currentDate.isAfter(endDate)) {
      if (!_markers.containsKey(currentDate)) {
        _markers[currentDate] = [];
      }

      // 检查是否已有预警标记
      final hasAlert = _markers[currentDate]!.any(
        (m) => m.type == MarkerType.alert,
      );

      if (!hasAlert) {
        _markers[currentDate]!.add(CalendarMarker(
          type: MarkerType.alert,
          date: currentDate,
          alert: alert, // 保存预警信息
        ));
      }

      currentDate = currentDate.add(const Duration(days: 1));
    }
  }

  setState(() {}); // 更新UI
}
💡 新手提示:
- 标注生成逻辑分为三部分:预报数据、历史数据、预警数据
- 预警可能跨多天,需要用循环标记所有日期
- 最后调用
setState()更新UI显示
4.6 步骤6:实现天气详情显示
实现 _buildWeatherDetail() 方法:
dart
/// 获取指定日期的天气数据
Map<String, dynamic>? _getWeatherForDate(DateTime date) {
final dateKey = _formatDate(date);
final now = DateTime.now();
// 未来日期或今天:从预报中获取
if (date.isAfter(now) || isSameDay(date, now)) {
final forecast = _forecastCache[_currentCityId];
if (forecast?.daily != null) {
for (final day in forecast!.daily!) {
if (day.fxDate == dateKey) {
return {
'tempMax': day.tempMax ?? '--',
'tempMin': day.tempMin ?? '--',
'textDay': day.textDay ?? '未知',
'precip': day.precip ?? '0',
};
}
}
}
} else {
// 历史日期:从历史数据中获取
final historical = _historicalCache[_currentCityId];
if (historical != null && historical.containsKey(dateKey)) {
return historical[dateKey];
}
}
return null;
}
/// 构建天气详情
Widget _buildWeatherDetail() {
final weatherData = _getWeatherForDate(_selectedDay);
if (weatherData == null) {
return Center(
child: Column(
mainAxisAlignment: MainAxisAlignment.center,
children: [
const Icon(Icons.info_outline, size: 48, color: Colors.grey),
const SizedBox(height: 16),
Text(
'暂无 ${_formatDate(_selectedDay)} 的天气数据',
style: TextStyle(color: Colors.grey.shade600),
),
],
),
);
}
final markers = _markers[_selectedDay] ?? [];
final isFuture = _selectedDay.isAfter(DateTime.now());
return SingleChildScrollView(
padding: const EdgeInsets.all(16),
child: Column(
crossAxisAlignment: CrossAxisAlignment.start,
children: [
// 日期标题
Text(
_formatDate(_selectedDay),
style: const TextStyle(
fontSize: 24,
fontWeight: FontWeight.bold,
),
),
const SizedBox(height: 8),
Text(
isFuture ? '📅 预报' : '📜 历史',
style: TextStyle(
fontSize: 14,
color: Colors.grey.shade600,
),
),
const SizedBox(height: 24),
// 天气卡片
Card(
elevation: 2,
child: Padding(
padding: const EdgeInsets.all(16),
child: Column(
crossAxisAlignment: CrossAxisAlignment.start,
children: [
// 天气状况
Row(
children: [
Text(
weatherData['textDay'] ?? '未知',
style: const TextStyle(
fontSize: 20,
fontWeight: FontWeight.bold,
),
),
const SizedBox(width: 16),
_getWeatherIcon(weatherData['textDay'] ?? ''),
],
),
const SizedBox(height: 16),
// 温度
Row(
children: [
Text(
'${weatherData['tempMax'] ?? '--'}°',
style: const TextStyle(
fontSize: 32,
fontWeight: FontWeight.bold,
color: Colors.orange,
),
),
const SizedBox(width: 8),
Text(
'/ ${weatherData['tempMin'] ?? '--'}°',
style: TextStyle(
fontSize: 24,
color: Colors.grey.shade600,
),
),
],
),
const SizedBox(height: 16),
// 标注信息(Chip标签)
if (markers.isNotEmpty) ...[
const Divider(),
const SizedBox(height: 8),
Wrap(
spacing: 8,
runSpacing: 8,
children: markers.map((marker) {
IconData icon;
String label;
Color color;
Color backgroundColor;
switch (marker.type) {
case MarkerType.precipitation:
icon = Icons.water_drop;
label = '🌧️ 有降水';
color = Colors.blue;
backgroundColor = Colors.blue.shade50;
break;
case MarkerType.highTemperature:
icon = Icons.wb_sunny;
label = '🌡️ 高温';
color = Colors.red;
backgroundColor = Colors.red.shade50;
break;
case MarkerType.alert:
icon = Icons.warning;
label = '⚠️ 天气预警';
color = Colors.orange;
backgroundColor = Colors.orange.shade50;
break;
}
return Chip(
avatar: Icon(icon, size: 18, color: color),
label: Text(label, style: const TextStyle(fontSize: 12)),
backgroundColor: backgroundColor,
);
}).toList(),
),
],
// 降水量
if (weatherData['precip'] != null) ...[
Builder(
builder: (context) {
final precipValue = double.tryParse(weatherData['precip'].toString());
if (precipValue != null && precipValue > 0) {
return Column(
children: [
const SizedBox(height: 16),
Row(
children: [
const Icon(Icons.water_drop, color: Colors.blue),
const SizedBox(width: 8),
Text(
'降水量: ${precipValue.toStringAsFixed(1)}mm',
style: const TextStyle(fontSize: 14),
),
],
),
],
);
}
return const SizedBox.shrink();
},
),
],
// 预警信息(详细)
if (markers.any((m) => m.type == MarkerType.alert)) ...[
Builder(
builder: (context) {
// 获取当天的预警
final alerts = _alertCache[_currentCityId] ?? [];
final dayAlerts = alerts.where((alert) {
final alertStart = DateTime(
alert.startTime.year,
alert.startTime.month,
alert.startTime.day,
);
final alertEnd = DateTime(
alert.endTime.year,
alert.endTime.month,
alert.endTime.day,
);
final selected = DateTime(
_selectedDay.year,
_selectedDay.month,
_selectedDay.day,
);
return !selected.isBefore(alertStart) &&
!selected.isAfter(alertEnd);
}).toList();
if (dayAlerts.isEmpty) {
return const SizedBox.shrink();
}
return Column(
children: [
const SizedBox(height: 16),
const Divider(),
const SizedBox(height: 8),
const Text(
'⚠️ 天气预警',
style: TextStyle(
fontSize: 16,
fontWeight: FontWeight.bold,
color: Colors.orange,
),
),
const SizedBox(height: 8),
...dayAlerts.map((alert) {
return Container(
margin: const EdgeInsets.only(bottom: 8),
padding: const EdgeInsets.all(12),
decoration: BoxDecoration(
color: alert.isUrgent
? Colors.red.shade50
: Colors.orange.shade50,
borderRadius: BorderRadius.circular(8),
border: Border.all(
color: alert.isUrgent
? Colors.red.shade300
: Colors.orange.shade300,
width: 1,
),
),
child: Column(
crossAxisAlignment: CrossAxisAlignment.start,
children: [
Row(
children: [
Text(alert.icon, style: const TextStyle(fontSize: 20)),
const SizedBox(width: 8),
Expanded(
child: Text(
alert.title,
style: const TextStyle(
fontSize: 14,
fontWeight: FontWeight.bold,
),
),
),
Container(
padding: const EdgeInsets.symmetric(
horizontal: 8,
vertical: 4,
),
decoration: BoxDecoration(
color: alert.isUrgent ? Colors.red : Colors.orange,
borderRadius: BorderRadius.circular(4),
),
child: Text(
alert.levelColor,
style: const TextStyle(
color: Colors.white,
fontSize: 12,
fontWeight: FontWeight.bold,
),
),
),
],
),
const SizedBox(height: 8),
Text(alert.content, style: const TextStyle(fontSize: 12)),
const SizedBox(height: 4),
Text(
'${_formatDate(alert.startTime)} 至 ${_formatDate(alert.endTime)}',
style: TextStyle(
fontSize: 11,
color: Colors.grey.shade600,
),
),
],
),
);
}).toList(),
],
);
},
),
],
],
),
),
),
],
),
);
}
/// 获取天气图标(Emoji)
Widget _getWeatherIcon(String text) {
final iconMap = {
'晴': '☀️',
'多云': '⛅',
'阴': '☁️',
'小雨': '🌦️',
'中雨': '🌧️',
'大雨': '⛈️',
'雪': '❄️',
};
return Text(
iconMap[text] ?? '🌤️',
style: const TextStyle(fontSize: 32),
);
}💡 新手提示:
SingleChildScrollView用于可滚动内容Builder用于在条件渲染中声明变量...展开运算符用于将列表展开为多个子元素
4.7 步骤7:添加城市切换监听
添加 didChangeDependencies() 方法监听城市变化:
dart
@override
void didChangeDependencies() {
  super.didChangeDependencies();
  // 当页面重新显示时,检查城市是否有变化
  _checkCityChange();
}

/// 检查城市变化
Future<void> _checkCityChange() async {
  try {
    final prefs = await SharedPreferences.getInstance();
    final cityId = prefs.getString('current_location_id');
    final cityName = prefs.getString('current_city_name');

    if (cityId != null &&
        cityName != null &&
        (cityId != _currentCityId || cityName != _currentCityName)) {
      // 城市发生变化,重新加载数据
      await _loadCurrentCity();
      await _loadWeatherData();
    }
  } catch (e) {
    debugPrint('检查城市变化失败: $e');
  }
}
💡 新手提示:
didChangeDependencies()在依赖变化时调用,适合监听外部数据变化- 比较城市ID和名称,避免重复加载
4.8 步骤8:添加标注类型定义
在文件末尾添加标注类型定义:
dart
/// 日历标注类型
enum MarkerType {
  precipitation,    // 降水 💧
  highTemperature, // 高温 🔥
  alert,           // 预警 🚨
}

/// 日历标注数据
class CalendarMarker {
  final MarkerType type;
  final DateTime date;
  final WeatherAlert? alert; // 预警信息(仅当type为alert时有效)

  CalendarMarker({
    required this.type,
    required this.date,
    this.alert,
  });
}
4.9 步骤9:集成到导航栏
在 lib/screens/main_navigation_page.dart 中:
dart
import 'weather_calendar_page.dart';

// 在 _buildScreens() 中添加
List<Widget> _buildScreens() {
  return [
    const HomePage(),
    const CityManagePage(),
    const WeatherDetailPage(),
    const WeatherCalendarPage(), // 新增
    const ProfilePage(),
  ];
}

// 在 _navBarsItems() 中添加
PersistentBottomNavBarItem(
  icon: const Icon(Icons.calendar_today),
  title: "天气日历",
  activeColorPrimary: Colors.teal,
  inactiveColorPrimary: Colors.grey,
  iconSize: 26,
),
5. 核心代码详解
5.1 数据加载流程图
💾 缓存 ⚠️ 预警服务 🌐 天气服务 📱 页面 👤 用户 💾 缓存 ⚠️ 预警服务 🌐 天气服务 📱 页面 👤 用户 打开天气日历 initState() _loadCurrentCity() getDailyForecast(15d) 返回预报数据 存储到_forecastCache _loadHistoricalWeather() 存储到_historicalCache getWeatherAlerts() 返回预警数据 存储到_alertCache _generateMarkers() 更新_markers 显示日历和标注 选择日期 _getWeatherForDate() 查询缓存数据 返回天气数据 显示天气详情
5.2 标注生成逻辑
有
无
有
无
有
无
开始生成标注
清空现有标注
处理预报数据
检查降水
添加蓝色标记
检查高温
添加红色标记
跳过
处理历史数据
检查降水/高温
添加标记
跳过
处理预警数据
遍历预警列表
计算预警日期范围
标记所有日期
添加橙色标记
更新UI
5.3 关键代码说明
5.3.1 日历组件配置
dart
TableCalendar(
  firstDay: DateTime.now().subtract(const Duration(days: 365)),
  lastDay: DateTime.now().add(const Duration(days: 365)),
  // ... 其他配置
)
说明:
firstDay和lastDay定义了日历的可显示范围- 设置为前后各一年,足够查看历史天气和未来预报
5.3.2 标记颜色映射
dart
switch (marker.type) {
  case MarkerType.precipitation:
    markerColor = Colors.blue;   // 💧 蓝色:降水
    break;
  case MarkerType.highTemperature:
    markerColor = Colors.red;    // 🔥 红色:高温
    break;
  case MarkerType.alert:
    markerColor = Colors.orange; // 🚨 橙色:预警
    break;
}
说明:
- 使用不同颜色区分不同类型的标记
- 颜色选择符合用户直觉(蓝色=水,红色=热,橙色=警告)
5.3.3 预警跨天处理
dart
var currentDate = startDate;
while (!currentDate.isAfter(endDate)) {
  // 标记每一天
  _markers[currentDate]!.add(CalendarMarker(...));
  currentDate = currentDate.add(const Duration(days: 1));
}
说明:
- 预警可能持续多天,需要标记预警期间的所有日期
- 使用循环逐日标记
6. 常见错误与解决方案
6.1 错误:TableCalendar 显示异常
错误信息:
RenderFlex overflowed by XX pixels问题分析:
日历组件高度超出容器范围,导致布局溢出。
解决方案:
dart
// ✅ 正确:使用 Column + Expanded
Column(
  children: [
    _buildCalendar(),  // 日历组件
    const Divider(),
    Expanded(          // 使用 Expanded 包裹详情区域
      child: _buildWeatherDetail(),
    ),
  ],
)

// ❌ 错误:直接使用 Column
Column(
  children: [
    _buildCalendar(),
    _buildWeatherDetail(), // 会导致溢出
  ],
)
其他注意事项:
- 确保
firstDay和lastDay设置合理(不要跨度太大) - 检查日历的
headerStyle和calendarStyle是否设置了过大的 padding
6.2 错误:日期选择无响应
可能原因:
onDaySelected回调未正确设置selectedDayPredicate逻辑错误- 忘记调用
setState()
解决方案:
dart
// ✅ 正确:完整的选择逻辑
onDaySelected: (selectedDay, focusedDay) {
  setState(() {  // 必须调用 setState
    _selectedDay = selectedDay;
    _focusedDay = focusedDay;
  });
},

selectedDayPredicate: (day) {
  return isSameDay(_selectedDay, day);  // 使用 isSameDay 比较
},
6.3 错误:标记不显示
可能原因:
markerBuilder返回 null- 标记数据未正确生成
- 忘记调用
setState()
解决方案:
dart
// ✅ 正确:确保标记数据已生成并更新UI
void _generateMarkers() {
  _markers.clear();
  // ... 生成标记逻辑
  setState(() {}); // 重要:调用 setState 更新UI
}

// ✅ 正确:markerBuilder 返回 Widget
markerBuilder: (context, date, events) {
  final markers = _markers[date];
  if (markers == null || markers.isEmpty) {
    return null; // 没有标记时返回 null
  }

  return Positioned(
    bottom: 1,
    child: Row(
      children: markers.map((marker) => _buildMarker(marker)).toList(),
    ),
  );
},
6.4 错误:日期格式化失败
错误信息:
FormatException: Invalid date format解决方案:
dart
// ✅ 正确:使用安全的日期格式化
String _formatDate(DateTime date) {
  return '${date.year}-${date.month.toString().padLeft(2, '0')}-${date.day.toString().padLeft(2, '0')}';
}

// ✅ 正确:解析日期时添加错误处理
try {
  final date = DateTime.parse(day.fxDate!);
  // 使用日期
} catch (e) {
  debugPrint('解析日期失败: ${day.fxDate}, error: $e');
  continue; // 跳过这条数据
}
6.5 错误:Builder 中无法声明变量
错误信息:
Error: Expected an identifier, but got 'final'.问题分析:
在条件渲染的 ... 展开运算符中直接声明 final 变量会报错。
解决方案:
dart
// ✅ 正确:使用 Builder 包裹
if (weatherData['precip'] != null) ...[
  Builder(
    builder: (context) {
      final precipValue = double.tryParse(weatherData['precip'].toString());
      if (precipValue != null && precipValue > 0) {
        return Column(
          children: [
            // ... 显示降水量
          ],
        );
      }
      return const SizedBox.shrink();
    },
  ),
]

// ❌ 错误:直接在展开运算符中声明变量
if (weatherData['precip'] != null) ...[
  final precipValue = ...; // 会报错
]
7. 进阶功能
7.1 自定义日历样式
dart
calendarStyle: CalendarStyle(
  todayDecoration: BoxDecoration(
    color: Colors.blue.shade100,
    shape: BoxShape.circle,
  ),
  selectedDecoration: BoxDecoration(
    color: Colors.blue,
    shape: BoxShape.circle,
  ),
  weekendDecoration: BoxDecoration(
    color: Colors.grey.shade100,
    shape: BoxShape.circle,
  ),
  outsideDecoration: const BoxDecoration(
    shape: BoxShape.circle,
  ),
  markerDecoration: const BoxDecoration(
    color: Colors.transparent,
  ),
),
7.2 优化性能
使用缓存避免重复请求:
dart
// 检查缓存中是否已有数据
if (_forecastCache.containsKey(_currentCityId)) {
  // 使用缓存数据
  _generateMarkers();
} else {
  // 加载新数据
  await _loadForecast();
}
使用 Future.wait 并行加载:
dart
await Future.wait([
  _loadForecast(),
  _loadHistoricalWeather(),
  _loadWeatherAlerts(),
]);
7.3 添加加载状态
dart
bool _isLoading = false;

Future<void> _loadWeatherData() async {
  setState(() {
    _isLoading = true;
  });

  try {
    // 加载数据
  } finally {
    setState(() {
      _isLoading = false;
    });
  }
}

// 在 build 中显示加载状态
body: _isLoading
    ? const Center(child: CircularProgressIndicator())
    : RefreshIndicator(...),
8. 总结
8.1 实现的功能
本教程详细介绍了如何使用 table_calendar 实现天气日历功能,已完成的功能包括:
- ✅ 引入三方库 :添加
table_calendar依赖 - ✅ 创建页面:实现天气日历页面组件
- ✅ 数据加载:加载历史天气、未来预报、天气预警
- ✅ 日历标注:实现降水💧、高温🔥、预警🚨标注
- ✅ 日期选择:实现日期选择和天气详情显示
- ✅ 预警详情:显示预警的详细信息
- ✅ 集成导航:添加到底部导航栏
- ✅ 城市切换:自动监听城市变化并重新加载数据
- ✅ 错误处理:常见错误及解决方案
8.2 核心功能
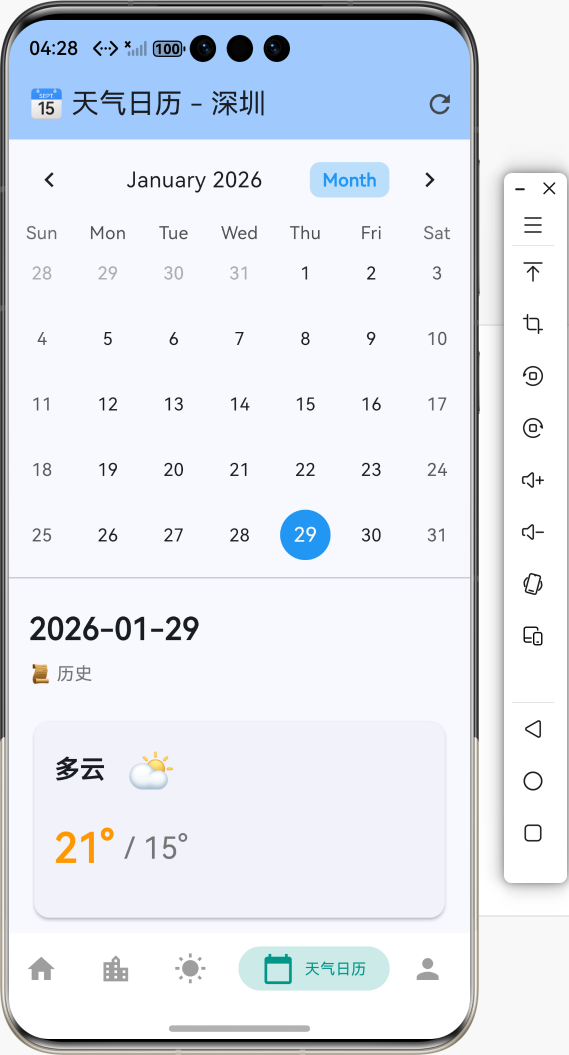
- 📅 日历显示:支持月/周/2周视图切换,美观的 Material Design 风格
- 📊 数据展示:显示近30天历史天气和未来15天天气预报
- 🎯 智能标注 :自动标注降水💧、高温🔥、预警🚨等特殊天气
- 降水标注:蓝色圆点,当降水量 > 0 时显示
- 高温标注:红色圆点,当最高温度 > 35°C 时显示
- 预警标注:橙色圆点,当有天气预警时显示
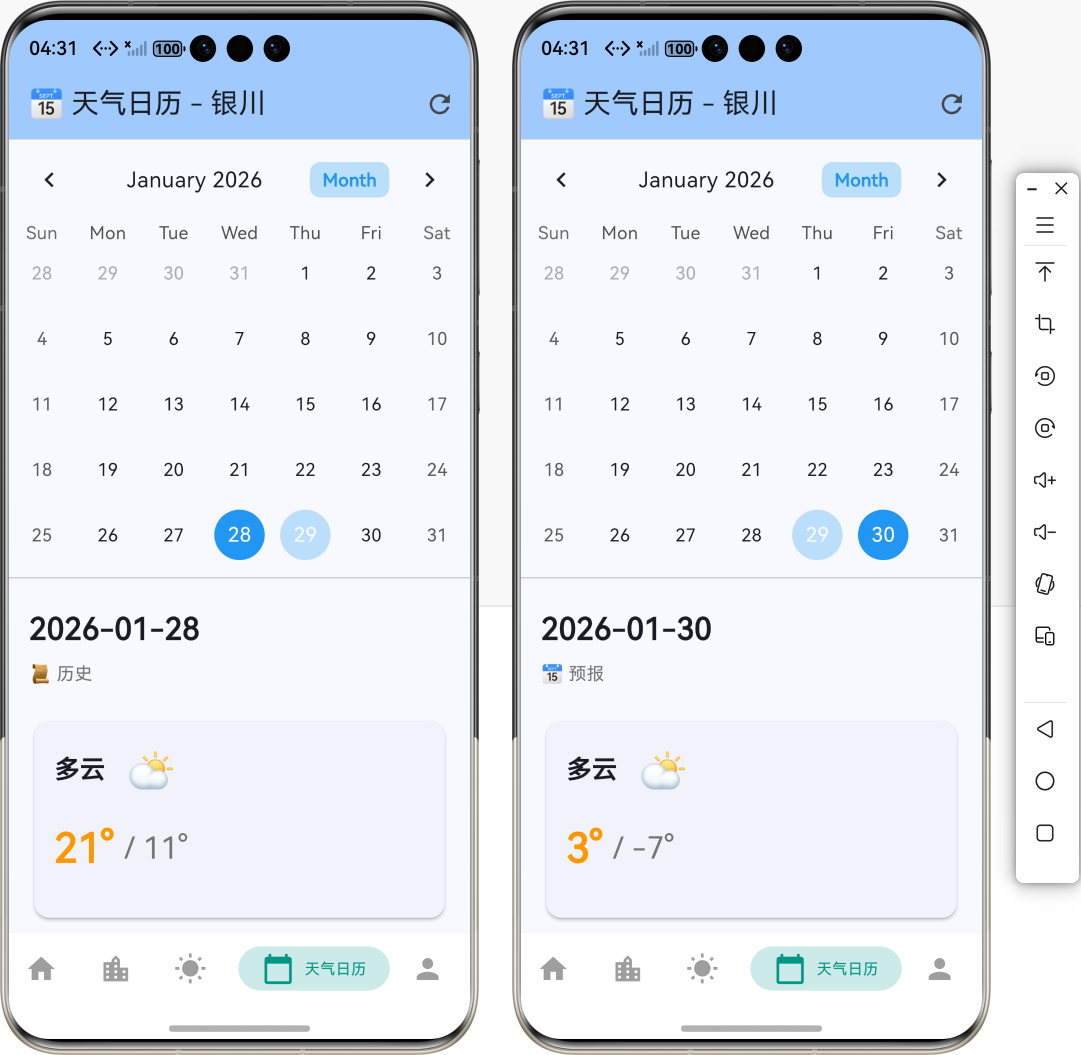
- 🔍 详情查看 :点击日期查看详细天气信息
- 温度信息(最高/最低温度)
- 天气状况(晴、多云、雨等)
- 降水量(如有)
- 预警详情(如有预警,显示预警标题、内容、等级、时间范围)
- 🔄 数据刷新:支持下拉刷新和手动刷新天气数据
- 🌍 多城市支持:自动读取当前城市,支持切换城市查看不同地区的天气日历
8.5 完整功能流程图
🌧️ 有降水
🌡️ 高温>35°C
⚠️ 有预警
未来
历史
📱 应用启动
打开天气日历
📍 读取当前城市
📡 加载天气数据
🔮 获取未来15天预报
📜 获取历史30天数据
⚠️ 获取天气预警数据
💾 存储到预报缓存
💾 存储到历史缓存
💾 存储到预警缓存
🏷️ 生成标注数据
检查天气类型
添加蓝色标记
添加红色标记
添加橙色标记
📅 更新日历显示
👆 用户选择日期
日期类型
从预报缓存获取
从历史缓存获取
📊 显示天气详情
显示温度/天气/标注/预警
9. 参考资料
10. 功能演示流程图
💾 数据缓存 🌐 天气服务 📅 日历组件 📱 应用 👤 用户 💾 数据缓存 🌐 天气服务 📅 日历组件 📱 应用 👤 用户 打开天气日历 初始化日历 请求未来15天预报 返回预报数据 缓存预报数据 请求历史30天数据 返回历史数据 缓存历史数据 请求天气预警 返回预警数据 缓存预警数据 生成标注 显示日历和标注 选择日期 触发日期选择事件 查询天气数据 返回天气数据 显示天气详情 下拉刷新 重新请求数据 返回最新数据 更新日历显示 刷新完成
🎉 祝你开发顺利! 🚀
欢迎加入开源鸿蒙跨平台社区