欢迎加入开源鸿蒙跨平台社区:https://openharmonycrossplatform.csdn.net
一、核心知识点
SVG(Scalable Vector Graphics)是一种基于 XML 的矢量图形格式,它不依赖于分辨率,可以在任何尺寸下保持清晰。在鸿蒙端,react-native-svg(CAPI) 提供了完整的 SVG 渲染支持,让开发者可以轻松实现自定义图标和动画效果。
1.1 SVG 的核心优势
typescript
import Svg, { Circle, Rect, Path, Defs, LinearGradient, Stop } from 'react-native-svg';

// 基础形状绘制
const BasicShapes = () => (
  <Svg width={200} height={200}>
    <Circle cx={100} cy={100} r={50} fill="#409EFF" />
    <Rect x={20} y={20} width={60} height={60} fill="#4CAF50" />
    <Path d="M100,100 L150,150 L50,150 Z" fill="#FF9800" />
  </Svg>
);
SVG 的优势:
- 矢量缩放:放大缩小不失真,适合各种屏幕尺寸
- 文件体积小:相比位图,SVG 文件更小
- 可编程控制:可以通过代码动态修改 SVG 属性
- 动画支持:可以轻松实现平滑的动画效果
- 样式定制:支持渐变、阴影、透明度等高级效果
- 无障碍支持:可以添加无障碍标签,提升用户体验
1.2 SVG 动画的核心特性
- 属性动画:通过修改 SVG 元素的属性实现动画
- 路径动画:通过修改 path 的 d 属性实现路径动画
- 渐变动画:动态改变渐变的颜色和位置
- 组合动画:多个动画组合使用,创建复杂效果
- 性能优化:使用 requestAnimationFrame 优化动画性能
- 鸿蒙支持:所有核心动画 API 在鸿蒙端完美支持
二、实战核心代码深度解析
2.1 自定义图标深度解析
typescript
import Svg, { Path, Defs, LinearGradient, Stop, Circle } from 'react-native-svg';

const CustomIcons = () => {
  return (
    <View style={styles.iconContainer}>
      {/* 心形图标 */}
      <Svg width={32} height={32} viewBox="0 0 32 32">
        <Defs>
          <LinearGradient id="heartGradient" x1="0%" y1="0%" x2="100%" y2="100%">
            <Stop offset="0%" stopColor="#FF5252" />
            <Stop offset="100%" stopColor="#FF1744" />
          </LinearGradient>
        </Defs>
        <Path
          d="M16,28.5c-8.5,0-14-7-14-12c0-7.5,7.5-14,14-14s6.5-14,14-14c7.5,0,14-7,14-12c0,5-5.5,12-14,12z"
          fill="url(#heartGradient)"
        />
      </Svg>

      {/* 星形图标 */}
      <Svg width={32} height={32} viewBox="0 0 32 32">
        <Path
          d="M16,2l3.5,8.5l9.5,1.5l-7,6.5l1.5,9.5l-8.5,-4.5l-8.5,4.5l1.5,-9.5l-7,-6.5l9.5,-1.5L16,2z"
          fill="#FFD700"
        />
      </Svg>

      {/* 勾形图标 */}
      <Svg width={32} height={32} viewBox="0 0 32 32">
        <Circle cx={16} cy={16} r={14} fill="#E5E6EB" />
        <Path
          d="M22,12l-8,4l-8-4l1,2l7,3.5l7-3.5z"
          fill="#FFFFFF"
        />
      </Svg>

      {/* 设置齿轮图标 */}
      <Svg width={32} height={32} viewBox="0 0 32 32">
        <Path
          d="M29.3,13.8l-3.5-0.6c-0.3-1-0.6-2.1-1.1-3.1l-2.8-2c-0.5-0.5-0.5-1.3,0-1.8l-1.5-2.7c-0.8-1.4-1.8-2.6-2.9-3.7
             c-1.1,1.1-2.3,2.1-3.7,2.9l-2.7,1.5c-0.5,0.5-1.3,0.5-1.8,0l-2,2.8c-1,0.5-2.1,0.8-3.1,1.1l-0.6,3.5
             c-0.3,1.5-0.5,3.1-0.5,4.7l0,4c0,1.6,0.2,3.2,0.5,4.7l0.6,3.5c1,0.5,2.1,0.6,3.1,1.1l2.8,2
             c0.5,0.5,1.3,0.5,1.8,0l2.7,1.5c1.4,0.8,2.6,1.8,3.7,2.9c1.1,1.1,2.1,2.3,2.9,3.7
             l1.5,2.7c0.5,0.5,0.5,1.3,0,1.8l2,2.8c0.5,1,0.8,2.1,1.1,3.1l3.5,0.6c1.5,0.3,3.1,0.5,4.7,0.5l4,0
             c1.6,0,3.2-0.2,4.7-0.5l3.5-0.6c1-0.5,2.1-0.6,3.1-1.1,3.1l-2.8-2c-0.5-0.5-1.3-0.5-1.8,0
             l-1.5-2.7c-0.8-1.4-1.8-2.6-2.9-3.7c-1.1-1.1-2.3-2.1-3.7-2.9
             l-2.7-1.5c-0.5-0.5-1.3-0.5-1.8,0l-2-2.8c-1-0.5-2.1-0.8-3.1-1.1l-0.6-3.5
             c-0.3-1.5-0.5-3.1-0.5-4.7l0-4c0-1.6-0.2-3.2-0.5-4.7l-0.6-3.5c-1-0.5-2.1-0.6-3.1-1.1l-2.8-2
             c-0.5-0.5-1.3-0.5-1.8,0l-2.7-1.5c-1.4-0.8-2.6-1.8-3.7-2.9
             c-1.1-1.1-2.1-2.3-2.9-3.7l-1.5-2.7c-0.5-0.5-0.5-1.3,0-1.8,0
             l-2-2.8c-0.5-1-0.8-2.1-1.1-3.1l-3.5-0.6c-1.5-0.3-3.1-0.5-4.7-0.5l-4,0z"
          fill="#606266"
        />
      </Svg>
    </View>
  );
};技术深度解析:
-
viewBox 的作用:
typescriptviewBox="0 0 32 32"- 定义坐标系:建立 32x32 的虚拟画布
- 响应式设计:图标可以在任何尺寸下清晰显示
- 裁剪效果:只显示 viewBox 定义的区域内
- 最佳实践:viewBox 通常是正方形,如 "0 0 24 24" 或 "0 0 32 32"
-
渐变的实现:
typescript<Defs> <LinearGradient id="heartGradient" x1="0%" y1="0%" x2="100%" y2="100%"> <Stop offset="0%" stopColor="#FF5252" /> <Stop offset="100%" stopColor="#FF1744" /> </LinearGradient> </Defs> <Path fill="url(#heartGradient)" />- Defs 的作用:定义可复用的资源(渐变、滤镜、模式)
- LinearGradient 参数:x1,y1 是起点,x2,y2 是终点
- Stop 定义渐变点:offset 是位置百分比(0-100%)
- 引用渐变 :通过
url(#gradientId)引用
-
Path 的 d 属性详解:
- 命令:M (Move)、L (Line)、C (Cubic Bezier)、Z (Close)
- 坐标系统:基于 viewBox 的相对坐标
- 复杂图形:可以创建任意复杂的矢量图形
- 工具生成:通常使用设计工具(如 Figma、Illustrator)生成
-
图标设计的最佳实践:
- 尺寸统一:使用统一的 viewBox(推荐 24x24 或 32x32)
- 风格一致:保持线条粗细、圆角大小一致
- 颜色语义:使用符合功能含义的颜色
- 简洁性:避免过于复杂的细节,确保小尺寸下清晰
- 对齐规则:元素应该居中对齐或符合网格
2.2 SVG 动画基础深度解析
typescript
import React, { useState, useEffect } from 'react';
import Svg, { Circle, Rect, Path } from 'react-native-svg';

const AnimatedIcon = () => {
  const [scale, setScale] = useState(1);
  const [rotation, setRotation] = useState(0);

  useEffect(() => {
    const interval = setInterval(() => {
      setScale(prev => prev === 1 ? 1.2 : 1);
      setRotation(prev => (prev + 90) % 360);
    }, 1000);

    return () => clearInterval(interval);
  }, []);

  return (
    <Svg width={32} height={32} viewBox="0 0 32 32">
      <G
        transform={`translate(16,16) scale(${scale}) rotate(${rotation}) translate(-16,-16)`}
      >
        <Path
          d="M16,2l3.5,8.5l9.5,1.5l-7,6.5l1.5,9.5l-8.5,-4.5l-8.5,4.5l1.5,-9.5l-7,-6.5l9.5,-1.5L16,2z"
          fill="#FFD700"
        />
      </G>
    </Svg>
  );
};技术深度解析:
-
transform 的使用:
typescripttransform={`translate(16,16) scale(${scale}) rotate(${rotation}) translate(-16,-16)`}- 变换原点:先平移到中心 (16,16),再进行缩放和旋转
- 变换顺序:translate → scale → rotate → translate(逆序执行)
- 中心旋转:实现围绕中心点的旋转效果
-
动画的实现策略:
typescriptuseEffect(() => { const interval = setInterval(() => { setScale(prev => prev === 1 ? 1.2 : 1); // 脉冲动画:1 ↔ 1.2 setRotation(prev => (prev + 90) % 360); // 旋转动画:每次 90 度 }, 1000); return () => clearInterval(interval); }, []);- 定时器管理:使用 setInterval 实现周期性动画
- 清理定时器:组件卸载时必须清理,避免内存泄漏
- 状态交替 :
prev === 1 ? 1.2 : 1实现简单的脉冲效果
-
动画性能优化:
- 避免过度渲染:使用 useMemo 缓存复杂的 JSX
- requestAnimationFrame:对于高帧率动画,使用 requestAnimationFrame 代替 setInterval
- 硬件加速:SVG 动画通常由 GPU 加速,性能良好
- 减少重绘:只在必要时更新 SVG 属性
-
动画类型选择:
typescript// 类型1:简单的属性变化(适合间歇性动画) const [scale, setScale] = useState(1); useEffect(() => { const interval = setInterval(() => { setScale(prev => prev === 1 ? 1.2 : 1); }, 1000); return () => clearInterval(interval); }, []); // 类型2:连续的属性变化(适合流畅动画) const [scale, setScale] = useState(1); useEffect(() => { let startTime: number; const animate = (timestamp: number) => { if (!startTime) startTime = timestamp; const progress = (timestamp - startTime) / 1000; // 1秒周期 const scale = 1 + Math.sin(progress * Math.PI * 2) * 0.2; setScale(scale); requestAnimationFrame(animate); }; requestAnimationFrame(animate); }, []);
2.3 路径动画深度解析
typescript
const PathAnimation = () => {
  const [progress, setProgress] = useState(0);

  // 路径动画:绘制进度环
  const getProgressPath = (percent: number): string => {
    const angle = (percent / 100) * 360;
    const radians = (angle - 90) * (Math.PI / 180);
    const x = 16 + 14 * Math.cos(radians);
    const y = 16 + 14 * Math.sin(radians);

    const largeArcFlag = percent > 50 ? 1 : 0;
    const sweepFlag = 1;

    return `M 16 16 L 16 2 A 14 14 0 ${largeArcFlag} ${sweepFlag} ${x} ${y} A 14 14 0 ${largeArcFlag} ${sweepFlag} 16 ${16}`;
  };

  return (
    <Svg width={32} height={32} viewBox="0 0 32 32">
      {/* 背景圆环 */}
      <Circle cx={16} cy={16} r={14} fill="none" stroke="#E5E6EB" strokeWidth={2} />

      {/* 进度圆环 */}
      <Path
        d={getProgressPath(progress)}
        fill="none"
        stroke="#409EFF"
        strokeWidth={2}
        strokeLinecap="round"
      />
    </Svg>
  );
};技术深度解析:
-
圆弧的数学原理:
typescriptconst angle = (percent / 100) * 360; const radians = (angle - 90) * (Math.PI / 180); const x = cx + r * Math.cos(radians); const y = cy + r * Math.sin(radians);- 角度转弧度 :
(angle - 90) * (Math.PI / 180),-90 度从 12 点钟方向开始 - 极坐标转换 :
x = cx + r * cos(θ),y = cy + r * sin(θ) - 圆弧命令 :
A rx ry x-axis-rotation large-arc-flag sweep-flag x yrx, ry:圆弧的 x 和 y 半径(相同为正圆)large-arc-flag:1 表示大于 180 度,0 表示小于 180 度sweep-flag:1 表示顺时针,0 表示逆时针
- 角度转弧度 :
-
路径动画的实现:
typescriptconst getProgressPath = (percent: number): string => { // 动态计算路径 const angle = (percent / 100) * 360; // ... 计算逻辑 return `M 16 16 L 16 2 A 14 14 0 ${largeArcFlag} ${sweepFlag} ${x} ${y} A 14 14 0 ${largeArcFlag} ${sweepFlag} 16 ${16}`; }; // 在渲染中使用 <Path d={getProgressPath(progress)} />- 动态路径生成:根据进度百分比实时计算路径字符串
- 状态驱动 :路径完全由
progress状态决定 - 平滑过渡:每次进度变化时,路径平滑更新
-
路径命令的高级应用:
typescript// M: Move To(移动到起点) // L: Line To(画直线) // H: Horizontal Line To(水平线) // V: Vertical Line To(垂直线) // C: Cubic Bezier(三次贝塞尔曲线) // Q: Quadratic Bezier(二次贝塞尔曲线) // A: Arc(圆弧) // Z: Close Path(闭合路径) // 示例:心形路径 "M16,28.5c0,0-10,-5.5-10,-12c0,-6,6,-12,10,-12c4,0,10,6,10,12C26,23,16,28.5,16,28.5z" ```
2.4 复杂组合动画深度解析
typescript
const ComplexAnimation = () => {
  const [pulse, setPulse] = useState(0);
  const [rotate, setRotate] = useState(0);

  useEffect(() => {
    const animate = () => {
      // 脉冲效果
      setPulse(prev => (prev + 0.05) % (Math.PI * 2));
      // 旋转效果
      setRotate(prev => (prev + 2) % 360);

      requestAnimationFrame(animate);
    };
    const animationId = requestAnimationFrame(animate);

    return () => cancelAnimationFrame(animationId);
  }, []);

  // 计算缩放(正弦波效果)
  const scale = 1 + Math.sin(pulse) * 0.1;

  return (
    <Svg width={64} height={64} viewBox="0 0 64 64">
      <G transform={`translate(32,32) rotate(${rotate}) scale(${scale}) translate(-32,-32)`}>
        {/* 外圈 */}
        <Circle cx={32} cy={32} r={28} fill="none" stroke="#409EFF" strokeWidth={2} opacity={0.5} />

        {/* 内圈 */}
        <Circle cx={32} cy={32} r={20} fill="none" stroke="#409EFF" strokeWidth={3} />

        {/* 中心圆点 */}
        <Circle cx={32}={32} r={8} fill="#409EFF" />

        {/* 装饰线条 */}
        <Path
          d="M32,4 L32,12"
          stroke="#409EFF"
          strokeWidth={2}
          opacity={0.3}
        />
        <Path
          d="M32,52 L32,60"
          stroke="#409EFF"
          strokeWidth={2}
          opacity={0.3}
        />
        <Path
          d="M4,32 L12,32"
          stroke="#409EFF"
          strokeWidth={2}
          opacity={0.3}
        />
        <Path
          d="M52,32 L60,32"
          stroke="#409EFF"
          strokeWidth={2}
          opacity={0.3}
        />
      </G>
    </Svg>
  );
};技术深度解析:
-
requestAnimationFrame 的使用:
typescriptconst animate = () => { setPulse(prev => (prev + 0.05) % (Math.PI * 2)); setRotate(prev => (prev + 2) % 360); requestAnimationFrame(animate); }; const animationId = requestAnimationFrame(animate);- 高帧率动画:requestAnimationFrame 通常运行在 60fps
- 数学函数 :使用
Math.sin创建平滑的周期性效果 - 状态更新:每次回调更新状态,触发重新渲染
- 清理资源 :组件卸载时使用
cancelAnimationFrame停止动画
-
多个动画的组合:
typescript// 动画1:脉冲效果(缩放) const pulse = Math.sin(progress) * 0.1; // 动画2:旋转效果(旋转) const rotate = (progress * 360) % 360; // 动画3:透明度变化(淡入淡出) const opacity = 0.5 + Math.sin(progress) * 0.3; // 组合变换 transform={`translate(32,32) scale(${scale}) rotate(${rotate}) translate(-32,-32)`}- 独立动画:每个动画有独立的参数和周期
- 协同效果:多个动画组合创建复杂的视觉效果
- 可定制性:可以轻松调整每个动画的速度和幅度
-
数学函数在动画中的应用:
typescript// 正弦波:平滑的周期性变化 Math.sin(progress * Math.PI * 2) // 返回 -1 到 1 // 余弦波:相位偏移的正弦波 Math.cos(progress * Math.PI * 2) // 返回 -1 到 1,但相位偏移 // 线性插值 const lerp = (start: number, end: number, t: number): number => { return start + (end - start) * t; }; // 缓动函数 const easeInOutQuad = (t: number): number => { return t < 0.5 ? 2 * t * t : -1 + (4 - 2 * t) * t; };- 三角函数 :
sin和cos创建周期性动画 - 线性插值:在两个值之间平滑过渡
- 缓动函数:让动画更自然,避免机械感
- 三角函数 :
-
性能优化的高级技巧:
- 避免布局抖动:使用固定的 width/height,避免频繁测量
- 减少重绘:只更新变化的属性,其他属性保持不变
- 批量更新 :使用
useState批量更新相关状态 - 硬件加速:SVG 的 transform 和 opacity 属性通常由 GPU 加速
- 降级策略:在低端设备上降低动画复杂度
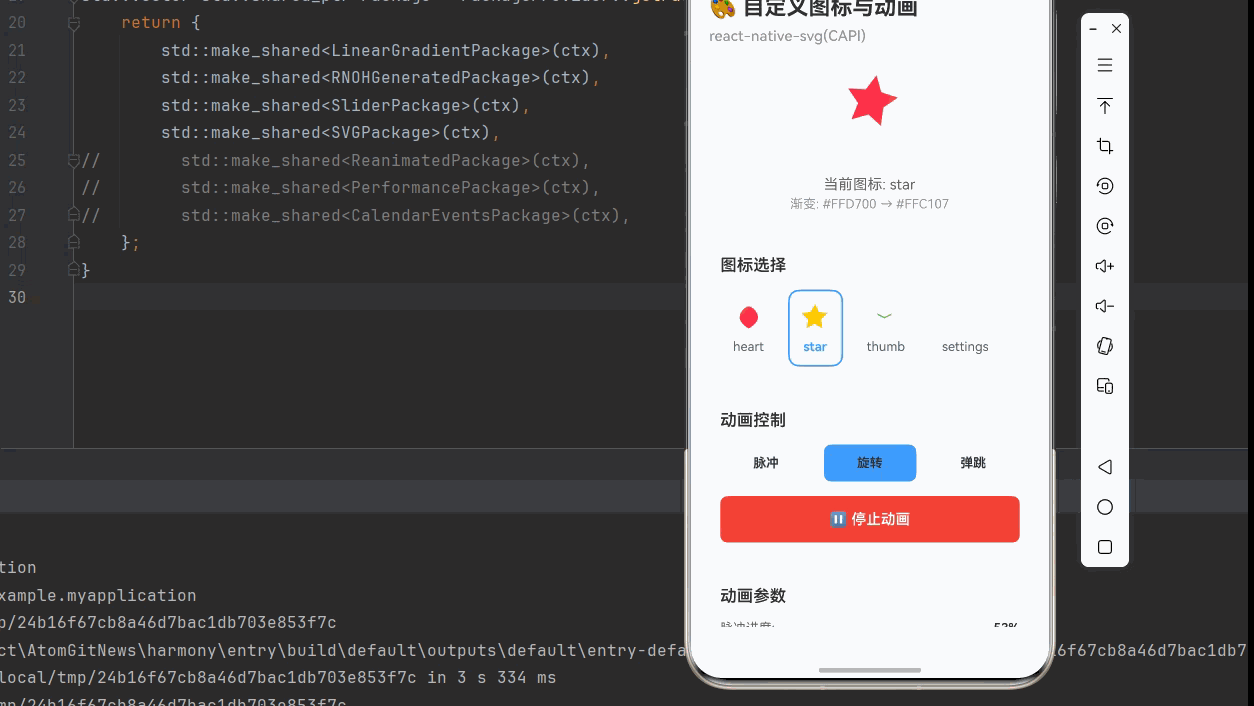
三、实战完整版:自定义图标与动画系统
typescript
import React, { useState, useEffect, useRef } from 'react';
import {
  StyleSheet,
  View,
  Text,
  TouchableOpacity,
  SafeAreaView,
  ScrollView,
  StatusBar,
  Alert,
} from 'react-native';
import Svg, {
  Circle,
  Rect,
  Path,
  Defs,
  LinearGradient,
  Stop,
  G,
  Text as SvgText,
  TSpan,
} from 'react-native-svg';

interface IconConfig {
  name: string;
  path: string;
  gradient: {
    startColor: string;
    endColor: string;
  };
}

const IconAnimationScreen = () => {
  const [selectedIcon, setSelectedIcon] = useState<string>('heart');
  const [isAnimating, setIsAnimating] = useState(false);
  const [animationType, setAnimationType] = useState<'pulse' | 'rotate' | 'bounce'>('pulse');

  const animationRef = useRef<number>();

  // 图标配置
  const icons: IconConfig[] = [
    {
      name: 'heart',
      path: 'M16,28.5c0,0-10,-5.5-10,-12c0,-6,6,-12,10,-12c4,0,10,6,10,12C26,23,16,28.5,16,28.5z',
      gradient: { startColor: '#FF5252', endColor: '#FF1744' },
    },
    {
      name: 'star',
      path: 'M16,2l3.5,8.5l9.5,1.5l-7,6.5l1.5,9.5l-8.5,-4.5l-8.5,4.5l1.5,-9.5l-7,-6.5l9.5,-1.5L16,2z',
      gradient: { startColor: '#FFD700', endColor: '#FFC107' },
    },
    {
      name: 'thumb',
      path: 'M22,12l-8,4l-8-4l1,2l7,3.5l7-3.5z',
      gradient: { startColor: '#4CAF50', endColor: '#8BC34A' },
    },
    {
      name: 'settings',
      path: 'M29.3,13.8l-3.5-0.6c-0.3-1-0.6-2.1-1.1-3.1l-2.8-2c-0.5-0.5-0.5-1.3,0-1.8l-1.5-2.7c-0.8-1.4-1.8-2.6-2.9-3.7c-1.1,1.1-2.3,2.1-2.9,3.7l-1.5,2.7c-0.5,0.5-1.3,0.5-1.8,0l-2,2.8c-1,0.5-2.1,0.8-3.1,1.1l-0.6,3.5c-0.3,1.5-0.5,3.1-0.5,4.7l0,4c0,1.6,0.2,3.2,0.5,4.7l0.6,3.5c1,0.5,2.1,0.6,3.1,1.1l2.8,2c0.5,0.5,1.3,0.5,1.8,0l2.7,1.5c1.4,0.8,2.6,1.8,3.7,2.9c1.1,1.1,2.1,2.3,2.9,3.7l1.5,2.7c0.5,0.5,0.5,1.3,0,1.8,0l2,2.8c0.5,1,0.8,2.1,1.1,3.1l3.5,0.6c1.5,0.3,3.1,0.5,4.7,0.5l4,0c1.6,0,3.2-0.2,4.7-0.5l3.5-0.6c1-0.5,2.1-0.6,3.1-1.1,3.1l-2.8-2c-0.5-0.5-1.3-0.5-1.8,0l-1.5-2.7c-0.8-1.4-1.8-2.6-2.9-3.7c-1.1-1.1-2.3-2.1-3.7-2.9l-2.7-1.5c-0.5-0.5-1.3-0.5-1.8,0l-2-2.8c-1-0.5-2.1-0.8-3.1-1.1l-0.6-3.5c-0.3-1.5-0.5-3.1-0.5-4.7l0-4c0-1.6-0.2-3.2-0.5-4.7l-0.6-3.5c-1-0.5-2.1-0.6-3.1-1.1l-2.8-2c-0.5-0.5-1.3-0.5-1.8,0l-2.7-1.5c-1.4-0.8-2.6-1.8-3.7-2.9c-1.1-1.1-2.1-2.3-2.9-3.7l-1.5-2.7c-0.5-0.5-0.5-1.3,0-1.8,0l-2-2.8c-0.5-1-0.8-2.1-1.1-3.1l-3.5-0.6c-1.5-0.3-3.1-0.5-4.7-0.5l-4,0z',
      gradient: { startColor: '#606266', endColor: '#909399' },
    },
  ];

  // 获取当前选中的图标配置
  const currentIcon = icons.find(icon => icon.name === selectedIcon) || icons[0];

  // 动画控制
  const toggleAnimation = () => {
    if (isAnimating) {
      setIsAnimating(false);
      if (animationRef.current) {
        cancelAnimationFrame(animationRef.current);
      }
    } else {
      setIsAnimating(true);
      animate();
    }
  };

  const animate = () => {
    const startTime = Date.now();

    const frame = () => {
      const elapsed = Date.now() - startTime;
      const progress = (elapsed % 2000) / 2000; // 2秒周期

      switch (animationType) {
        case 'pulse':
          setPulseProgress(progress);
          break;
        case 'rotate':
          setRotateProgress(progress);
          break;
        case 'bounce':
          setBounceProgress(progress);
          break;
      }

      animationRef.current = requestAnimationFrame(frame);
    };

    animationRef.current = requestAnimationFrame(frame);
  };

  const [pulseProgress, setPulseProgress] = useState(0);
  const [rotateProgress, setRotateProgress] = useState(0);
  const [bounceProgress, setBounceProgress] = useState(0);

  // 清理动画
  useEffect(() => {
    return () => {
      if (animationRef.current) {
        cancelAnimationFrame(animationRef.current);
      }
    };
  }, []);

  // 动画参数计算
  const getAnimationTransform = () => {
    let scale = 1;
    let rotation = 0;
    let translateY = 0;

    switch (animationType) {
      case 'pulse':
        scale = 1 + Math.sin(pulseProgress * Math.PI * 2) * 0.15;
        break;
      case 'rotate':
        rotation = rotateProgress * 360;
        break;
      case 'bounce':
        translateY = Math.abs(Math.sin(bounceProgress * Math.PI)) * -4;
        scale = 1 + Math.abs(Math.sin(bounceProgress * Math.PI)) * 0.1;
        break;
    }

    return `translate(16,16) scale(${scale}) rotate(${rotation}) translate(0,${translateY}) translate(-16,-16)`;
  };

  return (
    <SafeAreaView style={styles.container}>
      <StatusBar barStyle="dark-content" />

      <View style={styles.header}>
        <Text style={styles.headerTitle}>🎨 自定义图标与动画</Text>
        <Text style={styles.headerSubtitle}>react-native-svg(CAPI)</Text>
      </View>

      <ScrollView style={styles.content}>
        {/* 图标展示区域 */}
        <View style={styles.card}>
          <Text style={styles.cardTitle}>图标展示</Text>

          <View style={styles.iconDisplay}>
            <Svg width={64} height={64} viewBox="0 0 32 32">
              <Defs>
                <LinearGradient
                  id={`${selectedIcon}Gradient`}
                  x1="0%"
                  y1="0%"
                  x2="100%"
                  y2="100%"
                >
                  <Stop offset="0%" stopColor={currentIcon.gradient.startColor} />
                  <Stop offset="100%" stopColor={currentIcon.gradient.endColor} />
                </LinearGradient>
              </Defs>
              <G transform={getAnimationTransform()}>
                <Path
                  d={currentIcon.path}
                  fill={`url(#${selectedIcon}Gradient)`}
                />
              </G>
            </Svg>
          </View>

          <View style={styles.iconInfo}>
            <Text style={styles.iconName}>当前图标: {currentIcon.name}</Text>
            <Text style={styles.iconGradient}>
              渐变: {currentIcon.gradient.startColor} → {currentIcon.gradient.endColor}
            </Text>
          </View>
        </View>

        {/* 图标选择 */}
        <View style={styles.card}>
          <Text style={styles.cardTitle}>图标选择</Text>

          <View style={styles.iconGrid}>
            {icons.map((icon) => (
              <TouchableOpacity
                key={icon.name}
                style={[
                  styles.iconOption,
                  selectedIcon === icon.name && styles.iconOptionSelected,
                ]}
                onPress={() => setSelectedIcon(icon.name)}
              >
                <Svg width={32} height={32} viewBox="0 0 32 32">
                  <Defs>
                    <LinearGradient
                      id={`${icon.name}Gradient`}
                      x1="0%"
                      y1="0%"
                      x2="100%"
                      y2="100%"
                    >
                      <Stop offset="0%" stopColor={icon.gradient.startColor} />
                      <Stop offset="100%" stopColor={icon.gradient.endColor} />
                    </LinearGradient>
                  </Defs>
                  <Path
                    d={icon.path}
                    fill={`url(#${icon.name}Gradient)`}
                  />
                </Svg>
                <Text style={[
                  styles.iconOptionLabel,
                  selectedIcon === icon.name && styles.iconOptionLabelActive
                ]}>
                  {icon.name}
                </Text>
              </TouchableOpacity>
            ))}
          </View>
        </View>

        {/* 动画控制 */}
        <View style={styles.card}>
          <Text style={styles.cardTitle}>动画控制</Text>

          <View style={styles.animationButtons}>
            <TouchableOpacity
              style={[
                styles.animButton,
                animationType === 'pulse' && styles.animButtonActive,
              ]}
              onPress={() => setAnimationType('pulse')}
            >
              <Text style={styles.animButtonText}>脉冲</Text>
            </TouchableOpacity>

            <TouchableOpacity
              style={[
                styles.animButton,
                animationType === 'rotate' && styles.animButtonActive,
              ]}
              onPress={() => setAnimationType('rotate')}
            >
              <Text style={styles.animButtonText}>旋转</Text>
            </TouchableOpacity>

            <TouchableOpacity
              style={[
                styles.animButton,
                animationType === 'bounce' && styles.animButtonActive,
              ]}
              onPress={() => setAnimationType('bounce')}
            >
              <Text style={styles.animButtonText}>弹跳</Text>
            </TouchableOpacity>
          </View>

          <TouchableOpacity
            style={[styles.playButton, isAnimating && styles.playButtonActive]}
            onPress={toggleAnimation}
          >
            <Text style={styles.playButtonText}>
              {isAnimating ? '⏸ 停止动画' : '▶ 开始动画'}
            </Text>
          </TouchableOpacity>
        </View>

        {/* 动画参数展示 */}
        <View style={styles.card}>
          <Text style={styles.cardTitle}>动画参数</Text>

          <View style={styles.paramRow}>
            <Text style={styles.paramLabel}>脉冲进度:</Text>
            <Text style={styles.paramValue}>{(pulseProgress * 100).toFixed(0)}%</Text>
          </View>

          <View style={styles.paramRow}>
            <Text style={styles.paramLabel}>旋转角度:</Text>
            <Text style={styles.paramValue}>{(rotateProgress * 360).toFixed(0)}°</Text>
          </View>

          <View style={styles.paramRow}>
            <Text style={styles.paramLabel}>弹跳偏移:</Text>
            <Text style={styles.paramValue}>{Math.abs(Math.sin(bounceProgress * Math.PI) * 4).toFixed(2)}px</Text>
          </View>
        </View>

        {/* 使用说明 */}
        <View style={styles.card}>
          <Text style={styles.cardTitle}>💡 使用说明</Text>
          <Text style={styles.instructionText}>
            • 选择不同的图标查看其渐变效果
          </Text>
          <Text style={styles.instructionText}>
            • 选择动画类型:脉冲(缩放)、旋转(转动)、弹跳(上下移动)
          </Text>
          <Text style={styles.instructionText}>
            • 点击开始/停止按钮控制动画播放
          </Text>
          <Text style={styles.instructionText}>
            • 动画参数实时显示当前进度、角度、偏移量
          </Text>
          <Text style={[styles.instructionText, { color: '#F44336', fontWeight: '600' }]}>
            ⚠️ 注意: 鸿蒙端使用 CAPI 版本,性能更优
          </Text>
          <Text style={[styles.instructionText, { color: '#4CAF50', fontWeight: '600' }]}>
            💡 提示: SVG 动画由 GPU 加速,性能优异
          </Text>
          <Text style={[styles.instructionText, { color: '#2196F3', fontWeight: '600' }]}>
            💡 提示: viewBox 确保图标在任何尺寸下清晰
          </Text>
        </View>

        {/* 常用属性卡片 */}
        <View style={styles.card}>
          <Text style={styles.cardTitle}>📋 常用属性详解</Text>
          <Text style={styles.instructionText}>
            • viewBox: 定义 SVG 的坐标系和裁剪区域
          </Text>
          <Text style={styles.instructionText}>
            • width/height: SVG 的显示尺寸(与 viewBox 无关)
          </Text>
          <Text style={styles.instructionText}>
            • fill: 填充颜色,可以是颜色值或渐变引用
          </Text>
          <Text style={styles.instructionText}>
            • stroke: 描边颜色和宽度
          </Text>
          <Text style={styles.instructionText}>
            • opacity: 透明度(0-1)
          </Text>
          <Text style={styles.instructionText}>
            • transform: 变换(平移、缩放、旋转、倾斜)
          </Text>
          <Text style={styles.instructionText}>
            • Defs: 定义可复用的资源(渐变、滤镜、模式)
          </Text>
          <Text style={styles.instructionText}>
            • LinearGradient: 线性渐变,支持多个渐变点
          </Text>
          <Text style={styles.instructionText}>
            • RadialGradient: 径向渐变,支持多个渐变点
          </Text>
          <Text style={styles.instructionText}>
            • G: 组合元素,可以对多个元素应用相同的变换
          </Text>
        </View>
      </ScrollView>
    </SafeAreaView>
  );
};

const styles = StyleSheet.create({
  container: {
    flex: 1,
    backgroundColor: '#F5F7FA',
  },
  header: {
    padding: 20,
    backgroundColor: '#FFFFFF',
    borderBottomWidth: 1,
    borderBottomColor: '#EBEEF5',
  },
  headerTitle: {
    fontSize: 24,
    fontWeight: '700',
    color: '#303133',
    marginBottom: 8,
  },
  headerSubtitle: {
    fontSize: 16,
    fontWeight: '500',
    color: '#909399',
  },
  content: {
    flex: 1,
    padding: 16,
  },
  card: {
    backgroundColor: '#FFFFFF',
    borderRadius: 12,
    marginBottom: 16,
    padding: 16,
    shadowColor: '#000000',
    shadowOffset: { width: 0, height: 2 },
    shadowOpacity: 0.08,
    shadowRadius: 8,
    elevation: 4,
  },
  cardTitle: {
    fontSize: 18,
    fontWeight: '600',
    color: '#303133',
    marginBottom: 16,
  },
  iconDisplay: {
    alignItems: 'center',
    padding: 32,
    backgroundColor: '#F5F7FA',
    borderRadius: 12,
    marginBottom: 16,
  },
  iconInfo: {
    alignItems: 'center',
  },
  iconName: {
    fontSize: 16,
    color: '#606266',
    marginBottom: 4,
  },
  iconGradient: {
    fontSize: 14,
    color: '#909399',
  },
  iconGrid: {
    flexDirection: 'row',
    flexWrap: 'wrap',
    gap: 12,
  },
  iconOption: {
    alignItems: 'center',
    padding: 12,
    backgroundColor: '#F5F7FA',
    borderRadius: 12,
    borderWidth: 2,
    borderColor: 'transparent',
  },
  iconOptionSelected: {
    borderColor: '#409EFF',
    backgroundColor: '#ECF5FF',
  },
  iconOptionLabel: {
    fontSize: 14,
    color: '#606266',
    marginTop: 8,
  },
  iconOptionLabelActive: {
    color: '#409EFF',
    fontWeight: '600',
  },
  animationButtons: {
    flexDirection: 'row',
    gap: 12,
    marginBottom: 16,
  },
  animButton: {
    flex: 1,
    backgroundColor: '#E5E6EB',
    borderRadius: 8,
    padding: 12,
    alignItems: 'center',
  },
  animButtonActive: {
    backgroundColor: '#409EFF',
  },
  animButtonText: {
    fontSize: 14,
    color: '#303133',
    fontWeight: '600',
  },
  playButton: {
    backgroundColor: '#409EFF',
    borderRadius: 8,
    padding: 16,
    alignItems: 'center',
  },
  playButtonActive: {
    backgroundColor: '#F44336',
  },
  playButtonText: {
    fontSize: 16,
    color: '#FFFFFF',
    fontWeight: '600',
  },
  paramRow: {
    flexDirection: 'row',
    justifyContent: 'space-between',
    marginBottom: 12,
  },
  paramLabel: {
    fontSize: 14,
    color: '#606266',
  },
  paramValue: {
    fontSize: 14,
    color: '#303133',
    fontWeight: '600',
  },
  instructionText: {
    fontSize: 14,
    lineHeight: 22,
    marginBottom: 8,
    color: '#606266',
  },
});

export default IconAnimationScreen;
四、高级应用场景
1. 加载动画
typescript
const LoadingSpinner = () => {
  const [rotation, setRotation] = useState(0);

  useEffect(() => {
    const animate = () => {
      setRotation(prev => (prev + 30) % 360);
    };
    const interval = setInterval(animate, 100);
    return () => clearInterval(interval);
  }, []);

  return (
    <Svg width={40} height={40} viewBox="0 0 40 40">
      <G transform={`translate(20,20) rotate(${rotation}) translate(-20,-20)`}>
        <Path
          d="M20,4a16,16,0,1,1,32,0a16,16,0,0,1-32,0m0,4a12,12,0,1,0,24,0a12,12,0,0,0-24,0m0,4a8,8,0,1,0,16,0a8,8,0,0,0-16,0"
          fill="none"
          stroke="#409EFF"
          strokeWidth={3}
          strokeLinecap="round"
        />
      </G>
    </Svg>
  );
};
2. 状态指示器
typescript
const StatusIndicator = ({ status }: { status: 'success' | 'warning' | 'error' }) => {
  const getStatusColor = () => {
    switch (status) {
      case 'success': return '#4CAF50';
      case 'warning': return '#FF9800';
      case 'error': return '#F44336';
    }
  };

  const getStatusIcon = () => {
    switch (status) {
      case 'success': return '✓';
      case 'warning': return '!';
      case 'error': '✕';
    }
  };

  return (
    <View style={styles.statusContainer}>
      <Svg width={20} height={20} viewBox="0 0 20 20">
        <Circle cx={10} cy={10} r={10} fill={getStatusColor()} />
        <SvgText
          x="10"
          y="14"
          fontSize="12"
          fill="#FFFFFF"
          fontWeight="600"
          textAnchor="middle"
        >
          {getStatusIcon()}
        </SvgText>
      </Svg>
      <Text style={styles.statusText}>
        {status === 'success' ? '成功' : status === 'warning' ? '警告' : '错误'}
      </Text>
    </View>
  );
};
3. 数据可视化图表
typescript
const PieChart = () => {
  const data = [
    { label: '完成', value: 40, color: '#4CAF50' },
    { label: '进行中', value: 30, color: '#2196F3' },
    {label: '未开始', value: 20, color: '#E5E6EB' },
  ];

  const total = data.reduce((sum, item) => sum + item.value, 0);

  let startAngle = 0;

  return (
    <Svg width={200} height={200} viewBox="0 0 200 200">
      {data.map((item) => {
        const angle = (item.value / total) * 360;
        const endAngle = startAngle + angle;

        const x1 = 100 + 80 * Math.cos((startAngle - 90) * Math.PI / 180);
        const y1 = 100 + 80 * Math.sin((startAngle - 90) * Math.PI / 180);
        const x2 = 100 + 80 * Math.cos((endAngle - 90) * Math.PI / 180);
        const y2 = 100 + 80 * Math.sin((endAngle - 90) * Math.PI / 180);

        const largeArc = angle > 180 ? 1 : 0;

        startAngle = endAngle;

        return (
          <Path
            key={item.label}
            d={`M 100 100 L ${x1} ${y1} A 80 80 0 ${largeArc} 1 ${x2} ${y2} L 100 100`}
            fill={item.color}
          />
        );
      })}
    </Svg>
  );
};
五、技术深度解析:SVG 性能优化
1. 路径优化的技巧
typescript
// ❌ 不好的做法:每次渲染都重新计算路径
const ComplexPath = ({ data }: { data: number[] }) => {
  const pathData = data.map((value, index) => {
    const angle = (value / 100) * 360;
    // 复杂的计算
    const x1 = 100 + 80 * Math.cos((angle - 90) * Math.PI / 180);
    const y1 = 100 + 80 * Math.sin((angle - 90) * Math.PI / 180);
    // ...
    return `M 100 100 L ${x1} ${y1} A 80 80 0 ${largeArc} 1 ${x2} ${y2} L 100 100`;
  }).join(' ');

  return <Path d={pathData} />;
};

// ✅ 好的做法:使用 useMemo 缓存路径计算结果
const ComplexPath = ({ data }: { data: number[] }) => {
  const pathData = useMemo(() => {
    return data.map((value, index) => {
      const angle = (value / 100) * 360;
      const x1 = 100 + 80 * Math.cos((angle - 90) * Math.PI / 180);
      const y1 = 100 + 80 * Math.sin((angle - 90) * Math.PI / 180);
      // ...
      return `M  100 100 L ${x1} ${y1} A 80 80 0 ${largeArc} 1 ${x2} ${y2} L 100 100`;
    }).join(' ');
  }, [data]);

  return <Path d={pathData} />;
};
2. 动画帧率控制
typescript
const ControlledAnimation = () => {
  const [frameCount, setFrameCount] = useState(0);
  const lastTimeRef = useRef(Date.now());

  useEffect(() => {
    const animate = () => {
      const now = Date.now();
      const delta = now - lastTimeRef.current;

      // 限制到 60fps
      if (delta >= 16) {
        setFrameCount(prev => prev + 1);
        lastTimeRef.current = now;
      }

      requestAnimationFrame(animate);
    };

    const animationId = requestAnimationFrame(animate);

    return () => cancelAnimationFrame(animationId);
  }, []);
};
六、总结
本文深入讲解了如何使用 react-native-svg(CAPI) 实现自定义图标和动画效果,涵盖了图标设计、动画原理、复杂组合等多个方面。
关键技术要点:
- SVG 基础:viewBox、路径绘制、渐变效果
- 自定义图标:从设计到代码转换的完整流程
- 动画实现:多种动画类型和实现技巧
- 性能优化:避免过度渲染、使用硬件加速
- 高级应用:加载动画、状态指示器、数据可视化