在 Windows 上从源码编译 OpenSSL 1.1.1w
(注意:该版本已于 2023 年 9 月结束生命周期,仅建议用于遗留系统维护)
使用 Visual Studio + Perl + NASM 方案。以下是详细步骤:
| 工具 | 推荐版本 | 说明 |
|---|---|---|
| Visual Studio | 2015/2017/2019/2022 | 安装"使用 C++ 的桌面开发"工作负载(含 MSVC 编译器) |
| Perl | Strawberry Perl 5.32+ | 官网下载,安装后验证 perl -v |
| NASM | 2.15.05+ | 官网下载,添加至系统 PATH(用于汇编优化,提升性能) |
| OpenSSL 源码 | 1.1.1w | 官方归档 |
安装NASM
安装后,添加Perl: \bin;site\bin 和 NASM: \bin到系统环境变量path中
使用 Visual Studio 编译
- 解压源码
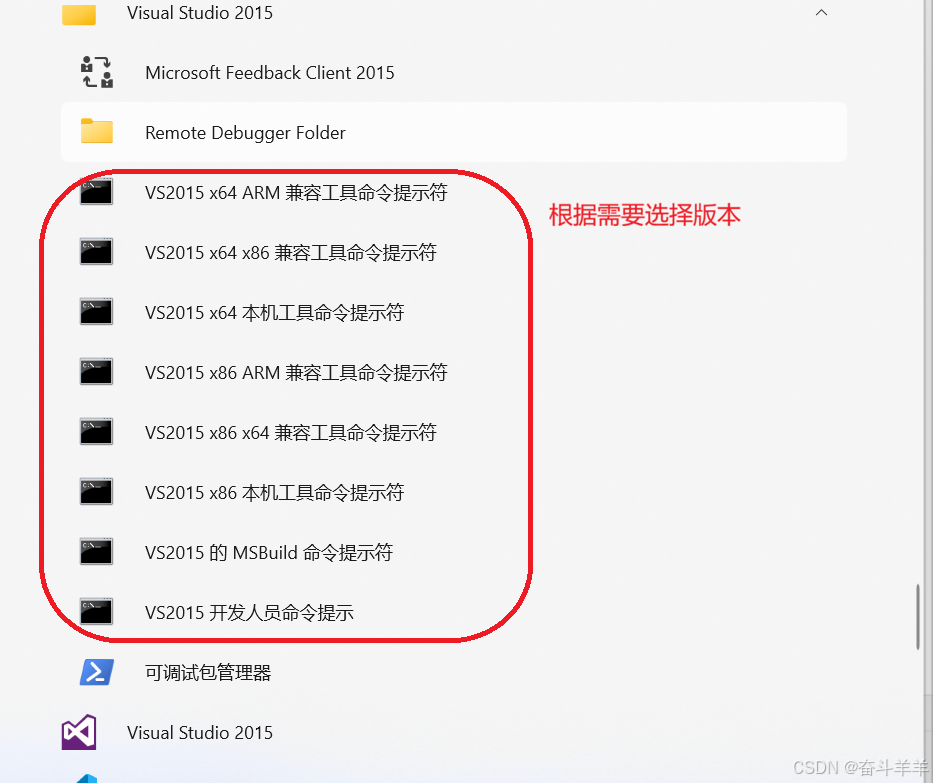
将 openssl-1.1.1w.tar.gz 解压至无空格路径(如 D:\openssl-src)。 - 打开开发命令提示符
在开始菜单找到如图内容
- 进入源码目录:
#路径需要改成你的目录, perl命令(一次选一个)
cd D:\openssl-1.1.1w
perl Configure VC-WIN64A --prefix=D:\openssl-1.1.1w\lib\x64\release --openssldir=D:\openssl-1.1.1w (release)
或
perl Configure VC-WIN64A --debug --prefix=D:\openssl-1.1.1w\lib\x64\debug --openssldir=D:\openssl-1.1.1w (debug)
执行
nmake
执行测试(可选)
nmake test
安装(可执行,也可不执行)
nmake install
清理中间文件
nmake clean
编译动态库:
perl Configure VC-WIN32 --debug --prefix=E:\openssl\Lib\x32\Debug --openssldir=E:\openssl\SSL
perl Configure VC-WIN32 --prefix=E:\openssl\Lib\x32\Release --openssldir=E:\openssl\SSL
perl Configure VC-WIN64A --debug --prefix=E:\openssl\Lib\x64\Debug --openssldir=E:\openssl\SSL
perl Configure VC-WIN64A --prefix=E:\openssl\Lib\x64\Release --openssldir=E:\openssl\SSL
编译静态库:
perl Configure VC-WIN32 --debug --prefix=E:\openssl\Lib\x32\Debug --openssldir=E:\openssl\SSL no-shared
perl Configure VC-WIN32 --prefix=E:\openssl\Lib\x32\Release --openssldir=E:\openssl\SSL no-shared
perl Configure VC-WIN64A --debug --prefix=E:\openssl\Lib\x64\Debug --openssldir=E:\openssl\SSL no-shared
perl Configure VC-WIN64A --prefix=E:\openssl\Lib\x64\Release --openssldir=E:\openssl\SSL no-shared