环境准备:
硬件 :瑞芯微RV1126
系统 :ubuntu20.04
语言 :python3.8
第三方依赖库 :rknnlite
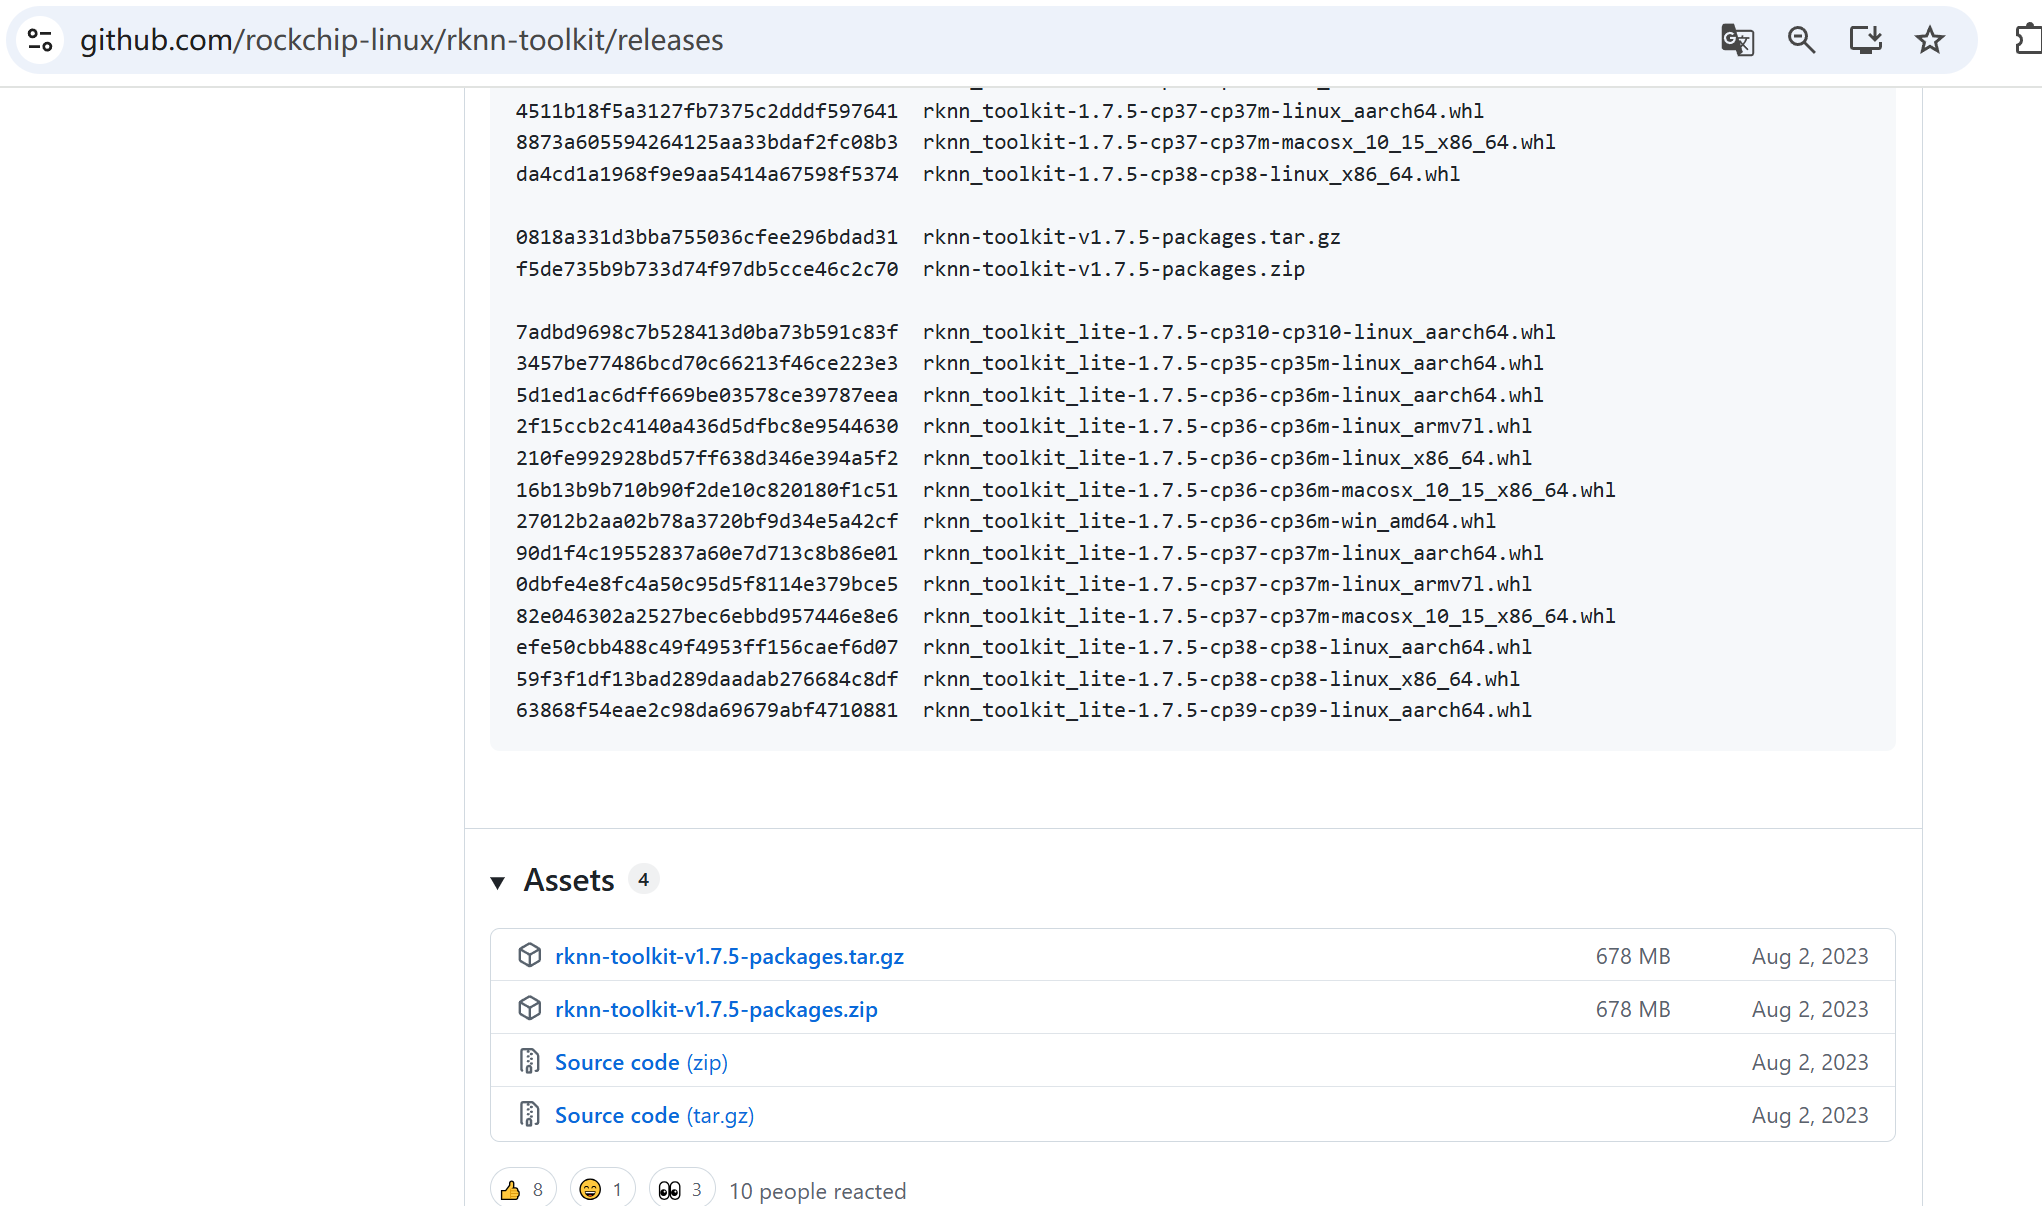
下载链接 :https://github.com/rockchip-linux/rknn-toolkit/releases
可以选不同的sdk版本:
关键函数:
引用rknnlite python-api
from rknnlite.api import RKNNLite模型初始化:
model = RKNNLite()

# 加载rknn模型 load RKNN model
model_path = "xxxx/yyyy/zzz.rknn"
model.load_rknn(model_path)

# 初始化运行环境 init runtime environment
ret =  model.init_runtime(target=None)
if ret != 0:
     print('Init runtime environment failed')
     exit(ret)
模型推理:
# 读取本地图片模拟
img_path = "aaa/bbb.jpg"
img = cv2.imread(img_path)
# AI模型推理
model.inference(inputs=[img])
后处理(这是专门为3个输出头的YOLO模型设计的):
import numpy as np

def postprocess_rknn(self, outputs, anchors, strides, num_classes=36, conf_thres=0.25, iou_thres=0.45, input_shape=(512, 288), orig_shape=None):
        """后处理函数"""
        boxes_all, scores_all, classes_all = [], [], []

        # 处理每个输出层
        for i, feat in enumerate(outputs):
            # 解码当前层的输出
            boxes, scores = self.decode_output(feat, anchors[i], strides[i], num_classes)

            # 获取类别ID和得分
            class_ids = np.argmax(scores, axis=-1)
            class_scores = np.max(scores, axis=-1)

            # 应用置信度阈值
            mask = class_scores >= conf_thres

            boxes_all.append(boxes[mask])
            scores_all.append(class_scores[mask])
            classes_all.append(class_ids[mask])

        # 如果没有检测到任何对象
        if not boxes_all:
            return None, None, None

        # 合并所有层的检测结果
        boxes = np.concatenate(boxes_all, axis=0)
        scores = np.concatenate(scores_all, axis=0)
        classes = np.concatenate(classes_all, axis=0)

        # 应用NMS
        keep = self.nms_boxes(boxes, scores, iou_thres)

        # 如果没有保留任何框
        if not keep:
            return None, None, None

        boxes = boxes[keep]
        classes = classes[keep]
        scores = scores[keep]

        # 坐标映射回原图
        if orig_shape is not None:
            orig_h, orig_w = orig_shape[:2]
            in_w, in_h = input_shape

            # 计算缩放比例
            scale_w = orig_w / in_w
            scale_h = orig_h / in_h

            # 应用缩放
            boxes[:, [0, 2]] = boxes[:, [0, 2]] * scale_w
            boxes[:, [1, 3]] = boxes[:, [1, 3]] * scale_h

            # 确保坐标不超出图像边界
            boxes[:, [0, 2]] = np.clip(boxes[:, [0, 2]], 0, orig_w)
            boxes[:, [1, 3]] = np.clip(boxes[:, [1, 3]], 0, orig_h)

        return boxes, classes, scores

def decode_output(self, feat, anchors, stride, num_classes=36):
        """
        解码YOLO输出
        feat: (1, 3, 41, H, W)
        anchors: 当前层的锚点 [(w1, h1), (w2, h2), (w3, h3)]
        stride: 当前层的步长
        """
        bs, na, no, ny, nx = feat.shape
        assert no == num_classes + 5, f"expect {num_classes+5}, got {no}"

        # 变换 shape -> (bs, na, ny, nx, no)
        feat = feat.transpose(0, 1, 3, 4, 2)

        # 生成网格坐标 (ny, nx, 2)
        grid_y, grid_x = np.meshgrid(np.arange(ny), np.arange(nx), indexing='ij')
        grid = np.stack((grid_x, grid_y), axis=-1).reshape(1, 1, ny, nx, 2)

        # 扩展锚点维度 (na, 1, 1, 2)
        anchors = np.array(anchors).reshape(1, na, 1, 1, 2)

        # 解码预测
        box_xy = (sigmoid(feat[..., :2]) * 2 - 0.5 + grid) * stride
        box_wh = (sigmoid(feat[..., 2:4]) * 2) ** 2 * anchors
        obj_conf = sigmoid(feat[..., 4:5])
        cls_conf = sigmoid(feat[..., 5:])

        # 转换为边界框坐标 (x1, y1, x2, y2)
        boxes = np.concatenate([
            box_xy - box_wh / 2,  # x1, y1
            box_xy + box_wh / 2   # x2, y2
        ], axis=-1)

        # 计算得分
        scores = obj_conf * cls_conf

        # 重塑为 (bs * na * ny * nx, 4) 和 (bs * na * ny * nx, num_classes)
        boxes = boxes.reshape(-1, 4)
        scores = scores.reshape(-1, num_classes)

        return boxes, scores

def nms_boxes(self, boxes, scores, iou_thres=0.45):
        """非极大值抑制"""
        if len(boxes) == 0:
            return []

        x1, y1, x2, y2 = boxes.T
        areas = (x2 - x1) * (y2 - y1)

        # 按得分降序排列
        order = scores.argsort()[::-1]
        keep = []

        while order.size > 0:
            i = order[0]
            keep.append(i)

            # 计算交并比
            xx1 = np.maximum(x1[i], x1[order[1:]])
            yy1 = np.maximum(y1[i], y1[order[1:]])
            xx2 = np.minimum(x2[i], x2[order[1:]])
            yy2 = np.minimum(y2[i], y2[order[1:]])

            w = np.maximum(0.0, xx2 - xx1)
            h = np.maximum(0.0, yy2 - yy1)
            inter = w * h

            # 计算IoU
            union = areas[i] + areas[order[1:]] - inter
            iou = inter / (union + 1e-8)  # 避免除以0

            # 保留IoU低于阈值的框
            inds = np.where(iou <= iou_thres)[0]
            order = order[inds + 1]

        return keep
完整RV1126模型推理模块实现:
from rknnlite.api import RKNNLite
import cv2
import numpy as np

class Yolov5rknn():
    def __init__(self, model_path, gpu_id):
        self.model = RKNNLite()

        # 加载RKNN模型
        print('--> Load RKNN model')
        ret = self.model.load_rknn(model_path)
        if ret != 0:
            print('Load RKNN model failed')
            exit(ret)
        print('load RKNN model done')

        # 初始化运行环境
        print('--> Init runtime environment')
        ret =  self.model.init_runtime(target=None)
        if ret != 0:
            print('Init runtime environment failed')
            exit(ret)
        print(' init runtime environment done')

        # 设置参数
        self.conf_thres = 0.25 # object confidence threshold, conf>0.1 for nms_op
        self.iou_thres = 0.45 # IOU threshold for NMS
        self.img_size = [640, 384] # width,height
        self.anchors = [
            [(10, 13), (16, 30), (33, 23)],  # 对应 outputs[0] (48x80)
            [(30, 61), (62, 45), (59, 119)], # 对应 outputs[1] (24x40)
            [(116, 90), (156, 198), (373, 326)]  # 对应 outputs[2] (12x20)
        ]
        self.strides = [8, 16, 32]  # 与特征图尺寸对应
        num_classes = 80 # rknn的模型类别数

    def __call__(self, cv2_image):
        # 数据预处理
        img = self.preprocess(cv2_image)
        # 模型推理
        outputs = self.model.inference(inputs=[img])
        # 后处理
        boxes, classes, scores = self.postprocess_rknn(
            outputs , self.anchors, self.strides,
            num_classes=num_classes, conf_thres=self.conf_thres, iou_thres=self.iou_thres,
            input_shape=self.img_size, orig_shape=(orig_h, orig_w)
        )
        pred_result = []

        if boxes is not None:
            for nbox,nclasses,nscore in zip(boxes.tolist(),classes.tolist(),scores.tolist()):
                pred_result.append([int(nbox[0]), int(nbox[1]), int(nbox[2]), int(nbox[3]), nscore, int(nclasses)])

        final_pred_result = pred_result
        return final_pred_result


    def preprocess(img):
        # 目前直接使用resize到模型尺寸,可以更换为其他方式
        resize_img = cv2.resize(img,(224,224))
        return resize_img

    def postprocess_rknn(self, outputs, anchors, strides, num_classes=36, conf_thres=0.25, iou_thres=0.45, input_shape=(512, 288), orig_shape=None):
        """后处理函数"""
        boxes_all, scores_all, classes_all = [], [], []

        # 处理每个输出层
        for i, feat in enumerate(outputs):
            # 解码当前层的输出
            boxes, scores = self.decode_output(feat, anchors[i], strides[i], num_classes)

            # 获取类别ID和得分
            class_ids = np.argmax(scores, axis=-1)
            class_scores = np.max(scores, axis=-1)

            # 应用置信度阈值
            mask = class_scores >= conf_thres

            boxes_all.append(boxes[mask])
            scores_all.append(class_scores[mask])
            classes_all.append(class_ids[mask])

        # 如果没有检测到任何对象
        if not boxes_all:
            return None, None, None

        # 合并所有层的检测结果
        boxes = np.concatenate(boxes_all, axis=0)
        scores = np.concatenate(scores_all, axis=0)
        classes = np.concatenate(classes_all, axis=0)

        # 应用NMS
        keep = self.nms_boxes(boxes, scores, iou_thres)

        # 如果没有保留任何框
        if not keep:
            return None, None, None

        boxes = boxes[keep]
        classes = classes[keep]
        scores = scores[keep]

        # 坐标映射回原图
        if orig_shape is not None:
            orig_h, orig_w = orig_shape[:2]
            in_w, in_h = input_shape

            # 计算缩放比例
            scale_w = orig_w / in_w
            scale_h = orig_h / in_h

            # 应用缩放
            boxes[:, [0, 2]] = boxes[:, [0, 2]] * scale_w
            boxes[:, [1, 3]] = boxes[:, [1, 3]] * scale_h

            # 确保坐标不超出图像边界
            boxes[:, [0, 2]] = np.clip(boxes[:, [0, 2]], 0, orig_w)
            boxes[:, [1, 3]] = np.clip(boxes[:, [1, 3]], 0, orig_h)

        return boxes, classes, scores


    def decode_output(self, feat, anchors, stride, num_classes=36):
        """
        解码YOLO输出
        feat: (1, 3, 41, H, W)
        anchors: 当前层的锚点 [(w1, h1), (w2, h2), (w3, h3)]
        stride: 当前层的步长
        """
        bs, na, no, ny, nx = feat.shape
        assert no == num_classes + 5, f"expect {num_classes+5}, got {no}"

        # 变换 shape -> (bs, na, ny, nx, no)
        feat = feat.transpose(0, 1, 3, 4, 2)

        # 生成网格坐标 (ny, nx, 2)
        grid_y, grid_x = np.meshgrid(np.arange(ny), np.arange(nx), indexing='ij')
        grid = np.stack((grid_x, grid_y), axis=-1).reshape(1, 1, ny, nx, 2)

        # 扩展锚点维度 (na, 1, 1, 2)
        anchors = np.array(anchors).reshape(1, na, 1, 1, 2)

        # 解码预测
        box_xy = (sigmoid(feat[..., :2]) * 2 - 0.5 + grid) * stride
        box_wh = (sigmoid(feat[..., 2:4]) * 2) ** 2 * anchors
        obj_conf = sigmoid(feat[..., 4:5])
        cls_conf = sigmoid(feat[..., 5:])

        # 转换为边界框坐标 (x1, y1, x2, y2)
        boxes = np.concatenate([
            box_xy - box_wh / 2,  # x1, y1
            box_xy + box_wh / 2   # x2, y2
        ], axis=-1)

        # 计算得分
        scores = obj_conf * cls_conf

        # 重塑为 (bs * na * ny * nx, 4) 和 (bs * na * ny * nx, num_classes)
        boxes = boxes.reshape(-1, 4)
        scores = scores.reshape(-1, num_classes)

        return boxes, scores


    def nms_boxes(self, boxes, scores, iou_thres=0.45):
        """非极大值抑制"""
        if len(boxes) == 0:
            return []

        x1, y1, x2, y2 = boxes.T
        areas = (x2 - x1) * (y2 - y1)

        # 按得分降序排列
        order = scores.argsort()[::-1]
        keep = []

        while order.size > 0:
            i = order[0]
            keep.append(i)

            # 计算交并比
            xx1 = np.maximum(x1[i], x1[order[1:]])
            yy1 = np.maximum(y1[i], y1[order[1:]])
            xx2 = np.minimum(x2[i], x2[order[1:]])
            yy2 = np.minimum(y2[i], y2[order[1:]])

            w = np.maximum(0.0, xx2 - xx1)
            h = np.maximum(0.0, yy2 - yy1)
            inter = w * h

            # 计算IoU
            union = areas[i] + areas[order[1:]] - inter
            iou = inter / (union + 1e-8)  # 避免除以0

            # 保留IoU低于阈值的框
            inds = np.where(iou <= iou_thres)[0]
            order = order[inds + 1]

        return keep
程序里调用示例:
model_path = "xxxx/yyyy/zzz.rknn"
rknn_engine = Yolov5rknn(model_path)
img_path = "aaa/bbb.jpg"
img = cv2.imread(img_path)
pred_result = rknn_engine(img)
print(pred_result)
RV1126 rknn模型转换:
前提:python已安装rknn.api依赖库
参考gihub链接:
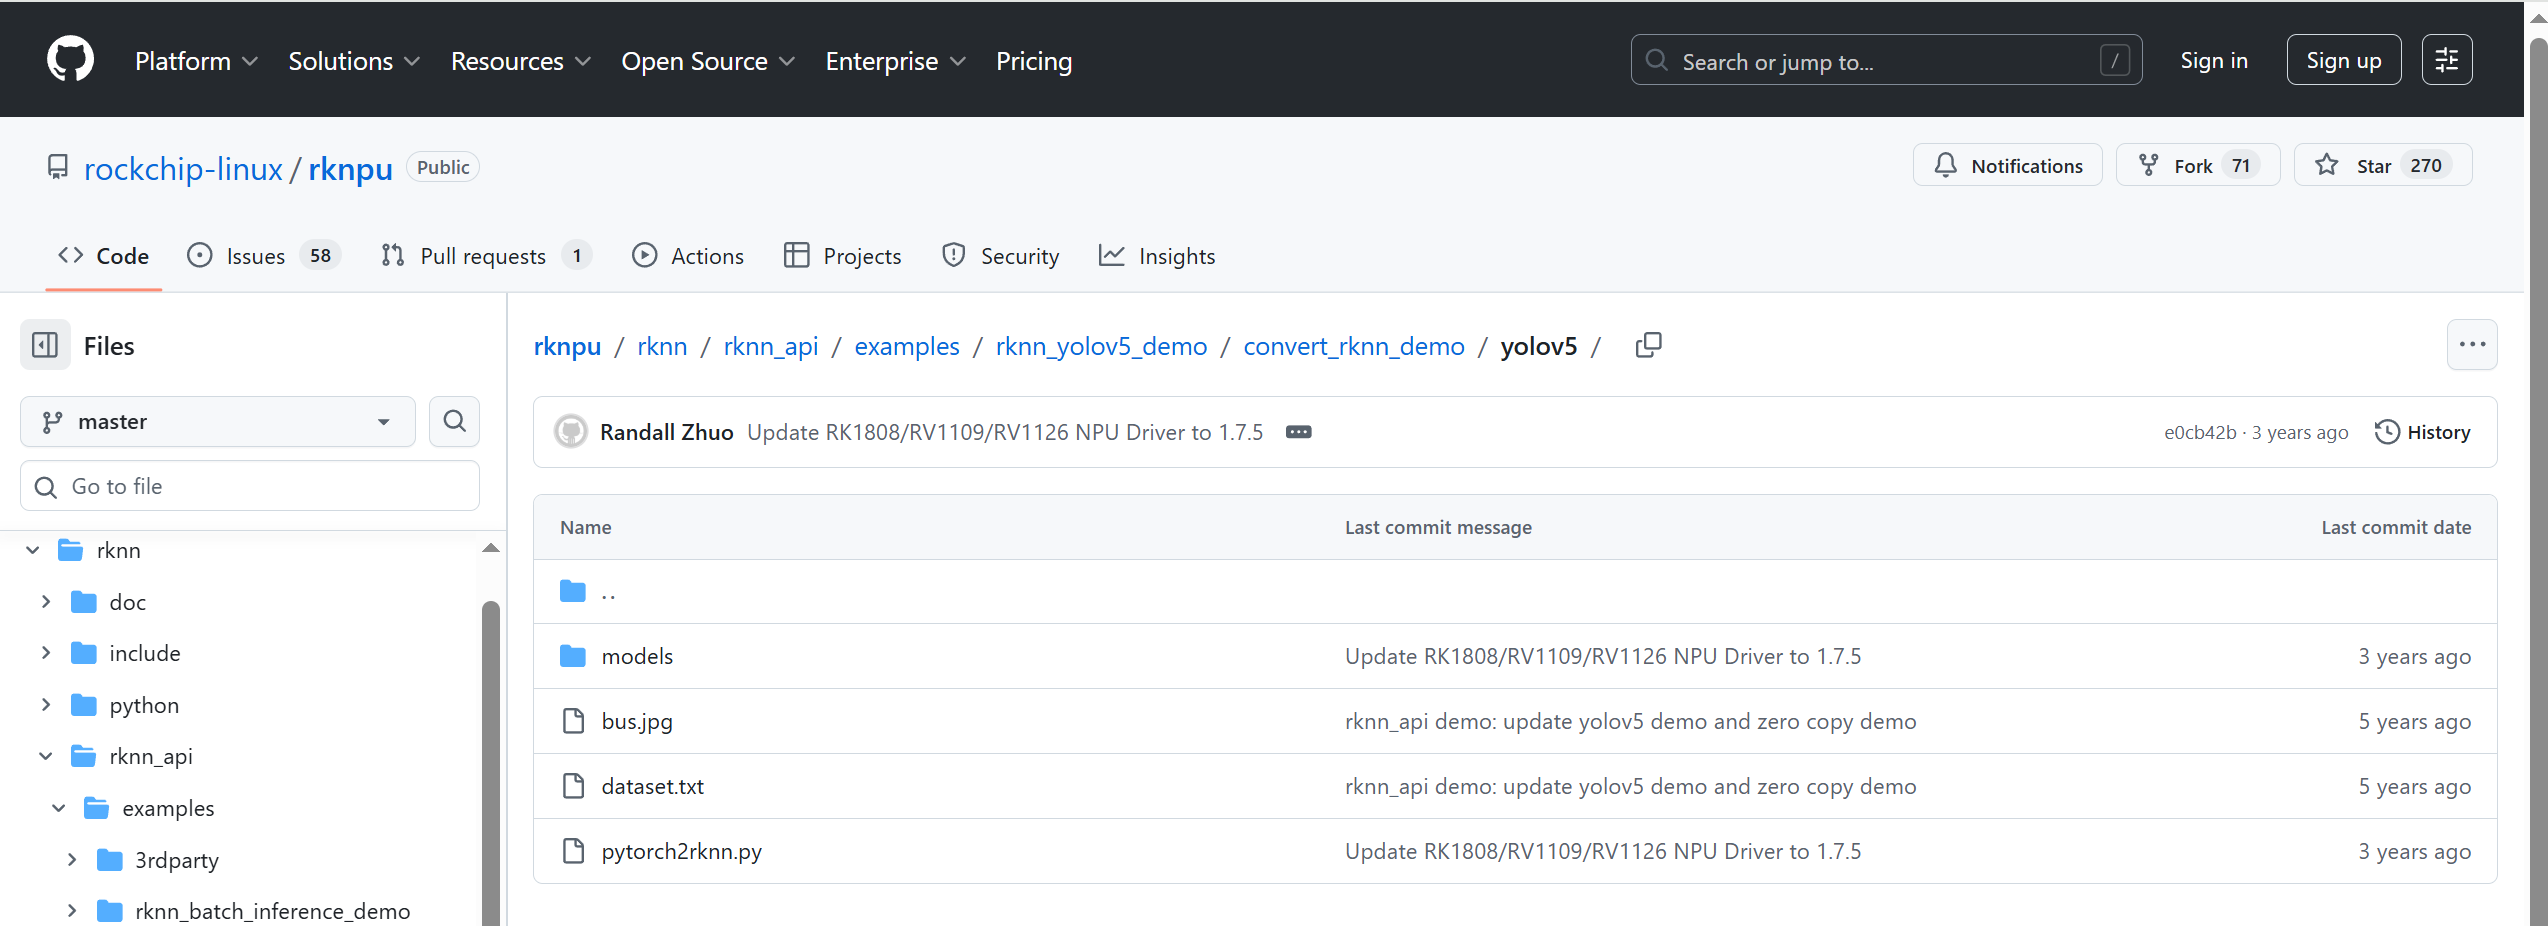
https://github.com/rockchip-linux/rknpu/tree/master/rknn/rknn_api/examples/rknn_yolov5_demo
首先下载rknpu项目,在
rknpu/rknn/rknn_api/examples/rknn_yolov5_demo/convert_rknn_demo/yolov5目录下:
其中:dataset.txt是量化数据集的索引文件,将量化数据集上传至convert_rknn_demo/yolov5目录下,将所有量化数据集的文件相对路径写在dataset.txt即可。
然后模型转换,需要编辑pytorch2rknn.py更改模型路径等。
也可以尝试本人常用的转换脚本:
在yolov5项目中,使用export.py将pt模型转换为onnx
然后使用以下脚本将onnx模型转换为rknn:
convert_rknn.py
import os
from rknn.api import RKNN
ONNX_MODEL_FILE = '/home/mydata/YOLOv5_COMMON_288_512_V1.9.4.onnx'
OUTPUT_RKNN_MODEL_FILE = ONNX_MODEL_FILE + '.{}_True.rknn'
DATASET_FILE = '/home/dev/convert_rknn/dataset.txt'
# TARGET_DEV = "rk1808"
TARGET_DEV = "rv1126"
QUANTIZE_ON = True
if __name__ == '__main__':
# Create RKNN object
rknn = RKNN()
output_file = OUTPUT_RKNN_MODEL_FILE.format(TARGET_DEV)
if not os.path.exists(ONNX_MODEL_FILE):
print('Input file does not exist: {}'.format(
os.path.abspath(ONNX_MODEL_FILE)))
exit(-1)
# pre-process config
print('--> Config model')
rknn.config(reorder_channel='0 1 2',
#reorder_channel='2 1 0',
mean_values=[[0, 0, 0]],
std_values=[[255, 255, 255]],
target_platform=TARGET_DEV,
force_builtin_perm=True,
#force_builtin_perm=False,
remove_tensorflow_output_permute=True,
quantize_input_node=False,
output_optimize=0)
# Load ONNX model
print('--> Loading model')
ret = rknn.load_onnx(model=ONNX_MODEL_FILE,
outputs=['/model.24/Reshape_output_0', '/model.24/Reshape_2_output_0', '/model.24/Reshape_4_output_0'])
if ret != 0:
print('Load yolov5 failed!')
exit(ret)
# Build model
print('--> Building model')
ret = rknn.build(do_quantization=QUANTIZE_ON,
dataset=DATASET_FILE,
pre_compile=True)
if ret != 0:
print('Build yolov5 failed!')
exit(ret)
# Export RKNN model
print('--> Export RKNN model')
ret = rknn.export_rknn(output_file)
if ret != 0:
print('Export yolov5rknn failed!')
exit(ret)
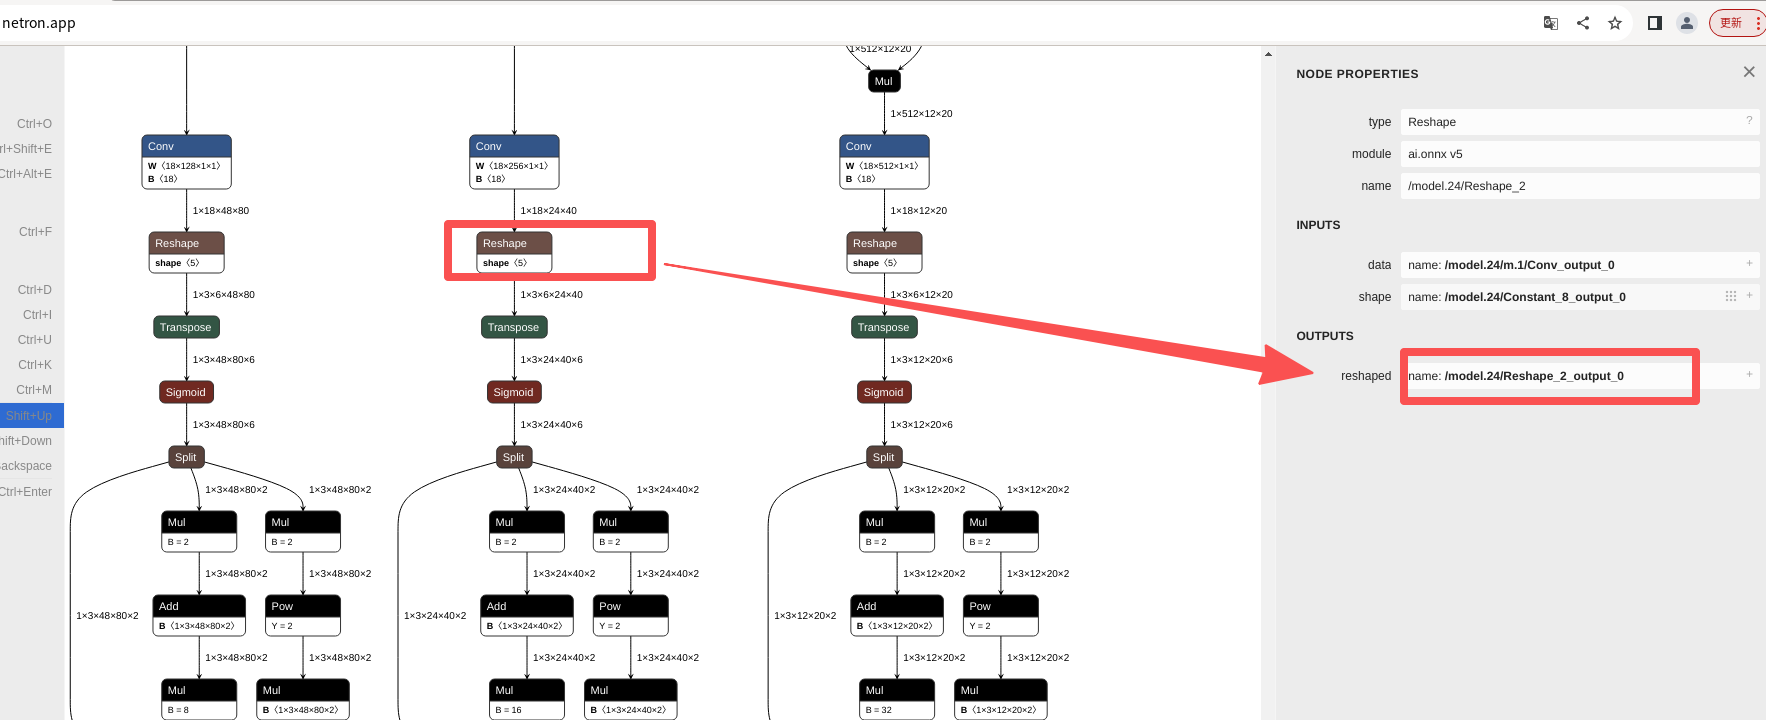
rknn.release()其中rknn.load_onnx的outputs输入onnx模型3个conv下方的3个reshape层的输出。
outputs=['/model.24/Reshape_output_0', '/model.24/Reshape_2_output_0', '/model.24/Reshape_4_output_0']意味着:
-
模型推理会完全执行:ONNX模型的所有计算都会被执行,因为这些输出节点是模型的最终输出节点
-
输出的是YOLOv5的原始输出:这三个节点对应YOLOv5的三个检测头(不同尺度的特征图)
-
需要额外的后处理:你得到的输出是:
3个不同尺度的特征图(如:85×20×40, 85×40×20, 85×80×10)
每个特征图的格式通常是:batch, channels, height, width
channels = 4(bbox) + 1(confidence) + 80(classes) = 85
如果对应单一的输出节点,如:
outputs=['output']这意味着:
- 模型可能包含了后处理:如果ONNX导出时已经做了后处理(如NMS)
- 输出的是直接可用的检测结果:格式可能是 batch, num_detections, 6
- 6 = x1, y1, x2, y2, confidence, class_id模型推理同样会完全执行:只是输出节点不同
在项目,基本采用三个输出头的方式转换模型!
查询方式(不同版本转换的onnx模型,输出头名称可能不也一样):
网页输入:https://netron.app/
然后导入onnx模型
在最下方的reshap查看outputs:

总结:
优点:实现比较快,只需要现在rknnlite的python-api的whl库文件即可,几乎没有额外的依赖文件
缺点:计算效率较低,目前测试,计算一帧图像(model_size:384,640)在100ms以上。不满足实时检测的需求
推荐:后期尝试使用C++的api接口进行rknn模型推理,然后将C++部分使用cpython封装为so库文件,然后主体的python业务调用so库文件实现模型推理,效率很高,基本能实现视频流满帧推理。