08-通知功能模块
提示:本文档使用了颜色标注来突出重点内容:
- 蓝色:文件路径和行号信息
- 橙色:关键提示、重要注意和问题
- 红色:抛出的问题
问题解答中的关键词语使用加粗标注。
学习这个模块时最好启动项目学习,这样会更直观。
模块说明
通知功能模块用于向用户推送系统消息和提醒。主要包括:
- 通知列表:查看所有收到的通知
- 通知已读:标记通知为已读状态
- 未读数量:显示未读通知的数量
- 系统通知:系统自动生成的通知(如审核结果、新消息等)
与前面模块的关联
通知功能模块是系统的消息推送中心,主要被审核机制触发,为用户提供系统反馈:
1. 依赖关系
- 依赖于01-用户模块 :
- 通知需要关联用户ID,系统从Session中获取用户信息
- 用户查看通知时,只显示该用户的通知
- 导航栏中显示未读通知数量,需要知道当前用户是谁
关键代码示例:从Session获取用户信息
java
// 文件:src/main/java/com/scfs/controller/UserController.java
// 位置:第326-351行,getNotificationCount方法

@RequestMapping("/getNotificationCount")
@ResponseBody
public Result getNotificationCount(HttpServletRequest request) {
    try {
        HttpSession session = request.getSession();
        // 从Session中获取当前登录用户
        User user = (User) session.getAttribute("USER_SESSION");
        if (user == null) {
            return new Result(true, "未登录", 0);
        }
        Long userId = user.getUserId();
        if (userId == null) {
            return new Result(true, "未登录", 0);
        }

        // 调用通知服务获取未读数量
        NotificationService notificationService = org.springframework.web.context.support.WebApplicationContextUtils
                .getWebApplicationContext(request.getServletContext())
                .getBean(NotificationService.class);

        int count = notificationService.getUnreadCount(userId);
        return new Result(true, "获取通知数量成功", count);
    } catch (Exception e) {
        logger.error("获取通知数量失败", e);
        return new Result(false, "获取通知数量失败:" + e.getMessage());
    }
}- 主要由05-审核机制模块触发 :
- 管理员审核店铺/菜品通过或驳回后,系统会自动创建通知
- 通知内容包括审核结果、审核的店铺/菜品名称、审核时间等
- 用户提交的待审核内容,审核完成后都能收到通知
关键代码示例:审核后创建通知
java
// 文件:src/main/java/com/scfs/service/impl/AuditServiceImpl.java
// 位置:第653-670行,approve方法中发送审核通过通知

// 发送审核通过通知给上传者
try {
    Long uploadUserId = getUploadUserId(entityType, entityId);  // 获取提交者ID
    if (uploadUserId != null) {
        String entityName = getEntityName(entityType, entityId);
        String title = "审核通过通知";
        String content = String.format("您提交的%s「%s」已通过审核", getEntityTypeName(entityType), entityName);
        String actionUrl = getEntityDetailUrl(entityType, entityId);

        // 创建通知对象
        Notification notification = new Notification(uploadUserId, title, content, "AUDIT_PASS");
        notification.setActionUrl(actionUrl);
        // 调用08-通知功能模块创建通知
        notificationService.createNotification(notification);
        logger.info("已发送审核通过通知给用户: userId={}, entityType={}, entityId={}",
                new Object[] { uploadUserId, entityType, entityId });
    }
} catch (Exception e) {
    logger.warn("发送审核通过通知失败", e);
}
2. 被依赖关系
- 被01-用户模块使用 :
- 导航栏中的通知图标显示未读通知数量
- 用户中心可以查看所有通知
关键代码示例:导航栏显示未读通知数量
javascript
// 文件:src/main/webapp/jsp/navbar.jsp
// 位置:第119-139行,loadNotificationInfo函数

function loadNotificationInfo() {
    $.ajax({
        url: contextPath + '/user/getNotificationCount',
        type: 'GET',
        success: function (response) {
            if (response.success) {
                var count = response.data || 0;
                var badge = $('#notificationBadge');
                if (count > 0) {
                    // 显示未读数量(最多显示99+)
                    badge.text(count > 99 ? '99+' : count).show();
                } else {
                    badge.hide();  // 没有未读通知,隐藏徽章
                }
            }
        },
        error: function() {
            // 加载失败,隐藏徽章
            $('#notificationBadge').hide();
        }
    });
}
3. 数据流转
审核后发送通知的完整流程:
用户在02/03模块添加/修改店铺或菜品
    ↓
数据保存,status=0(待审核)
    ↓
05-审核机制模块:管理员审核
    ↓
管理员点击"通过"或"驳回"按钮
    ↓
05-审核机制模块的AuditService执行审核操作
    ↓
AuditService调用NotificationService.sendAuditNotificationToAdmins()(08-通知功能模块)
    ↓
08-通知功能模块创建通知记录(notification表)
    ↓
通知保存到数据库,is_read=0(未读)
    ↓
用户下次登录或刷新页面时,导航栏显示未读通知数量
    ↓
用户点击通知图标,跳转到用户中心的通知列表
    ↓
08-通知功能模块加载该用户的所有通知
    ↓
用户查看通知,系统标记为已读(is_read=1)
4. 通知类型
系统主要生成以下几种通知:
- 审核通过通知:你的店铺/菜品已通过审核,现在对外可见了
- 审核驳回通知:你的店铺/菜品审核未通过,可以查看驳回原因
- 系统消息:其他系统级别的通知
5. 学习建议
-
在学习本模块前:
- 建议先理解01-用户模块的Session管理(如何获取当前用户)
- 理解05-审核机制模块的审核流程(审核后如何触发通知)
-
学习时可以结合:
- 实际操作:添加一个店铺/菜品,等待管理员审核
- 用管理员账号审核,观察通知是否创建
- 切换回普通用户账号,查看是否收到通知
- 查看数据库中的
notification表,看看通知数据是什么样的 - 观察导航栏的未读通知数量是如何更新的
- 点击通知后,观察通知的已读状态变化
-
学习本模块后:
- 理解通知系统的设计思路(异步通知、持久化存储)
- 思考如何优化通知功能(实时推送、通知分类等)
- 理解为什么需要已读/未读状态(用户体验)
6. 问题解答
Q1:为什么通知系统需要已读/未读状态?
A: 已读/未读状态用于提升用户体验,让用户知道哪些通知还没有查看过。
作用:
- 视觉区分:已读和未读通知在界面上有不同的样式(如未读加粗、已读灰色)
- 提醒功能:导航栏显示未读数量,提醒用户查看
- 统计功能:可以统计用户查看了多少通知,哪些通知重要
实现方式:
notification表中有is_read字段:0表示未读,1表示已读- 查询时通过SQL条件区分:
WHERE is_read = 0(未读)
代码位置:
java
// 文件:src/main/java/com/scfs/service/impl/NotificationServiceImpl.java
// 位置:第68-78行,getUnreadCount方法

@Override
public int getUnreadCount(Long userId) {
    if (userId == null) {
        return 0;
    }
    try {
        // 查询未读数量(is_read = 0)
        return notificationMapper.countUnreadByUserId(userId);
    } catch (Exception e) {
        e.printStackTrace();
        return 0;
    }
}
Q2:通知是怎么被创建的?什么时候创建?
A: 通知在审核操作完成后自动创建,由05-审核机制模块调用08-通知功能模块。
创建时机:
- 审核通过:管理员审核通过店铺/菜品后,系统创建"审核通过通知"
- 审核驳回:管理员审核驳回店铺/菜品后,系统创建"审核驳回通知"
创建流程:
java
// 文件:src/main/java/com/scfs/service/impl/NotificationServiceImpl.java
// 位置:第34-49行,createNotification方法

@Override
@Transactional
public boolean createNotification(Notification notification) {
    if (notification == null || notification.getUserId() == null) {
        return false;
    }
    try {
        if (notification.getIsRead() == null) {
            notification.setIsRead(0); // 默认未读
        }
        // 插入通知到数据库
        return notificationMapper.insert(notification) > 0;
    } catch (Exception e) {
        e.printStackTrace();
        return false;
    }
}通知内容:
user_id:接收通知的用户IDtitle:通知标题(如"审核通过通知")content:通知内容(包含审核结果、店铺/菜品名称)type:通知类型(AUDIT_PASS、AUDIT_REJECT等)is_read:是否已读(默认0,未读)action_url:点击通知后跳转的URL
Q3:导航栏的未读通知数量是怎么实时更新的?
A: 通过页面加载时和定期轮询两种方式更新。
更新方式:
- 页面加载时 :每次加载页面时,自动调用
loadNotificationInfo函数获取未读数量 - 定期刷新:可以设置定时器,每隔一段时间(如30秒)刷新一次
代码位置:
javascript
// 文件:src/main/webapp/jsp/navbar.jsp
// 位置:第119-139行,loadNotificationInfo函数

function loadNotificationInfo() {
    $.ajax({
        url: contextPath + '/user/getNotificationCount',
        type: 'GET',
        success: function (response) {
            if (response.success) {
                var count = response.data || 0;
                var badge = $('#notificationBadge');
                if (count > 0) {
                    badge.text(count > 99 ? '99+' : count).show();
                } else {
                    badge.hide();
                }
            }
        }
    });
}

// 页面加载时调用
$(document).ready(function() {
    loadNotificationInfo();
    // 可以设置定时刷新(每30秒)
    setInterval(loadNotificationInfo, 30000);
});为什么需要定期刷新:
- 用户可能在其他页面收到通知(如管理员审核)
- 定期刷新可以确保未读数量及时更新
- 提升用户体验,用户不需要刷新页面就能看到新通知
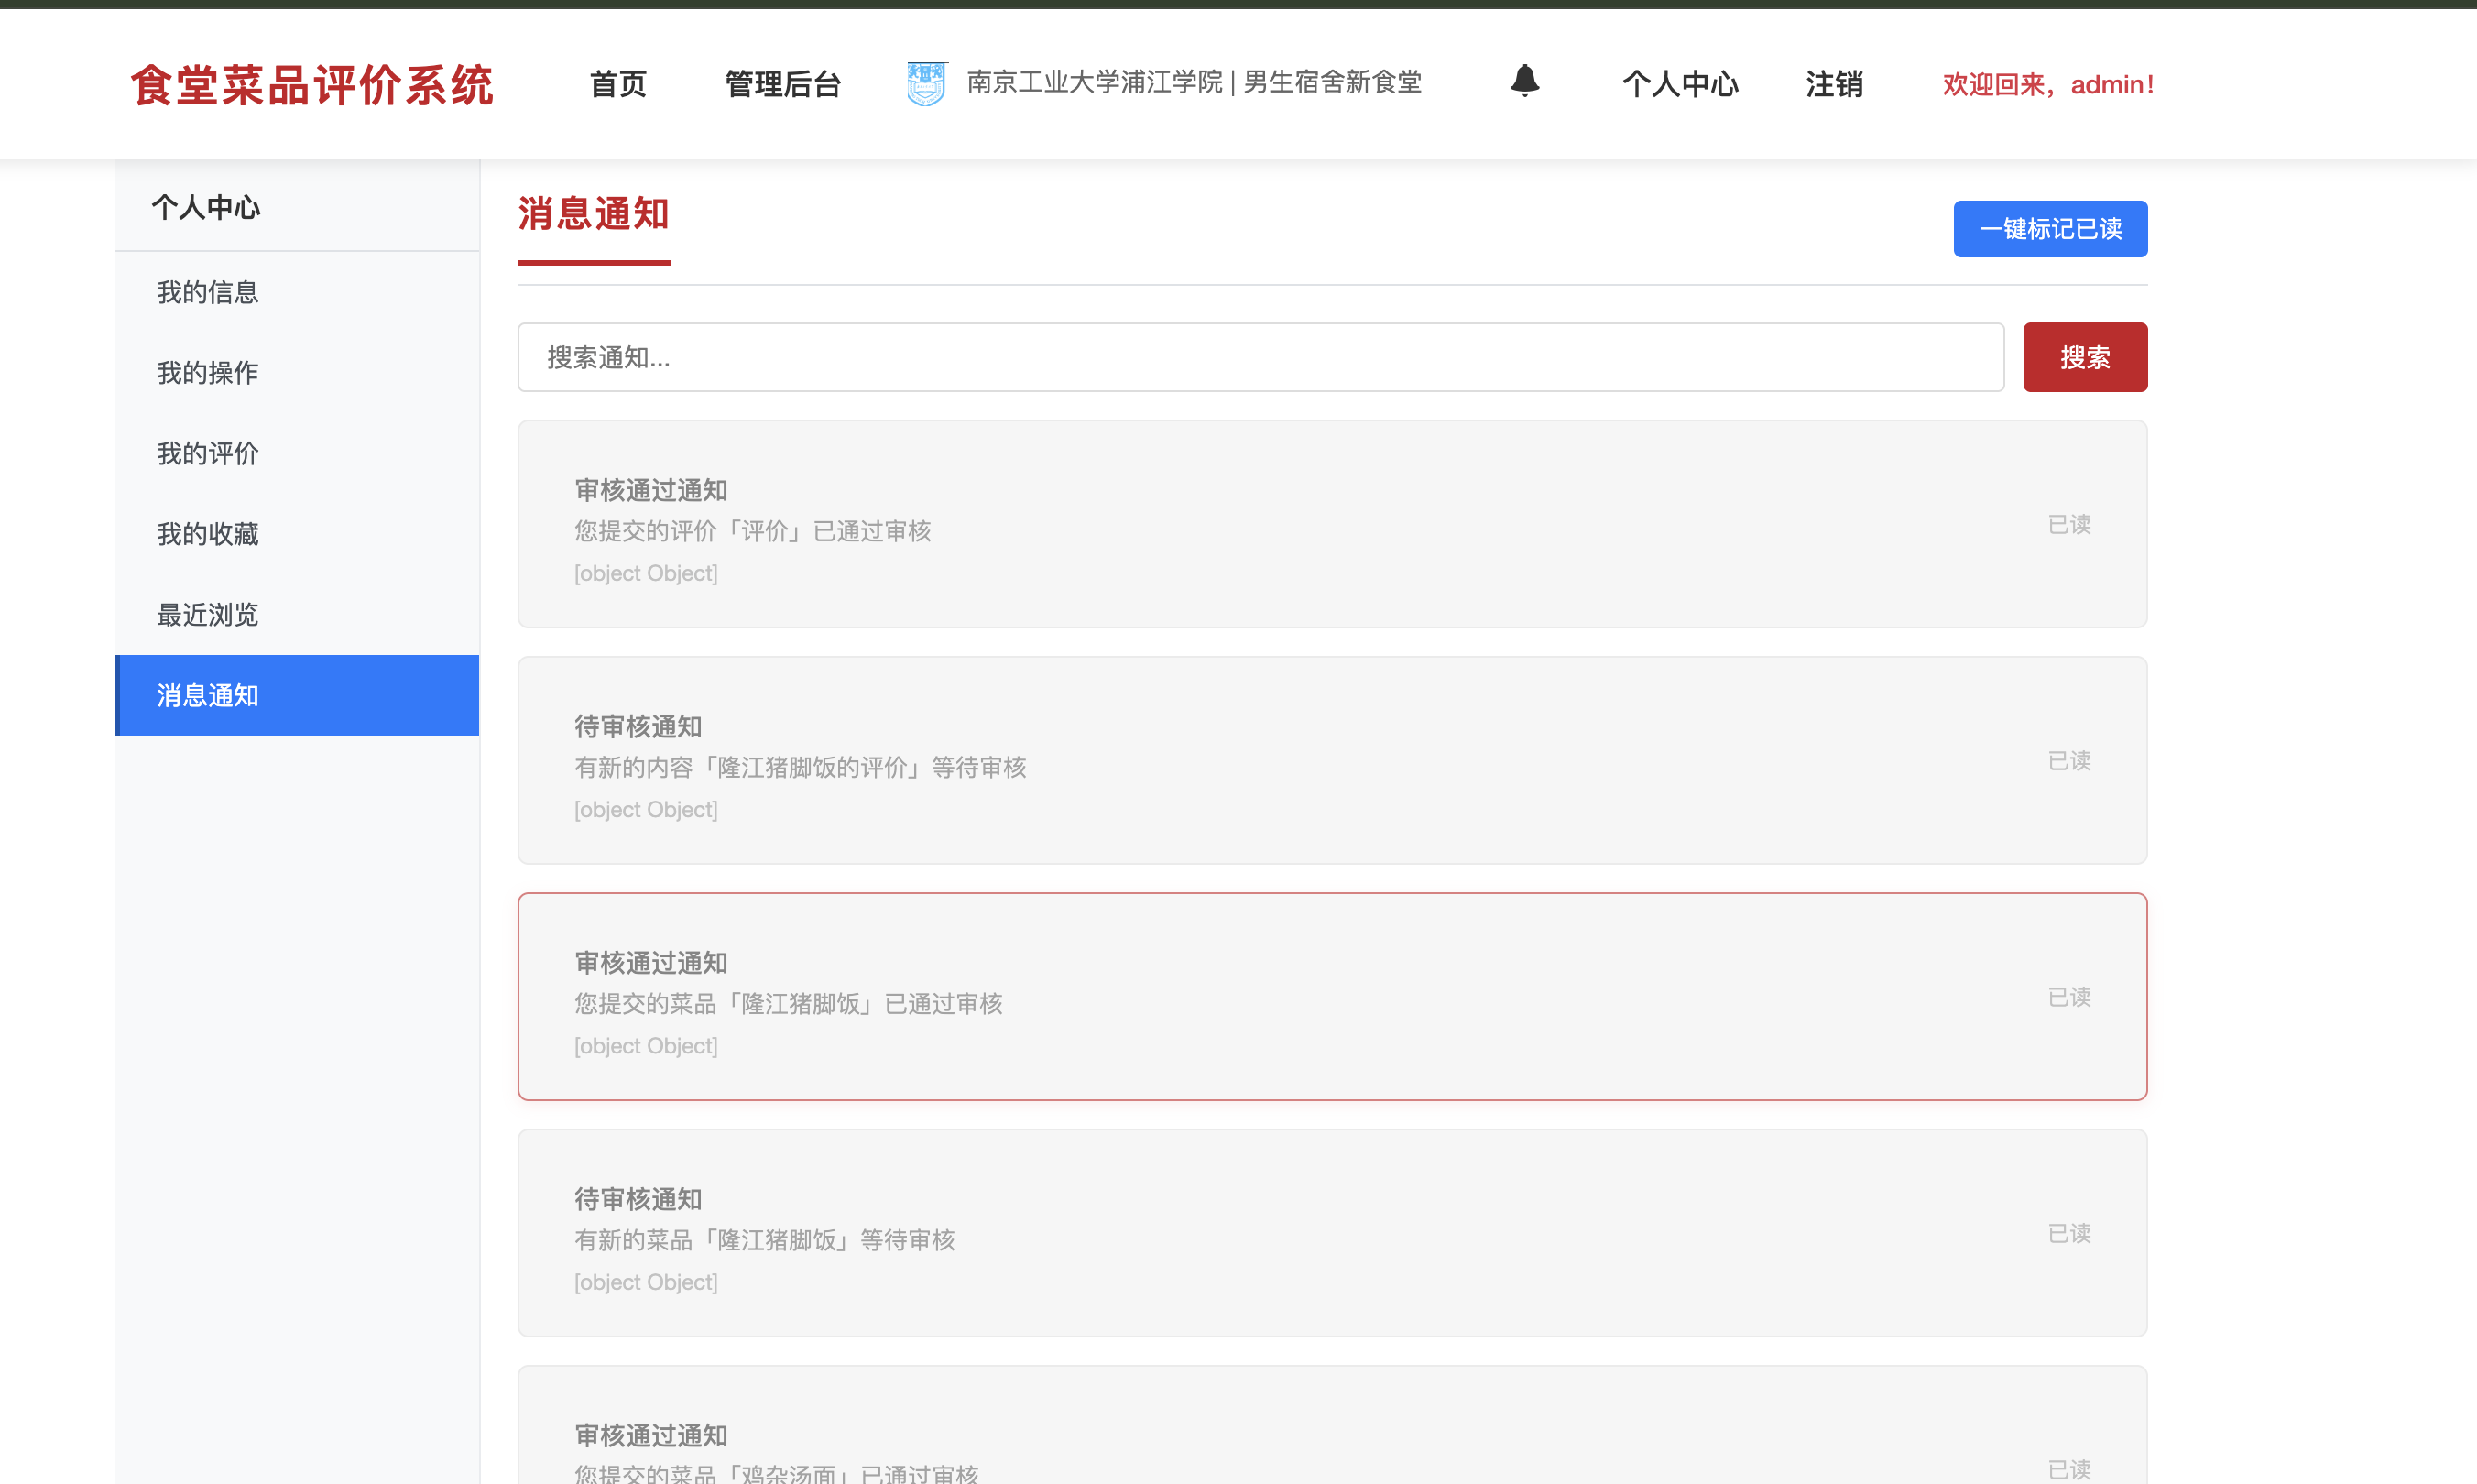
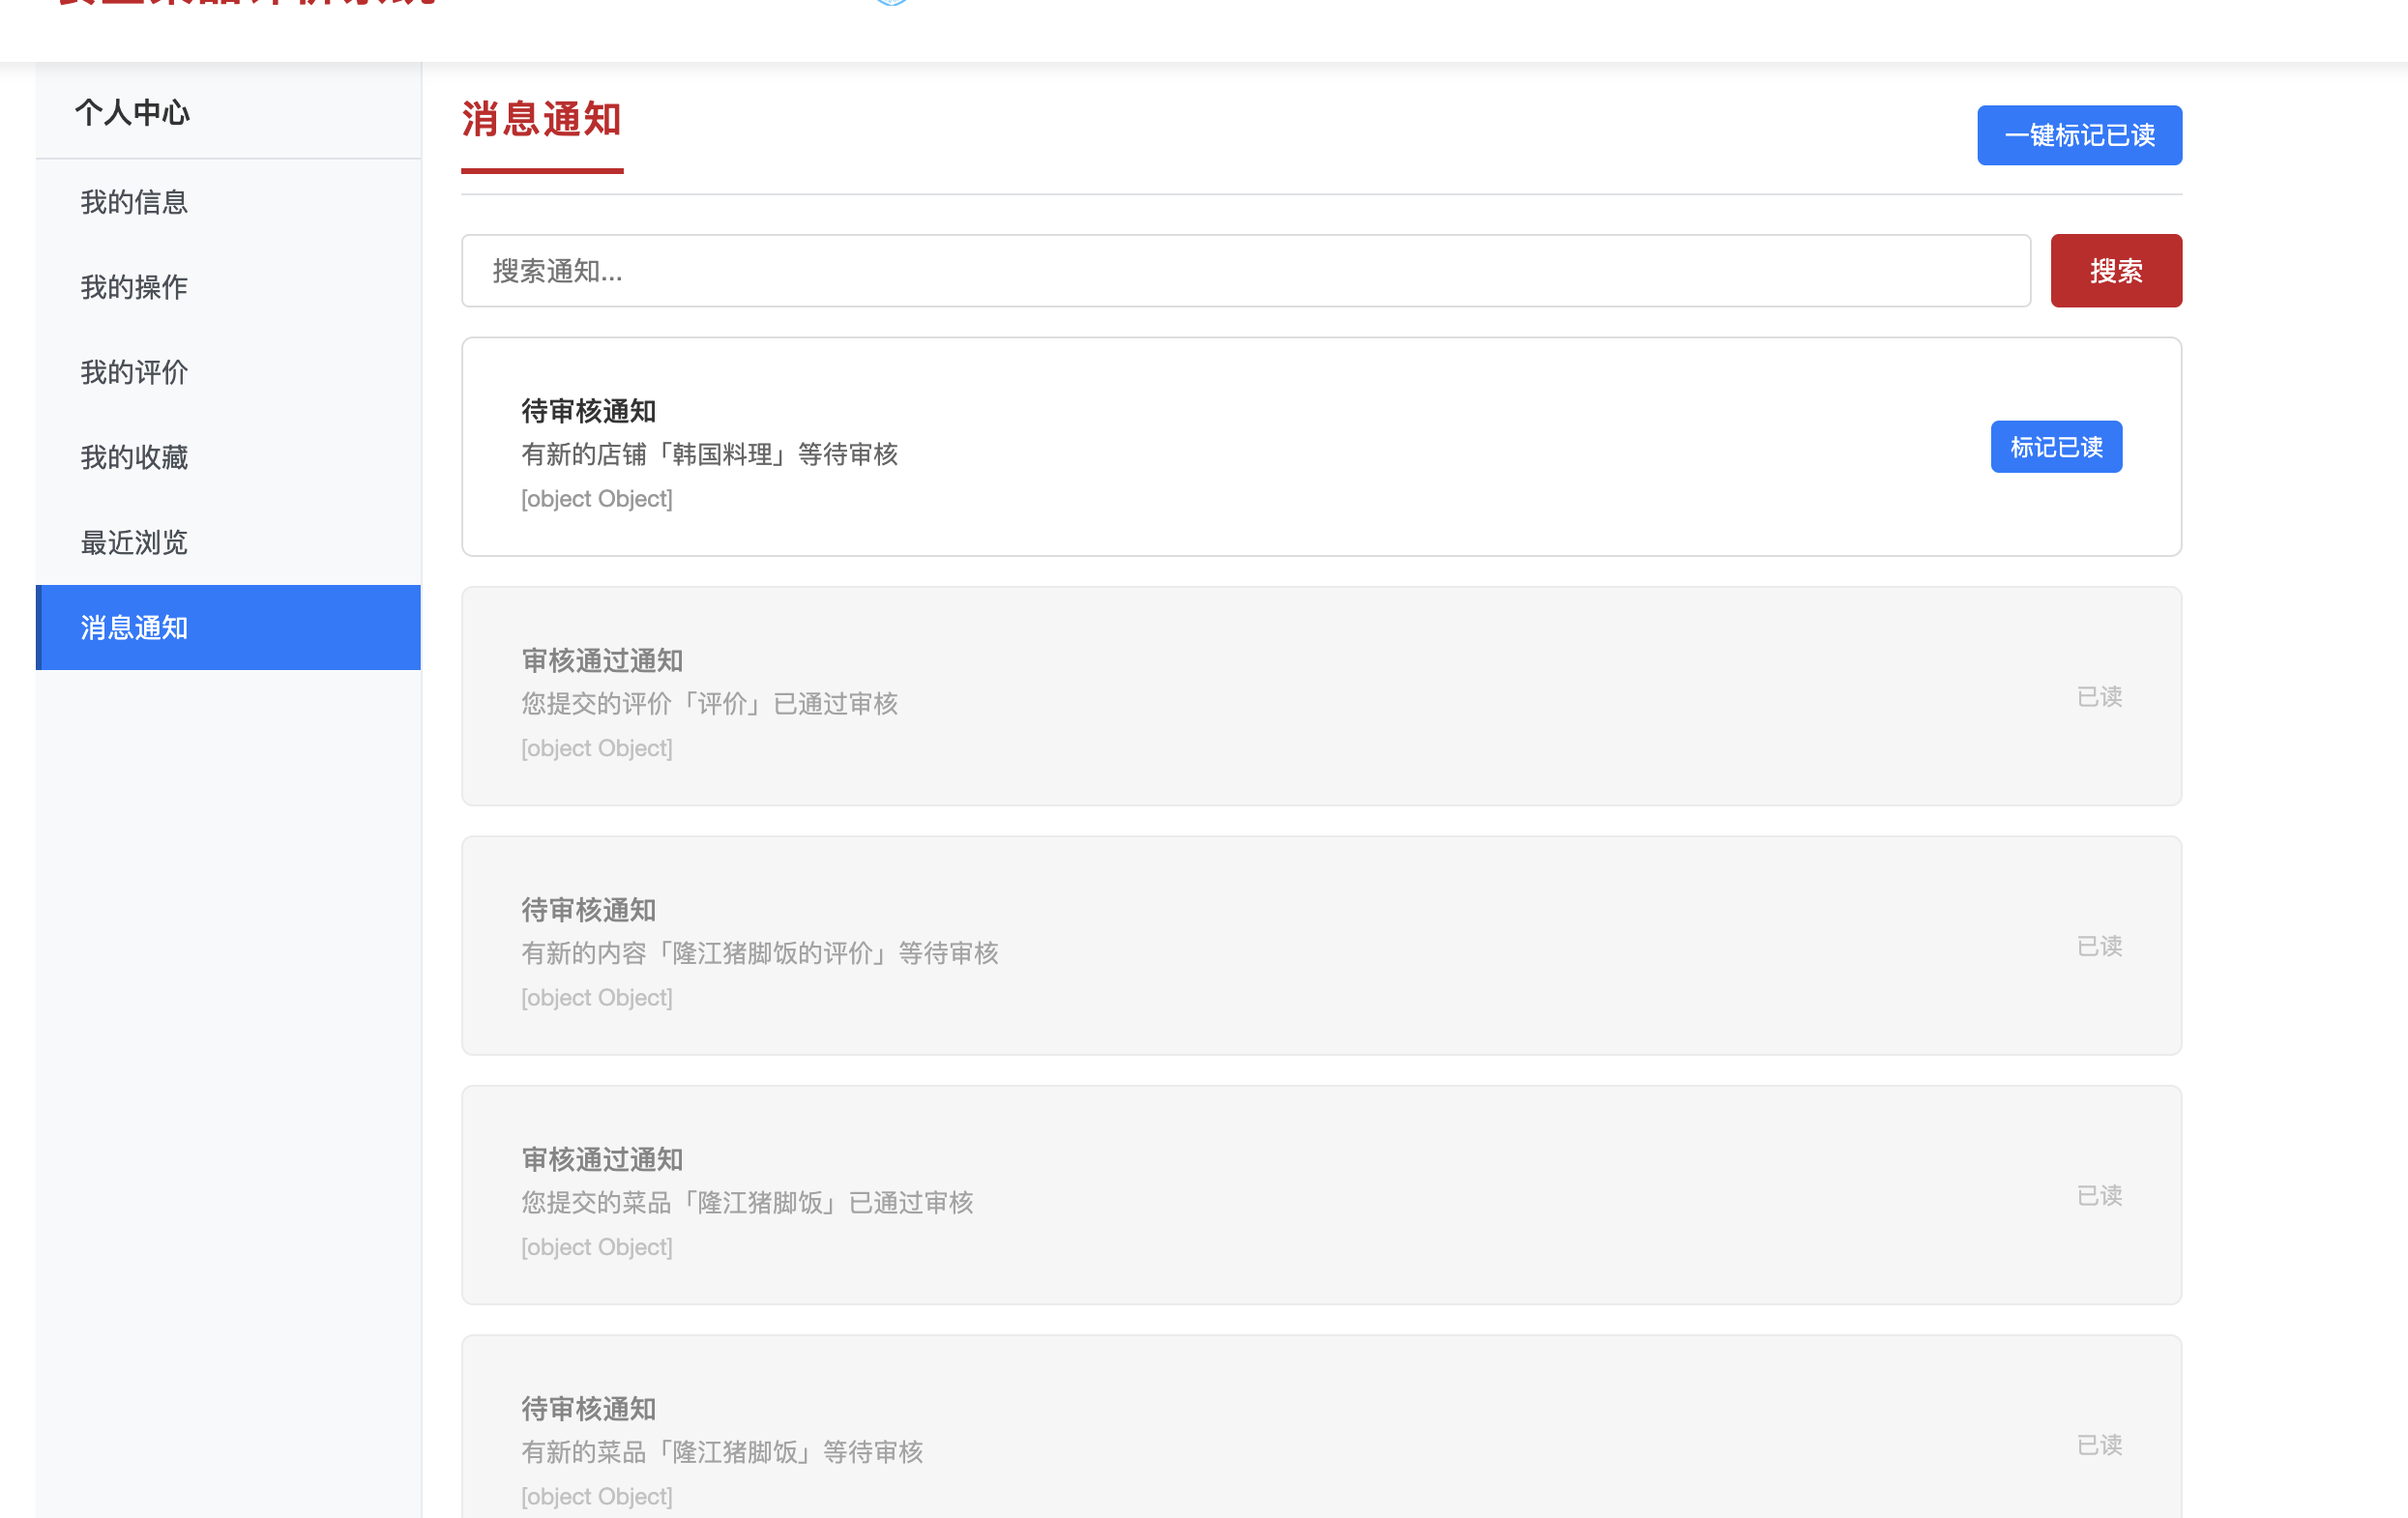
功能一:查看通知列表
功能说明
通知列表功能是用户可以查看自己收到的所有系统通知,了解审核结果、系统消息等。
抛出问题:用户进入用户中心查看通知列表时,系统是怎么把通知从数据库读取出来并展示到页面上的?未读通知和已读通知是怎么区分的?
逐步追踪
第一步:找到用户操作的入口
用户在用户中心页面(user-center.jsp)点击"通知"标签页,页面会自动调用loadNotifications函数加载通知列表。
第二步:追踪前端JavaScript处理
在user-center.jsp中,找到loadNotifications函数:
javascript
// [1] 加载消息通知函数(数据流向:前端 → Controller)
function loadNotifications() {
    // [2] 发送AJAX GET请求获取通知列表
    $.ajax({
        url: '${pageContext.request.contextPath}/user/getNotifications',
        type: 'GET',
        // [3] 请求成功回调:处理后端返回的结果(数据流向:Controller → 前端)
        success: function (response) {
            if (response.success) {
                // [4] 调用渲染函数,将通知列表显示到页面
                renderNotificationList(response.data, '');
                // [5] 计算未读通知数量
                const unreadCount = response.data.filter(function (item) {
                    return item.isRead === 0 || item.isRead === false;
                }).length;
                // [6] 更新导航栏的未读通知数量徽章
                updateNotificationBadge(unreadCount);
            }
        }
    });
}
位置 :src/main/webapp/jsp/user-center.jsp 第379-395行
渲染函数 :renderNotificationList(data, keyword)将后端返回的通知列表渲染到页面:
javascript
// [1] 渲染通知列表函数
function renderNotificationList(data, keyword) {
    const container = $('#notificationList');
    container.empty();  // [2] 清空容器

    // [3] 过滤数据(如果有关键词)
    let filteredData = data;
    if (keyword) {
        filteredData = data.filter(function (item) {
            return (item.title && item.title.indexOf(keyword) !== -1) ||
                   (item.content && item.content.indexOf(keyword) !== -1);
        });
    }

    // [4] 判断是否有通知
    if (filteredData.length === 0) {
        container.html('<div class="empty-state">暂无通知</div>');
        return;
    }

    // [5] 遍历通知列表,为每个通知项生成HTML
    filteredData.forEach(function (item) {
        // [6] 判断通知是否已读(isRead字段:0或false表示未读,1或true表示已读)
        const isRead = item.isRead === 1 || item.isRead === true;
        // [7] 根据已读状态设置CSS类名
        const readClass = isRead ? 'notification-read' : 'notification-unread';

        // [8] 生成通知项的HTML
        const html = '<div class="notification-item ' + readClass + '" data-notification-id="' + item.notificationId + '">' +
            '<div class="notification-content">' +
                '<h4>' + (item.title || '系统通知') + '</h4>' +
                '<p>' + (item.content || '') + '</p>' +
                '<span class="notification-time">' + formatDateTime(item.createTime) + '</span>' +
            '</div>' +
            '<div class="notification-actions">' +
                // [9] 只有未读通知才显示"标记已读"按钮
                (!isRead ? '<button class="btn btn-sm btn-primary" onclick="markAsRead(' + item.notificationId + ')">标记已读</button>' : '') +
            '</div>' +
        '</div>';
        container.append(html);
    });
}
位置 :src/main/webapp/jsp/user-center.jsp 第397-430行
第三步:追踪到Controller层
根据请求URL/user/getNotifications,找到UserController的getNotifications方法:
java
// [1] 处理GET请求 /user/getNotifications(数据流向:前端 → Controller)
@RequestMapping("/getNotifications")
@ResponseBody
public Result getNotifications(HttpServletRequest request) {
    try {
        // [2] 从Session中获取当前登录用户(01-用户模块提供的USER_SESSION)
        HttpSession session = request.getSession();
        User user = (User) session.getAttribute("USER_SESSION");
        if (user == null) {
            return new Result(false, 401, "请先登录", null);
        }
        Long userId = user.getUserId();

        // [3] 获取NotificationService服务
        NotificationService notificationService = org.springframework.web.context.support.WebApplicationContextUtils
                .getWebApplicationContext(request.getServletContext())
                .getBean(NotificationService.class);

        // [4] 调用Service层获取通知列表(数据流向:Controller → Service)
        List<Notification> notifications = notificationService.getUserNotifications(userId, 50);  // 限制50条
        // [5] 封装成Result对象返回(数据流向:Controller → 前端)
        return new Result(true, "获取通知列表成功", notifications);
    } catch (Exception e) {
        logger.error("获取通知列表失败", e);
        return new Result(false, "获取通知列表失败:" + e.getMessage());
    }
}
位置 :src/main/java/com/scfs/controller/UserController.java 第296-321行
第四步:追踪到Service层
Controller调用notificationService.getUserNotifications(userId, 50),Service层实现:
java
// [1] 获取用户通知列表(数据流向:Service → Mapper)
@Override
public List<Notification> getUserNotifications(Long userId, Integer limit) {
    // [2] 参数验证
    if (userId == null) {
        return null;
    }
    // [3] 设置默认限制数量
    if (limit == null || limit <= 0) {
        limit = 50; // 默认50条
    }
    try {
        // [4] 调用Mapper查询通知列表(数据流向:Service → Mapper)
        return notificationMapper.findByUserId(userId, limit);
    } catch (Exception e) {
        e.printStackTrace();
        return null;
    }
}
位置 :src/main/java/com/scfs/service/impl/NotificationServiceImpl.java 第51-65行
第五步:追踪到Mapper层
Service调用notificationMapper.findByUserId(userId, limit),Mapper层实现:
java
// [1] 根据用户ID查询通知列表(数据流向:Mapper → 数据库)
@Select("SELECT notification_id AS notificationId, user_id AS userId, title, content, " +
        "type, is_read AS isRead, action_url AS actionUrl, create_time AS createTime " +
        "FROM notification " +
        "WHERE user_id = #{userId} " +
        "ORDER BY create_time DESC " +
        "LIMIT #{limit}")
List<Notification> findByUserId(@Param("userId") Long userId, @Param("limit") Integer limit);
位置 :src/main/java/com/scfs/mapper/NotificationMapper.java 第28-39行
执行顺序说明:
FROM notification:从通知表开始查询WHERE user_id = #{userId}:只查询当前用户的通知记录ORDER BY create_time DESC:按创建时间倒序排列(最新的在前)LIMIT #{limit}:限制返回的记录数(默认50条)- 每条通知都有一个
is_read字段,0表示未读,1表示已读 - 数据库执行SQL查询后,返回
List<Notification>(数据流向:数据库 → Mapper → Service)
第六步:数据返回流程
完整的数据返回路径:
- 数据库 → Mapper :数据库执行SELECT查询,获取通知记录(包含
is_read字段),返回给Mapper - Mapper → Service :Mapper将查询结果映射为
List<Notification>对象,返回给Service - Service → Controller:Service直接返回通知列表给Controller
- Controller处理 :
- Controller封装成
Result对象,success为true,data为通知列表 - 返回给前端(数据流向:Controller → 前端)
- Controller封装成
- 前端处理 :
- JavaScript接收到
Result对象 - 判断
response.success是否为true - 如果成功,调用
renderNotificationList(response.data, '')渲染通知列表 renderNotificationList()遍历通知列表数组,为每个通知项生成HTML- 根据
isRead字段判断是否已读:- 如果未读(
isRead === 0 || isRead === false),添加notification-unread样式类,显示"标记已读"按钮 - 如果已读(
isRead === 1 || isRead === true),添加notification-read样式类,不显示按钮
- 如果未读(
- 将HTML插入到页面的通知列表容器中
- 同时计算未读通知数量,更新导航栏的徽章
- JavaScript接收到
这样,用户点击"通知"标签页,系统就从数据库查询通知列表,根据is_read字段区分已读和未读,然后渲染到页面上,整个流程就完成了。
通知列表加载时序图
数据库 NotificationMapper NotificationService UserController JavaScript user-center.jsp 用户 数据库 NotificationMapper NotificationService UserController JavaScript user-center.jsp 用户 1 点击"通知"标签页 2 触发loadNotifications() 3 AJAX GET /user/getNotifications 4 从Session获取用户信息 5 调用notificationService.getUserNotifications(userId, 50) 6 调用notificationMapper.findByUserId() 7 执行SQL: SELECT * FROM notification WHERE user_id = ? ORDER BY create_time DESC LIMIT 50 8 返回通知记录列表(包含is_read字段) 9 返回List<Notification> 10 返回List<Notification> 11 封装成Result对象 12 返回Result对象 (success, message, data=通知列表) 13 判断response.success 14 调用renderNotificationList(response.data) 15 遍历通知列表,根据isRead字段判断已读/未读 16 为每个通知生成HTML (未读显示"标记已读"按钮) 17 将HTML插入到通知列表容器 18 计算未读通知数量 19 更新导航栏的未读通知数量徽章 20 显示通知列表(已读/未读区分)
为什么这样设计
为什么使用is_read字段区分已读和未读,而不是删除已读通知?
-
原因1:数据保留
- 保留已读通知可以让用户回顾历史通知
- 用户可以随时查看之前的通知内容
- 符合实际使用场景,用户可能需要查看历史通知
-
原因2:用户体验
- 已读和未读通知有不同的视觉样式,用户可以快速区分
- 未读通知显示"标记已读"按钮,用户可以手动标记
- 提升用户体验,让用户知道哪些通知还没有查看过
-
原因3:统计分析
- 可以统计用户查看了多少通知
- 可以分析哪些通知重要(查看率)
- 便于后续的功能优化
功能二:显示未读通知数量
功能说明
未读通知数量功能是在导航栏上显示用户有多少条未读通知,提醒用户及时查看。
抛出问题:导航栏上的未读通知数量是怎么获取的?系统是怎么知道用户有多少条未读通知的?
逐步追踪
第一步:找到用户操作的入口
用户在导航栏(navbar.jsp)上会看到一个通知图标,图标旁边会显示一个红色徽章,显示未读通知的数量。当页面加载时,会自动调用loadNotificationInfo函数加载未读数量。
第二步:追踪前端JavaScript处理
在navbar.jsp中,找到loadNotificationInfo函数:
javascript
// [1] 加载通知数量信息函数(数据流向:前端 → Controller)
function loadNotificationInfo() {
    // [2] 发送AJAX GET请求获取未读通知数量
    $.ajax({
        url: '${pageContext.request.contextPath}/user/getNotificationCount',
        type: 'GET',
        dataType: 'json',
        // [3] 请求成功回调:处理后端返回的结果(数据流向:Controller → 前端)
        success: function (response) {
            if (response.success && response.data !== undefined) {
                // [4] 解析未读通知数量
                var count = parseInt(response.data) || 0;
                // [5] 更新导航栏的通知徽章
                updateNotificationBadge(count);
            }
        },
        error: function () {
            // 静默失败,不显示错误
        }
    });
}

// [1] 更新通知徽章函数
function updateNotificationBadge(count) {
    var badge = $('#notificationBadge');
    // [2] 判断未读数量是否大于0
    if (count > 0) {
        // [3] 显示徽章,显示未读数量(最多显示99+)
        badge.text(count > 99 ? '99+' : count).show();
    } else {
        // [4] 隐藏徽章(没有未读通知)
        badge.hide();
    }
}
位置 :src/main/webapp/jsp/navbar.jsp 第169-195行
页面加载时自动调用 :在$(document).ready()中调用loadNotificationInfo(),页面加载时自动获取未读通知数量。
第三步:追踪到Controller层
根据请求URL/user/getNotificationCount,找到UserController的getNotificationCount方法:
java
// [1] 处理GET请求 /user/getNotificationCount(数据流向:前端 → Controller)
@RequestMapping("/getNotificationCount")
@ResponseBody
public Result getNotificationCount(HttpServletRequest request) {
    try {
        // [2] 从Session中获取当前登录用户(01-用户模块提供的USER_SESSION)
        HttpSession session = request.getSession();
        User user = (User) session.getAttribute("USER_SESSION");
        if (user == null) {
            // [3] 用户未登录,返回0
            return new Result(true, "未登录", 0);
        }
        Long userId = user.getUserId();
        if (userId == null) {
            return new Result(true, "未登录", 0);
        }

        // [4] 获取NotificationService服务
        NotificationService notificationService = org.springframework.web.context.support.WebApplicationContextUtils
                .getWebApplicationContext(request.getServletContext())
                .getBean(NotificationService.class);

        // [5] 调用Service层获取未读通知数量(数据流向:Controller → Service)
        int count = notificationService.getUnreadCount(userId);
        // [6] 封装成Result对象返回(数据流向:Controller → 前端)
        return new Result(true, "获取通知数量成功", count);
    } catch (Exception e) {
        logger.error("获取通知数量失败", e);
        return new Result(false, "获取通知数量失败:" + e.getMessage());
    }
}
位置 :src/main/java/com/scfs/controller/UserController.java 第326-351行
第四步:追踪到Service层
Controller调用notificationService.getUnreadCount(userId),Service层实现:
java
// [1] 获取未读通知数量(数据流向:Service → Mapper)
@Override
public int getUnreadCount(Long userId) {
    // [2] 参数验证
    if (userId == null) {
        return 0;
    }
    try {
        // [3] 调用Mapper统计未读通知数量(数据流向:Service → Mapper)
        return notificationMapper.countUnreadByUserId(userId);
    } catch (Exception e) {
        e.printStackTrace();
        return 0;
    }
}
位置 :src/main/java/com/scfs/service/impl/NotificationServiceImpl.java 第67-78行
第五步:追踪到Mapper层
Service调用notificationMapper.countUnreadByUserId(userId),Mapper层实现:
java
// [1] 统计未读通知数量(数据流向:Mapper → 数据库)
@Select("SELECT COUNT(*) FROM notification " +
        "WHERE user_id = #{userId} AND is_read = 0")
int countUnreadByUserId(@Param("userId") Long userId);
位置 :src/main/java/com/scfs/mapper/NotificationMapper.java 第44-45行
执行顺序说明:
FROM notification:从通知表开始查询WHERE user_id = #{userId}:只统计当前用户的通知AND is_read = 0:只统计未读通知(is_read = 0表示未读)COUNT(*):统计符合条件的记录数量- 数据库执行SQL查询后,返回未读通知数量(整数)(数据流向:数据库 → Mapper → Service)
第六步:数据返回流程
完整的数据返回路径:
- 数据库 → Mapper:数据库执行COUNT查询,统计未读通知数量,返回给Mapper
- Mapper → Service:Mapper返回未读通知数量(整数)给Service
- Service → Controller:Service直接返回未读通知数量给Controller
- Controller处理 :
- Controller封装成
Result对象,success为true,data为未读通知数量 - 返回给前端(数据流向:Controller → 前端)
- Controller封装成
- 前端处理 :
- JavaScript接收到
Result对象 - 判断
response.success是否为true - 如果成功,解析
response.data为整数(未读通知数量) - 调用
updateNotificationBadge(count)更新徽章显示 - 如果数量大于0,在导航栏的通知图标上显示红色徽章,显示数字(最多显示99+)
- 如果数量为0,隐藏徽章
- JavaScript接收到
这样,页面加载时,系统就从数据库统计未读通知数量,然后更新导航栏的徽章显示,整个流程就完成了。
未读通知数量获取时序图
数据库 NotificationMapper NotificationService UserController JavaScript navbar.jsp 用户 数据库 NotificationMapper NotificationService UserController JavaScript navbar.jsp 用户 alt 有未读通知 无未读通知 1 页面加载 2 触发$(document).ready() 3 调用loadNotificationInfo() 4 AJAX GET /user/getNotificationCount 5 从Session获取用户信息 6 调用notificationService.getUnreadCount() 7 调用notificationMapper.countUnreadByUserId() 8 执行SQL: SELECT COUNT(*) FROM notification WHERE user_id = ? AND is_read = 0 9 返回未读通知数量(整数) 10 返回未读通知数量 11 返回未读通知数量 12 封装成Result对象 13 返回Result对象 (success, message, data=数量) 14 判断response.success 15 调用updateNotificationBadge(count) 16 判断count > 0 17 显示徽章,显示数量(最多99+) 18 隐藏徽章 19 导航栏显示/隐藏未读通知数量徽章
为什么这样设计
为什么使用COUNT(*)统计未读数量,而不是查询所有通知再过滤?
-
原因1:性能优化
COUNT(*)是数据库层面的聚合操作,性能更高- 只返回一个整数,减少数据传输量
- 避免查询大量通知记录,减少内存占用
-
原因2:实时性
- 每次页面加载时都获取最新的未读数量
- 可以设置定时刷新(如每30秒),确保数量实时更新
- 提升用户体验,用户不需要刷新页面就能看到新通知
-
原因3:资源节约
- 只统计数量,不需要查询通知的详细内容
- 减少数据库查询开销
- 减少网络传输数据量

功能三:标记通知为已读
功能说明
标记通知为已读功能是用户可以手动标记某条通知为已读,也可以一键标记所有通知为已读。
抛出问题:用户点击"标记已读"按钮后,系统是怎么把通知的已读状态更新到数据库的?页面是怎么更新的?
逐步追踪
第一步:找到用户操作的入口
用户在通知列表中看到未读通知时,会看到一个"标记已读"按钮。点击这个按钮,会触发markAsRead函数。
第二步:追踪前端JavaScript处理
在user-center.jsp中,找到markAsRead函数:
javascript
// [1] 标记通知为已读函数(数据流向:前端 → Controller)
function markAsRead(notificationId) {
    // [2] 参数验证
    if (!notificationId) {
        alert('通知ID无效');
        return;
    }
    // [3] 发送AJAX POST请求标记通知为已读(使用URL参数方式传递,因为后端使用@RequestParam)
    $.ajax({
        url: '${pageContext.request.contextPath}/user/markNotificationRead?notificationId=' + notificationId,
        type: 'POST',
        dataType: 'json',
        // [4] 请求成功回调:处理后端返回的结果(数据流向:Controller → 前端)
        success: function (response) {
            if (response.success) {
                // [5] 不显示alert,静默更新
                // [6] 重新加载通知列表(通知状态会更新)
                loadNotifications();
                // [7] 更新导航栏的通知数量(未读数量会减少1)
                if (typeof loadNotificationInfo === 'function') {
                    loadNotificationInfo();
                }
            } else {
                alert('标记已读失败:' + (response.message || '未知错误'));
            }
        },
        error: function (xhr, status, error) {
            console.error('标记已读失败:', error, xhr);
            if (xhr.status === 400) {
                alert('参数错误,请刷新页面重试');
            } else if (xhr.status === 401) {
                alert('登录已过期,请重新登录');
            } else {
                alert('标记已读失败,请稍后重试');
            }
        }
    });
}
位置 :src/main/webapp/jsp/user-center.jsp 第775-809行
第三步:追踪到Controller层
根据请求URL/user/markNotificationRead,找到UserController的markNotificationRead方法:
java
// [1] 处理POST请求 /user/markNotificationRead(数据流向:前端 → Controller)
@RequestMapping("/markNotificationRead")
@ResponseBody
public Result markNotificationRead(@RequestParam Long notificationId, HttpServletRequest request) {
    try {
        // [2] 从Session中获取当前登录用户(01-用户模块提供的USER_SESSION)
        HttpSession session = request.getSession();
        User user = (User) session.getAttribute("USER_SESSION");
        if (user == null) {
            return new Result(false, 401, "请先登录", null);
        }
        Long userId = user.getUserId();
        if (userId == null) {
            return new Result(false, 401, "请先登录", null);
        }

        // [3] 参数验证
        if (notificationId == null) {
            return new Result(false, "通知ID不能为空");
        }

        // [4] 获取NotificationService服务
        NotificationService notificationService = org.springframework.web.context.support.WebApplicationContextUtils
                .getWebApplicationContext(request.getServletContext())
                .getBean(NotificationService.class);

        // [5] 调用Service层标记通知为已读(数据流向:Controller → Service)
        // 传入通知ID和用户ID,确保只能标记自己的通知
        boolean success = notificationService.markAsRead(notificationId, userId);
        if (success) {
            // [6] 封装成Result对象返回(数据流向:Controller → 前端)
            return new Result(true, "标记已读成功");
        } else {
            return new Result(false, "标记已读失败");
        }
    } catch (Exception e) {
        logger.error("标记通知已读失败", e);
        return new Result(false, "标记通知已读失败:" + e.getMessage());
    }
}
位置 :src/main/java/com/scfs/controller/UserController.java 第356-389行
第四步:追踪到Service层
Controller调用notificationService.markAsRead(notificationId, userId),Service层实现:
java
// [1] 标记通知为已读(数据流向:Service → Mapper)
@Override
@Transactional  // [2] 使用事务,确保数据一致性
public boolean markAsRead(Long notificationId, Long userId) {
    // [3] 参数验证
    if (notificationId == null || userId == null) {
        return false;
    }
    try {
        // [4] 调用Mapper更新数据库(数据流向:Service → Mapper)
        // 传入通知ID和用户ID,确保只能标记自己的通知
        return notificationMapper.markAsRead(notificationId, userId) > 0;
    } catch (Exception e) {
        e.printStackTrace();
        return false;
    }
}
位置 :src/main/java/com/scfs/service/impl/NotificationServiceImpl.java 第80-92行
第五步:追踪到Mapper层
Service调用notificationMapper.markAsRead(notificationId, userId),Mapper层实现:
java
// [1] 更新通知为已读状态(数据流向:Mapper → 数据库)
@Update("UPDATE notification SET is_read = 1 " +
        "WHERE notification_id = #{notificationId} AND user_id = #{userId}")
int markAsRead(@Param("notificationId") Long notificationId, @Param("userId") Long userId);
位置 :src/main/java/com/scfs/mapper/NotificationMapper.java 第50-51行
执行顺序说明:
UPDATE notification:更新通知表SET is_read = 1:将is_read字段设置为1(已读)WHERE notification_id = #{notificationId}:只更新指定的通知AND user_id = #{userId}:同时检查用户ID,确保用户只能标记自己的通知(安全性)- 数据库执行SQL更新后,返回受影响的行数(通常为1)(数据流向:数据库 → Mapper → Service)
第六步:数据返回流程
完整的数据返回路径:
- 数据库 → Mapper :数据库执行UPDATE语句,将
is_read字段更新为1,返回受影响的行数(通常为1)给Mapper - Mapper → Service:Mapper返回受影响的行数给Service
- Service → Controller :Service判断行数大于0,返回
true给Controller - Controller处理 :
- Controller封装成
Result对象,success为true,message为"标记已读成功" - 返回给前端(数据流向:Controller → 前端)
- Controller封装成
- 前端处理 :
- JavaScript接收到
Result对象 - 判断
response.success是否为true - 如果成功,调用
loadNotifications()重新加载通知列表 - 重新加载后,该通知的
isRead字段变为1,renderNotificationList()会:- 移除
notification-unread样式类,添加notification-read样式类 - 隐藏"标记已读"按钮
- 移除
- 同时调用
loadNotificationInfo()更新导航栏的通知数量 - 未读通知数量会减少1,如果变为0,徽章会隐藏
- JavaScript接收到
这样,用户点击"标记已读"按钮,系统就把通知的已读状态更新到数据库,然后页面重新加载,按钮消失,未读数量减少,整个流程就完成了。
标记通知为已读时序图
数据库 NotificationMapper NotificationService UserController JavaScript user-center.jsp 用户 数据库 NotificationMapper NotificationService UserController JavaScript user-center.jsp 用户 1 点击"标记已读"按钮 2 触发markAsRead(notificationId) 3 参数验证 4 AJAX POST /user/markNotificationRead ?notificationId=xxx 5 从Session获取用户信息 6 参数验证 7 调用notificationService.markAsRead() (notificationId, userId) 8 开始事务 9 调用notificationMapper.markAsRead() 10 执行SQL: UPDATE notification SET is_read = 1 WHERE notification_id = ? AND user_id = ? 11 返回受影响行数(1) 12 返回受影响行数 13 提交事务 14 返回true 15 封装成Result对象 16 返回Result对象 (success, message="标记已读成功") 17 判断response.success 18 调用loadNotifications()重新加载通知列表 19 AJAX GET /user/getNotifications 20 返回更新后的通知列表 21 重新渲染通知列表 (该通知的"标记已读"按钮消失) 22 调用loadNotificationInfo()更新导航栏数量 23 AJAX GET /user/getNotificationCount 24 返回更新后的未读数量(减少1) 25 更新导航栏的未读通知数量徽章 26 页面更新完成 (通知已标记为已读,未读数量减少)
为什么这样设计
为什么在UPDATE语句中同时检查notification_id和user_id?
-
原因1:安全性
- 防止用户标记其他用户的通知
- 确保用户只能操作自己的通知
- 避免越权操作,保护数据安全
-
原因2:数据一致性
- 确保更新的通知确实属于当前用户
- 避免误操作导致的数据错误
- 保证数据的准确性和一致性
-
原因3:错误处理
- 如果通知ID不存在或不属于当前用户,UPDATE不会影响任何行
- Service层可以通过返回的行数判断操作是否成功
- 便于错误处理和日志记录
功能四:系统自动创建通知
功能说明
系统自动创建通知功能是系统在特定事件(如审核提交、审核完成)时自动创建通知,插入到数据库,通知用户。
抛出问题:当用户提交一个待审核的菜品时,系统是怎么给管理员发送审核通知的?当管理员审核通过或驳回时,系统是怎么给用户发送审核结果通知的?
逐步追踪
第一步:找到系统自动创建通知的场景
当用户提交一个待审核的菜品时,系统会调用NotificationService.sendAuditNotificationToAdmins方法给所有管理员发送审核通知。
当管理员审核通过或驳回时,系统会调用NotificationService.createNotification方法给提交用户发送审核结果通知。
第二步:追踪发送审核通知给管理员
当用户提交待审核内容时,系统会调用NotificationService.sendAuditNotificationToAdmins方法。在NotificationServiceImpl中,找到该方法:
java
// [1] 发送审核通知给所有管理员(数据流向:Service → Mapper)
@Override
public void sendAuditNotificationToAdmins(String entityType, Long entityId, String entityName) {
    try {
        // [2] 查询所有管理员用户(数据流向:Service → UserMapper)
        List<User> admins = userMapper.findAllAdmins();
        if (admins == null || admins.isEmpty()) {
            return;  // 没有管理员,直接返回
        }

        // [3] 构建通知内容
        String title = "待审核通知";
        String content = String.format("有新的%s「%s」等待审核",
            "DISH".equals(entityType) ? "菜品" : "STORE".equals(entityType) ? "店铺" : "内容",
            entityName);
        String actionUrl = "/jsp/admin.jsp";  // 点击通知后跳转到管理员后台

        // [4] 为每个管理员创建通知
        for (User admin : admins) {
            // [5] 创建通知对象
            Notification notification = new Notification(admin.getUserId(), title, content, "AUDIT_PENDING");
            notification.setActionUrl(actionUrl);
            // [6] 调用createNotification方法保存通知(数据流向:Service → Mapper)
            createNotification(notification);
        }
        logger.info("已发送审核通知给{}个管理员: entityType={}, entityId={}",
            new Object[]{String.valueOf(admins.size()), entityType, String.valueOf(entityId)});
    } catch (Exception e) {
        logger.warn("发送审核通知给管理员失败", e);
    }
}
位置 :src/main/java/com/scfs/service/impl/NotificationServiceImpl.java 第108-132行
第三步:追踪创建通知
createNotification方法在NotificationServiceImpl中实现:
java
// [1] 创建通知(数据流向:Service → Mapper)
@Override
@Transactional  // [2] 使用事务,确保数据一致性
public boolean createNotification(Notification notification) {
    // [3] 参数验证
    if (notification == null || notification.getUserId() == null) {
        return false;
    }
    try {
        // [4] 设置默认未读状态
        if (notification.getIsRead() == null) {
            notification.setIsRead(0); // 默认未读
        }
        // [5] 调用Mapper插入通知到数据库(数据流向:Service → Mapper)
        return notificationMapper.insert(notification) > 0;
    } catch (Exception e) {
        e.printStackTrace();
        return false;
    }
}
位置 :src/main/java/com/scfs/service/impl/NotificationServiceImpl.java 第34-49行
第四步:追踪到Mapper层
Service调用notificationMapper.insert(notification),Mapper层实现:
java
// [1] 插入通知到数据库(数据流向:Mapper → 数据库)
@Insert("INSERT INTO notification (user_id, title, content, type, is_read, action_url, create_time) " +
        "VALUES (#{userId}, #{title}, #{content}, #{type}, #{isRead}, #{actionUrl}, NOW())")
@Options(useGeneratedKeys = true, keyProperty = "notificationId", keyColumn = "notification_id")
int insert(Notification notification);
位置 :src/main/java/com/scfs/mapper/NotificationMapper.java 第20-23行
执行顺序说明:
INSERT INTO notification:插入通知到通知表(user_id, title, content, type, is_read, action_url, create_time):指定要插入的字段VALUES (#{userId}, #{title}, #{content}, #{type}, #{isRead}, #{actionUrl}, NOW()):插入的值,create_time使用NOW()自动设置当前时间@Options(useGeneratedKeys = true, keyProperty = "notificationId", keyColumn = "notification_id"):自动生成通知ID并回填到对象中- 数据库执行SQL插入后,返回受影响的行数(通常为1)(数据流向:数据库 → Mapper → Service)
第五步:追踪审核结果通知
当管理员审核通过或驳回时,系统会调用NotificationService.createNotification方法给提交用户发送审核结果通知。在AuditServiceImpl中:
java
// [1] 发送审核通过通知给上传者(数据流向:AuditService → NotificationService)
try {
    // [2] 获取提交者ID
    Long uploadUserId = getUploadUserId(entityType, entityId);
    if (uploadUserId != null) {
        // [3] 获取实体名称
        String entityName = getEntityName(entityType, entityId);
        // [4] 构建通知内容
        String title = "审核通过通知";
        String content = String.format("您提交的%s「%s」已通过审核",
            getEntityTypeName(entityType), entityName);
        String actionUrl = getEntityDetailUrl(entityType, entityId);

        // [5] 创建通知对象
        Notification notification = new Notification(uploadUserId, title, content, "AUDIT_PASS");
        notification.setActionUrl(actionUrl);
        // [6] 调用NotificationService创建通知(数据流向:AuditService → NotificationService)
        notificationService.createNotification(notification);
        logger.info("已发送审核通过通知给用户: userId={}, entityType={}, entityId={}",
                new Object[] { uploadUserId, entityType, entityId });
    }
} catch (Exception e) {
    logger.warn("发送审核通过通知失败", e);
}
位置 :src/main/java/com/scfs/service/impl/AuditServiceImpl.java 第653-670行
第六步:数据返回流程
完整的通知创建流程:
-
触发场景:
- 用户提交待审核内容时,系统调用
sendAuditNotificationToAdmins()给所有管理员发送通知 - 管理员审核通过/驳回时,系统调用
createNotification()给提交用户发送审核结果通知
- 用户提交待审核内容时,系统调用
-
通知创建流程:
- Service层创建
Notification对象,设置用户ID、标题、内容、类型、动作URL等 - 如果
isRead字段为空,设置为0(未读) - Service调用Mapper层插入通知到数据库
- Service层创建
-
数据库操作:
- Mapper执行INSERT语句,将通知数据插入到
notification表 - 数据库自动生成通知ID,设置创建时间为当前时间
- 返回受影响的行数(通常为1)
- Mapper执行INSERT语句,将通知数据插入到
-
通知生效:
- 通知创建成功后,用户/管理员登录系统时,导航栏会显示未读通知数量
- 用户/管理员点击通知图标,可以看到新通知
- 点击通知可以跳转到相应的页面(如管理员后台、实体详情页)
这样,系统在特定事件发生时,自动创建通知并插入数据库,用户和管理员可以及时收到通知,整个流程就完成了。
系统自动创建通知时序图
数据库 NotificationMapper UserMapper NotificationService AuditService 用户/管理员 数据库 NotificationMapper UserMapper NotificationService AuditService 用户/管理员 场景1:用户提交待审核内容 loop 为每个管理员创建通知 场景2:管理员审核通过/驳回 用户/管理员查看通知 1 用户提交待审核内容 2 调用sendAuditNotificationToAdmins() 3 查询所有管理员 4 SELECT * FROM user WHERE user_role = 'admin' 5 返回管理员列表 6 返回List<User> 7 创建Notification对象 (title, content, type=AUDIT_PENDING) 8 调用createNotification() 9 调用notificationMapper.insert() 10 INSERT INTO notification (user_id, title, content, type, is_read=0, action_url, create_time) 11 返回受影响行数(1) 12 返回受影响行数 13 通知创建完成 14 管理员审核通过/驳回 15 获取提交者ID和实体信息 16 调用createNotification() (type=AUDIT_PASS或AUDIT_REJECT) 17 创建Notification对象 (设置is_read=0) 18 调用notificationMapper.insert() 19 INSERT INTO notification (user_id, title, content, type, is_read=0, action_url, create_time) 20 返回受影响行数(1) 21 返回受影响行数 22 通知创建完成 23 登录系统,导航栏显示未读通知数量 24 点击通知图标,查看通知列表 25 点击通知,跳转到相应页面
为什么这样设计
为什么通知创建时默认设置为未读(is_read=0)?
-
原因1:提醒功能
- 未读通知可以提醒用户有新的消息需要查看
- 导航栏显示未读数量,用户可以快速知道有多少新通知
- 提升用户体验,确保用户不会错过重要通知
-
原因2:状态管理
- 已读/未读状态可以区分通知是否被查看过
- 用户可以手动标记为已读,管理自己的通知状态
- 便于后续的统计和分析
-
原因3:数据完整性
- 新创建的通知应该默认为未读状态
- 符合实际使用场景,用户还没有查看过新通知
- 保证数据的一致性和准确性
为什么审核通知要发送给所有管理员?
-
原因1:及时处理
- 多个管理员可以同时收到通知,提高审核效率
- 如果某个管理员不在线,其他管理员可以处理
- 确保待审核内容能够及时被处理
-
原因2:负载均衡
- 多个管理员可以分担审核工作
- 避免单个管理员工作压力过大
- 提高系统的可用性和响应速度
-
原因3:冗余保障
- 即使某个管理员无法处理,其他管理员也可以处理
- 提高系统的可靠性和容错能力
通知类型说明
系统支持以下通知类型:
AUDIT_PENDING:待审核通知(发送给管理员)AUDIT_PASS:审核通过通知(发送给提交用户)AUDIT_REJECT:审核驳回通知(发送给提交用户)- 其他自定义类型
通知创建时会自动设置 is_read = 0(未读状态),用户查看后可以标记为已读。
总结
通知功能模块的完整流程:
-
通知列表:
- 用户点击"通知"标签页,前端调用
loadNotifications函数 - 发送GET请求到
/user/getNotifications接口 - 后端Controller获取用户ID,调用Service层
- Service层调用Mapper层查询数据库,按创建时间倒序排列,返回最近50条
- Mapper层从
notification表查询指定用户的通知,根据is_read字段区分已读和未读 - 后端返回通知列表,前端根据
isRead字段渲染不同的样式,未读通知显示"标记已读"按钮
- 用户点击"通知"标签页,前端调用
-
未读通知数量:
- 页面加载时,导航栏自动调用
loadNotificationInfo函数 - 发送GET请求到
/user/getNotificationCount接口 - 后端Controller获取用户ID,调用Service层
- Service层调用Mapper层统计未读数量
- Mapper层使用
COUNT(*)统计is_read = 0的通知数量 - 后端返回未读数量,前端更新导航栏的徽章显示
- 页面加载时,导航栏自动调用
-
标记通知为已读:
- 用户点击"标记已读"按钮,前端调用
markAsRead函数 - 发送POST请求到
/user/markNotificationRead接口,携带通知ID - 后端Controller获取用户ID,调用Service层,确保只能标记自己的通知
- Service层调用Mapper层更新数据库
- Mapper层将
is_read字段更新为1 - 后端返回结果,前端重新加载通知列表和导航栏的通知数量
- 用户点击"标记已读"按钮,前端调用
-
系统自动创建通知:
- 当用户提交待审核内容时,系统调用
sendAuditNotificationToAdmins方法给所有管理员发送通知 - 当管理员审核完成时,系统调用
createNotification方法给提交用户发送审核结果通知 - Service层创建通知对象,设置默认未读状态,调用Mapper层插入数据库
- Mapper层执行SQL插入语句,将通知数据保存到
notification表 - 通知创建成功后,用户和管理员可以及时收到通知
- 当用户提交待审核内容时,系统调用
学习建议:
- 启动项目,提交一个待审核的菜品,观察管理员收到的审核通知
- 以管理员身份审核通过/驳回,观察用户收到的审核结果通知
- 在用户中心查看通知列表,测试标记已读功能
- 观察导航栏的未读通知数量变化
- 理解通知表的字段结构:
notification_id,user_id,title,content,type,is_read,action_url,create_time - 理解通知类型的作用:不同类型的通知可以有不同的处理逻辑和显示样式
注意:本模块的详细代码追踪已在上述内容中补充完整,采用从用户操作视角逐步追踪数据流向的方式,便于理解整个流程。