版面区域检测任务的核心是对输入的文档图像进行内容解析和区域划分。通过识别图像中的不同元素(如文字、图表、图像、公式、段落、摘要、参考文献等),将其归类为预定义的类别,并确定这些区域在文档中的位置。
一、模型信息
使用模型:PP-DocLayout-L
版面检测模型,包含23个常见的类别:文档标题、段落标题、文本、页码、摘要、目录、参考文献、脚注、页眉、页脚、算法、公式、公式编号、图像、图表标题、表格、表格标题、印章、图表标题、图表、页眉图像、页脚图像、侧栏文本
类别数:23
类别标签:
paragraph_title
image
text
number
abstract
content
figure_title
formula
table
table_title
reference
doc_title
footnote
header
algorithm
footer
seal
chart_title
chart
formula_number
header_image
footer_image
aside_text
二、标注工具Labelme
2.1 Labelme标注工具介绍
Labelme 是一个 python 语言编写,带有图形界面的图像标注软件。可用于图像分类,目标检测,图像分割等任务,在目标检测的标注任务中,标签存储为 JSON 文件。
2.2 Labelme 安装
为避免环境冲突,建议在 conda 环境下安装,可以参考:Miniconda安装与使用-CSDN博客
bash
conda create -n labelme python=3.10
conda activate labelme
pip install pyqt5
pip install labelme
2.3 Labelme 标注过程
2.3.1 准备待标注数据
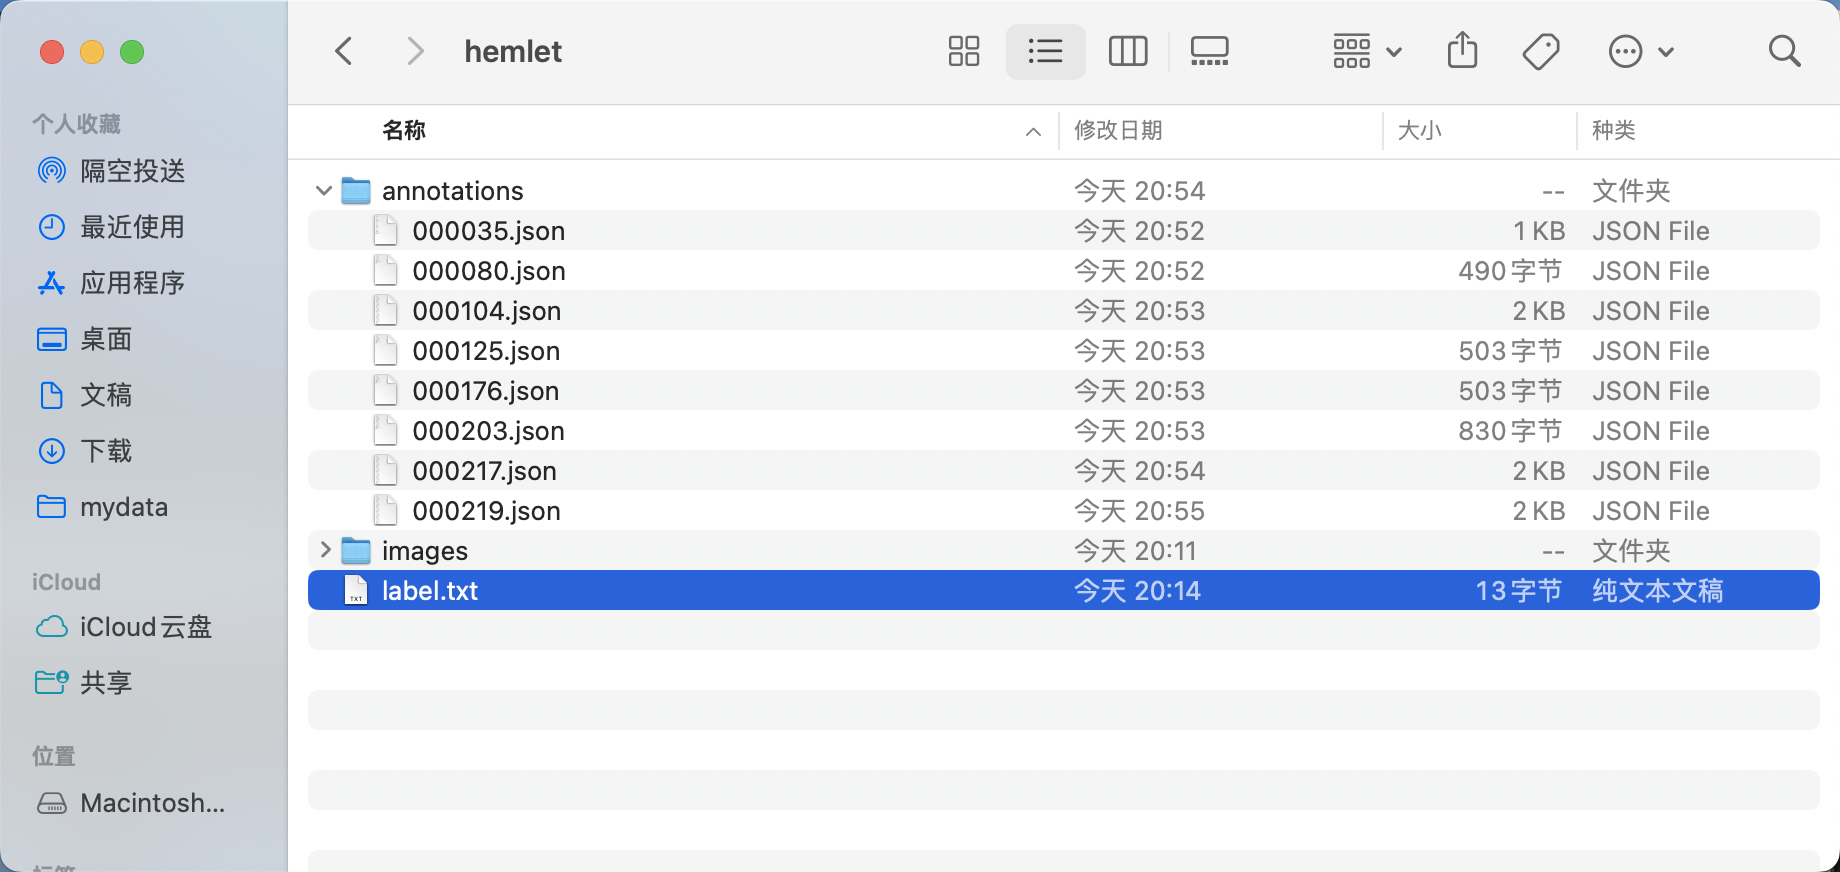
- 创建数据集根目录,如
hemlet。 - 在
hemlet中创建images目录(必须为images目录),并将待标注图片存储在images目录下,如下图所示:

* 在 hemlet 文件夹中创建待标注数据集的类别标签文件 label.txt,并在 label.txt 中按行写入待标注数据集的类别。安全帽检测数据集的**label.txt**为例,如下图所示:

2.3.2 启动 Labelme
终端进入到待标注数据集根目录,并启动 Labelme 标注工具:
bash
cd path/to/hemlet
labelme images --labels label.txt --nodata --autosave --output annotations
* flags 为图像创建分类标签,传入标签路径。
* nodata 停止将图像数据存储到 JSON文件。
* autosave 自动存储。
* output 标签文件存储路径。
2.3.3 开始图片标注
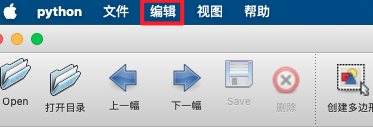
- 启动
Labelme后如图所示:
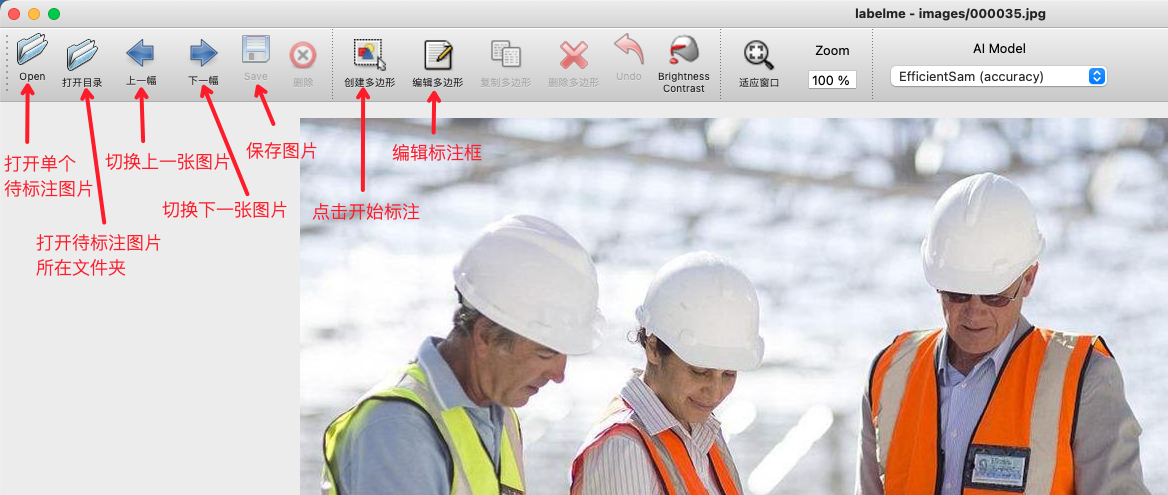
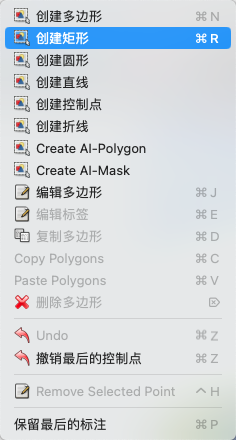
* 点击"编辑"选择标注类型
* 选择创建矩形框
* 在图片上拖动十字框选目标区域

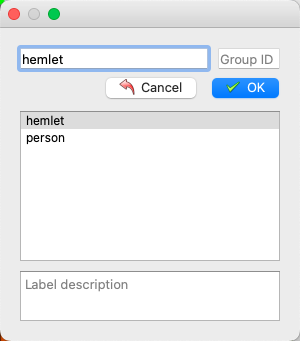
* 再次点击选择目标框类别
* 标注好后点击存储。(若在启动 Labelme 时未指定 output 字段,会在第一次存储时提示选择存储路径,若指定 autosave 字段使用自动保存,则无需点击存储按钮)。

* 然后点击 Next Image 进行下一张图片的标注。

* 最终标注好的标签文件如图所示:
* 调整目录得到安全帽检测标准Labelme格式数据集
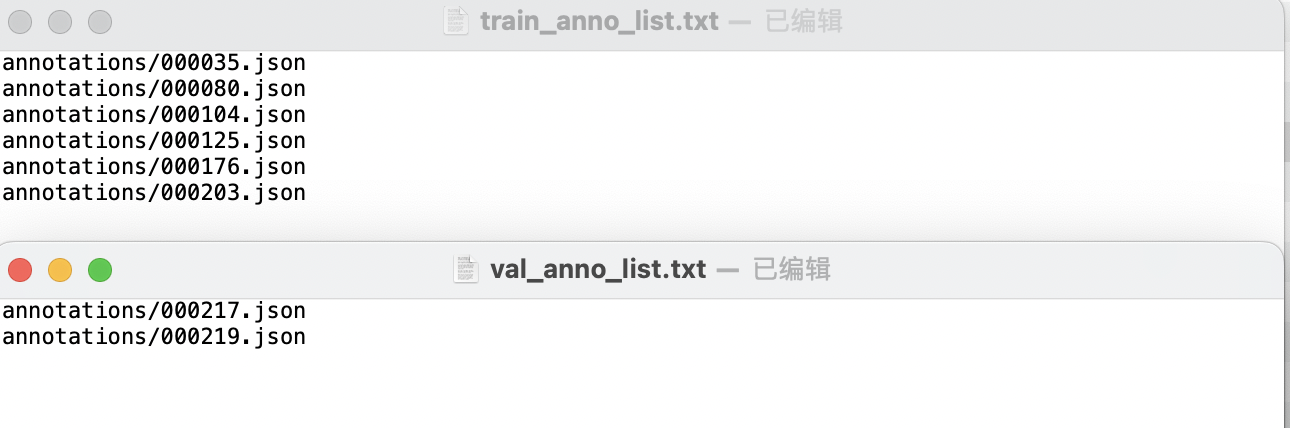
* 在数据集根目录创建train_anno_list.txt和val_anno_list.txt两个文本文件,并将annotations目录下的全部json文件路径按一定比例分别写入train_anno_list.txt和val_anno_list.txt,也可全部写入到train_anno_list.txt同时创建一个空的val_anno_list.txt文件,使用数据划分功能进行重新划分。
数据分割代码:
python
import os
import random


def split_annotations(annotations_dir, train_txt, val_txt, split_ratio=4):
    """
    将annotations目录下的JSON文件按照指定比例随机分配到训练集和验证集

    Args:
        annotations_dir (str): 标注文件目录
        train_txt (str): 训练集txt文件路径
        val_txt (str): 验证集txt文件路径
        split_ratio (int): 训练集与验证集的比例,默认为4:1
    """
    # 获取annotations目录下所有JSON文件
    json_files = []
    for file in os.listdir(annotations_dir):
        if file.endswith(".json"):
            json_files.append(file)

    # 随机打乱文件列表
    random.shuffle(json_files)

    # 计算分割点
    total_files = len(json_files)
    train_size = int(total_files * split_ratio / (split_ratio + 1))

    # 分割文件列表
    train_files = json_files[:train_size]
    val_files = json_files[train_size:]

    # 构建文件路径(格式:annotations/xxx.json)
    train_paths = [f"annotations/{file}" for file in train_files]
    val_paths = [f"annotations/{file}" for file in val_files]

    # 写入训练集txt文件
    with open(train_txt, "w", encoding="utf-8") as f:
        for path in train_paths:
            f.write(path + "\n")

    # 写入验证集txt文件
    with open(val_txt, "w", encoding="utf-8") as f:
        for path in val_paths:
            f.write(path + "\n")

    print(f"分割完成!")
    print(f"训练集文件数: {len(train_files)}")
    print(f"验证集文件数: {len(val_files)}")
    print(f"训练集已写入: {train_txt}")
    print(f"验证集已写入: {val_txt}")


if __name__ == "__main__":
    # 配置路径
    annotations_dir = r"E:\xxx\annotations"
    train_txt = (
        r"E:\xxx\train_anno_list.txt"
    )
    val_txt = r"E:\xxx\val_anno_list.txt"

    # 执行分割
split_annotations(annotations_dir, train_txt, val_txt)train_anno_list.txt和val_anno_list.txt的具体填写格式如图所示:
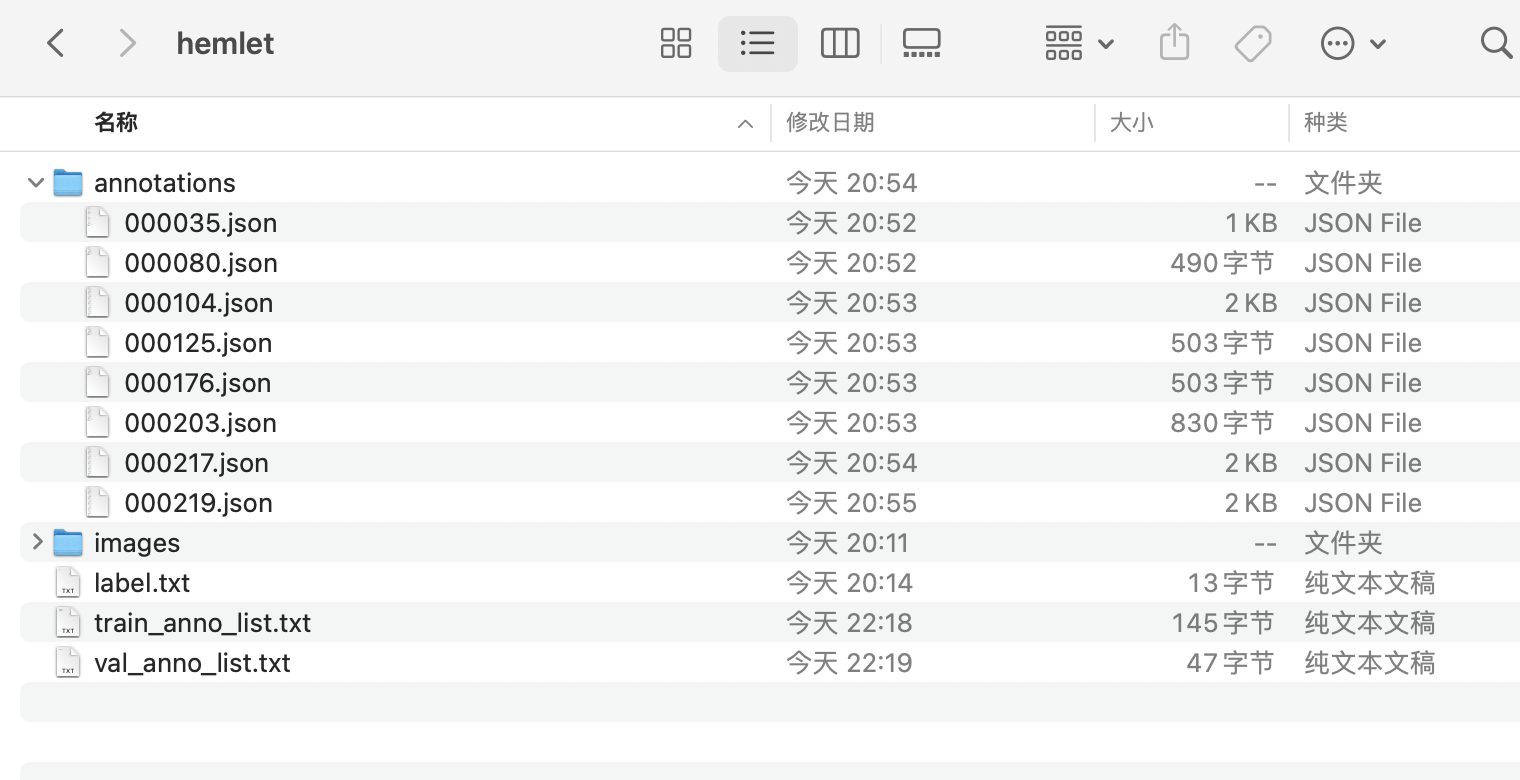
* 经过整理得到的最终目录结构如下:
2.3.4 格式转换
使用Labelme标注完成后,需要将数据格式转换为coco格式。下面给出了按照上述教程使用Lableme标注完成的数据和进行数据格式转换的代码示例:
bash
cd /path/to/paddlex
wget https://paddle-model-ecology.bj.bcebos.com/paddlex/data/det_labelme_examples.tar -P ./dataset
tar -xf ./dataset/det_labelme_examples.tar -C ./dataset/

python main.py -c paddlex/configs/object_detection/PicoDet-L.yaml \
    -o Global.mode=check_dataset \
    -o Global.dataset_dir=./dataset/det_labelme_examples \
    -o CheckDataset.convert.enable=True \
-o CheckDataset.convert.src_dataset_type=LabelMe转换完会在annotations 文件夹下生成instance_train.json和instance_val.json文件
文件大体如下:
{
"images": [
{
"id": 1,
"file_name": "test.png",
"width": 1191,
"height": 1685
}
],
"categories": [
{
"name": "header",
"id": 1
},
{
"name": "doc_title",
"id": 2
},
{
"name": "text",
"id": 3
},
{
"name": "seal",
"id": 4
},
{
"name": "paragraph_title",
"id": 5
},
{
"name": "table",
"id": 6
},
{
"name": "figure_title",
"id": 7
},
{
"name": "vision_footnote",
"id": 8
},
{
"name": "number",
"id": 9
},
{
"name": "image",
"id": 10
},
{
"name": "footer",
"id": 11
},
{
"name": "aside_text",
"id": 12
}
],
"annotations": [
{
"image_id": 1,
"bbox": [
197.0,
46.0,
390.0,
153.0
],
"category_id": 1,
"id": 1,
"iscrowd": 0,
"area": 59670.0,
"ignore": 0
},
{
"image_id": 1,
"bbox": [
317.0,
255.0,
579.0,
83.0
],
"category_id": 2,
"id": 2,
"iscrowd": 0,
"area": 48057.0,
"ignore": 0
},
{
"image_id": 1,
"bbox": [
488.0,
377.0,
239.0,
42.0
],
"category_id": 3,
"id": 3,
"iscrowd": 0,
"area": 10038.0,
"ignore": 0
},
{
"image_id": 1,
"bbox": [
445.0,
500.0,
319.0,
32.0
],
"category_id": 3,
"id": 4,
"iscrowd": 0,
"area": 10208.0,
"ignore": 0
},
{
"image_id": 1,
"bbox": [
172.0,
624.0,
880.0,
303.0
],
"category_id": 3,
"id": 5,
"iscrowd": 0,
"area": 266640.0,
"ignore": 0
},
{
"image_id": 1,
"bbox": [
332.0,
1317.0,
541.0,
214.0
],
"category_id": 4,
"id": 6,
"iscrowd": 0,
"area": 115774.0,
"ignore": 0
}
]
}