基于 Vue 和 Node.js 的自动化发布服务脚本实现方案,该方案主要依赖 node-ssh(用于服务器 SSH 连接)和 archiver(用于文件压缩打包)两大核心模块。通过与 package.json 中配置的多环境部署脚本协同工作,在 deploy 目录下构建完整的发布流程。以下将详细介绍脚本开发、环境配置及使用说明,确保完全符合您的项目需求。
一、环境准备:依赖安装
请在 Vue 项目根目录执行以下命令安装必要依赖(包括 rimraf 清理工具,该依赖已在您的 package.json 中配置,建议一并确认安装状态):
js
# 核心依赖:ssh连接、压缩打包
npm i node-ssh archiver -D
# 清理依赖(若未安装)
npm i rimraf -D
# ssh
npm i node-ssh -D
二、项目目录结构
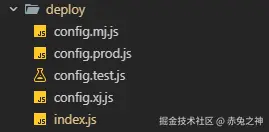
在 Vue 项目根目录新建 deploy 文件夹,最终目录结构如下(新增文件已标注):
三、编写 deploy 文件夹下的核心文件
deploy/index.js :部署入口文件 核心逻辑:解析命令行的环境参数 → 执行 Vue 打包 → 压缩 dist 目录为 zip 包 → SSH 连接服务器 → 上传压缩包并解压 → 清理临时文件 → 完成部署,全程自动化,无需手动操作:
/**
 * 自动化部署脚本
 * @description 实现项目打包、压缩、上传、备份、解压等自动化部署功能
 */
const { NodeSSH } = require("node-ssh");
const archiver = require("archiver");
const fs = require("fs");
const path = require("path");
const { exec } = require("child_process");
const util = require("util");
const execPromise = util.promisify(exec);

/**
 * 获取环境配置
 * @returns {Object} 配置对象
 */
function getConfig() {
  // 从命令行参数获取环境,例如: node deploy/index.js --env=test
  const args = process.argv.slice(2);
  let env = "prod"; // 默认生产环境

  // 解析命令行参数
  for (const arg of args) {
    if (arg.startsWith("--env=")) {
      env = arg.split("=")[1];
    }
  }

  // 如果有环境变量 DEPLOY_ENV,优先使用
  if (process.env.DEPLOY_ENV) {
    env = process.env.DEPLOY_ENV;
  }

  // 处理 production 别名
  if (env === "production") {
    env = "prod";
  }

  // 直接根据环境名称构建配置文件路径
  const configFile = `./config.${env}.js`;
  const configPath = path.join(__dirname, configFile);

  // 检查配置文件是否存在
  if (!fs.existsSync(configPath)) {
    throw new Error(
      `配置文件不存在: ${configFile}\n` +
        `请创建 deploy/config.${env}.js 文件,或使用已有的环境配置。\n` +
        `可用环境示例: test, prod, xj, mj`
    );
  }

  console.log(`\x1b[36m[INFO]\x1b[0m 使用配置环境: ${env}`);
  console.log(`\x1b[36m[INFO]\x1b[0m 配置文件: ${configFile}`);

  return require(configFile);
}

const config = getConfig();

const ssh = new NodeSSH();

/**
 * 输出带颜色的日志
 */
const log = {
  info: (msg) => console.log(`\x1b[36m[INFO]\x1b[0m ${msg}`),
  success: (msg) => console.log(`\x1b[32m[SUCCESS]\x1b[0m ${msg}`),
  error: (msg) => console.log(`\x1b[31m[ERROR]\x1b[0m ${msg}`),
  warning: (msg) => console.log(`\x1b[33m[WARNING]\x1b[0m ${msg}`),
};

/**
 * 步骤1: 执行项目打包
 * @returns {Promise<void>}
 */
async function buildProject() {
  log.info("开始执行项目打包...");
  try {
    const { stdout, stderr } = await execPromise(config.build.command);
    if (stderr && !stderr.includes("warning")) {
      log.warning(`构建警告: ${stderr}`);
    }
    log.success("项目打包完成!");
    return true;
  } catch (error) {
    log.error(`项目打包失败: ${error.message}`);
    throw error;
  }
}

/**
 * 步骤2: 压缩dist文件夹为zip
 * @returns {Promise<string>} 返回zip文件路径
 */
async function compressDistToZip() {
  log.info("开始压缩dist文件夹...");

  const { localDistPath, localZipName } = config.deploy;
  const zipPath = path.join(process.cwd(), localZipName);

  // 如果已存在zip文件,先删除
  if (fs.existsSync(zipPath)) {
    fs.unlinkSync(zipPath);
  }

  // 检查 dist 目录是否存在
  if (!fs.existsSync(localDistPath)) {
    throw new Error(`dist目录不存在: ${localDistPath}`);
  }

  return new Promise((resolve, reject) => {
    const output = fs.createWriteStream(zipPath);
    const archive = archiver("zip", {
      zlib: { level: 9 }, // 压缩级别
    });

    let fileCount = 0;

    output.on("close", () => {
      const size = (archive.pointer() / 1024 / 1024).toFixed(2);
      log.success(`压缩完成! 文件大小: ${size} MB, 文件数: ${fileCount}`);
      log.info(`压缩包路径: ${zipPath}`);
      resolve(zipPath);
    });

    archive.on("error", (err) => {
      log.error(`压缩失败: ${err.message}`);
      reject(err);
    });

    archive.on("warning", (err) => {
      if (err.code === "ENOENT") {
        log.warning(`压缩警告: ${err.message}`);
      } else {
        reject(err);
      }
    });

    // 监听文件添加事件
    archive.on("entry", (entry) => {
      fileCount++;
    });

    archive.pipe(output);

    // 将dist文件夹内容添加到压缩包根目录
    // false 参数表示不包含 dist 文件夹本身,直接将其内容放在 zip 根目录
    archive.directory(localDistPath, false);

    archive.finalize();
  });
}

/**
 * 步骤3: 连接SSH服务器
 * @returns {Promise<void>}
 */
async function connectSSH() {
  log.info("正在连接SSH服务器...");
  try {
    await ssh.connect({
      host: config.server.host,
      port: config.server.port,
      username: config.server.username,
      password: config.server.password,
    });
    log.success(`成功连接到服务器: ${config.server.host}`);
  } catch (error) {
    log.error(`SSH连接失败: ${error.message}`);
    throw error;
  }
}

/**
 * 步骤4: 备份服务器上的dist目录
 * @returns {Promise<void>}
 */
async function backupRemoteDist() {
  log.info("正在备份服务器上的dist目录...");

  const { remoteDir, remoteDist, backupDir } = config.deploy;
  const remoteDistPath = `${remoteDir}/${remoteDist}`;

  // 生成时间戳:格式如 20260204_153045
  const now = new Date();
  const year = now.getFullYear();
  const month = String(now.getMonth() + 1).padStart(2, "0");
  const day = String(now.getDate()).padStart(2, "0");
  const hours = String(now.getHours()).padStart(2, "0");
  const minutes = String(now.getMinutes()).padStart(2, "0");
  const seconds = String(now.getSeconds()).padStart(2, "0");
  const timestamp = `${year}${month}${day}_${hours}${minutes}${seconds}`;

  const backupPath = `${backupDir}/${remoteDist}_backup_${timestamp}`;
  log.info(`备份时间: ${year}-${month}-${day} ${hours}:${minutes}:${seconds}`);

  try {
    // 检查dist目录是否存在
    const checkCmd = `[ -d "${remoteDistPath}" ] && echo "exists" || echo "not_exists"`;
    const checkResult = await ssh.execCommand(checkCmd);

    if (checkResult.stdout.trim() === "exists") {
      // 创建备份目录
      await ssh.execCommand(`mkdir -p ${backupDir}`);

      // 备份dist目录
      const backupCmd = `cp -r ${remoteDistPath} ${backupPath}`;
      await ssh.execCommand(backupCmd);
      log.success(`备份完成: ${backupPath}`);
    } else {
      log.warning("服务器上不存在dist目录,跳过备份");
    }
  } catch (error) {
    log.error(`备份失败: ${error.message}`);
    throw error;
  }
}

/**
 * 步骤5: 上传zip文件到服务器(已合并到步骤6)
 * @deprecated 此步骤已合并
 */

/**
 * 步骤6: 上传zip文件到服务器
 * @param {string} zipPath 本地zip文件路径
 * @returns {Promise<void>}
 */
async function uploadZipToServer(zipPath) {
  log.info("正在上传dist.zip到服务器...");

  const { remoteDir, localZipName } = config.deploy;
  const remoteZipPath = `${remoteDir}/${localZipName}`;

  try {
    // 获取文件大小
    const stats = fs.statSync(zipPath);
    const fileSize = stats.size;
    const fileSizeMB = (fileSize / 1024 / 1024).toFixed(2);
    log.info(`文件大小: ${fileSizeMB} MB`);

    // 上传文件并显示进度(提高并发数加速上传)
    await ssh.putFile(zipPath, remoteZipPath, null, {
      concurrency: 20, // 提高并发数,加速上传
      chunkSize: 32768, // 32KB 块大小
      step: (transferred, chunk, total) => {
        const percent = ((transferred / total) * 100).toFixed(2);
        const transferredMB = (transferred / 1024 / 1024).toFixed(2);
        const totalMB = (total / 1024 / 1024).toFixed(2);
        const speed = (chunk / 1024 / 1024).toFixed(2);
        // 使用\r回到行首,实现进度条效果
        process.stdout.write(
          `\r\x1b[36m[INFO]\x1b[0m 上传进度: ${percent}% (${transferredMB}MB / ${totalMB}MB) 速度: ${speed}MB/s`
        );
      },
    });

    // 上传完成后换行
    console.log("");
    log.success(`上传完成: ${remoteZipPath}`);
  } catch (error) {
    console.log(""); // 确保错误信息另起一行
    log.error(`上传失败: ${error.message}`);
    throw error;
  }
}

/**
 * 步骤7: 在服务器上解压zip文件并替换dist
 * @returns {Promise<void>}
 */
async function unzipAndReplaceDist() {
  log.info("正在解压dist.zip并准备替换...");

  const { remoteDir, localZipName, remoteDist } = config.deploy;
  const remoteZipPath = `${remoteDir}/${localZipName}`;
  const remoteDistPath = `${remoteDir}/${remoteDist}`;

  try {
    // 检查zip文件是否存在
    const checkZipCmd = `[ -f "${remoteZipPath}" ] && echo "exists" || echo "not_exists"`;
    const checkZipResult = await ssh.execCommand(checkZipCmd);

    if (checkZipResult.stdout.trim() !== "exists") {
      throw new Error("服务器上的zip文件不存在");
    }

    log.info("正在检查zip文件内容...");
    const listZipCmd = `unzip -l ${remoteZipPath} | head -20`;
    const listResult = await ssh.execCommand(listZipCmd);
    log.info("zip文件内容预览:");
    console.log(listResult.stdout);

    // 创建临时目录并解压
    const tempDir = `${remoteDir}/temp_dist_${Date.now()}`;
    log.info(`解压到临时目录: ${tempDir}`);

    // 解压命令:使用 -o 覆盖已存在文件
    const unzipCmd = `mkdir -p ${tempDir} && unzip -o -q ${remoteZipPath} -d ${tempDir}`;
    const unzipResult = await ssh.execCommand(unzipCmd);

    if (unzipResult.code !== 0) {
      log.error(`解压错误: ${unzipResult.stderr}`);
      // 清理临时目录
      await ssh.execCommand(`rm -rf ${tempDir}`);
      throw new Error(`解压失败: ${unzipResult.stderr}`);
    }

    // 检查解压后的内容和文件数量
    const checkContentCmd = `ls -lah ${tempDir} | head -20 && echo "--- 文件统计 ---" && find ${tempDir} -type f | wc -l`;
    const contentResult = await ssh.execCommand(checkContentCmd);
    log.info("解压后的内容:");
    console.log(contentResult.stdout);

    // 删除旧dist并用临时目录替换(使用原子操作)
    log.info(`正在替换目标目录: ${remoteDistPath}`);

    // 方案:先删除旧的,再重命名新的(更可靠)
    const deleteOldCmd = `rm -rf ${remoteDistPath}`;
    const deleteResult = await ssh.execCommand(deleteOldCmd);

    if (deleteResult.code !== 0 && deleteResult.stderr) {
      log.warning(`删除旧目录警告: ${deleteResult.stderr}`);
    }

    const moveCmd = `mv ${tempDir} ${remoteDistPath}`;
    const moveResult = await ssh.execCommand(moveCmd);

    if (moveResult.code !== 0) {
      log.error(`移动失败: ${moveResult.stderr}`);
      throw new Error(`替换文件失败: ${moveResult.stderr}`);
    }

    log.success("替换完成");

    // 验证最终结果 - 显示详细信息
    log.info("正在验证部署结果...");
    const verifyCmd = `
      echo "=== 目录内容 ===" &&
      ls -lah ${remoteDistPath} | head -20 &&
      echo "" &&
      echo "=== 文件统计 ===" &&
      echo "总文件数: $(find ${remoteDistPath} -type f | wc -l)" &&
      echo "总目录数: $(find ${remoteDistPath} -type d | wc -l)" &&
      echo "总大小: $(du -sh ${remoteDistPath} | cut -f1)" &&
      echo "" &&
      echo "=== index.html 信息 ===" &&
      ls -lh ${remoteDistPath}/index.html 2>/dev/null || echo "index.html 不存在"
    `;
    const verifyResult = await ssh.execCommand(verifyCmd);
    console.log(verifyResult.stdout);

    if (verifyResult.code !== 0) {
      log.warning("验证过程中出现警告,但部署已完成");
    }

    // 删除zip文件
    await ssh.execCommand(`rm -f ${remoteZipPath}`);
    log.success("清理临时文件完成");
  } catch (error) {
    log.error(`操作失败: ${error.message}`);
    // 清理可能的临时目录
    await ssh.execCommand(`rm -rf ${remoteDir}/temp_dist_*`);
    throw error;
  }
}

/**
 * 步骤8: 清理本地zip文件
 * @param {string} zipPath 本地zip文件路径
 * @returns {void}
 */
function cleanupLocalZip(zipPath) {
  log.info("正在清理本地临时文件...");
  try {
    if (fs.existsSync(zipPath)) {
      fs.unlinkSync(zipPath);
      log.success("本地临时文件清理完成");
    }
  } catch (error) {
    log.warning(`清理本地文件失败: ${error.message}`);
  }
}

/**
 * 主部署流程
 */
async function deploy() {
  const startTime = Date.now();
  console.log("\n");
  log.info("========================================");
  log.info("          开始自动化部署流程");
  log.info("========================================");
  log.info(`目标服务器: ${config.server.host}`);
  log.info(`部署目录: ${config.deploy.remoteDir}/${config.deploy.remoteDist}`);
  log.info(`构建模式: ${config.build.mode}`);
  log.info("========================================\n");

  let zipPath = "";

  try {
    // 1. 打包项目
    await buildProject();
    console.log("\n");

    // 2. 压缩dist
    zipPath = await compressDistToZip();
    console.log("\n");

    // 3. 连接SSH
    await connectSSH();
    console.log("\n");

    // 4. 备份服务器dist
    await backupRemoteDist();
    console.log("\n");

    // 5. 上传zip
    await uploadZipToServer(zipPath);
    console.log("\n");

    // 6. 解压zip并替换dist
    await unzipAndReplaceDist();
    console.log("\n");

    // 8. 清理本地zip
    cleanupLocalZip(zipPath);
    console.log("\n");

    const duration = ((Date.now() - startTime) / 1000).toFixed(2);
    log.info("========================================");
    log.success(`       部署成功! 耗时: ${duration}秒`);
    log.info("========================================\n");
  } catch (error) {
    log.error(`\n部署失败: ${error.message}\n`);
    // 清理本地文件
    if (zipPath) {
      cleanupLocalZip(zipPath);
    }
    process.exit(1);
  } finally {
    // 断开SSH连接
    if (ssh.isConnected()) {
      ssh.dispose();
      log.info("SSH连接已关闭");
    }
  }
}

// 执行部署
if (require.main === module) {
  deploy();
}

module.exports = { deploy };- deploy/config.XX.js :多环境服务器配置文件
集中管理 prod/xj/mj/test 四个环境的SSH 连接信息、服务器部署目录,后续修改环境配置仅需改此文件,按需替换你的实际配置:
/**
 * 测试环境部署配置
 * @description 测试服务器配置
 */
module.exports = {
  // 服务器配置
  server: {
    host: "1.1.1.1",
    port: 22,
    username: "admin",
    password: "123",
  },

  // 部署配置
  deploy: {
    localDistPath: "./dist",
    localZipName: "dist.zip",
    remoteDir: "/home/web",
    remoteDist: "dist",
    backupDir: "/home/web/backup",
  },

  // 构建配置
  build: {
    command: "npm run build:test",
    mode: "test",
  },
};
四、package.json 脚本说明(你的原有配置,无需修改)
你的 package.json 中已配置好多环境启动、打包、部署脚本,对应关系如下,直接执行即可:
"scripts":
  // 本地启动脚本(按环境区分,无需修改)
  "serve": "vue-cli-service serve",
  "dev": "vue-cli-service serve",
  "test": "vue-cli-service serve --mode test",
  "start": "npm run dev",
  // 核心部署脚本:执行后自动打包+发布到对应服务器
  "deploy:prod": "node deploy/index.js --env=prod",
  "deploy:xj": "node deploy/index.js --env=xj",
  "deploy:mj": "node deploy/index.js --env=mj",
  "deploy:test": "node deploy/index.js --env=test",
}
五、使用说明
修改配置:先修改 deploy/config.js 中四个环境的服务器 IP、账号、密码 、部署目录,确保信息正确;
执行部署:在项目根目录执行对应环境的部署命令,全程自动化,示例:
#
npm run deploy:prod
# 部署到测试环境
npm run deploy:test
部署流程:执行命令后,脚本会自动完成「环境打包 → 压缩 dist → SSH 连服务器 → 上传解压 → 清理临时文件」,全程控制台输出彩色日志,成功 / 失败一目了然。
六、关键注意事项
服务器准备:
安装unzip工具(CentOS执行yum install unzip -y,Ubuntu执行apt install unzip -y) 确保部署目录具有读写权限(推荐使用root账户或授权对应账号) 打包配置: 默认test环境执行npm run build:test 其他环境执行npm run build 日志与错误处理:
任一环节失败时自动终止流程,并输出红色错误提示 自动清理临时文件并断开SSH连接,确保无资源残留 部署说明:
安装核心依赖:npm i node-ssh archiver rimraf -D 主要配置文件: deploy/config.xx.js(多环境服务器配置) deploy/index.js(自动化部署逻辑) 执行命令:npm run deploy:xxx,自动完成「打包→压缩→上传→解压」全流程服务器准备: 确保服务器安装了 unzip 命令(用于解压,若未安装执行 yum install unzip -y(CentOS)或 apt install unzip -y(Ubuntu)); 服务器部署目录需有读写权限(建议用 root 或赋予对应账号权限); 打包匹配:脚本中默认 test 环境执行 npm run build:test,其他环境执行 npm run build,若 xj/mj 需单独打包,可在 buildProject 函数中新增判断; 日志输出:脚本使用 stdio: "inherit" 让打包、解压的日志直接输出到控制台,方便排查问题; 错误处理:任意步骤失败都会终止脚本,并输出红色错误信息,同时清理临时文件、断开 SSH 连接,避免资源残留。
七、总结
核心依赖为 node-ssh(SSH 连接)和 archiver(压缩),需先执行 npm i node-ssh archiver rimraf -D 安装; 核心文件是 deploy/config.js(多环境服务器配置)和 deploy/index.js(自动化部署逻辑),无需修改原有 package.json; 部署命令直接用你原有配置的 npm run deploy:xxx,全程自动化完成「打包→压缩→上传→解压」,无需手动操作服务器;