文章目录
- 前言
- 一、两级缓存的封装
-
- [1.1 什么是本地缓存?](#1.1 什么是本地缓存?)
- [1.2 为什么要引入本地缓存?](#1.2 为什么要引入本地缓存?)
- [1.3 在 common 工程下创建 common-cache 子工程](#1.3 在 common 工程下创建 common-cache 子工程)
- [1.4 添加依赖](#1.4 添加依赖)
- [1.5 创建包目录及 utils 包和 config 包](#1.5 创建包目录及 utils 包和 config 包)
- [1.6 在 utils 包下创建 CacheUtil 类](#1.6 在 utils 包下创建 CacheUtil 类)
- [1.7 在 config 包下创建 CaffeineConfig 类](#1.7 在 config 包下创建 CaffeineConfig 类)
- [1.8 在 resources 下创建自动配置](#1.8 在 resources 下创建自动配置)
- [二、配置 nacos](#二、配置 nacos)
- 三、验证
-
- [3.1 引入依赖](#3.1 引入依赖)
- [3.2 在模板服务里创建 service 包](#3.2 在模板服务里创建 service 包)
- [3.3 在 service 包下创建 IClothService接口和实现类](#3.3 在 service 包下创建 IClothService接口和实现类)
- [3.4 在 CacheUtil 上打上断点](#3.4 在 CacheUtil 上打上断点)
- [3.5 进行测试](#3.5 进行测试)
- END
鸡汤:
● 跑得慢不怕,怕的是站在原地计算风雨。你迈出的每一步,都在改写未来的坐标。
● 竹子用四年扎根三厘米,第五年却以每天30厘米的速度破土------所有沉默的积累,终将惊艳时光。
前言
前面封装了 redis,现在来封装其他常用中间件。
一、两级缓存的封装
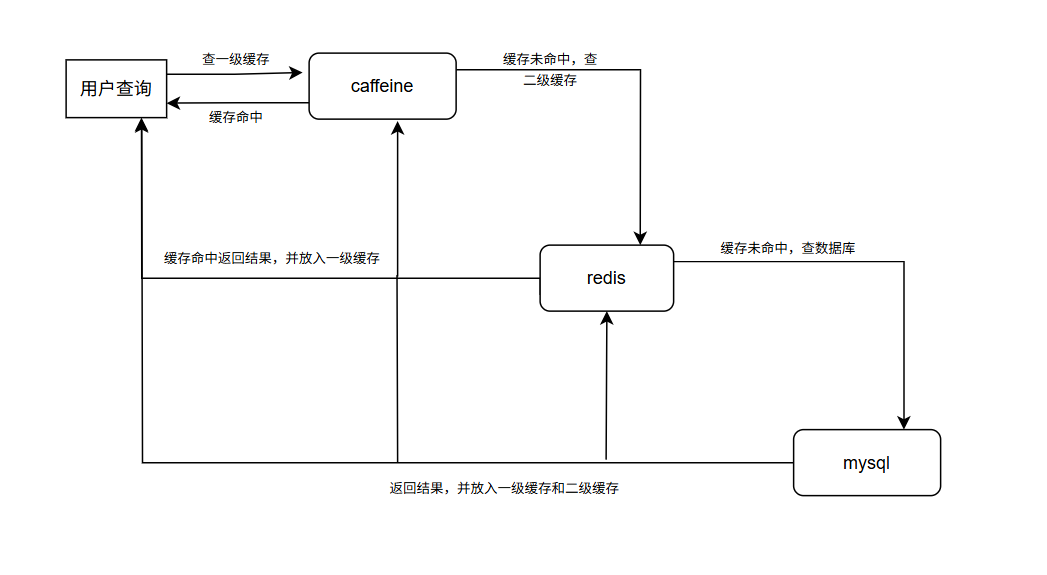
两级缓存就是搭建两级缓存数据查询方案。(本地缓存 + Redis)
画个简图:
1.1 什么是本地缓存?
对于微服务项目而言,本地缓存是一种将数据存储在应用程序所在服务器的内存中的缓存机制。
1.2 为什么要引入本地缓存?
● 提高性能:减少服务器与后端数据存储机制交互、网络开销和延迟,从而加快数据获取。
● 降低存储系统压力:减轻后端存储系统的负载压力,防止因频繁请求导致其性能下降,保证其稳定高效运行。
● 提高可用性:在网络出现短暂故障或不稳定时,可依靠本地缓存数据持续为客户端提供服务,增强系统可用性。
● 提升安全性、健壮性:有助于保护后端数据源,避免大量并发请求冲击,提升数据安全性和系统整体的健壮性。
● 适应复杂业务场景:两级缓存可依据复杂业务场景中的具体情况,更灵活地配置缓存进一步提高性能。
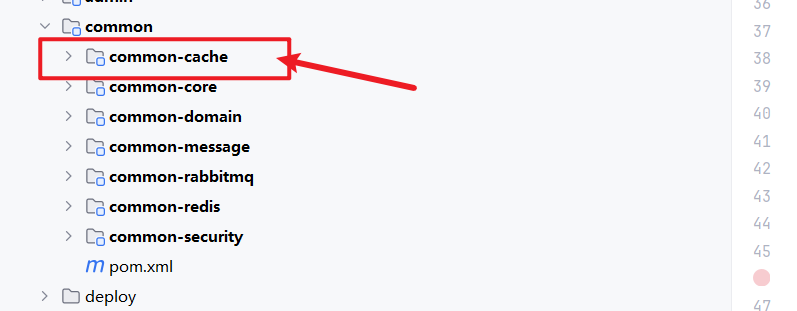
1.3 在 common 工程下创建 common-cache 子工程
我们将 cache 单独创建一个工程出来,就是为了达到 ''可插拔''的效果,开发者如果需要就可以引入 common-cache 的依赖,而开发者如果无需要,只要不添加依赖就可以。
注:
二级缓存的依赖,包含 redis 的依赖,如果引入 common-cache 就不用引入common-redis 了
1.4 添加依赖
这里的本地缓存的方案我们选择 Caffeine
pom.xml:
java
<?xml version="1.0" encoding="UTF-8"?>
<project xmlns="http://maven.apache.org/POM/4.0.0"
xmlns:xsi="http://www.w3.org/2001/XMLSchema-instance"
xsi:schemaLocation="http://maven.apache.org/POM/4.0.0 http://maven.apache.org/xsd/maven-4.0.0.xsd">
<modelVersion>4.0.0</modelVersion>
<parent>
<groupId>com.my</groupId>
<artifactId>common</artifactId>
<version>1.0-SNAPSHOT</version>
</parent>
<groupId>com.my</groupId>
<artifactId>common-cache</artifactId>
<version>1.0-SNAPSHOT</version>
<properties>
<maven.compiler.source>17</maven.compiler.source>
<maven.compiler.target>17</maven.compiler.target>
<project.build.sourceEncoding>UTF-8</project.build.sourceEncoding>
</properties>
<dependencies>
<dependency>
<groupId>com.my</groupId>
<artifactId>common-redis</artifactId>
<version>1.0-SNAPSHOT</version>
</dependency>
<dependency>
<groupId>com.github.ben-manes.caffeine</groupId>
<artifactId>caffeine</artifactId>
</dependency>
<dependency>
<groupId>io.prometheus</groupId>
<artifactId>simpleclient</artifactId>
</dependency>
</dependencies>
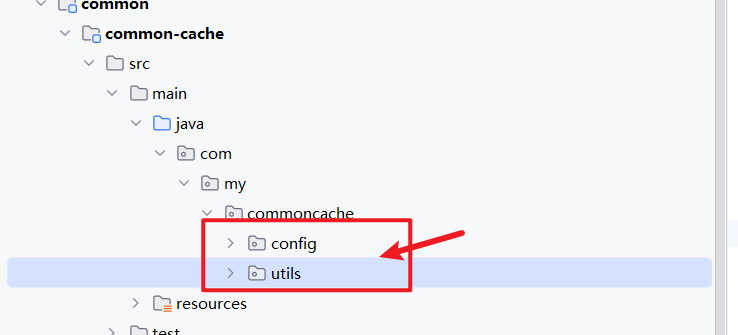
</project>1.5 创建包目录及 utils 包和 config 包
1.6 在 utils 包下创建 CacheUtil 类
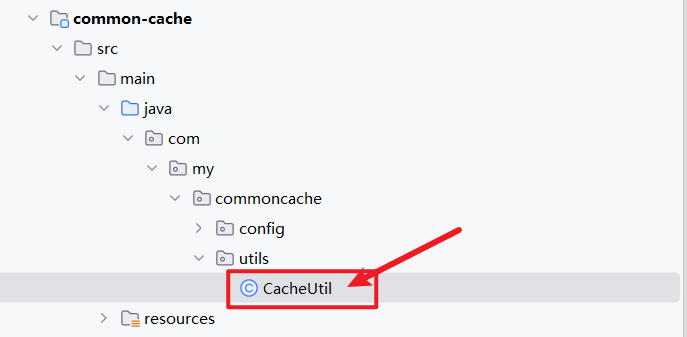
CacheUtil:
java
package com.my.commoncache.utils;
import com.fasterxml.jackson.core.type.TypeReference;
import com.github.benmanes.caffeine.cache.Cache;
import com.my.commonredis.service.RedisService;
import java.util.concurrent.TimeUnit;
public class CacheUtil {
/**
* 读取二级缓存
*
* @param redisService redis服务
* @param key 缓存key
* @param valueTypeRef 模板类型
* @param caffeineCache 本地缓存服务
* @return 缓存信息
* @param <T> 缓存类型
*/
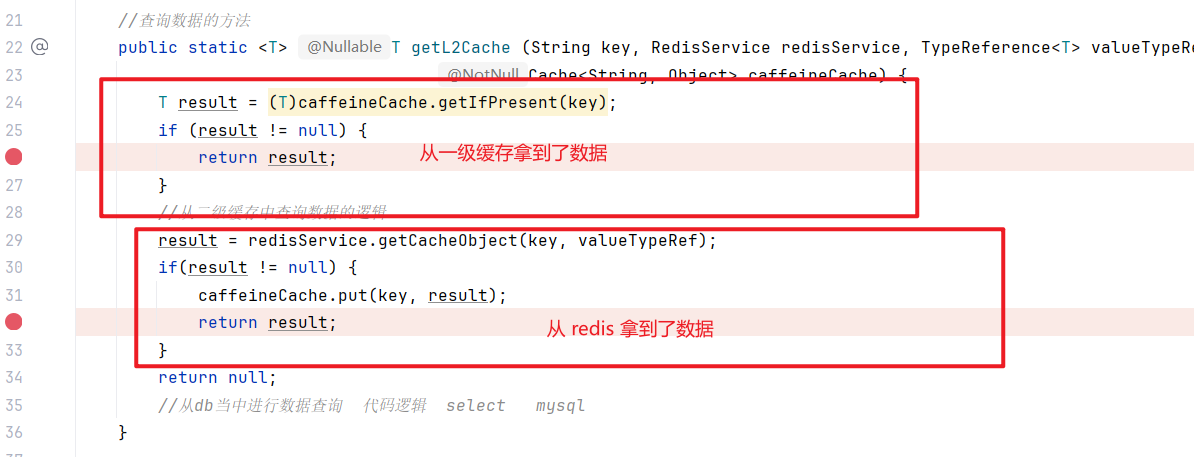
//查询数据的方法
public static <T> T getL2Cache (String key, RedisService redisService, TypeReference<T> valueTypeRef,
Cache<String, Object> caffeineCache) {
T result = (T)caffeineCache.getIfPresent(key);
if (result != null) {
return result;
}
//从二级缓存中查询数据的逻辑
result = redisService.getCacheObject(key, valueTypeRef);
if(result != null) {
caffeineCache.put(key, result);
return result;
}
return null;
//从db当中进行数据查询 代码逻辑 select mysql
}
//存储数据的方法
//存储到一级缓存的方法
public static <T> void setL2Cache (String key, T value, Cache<String, Object> cache) {
cache.put(key, value);
}
/**
* 设置二级缓存
*
* @param redisService redis服务
* @param key 缓存key
* @param value 缓存对象值
* @param caffeineCache 本地缓存信息
* @param timeout 超时时间
* @param timeUnit 超时单位
* @param <T> 对象类型
*/
//存储到二级缓存和一级缓存的方法
public static <T> void setL2Cache (String key, T value, RedisService redisService,
Cache<String, Object> caffeineCache, long timeout, TimeUnit timeUnit) {
redisService.setCacheObject(key, value, timeout, timeUnit);
caffeineCache.put(key, value);
}
}1.7 在 config 包下创建 CaffeineConfig 类
因为 想要操作 Caffeine 实现本地缓存,需要使用 Caffeine 提供的 Cache<String, Object> ,但是 Caffeine 默认不给提供,只能自己在配置类里自己创建一个 Cache<String, Object>的 Bean 交给 Spring 来管理,还可以将本地缓存的相关参数交给 nacos 来集中管理
CaffeineConfig:
java
package com.my.commoncache.config;
import com.github.benmanes.caffeine.cache.Cache;
import com.github.benmanes.caffeine.cache.Caffeine;
import org.springframework.beans.factory.annotation.Value;
import org.springframework.context.annotation.Bean;
import org.springframework.context.annotation.Configuration;
import java.util.concurrent.TimeUnit;
/**
* 本地缓存配置
*/
@Configuration
public class CaffeineConfig {
/**
* 初始容量
*/
@Value("${caffeine.build.initial-capacity}")
private Integer initialCapacity;
/**
* 最大容量
*/
@Value("${caffeine.build.maximum-size}")
private Long maximumSize;
/**
* 过期时间
*/
@Value("${caffeine.build.expire}")
private Long expire;
/**
* 构造本地缓存对象
*
* @return 本地缓存对象
*/
@Bean
public Cache<String, Object> caffeine() {
return Caffeine.newBuilder()
.initialCapacity(initialCapacity)
.maximumSize(maximumSize)
.expireAfterWrite(expire, TimeUnit.SECONDS)
.build();
}
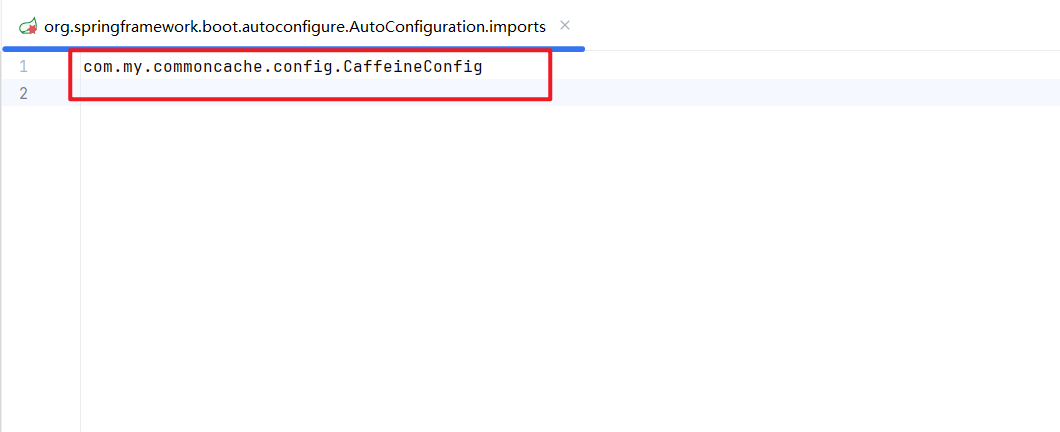
}1.8 在 resources 下创建自动配置
再次写一遍
自动配置目录 : META.spring.org.springframework.boot.autoconfigure.AutoConfiguration.imports
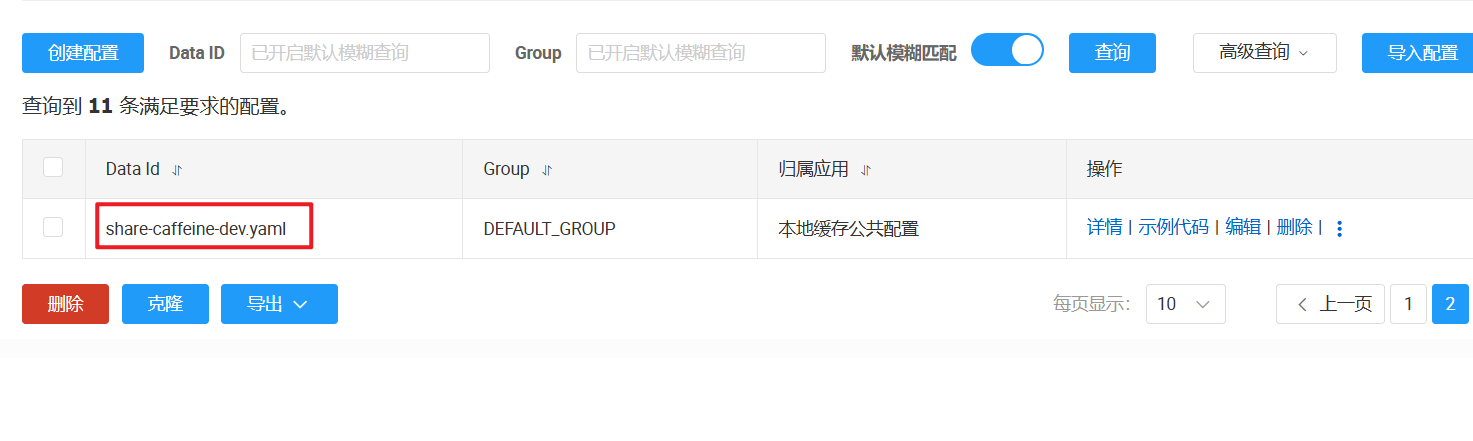
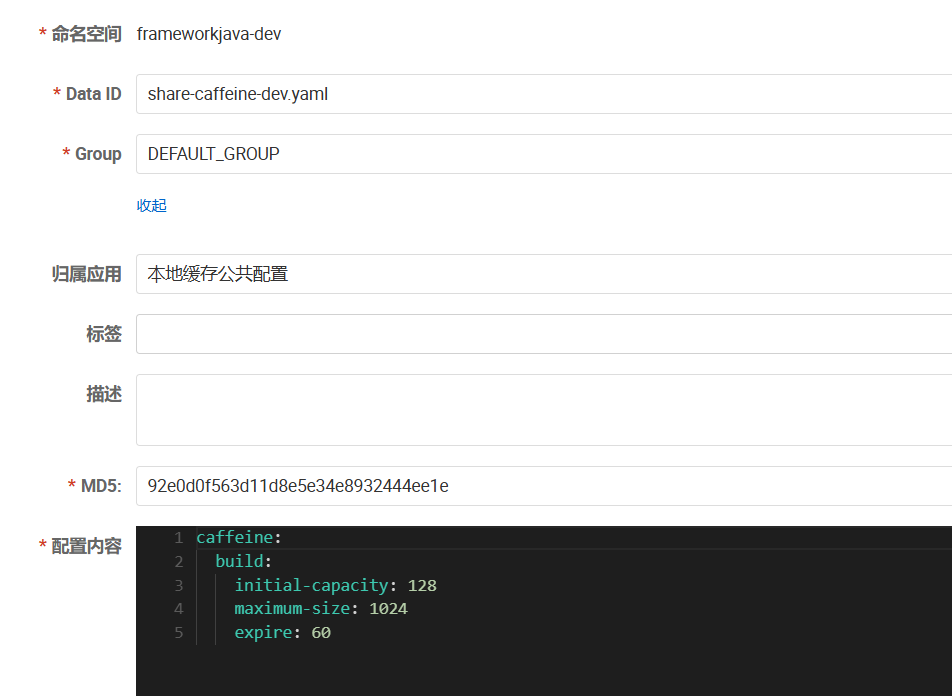
二、配置 nacos
因为我们将 Caffeine 的 Cache<String, Object> 创建的基本参数都放在了 nacos 里,来进行统一管理
三、验证
继续拿 mstemplate 模版服务来进行验证,将 common-cache 的依赖引入模板服务,搞一个 controller 层,拿apifox验证一下
3.1 引入依赖

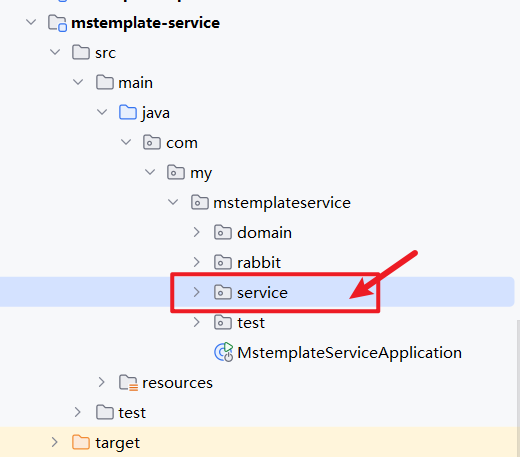
3.2 在模板服务里创建 service 包
3.3 在 service 包下创建 IClothService接口和实现类
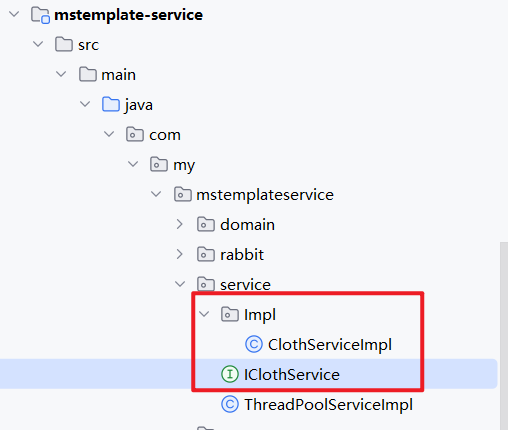
ClothServiceImpl:
java
package com.my.mstemplateservice.service.Impl;

import com.fasterxml.jackson.core.type.TypeReference;
import com.github.benmanes.caffeine.cache.Cache;
import com.my.commoncache.utils.CacheUtil;
import com.my.commonredis.service.RedisService;
import com.my.mstemplateservice.service.IClothService;
import org.springframework.beans.factory.annotation.Autowired;
import org.springframework.stereotype.Service;

import java.util.concurrent.TimeUnit;

@Service
public class ClothServiceImpl implements IClothService {

    @Autowired
    private RedisService redisService;

    @Autowired
    private Cache<String,Object> cache;

    @Override
    public Integer clothPriceGet(Long proId) {
        String key = "c:" + proId;
        Integer price = CacheUtil.getL2Cache(key, redisService, new TypeReference<Integer>() {}, cache);
        if(price != null) {
            return price;
        }
        price = getPriceFromDB(proId);
        CacheUtil.setL2Cache(key,price,redisService,cache,120, TimeUnit.SECONDS);
        return price;
    }

    private Integer getPriceFromDB(Long proId) {
        return 100;
    }
}
这里 mock 一个假数据进行验证
3.4 在 CacheUtil 上打上断点
3.5 进行测试
TestCaffeineController:
java
package com.my.mstemplateservice.test;

import com.fasterxml.jackson.core.type.TypeReference;
import com.github.benmanes.caffeine.cache.Cache;
import com.my.commoncache.utils.CacheUtil;
import com.my.commondomain.domain.vo.R;
import com.my.commonredis.service.RedisService;
import com.my.mstemplateservice.service.IClothService;
import lombok.extern.slf4j.Slf4j;
import org.springframework.beans.factory.annotation.Autowired;
import org.springframework.web.bind.annotation.GetMapping;
import org.springframework.web.bind.annotation.RequestMapping;
import org.springframework.web.bind.annotation.RestController;

@RestController
@Slf4j
@RequestMapping("/test/cache")
public class TestCacheController {

    @Autowired
    private RedisService redisService;
    @Autowired
    private Cache<String, Object> cache;
    @Autowired
    private IClothService iClothService;

    @GetMapping("/get")
    public R<Void> get() {
        String key = "key";
        CacheUtil.getL2Cache(key, redisService, new TypeReference<String>() {},cache);
        return R.success();
    }

    @GetMapping("/cloth/get")
    public R<Integer> clothPriceGet(Long proId) {
        return R.success(iClothService.clothPriceGet(proId));
    }
}
第一次:
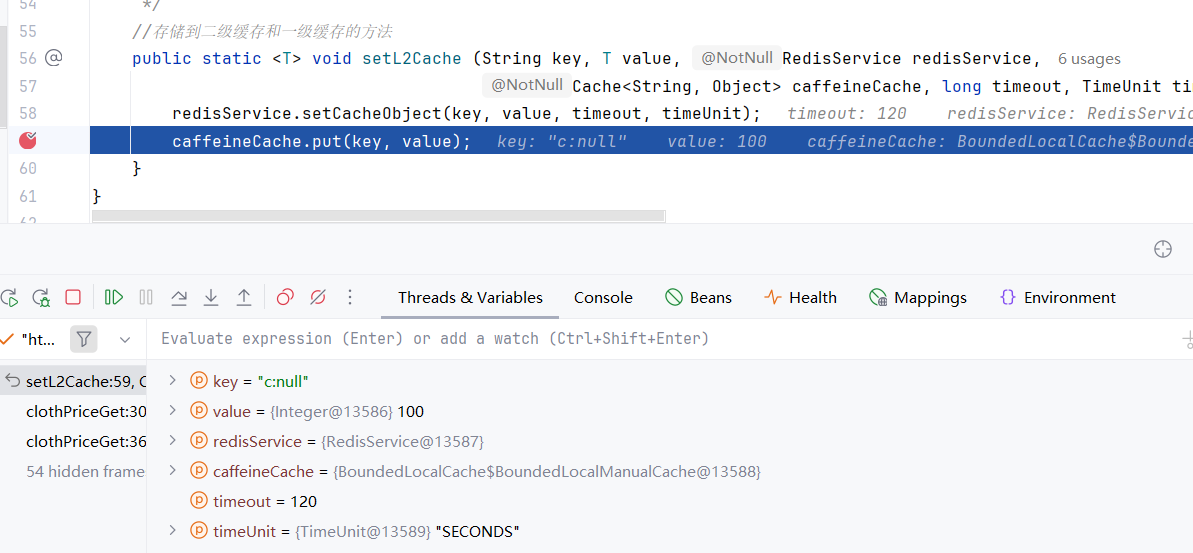
第一次走到的 set 方法,说明缓存里没有,将 mock 的数据查出来在放进 redis 和 caffeine 中
第二次:
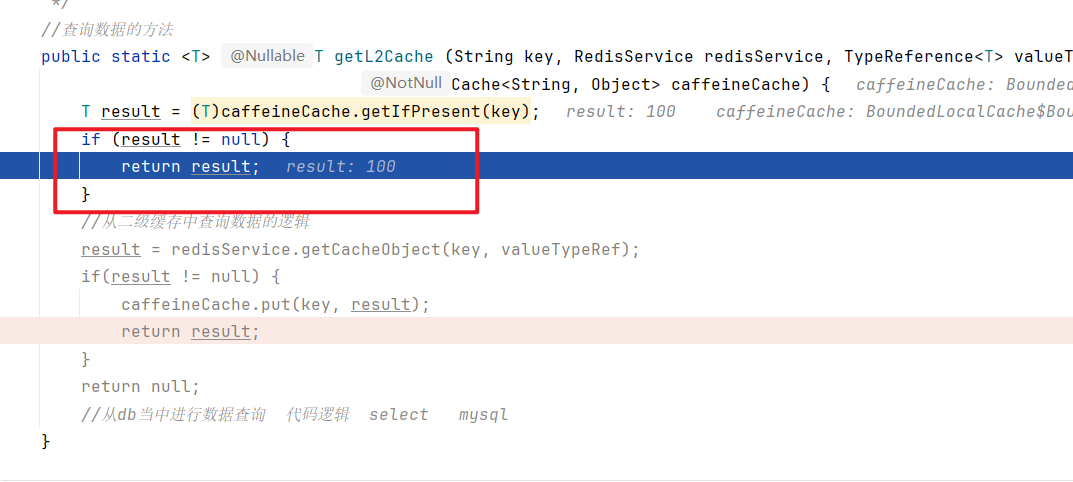
第二次在本地缓存 caffeine 里找到了数据直接返回
第三次:

第三次在本地缓存 caffeine 里没找到数据去找了 redis ,redis里有数据,将数据放到本地缓存里,在返回数据
END
二级缓存封装完成!