在企业级微服务架构中,日志不仅仅是代码的运行记录,更是排查问题的"第一现场"。尤其在复杂的分布式链路中,如果没有一个唯一标识串联起所有的调用,面对海量日志,排查报错简直如同大海捞针。
本文将介绍一种日志追踪的方式,来全链路追踪请求的处理。并设置相应的格式,输出更加直观、易处理的日志。
1. Spring boot的日志原理
为什么我们在启动Spring boot应用的时候,控制台能够输出日志。这里的日志是如何输出的呢?
Spring Boot 巧妙地利用了事件发布/监听机制(Event/Listener) 来尽早拉起日志系统。
Spring Application在Run的过程中,会有不同的状态,在到达不同的状态后,SpringApplicationRunListener会监听相应的事件:
java
public interface SpringApplicationRunListener {

	default void starting() {
	}

	default void environmentPrepared(ConfigurableEnvironment environment) {
	}

	default void contextPrepared(ConfigurableApplicationContext context) {
	}

	default void contextLoaded(ConfigurableApplicationContext context) {
	}

	default void started(ConfigurableApplicationContext context) {
	}

	default void running(ConfigurableApplicationContext context) {
	}

	default void failed(ConfigurableApplicationContext context, Throwable exception) {
	}

}
这里一共有7个方法,分别对应SpringApplication在Run过程中对应的7个状态。如果我们想要在某个状态后自定义一些操作,可以实现相应的接口。
EventPublishingRunListener这个类就是实现了上述SpringApplicationRunListener的具体类,在不同的场景下,产生并发布不同的ApplicationRunEvent。而这些Event的LIstener,将会对相应的Event做出相应的处理。
这里,日志系统的主角就登场了org.springframework.boot.context.logging.LoggingApplicationListener,这个类实现了GenericApplicationListener,而GenericApplicationListener又继承了ApplicationListener,而ApplicationLIstener的方法:
java
@FunctionalInterface
public interface ApplicationListener<E extends ApplicationEvent> extends EventListener {

	/**
	 * Handle an application event.
	 * @param event the event to respond to
	 */
	void onApplicationEvent(E event);

}
正是处理这个Event的地方。
翻看Spring boot的源码,启动主要分两步:
- 创建一个SpringApplication对象
- run方法
在new SpringApplication()方法中,通过spi方式,设置了org.springframework.boot.context.logging.LoggingApplicationListener,而在这个Listener中的onApplicationEvent方法中,接受ApplicationEvent作为参数,进行处理:
java
@Override
	public void onApplicationEvent(ApplicationEvent event) {
		if (event instanceof ApplicationStartingEvent) {
			onApplicationStartingEvent((ApplicationStartingEvent) event);
		}
		else if (event instanceof ApplicationEnvironmentPreparedEvent) {
			onApplicationEnvironmentPreparedEvent((ApplicationEnvironmentPreparedEvent) event);
		}
		else if (event instanceof ApplicationPreparedEvent) {
			onApplicationPreparedEvent((ApplicationPreparedEvent) event);
		}
		else if (event instanceof ContextClosedEvent
				&& ((ContextClosedEvent) event).getApplicationContext().getParent() == null) {
			onContextClosedEvent();
		}
		else if (event instanceof ApplicationFailedEvent) {
			onApplicationFailedEvent();
		}
	}
从源码可以看到,在众多ApplicationEvent中,LoggingApplicationListener主要关注这5个Event:
- ApplicationStartingEvent
- ApplicationEnvironmentPreparedEvent
- ApplicationPreparedEvent
- ContextClosedEvent
- ApplicationFailedEvent
1.1 ApplicationStartingEvent
从名字就可以知道,ApplicationStartingEvent是Spring上下文正在启动的事件,那么这个事件是在什么时候产生的呢?
翻看源码
java
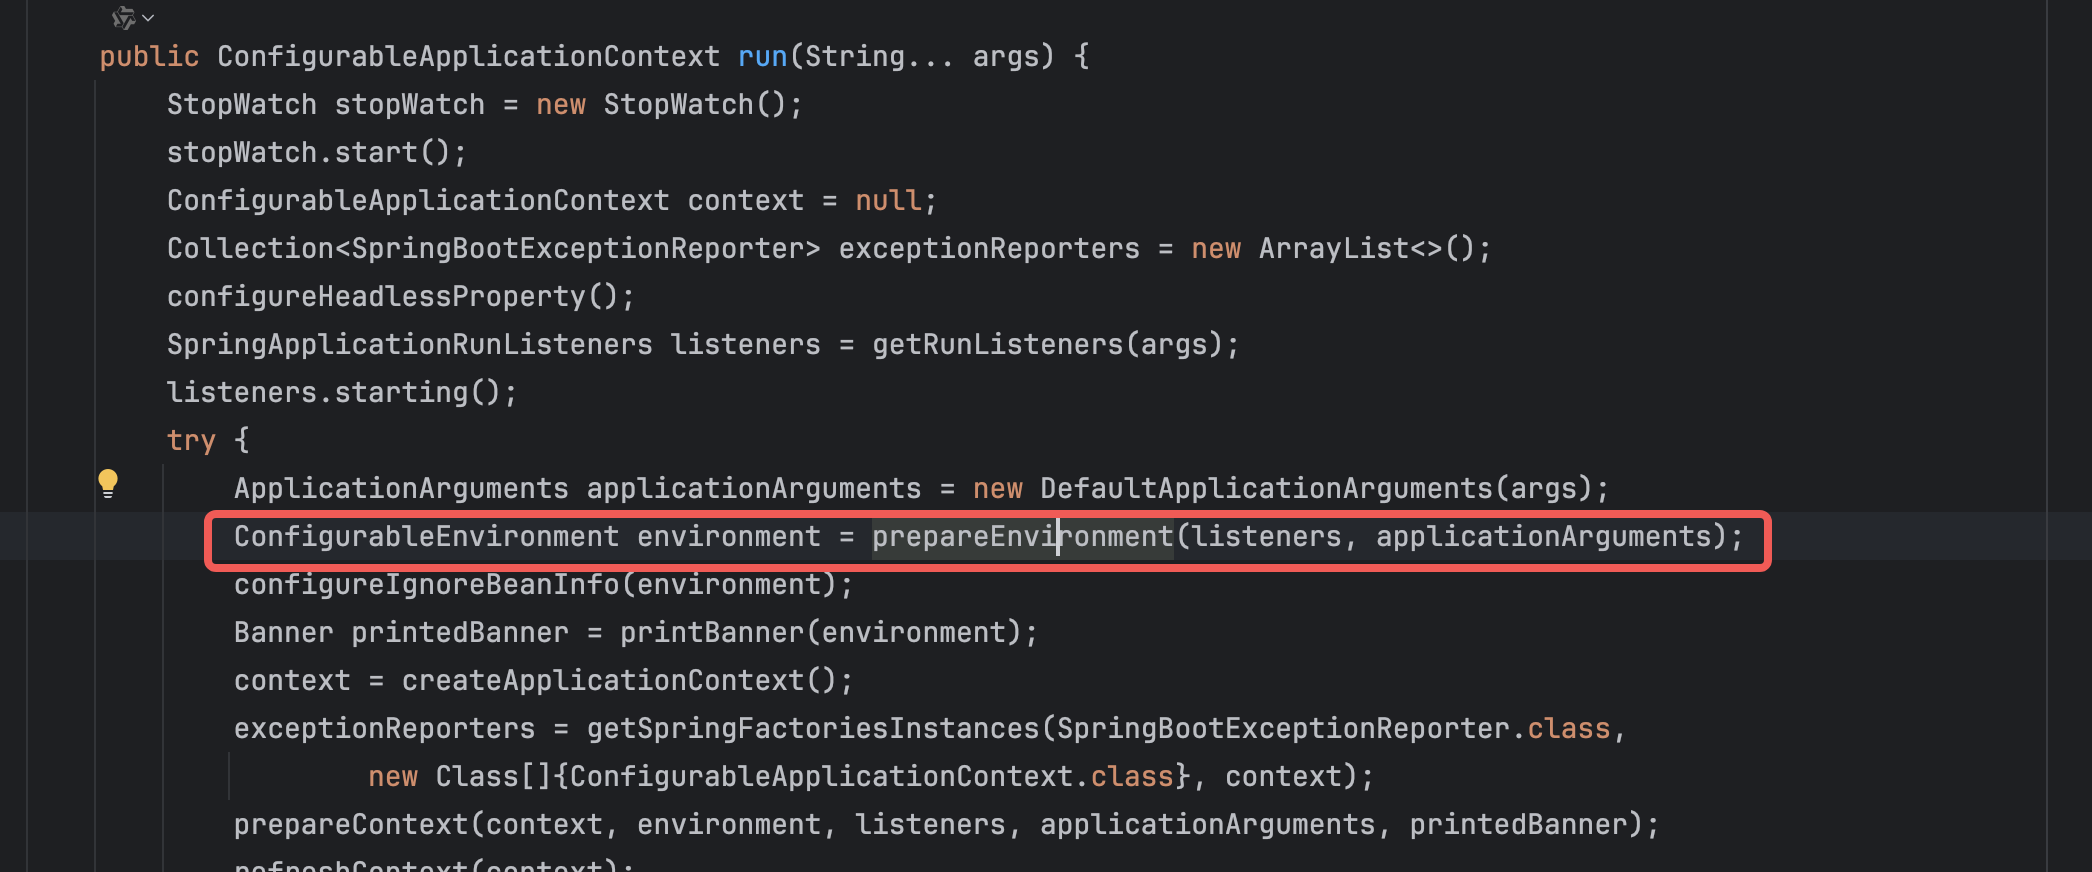
public ConfigurableApplicationContext run(String... args) {
		StopWatch stopWatch = new StopWatch();
		stopWatch.start();
		ConfigurableApplicationContext context = null;
		Collection<SpringBootExceptionReporter> exceptionReporters = new ArrayList<>();
		configureHeadlessProperty();
		SpringApplicationRunListeners listeners = getRunListeners(args);
		listeners.starting();
		try {
			ApplicationArguments applicationArguments = new DefaultApplicationArguments(args);
			ConfigurableEnvironment environment = prepareEnvironment(listeners, applicationArguments);
			configureIgnoreBeanInfo(environment);
			Banner printedBanner = printBanner(environment);
			context = createApplicationContext();
			exceptionReporters = getSpringFactoriesInstances(SpringBootExceptionReporter.class,
					new Class[] { ConfigurableApplicationContext.class }, context);
			prepareContext(context, environment, listeners, applicationArguments, printedBanner);
			refreshContext(context);
			afterRefresh(context, applicationArguments);
			stopWatch.stop();
			if (this.logStartupInfo) {
				new StartupInfoLogger(this.mainApplicationClass).logStarted(getApplicationLog(), stopWatch);
			}
			listeners.started(context);
			callRunners(context, applicationArguments);
		}
		catch (Throwable ex) {
			handleRunFailure(context, ex, exceptionReporters, listeners);
			throw new IllegalStateException(ex);
		}

		try {
			listeners.running(context);
		}
		catch (Throwable ex) {
			handleRunFailure(context, ex, exceptionReporters, null);
			throw new IllegalStateException(ex);
		}
		return context;
	}
在代码中,首先获取到所有的ApplicationRunListener,然后调用其starting()方法。
那么这个ApplicationStartingEvent事件产生时,LoggingApplicationListener的onApplicationEvent做了哪些事呢?
java
private void onApplicationStartingEvent(ApplicationStartingEvent event) {
		this.loggingSystem = LoggingSystem.get(event.getSpringApplication().getClassLoader());
		this.loggingSystem.beforeInitialize();
	}
第一行代码就是根据classLoader获取日志系统。Spring中支持多个不同的日志系统,支持logback,java log等。然后再根据不同的日志系统,做相应的初始化操作。
那么,是如何获得哪些不同的日志系统的呢?
java
	/**
	 * Detect and return the logging system in use. Supports Logback and Java Logging.
	 * @param classLoader the classloader
	 * @return the logging system
	 */
	public static LoggingSystem get(ClassLoader classLoader) {
		String loggingSystem = System.getProperty(SYSTEM_PROPERTY);
		if (StringUtils.hasLength(loggingSystem)) {
			if (NONE.equals(loggingSystem)) {
				return new NoOpLoggingSystem();
			}
			return get(classLoader, loggingSystem);
		}
		return SYSTEMS.entrySet().stream().filter((entry) -> ClassUtils.isPresent(entry.getKey(), classLoader))
				.map((entry) -> get(classLoader, entry.getValue())).findFirst()
				.orElseThrow(() -> new IllegalStateException("No suitable logging system located"));
	}

	private static LoggingSystem get(ClassLoader classLoader, String loggingSystemClass) {
		try {
			Class<?> systemClass = ClassUtils.forName(loggingSystemClass, classLoader);
			Constructor<?> constructor = systemClass.getDeclaredConstructor(ClassLoader.class);
			constructor.setAccessible(true);
			return (LoggingSystem) constructor.newInstance(classLoader);
		}
		catch (Exception ex) {
			throw new IllegalStateException(ex);
		}
	}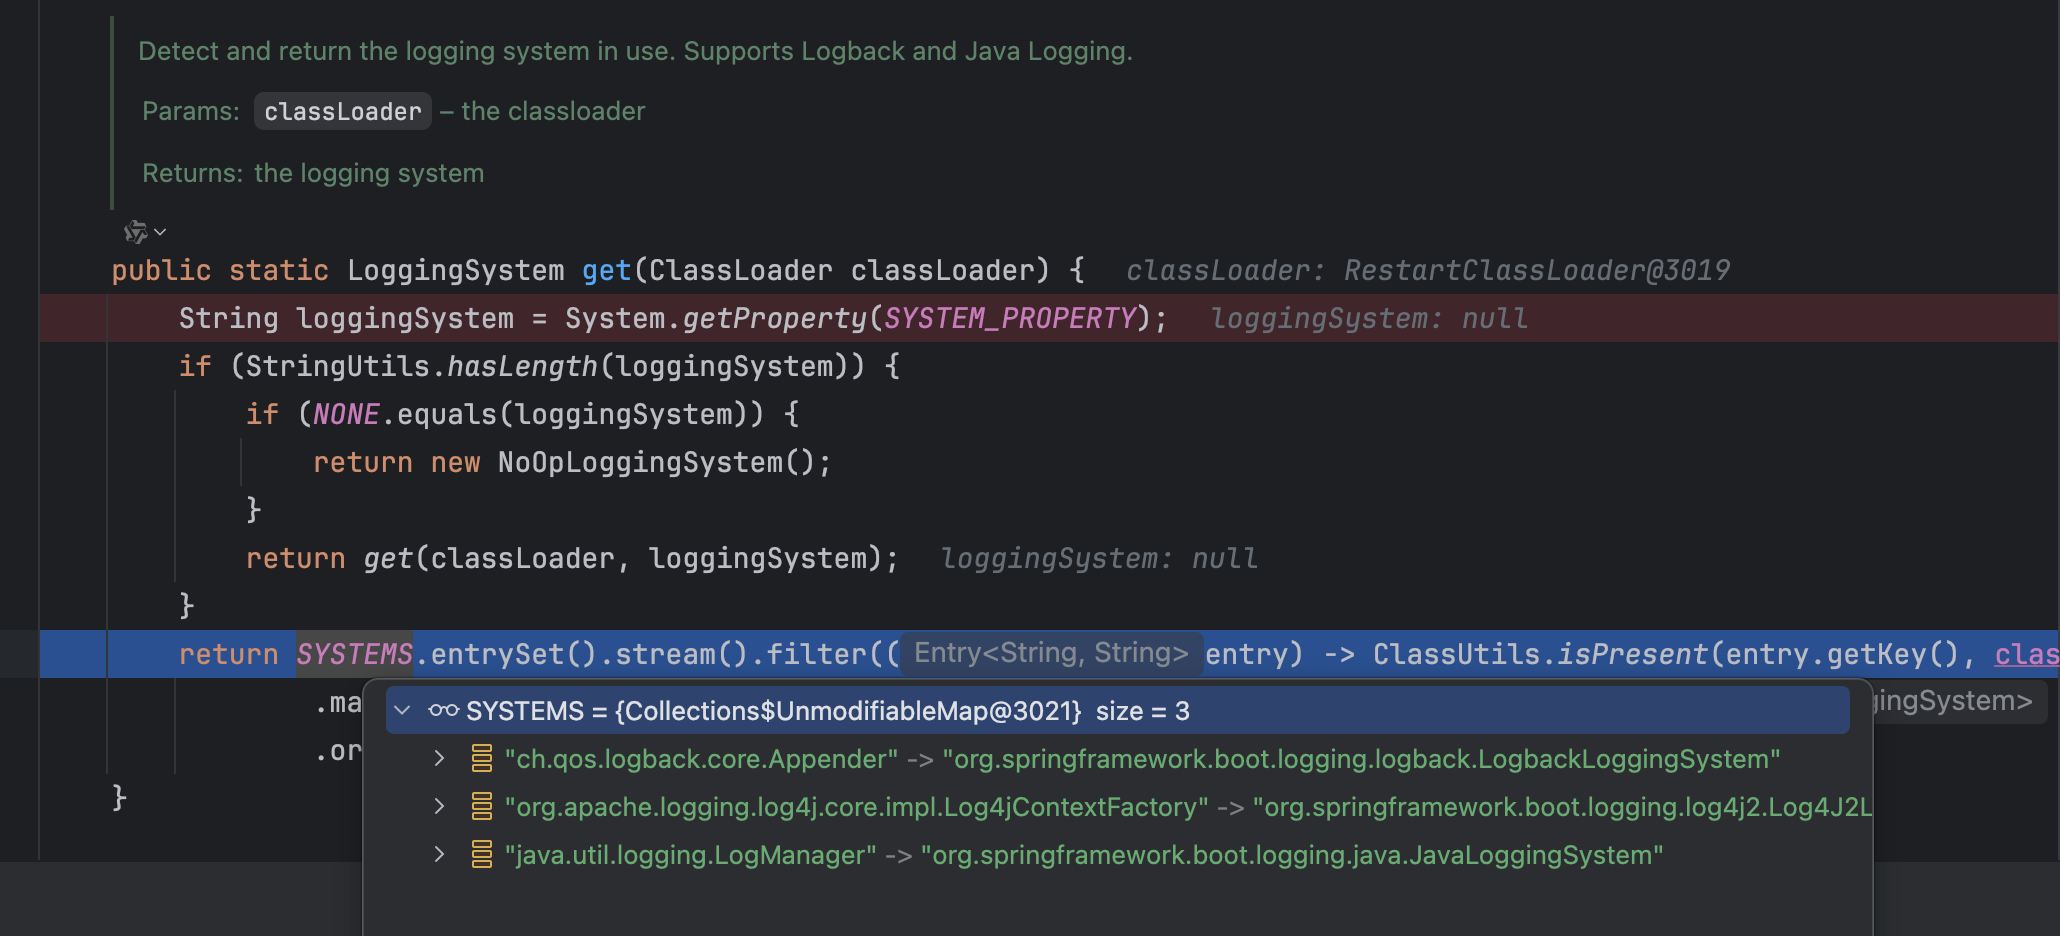
从DEBUG的结果可以看到,当前是默认的SYSTEMS中的日志系统,有3个。那么这3个日志系统是如何加载进来的呢?
java
private static final Map<String, String> SYSTEMS;

	static {
		Map<String, String> systems = new LinkedHashMap<>();
		systems.put("ch.qos.logback.core.Appender", "org.springframework.boot.logging.logback.LogbackLoggingSystem");
		systems.put("org.apache.logging.log4j.core.impl.Log4jContextFactory",
				"org.springframework.boot.logging.log4j2.Log4J2LoggingSystem");
		systems.put("java.util.logging.LogManager", "org.springframework.boot.logging.java.JavaLoggingSystem");
		SYSTEMS = Collections.unmodifiableMap(systems);
	}
静态变量与静态代码块!可以看到,这个SYSTEMS是一个不可变的Map,其中设置3个不同的值,正是我们调试时看到的3个日志系统。
Spring boot在过滤后调用findFirst方法,第一个是logbackLoggingSystem,这个正是Springboot中的默认日志系统。
那日志系统的初始化之前都做哪些事呢?
首先就是要获取日志上下文LoggerContext,这里是使用Logback的日志系统获取的,如果获取到的Context不上Logback的,会有相应提醒:
java
private LoggerContext getLoggerContext() {
		ILoggerFactory factory = StaticLoggerBinder.getSingleton().getLoggerFactory();
		Assert.isInstanceOf(LoggerContext.class, factory,
				String.format(
						"LoggerFactory is not a Logback LoggerContext but Logback is on "
								+ "the classpath. Either remove Logback or the competing "
								+ "implementation (%s loaded from %s). If you are using "
								+ "WebLogic you will need to add 'org.slf4j' to "
								+ "prefer-application-packages in WEB-INF/weblogic.xml",
						factory.getClass(), getLocation(factory)));
		return (LoggerContext) factory;
	}
由于Spring boot的日志是Slf4J+Logback的日志系统,因此这里一些通用的操作,就交给到Slf4JLoggingSystem去做,比如configureJdkLoggingBridgeHandler等。
1.2 ApplicationEnvironmentPreparedEvent
顾名思义,ApplicationEnvironmentPreparedEvent是在EnvironmentPrepared的时候触发产生的事件:
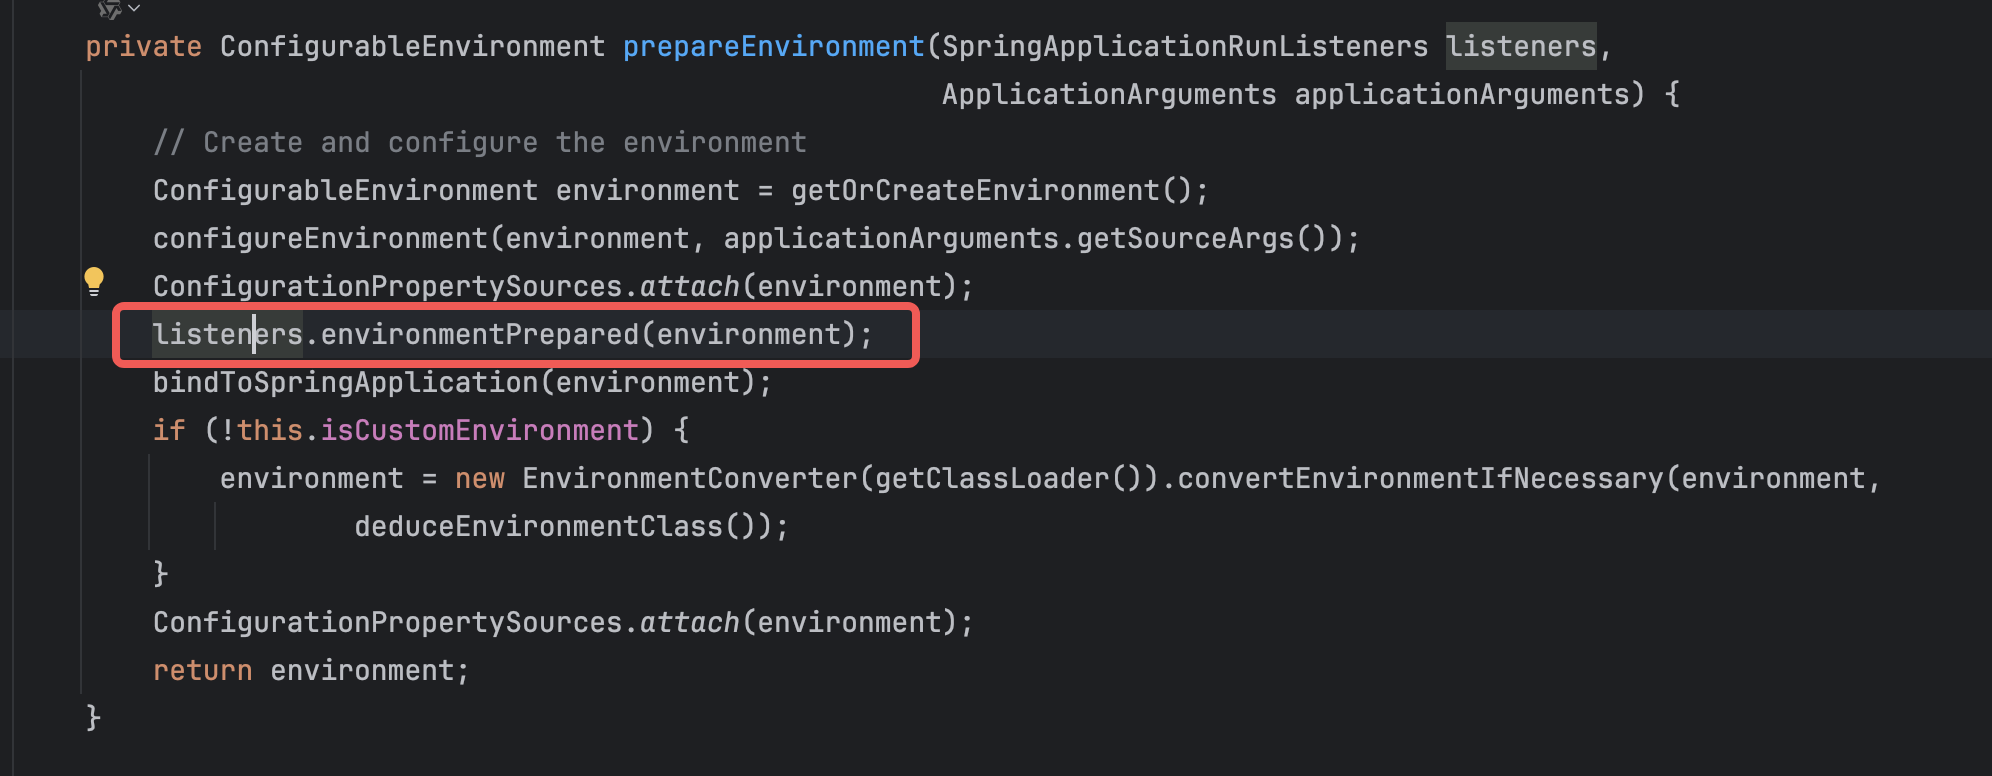
LIstener中又是如何处理的呢?
java
private void onApplicationEnvironmentPreparedEvent(ApplicationEnvironmentPreparedEvent event) {
		if (this.loggingSystem == null) {
			this.loggingSystem = LoggingSystem.get(event.getSpringApplication().getClassLoader());
		}
		initialize(event.getEnvironment(), event.getSpringApplication().getClassLoader());
	}

	/**
	 * Initialize the logging system according to preferences expressed through the
	 * {@link Environment} and the classpath.
	 * @param environment the environment
	 * @param classLoader the classloader
	 */
	protected void initialize(ConfigurableEnvironment environment, ClassLoader classLoader) {
		new LoggingSystemProperties(environment).apply();
		this.logFile = LogFile.get(environment);
		if (this.logFile != null) {
			this.logFile.applyToSystemProperties();
		}
		this.loggerGroups = new LoggerGroups(DEFAULT_GROUP_LOGGERS);
		initializeEarlyLoggingLevel(environment);
		initializeSystem(environment, this.loggingSystem, this.logFile);
		initializeFinalLoggingLevels(environment, this.loggingSystem);
		registerShutdownHookIfNecessary(environment, this.loggingSystem);
	}
由于这个时候,已经拿到environment,那么一些环境变量相关的值都可以设置到日志系统中了。比如日志级别。它从准备好的 Environment 中提取与日志相关的配置(如 logging.level.*, logging.config, logging.file.name 等)。
初始化日志系统(LoggingSystem.initialize())。
真正去寻找并解析具体的配置文件(比如你自定义的 logback-spring.xml)。
这是日志系统真正开始"工作"的分水岭。在这个事件之后,应用打印的日志就会完全按照你 logback-spring.xml 中配置的格式(比如带上 %X{traceId})输出了。
1.3 ApplicationPreparedEvent
上面是Application的Environment已经准备好,这个就是SpringApplication已经准备好的事件了,仍旧是在run这段代码中:
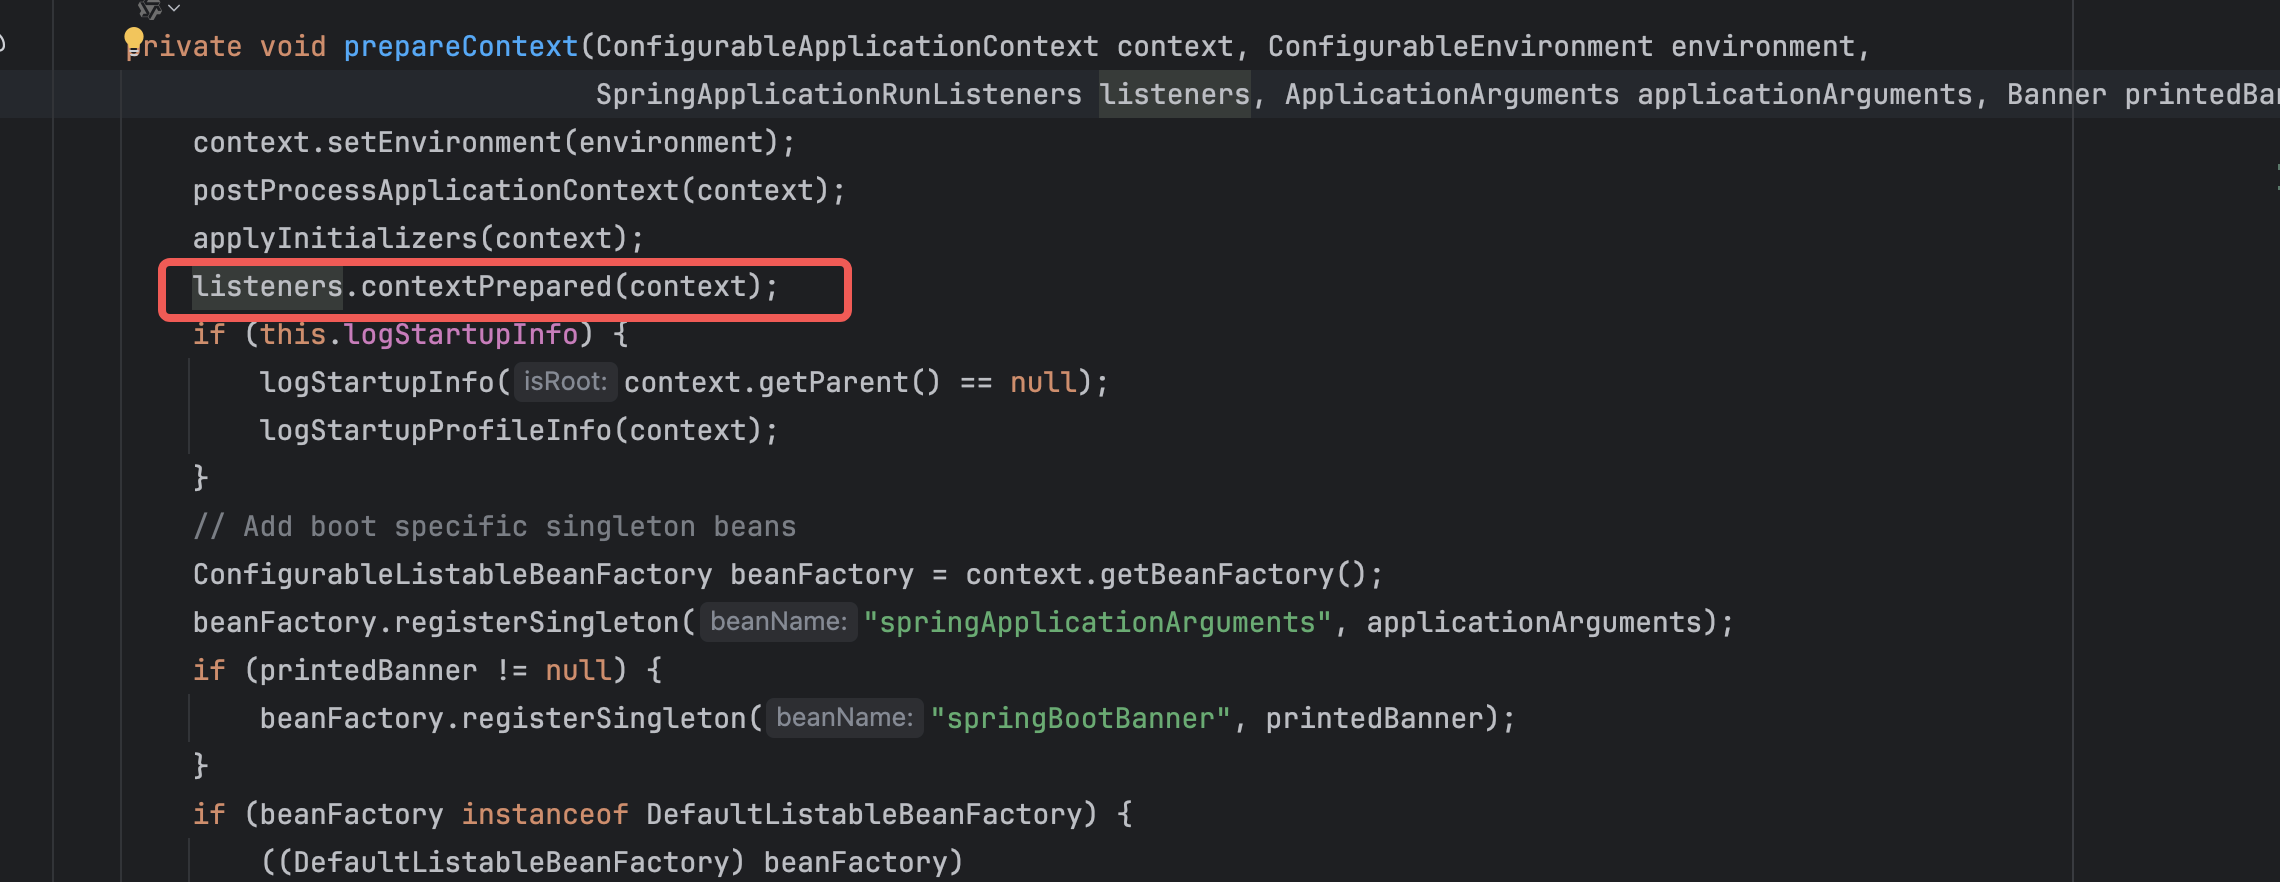
日志系统的处理:
java
private void onApplicationPreparedEvent(ApplicationPreparedEvent event) {
		ConfigurableListableBeanFactory beanFactory = event.getApplicationContext().getBeanFactory();
		if (!beanFactory.containsBean(LOGGING_SYSTEM_BEAN_NAME)) {
			beanFactory.registerSingleton(LOGGING_SYSTEM_BEAN_NAME, this.loggingSystem);
		}
		if (this.logFile != null && !beanFactory.containsBean(LOG_FILE_BEAN_NAME)) {
			beanFactory.registerSingleton(LOG_FILE_BEAN_NAME, this.logFile);
		}
		if (this.loggerGroups != null && !beanFactory.containsBean(LOGGER_GROUPS_BEAN_NAME)) {
			beanFactory.registerSingleton(LOGGER_GROUPS_BEAN_NAME, this.loggerGroups);
		}
	}
这一步主要是将日志系统与 Spring 容器打通。
它会将当前正在使用的 LoggingSystem 实例、LogFile 实例等,注册为 Spring 容器中的单例 Bean(Singleton)。
为什么要这样做?是为了让后续 Spring 容器里的其他 Bean(比如 Spring Boot Actuator)能够直接 @Autowired 注入并操作底层的日志系统。
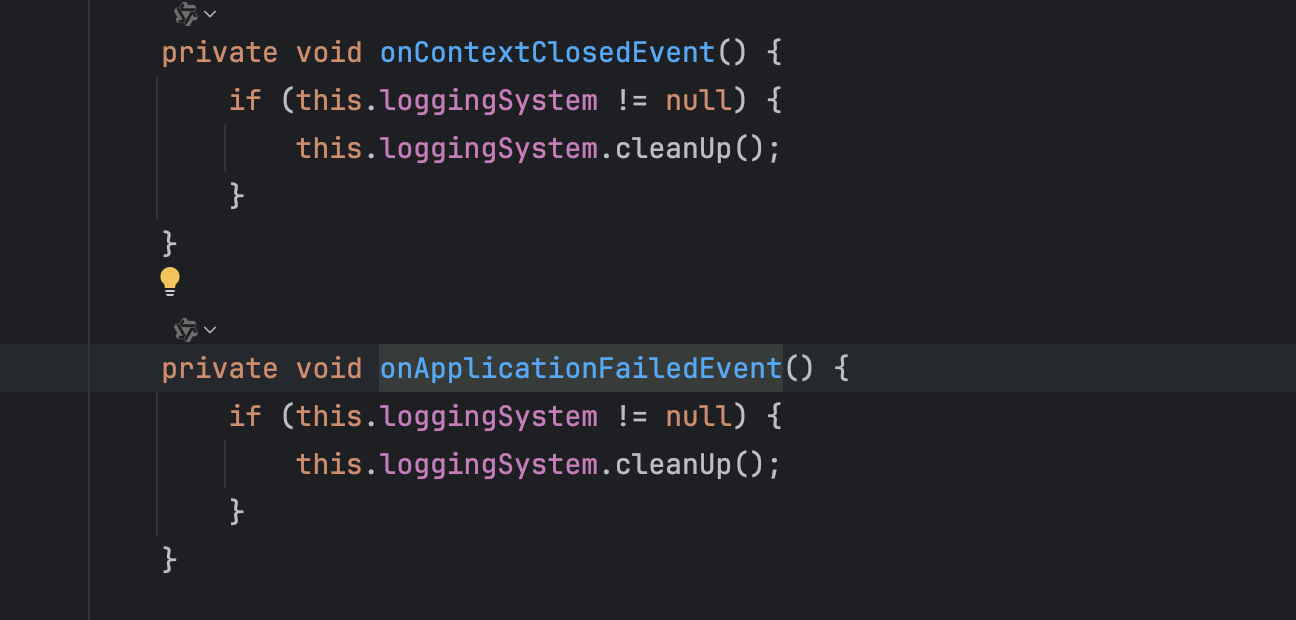
1.4 ContextClosedEvent 和ApplicationFailedEvent
这里已经是日志清理相应的资源了
应用正常关闭(ContextClosedEvent)或者启动过程中抛出异常导致失败(ApplicationFailedEvent)。
LoggingApplicationListener 的处理动作:调用 LoggingSystem.cleanUp()。
2.Spring boot自带日志的局限性
- 缺乏上下文:无法区分当前日志属于哪个请求。
- 多线程断流:一旦进入子线程或线程池,主线程的上下文信息(如用户信息、请求 ID)就会丢失。
- 格式不统一:不同模块日志风格迥异,难以通过 ELK 等工具进行结构化分析。
3.自定义日志格式
由于默认格式的缺点,因此我们可以做一些适当的配置,来优化日志的输出,便于采集和分析。
使用spring-logback.xml文件来进行配置,这里做一个最简单的适配:
xml
<?xml version="1.0" encoding="UTF-8" ?>
<configuration>

    <!-- 定义LOG_HOME为当前目录 -->
    <property name="LOG_HOME" value="./logs"/>


    <appender name="consoleLog_local" class="ch.qos.logback.core.ConsoleAppender">
        <encoder class="ch.qos.logback.classic.encoder.PatternLayoutEncoder">
            <!--格式化输出(配色):%d表示日期,%thread表示线程名,%-5level:级别从左显示5个字符宽度%msg:日志消息,%n是换行符-->
            <pattern>[traceId-%X{traceId}] %yellow(%d{yyyy-MM-dd HH:mm:ss}) %red([%thread]) %highlight(%-5level) %boldMagenta(%logger{50}) - %cyan(%msg%n)
            </pattern>
            <charset>UTF-8</charset>
        </encoder>
    </appender>

    <appender name="consoleLog" class="ch.qos.logback.core.ConsoleAppender">
        <encoder charset="UTF-8" class="net.logstash.logback.encoder.LoggingEventCompositeJsonEncoder">
            <providers>
                <pattern>
                    <pattern>
                        {
                        <!--打印时间-->
                        "time": "%date{yyyy-MM-dd HH:mm:ss.SSS}",
                        <!--日志级别-->
                        "level": "%level",
                        <!--类中的第几行-->
                        "caller": "%X{traceId}",
                        <!--日志打印的信息-->
                        "msg": "%message",
                        <!--堆栈异常信息-->
                        "stack_trace":"%xEx",
                        <!--类名 -->
                        "class": "%c",
                        <!--类中第几行 -->
                        "method":"%M"
                        }
                    </pattern>
                </pattern>
            </providers>
        </encoder>
    </appender>


    <!--根据日志级别分离日志,分别输出到不同的文件-->
    <appender name="fileInfoLog" class="ch.qos.logback.core.rolling.RollingFileAppender">
        <encoder charset="UTF-8" class="net.logstash.logback.encoder.LoggingEventCompositeJsonEncoder">
            <providers>
                <pattern>
                    <pattern>
                        {
                        <!--打印时间-->
                        "time": "%date{yyyy-MM-dd HH:mm:ss.SSS}",
                        <!--日志级别-->
                        "level": "%level",
                        <!--类中的第几行-->
                        "caller": "%X{traceId}",
                        <!--日志打印的信息-->
                        "msg": "%message",
                        <!--堆栈异常信息-->
                        "stack_trace":"%xEx",
                        <!--类名 -->
                        "class": "%c",
                        <!--类中第几行 -->
                        "method":"%M"
                        }
                    </pattern>
                </pattern>
            </providers>
        </encoder>
        <!--滚动策略-->
        <rollingPolicy class="ch.qos.logback.core.rolling.TimeBasedRollingPolicy">
            <!--按时间保存日志 修改格式可以按小时、按天、月来保存-->
            <fileNamePattern>${LOG_HOME}/log.%d{yyyy-MM-dd}.log</fileNamePattern>
            <!--保存时长-->
            <MaxHistory>90</MaxHistory>
            <!--文件大小-->
            <totalSizeCap>1GB</totalSizeCap>
        </rollingPolicy>
    </appender>


    <root level="info">
        <springProfile name="!local">
            <appender-ref ref="fileInfoLog"/>
            <appender-ref ref="consoleLog"/>
        </springProfile>
        <springProfile name="local">
            <appender-ref ref="consoleLog_local"/>
            <appender-ref ref="fileInfoLog"/>
        </springProfile>
    </root>

</configuration>
这里主要设置了日志存放的位置以及大小,在文件中和在控制台输出的格式。当我们把这个文件添加到resource目录下时,启动日志就会如:

4. 请求追踪-多线程
在线程池或者进入子线程,我们设置的唯一ID就会丢失,这样不利于排查问题。因此需要把每个请求所鞋带的唯一ID,透传到子线程或者线程池。
4.1 为什么会丢失?
ID会丢失的根本原因是MDC(Mapped Diagnostic Context)底层依赖的是 ThreadLocal,而 ThreadLocal 的数据是与具体的"线程实例"强绑定的。
什么是MDC?
MDC 的全称是 Mapped Diagnostic Context(映射诊断上下文)。 你可以把它生动地理解为 "主线程的随身背包"或者"行李牌"。
它最早由 Log4j 提出,现在 SLF4J(Spring Boot 默认的日志门面)和 Logback/Log4j2(日志实现)都对它提供了完美支持。
-
数据结构:本质上是一个 Map<String, String>。
-
物理存储:它的底层完全依赖于 ThreadLocal。
这意味着 MDC 中的数据是线程隔离的。A 线程看不见 B 线程的 MDC 数据。
这也意味着 MDC 的生命周期通常绑定在当前线程的单次任务执行周期内。
核心 API:
-
MDC.put("key", "value"):往当前线程的 map 里存数据。
-
MDC.get("key"):取数据。
-
MDC.remove("key"):删掉某条数据。
-
MDC.clear():清空当前线程的所有数据(极其重要,防止内存泄漏和污染)。
由于物理存储依赖ThreadLocal,因此A 线程看不见 B 线程的 MDC 数据,这就造成了丢失的现象。
4.2 手动进行传递
既然线程间MDC的数据是隔离的,那么我们就可以手动进行传递。
创建一个TraceIdUtil.java类
java
import lombok.extern.slf4j.Slf4j;
import org.slf4j.MDC;

import java.util.Map;
import java.util.UUID;

@Slf4j
public class TraceIdUtil {

    public static final String TRACE_ID = "traceId";

    public static String getTraceId() {
        String traceId = null;
        try {
            traceId = MDC.get(TRACE_ID);
        } catch (Exception e) {
            log.error("mdc get error", e);
        }
        return traceId == null ? "" : traceId;
    }

    public static void setTraceId(String traceId) {
        try {
            MDC.put(TRACE_ID, traceId);
        } catch (Exception e) {
            log.error("mdc put error", e);
        }
    }

    public static void removeTraceId() {
        try {
            MDC.remove(TRACE_ID);
        } catch (Exception e) {
            log.error("mdc remove error", e);
        }
    }

    public static void clear() {
        try {
            MDC.clear();
        } catch (Exception e) {
            log.error("mdc clear error", e);
        }
    }

    public static String generateTraceId() {
        return "random-" + UUID.randomUUID().toString().replace("-", "");
    }

    public static void setContextMap(Map<String, String> contextMap) {
        try {
            MDC.setContextMap(contextMap);
        } catch (Exception e) {
            log.error("mdc setContextMap error", e);
        }
    }

    public static Map<String, String> getCopyOfContextMap() {
        try {
            return MDC.getCopyOfContextMap();
        } catch (Exception e) {
            log.error("mdc getCopyOfContextMap error", e);
        }
        return null;
    }

}
再添加一个ThreadMdcUtil.java类:
java
import org.apache.commons.lang3.StringUtils;

import java.util.Map;
import java.util.concurrent.Callable;

public class ThreadMdcUtil {

    public static void setTraceIdIfAbsent() {
        if (StringUtils.isBlank(TraceIdUtil.getTraceId())) {
            TraceIdUtil.setTraceId(TraceIdUtil.generateTraceId());
        }
    }

    public static <T> Callable<T> wrap(final Callable<T> callable, final Map<String, String> context) {
        return () -> {
            if (context == null) {
                TraceIdUtil.clear();
            } else {
                TraceIdUtil.setContextMap(context);
            }

            setTraceIdIfAbsent();
            try {
                return callable.call();
            } finally {
                TraceIdUtil.clear();
            }
        };
    }


    public static Runnable wrap(final Runnable runnable, final Map<String, String> context) {
        return () -> {
            if (context == null) {
                TraceIdUtil.clear();
            } else {
                TraceIdUtil.setContextMap(context);
            }
            //设置traceId
            setTraceIdIfAbsent();
            try {
                runnable.run();
            } finally {
                TraceIdUtil.clear();
            }
        };
    }
}
在线程池中使用的话,可以使用如下的工具类ThreadPoolExecutorMdcExecutor.java
java
import java.util.concurrent.BlockingQueue;
import java.util.concurrent.Callable;
import java.util.concurrent.Future;
import java.util.concurrent.RejectedExecutionHandler;
import java.util.concurrent.ThreadFactory;
import java.util.concurrent.ThreadPoolExecutor;
import java.util.concurrent.TimeUnit;

public class ThreadPoolExecutorMdcExecutor extends ThreadPoolExecutor {
    public ThreadPoolExecutorMdcExecutor(int corePoolSize, int maximumPoolSize, long keepAliveTime, TimeUnit unit, BlockingQueue<Runnable> workQueue) {
        super(corePoolSize, maximumPoolSize, keepAliveTime, unit, workQueue);
    }

    public ThreadPoolExecutorMdcExecutor(int corePoolSize, int maximumPoolSize, long keepAliveTime, TimeUnit unit, BlockingQueue<Runnable> workQueue, ThreadFactory threadFactory) {
        super(corePoolSize, maximumPoolSize, keepAliveTime, unit, workQueue, threadFactory);
    }

    public ThreadPoolExecutorMdcExecutor(int corePoolSize, int maximumPoolSize, long keepAliveTime, TimeUnit unit, BlockingQueue<Runnable> workQueue, RejectedExecutionHandler handler) {
        super(corePoolSize, maximumPoolSize, keepAliveTime, unit, workQueue, handler);
    }

    public ThreadPoolExecutorMdcExecutor(int corePoolSize, int maximumPoolSize, long keepAliveTime, TimeUnit unit, BlockingQueue<Runnable> workQueue, ThreadFactory threadFactory, RejectedExecutionHandler handler) {
        super(corePoolSize, maximumPoolSize, keepAliveTime, unit, workQueue, threadFactory, handler);
    }

    @Override
    public void execute(Runnable task) {
        super.execute(ThreadMdcUtil.wrap(task, TraceIdUtil.getCopyOfContextMap()));
    }

    @Override
    public <T> Future<T> submit(Callable<T> task) {
        return super.submit(ThreadMdcUtil.wrap(task, TraceIdUtil.getCopyOfContextMap()));
    }

    @Override
    public Future<?> submit(Runnable task) {
        return super.submit(ThreadMdcUtil.wrap(task, TraceIdUtil.getCopyOfContextMap()));
    }
}
这样就可以主动把ID传入子线程或者线程池,就不会丢失了。
如何展示呢?我这里封装了一个starter,直接使用自定义starter就可以使用了。
4.3 创建自己的starter
这里我创建了一个自定义的starter,同时在filter中增加id追踪。
LogMdcFilter.java
java
import javax.servlet.Filter;
import javax.servlet.FilterChain;
import javax.servlet.ServletException;
import javax.servlet.ServletRequest;
import javax.servlet.ServletResponse;
import javax.servlet.http.HttpServletRequest;
import java.io.IOException;
import java.util.Optional;
import java.util.UUID;

import static com.yaoyuan.bi.utils.Constant.REQUEST_HEADER_KEY_ID;

public class LogMdcFilter implements Filter {

    public static final String UNIQUE_ID_NAME = "traceId";

    @Override
    public void doFilter(ServletRequest servletRequest, ServletResponse servletResponse, FilterChain filterChain) throws IOException, ServletException {
        String requestId = Optional.of(servletRequest)
                .filter(HttpServletRequest.class::isInstance)
                .map(HttpServletRequest.class::cast)
                .map(req -> req.getHeader(REQUEST_HEADER_KEY_ID))
                .filter(header -> !header.trim().isEmpty())
                .orElseGet(() -> UUID.randomUUID().toString().replace("-", ""));
        MDC.put(UNIQUE_ID_NAME, requestId);
        try {
            filterChain.doFilter(servletRequest, servletResponse);
        } finally {
            MDC.remove(UNIQUE_ID_NAME);
        }
    }
}
配置使filter生效
java
import org.springframework.boot.web.servlet.FilterRegistrationBean;
import org.springframework.context.annotation.Bean;
import org.springframework.context.annotation.Configuration;

@Configuration
public class FilterConfig {
    @Bean
    public FilterRegistrationBean<LogMdcFilter> logFilterRegistration() {
        FilterRegistrationBean<LogMdcFilter> registration = new FilterRegistrationBean<>();
        // 注入过滤器
        registration.setFilter(new LogMdcFilter());
        // 拦截规则
        registration.addUrlPatterns("/*");
        // 过滤器名称
        registration.setName("logMDCFilter");
        // 过滤器顺序
        registration.setOrder(0);
        return registration;
    }
}
当然了,不要忘了使用上面的spring-logback.xml文件来格式化日志。
这部分代码托管于这个仓库。
5.总结
本文从源码层面探讨了spring的日志系统运作原理,以及在使用中的局限性,并使用了一个可行的方案解决了追踪ID丢失的问题,并且最后自定义了一个spring-boot-starter,用来处理日志全链路追踪。
当然,这个手动传递ID的方法不够优雅,阿里开源的TransmittableThreadLocal(TTL)可以实现零代码侵入的全量链路打通。这里挖个坑,有空再来填。