目录:
一、环境准备
1、Anaconda 环境配置
环境配置参考前面章节:
2、添加依赖
powershell
conda install -c conda-forge cmake pip
conda install -c conda-forge dlib
conda install -c conda-forge face_recognition
捋一下几个module的关系:
- 主要用到 face_recognition,调用其中的api接口,完成人脸比对
- face_recognition 的核心,来自于C++编写的 dlib库
- 下载 dlib后,需要用到 c++编译工具进行编译,就用到了 cmake
- pip ,pip 是 Python 的包管理工具,用于安装、管理和维护 Python 第三方库
二、代码案例
python
import face_recognition
import cv2
import matplotlib.pyplot as plt
import time

# 设置中文字体支持
plt.rcParams['font.sans-serif'] = ['SimHei', 'Microsoft YaHei', 'DejaVu Sans']  # 设置中文字体
plt.rcParams['axes.unicode_minus'] = False# 正常显示负号


def face_comparison():
    print("开始加载图片...")
    source_image = face_recognition.load_image_file("datas/images/kobe_1.jpeg")
    target_image = face_recognition.load_image_file("datas/images/kobe_2.jpg")
    load_time = time.time()

    # 使用HOG模型进行快速人脸检测
    source_image_face_locations = face_recognition.face_locations(source_image, model="hog")
    target_image_face_locations = face_recognition.face_locations(target_image, model="hog")
    detection_time = time.time()
    print(f"人脸检测完成,耗时: {detection_time - load_time:.2f}秒")

    ifnot source_image_face_locations:
        print("图片1中未检测到人脸")
        return
    ifnot target_image_face_locations:
        print("图片2中未检测到人脸")
        return

    # 获取人脸编码
    print("正在提取人脸特征...")
    source_image_face_encodings = face_recognition.face_encodings(source_image, source_image_face_locations)
    target_image_face_encodings = face_recognition.face_encodings(target_image, target_image_face_locations)
    encoding_time = time.time()
    print(f"特征提取完成,耗时: {encoding_time - detection_time:.2f}秒")

    # 只比较第一个人脸
    source_face = source_image_face_encodings[0]
    target_face = target_image_face_encodings[0]

    # 比较人脸
    distance = face_recognition.face_distance([source_face], target_face)[0]
    is_match = distance < 0.6

    print("\n" + "=" * 50)
    print("人脸比对结果:")
    print("=" * 50)
    print(f"人脸距离: {distance:.4f}")
    print(f"是否匹配 (阈值0.6): {is_match}")
    print(f"相似度: {(1 - distance) * 100:.1f}%")

    if is_match:
        print("识别结果:是同一个人!")
    else:
        print("识别结果:不是同一个人!")

    # 绘制人脸框
    known_with_boxes = source_image.copy()
    for top, right, bottom, left in source_image_face_locations:
        cv2.rectangle(known_with_boxes, (left, top), (right, bottom), (0, 255, 0), 2)

    unknown_with_boxes = target_image.copy()
    for top, right, bottom, left in target_image_face_locations:
        cv2.rectangle(unknown_with_boxes, (left, top), (right, bottom), (0, 255, 0), 2)

    plt.figure(figsize=(12, 5))

    plt.subplot(1, 2, 1)
    plt.imshow(known_with_boxes)
    plt.title(f"图片1 - {len(source_image_face_locations)}人脸")
    plt.axis('off')

    plt.subplot(1, 2, 2)
    plt.imshow(unknown_with_boxes)
    plt.title(f"图片2 - {len(target_image_face_locations)}人脸")
    plt.axis('off')

    plt.tight_layout()
    plt.show()


if __name__ == "__main__":
    face_comparison()
三、运行结果
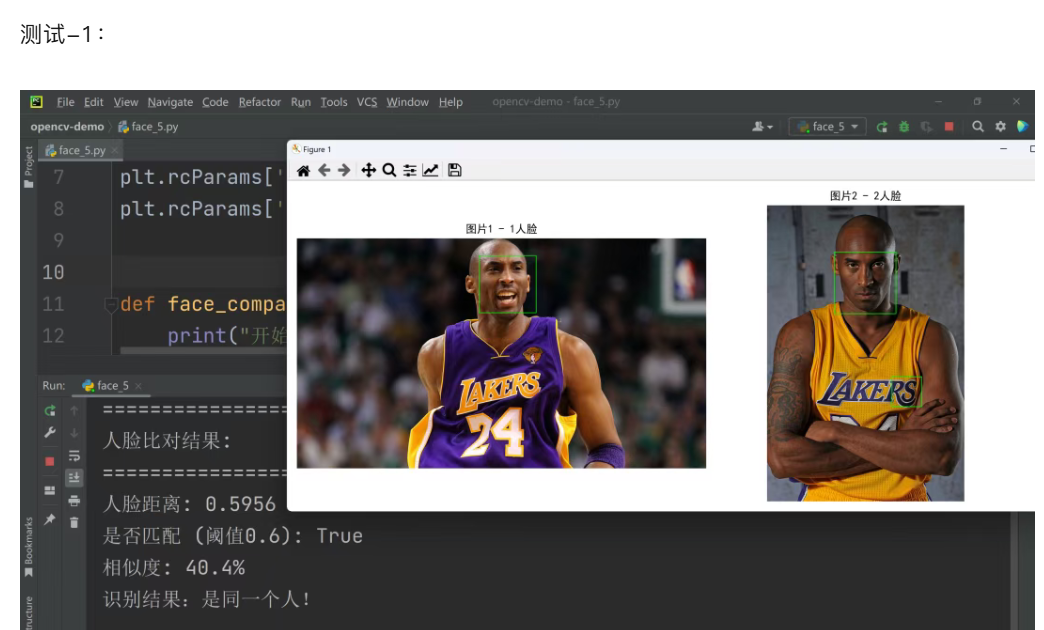
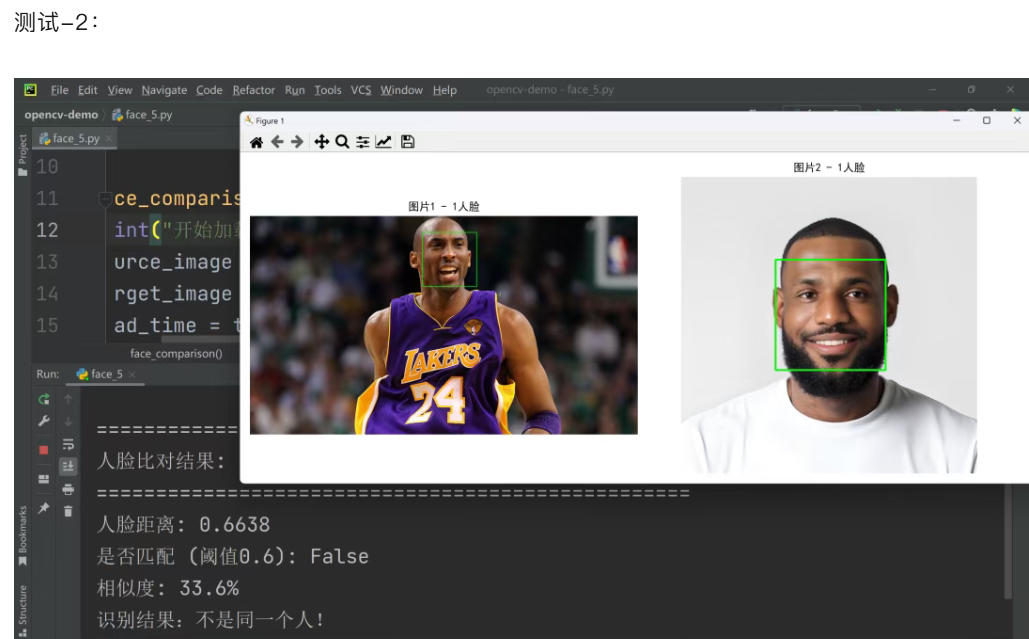
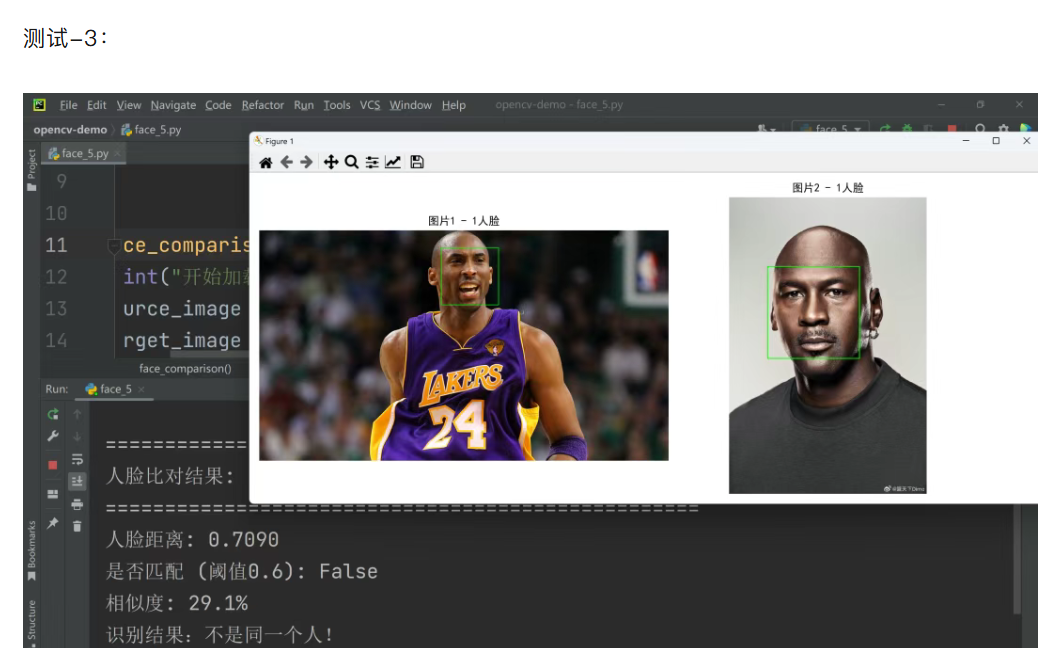
重点分析:
代码里面用的是 HOG 模型,出结果比较快,但是准确度可能不会太高。
也可以换成 CNN 模型,就是在代码里面改成:
python
face_recognition.face_locations(source_image, model="cnn")