elk典型架构-kibana部署,nginx部署(文章顺带)
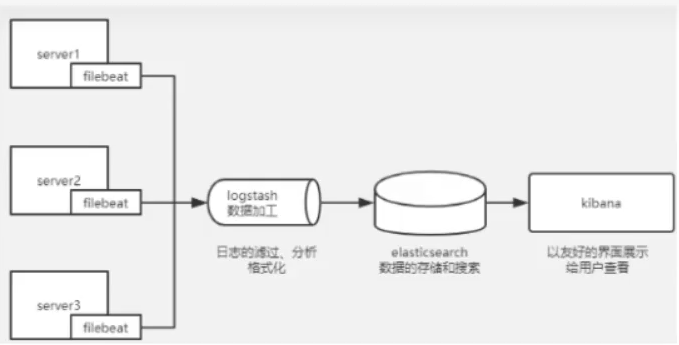
1、实验拓扑图
2、实验环境介绍
| hostname | IP | role | 配置 |
|---|---|---|---|
| es01 | 192.168.92.14 | es+kibana+es-head | 4G内存 |
| es02 | 192.168.92.15 | es | 2G |
| logstash | 192.168.92.16 | logstash | 2G |
| filebeat01 | 192.168.92.17 | filebeat+nginx | 2G |
应用场景 本次实验是收集nginx 日志,并存储在elasticsearch中。将elasticsearch和kibana 安装在同一主机上可以避免不必要的网络IO操作,直接本机交互。
3、实施步骤
Filebeat 下载地址: Past Releases of Elastic Stack Software |Elastic
https://artifacts.elastic.co/downloads/elasticsearch/elasticsearch-7.17.10-x86_64.rpm
https://artifacts.elastic.co/downloads/kibana/kibana-7.17.10-x86_64.rpm
https://artifacts.elastic.co/downloads/logstash/logstash-7.17.10-x86_64.rpm
https://artifacts.elastic.co/downloads/beats/filebeat/filebeat-7.17.10-x86_64.rpm
(1)安装基础软件
#配置rockylinux9.6的yum源
sed -e 's|^mirrorlist=|#mirrorlist=|g' \
    -e 's|^#baseurl=http://dl.rockylinux.org/$contentdir|baseurl=https://mirrors.aliyun.com/rockylinux|g' \
    -i.bak \
    /etc/yum.repos.d/rocky*.repo
dnf makecache

yum install wget vim net-tools -y
selinux、firewall关闭、设置时区
timedatectl set-timezone Asia/Shanghai
systemctl stop firewalld
systemctl disable firewalld
setenforce 0
vim /etc/selinux/config
(2)安装nginx直接yum安装
yum -y install epel-release nginx启动nginx
systemctl start nginx && systemctl enable nginxnginx服务端口确认
[root@filebeat01 ~]# netstat -anpt | grep 80
tcp        0      0 0.0.0.0:80              0.0.0.0:*               LISTEN      72796/nginx: master
tcp6       0      0 :::80                   :::*                    LISTEN      72796/nginx: master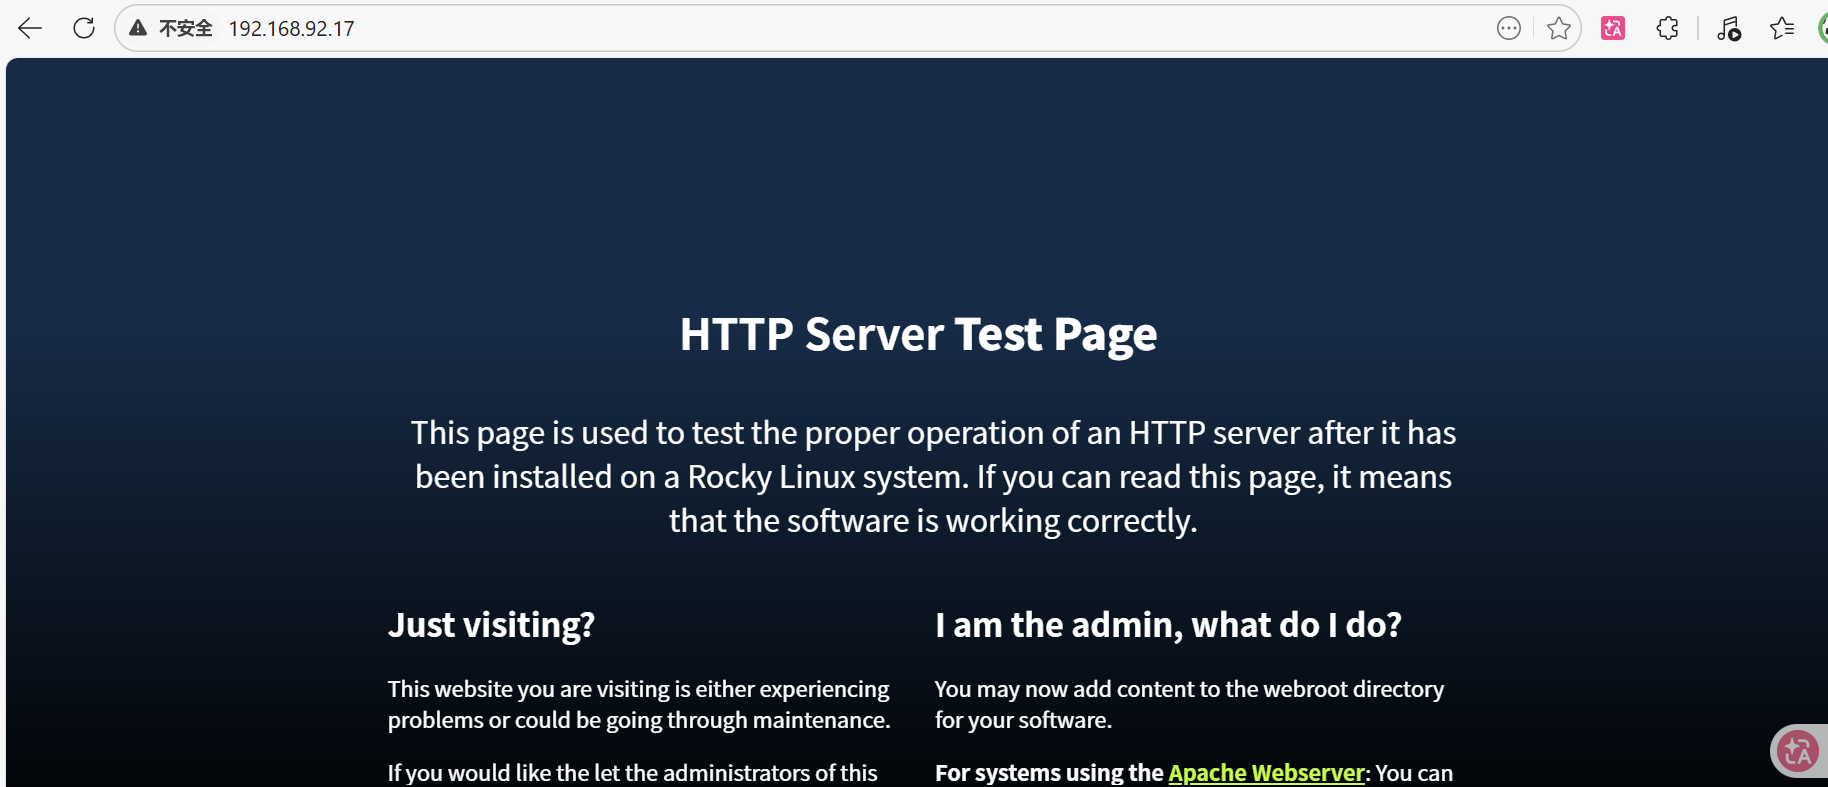
nginx搭载完毕!
(3)安装flebeat
[root@filebeat01 ~]# ls
anaconda-ks.cfg  filebeat-7.17.10-x86_64.rpm
[root@filebeat01 ~]# yum -y install filebeat-7.17.10-x86_64.rpm
开启nginx模块支持
[root@filebeat01 ~]# cd /etc/filebeat/
[root@filebeat01 filebeat]# vi filebeat.yml
修改filebeat主配置文件 (vi /etc/filebeat/filebeat.yml)
[root@filebeat01 filebeat]# cp filebeat.yml{,.bak}
[root@filebeat01 filebeat]# vi filebeat.yml

#135行注释掉输出到 elasticsearch(不让它输出到elasticsearch)
#output.elasticsearch:
  # Array of hosts to connect to.
  # hosts: ["localhost:9200"]

#137行下发添加下列内容,开启输出到logstash(让它输出到logstash上)
output.logstash:
  #The Logstas hosts
  hosts: ["192.168.92.16:5044"] #hosts 数组指定了 Logstash 服务器的地址和端口(默认端口是 5044)
#同时,必须在 Logstash 节点上单独配置!(后文有讲)
#Filebeat 只是负责把日志推送给 Logstash,Logstash 自己需要配置一个 beats 输入插件来接收这些日志,然后才能进一步处理并输出到 Elasticsearch(或其他目标)。
#在 Logstash 节点(192.168.92.16)上,你需要创建或修改配置文件,
注意这里的hosts要写logstash主机的IP 修改 nginx块配置文件(vi /etc/filebeat/modules.d/nginx.yml)(这个文件一开始没有,vi的时候是一个空白文件)
- module: nginx
  # Access logs
  access:
    enabled: true
    # Set custom paths for the log files. If left empty,
    # Filebeat will choose the paths depending on your OS.
    var.paths: ["/var/log/nginx/access.log"]

  # Error logs
  error:
    enabled: true
    # Set custom paths for the log files. If left empty,
    # Filebeat will choose the paths depending on your OS.
    var.paths: ["/var/log/nginx/error.log"]
启动,开机自启filebeat
[root@filebeat01 modules.d]# systemctl start filebeat
[root@filebeat01 modules.d]# systemctl enable filebeat
=========================================================================
Elasticsearch 7.17.10 双节点集群部署实战(基于 Rocky Linux 9.6)
Elasticsearch 7.17.10 双节点集群部署(二):安装 elasticsearch-head 插件实现可视化
ELK日志分析平台(三):Logstash 7.17.10 独立节点部署与基础测试(基于Rocky Linux 9.6)
ELK日志分析平台(四):Kibana 7.17.10 部署与基本配置(与ES01同机,基于Rocky Linux 9.6)
ELK日志分析平台(五):Filebeat 部署与 Nginx 日志采集(输出至 Logstash)(基于Rocky Linux 9.6)
这 5 篇文章已经完整覆盖了 ELK 日志分析平台从 0 到 1 的全部搭建流程,可以直接用于生产环境!
💡 后续可以扩展的方向(可选)
你的平台已经生产可用了,如果后续想继续完善,可以考虑:
表格
| 扩展方向 | 说明 | 优先级 |
|---|---|---|
| Kibana 仪表盘 | 创建 Nginx 访问分析、错误率等可视化图表 | ⭐⭐⭐ |
| 告警规则 | 配置错误日志阈值告警 | ⭐⭐⭐ |
| 多日志源 | 添加系统日志、应用日志采集 | ⭐⭐ |
| Kafka 缓冲 | 高并发场景下加入 Kafka 做消息队列 | ⭐⭐ |
| 安全认证 | 配置 X-Pack 或搜索守卫 | ⭐⭐ |
| 日志 retention | 设置索引生命周期管理 (ILM) | ⭐⭐ |