本篇要给大家介绍的是Docker自己的容器编排工具,叫做Compose。不过它的后面知识点要说的K8s有很大的区别,K8s容器编排以容器类型为核心,比如你要起1000台Tomcat,或者1000台Mysql,而Compose是为了启动一个完整服务而存在的编排工具,例如启动一个Hadoop,要有NameNode、DataNode、ResourceManager等等多种类型的容器,Compose就好比一个串联这些容器的骨架一样,在单台Docker部署机上提供针对服务的一键启动能力。当然Docker本身还有Docker Swarm,用来将多台Docker部署机组成Docker资源池,不过由于使用起来不方便,现在基本很少见了。因为所有资源池内的服务器不只要满足自身是Docker的主机,还要满足加入swarm的条件。后来docker又出了一个预处理工具Machine,可以让docker主机可以满足加入资源池的条件,这三个玩意儿在当年业界被称为docker运维三剑客,后来有了K8s渐渐地就退出一线了,本文也不扩展后两个工具,但是Compose在个人使用Docker上还是很有价值的,尤其是后面私有化部署镜像仓库时,会涉及很多的容器,不可能一个个的手动run
首先下载需要的安装包https://github.com/docker/compose/releases,这里使用5.0.2,下载docker-compose-linux-x86_64,它是个二进制文件可执行文件,上传服务器后赋执行权限,并移动到 /usr/bin 从命名为 docker-compose 即可
bash
[root@node1 opt]# chmod 755 docker-compose-linux-x86_64
[root@node1 opt]# mv docker-compose-linux-x86_64 /usr/bin/docker-compose
[root@node1 opt]# ls /usr/bin/ |grep docker
docker
docker-compose
dockerd
dockerd-rootless-setuptool.sh
dockerd-rootless.sh
docker-proxy
rootlesskit-docker-proxy
[root@node1 opt]# docker-compose version
Docker Compose version v5.0.2安装就完成了,就怎么简单。现在去下载Harbor的安装包https://github.com/goharbor/harbor/releases,本文使用2.14.3,下载harbor-offline-installer-v2.14.3.tgz离线安装包。考虑到后期正常使用,所以安装它时要通过df -h命令查看服务器各储存空间使用情况,找一个加大空闲容量的磁盘部署,本文部署到 /opt 下
bash
[root@node1 opt]# ll
total 670556
drwx--x--x.  4 root root        28 Mar 10 21:32 containerd
drwx--x---. 12 root root       171 Mar 11 22:10 docker
drwxr-xr-x.  2 root root       123 Mar 14 15:00 harbor  《--解压后的文件夹
-rw-r--r--.  1 root root 686615635 Mar 14 00:10 harbor-offline-installer-v2.14.3.tgz  《--离线部署安装包
drwxr-xr-x.  2 root root        42 Mar  8 18:15 iso
drwxr-xr-x.  8 root root      4096 Mar 13 23:29 jdk1.8.0_411
[root@node1 harbor]# ll
total 674876
-rw-r--r--. 1 root root      3646 Mar  8 13:39 common.sh
-rw-r--r--. 1 root root 691030605 Mar  8 13:39 harbor.v2.14.3.tar.gz
-rw-r--r--. 1 root root     14688 Mar  8 13:39 harbor.yml.tmpl
-rwxr-xr-x. 1 root root      1975 Mar  8 13:39 install.sh
-rw-r--r--. 1 root root     11347 Mar  8 13:39 LICENSE
-rwxr-xr-x. 1 root root      2211 Mar  8 13:39 prepare
现在要去准备一个自签证书,未来如果工作中使用,通常会直接给你准备好公共CA机构的证书。要特别说明的是,各位读者看其他文献时,会发现没有准备证书这一步,是因为看到的都是个人部署用的,商用必须有证书,走https协议,像阿里云、百度云等等都是走https过443端口对外服务,且其他技术和harbor联合时,有证书在部署上就相应的容易很多
如果看过作者本人主页发布的安全集群部署中的生成过程 https://blog.csdn.net/dudadudadd/article/details/157364726,在此步不要着急去操作, harbor 用的证书文件需要是 PEM 格式的,不是Java的 JKS
bash
# 首先CA机构节点如果你自己有就沿用,如果没有则选一台出来,运行下面的命令生成
# 生成一个自签的X.509 CA根证书(cert)和根证书的私钥(key),运行后要求输入根证书的密码,按需设置,这里设置123456。
# 其实说白了根证书本质是个密钥库,只不过其中只有一条密钥和这条秘钥的公钥
# 相当于这个CA机构的营业执照,密钥部分是营业执照的原件,公钥部分是用于展示的副本
# 单独存在的私钥是一个很长的字符串,用来验证证书的真伪以及作为给别人签名的基础,就相当于公司的公章
# -keyout 根证书的私钥存放路径   -out 根证书存放路径  -days 当前证书有效天数 -subj 这个是根证书签名中的附加信息,就是这个证书CA机构在那里,那个城市这些自定义信息
openssl req -new -x509 -keyout /root/public_ca_key -out /root/public_ca_cert -days 36500 -subj '/C=CN/ST=beijing/L=haidian/O=devA/OU=devB/CN=devC'

# 和安全集群部署中一样的流程是作为harbor的部署节点,要生成一个用来标识部署节点自身的东西
# 不同的是,这里用openssl生成,且生成的是私钥,相比较下,没有 keytool 工具生成的密钥库复杂(里面通常是成对的密钥和公钥,也有特殊的比如单独存在的CA证书公钥部分)
# 但它也并不是 -keyout 参数同类文件,首先它不是文本文件,而是一个PEM文件,其中的内容是密钥和公钥混合在一起,就好比你的身份证上面有身份证号码和照片,但通常叫身份证,说白了就是 keytool 工具结果物的另一种生成方式
# 如果未来需要可以通过 openssl rsa -in harbor.key -pubout -out harbor.pub 提前公钥部分
# 现在,只需要用如下命令生成Harbor服务器的私钥
openssl genrsa -out harbor.key 2048

# 生成签名请求  注意:CN必须填你访问Harbor的域名或IP
openssl req -new -key harbor.key -out harbor.csr -subj "/C=CN/ST=Beijing/L=Beijing/O=YourOrg/CN=node1"

# 由于 harbor 使用了go语言1.15版本以上的语法库,所以它对证书的验证需要携带附加信息,这些信息在证书签名时需要准备一个扩展文件
cat > harbor-san.ext << EOF
authorityKeyIdentifier=keyid,issuer
basicConstraints=CA:FALSE
keyUsage = digitalSignature, nonRepudiation, keyEncipherment, dataEncipherment
extendedKeyUsage = serverAuth
subjectAltName = @alt_names

[alt_names]
# 关键:把你所有的访问方式都列在这里
DNS.1 = node1                    # 主机名(你现在用的)
DNS.2 = localhost
IP.1 = 127.0.0.1
IP.2 = 192.168.239.56             # 你的Harbor服务器IP(如果有固定IP)
# 如果你还有域名,也加上
# DNS.3 = harbor.example.com
EOF

#CA用根证书和CA私钥签名,运行后输入根证书密码
openssl x509 -req -in harbor.csr -CA /root/public_ca_cert -CAkey /root/public_ca_key -CAcreateserial -out harbor.crt -days 365 -extfile harbor-san.ext

# 查看证书内容
openssl x509 -in harbor.crt -text -noout
# 验证证书链,输出OK
openssl verify -CAfile /root/public_ca_cert harbor.crt

#查看harbor需要的两个结果物类型
[root@node1 opt]# file harbor.crt
harbor.crt: PEM certificate
[root@node1 opt]# file harbor.key
harbor.key: PEM RSA private key
此时此刻!你要确保 harbor 部署节点上,有三个文件,分别是 harbor.crt(harbor节点被ca签名的证书)、harbor.key(harbor节点的私钥)、public_ca_cert(ca的根证书)。ca的根证书自签的通常是要给到使用方,ca的私钥正常是一定不外流的。将ca的根证书放到harbor部署节点的docker信任证书路径下,需要自己创建
bash
#首先创建该路径 node1 这一级路径名称要求必须是当前节点的dns,也就是本文中harbor的域名node1
mkdir /etc/docker/certs.d/node1

# 随后,把 ca 的根证书放进去,并且重命名为 ca.crt
[root@node1 harbor]# ls /etc/docker/certs.d/node1
ca.crt

# 重启 docker
systemctl daemon-reload
systemctl restart docker更改harbor的配置文件harbor.yml.tmpl,它是一个yml格式文件,更改时要求如下
1、不支持制表符Tab 建缩进,需要使用空格缩进
2、通常开头缩进2个空格
3、内容英文单词之间缩进1个空格
4、用井号注释
5、如果包含特殊字符用单引号引起来,布尔值必须用单引号括起来
bash
[root@node1 harbor]# mv harbor.yml.tmpl harbor.yml

改下面的东西
# 改成证书中用的harbor部署节点域名
hostname: node1
#你的证书路径
certificate: /opt/harbor.crt
#你的私钥
private_key: /opt/harbor.key
#管理harbor用的密码
harbor_admin_password: Harbor12345
#数据存放路径
data_volume: /opt/harbor_data
#harbor数据库的密码
password: root123随后执行harbor的prepare它将为当前docker部署机下载需要的镜像
bash
[root@node1 harbor]# ./prepare
prepare base dir is set to /opt/harbor
Unable to find image 'goharbor/prepare:v2.14.3' locally
v2.14.3: Pulling from goharbor/prepare
f32f037feefe: Downloading  491.1kB/16.25MB
3fb8f2e0cbb8: Pulling fs layer
a74d32723be7: Downloading  523.8kB/24.62MB
6135d0c1b20a: Downloading  1.204MB/9.722MB
80bb154945c2: Download complete
03a45920739e: Download complete
f7c319bd6d99: Downloading
211eb9f74289: Download complete
207f1318f07e: Download complete
0d2307c3fac2: Download complete
v2.14.3: Pulling from goharbor/prepare
f32f037feefe: Pull complete
3fb8f2e0cbb8: Pull complete
a74d32723be7: Pull complete
6135d0c1b20a: Pull complete
80bb154945c2: Pull complete
03a45920739e: Pull complete
f7c319bd6d99: Pull complete
211eb9f74289: Pull complete
207f1318f07e: Pull complete
0d2307c3fac2: Pull complete
Digest: sha256:c09fc4fd9441de4f919fb726f087d2fa0aa1f45ce890e813f27f3fb5b3ca1634
Status: Downloaded newer image for goharbor/prepare:v2.14.3
Generated configuration file: /config/portal/nginx.conf
Generated configuration file: /config/log/logrotate.conf
Generated configuration file: /config/log/rsyslog_docker.conf
Generated configuration file: /config/nginx/nginx.conf
Generated configuration file: /config/core/env
Generated configuration file: /config/core/app.conf
Generated configuration file: /config/registry/config.yml
Generated configuration file: /config/registryctl/env
Generated configuration file: /config/registryctl/config.yml
Generated configuration file: /config/db/env
Generated configuration file: /config/jobservice/env
Generated configuration file: /config/jobservice/config.yml
copy /data/secret/tls/harbor_internal_ca.crt to shared trust ca dir as name harbor_internal_ca.crt ...
ca file /hostfs/data/secret/tls/harbor_internal_ca.crt is not exist
copy  to shared trust ca dir as name storage_ca_bundle.crt ...
copy None to shared trust ca dir as name redis_tls_ca.crt ...
Generated and saved secret to file: /data/secret/keys/secretkey
Successfully called func: create_root_cert
Generated configuration file: /compose_location/docker-compose.yml
Clean up the input dir

#查看镜像
[root@node1 harbor]# docker images
REPOSITORY         TAG       IMAGE ID       CREATED       SIZE
goharbor/prepare   v2.14.3   3fac95130cf1   6 days ago    199MB

#查看是否在 harbor 部署主路径下生成了 common 文件夹,以及你指定的数据路径
[root@node1 harbor]# ll
total 674884
drwxr-xr-x. 3 root root        20 Mar 14 17:17 common  《----这个
-rw-r--r--. 1 root root      3646 Mar  8 13:39 common.sh
-rw-r--r--. 1 root root      6004 Mar 14 17:17 docker-compose.yml
-rw-r--r--. 1 root root 691030605 Mar  8 13:39 harbor.v2.14.3.tar.gz
-rw-r--r--. 1 root root     14669 Mar 14 16:43 harbor.yml
-rwxr-xr-x. 1 root root      1975 Mar  8 13:39 install.sh
-rw-r--r--. 1 root root     11347 Mar  8 13:39 LICENSE
-rwxr-xr-x. 1 root root      2211 Mar  8 13:39 prepare
[root@node1 harbor_data]# pwd
/opt/harbor_data
[root@node1 harbor_data]# ll
total 0
drwxr-xr-x. 2   10000    10000  6 Mar 14 17:17 ca_download
drwx------. 2 polkitd ssh_keys  6 Mar 14 17:17 database
drwxr-xr-x. 2   10000    10000  6 Mar 14 17:17 job_logs
drwxr-xr-x. 2 polkitd ssh_keys  6 Mar 14 17:17 redis
drwxr-xr-x. 2   10000    10000  6 Mar 14 17:17 registry
drwxr-xr-x. 6 root root 58 Mar 14 17:17 secret执行安装脚本isntall.sh
bash
[root@node1 harbor]# ./install.sh

[Step 0]: checking if docker is installed ...

Note: docker version: 24.0.4

[Step 1]: checking docker-compose is installed ...

Note: Docker Compose version v2.27.1

[Step 2]: loading Harbor images ...
431134679797: Loading layer  8.541MB/8.541MB
80e8bf6c6b6c: Loading layer  4.096kB/4.096kB
699d103ec779: Loading layer  3.072kB/3.072kB
d3c1f8190761: Loading layer  18.97MB/18.97MB
892a6e713d21: Loading layer   19.9MB/19.9MB
Loaded image: goharbor/registry-photon:v2.14.3
64a9aae83f5b: Loading layer  132.1MB/132.1MB
7b62e4389f49: Loading layer  3.584kB/3.584kB
05b90e26e5b2: Loading layer  3.072kB/3.072kB
fae5bbd3acbf: Loading layer   2.56kB/2.56kB
dd6a4f4d158c: Loading layer  3.072kB/3.072kB
ba9c3a512c84: Loading layer  3.584kB/3.584kB
28764de3948f: Loading layer  20.48kB/20.48kB
Loaded image: goharbor/harbor-log:v2.14.3
6ab4d8210203: Loading layer  10.14MB/10.14MB
8091c5359788: Loading layer  4.096kB/4.096kB
4b1083121cbb: Loading layer  3.072kB/3.072kB
7badf53f790a: Loading layer  162.2MB/162.2MB
b7cf602b2983: Loading layer  16.49MB/16.49MB
05223123852b: Loading layer  179.6MB/179.6MB
Loaded image: goharbor/trivy-adapter-photon:v2.14.3
471fb193a16e: Loading layer  119.3MB/119.3MB
1de4ab78dc79: Loading layer  6.985MB/6.985MB
2c39e53c3959: Loading layer  253.4kB/253.4kB
8ec675ff0fd8: Loading layer  1.539MB/1.539MB
Loaded image: goharbor/harbor-portal:v2.14.3
a588f842860a: Loading layer   11.5MB/11.5MB
989080f3fc59: Loading layer  3.584kB/3.584kB
9e2b6d0cfcb9: Loading layer   2.56kB/2.56kB
078556b955a6: Loading layer  75.55MB/75.55MB
24e1fd3c9e70: Loading layer  5.632kB/5.632kB
938f8045460a: Loading layer  130.6kB/130.6kB
85c74e9f5628: Loading layer  209.9kB/209.9kB
245a25228972: Loading layer  76.82MB/76.82MB
5f70bf18a086: Loading layer  1.024kB/1.024kB
ace8ced110e9: Loading layer   2.56kB/2.56kB
Loaded image: goharbor/harbor-core:v2.14.3
c9e04826e9be: Loading layer   11.5MB/11.5MB
edd7f759c355: Loading layer  3.584kB/3.584kB
ea77c610e66a: Loading layer   2.56kB/2.56kB
a4e21efe9150: Loading layer  63.18MB/63.18MB
5573b7f4d841: Loading layer  64.11MB/64.11MB
5f70bf18a086: Loading layer  1.024kB/1.024kB
Loaded image: goharbor/harbor-jobservice:v2.14.3
16c1268c6ecf: Loading layer  119.3MB/119.3MB
Loaded image: goharbor/nginx-photon:v2.14.3
Loaded image: goharbor/prepare:v2.14.3
7873dd3fb72a: Loading layer   11.5MB/11.5MB
a53abc4bafde: Loading layer  39.98MB/39.98MB
a00f7498a25e: Loading layer  4.608kB/4.608kB
2e012559f5f7: Loading layer   40.9MB/40.9MB
5f70bf18a086: Loading layer  1.024kB/1.024kB
Loaded image: goharbor/harbor-exporter:v2.14.3
d71c7166ad5b: Loading layer  16.64MB/16.64MB
fd451c161648: Loading layer  182.7MB/182.7MB
0d4da0459de0: Loading layer  26.74MB/26.74MB
a19c7f8c3ba3: Loading layer  12.06MB/12.06MB
17193fdaa4b4: Loading layer   5.12kB/5.12kB
f0dc1de7b547: Loading layer  6.144kB/6.144kB
d1debf232f43: Loading layer  3.072kB/3.072kB
a562d944c69e: Loading layer  2.048kB/2.048kB
4a046fd552ea: Loading layer   2.56kB/2.56kB
2eae49fdecec: Loading layer  14.85kB/14.85kB
Loaded image: goharbor/harbor-db:v2.14.3
95df0a6deb2b: Loading layer  8.541MB/8.541MB
bd761f9f522a: Loading layer  4.096kB/4.096kB
60c425ab08b5: Loading layer  18.97MB/18.97MB
a70b693d1cbd: Loading layer  3.072kB/3.072kB
f593b600d292: Loading layer   39.2MB/39.2MB
72654bc77339: Loading layer  59.09MB/59.09MB
Loaded image: goharbor/harbor-registryctl:v2.14.3
bc07d4a64a96: Loading layer  16.64MB/16.64MB
18d8a793a6bf: Loading layer  117.6MB/117.6MB
5f70bf18a086: Loading layer  1.024kB/1.024kB
d54c9c6d73c3: Loading layer  3.072kB/3.072kB
d842dbc9b4b0: Loading layer   59.9kB/59.9kB
d71cfb20d2c8: Loading layer  61.95kB/61.95kB
Loaded image: goharbor/redis-photon:v2.14.3


[Step 3]: preparing environment ...

[Step 4]: preparing harbor configs ...
prepare base dir is set to /opt/harbor
Clearing the configuration file: /config/portal/nginx.conf
Clearing the configuration file: /config/log/logrotate.conf
Clearing the configuration file: /config/log/rsyslog_docker.conf
Clearing the configuration file: /config/nginx/nginx.conf
Clearing the configuration file: /config/core/env
Clearing the configuration file: /config/core/app.conf
Clearing the configuration file: /config/registry/passwd
Clearing the configuration file: /config/registry/config.yml
Clearing the configuration file: /config/registryctl/env
Clearing the configuration file: /config/registryctl/config.yml
Clearing the configuration file: /config/db/env
Clearing the configuration file: /config/jobservice/env
Clearing the configuration file: /config/jobservice/config.yml
Generated configuration file: /config/portal/nginx.conf
Generated configuration file: /config/log/logrotate.conf
Generated configuration file: /config/log/rsyslog_docker.conf
Generated configuration file: /config/nginx/nginx.conf
Generated configuration file: /config/core/env
Generated configuration file: /config/core/app.conf
Generated configuration file: /config/registry/config.yml
Generated configuration file: /config/registryctl/env
Generated configuration file: /config/registryctl/config.yml
Generated configuration file: /config/db/env
Generated configuration file: /config/jobservice/env
Generated configuration file: /config/jobservice/config.yml
copy /data/secret/tls/harbor_internal_ca.crt to shared trust ca dir as name harbor_internal_ca.crt ...
ca file /hostfs/data/secret/tls/harbor_internal_ca.crt is not exist
copy  to shared trust ca dir as name storage_ca_bundle.crt ...
copy None to shared trust ca dir as name redis_tls_ca.crt ...
loaded secret from file: /data/secret/keys/secretkey
Generated configuration file: /compose_location/docker-compose.yml
Clean up the input dir


Note: stopping existing Harbor instance ...


[Step 5]: starting Harbor ...
[+] Running 10/10
 ✔ Network harbor_harbor        Created                                    0.1s
 ✔ Container harbor-log         Started                                    0.3s
 ✔ Container harbor-portal      Started                                    0.7s
 ✔ Container registry           Started                                    0.8s
 ✔ Container harbor-db          Started                                    0.6s
 ✔ Container redis              Started                                    0.5s
 ✔ Container registryctl        Started                                    0.8s
 ✔ Container harbor-core        Started                                    0.9s
 ✔ Container harbor-jobservice  Started                                    1.1s
 ✔ Container nginx              Started                                    1.2s
✔ ----Harbor has been installed and started successfully.----
用上面安装的docker-compose查看启动的容器
bash
[root@node1 harbor]# docker-compose ps
NAME                IMAGE                                 COMMAND                  SERVICE       CREATED              STATUS                        PORTS
harbor-core         goharbor/harbor-core:v2.14.3          "/harbor/entrypoint...."   core          About a minute ago   Up About a minute (healthy)
harbor-db           goharbor/harbor-db:v2.14.3            "/docker-entrypoint...."   postgresql    About a minute ago   Up About a minute (healthy)
harbor-jobservice   goharbor/harbor-jobservice:v2.14.3    "/harbor/entrypoint...."   jobservice    About a minute ago   Up About a minute (healthy)
harbor-log          goharbor/harbor-log:v2.14.3           "/bin/sh -c /usr/loc..."   log           About a minute ago   Up About a minute (healthy)   127.0.0.1:1514->10514/tcp
harbor-portal       goharbor/harbor-portal:v2.14.3        "nginx -g 'daemon of..."   portal        About a minute ago   Up About a minute (healthy)
nginx               goharbor/nginx-photon:v2.14.3         "nginx -g 'daemon of..."   proxy         About a minute ago   Up About a minute (healthy)   0.0.0.0:80->8080/tcp, [::]:80->8080/tcp, 0.0.0.0:443->8443/tcp, [::]:443->8443/tcp
redis               goharbor/redis-photon:v2.14.3         "redis-server /etc/r..."   redis         About a minute ago   Up About a minute (healthy)
registry            goharbor/registry-photon:v2.14.3      "/home/harbor/entryp..."   registry      About a minute ago   Up About a minute (healthy)
registryctl         goharbor/harbor-registryctl:v2.14.3   "/home/harbor/start...."   registryctl   About a minute ago   Up About a minute (healthy)
确保服务器域名映射正常,应当存在两个,自签CA的主机域名、和本地自己的域名
bash
vi /etc/hosts

192.168.239.133 node4
192.168.239.56 node1
测试docker是否可以登录
bash
[root@node1 harbor]# docker login node1
Username: admin
Password:
WARNING! Your password will be stored unencrypted in /root/.docker/config.json.
Configure a credential helper to remove this warning. See
https://docs.docker.com/engine/reference/commandline/login/#credentials-store

Login Succeeded
到此服务就安装好了,后续启停 harbor 在部署路径下执行这三个命令即可。当你重启了docker服务或者服务器本身,记得要重启harbor的容器服务,不然会无法访问
bash
docker-compose up -d      #启动
docker-compose stop       #停止
docker-compose restart #重新启动至于Windows电脑,修改C:\Windows\System32\drivers\etc下的host文件,和上面一样持有CA机构节点,以及 harbor 节点的域名,随后浏览器直接访问 harbor 节点的80端口
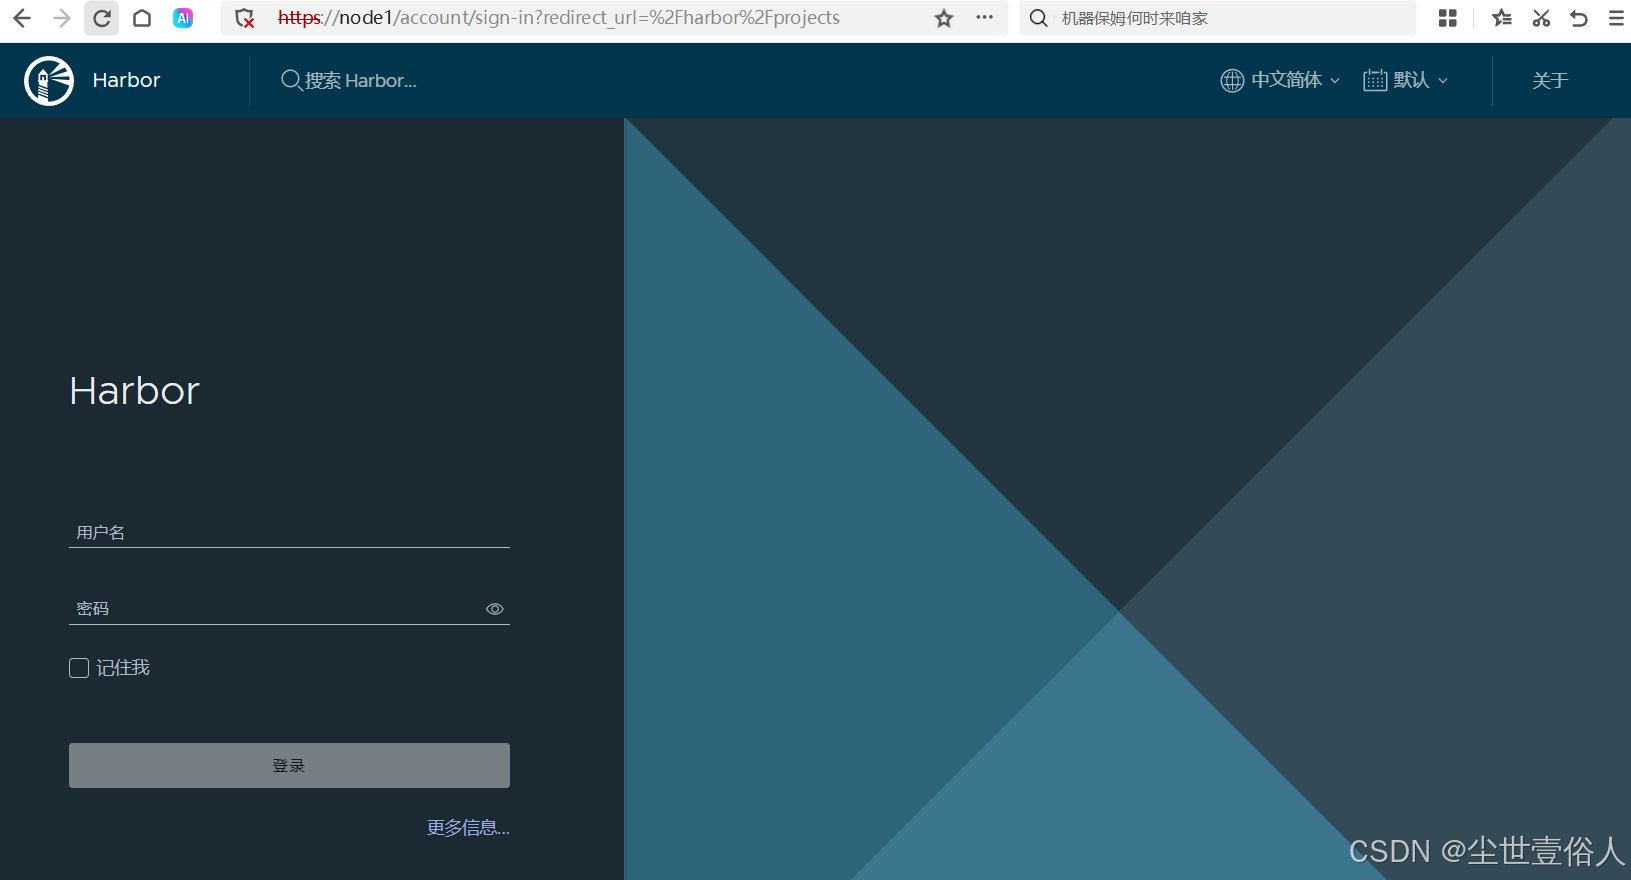
初始的用户名是 admin 密码是你配置文件中写的,后期在页面上可以新增其他用户
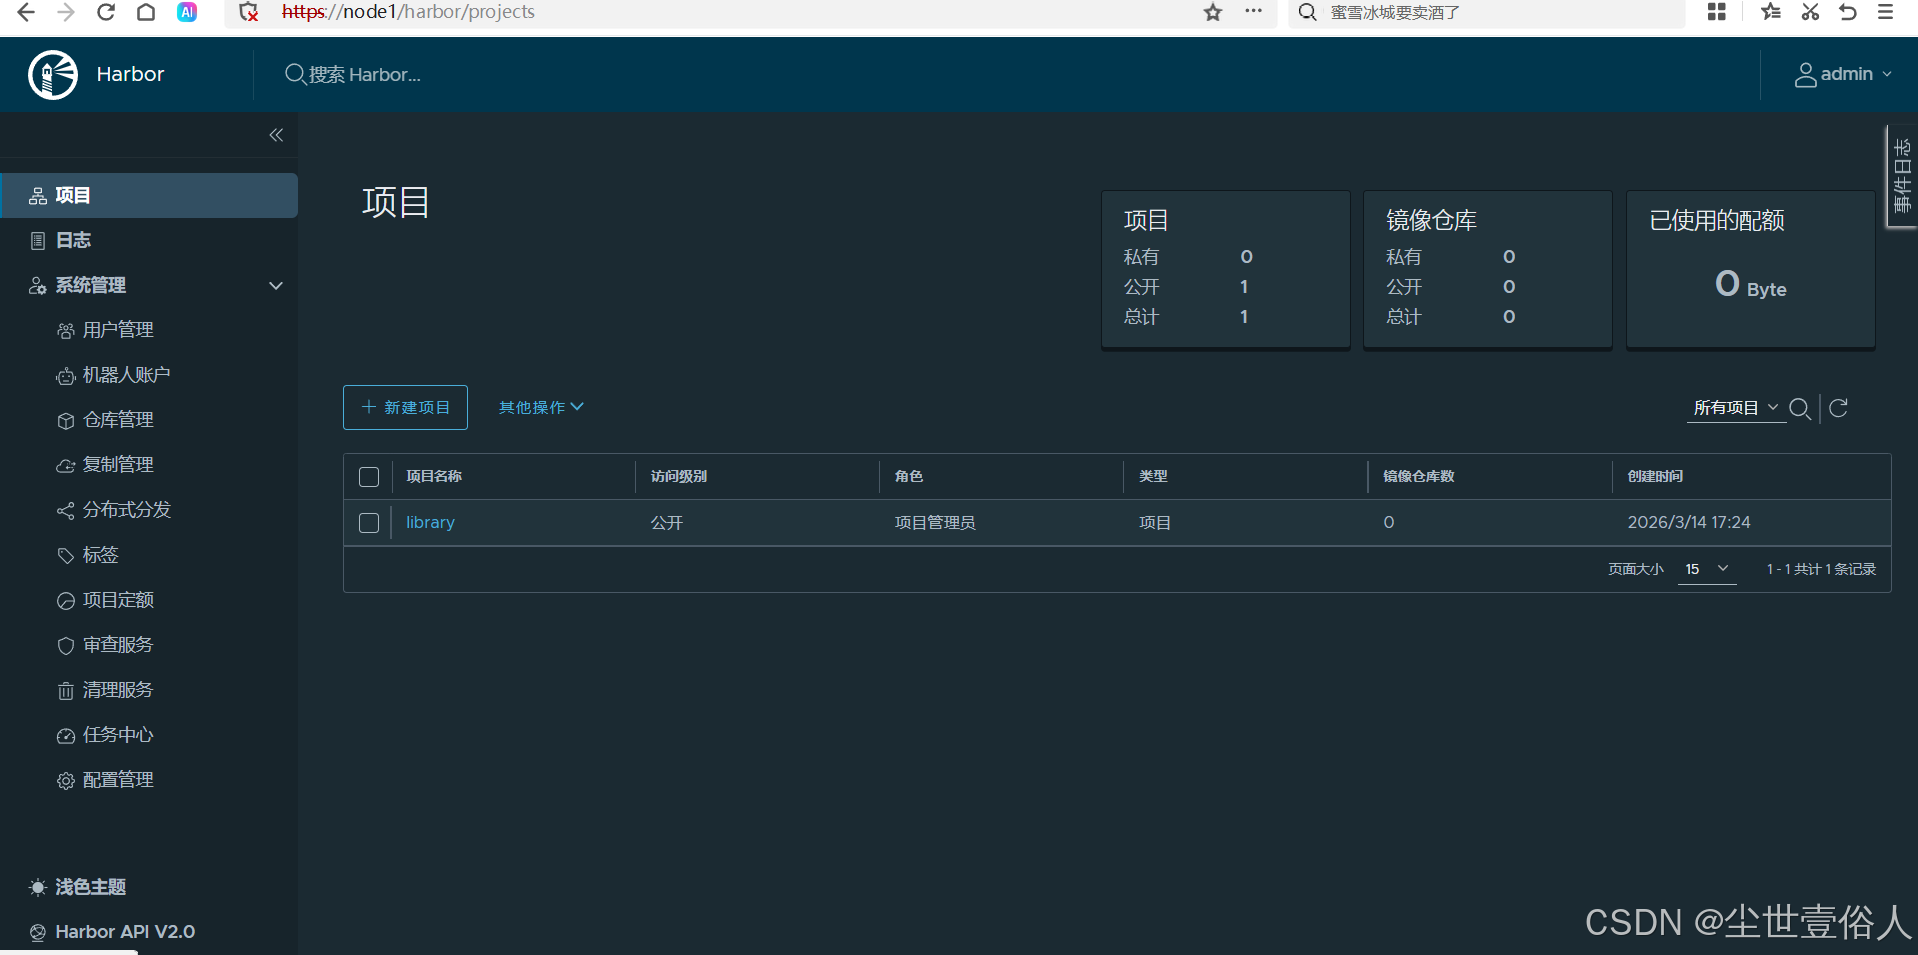
默认带了一个项目,可以删掉。建一个自己的项目,自己用这里配额不限制

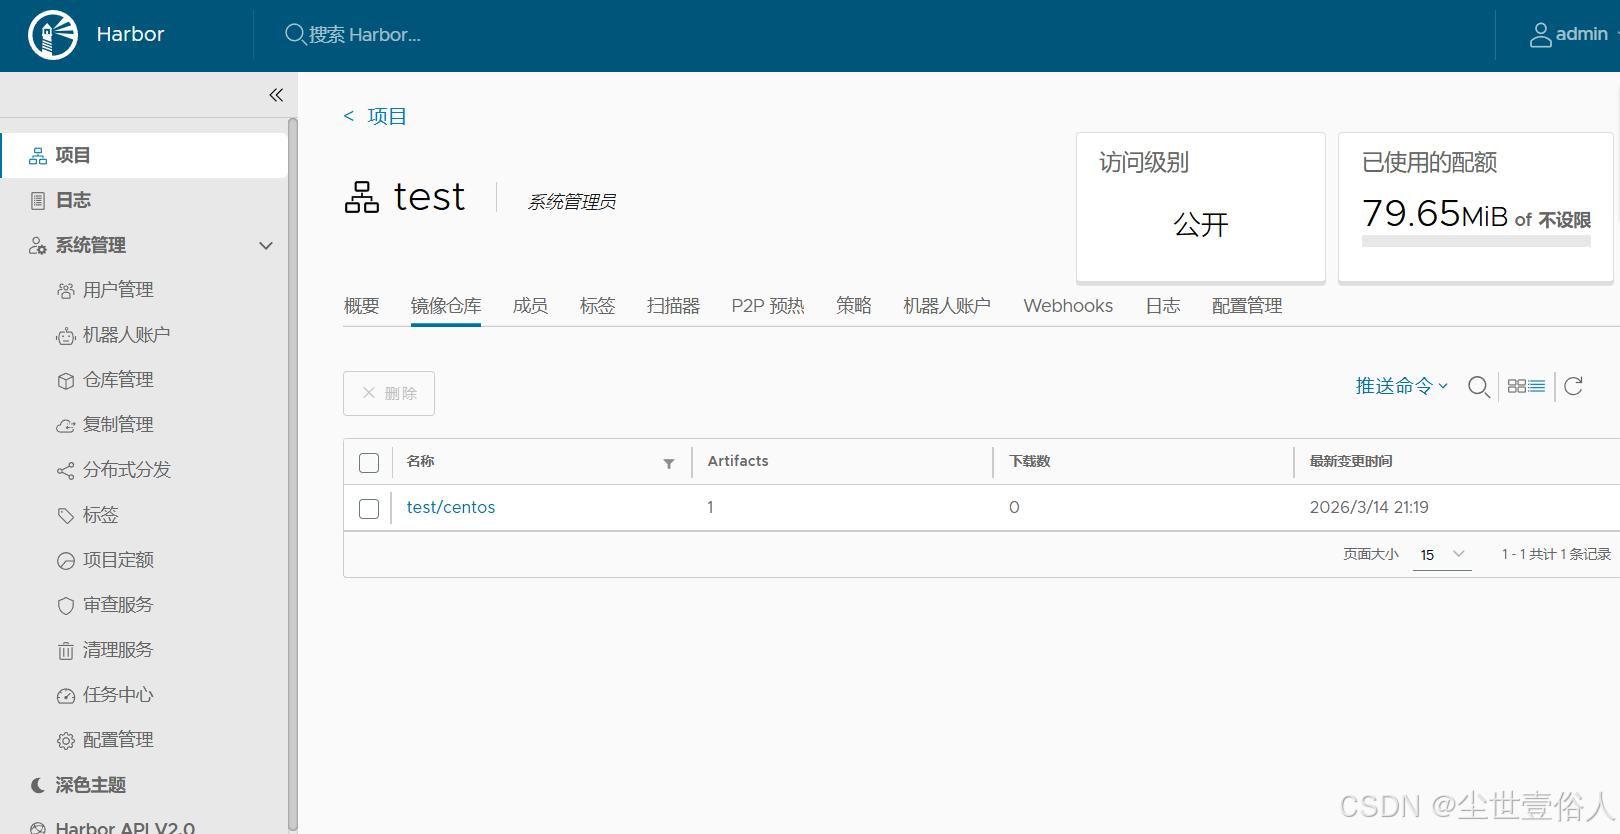
在项目的镜像仓库中,可以看到镜像推送的命令提示

到了这个页面,其实就应该能够明白。harbor的项目就是阿里云docker镜像服务的命名空间,阿里云个人实例给你三个的配额,私有部署就随自己实际使用来了。读者可以推送一个体验一下,因为这个时候会出现一个很抽象的事情
bash
# 先登录
[root@node1 harbor]# docker login node1
Username: admin
Password:
WARNING! Your password will be stored unencrypted in /root/.docker/config.json.
Configure a credential helper to remove this warning. See
https://docs.docker.com/engine/reference/commandline/login/#credentials-store

Login Succeeded
[root@node1 harbor]# docker tag centos:latest node1/test/centos:latest
[root@node1 harbor]# docker images
REPOSITORY                      TAG       IMAGE ID       CREATED       SIZE
centos                          latest    5d0da3dc9764   4 years ago   231MB
node1/test/centos               latest    5d0da3dc9764   4 years ago   231MB

# 注意!抽象的事情来了!!当你推送这个镜像会报错
[root@node1 harbor]# docker push node1/test/centos:latest
The push refers to repository [docker.io/node1/test/centos] 《-----注意报错的这个位置
Get "https://registry-1.docker.io/v2/": net/http: request canceled while waiting for connection (Client.Timeout exceeded while awaiting headers)
本文这里通过这个报错案例想要告诉各位读者的是,docker在推送或者拉取镜像时,对镜像名称的识别是先看第一部分是否有 . 或者 :,如果有这判定它是个域名,随后去访问域名对应的docker镜像服务,而第二部分开始往后就是仓库和具体镜像部分,通常镜像名称最多两级仓库/镜像。如果没有,则判定为给定的名称全部是仓库和镜像名称,则去连接默认的官方仓库
此时,由于上面部署时用的是 node1 这个域名,没有办法命中docker的域名判定,所以需要显示的给一个端口。操作如下
bash
#首先,在docker的ca证书路径下,新建一个同级路径 node1:443 ,将ca证书复制进去 ,这一步是因为docker的域名识别实在是太抽象了,给它显示的端口后,它在取根证书时会直接取同字符内容的路径
[root@node1 certs.d]# mkdir node1:443
[root@node1 certs.d]# ll
total 0
drwxr-xr-x. 2 root root 20 Mar 14 17:52 node1
drwxr-xr-x. 2 root root 20 Mar 14 21:06 node1:443
[root@node1 certs.d]# cp node1/ca.crt node1:443/
[root@node1 certs.d]# cd node1:443
[root@node1 node1:443]# ll
total 4
-rw-r--r--. 1 root root 1298 Mar 14 21:06 ca.crt

#重启docker 和 harbor
[root@node1 certs.d]# systemctl restart docker
[root@node1 harbor]# docker-compose restart
[+] restart 0/9
 ⠸ Container harbor-core       Restarting                                  10.3s
 ⠸ Container registry          Restarting                                  10.3s
 ⠸ Container nginx             Restarting                                  10.3s
 ⠸ Container harbor-db         Restarting                                  10.3s
 ⠸ Container harbor-jobservice Restarting                                  10.3s
 ⠸ Container harbor-portal     Restarting                                  10.3s
 ⠸ Container registryctl       Restarting                                  10.3s
 ⠸ Container redis             Restarting                                  10.3s
 ⠸ Container harbor-log        Restarting

# 这里注意,你登录的服务连接也要写成 node1:443
[root@node1 harbor]# docker login node1:443
Username: admin
Password:
WARNING! Your password will be stored unencrypted in /root/.docker/config.json.
Configure a credential helper to remove this warning. See
https://docs.docker.com/engine/reference/commandline/login/#credentials-store

Login Succeeded

#把原本的镜像标签也改成 node1:443 开头
[root@node1 harbor]# docker tag node1/test/centos:latest node1:443/test/centos:latest

# 现在就可以推送了
[root@node1 harbor]# docker push node1:443/test/centos:latest
The push refers to repository [node1:443/test/centos]
74ddd0ec08fa: Pushed
latest: digest: sha256:a1801b843b1bfaf77c501e7a6d3f709401a1e0c83863037fa3aab063a7fdb9dc size: 529页面上项目的镜像仓库就可以看到内容了。所以各位读者知道这个抽象问题后,应该能够理解为什么公司内部署服务,常常用DNS做主机名,它是有一定道理的
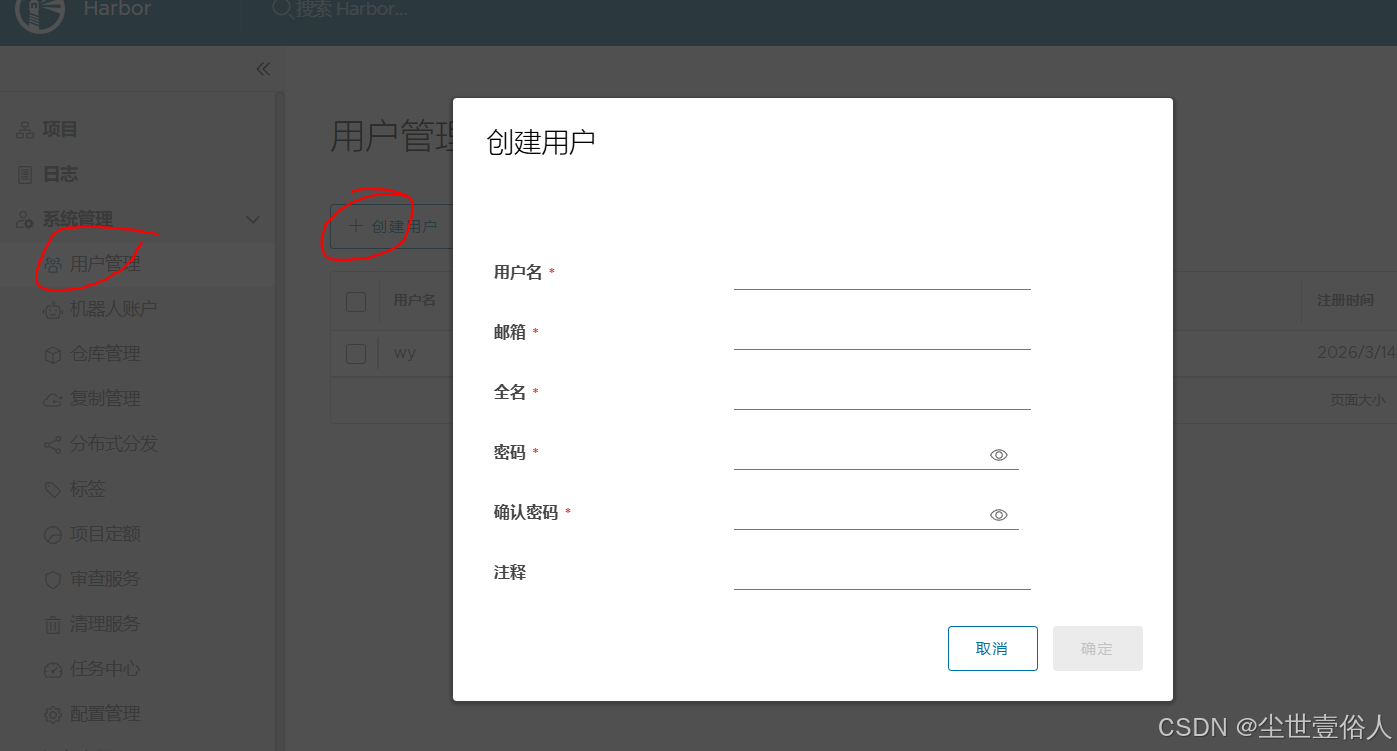
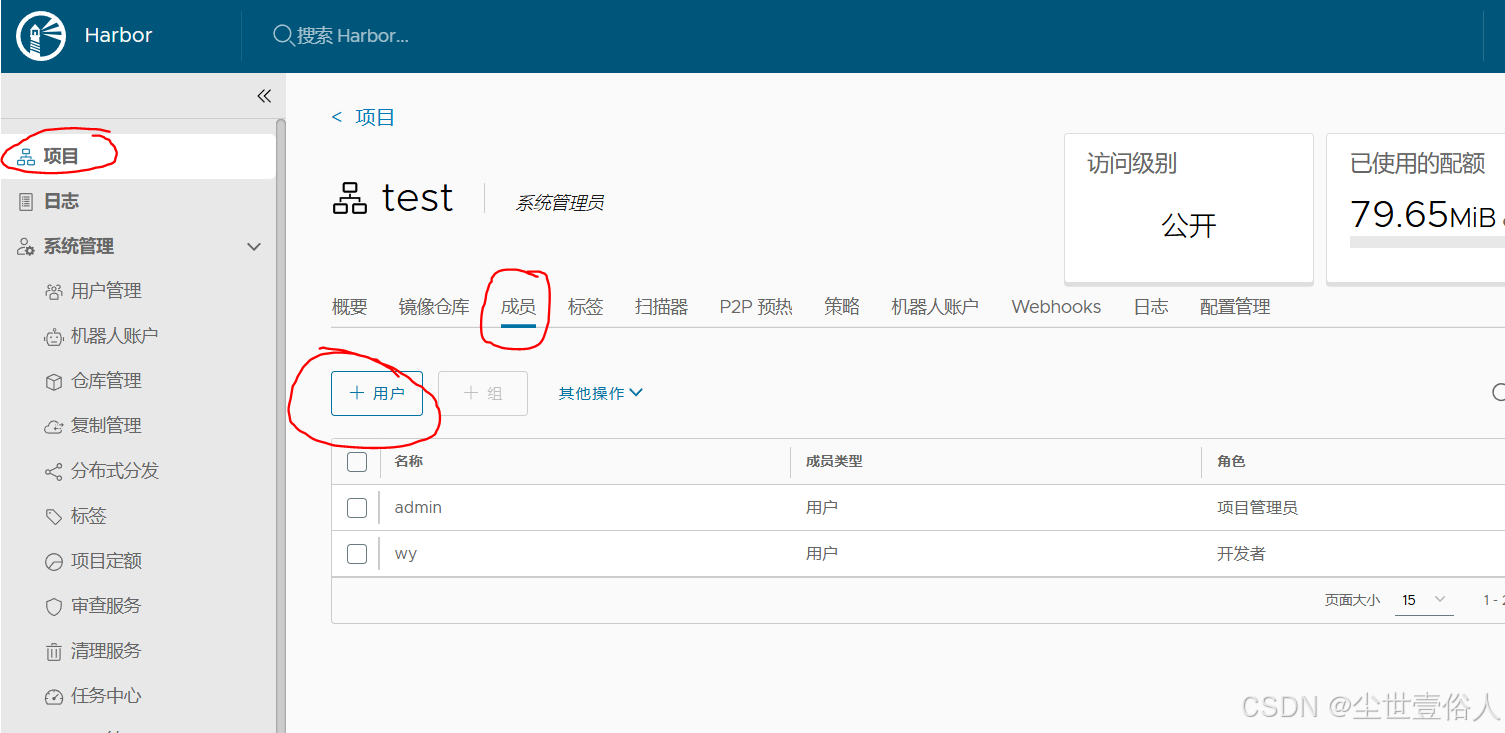
其他人想要使用这个服务,在左侧用户管理中创建用户,并加入项目即可,需要留心的是给一个用户添加项目时,harbor的页面是修改联动,而不是直接的下拉选择框
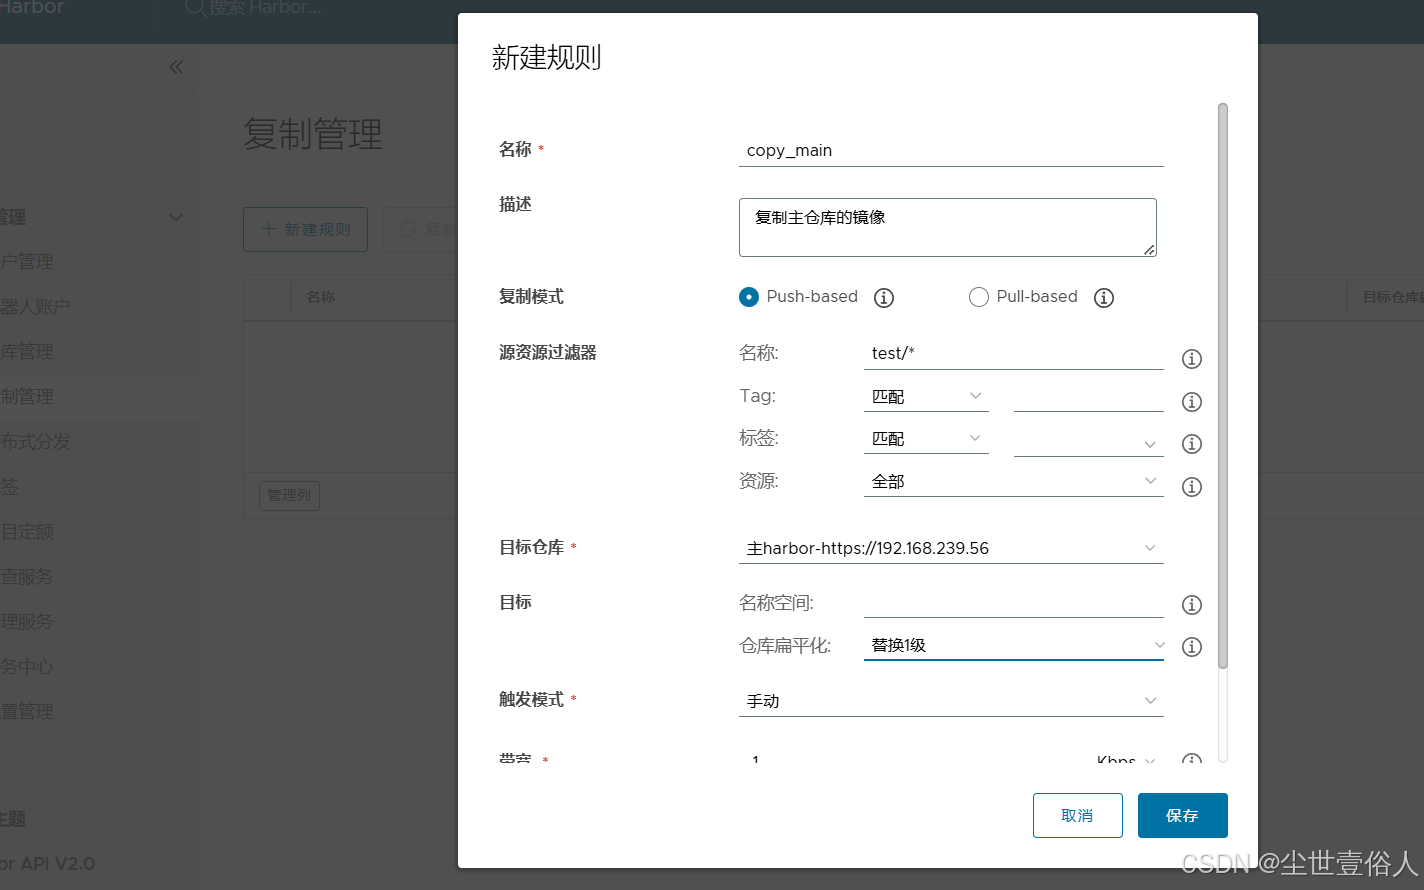
harbor的仓库管理是用来同步拉取其他docker镜像服务的,比如两台 harbor 之间镜像同步,它还可以拉取github的等等。本文这里由于只有一台实例,所以只给各位读者演示如何使用
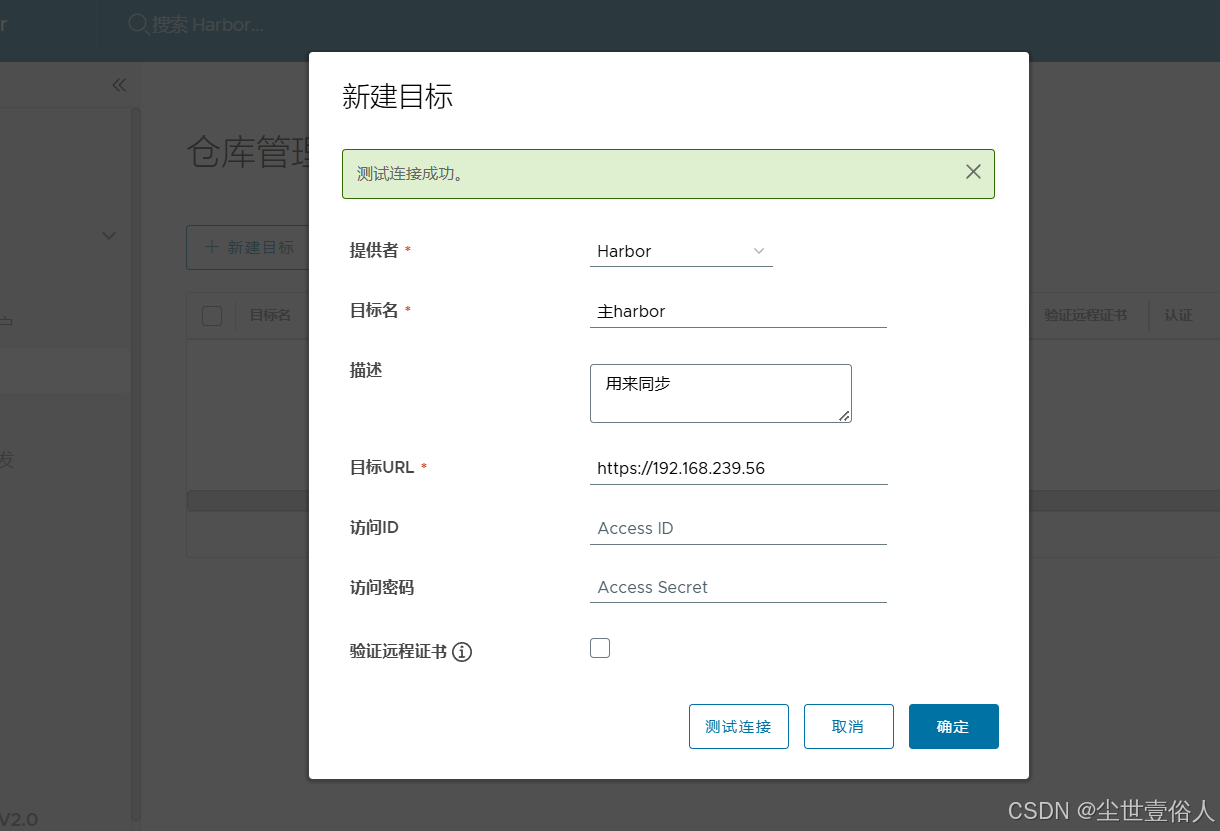
随后在复制管理中配一个远程仓库接收到push数据时复制
最后要说一下Compose这个工具,其实现在已经基本不用它了,除了单点测试等特殊需求。它的执行依赖一个服务为跨度的yml配置文件,可以参考 harbor 安装路径下的docker-compose.yml 文件。本身上命令执行会自动寻找当前路径下的这个文件
yml
# 格式是固定的 services 做第一级配置
services:
  # 第二级是你的服务,自定义,由字母(a-z, A-Z)、数字(0-9)、下划线(_)、横线(-)组成,不能以数字开头,区分大小写
  log:
    # 第三级开始是固定的关键字,image是用那个镜像
    image: goharbor/harbor-log:v2.14.3
    # 容器名称
    container_name: harbor-log
    # 容器被退出时的重启策略,可选值 no(退出就不重启了)、always(无论退出状态是什么都要重启)、on-failure(退出码非0时重启)、unless-stopped(除非手动停止否则重启),多数用always
    restart: always
    # 特权容器的一种可控写法,这个在手动 run 的时候也可以做,但是由于比较麻烦,所以常态直接用特权模式了,这里cap_drop意思是先删除所有特权
    cap_drop:
      - ALL
    # 添加那些额外的权限,这你可以看docker run 命令的帮助
    cap_add:
      - CHOWN
      - DAC_OVERRIDE
      - SETGID
      - SETUID
    # 数据卷挂载
    volumes:
      # 宿主机路径:容器路径:z  最后的z是在SELinux开启的系统下,告诉SElinux该宿主机路径容器可以访问,如果是关闭的你就可以不写
      - /var/log/harbor/:/var/log/docker/:z
      # 控制更精细的挂载方式 bind 是绑定挂载
      - type: bind
        # 宿主机路径
        source: ./common/config/log/logrotate.conf
        # 容器路径
        target: /etc/logrotate.d/logrotate.conf
      - type: bind
        source: ./common/config/log/rsyslog_docker.conf
        target: /etc/rsyslog.d/rsyslog_docker.conf
    # 端口映射 宿主机:宿主机端口:容器端口
    ports:
      - 127.0.0.1:1514:10514
    #加入那个网络
    networks:
      - harbor
  registry:
    image: goharbor/registry-photon:v2.14.3
    container_name: registry
    restart: always
    cap_drop:
      - ALL
    cap_add:
      - CHOWN
      - SETGID
      - SETUID
    volumes:
      - /opt/harbor_data/registry:/storage:z
      - ./common/config/registry/:/etc/registry/:z
      - type: bind
        source: /opt/harbor_data/secret/registry/root.crt
        target: /etc/registry/root.crt
      - type: bind
        source: ./common/config/shared/trust-certificates
        target: /harbor_cust_cert
    networks:
      - harbor
    # 控制启动顺序,这里需要 log 启动后这个才第二顺位启动
    depends_on:
      - log
    # 日志驱动,也是有几种可选的可以网上搜一下,这里用了日志服务,把日志推送到最上面的log服务中
    logging:
      driver: "syslog"
      options:
        # 日志服务的地址和日志内容的标签就是表明日志来源的身份
        syslog-address: "tcp://localhost:1514"
        tag: "registry"
  registryctl:
    image: goharbor/harbor-registryctl:v2.14.3
    container_name: registryctl
    # 环境变量来自于一个配置文件
    env_file:
      - ./common/config/registryctl/env
    restart: always
    cap_drop:
      - ALL
    cap_add:
      - CHOWN
      - SETGID
      - SETUID
    volumes:
      - /opt/harbor_data/registry:/storage:z
      - ./common/config/registry/:/etc/registry/:z
      - type: bind
        source: ./common/config/registryctl/config.yml
        target: /etc/registryctl/config.yml
      - type: bind
        source: ./common/config/shared/trust-certificates
        target: /harbor_cust_cert
    networks:
      - harbor
    depends_on:
      - log
    logging:
      driver: "syslog"
      options:
        syslog-address: "tcp://localhost:1514"
        tag: "registryctl"
  postgresql:
    image: goharbor/harbor-db:v2.14.3
    container_name: harbor-db
    restart: always
    cap_drop:
      - ALL
    cap_add:
      - CHOWN
      - DAC_OVERRIDE
      - SETGID
      - SETUID
    volumes:
      - /opt/harbor_data/database:/var/lib/postgresql/data:z
    networks:
      harbor:
    env_file:
      - ./common/config/db/env
    depends_on:
      - log
    logging:
      driver: "syslog"
      options:
        syslog-address: "tcp://localhost:1514"
        tag: "postgresql"
    shm_size: '1gb'
  core:
    image: goharbor/harbor-core:v2.14.3
    container_name: harbor-core
    env_file:
      - ./common/config/core/env
    restart: always
    cap_drop:
      - ALL
    cap_add:
      - SETGID
      - SETUID
    volumes:
      - /opt/harbor_data/ca_download/:/etc/core/ca/:z
      - /opt/harbor_data/:/data/:z
      - ./common/config/core/certificates/:/etc/core/certificates/:z
      - type: bind
        source: ./common/config/core/app.conf
        target: /etc/core/app.conf
      - type: bind
        source: /opt/harbor_data/secret/core/private_key.pem
        target: /etc/core/private_key.pem
      - type: bind
        source: /opt/harbor_data/secret/keys/secretkey
        target: /etc/core/key
      - type: bind
        source: ./common/config/shared/trust-certificates
        target: /harbor_cust_cert
    networks:
      harbor:
    depends_on:
      - log
      - registry
      - redis
      - postgresql
    logging:
      driver: "syslog"
      options:
        syslog-address: "tcp://localhost:1514"
        tag: "core"
  portal:
    image: goharbor/harbor-portal:v2.14.3
    container_name: harbor-portal
    restart: always
    cap_drop:
      - ALL
    cap_add:
      - CHOWN
      - SETGID
      - SETUID
      - NET_BIND_SERVICE
    volumes:
      - type: bind
        source: ./common/config/portal/nginx.conf
        target: /etc/nginx/nginx.conf
    networks:
      - harbor
    depends_on:
      - log
    logging:
      driver: "syslog"
      options:
        syslog-address: "tcp://localhost:1514"
        tag: "portal"

  jobservice:
    image: goharbor/harbor-jobservice:v2.14.3
    container_name: harbor-jobservice
    env_file:
      - ./common/config/jobservice/env
    restart: always
    cap_drop:
      - ALL
    cap_add:
      - CHOWN
      - SETGID
      - SETUID
    volumes:
      - /opt/harbor_data/job_logs:/var/log/jobs:z
      - type: bind
        source: ./common/config/jobservice/config.yml
        target: /etc/jobservice/config.yml
      - type: bind
        source: ./common/config/shared/trust-certificates
        target: /harbor_cust_cert
    networks:
      - harbor
    depends_on:
      - core
    logging:
      driver: "syslog"
      options:
        syslog-address: "tcp://localhost:1514"
        tag: "jobservice"
  redis:
    image: goharbor/redis-photon:v2.14.3
    container_name: redis
    restart: always
    cap_drop:
      - ALL
    cap_add:
      - CHOWN
      - SETGID
      - SETUID
    volumes:
      - /opt/harbor_data/redis:/var/lib/redis
    networks:
      harbor:
    depends_on:
      - log
    logging:
      driver: "syslog"
      options:
        syslog-address: "tcp://localhost:1514"
        tag: "redis"
  proxy:
    image: goharbor/nginx-photon:v2.14.3
    container_name: nginx
    restart: always
    cap_drop:
      - ALL
    cap_add:
      - CHOWN
      - SETGID
      - SETUID
      - NET_BIND_SERVICE
    volumes:
      - ./common/config/nginx:/etc/nginx:z
      - /opt/harbor_data/secret/cert:/etc/cert:z
      - type: bind
        source: ./common/config/shared/trust-certificates
        target: /harbor_cust_cert
    networks:
      - harbor
    ports:
      - 80:8080
      - 443:8443
    depends_on:
      - registry
      - core
      - portal
      - log
    logging:
      driver: "syslog"
      options:
        syslog-address: "tcp://localhost:1514"
        tag: "proxy"

# 决定这个服务使用那个docker网络
networks:
  # 自动生成的网络命名格式为: 执行启动命令所在目录名称_这里的配置值 比如harbor的叫做 harbor_harbor
  harbor:
    # 默认是false,表明这个网络会自动创建 ,通常用 true 且自己另行创建
    external: false