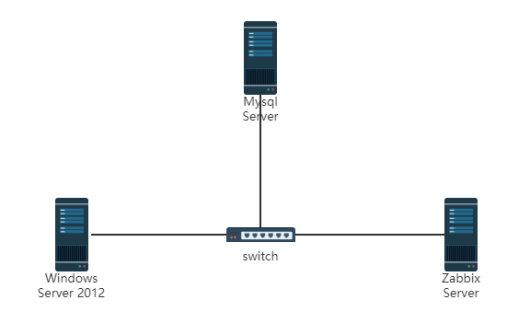
拓扑图
准备环境(部署lnmp)
server---192.168.1.110(仅主机)
agent----192.168.1.120(仅主机)
操作步骤
关闭防火墙、关闭selinux、修改hosts
root@server# systemctl stop firewalld && systemctl disable firewalld
root@server# vi /etc/selinux/config
SELINUX=disabled
root@server# vi /etc/hosts
192.168.1.110 server
192.168.1.120 agent
提前准备对应包

部署LNMP环境
1、安装nginx
root@server lnmp# mkdir lnmp
root@server lnmp# yum -y install gcc gcc-c++ autoconf automake libtool make zlib zlib-devel openssl openssl-devel pcre* pcre-devel
root@server \~# useradd -M -u 8001 -s /sbin/nologin nginx 创建nginx用户
root@server nginx-1.14.2# id nginx
uid=8001(nginx) gid=8001(nginx) 组=8001(nginx)
root@server lnmp# tar -xf nginx-1.14.2.tar.gz
root@server lnmp# cd nginx-1.14.2
root@servernginx-1.14.2# ./configure --prefix=/usr/local/nginx --with-http_dav_module --with-http_stub_status_module --with-http_addition_module --with-http_sub_module --with-http_flv_module --with-http_mp4_module --with-pcre
root@servernginx-1.14.2# make && make install
root@server \~# vi /usr/local/nginx/conf/nginx.conf
user nginx nginx; //在第四行添加
删除前面的#;更改添加红色部分
44 location / {
45 root html;
46 index index.html index.htm index.php;
}
}
location ~ \.php$ {
root html;
67 fastcgi_pass 127.0.0.1:9000;
68 fastcgi_index index.php;
69 fastcgi_param SCRIPT_FILENAME /usr/local/nginx/html$fastcgi_script_name;
70 include fastcgi_params;
}
root@server \~# /usr/local/nginx/sbin/nginx //启动nginx
root@server lnmp# netstat -nltup | grep nginx
tcp 0 0 0.0.0.0:80 0.0.0.0:* LISTEN 4991/nginx: master
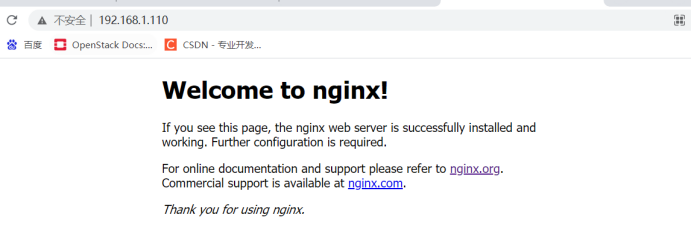
网页访问,出现以下画面部署nginx成功
2、安装mysql
root@server lnmp# yum -y install cmake ncurses-devel
root@server lnmp# useradd -M -s /sbin/nologin mysql
root@server lnmp# tar -xf mysql-5.6.26.tar.gz
root@server mysql-5.6.26# cmake -DCMAKE_INSTALL_PREFIX=/usr/local/mysql -DMYSQL_UNIX_ADDR=/tmp/mysql.sock -DDEFAULT_CHARSET=utf8 -DDEFAULT_COLLATION=utf8_general_ci -DWITH_EXTRA_CHARSETS=all -DWITH_MYISAM_STORAGE_ENGINE=1 -DWITH_INNOBASE_STORAGE_ENGINE=1 -DWITH_MEMORY_STORAGE_ENGINE=1 -DWITH_READLINE=1 -DENABLED_LOCAL_INFILE=1 -DMYSQL_DATADIR=/usr/local/mysql/data -DMYSQL-USER=mysql
root@server mysql-5.6.26# make -j 2 && make install //2核CPU,用-j2编译
root@server mysql-5.6.26# cd && chown -R mysql:mysql /usr/local/mysql/
root@server\~#cp /usr/local/mysql/support-files/my-default.cnf /etc/my.cnf
root@server \~# cp /usr/local/mysql/support-files/mysql.server /etc/init.d/mysqld
root@server \~# vi /etc/init.d/mysqld
46 basedir=/usr/local/mysql
47 datadir=/usr/local/mysql/data
root@server \~# chkconfig mysqld on //启动数据库
初始化数据库:
root@server support-files# /usr/local/mysql/scripts/mysql_install_db --user=mysql --defaults-file=/etc/my.cnf --basedir=/usr/local/mysql --datadir=/usr/local/mysql/data
必须出现2个OK才表示初始化成功!!!
root@server \~# ln -s /usr/local/mysql/bin/* /bin/
root@server \~# /etc/init.d/mysqld start
Starting MySQL. SUCCESS!
root@server \~# netstat -natup | grep 3306
tcp6 0 0 :::3306 :::* LISTEN 33238/mysqld
root@server \~# mysql_secure_installation //初始化数据库
到这里提示需要创建密码,我们先不创建,根据提示按Y下一步。到创建新密码那一步时,再创建密码。密码为:000000
root@server \~# mysql -uroot -p000000 //测试登录成功!
3、安装PHP
root@server \~# yum -y install gcc gcc-c++ libxml2-devel openssl-devel curl-devel libjpeg-devel libpng-devel libicu-devel freetype-devel openldap-devel openldap openldap-devel php-pear sqlite-devel bzip2
root@server lnmp# tar -xf libmcrypt-2.5.8.tar.bz2
root@server libmcrypt-2.5.8# ./configure --prefix=/usr/local/libmcrypt //编译安装
root@server libmcrypt-2.5.8# make && make install
root@server \~# vim /etc/ld.so.conf //编辑这个文件,添加两个lib库的位置
/usr/local/libmcrypt/lib
/usr/local/mysql/lib
root@server \~# ldconfig //执行这个生效
root@server \~# echo "ldconfig" >> /etc/rc.local //写入到开机自动执行
root@server lnmp# tar -xf php-5.6.13.tar.bz2
root@server lnmp# cd php-5.6.13/
root@server php-5.6.13# ./configure --prefix=/usr/local/php --with-config-file-path=/usr/local/php --with-mysqli=mysqlnd --with-pdo-mysql=mysqlnd --with-iconv-dir --with-freetype-dir --with-jpeg-dir --with-png-dir --with-zlib --with-libxml-dir=/usr --enable-xml --disable-rpath --enable-bcmath --enable-shmop --enable-sysvsem --enable-inline-optimization --with-curl --enable-mbregex --enable-fpm --enable-mbstring --with-gd --enable-mysqlnd --enable-gd-native-ttf --with-openssl --with-mhash --enable-pcntl --enable-sockets --with-xmlrpc --enable-soap --with-gettext --with-mcrypt=/usr/local/libmcrypt
root@server php-5.6.13# make -j 2 && make install //执行安装
root@server php-5.6.13# cp -a php.ini-development /usr/local/php/php.ini //复制PHP.ini 文件
root@server php-5.6.13]# cp -a sapi/fpm/init.d.php-fpm /etc/init.d/php-fpm //复制启动及脚本文件
root@server php-5.6.13#cd /usr/local/php/etc
root@server etc# cp php-fpm.conf.default php-fpm.conf
\[root@server php# chmod a+x /etc/init.d/php-fpm
root@server php# /etc/init.d/php-fpm start
Starting php-fpm done
root@server php-5.6.13# ss -tan | grep 9000
LISTEN 0 128 127.0.0.1:9000 *:*
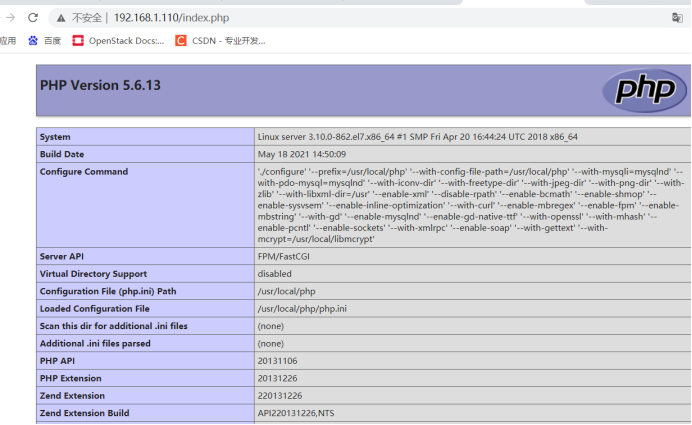
测试Nginx能否识别PHP文件
root@server \~# echo "<?php phpinfo(); ?>" >> /usr/local/nginx/html/index.php
网页访问:http://192.168.1.110/index.php
到这里就部署完LNMP环境,现在开始部署zabbix监控
4、安装zabbix
root@server zabbix-4.2.4# useradd -s /sbin/nologin -M zabbix //创建zabbix用户
root@server zabbix-4.2.4# yum install -y net-snmp-devel libevent libevent-devel //依赖关系解决
root@server zabbix-4.2.4# ./configure --prefix=/usr/local/zabbix --enable-server --enable-agent --with-mysql=/usr/local/mysql/bin/mysql_config --with-net-snmp --with-libcurl --with-mysql //编译安装
出现这个代表编译成功
直接执行make install
root@server zabbix-4.2.4# make install
root@server \~# mysql -uroot -p000000
mysql> create database zabbix;
mysql> grant all on zabbix.* to zabbix@localhost identified by '000000';
mysql> flush privileges; //刷新系统权限
root@server \~# /etc/init.d/mysqld restart
Shutting down MySQL.. SUCCESS!
Starting MySQL. SUCCESS!
root@server \~# mysql -uzabbix -p000000 //没有报错就登录成功
root@server zabbix-4.2.4# mysql -uzabbix -p000000 zabbix < database/mysql/schema.sql
root@server zabbix-4.2.4# mysql -uzabbix -p000000 zabbix < database/mysql/images.sql
root@server zabbix-4.2.4# mysql -uzabbix -p000000 zabbix < database/mysql/data.sql
root@server \~# vi /usr/local/zabbix/etc/zabbix_server.conf
85 DBHost=localhost #默认注释掉了,直接取消注释即可
94 DBName=zabbix #数据库用户,我们授权的用户也是zabbix
110 DBUser=zabbix #默认是 root,我们授权的用户是 zabbix
118 DBPassword=000000 #密码我们授权的是 000000
root@server \~# vi /usr/local/zabbix/etc/zabbix_agentd.conf
281 UnsafeUserParameters=1 #允许所有的字符是在用户定义的参数,参数传递,也就是支持自定义脚本
root@server \~# /usr/local/zabbix/sbin/zabbix_server
root@server zabbix-4.2.4# cd misc/init.d/fedora/core
root@server core# cp -a * /etc/init.d/
root@server core# chmod a+x /etc/init.d/zabbix_*
root@server core# vi /etc/init.d/zabbix_server
22 BASEDIR=/usr/local/zabbix
root@server core# vi /etc/init.d/zabbix_agentd
22 BASEDIR=/usr/local/zabbix
root@server core# /etc/init.d/zabbix_agentd start
root@server core# netstat -lnupt | grep zabbix //只启动一个端口
tcp 0 0 0.0.0.0:10050 0.0.0.0:* LISTEN 50391/zabbix_agentd
root@server core# find / -name mysql.sock
/tmp/mysql.sock
root@server core# vi /usr/local/zabbix/etc/zabbix_server.conf
DBSocket= /tmp/mysql.sock //添加这一行
root@server core# systemctl daemon-reload
root@server core# /etc/init.d/zabbix_server restart //重新启动zabbix_server
root@server core# netstat -lnupt | grep zabbix
tcp 0 0 0.0.0.0:10050 0.0.0.0:* LISTEN 50391/zabbix_agentd
tcp 0 0 0.0.0.0:10051 0.0.0.0:* LISTEN 50804/zabbix_server
root@server init.d# /usr/local/nginx/sbin/nginx -s reload
root@server init.d# /etc/init.d/zabbix_server restart
root@server init.d# /etc/init.d/php-fpm restart

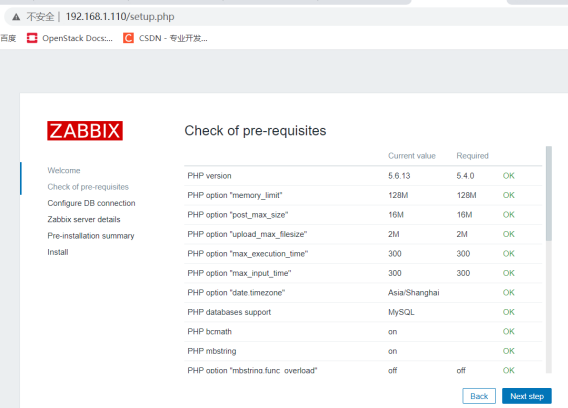
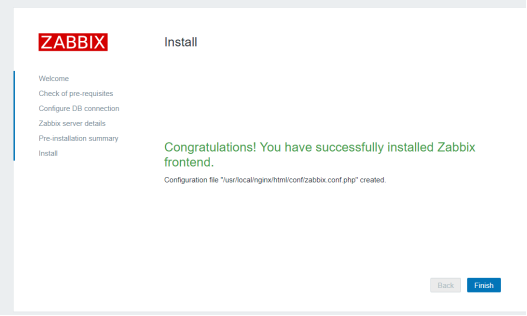
网页访问zabbix


出现报错,需要修改php.ini参数
root@server init.d# vi /usr/local/php/php.ini
660 post_max_size = 16M
372 max_execution_time = 300
382 max_input_time = 300
926 date.timezone = Asia/Shanghai //此行有注释,取消注释并修改
704 always_populate_raw_post_data = -1 此行有注释,取消注释
1214 mysqli.default_socket =/tmp/mysql.sock
root@server init.d# /etc/init.d/php-fpm restart
Gracefully shutting down php-fpm . done
Starting php-fpm done
网页刷新
root@server# cd /root/lnmp/php-5.6.13/ext/ldap/
root@server ldap# /usr/local/php/bin/phpize
Configuring for:
PHP Api Version: 20131106
Zend Module Api No: 20131226
Zend Extension Api No: 220131226
root@server ldap# ./configure --with-php-config=/usr/local/php/bin/php-config --with-ldap
执行后会报错
configure: error: Cannot find ldap libraries in /usr/lib.
解决:
root@server \~# yum -y install rsync
root@server \~# rsync -avz /usr/lib64/libldap* /usr/lib/
root@server ldap# ./configure --with-php-config=/usr/local/php/bin/php-config --with-ldap
root@server ldap# make && make install //执行后会提醒"make test"
root@server ldap# make test
root@server ldap# vi /usr/local/php/php.ini
root@server ldap# /etc/init.d/php-fpm restart
Gracefully shutting down php-fpm . done
Starting php-fpm done
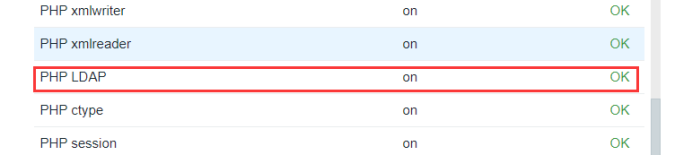
网页刷新:
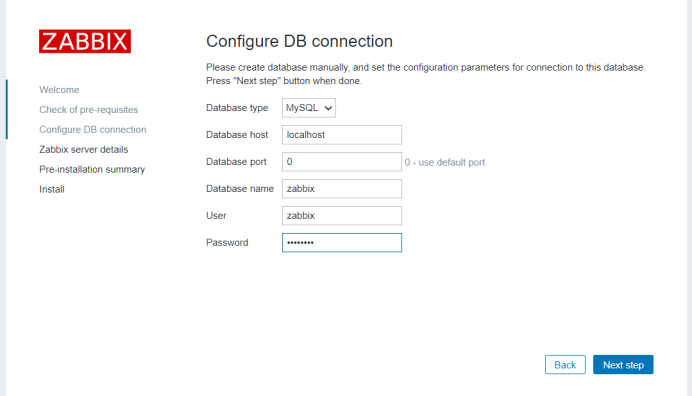
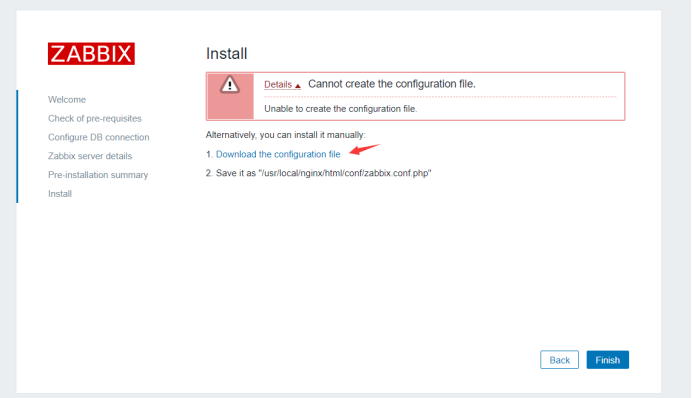
下载后上传
root@server ldap# cd /usr/local/nginx/html/conf
root@server conf# ls
maintenance.inc.php zabbix.conf.php zabbix.conf.php.example
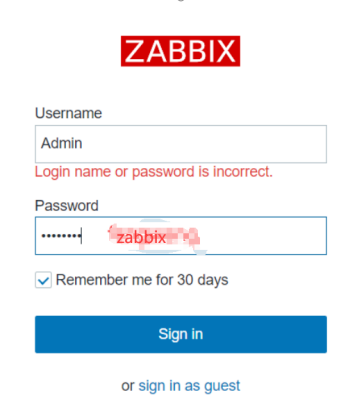
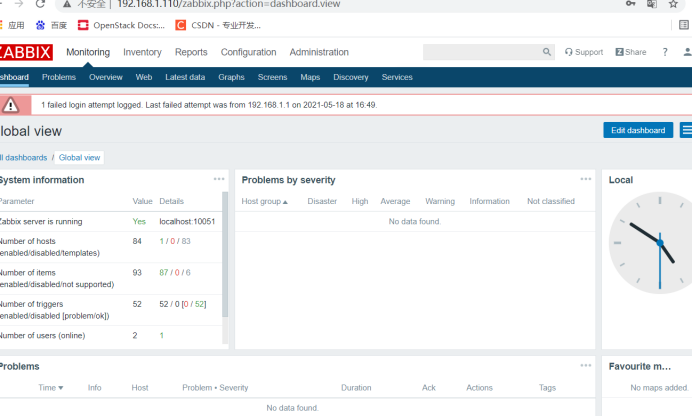
登录
点击右上角用户,然后选择语言
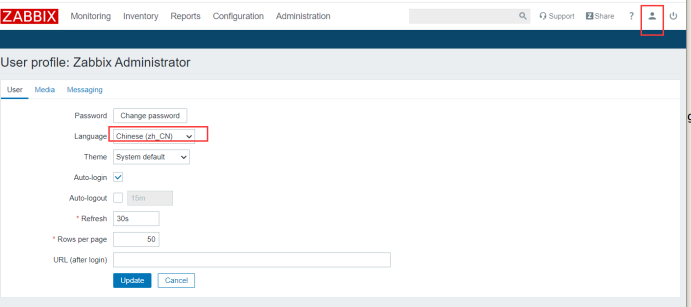
然后 Update 即可,页面变为中文

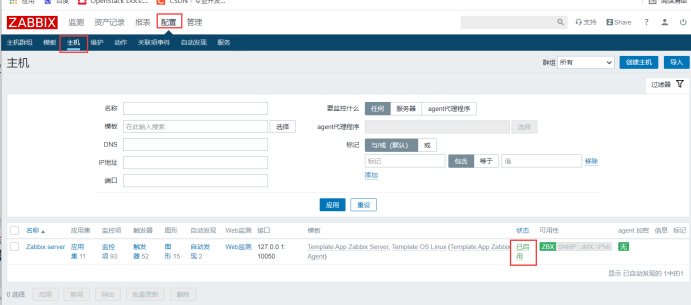
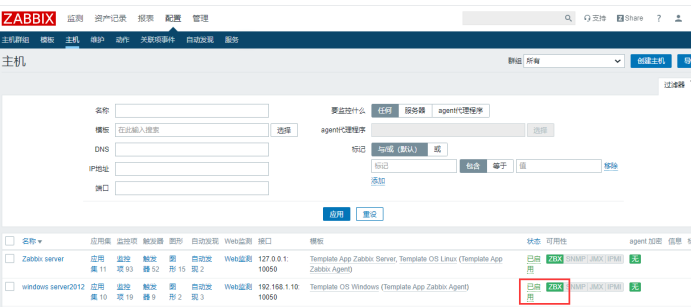
点击配置-主机 启用本主机
1、解决乱码问题:
在 Windows 下面找一个 ttf 的字体文件移动到
/usr/local/nginx/html/assets/fonts/ 目录下:
root@server fonts# ls
DejaVuSans.ttf simkai.ttf
root@server fonts# vi /usr/local/nginx/html/include/defines.inc.php
69 define('ZBX_GRAPH_FONT_NAME', 'simkai'); // font file name
返回网页刷新
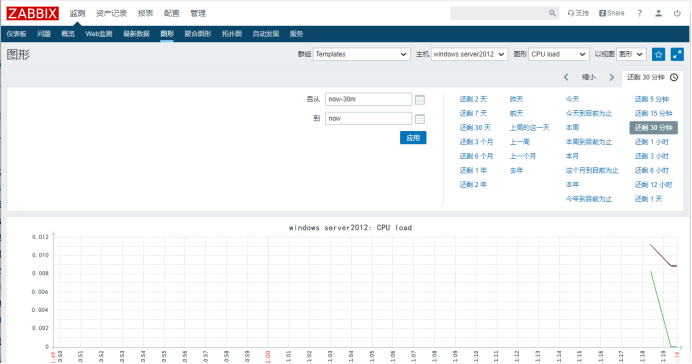
监控windows server2012
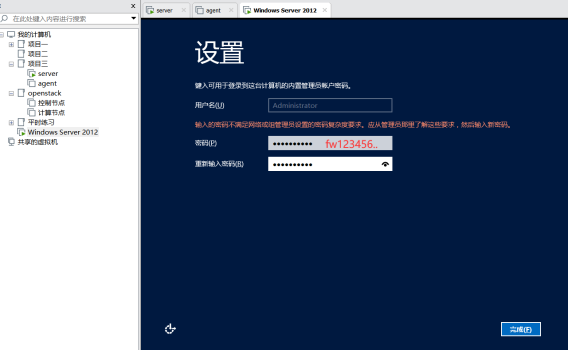
安装windows server 2012
网卡为仅主机模式
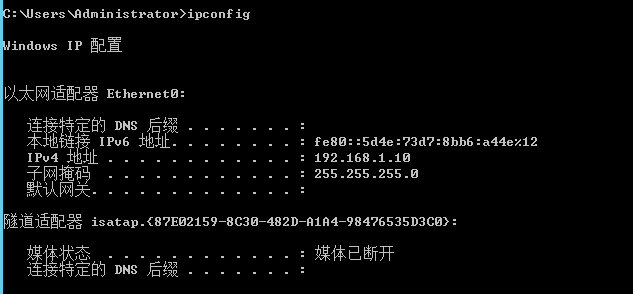
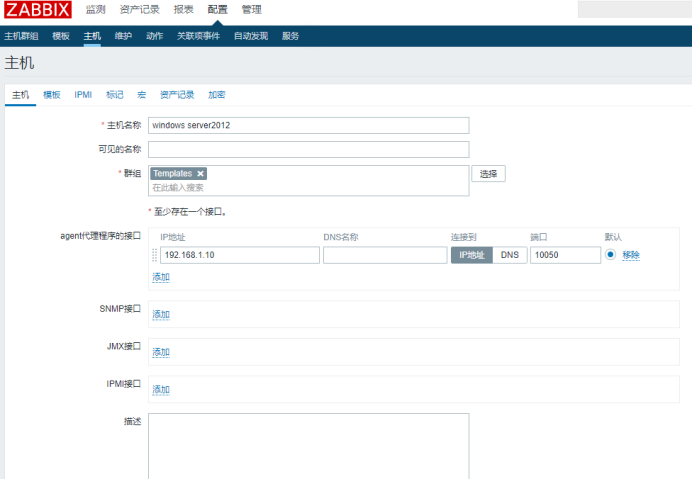
Windows server 2012
ip地址:192.168.1.10
Zabbix server:192.168.1.110
关闭防火墙
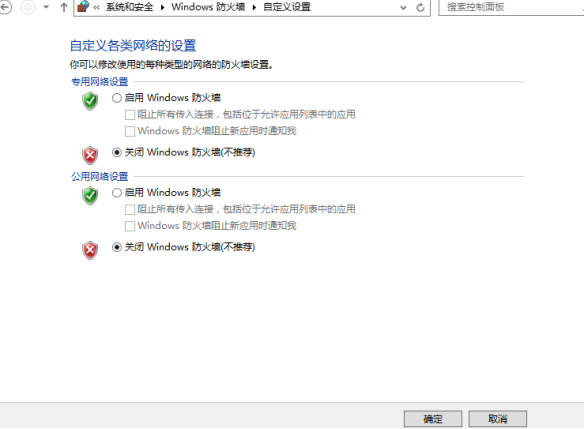
保证与zabbix server端通信

在windows server2012上安装net-tools,上传zabbix并解压
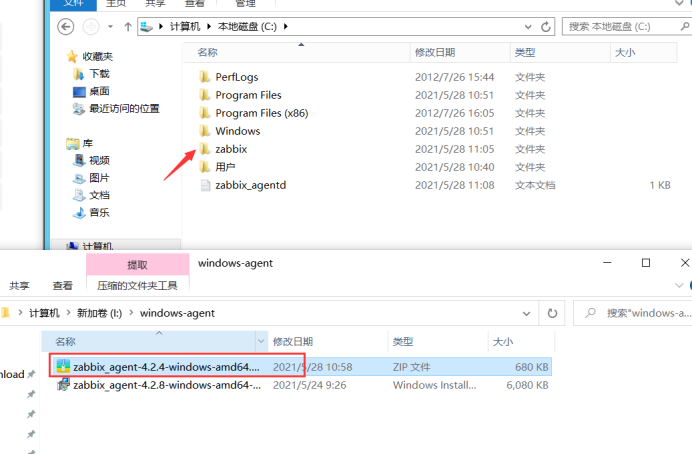
C:\zabbix\zabbix_agent-4.2.4-win\conf
修改配置文件zabbix_agentd
Server=192.168.1.110
ServerActive=192.168.1.110
Hostname=WIN-B02BPENBV0V

监控centos7
配置监控Linux远程主机:
(在另外一台主机上,监控该主机centos7或其它服务器)
安装 Agent
root@agent \~# yum install -y curl curl-devel net-snmp net-snmp-devel perl-DBI pcre* gcc gcc-c++
root@agent \~# useradd -M -s /sbin/nologin zabbix
root@agent \~# ls
anaconda-ks.cfg zabbix-4.2.4.tar.gz
root@agent \~# tar -xf zabbix-4.2.4.tar.gz -C /usr/local/src/
root@agent zabbix-4.2.4# ./configure --prefix=/usr/local/zabbix --enable-agent
root@agent zabbix-4.2.4# vi /usr/local/zabbix/etc/zabbix_agentd.conf
94 Server=192.168.1.110
135 ServerActive=192.168.1.110
root@agent zabbix-4.2.4# cd misc/init.d/fedora/core
root@agent core# ls
zabbix_agentd zabbix_server
root@agent core# cp -a zabbix_agentd /etc/init.d/
root@agent core# chmod a+x /etc/init.d/zabbix_agentd
root@agent core# vi /etc/init.d/zabbix_agentd
BASEDIR=/usr/local/zabbix
root@agent core# netstat -anltp | grep zabbix
tcp 0 0 0.0.0.0:10050 0.0.0.0:* LISTEN 17954/zabbix_agentd
root@server \~# /usr/local/zabbix/bin/zabbix_get -s 192.168.1.120 -p10050 -ksystem.uname
Linux agent 3.10.0-862.el7.x86_64 #1 SMP Fri Apr 20 16:44:24 UTC 2018 x86_64
#10050是zabbix_agent的端口,10051是zabbix_server端口 -k 指定键值 uname
能查看到客户机系统信息,表示能监控centos7客户机
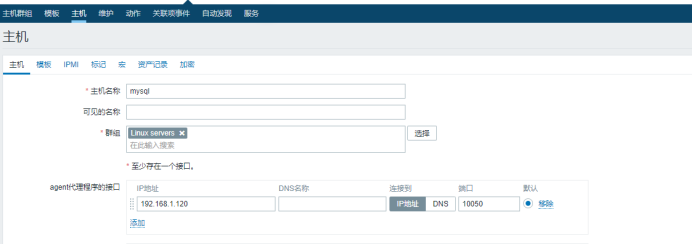
监控数据库
root@agent \~# yum install -y mariadb mariadb-server
root@agent \~# systemctl start mariadb
root@agent \~# mysql_secure_installation
root@agent \~# mysql -uroot -p000000
创建测试用户test
MariaDB (none)> grant usage on *.* to 'test'@'%' identified by '123456';
Query OK, 0 rows affected (0.00 sec)
MariaDB (none)> grant usage on *.* to 'test'@'localhost' identified by '123456';
root@zabbix-agent \~# cd zabbix-4.2.4/conf/zabbix_agentd
root@zabbix-agent zabbix_agentd# ls
userparameter_examples.conf userparameter_mysql.conf
root@zabbix-agent zabbix_agentd# cp -r userparameter_mysql.conf /usr/local/zabbix/etc/zabbix_agentd.conf.d/
root@zabbix-agent zabbix_agentd# vi /usr/local/zabbix/etc/.my.cnf //编辑一个脚本文件
#Zabbix Agent
mysql
host=agent
user=zabbix
password=000000
socket= /var/lib/mysql/mysql.sock
mysqladmin
host=agent
user=zabbix
password=000000
socket= /var/lib/mysql/mysql.sock
root@zabbix-agent zabbix_agentd# vi /usr/local/zabbix/etc/zabbix_agentd.conf //然后再次修改zabbix的配置文件
去掉注释,修改为正确的路径
265 Include=/usr/local/zabbix/etc/zabbix_agentd.conf.d/
root@zabbix-agent zabbix_agentd# vi /usr/local/zabbix/etc/zabbix_agentd.conf.d/userparameter_mysql.conf
将里面/var/lib/zabbix改为/usr/loca/zabbix/etc (有三处需要改)
root@zabbix-agent zabbix_agentd# /etc/init.d/zabbix_agentd restart //重启生效
Restarting zabbix_agentd (via systemctl): 确定
root@zabbix-agent zabbix_agentd# ss -tan | grep 10050
LISTEN 0 128 *:10050 *:*
测试zabbix-server端能否获取到zabbix-agent端的信息
root@server \~# /usr/local/zabbix/bin/zabbix_get -s 192.168.1.120 -p10050 -kmysql.version
mysql Ver 15.1 Distrib 5.5.68-MariaDB, for Linux (x86_64) using readline 5.1
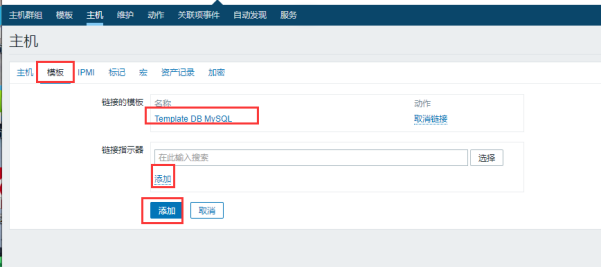
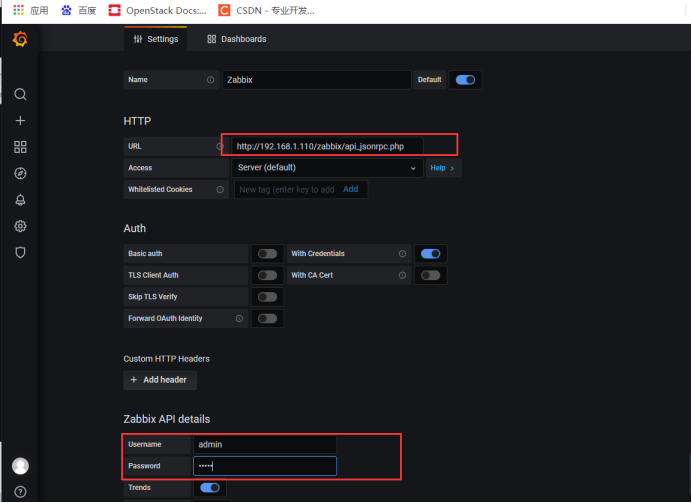
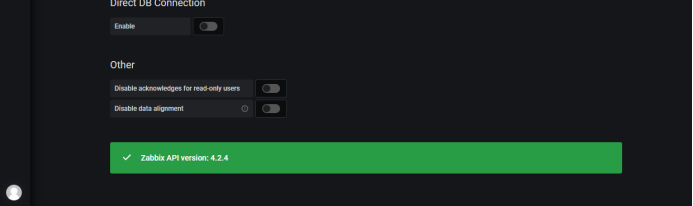
返回浏览器添加数据库

监控华为交换机
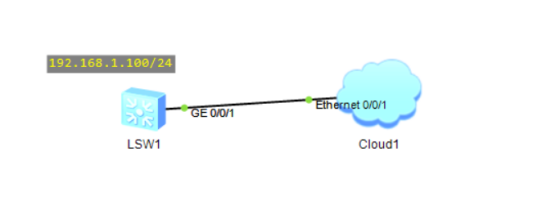
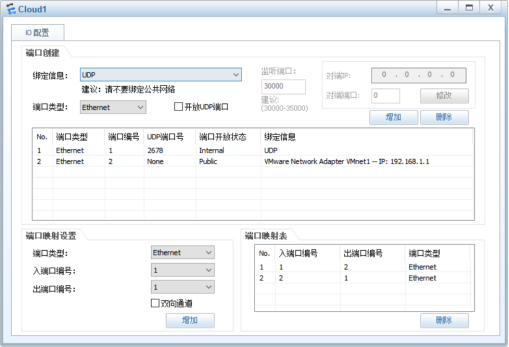
交换机配置
交换机配置:
Huawei snmp-agent
Huawei snmp-agent community read zabbix@000000
Huawei snmp-agent sys-info version all
Huawei snmp-agent target-host inform address udp-domain 192.168.1.110 udp-port 161 Huawei params securityname zabbix@000000 v2c //server端的内网ip
Huawei snmp-agent trap enable
Warning: All switches of SNMP trap/notification will be open. Continue? Y/N:y
root@server \~# yum install net-snmp* -y
root@server \~# systemctl start snmpd
root@server \~# systemctl enable snmpd
Created symlink from /etc/systemd/system/multi-user.target.wants/snmpd.service to /usr/lib/systemd/system/snmpd.service.
root@server \~# snmpwalk -v 2c -c zabbix@000000 192.168.1.100 system //交换机地址
SNMPv2-MIB::sysDescr.0 = STRING: S5700-28C-HI
Huawei Versatile Routing Platform Software
VRP (R) software,Version 3.30 (S5700 V200R001C00)
Copyright (C) 2007 Huawei Technologies Co., Ltd.
SNMPv2-MIB::sysObjectID.0 = OID: SNMPv2-SMI::enterprises.2011.2.23.169
DISMAN-EVENT-MIB::sysUpTimeInstance = Timeticks: (54612) 0:09:06.12
SNMPv2-MIB::sysContact.0 = STRING: R&D Beijing, Huawei Technologies co.,Ltd.
SNMPv2-MIB::sysName.0 = STRING: Huawei
SNMPv2-MIB::sysLocation.0 = STRING: Beijing China
SNMPv2-MIB::sysServices.0 = INTEGER: 78
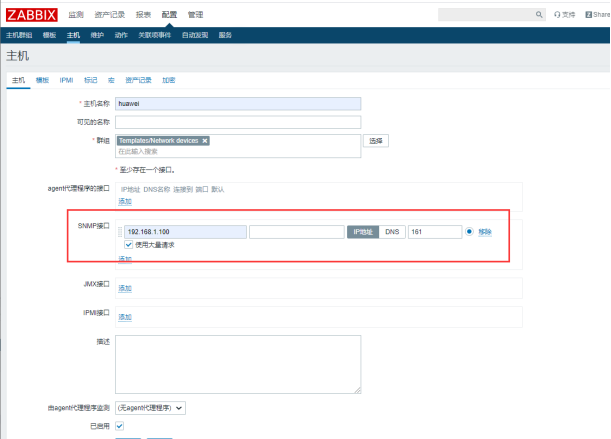
添加主机
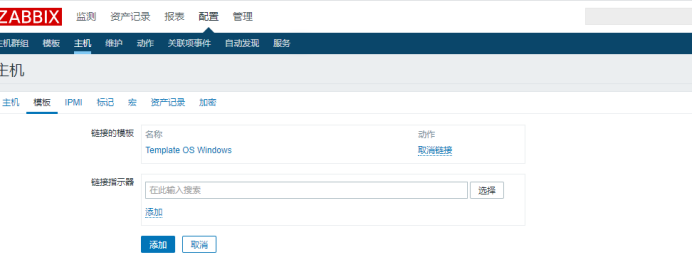
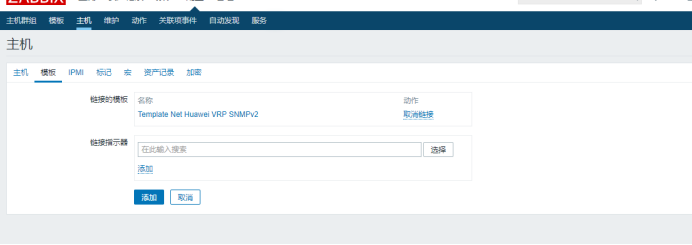
添加模块:
添加宏:
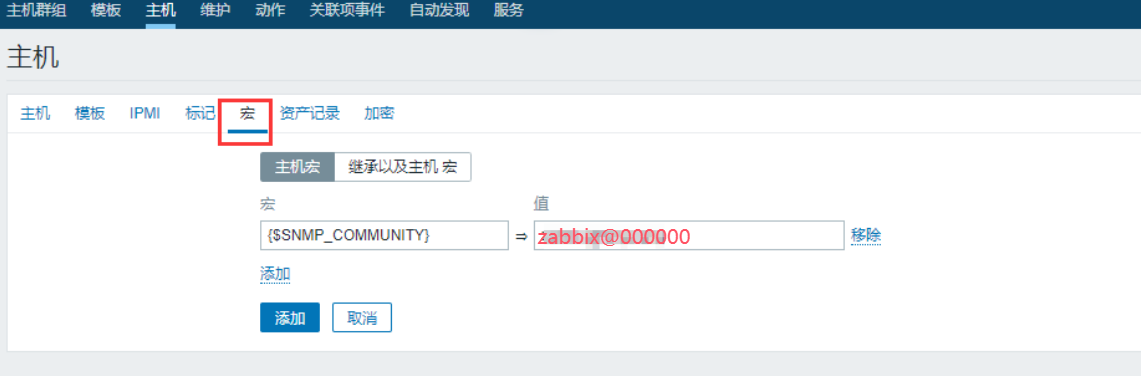
等待30-60s后,SNMP服务显示启动正常,绿色状态

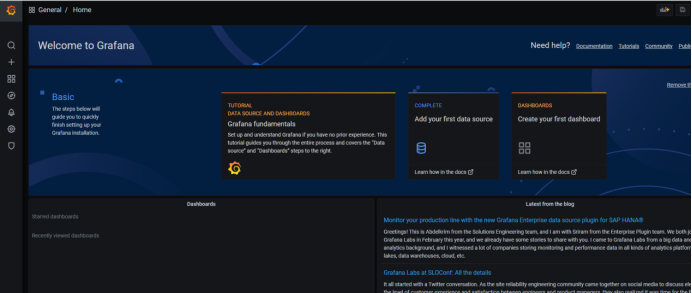
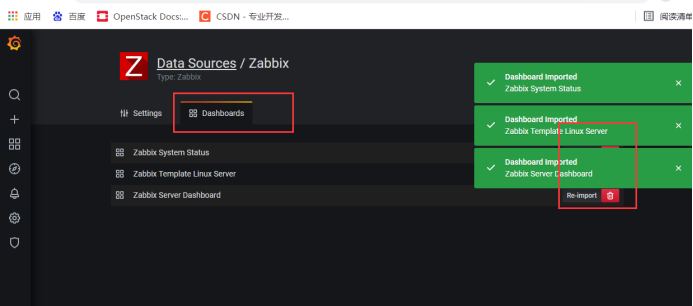
部署grafana
root@server \~# wget https://dl.grafana.com/oss/release/grafana-7.5.6-1.x86_64.rpm
root@server \~# yum install -y grafana-7.5.6-1.x86_64.rpm
root@server \~# systemctl start grafana-server
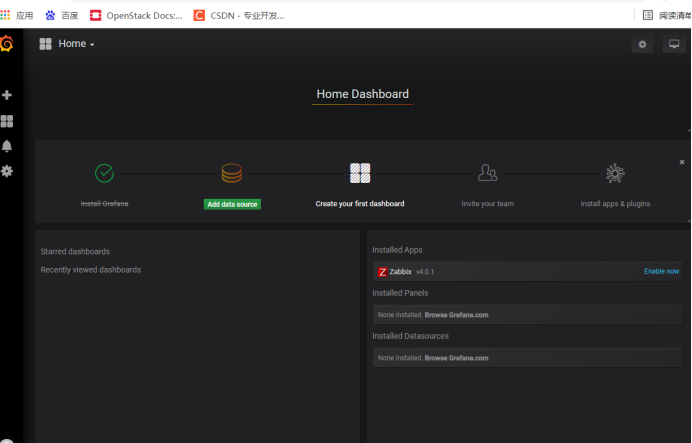
网页访问:192.168.1.110:3000
用户名和密码为admin

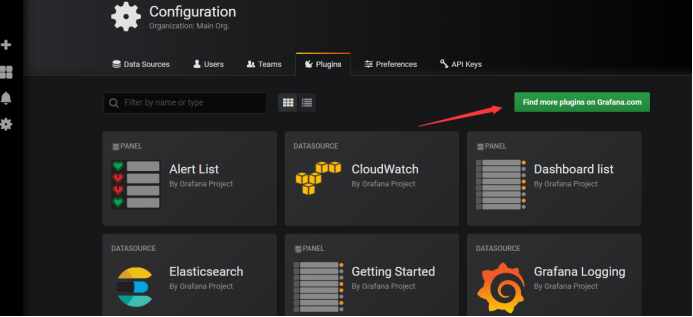
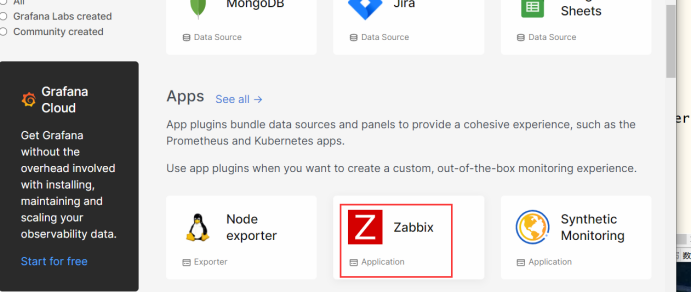
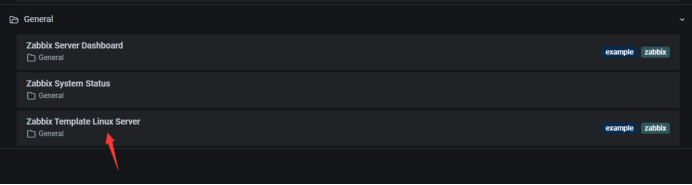
复制代码到linux执行
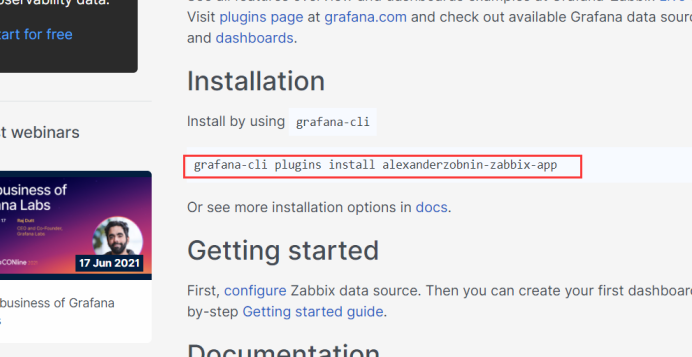
root@server plugins# cd /var/lib/grafana/plugins/
root@server plugins# grafana-cli plugins install alexanderzobnin-zabbix-app
installing alexanderzobnin-zabbix-app @ 4.0.1
from url: https://grafana.com/api/plugins/alexanderzobnin-zabbix-app/versions/4.0.1/download
into: /var/lib/grafana/plugins
✔ Installed alexanderzobnin-zabbix-app successfully
Restart grafana after installing plugins . <service grafana-server restart>
root@server plugins# service grafana-server restart

安装部署Elasticsearch
root@server \~# yum install -y java java-devel
root@server opt# ls
elasticsearch-6.1.4.tar.gz
root@server opt# tar -xf elasticsearch-6.1.4.tar.gz
root@server opt# cd
root@server \~# groupadd elsearch
root@server \~# useradd elsearch -g elsearch -p elasticsearch
root@server opt# chown -R elsearch:elsearch elasticsearch-6.1.4
root@server elasticsearch-6.1.4# su elsearch
elsearch@server opt$ cd /opt/elasticsearch-6.1.1
elsearch@server opt$ ./bin/elasticsearch
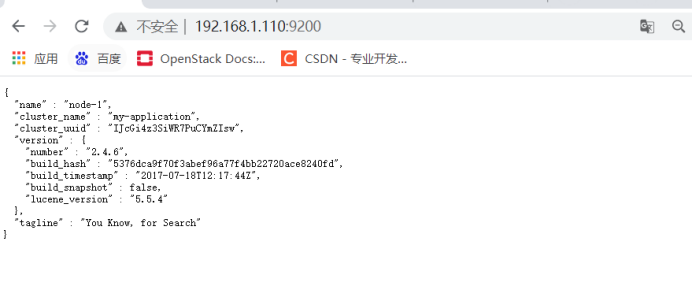
出现info没有报错就成功
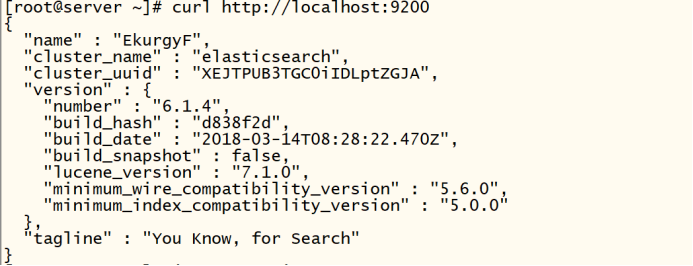
使用curl在本机(虚拟机)测试一下成功如下:
elsearch@server config$ vi /opt/elasticsearch-6.1.4/config/elasticsearch.yml
55 network.host: 192.168.1.110
59 http.port: 9200
root@server \~# yum install -y java java-devel
root@server \~# wget http://dl.fedoraproject.org/pub/epel/epel-release-latest-7.noarch.rpm
root@server \~# rpm -ivh epel-release-latest-7.noarch.rpm
elasticsearch安装
下载并安装GPG key
root@server \~# rpm --import https://packages.elastic.co/GPG-KEY-elasticsearch
添加yum源
root@server \~# vi /etc/yum.repos.d/elasticsearch.repo
elasticsearch-2.x
name=Elasticsearch repository for 2.x packages
baseurl=http://packages.elastic.co/elasticsearch/2.x/centos
gpgcheck=1
gpgkey=http://packages.elastic.co/GPG-KEY-elasticsearch
enabled=1
在安装elasticsearch之前 需要对文件 /etc/passwd /etc/group进行操作
root@server \~# chattr -i /etc/passwd
root@server \~# chattr -i /etc/group
安装elasticsearch
root@server \~# yum install -y elasticsearch
启动服务并加入开机自启动
root@server \~# systemctl daemon-reload
root@server \~# systemctl enable elasticsearch.service
root@server \~# systemctl start elasticsearch.service
4 管理配置elasticsearch
修改elasticsearch的配置文件
备份原配置文件
root@server \~# cp /etc/elasticsearch/elasticsearch.yml /etc/elasticsearch/elasticsearch.yml.bak
修改后的配置文件如下
root@server elasticsearch# egrep -v '^#' /etc/elasticsearch/elasticsearch.yml
取消注释:
cluster.name:my-server ##集群名字
node.name: server ##节点名字
path.data: /data/es-data ##数据目录
path.logs: /var/log/elasticsearch ##elasticsearch日志所在路径
bootstrap.memory_lock: true ##是否锁定内存 开启
network.host: 0.0.0.0 ##默认是所有网段
http.port: 9200 ##端口
创建elasticsearch的数据目录并进行授权
root@server \~# cd /etc/elasticsearch/
elasticsearch.yml elasticsearch.yml.bak logging.yml scripts
root@server elasticsearch# mkdir -p /data/es-data
root@server elasticsearch# chown elasticsearch.elasticsearch /data/es-data/ -R
root@server elasticsearch# systemctl restart elasticsearch.service

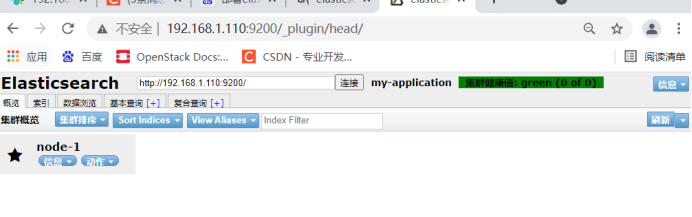
安装Elasticsearch集群管理插件 head(此插件是集群插件)
root@server elasticsearch# /usr/share/elasticsearch/bin/plugin install mobz/elasticsearch-head
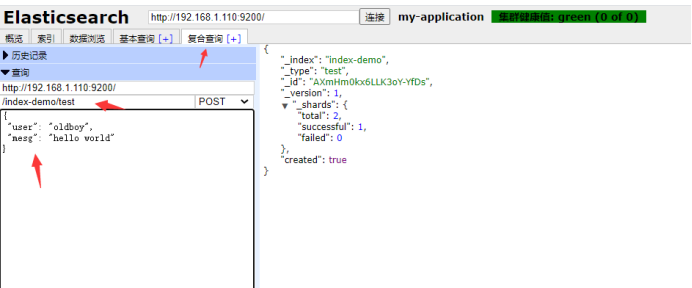
写点数据, 写一个/index-demo/test的索引,方法post,点击提交请求
{
"user": "oldboy",
"mesg": "hello world"
}