参考视频:【狂神说Java】Spring5最新完整教程IDEA版通俗易懂 点击观看
文章目录
HelloSpring
导入jar包
编写一个Hello实体类
java
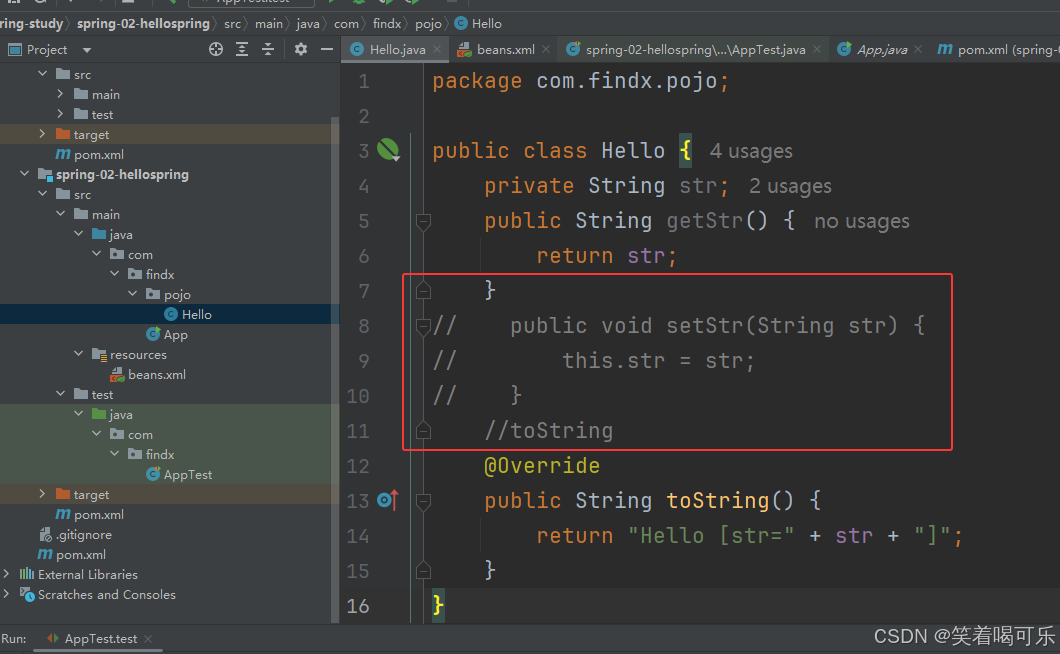
package com.findx.pojo;

public class Hello {
    private String str;
    public String getStr() {
        return str;
    }
    public void setStr(String str) {
        this.str = str;
    }
    //toString
    @Override
    public String toString() {
        return "Hello [str=" + str + "]";
    }
}
编写spring文件(命名为beans.xml)
xml
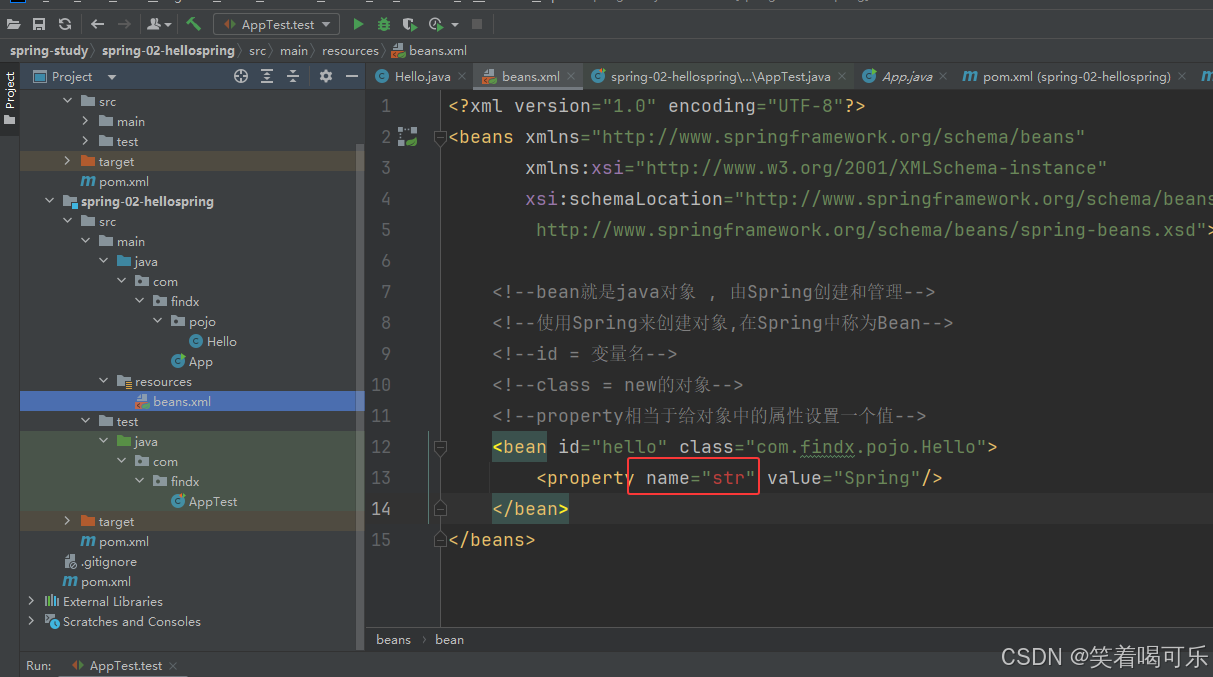
<?xml version="1.0" encoding="UTF-8"?>
<beans xmlns="http://www.springframework.org/schema/beans"
       xmlns:xsi="http://www.w3.org/2001/XMLSchema-instance"
       xsi:schemaLocation="http://www.springframework.org/schema/beans
        http://www.springframework.org/schema/beans/spring-beans.xsd">

    <!--bean就是java对象 , 由Spring创建和管理-->
    <bean id="hello" class="com.findx.pojo.Hello">
        <property name="str" value="Spring"/>
    </bean>
</beans>
测试
java
package com.findx;

import com.findx.pojo.Hello;
import org.junit.Test;
import org.springframework.context.ApplicationContext;
import org.springframework.context.support.ClassPathXmlApplicationContext;

public class AppTest{
    @Test
    public void test(){
        //获取Spring的上下文对象
        ApplicationContext context = new ClassPathXmlApplicationContext("beans.xml");
        //对象现在都在Spring中进行管理(如果使用需要取出来)
        //getBean : 参数即为Spring配置文件中bean的id
        Hello hello = (Hello) context.getBean("hello");
        System.out.println(hello.toString());
    }
}
思考
Hello 对象是谁创建的?  hello 对象是由Spring创建的
Hello 对象的属性是怎么设置的?  hello 对象的属性是由Spring容器设置的
这个过程就叫控制反转
控制:谁来控制对象的创建
传统应用程序的对象是由程序本身控制创建的,使用Spring后,对象是由Spring来创建的。
反转:程序本身不创建对象,而变成被动的接收对象
依赖注入:就是利用set方法来进行注入的
DI(依赖注入)是实现IOC的一种方法。
IOC是一种编程思想,由主动的编程变成被动的接收。
总结
所谓的IOC就是:对象由Spring来创建 管理 装配
xml
<?xml version="1.0" encoding="UTF-8"?>
<beans xmlns="http://www.springframework.org/schema/beans"
       xmlns:xsi="http://www.w3.org/2001/XMLSchema-instance"
       xsi:schemaLocation="http://www.springframework.org/schema/beans
        http://www.springframework.org/schema/beans/spring-beans.xsd">
    <bean id="mysqlImpl" class="com.findx.dao.UserDaoMysqlImpl"/>
    <bean id="oracleImpl" class="com.findx.dao.UserDaoOracleImpl"/>
    <bean id="userServiceImpl" class="com.findx.service.UserServiceImpl">
        <!--ref:表示引用容器中创建好的对象-->
        <!--value:基本数据类型设置基本的值-->
        <property name="userDao" ref="oracleImpl"/>
    </bean>
</beans>
java
package com.findx;

import com.findx.service.UserServiceImpl;
import org.junit.Test;
import org.springframework.context.ApplicationContext;
import org.springframework.context.support.ClassPathXmlApplicationContext;

public class AppTest{
    @Test
    public void test(){
        //获取ApplicationContext对象:拿到Spring的容器
        ApplicationContext context = new ClassPathXmlApplicationContext("beans.xml");
        //获取对象
        UserServiceImpl userServiceImpl = (UserServiceImpl) context.getBean("userServiceImpl");
        userServiceImpl.getUser();
    }
}
IOC创建对象的方式
通过无参构造方法来创建对象
java
package com.findx.pojo;
public class User {
    private String name;
    //无参构造方法
    public User() {
        System.out.println("User的无参构造方法");
    }
    //get和set方法
    public String getName() {
        return name;
    }
    public void setName(String name) {
        this.name = name;
    }
    //show方法
    public void show() {
        System.out.println("Hello " + name);
    }
}
xml
<?xml version="1.0" encoding="UTF-8"?>
<beans xmlns="http://www.springframework.org/schema/beans"
       xmlns:xsi="http://www.w3.org/2001/XMLSchema-instance"
       xsi:schemaLocation="http://www.springframework.org/schema/beans
        http://www.springframework.org/schema/beans/spring-beans.xsd">

    <bean id="user" class="com.findx.pojo.User">
        <property name="name" value="FindX"/>
    </bean>
</beans>
java
package com.findx;

import com.findx.pojo.User;
import org.springframework.context.ApplicationContext;
import org.springframework.context.support.ClassPathXmlApplicationContext;

public class MyTest {
    public static void main(String[] args) {
        ApplicationContext applicationContext = new ClassPathXmlApplicationContext("beans.xml");
        User user = (User) applicationContext.getBean("user");
        System.out.println("user.getName() = " + user.getName());
        user.show();
    }
}
通过有参构造方法来创建对象
通过下标赋值
java
package com.findx.pojo;

public class User {
    private String name;
    //带参构造方法
    public User(String name) {
        this.name = name;
    }
    //get和set方法
    public String getName() {
        return name;
    }
    public void setName(String name) {
        this.name = name;
    }
    //show方法
    public void show() {
        System.out.println("Hello " + name);
    }
}
xml
<?xml version="1.0" encoding="UTF-8"?>
<beans xmlns="http://www.springframework.org/schema/beans"
       xmlns:xsi="http://www.w3.org/2001/XMLSchema-instance"
       xsi:schemaLocation="http://www.springframework.org/schema/beans
        http://www.springframework.org/schema/beans/spring-beans.xsd">

    <bean id="user" class="com.findx.pojo.User">
        <constructor-arg index="0" value="findx"/>
    </bean>
</beans>
通过参数类型赋值
xml
<?xml version="1.0" encoding="UTF-8"?>
<beans xmlns="http://www.springframework.org/schema/beans"
       xmlns:xsi="http://www.w3.org/2001/XMLSchema-instance"
       xsi:schemaLocation="http://www.springframework.org/schema/beans
        http://www.springframework.org/schema/beans/spring-beans.xsd">

    <bean id="user" class="com.findx.pojo.User">
        <constructor-arg type="java.lang.String" value="zfx"/>
    </bean>
</beans>
通过参数名字赋值
xml
<?xml version="1.0" encoding="UTF-8"?>
<beans xmlns="http://www.springframework.org/schema/beans"
       xmlns:xsi="http://www.w3.org/2001/XMLSchema-instance"
       xsi:schemaLocation="http://www.springframework.org/schema/beans
        http://www.springframework.org/schema/beans/spring-beans.xsd">

    <bean id="user" class="com.findx.pojo.User">
        <constructor-arg name="name"  value="xduzfx"/>
    </bean>
</beans>
在配置文件加载的时候,其中管理的对象都已经初始化了!
Spring配置
别名
xml
<alias name="user" alias="USER"/>Bean的配置
xml
<?xml version="1.0" encoding="UTF-8"?>
<beans xmlns="http://www.springframework.org/schema/beans"
       xmlns:xsi="http://www.w3.org/2001/XMLSchema-instance"
       xsi:schemaLocation="http://www.springframework.org/schema/beans
        http://www.springframework.org/schema/beans/spring-beans.xsd">

<!--    id是bean的唯一标识符(相当于对象名)
        class是bean对象所对应的全类名
        name也是别名并且可以取多个别名
-->
    <bean id="user" class="com.findx.pojo.User" name="user2,user3">
        <constructor-arg name="name"  value="zfx"/>
    </bean>
</beans>
import
可以将多个配置文件导入合并为一个