依赖注入
Prism 内置了对依赖注入的支持,默认使用Unity或DryIoc作为 DI 容器。其核心思想是:
- 将服务的创建和管理交给 DI 容器,而非手动
new - 通过构造函数注入、属性注入等方式获取依赖
- 支持服务的生命周期管理(
Transient、Singleton、Scoped)
本系列教程以Unity作为DI容器进行演示(DryIoc除了配置和注入时有点小区别,使用方面无异)
如果对依赖注入还不够了解,可以参考前面的文章
https://www.cnblogs.com/zhaotianff/p/18884247
https://www.cnblogs.com/zhaotianff/p/18515397
如何配置不同的DI容器
DryIoc
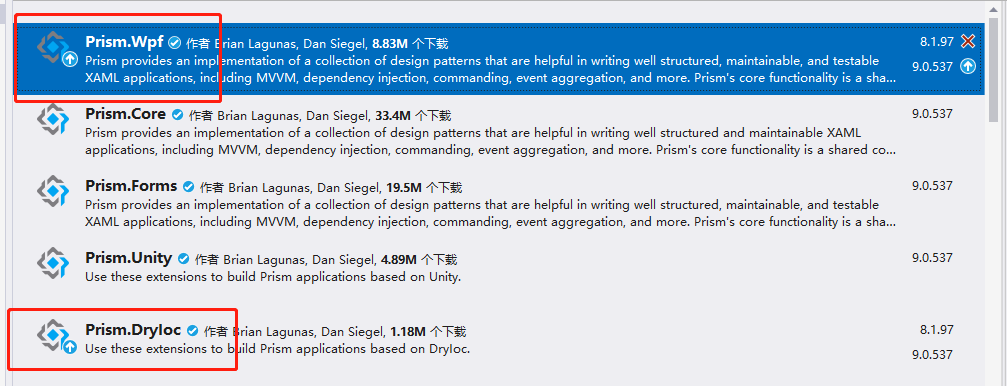
1、安装Prism.Wpf包和Prism.DryIoc包
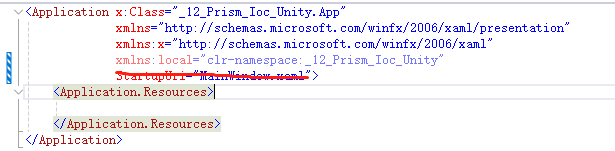
2、修改App.xaml,将App类替换为Prism.DryIoc.PrismApplication类并移除StartupUri
1 <prism:PrismApplication x:Class="_12_Prism_Ioc.App"
2              xmlns="http://schemas.microsoft.com/winfx/2006/xaml/presentation"
3              xmlns:x="http://schemas.microsoft.com/winfx/2006/xaml"
4              xmlns:local="clr-namespace:_12_Prism_Ioc"
5              xmlns:prism="http://prismlibrary.com/">
6     <Application.Resources>
7
8     </Application.Resources>
9 </prism:PrismApplication>3、改造App类,使之继承自Prism.DryIoc.PrismApplication类
改造后的App类和前面介绍的Bootstrapper类结构一致
4、在RegisterTypes函数中注册类型到容器中
示例代码如下:
 1  public partial class App : PrismApplication
 2  {
 3      // 1. 配置主窗口(Prism 启动时加载)
 4      protected override Window CreateShell()
 5      {
 6          // DryIoc 会自动解析 MainWindow(依赖注入)
 7          return Container.Resolve<MainWindow>();
 8      }
 9
10      // 2. 注册服务到 DryIoc 容器
11      protected override void RegisterTypes(IContainerRegistry containerRegistry)
12      {
13          // ========== 基础注册方式 ==========
14          // 单例注册(全局唯一)
15          containerRegistry.RegisterSingleton<IMessageService, MessageService>();
16
17          // 瞬时注册(每次解析新建实例)
18          containerRegistry.Register<IDataService, DataService>();
19
20          // 若需要使用 DryIoc 原生 API,可通过 Container 转换
21          var dryIocContainer = containerRegistry.GetContainer();
22
23          //dryIocContainer是DryIoc原生容器对象,可以参考DryIoc文档了解详细使用
24          //https://github.com/dadhi/DryIoc
25
26          // 注册视图(Prism 导航用)
27          containerRegistry.RegisterForNavigation<HomeView>();
28      }
29
30      // 3. 可选:模块化配置(若使用模块)
31      protected override void ConfigureModuleCatalog(IModuleCatalog moduleCatalog)
32      {
33          base.ConfigureModuleCatalog(moduleCatalog);
34          // 注册模块(示例)
35          // moduleCatalog.AddModule<MyModule>();
36      }
37  }
Unity
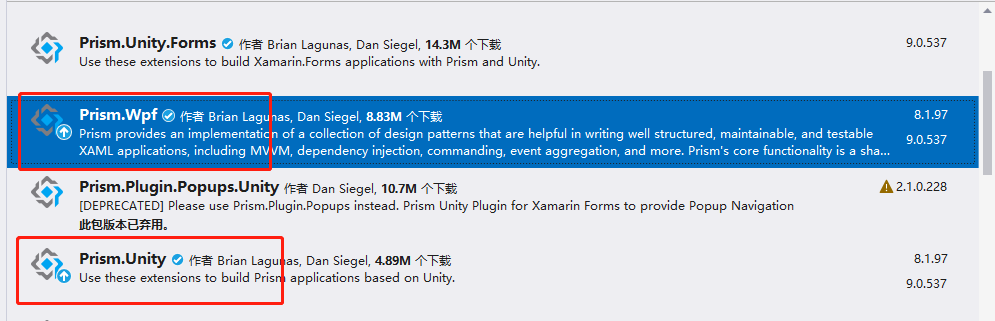
1、安装Prism.Wpf包和Prism.Unity包
2、创建Bootstrapper类
 1   public class Bootstrapper : PrismBootstrapper
 2   {
 3       protected override DependencyObject CreateShell()
 4       {
 5           return Container.Resolve<MainWindow>();
 6       }
 7
 8       protected override void RegisterTypes(IContainerRegistry containerRegistry)
 9       {
10
11       }
12 }3、移除App.xaml中的StartupUri
4、修改App类,重写Startup函数,启动Bootstrapper
 1  public partial class App : Application
 2  {
 3      protected override void OnStartup(StartupEventArgs e)
 4      {
 5          base.OnStartup(e);
 6
 7          Bootstrapper bootstrapper = new Bootstrapper();
 8          bootstrapper.Run();
 9      }
10  }
Prism框架提供的服务
在前面介绍Bootstrapper的职责时,其中包含了一项自动初始化 Prism 的关键服务。
Prism框架为我们提供了以下服务
IRegionManager:管理视图区域(Region),实现视图的动态加载 / 切换;
IEventAggregator:实现模块间的无耦合通信;
IDialogService:统一管理对话框;
INavigationService:实现视图导航。
在Bootstrapper初始化时,框架会帮我们注入这些服务的实例到容器中。
后面我们在使用时,就可以直接从容器中去取。
这里暂时不做进一步演示,等介绍到对应的服务时,再进行演示。
如何注册自己的服务 / 视图
首先我们创建服务接口/类
 1 // 服务接口
 2 public interface IMessageService
 3 {
 4     string GetMessage();
 5 }
 6
 7 // 服务实现
 8 public class MessageService : IMessageService
 9 {
10      public string GetMessage()
11      {
12          return "Hello Prism DI!";
13      }
14  }
15
16  // 服务实现2
17 public class MessageService2 : IMessageService
18 {
19     public string GetMessage()
20     {
21         return "Hello Prism DI 2222222!";
22     }
23 }然后在RegisterTypes函数中进行注册
1  protected override void RegisterTypes(IContainerRegistry containerRegistry)
2  {
3      containerRegistry.Register<IMessageService, MessageService>();
4  }
Prism提供了三个注册类型的接口
Register:Transient,每次service请求都是获得不同的实例.
RegisterScoped:对于同一个请求返回同一个实例,不同的请求返回不同的实例.
RegisterSingleton:每次都是获得同一个实例, 单一实例模式.
此外,Prism还提供一种注册视图与 ViewModel(自动关联)的方式
这种方式在后面进行导航时会经常用到
1 protected override void RegisterTypes(IContainerRegistry containerRegistry)
2 {
3      containerRegistry.RegisterForNavigation<ViewA, ViewAViewModel>();
4 }
如何使用Unity的原生接口
通过下面的语句,就可以获取Unity原生容器对象(DryIoc也是一样的方法)
1 var unityContainer = containerProvider.GetContainer()Unity原生的注册方式会有点小区别,可以参考Unity的文档(https://github.com/UnityContainer/Unity)
1 unityContainer.RegisterType<IMessageService, MessageService>("Service1", new Unity.Lifetime.ContainerControlledLifetimeManager());说明:Prism 的 IContainerRegistry 是 DI容器的封装,RegisterTypes 是注册服务的唯一推荐入口,不要在其他地方随意创建 DI容器实例。
如何注册同一个接口的不同实现
在前面我们实现了MessageService和MessageService2,但是只注册了MessageService。
如果要注册同一个接口的不同实现,我们可以通过给实例命名的方式实现
1  containerRegistry.Register<IMessageService, MessageService>("ServiceA");
2  containerRegistry.Register<IMessageService, MessageService2>("ServiceB");
如何使用容器中注入的对象
在前面我们介绍CommunityToolkit中的Ioc时,是使用了手动从容器中去取的方法。
类似下面的形式
1 var messageService = containerRegistry.GetContainer().Resolve<IMessageService>();在Prism中,推荐是使用构造函数注入的形式来获取容器中的对象,如下所示
 1  public class MainWindowViewModel : BindableBase
 2     {
 3         private string _message;
 4         public string Message
 5         {
 6             get => _message;
 7             set => SetProperty(ref _message, value);
 8         }
 9
10         // 构造函数注入(Unity自动解析)
11         public MainWindowViewModel(IMessageService messageService)
12         {
13             Message = messageService.GetMessage();
14         }
15 }但是这种方式是有前提的,需要使用ViewModelLocator.AutoWireViewModel附加属性,将ViewModel自动绑定到View上。
当指定了ViewModelLocator.AutoWireViewModel=true时,Prism会帮我们自动将ViewModel和View进行绑定,这个功能在下一篇文章中会进行详细介绍。
注意:我们也可以把IContainerProvider进行注入,以便手动去容器中获取对象实例,如下所示。
但是不推荐这种方法,尽量使用构造函数自动注入的方式。
其中:IContainerProvider是Unity提供的解析接口,用于从容器中获取已注册的服务实例。
1  public MainWindowViewModel(IContainerProvider containerProvider)
2  {
3      //手动解析
4      var messageServiceB = containerProvider.Resolve<IMessageService>("ServiceB");
5  }
如何指定注入的对象
在前面我们使用构造函数来获取注入的对象,那这种情况是系统控制的。如果我们使用的接口有两个实现,那如何获取指定的实例呢?
解决方法就是手动配置构造函数注入
这种情况需要使用Unity的原生接口,如下所示
1 protected override void RegisterTypes(IContainerRegistry containerRegistry)
2 {
3 //注册同一接口的不同实现
4 containerRegistry.Register<IMessageService, MessageService>("ServiceA");
5 containerRegistry.Register<IMessageService, MessageService2>("ServiceB");
6
7 //手动配置注入
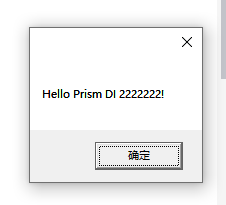
8 containerRegistry.GetContainer().RegisterFactory<MainWindowViewModel>((container, type, name) => new MainWindowViewModel(container.Resolve<IMessageService>("ServiceB")));
9 }这样我们在MainWindowViewModel中使用时,获取的就是MessageService2的实例
 1  public class MainWindowViewModel : BindableBase
 2  {
 3      private IMessageService messageService;
 4
 5      public MainWindowViewModel(IMessageService messageService)
 6      {
 7          this.messageService = messageService;
 8
 9          System.Windows.MessageBox.Show( messageService.GetMessage());
10      }
11  }
运行效果
示例代码
https://github.com/zhaotianff/WPF-MVVM-Beginner/tree/main/12_Prism_Ioc