目录
有时候我们想在嵌入式linux中,起一个服务,用于传输文件等工作。当然,方案很多,这里采用了比较小巧的mongoose。
下载mongoose源码
我下载的是最新sdk,V7.14版本。
万能的github,链接在这里:
点我转到下载链接
(PS:可能需要梯子)
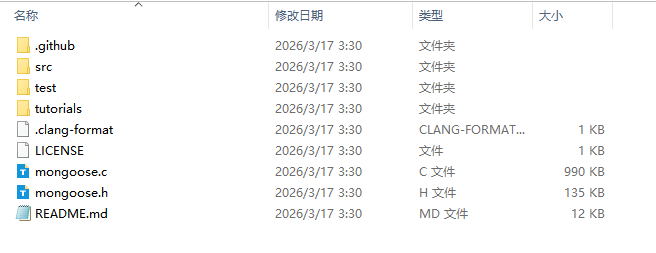
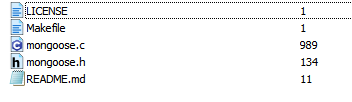
下载完成后,目录中很多文件,其实编译只要3个文件,C文件,H头文件,Makfile文件即可。
这里把对应的文件放到了交叉编译环境下:
Makefile制作
我这里是ARM的aarch64架构,你们若是其他平台,根据对应的平台进行修改即可,我这边生成的makefile如下:
bash
# Makefile for libmongoose.so (fixed for embedded/aarch64)

CC := aarch64-linux-gnu-gcc

# 启用必要的特性宏,并显式指定 MG_ARCH
CFLAGS ?= -O2 -fPIC -std=c99 \
          -D_GNU_SOURCE \
          -DMG_ARCH=MG_ARCH_UNIX

# 可选:如果你后续要自定义配置,可取消注释下一行并提供 mongoose_config.h
# CFLAGS += -DMG_ARCH=MG_ARCH_CUSTOM

LDFLAGS = -shared

TARGET = libmongoose.so
SRC = mongoose.c
OBJ = mongoose.o

all: $(TARGET)

%.o: %.c
	$(CC) $(CFLAGS) -c $< -o $@

$(TARGET): $(OBJ)
	$(CC) $(LDFLAGS) $< -o $@ -lpthread

clean:
	rm -f $(OBJ) $(TARGET)

.PHONY: all clean
编译so文件

make以后,生成了:libmongoose.so文件。
拷贝到开发板的usr/lib目录中,注意修改一下权限,我这用的权限是755。
编写mongoose后端程序
把对应的so文件和mongoose.h文件放到工程中,修改你的makefile,且修改对应的后端程序后,进行应用端的编译,即可。
后端是采用C语言:
如下:
初始化代码:
c
void my_web_init(void)
{
	mg_log_set(MG_LL_NONE);//关闭所有日志

    // 创建上传目录(如果不存在)
    ensure_upload_dir(UPLOAD_DIR);


    mg_mgr_init(&mgr);

    const char *url = "http://0.0.0.0:8180";
    mg_http_listen(&mgr, url, fn, NULL);

    printf("-----------Web server starting on %s-----------\n", url);
    printf("-----------Place 'index.html' in /www/-----------\n");


	pthread_t pthid_handle;
	pthread_attr_t a; //线程属性
	pthread_attr_init(&a);  //初始化线程属性
	pthread_attr_setdetachstate(&a, PTHREAD_CREATE_DETACHED);      //设置线程属性(交给操作系统进行释放资源)
	pthread_create(&pthid_handle,&a,my_web_poll_handle, NULL);


	printf("------------------------------++++++++++++++++++++++++++++++++++2222222\n");
}
其中,mg_log_set(MG_LL_NONE);是关闭若是有日志,日志级别如下:
| 级别 | 含义 |
|---|---|
MG_LL_NONE |
不输出任何日志 |
MG_LL_ERROR |
只输出错误 |
MG_LL_INFO |
错误 + 信息(默认级别) |
MG_LL_DEBUG |
所有日志(包括 read_conn/write_conn 等) |
MG_LL_VERBOSE_DEBUG |
更详细的调试(极少用) |
poll循环程序
我采用了一个比较简单的方式,就是线程循环:
c
struct mg_mgr mgr;
static void *my_web_poll_handle(void *arg)
{
	for (;;) {
        mg_mgr_poll(&mgr, 60);
		usleep(50*1000);
    }

	mg_mgr_free(&mgr);

}
回调处理,这里是程序的关键:
c
// HTTP event handler
extern struct mg_fs mg_fs_posix;
static void fn(struct mg_connection *c, int ev, void *ev_data)
{
    if (ev == MG_EV_HTTP_MSG)
	{
        struct mg_http_message *hm = (struct mg_http_message *) ev_data;
		struct mg_str post_str={"POST",4};

        if (mg_match(hm->uri, mg_str("/list"), NULL))
		{
            mydebugMsg(hm->uri);
            handle_list(c, hm);
        }
		else if (mg_match(hm->uri, mg_str("/upload"), NULL) && mg_strcmp(hm->method, post_str) == 0)
		{
                    long tmp = mg_http_upload(c, hm, &mg_fs_posix, UPLOAD_DIR, 10*1024*1024);

        }
		else {
			struct mg_http_serve_opts opts = {.root_dir = WWW_ROOT};
			mg_http_serve_dir(c, ev_data, &opts);
		}
    }
	else
	{
		//
	}
}
编写前端html和js程序
不磨叽,直接上代码:
(PS:这个代码是官方文件:tutorials\http\file-upload-multiple-posts\web_root中的代码,用于参考)
index.html代码如下:
html
<!DOCTYPE html>
<html lang="en">
  <head>
    <title>example</title>
    <meta charset="utf-8" />
    <meta http-equiv="X-UA-Compatible" content="IE=edge" />
    <meta name="viewport" content="width=device-width, initial-scale=1.0" />
    <style>
      #container { margin-right: auto; margin-left: auto; max-width: 480px; }
      #info { background: #e0f0f0; border-radius: .5em; padding: 2em;  }
      #wrapper { margin-top: 1em; }
    </style>
  </head>
  <body>
    <div id="container">
      <div id="info">
        Mongoose always buffers a full HTTP message before invoking
        the MG_EV_HTTP_MSG event. A big POST request would require a lot
        of RAM to buffer everything. Therefore, in order to upload large
        files on memory-constrained systems, a large file should be sent
        in small chunks.
        <br/><br/>
        In this example, the JavaScript code on this page sends the chosen
        file in 2Kb chunks using the <code>/upload</code> endpoint.
        The uploaded file is stored in the <code>/tmp</code> directory by
        the helper API function <code>mg_http_upload()</code>
      </div>
      <div id="wrapper">
        <input type="file" id="el1" style="display: none"/>
        <button id="el2">choose file...</button>
        <div id="el3"></div>
      </div>
    </div>
  </body>
  <script src="app.js"></script>
</html>
app.js代码如下:
javascript
// Copyright (c) 2020 Cesanta Software Limited
// All rights reserved

// Helper function to display upload status
var setStatus = function(text) {
  document.getElementById('el3').innerText = text;
};

// When user clicks on a button, trigger file selection dialog
var button = document.getElementById('el2');
button.onclick = function(ev) {
  input.click();
};

// Send a large blob of data chunk by chunk
var sendFileData = function(name, data, chunkSize) {
  var sendChunk = function(offset) {
    var chunk = data.subarray(offset, offset + chunkSize) || '';
    var opts = {method: 'POST', body: chunk};
    var url = '/upload?offset=' + offset + '&file=' + encodeURIComponent(name);
    var ok;
    setStatus(
        'Uploading ' + name + ', bytes ' + offset + '..' +
        (offset + chunk.length) + ' of ' + data.length);
    fetch(url, opts)
        .then(function(res) {
          if (res.ok && chunk.length > 0) sendChunk(offset + chunk.length);
          ok = res.ok;
          return res.text();
        })
        .then(function(text) {
          if (!ok) setStatus('Error: ' + text);
        });
  };
  sendChunk(0);
};

// If user selected a file, read it into memory and trigger sendFileData()
var input = document.getElementById('el1');
input.onchange = function(ev) {
  if (!ev.target.files[0]) return;
  var f = ev.target.files[0], r = new FileReader();
  r.readAsArrayBuffer(f);
  r.onload = function() {
    ev.target.value = '';
    sendFileData(f.name, new Uint8Array(r.result), 2048);
  };
};
测试
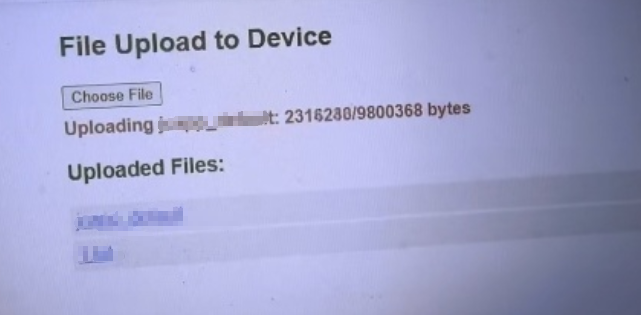
如上图,能正常上传。