一、安装openclaw
openclaw开源代码中有安装命令,直接拷贝应用即可(注意需要提前安装node):
https://github.com/openclaw/openclaw/blob/main/README.md
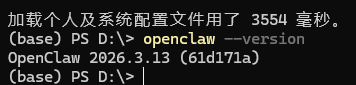
npm install -g openclaw@latest安装完成后,可以执行openclaw --version查看版本,若正确显示版本,则openclaw安装成功
二、配置openclaw
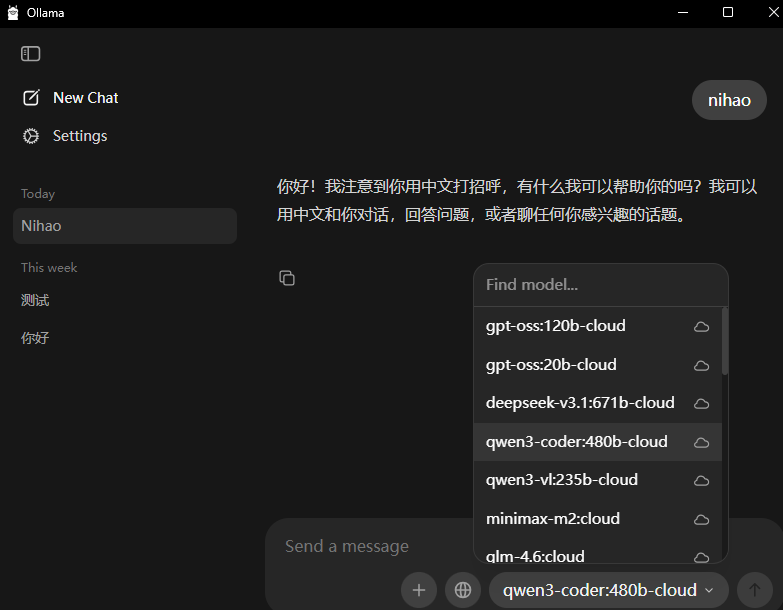
本文之所以用ollama的云端模型作为openclaw的模型,因为当前不需要APIKEY,不需要收费。便于新手入门openclaw安装配置过程。
在配置之前请确认自己本地已经安装了ollama软件,并查看ollama支持的云端模型(后面openclaw配置时会使用)
执行openclaw onboard进入配置界面,出现下面的界面用左右方向键选择yes,然后enter
(base) PS D:\> openclaw onboard Config warnings:\n- plugins.entries.feishu: plugin feishu: duplicate plugin id detected; later plugin may be overridden (C:\Users\tashi\.openclaw\extensions\feishu\index.ts) 21:08:55 [plugins] plugins.allow is empty; discovered non-bundled plugins may auto-load: feishu (C:\Users\tashi\.openclaw\extensions\feishu\index.ts). Set plugins.allow to explicit trusted ids. Config warnings:\n- plugins.entries.feishu: plugin feishu: duplicate plugin id detected; later plugin may be overridden (C:\Users\tashi\.openclaw\extensions\feishu\index.ts) 🦞 OpenClaw 2026.3.13 (61d171a) --- Say "stop" and I'll stop---say "ship" and we'll both learn a lesson. │ ◇ Config warnings ─────────────────────────────────────────────────────────────────────────╮ │ │ │ - plugins.entries.feishu: plugin feishu: duplicate plugin id detected; later plugin may │ │ be overridden (C:\Users\tashi\.openclaw\extensions\feishu\index.ts) │ │ │ ├───────────────────────────────────────────────────────────────────────────────────────────╯ Windows detected - OpenClaw runs great on WSL2! Native Windows might be trickier. Quick setup: wsl --install (one command, one reboot) Guide: https://docs.openclaw.ai/windows ▄▄▄▄▄▄▄▄▄▄▄▄▄▄▄▄▄▄▄▄▄▄▄▄▄▄▄▄▄▄▄▄▄▄▄▄▄▄▄▄▄▄▄▄▄▄▄▄▄▄▄▄ ██░▄▄▄░██░▄▄░██░▄▄▄██░▀██░██░▄▄▀██░████░▄▄▀██░███░██ ██░███░██░▀▀░██░▄▄▄██░█░█░██░█████░████░▀▀░██░█░█░██ ██░▀▀▀░██░█████░▀▀▀██░██▄░██░▀▀▄██░▀▀░█░██░██▄▀▄▀▄██ ▀▀▀▀▀▀▀▀▀▀▀▀▀▀▀▀▀▀▀▀▀▀▀▀▀▀▀▀▀▀▀▀▀▀▀▀▀▀▀▀▀▀▀▀▀▀▀▀▀▀▀▀ 🦞 OPENCLAW 🦞 ┌ OpenClaw onboarding │ ◇ Security ─────────────────────────────────────────────────────────────────────────────────╮ │ │ │ Security warning --- please read. │ │ │ │ OpenClaw is a hobby project and still in beta. Expect sharp edges. │ │ By default, OpenClaw is a personal agent: one trusted operator boundary. │ │ This bot can read files and run actions if tools are enabled. │ │ A bad prompt can trick it into doing unsafe things. │ │ │ │ OpenClaw is not a hostile multi-tenant boundary by default. │ │ If multiple users can message one tool-enabled agent, they share that delegated tool │ │ authority. │ │ │ │ If you're not comfortable with security hardening and access control, don't run │ │ OpenClaw. │ │ Ask someone experienced to help before enabling tools or exposing it to the internet. │ │ │ │ Recommended baseline: │ │ - Pairing/allowlists + mention gating. │ │ - Multi-user/shared inbox: split trust boundaries (separate gateway/credentials, ideally │ │ separate OS users/hosts). │ │ - Sandbox + least-privilege tools. │ │ - Shared inboxes: isolate DM sessions (`session.dmScope: per-channel-peer`) and keep │ │ tool access minimal. │ │ - Keep secrets out of the agent's reachable filesystem. │ │ - Use the strongest available model for any bot with tools or untrusted inboxes. │ │ │ │ Run regularly: │ │ openclaw security audit --deep │ │ openclaw security audit --fix │ │ │ │ Must read: https://docs.openclaw.ai/gateway/security │ │ │ ├────────────────────────────────────────────────────────────────────────────────────────────╯ │ ◆ I understand this is personal-by-default and shared/multi-user use requires lock-down. Continue? │ ● Yes /○ No 然后选择QuickStart

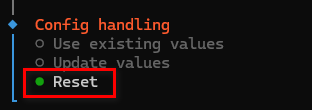
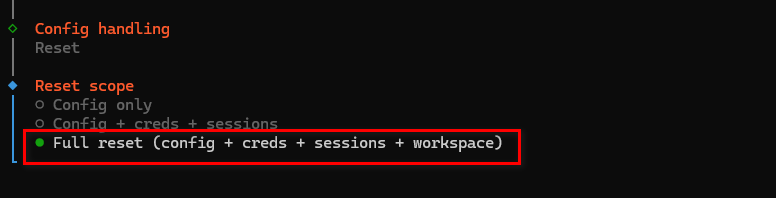
因为我之前配置过,此次进入,我选择全部重置(为了后面方便演示相关配置过程)。如果你是第一次配置,不会出现这个界面。
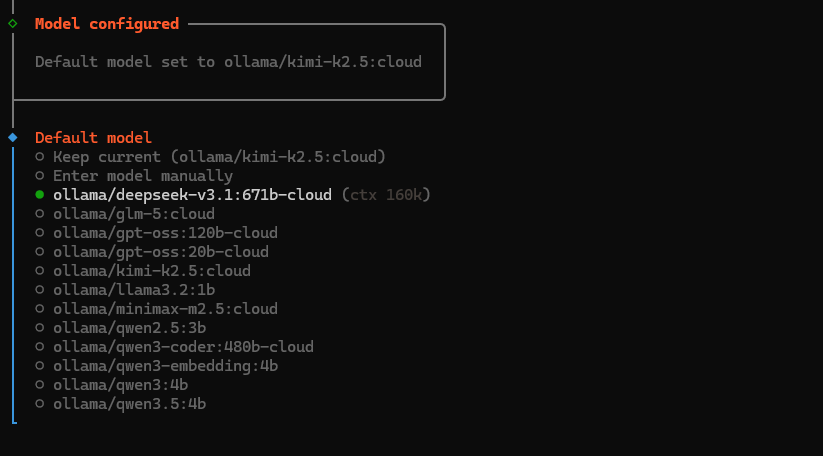
选择ollama模型(cloud和local)


default model选择你的ollama上支持的云端模型ollama/deepseek-v3.1:671b-cloud
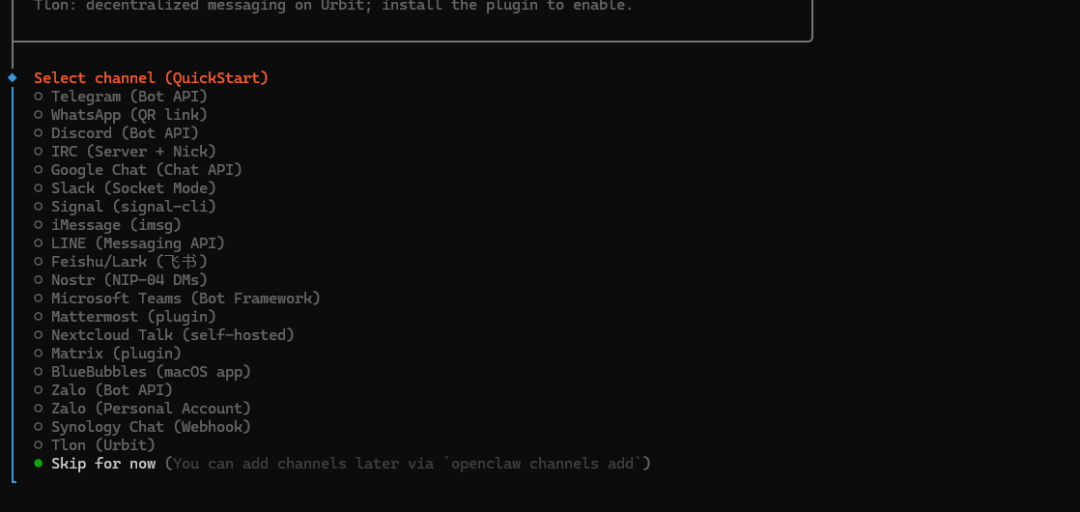
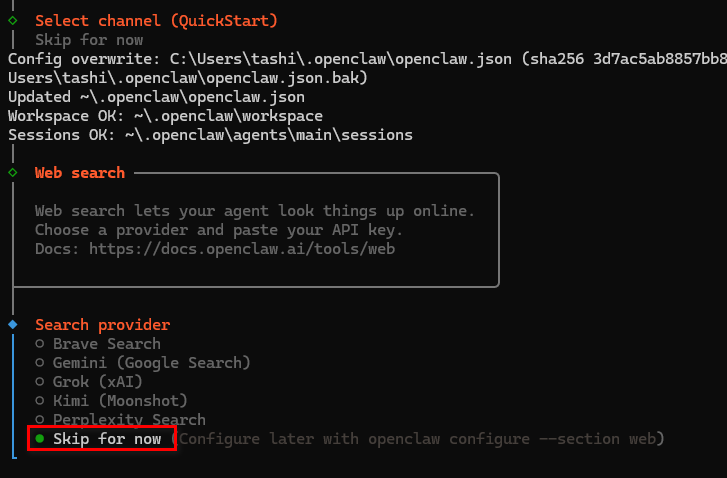
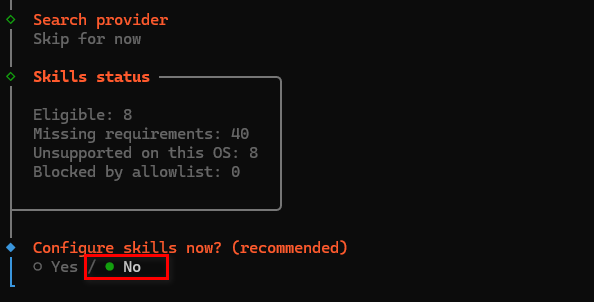
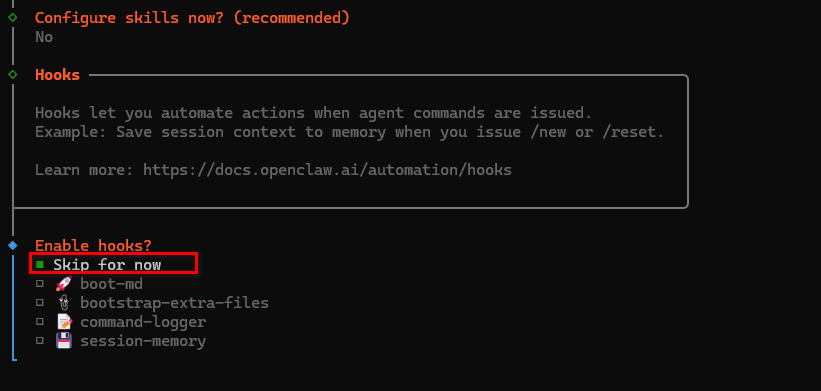
后面的步骤都可以先skip,后面需要时再配置
执行openclaw gateway,浏览器中输入( http://127.0.0.1:18789/#token=68ebd22c294caf0268dfe9f6172f6a0......)打开网页版openclaw管理页面
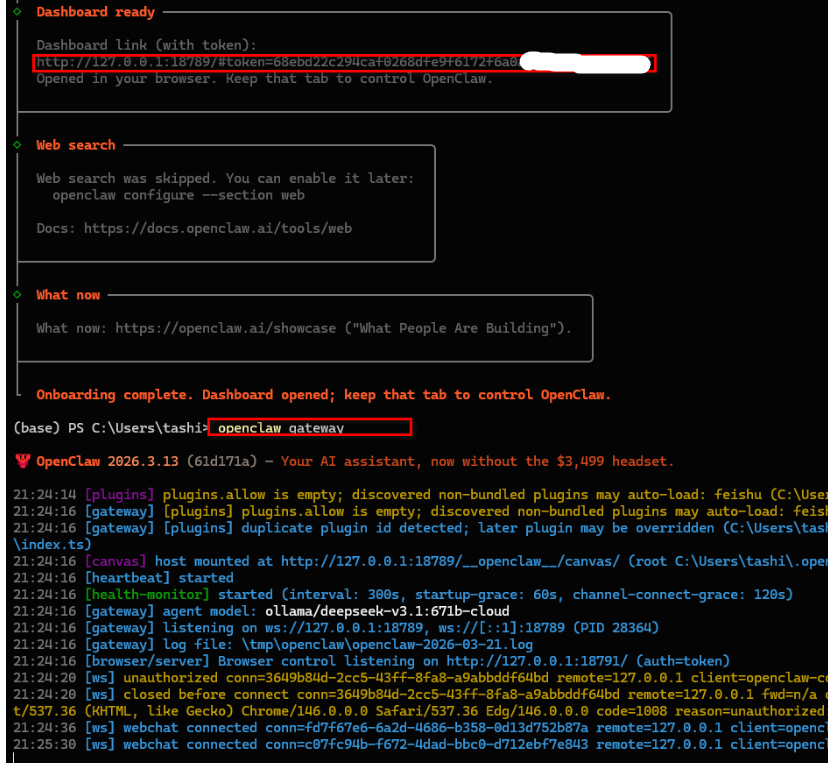
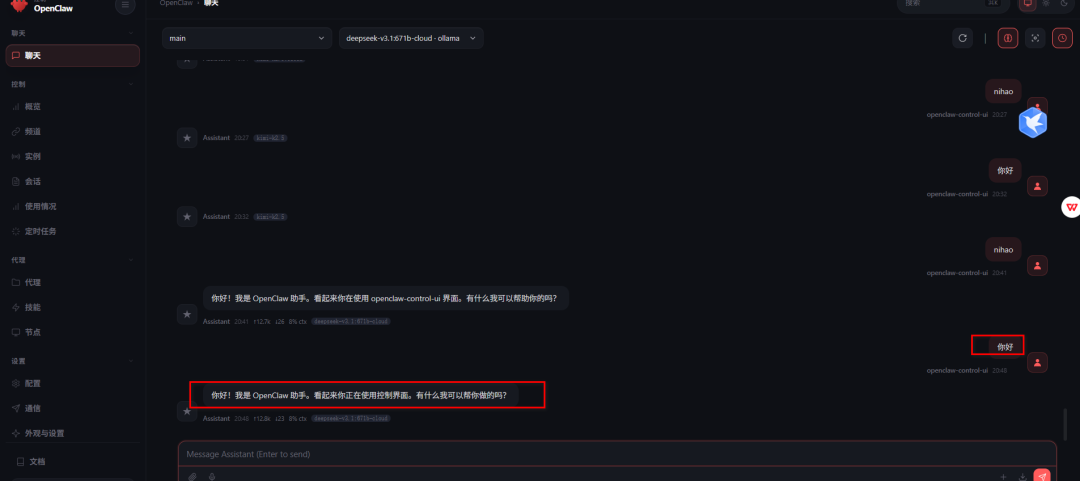
聊天中输入你好,若有回应,则代表openclaw模型已经配置成功,可以对话了。
三、配置飞书机器人
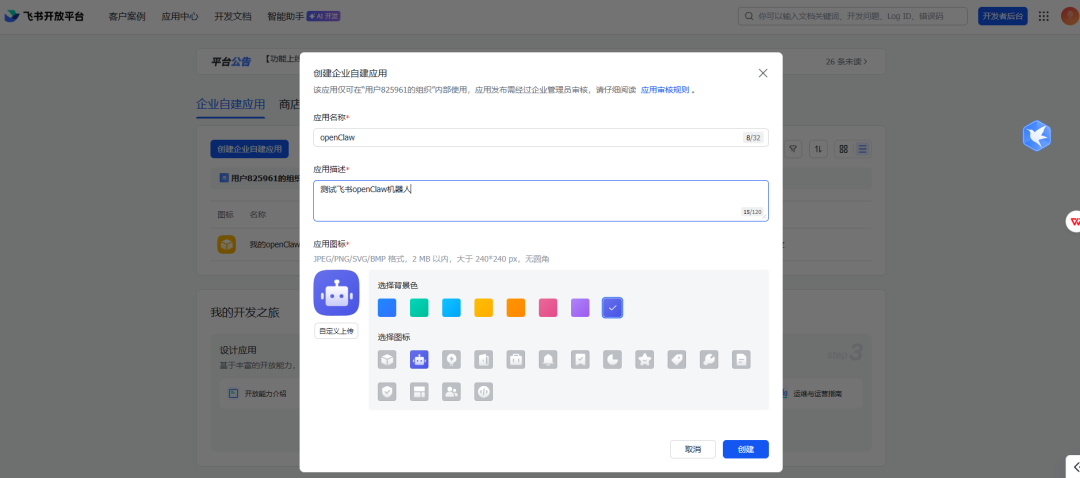
在飞书官网下载飞书软件,安装到本地,如果没有账号先注册一个。并在飞书开发者后台(https://open.feishu.cn/app),创建自定义应用
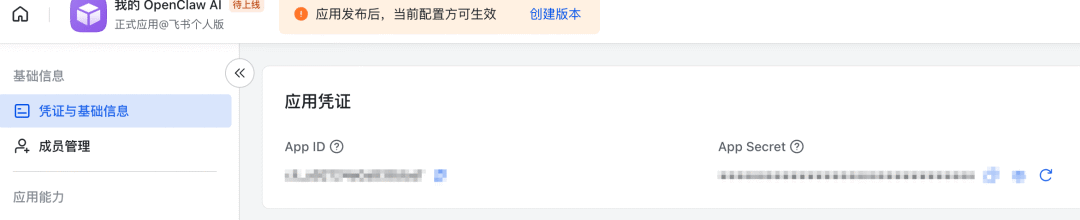
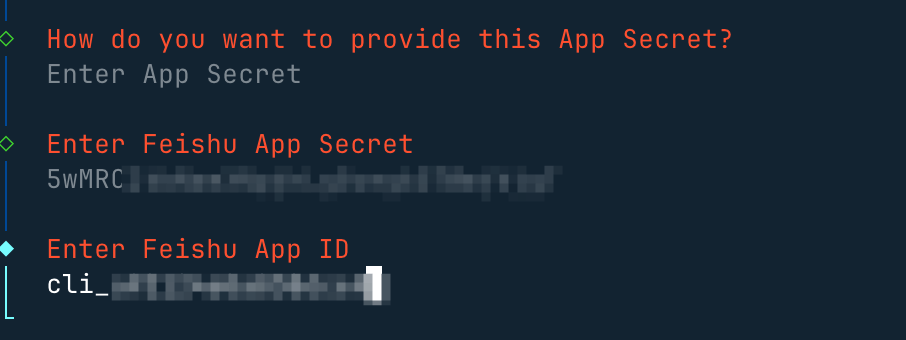
在凭证与基础信息 页面可以看到应用的凭证App ID 和 App Secret,后面要用到:
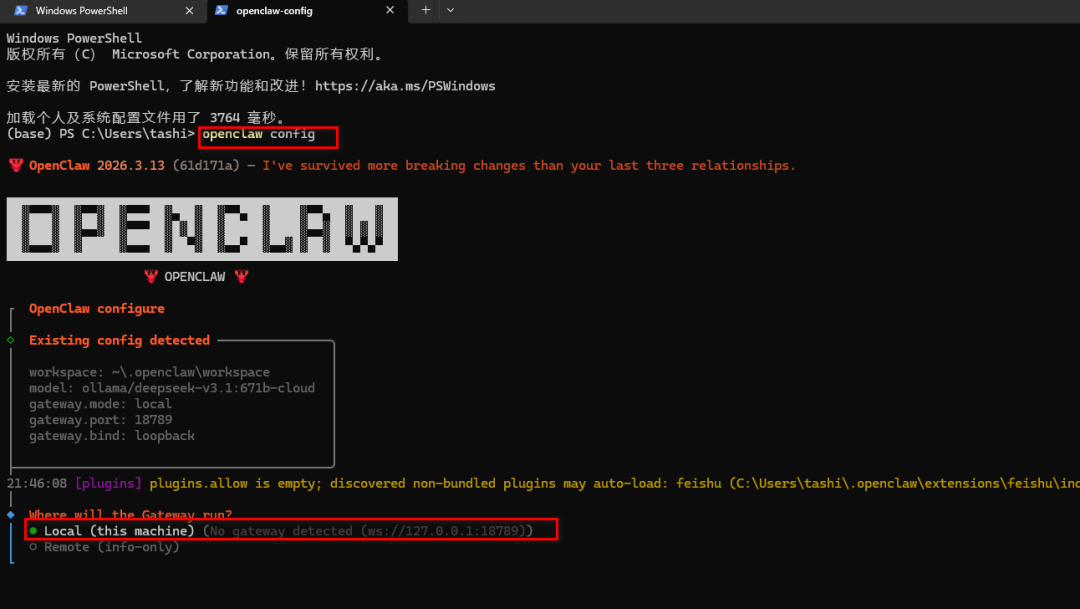
执行openclaw config重新进入配置界面
选择local
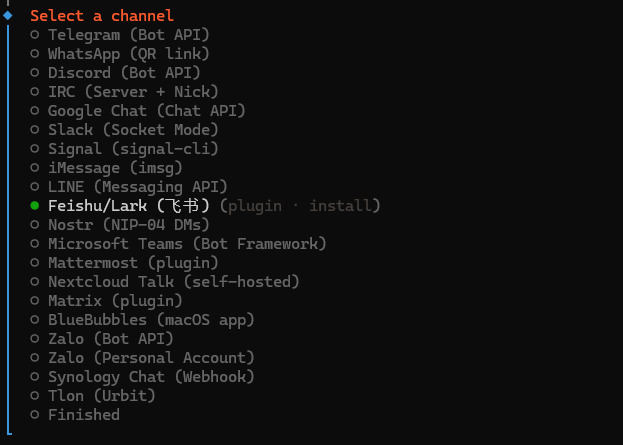
选择channel

选择Configure/link

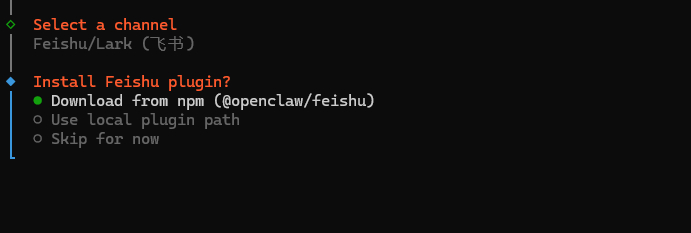
选择Feishu/Lark(飞书)
download飞书插件
输入App Sceret和App Id

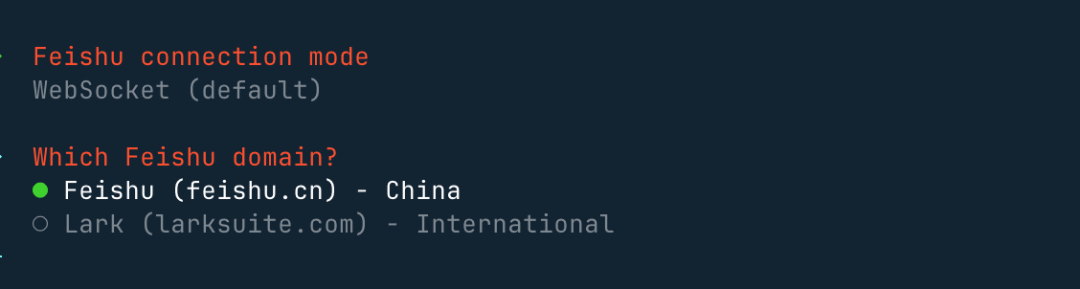
设置连接模式,并使用国内域名:
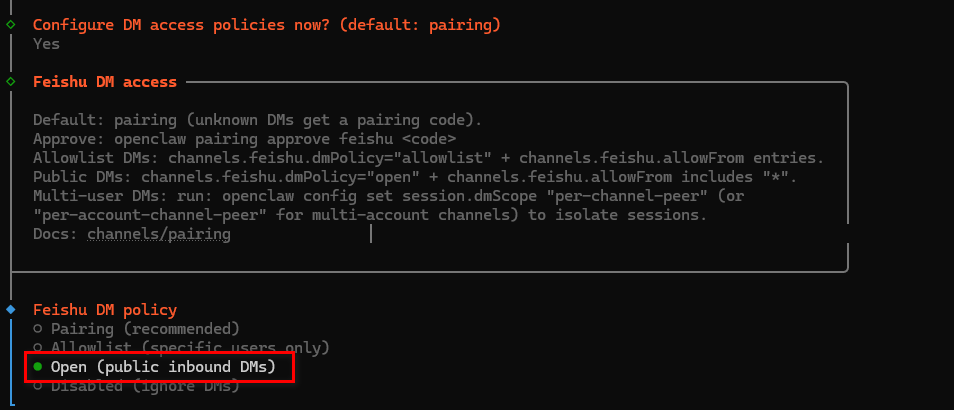
接下来的群聊策略选择 Open,这样可以响应所有的群聊:
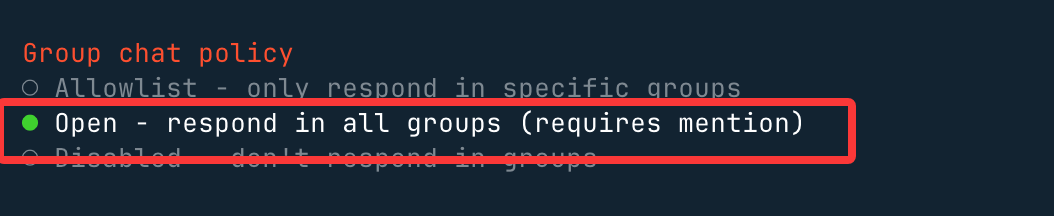
如果选择 Allowlist,只会在白名单的群聊可以响应。
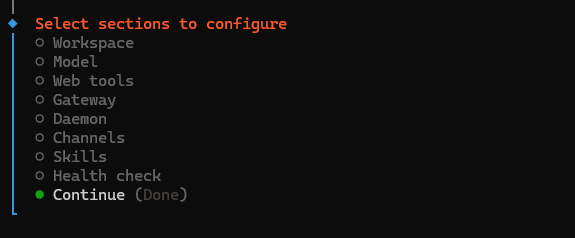
选择 Finished,往后执行 。
这里选择Yes

选择open方便调试,不用pairing配对了
接下来选择Continue
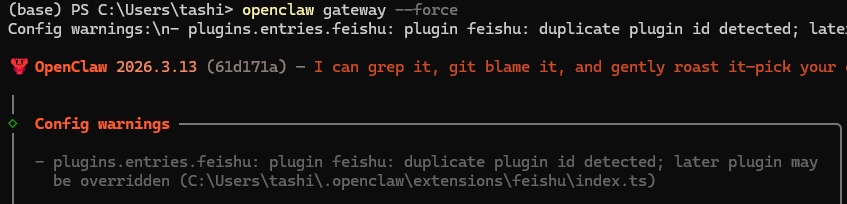
执行openclaw gateway --force强制重启openclaw gateway
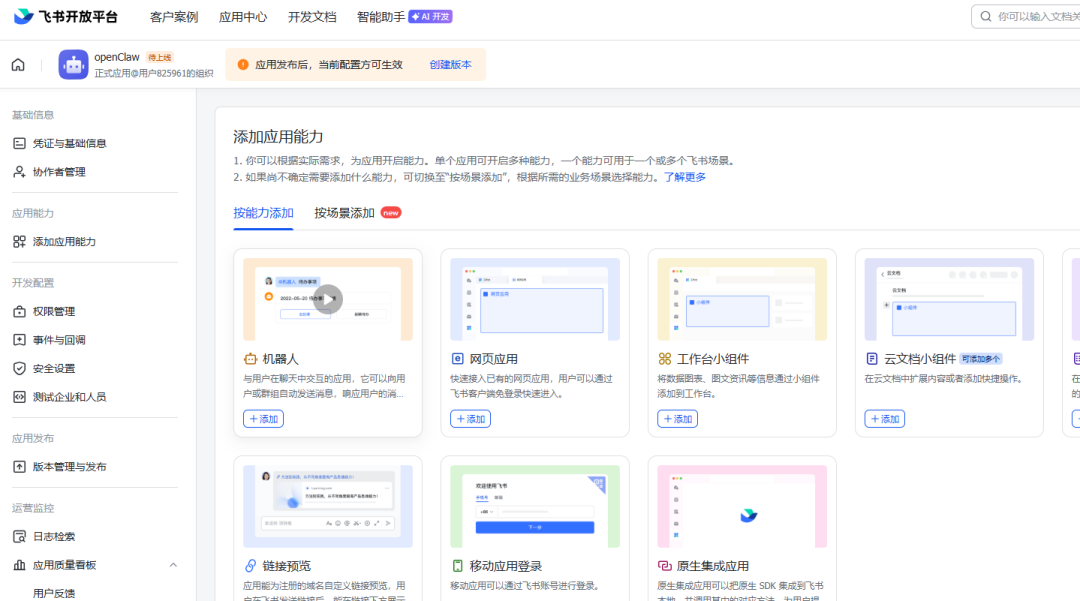
然后给应用添加机器人能力
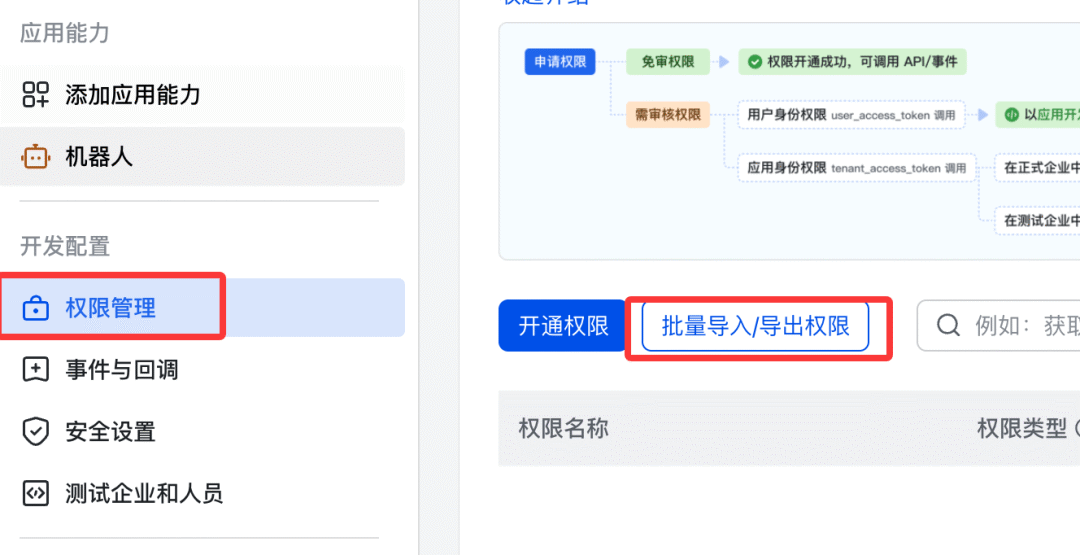
配置权限,左侧 → 权限管理 → 批量批量导入/导出权限:
粘贴以下 JSON:
{ "scopes": { "tenant": [ "aily:file:read", "aily:file:write", "application:application.app_message_stats.overview:readonly", "application:application:self_manage", "application:bot.menu:write", "cardkit:card:read", "cardkit:card:write", "contact:user.employee_id:readonly", "corehr:file:download", "event:ip_list", "im:chat.access_event.bot_p2p_chat:read", "im:chat.members:bot_access", "im:message", "im:message.group_at_msg:readonly", "im:message.p2p_msg:readonly", "im:message:readonly", "im:message:send_as_bot", "im:resource" ], "user": ["aily:file:read", "aily:file:write", "im:chat.access_event.bot_p2p_chat:read"] }}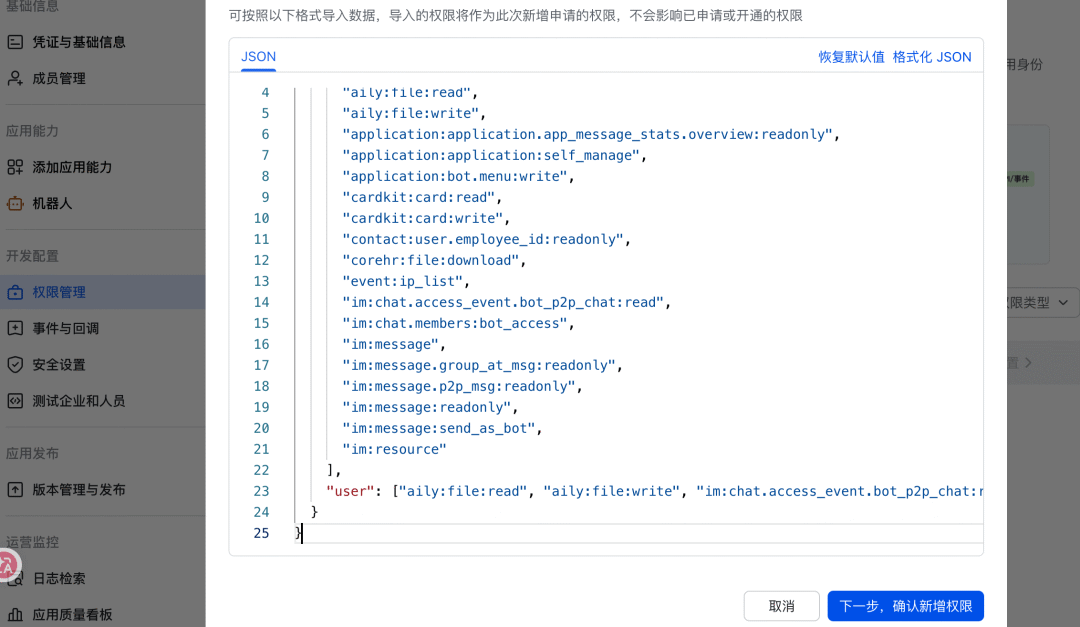
配置事件订阅,接下来我们需要为应用订阅相关事件,在左侧菜单选择事件与回调 → 事件配置:
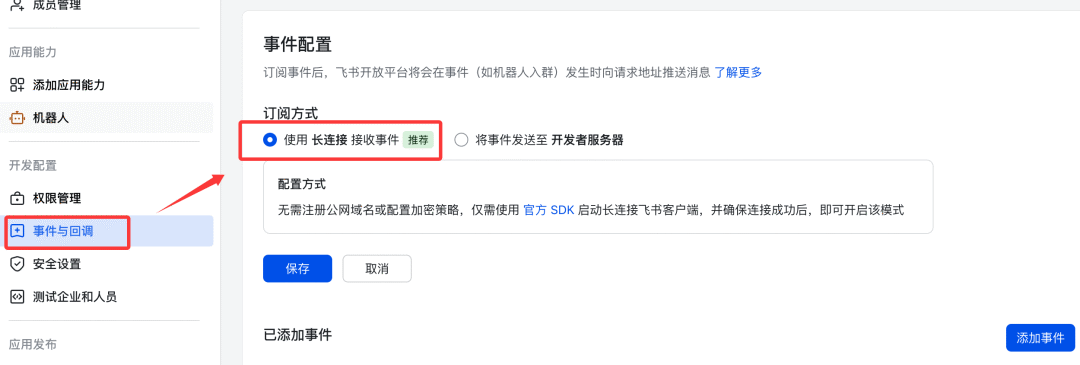
订阅方式使用长连接接收事件(WebSocket),然后保存。
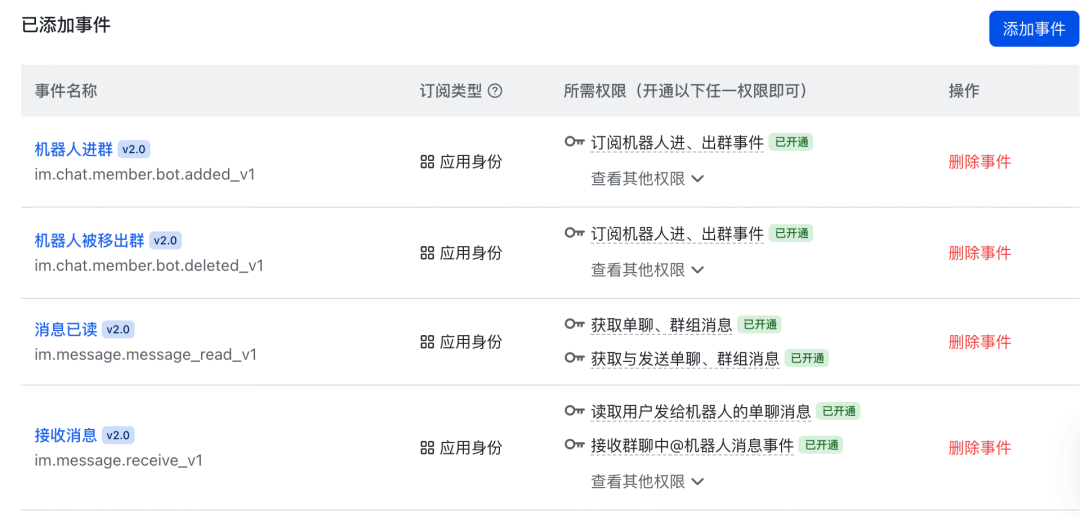
添加以下事件:
im.message.receive_v1- 接收消息im.message.message_read_v1- 消息已读回执im.chat.member.bot.added_v1- 机器人进群im.chat.member.bot.deleted_v1- 机器人被移出群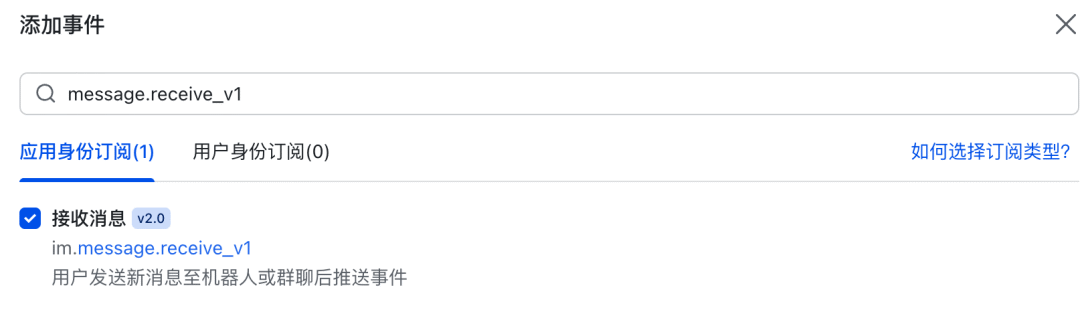
已添加事件列表:
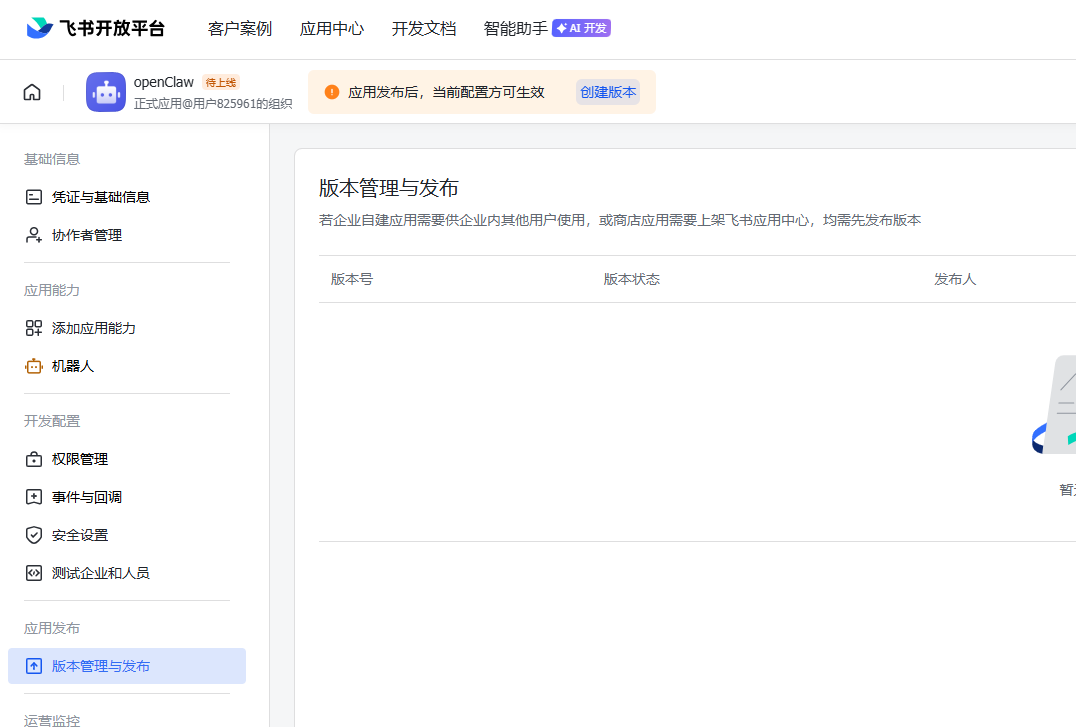
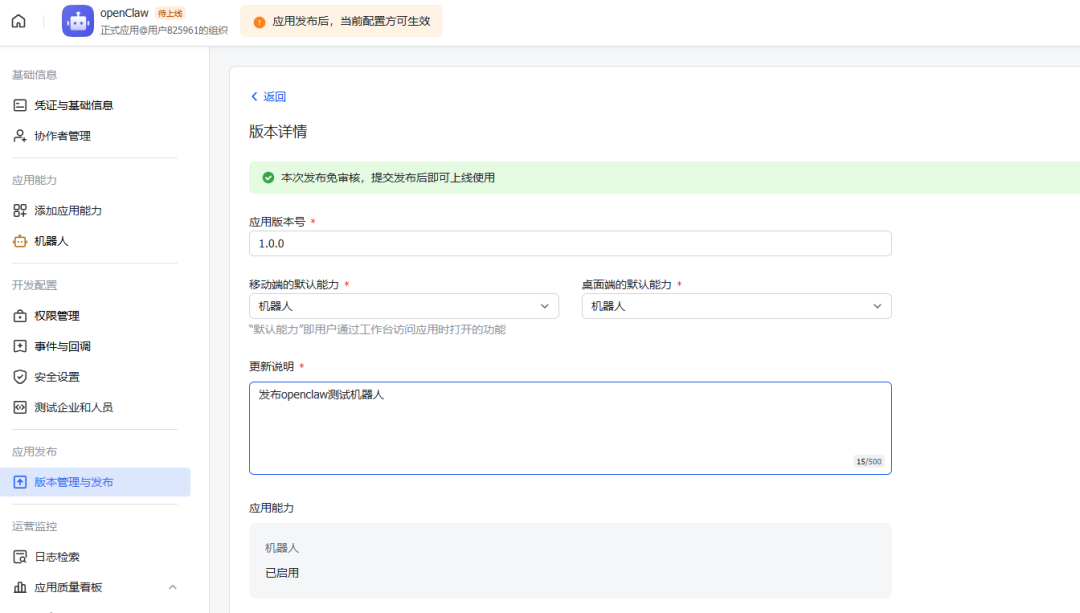
发布应用,左侧 → 版本管理与发布 → 创建版本 → 提交审核 → 发布:
发布成功后,会在飞书客户端收到应用发布成功的消息

执行openclaw gateway --force强制重启openclaw gateway

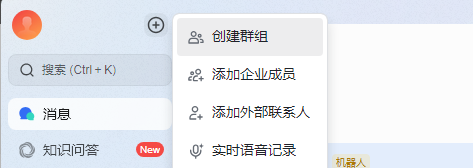
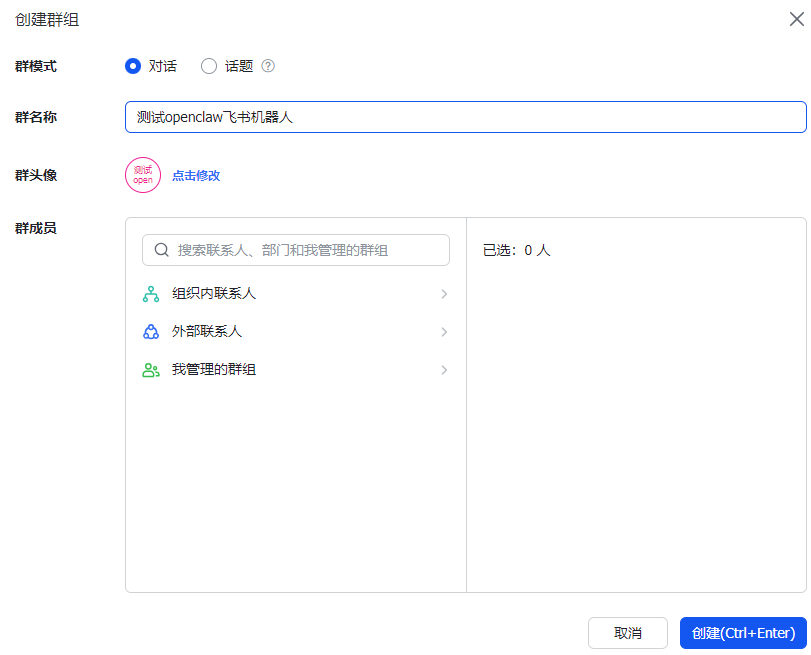
使用飞书创建一个测试群:
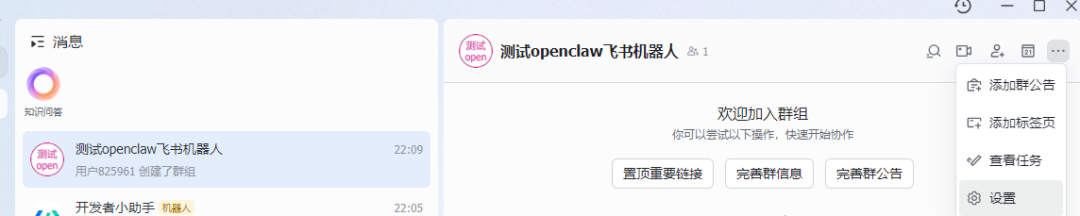
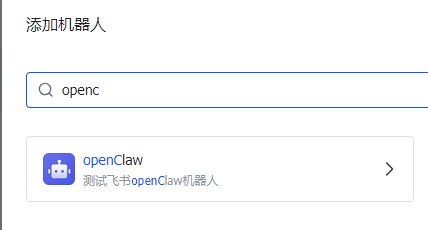
点击群的右上角设置,添加群机器人到群里

在群里可以@机器人,与机器人进行问答。
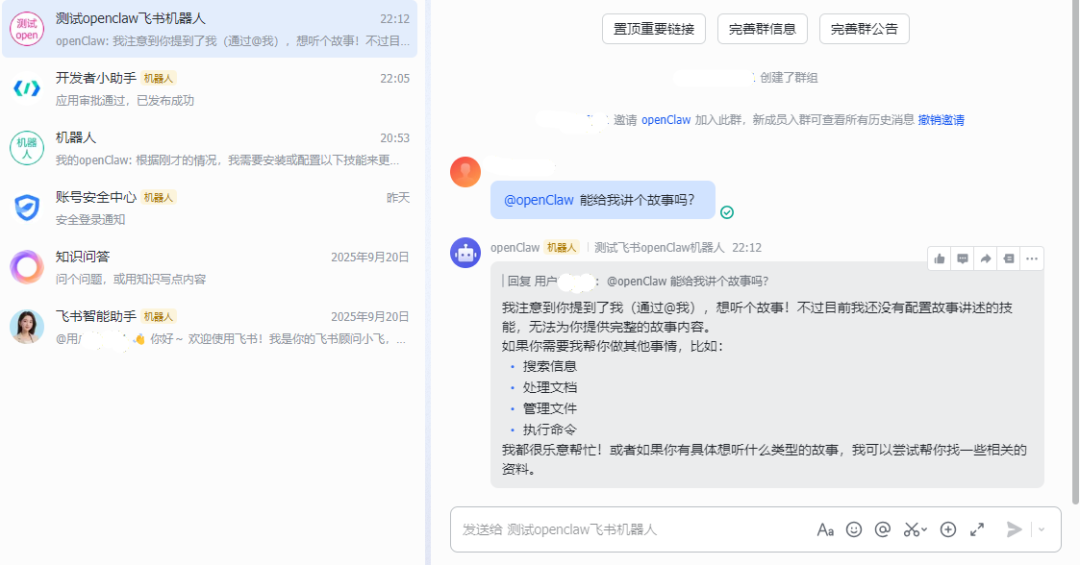
至此,openclaw+ollama云端模型+飞书完美结合配置出飞书辅助问答机器人。