欢迎加入开源鸿蒙跨平台社区 :https://openharmonycrossplatform.csdn.net

📋 前言
在移动应用开发中,生物认证(指纹识别、人脸识别)已成为提升安全性和用户体验的重要手段。react-native-fingerprint-scanner 是一个跨平台的生物认证库,支持指纹识别功能,让开发者能够轻松在应用中集成安全的身份验证机制。
🎯 库简介
基本信息
- 库名称 :
react-native-fingerprint-scanner - 版本信息: 6.1.0
- 官方仓库: https://github.com/react-native-oh-library/react-native-fingerprint-scanner
- 主要功能 :
- 🔍 检测设备生物识别传感器可用性
- 👆 指纹认证
- 📱 跨平台支持(Android、iOS、HarmonyOS)
- 🔐 安全的身份验证机制
支持的生物识别类型
| 功能 | 说明 | HarmonyOS 支持 |
|---|---|---|
| 指纹识别 | 使用设备指纹传感器进行认证 | ✅ |
| 传感器检测 | 检测设备是否支持生物识别 | ✅ |
| 认证状态监听 | 监听认证尝试状态 | ✅ |
| 资源释放 | 释放认证相关资源 | ✅ |
兼容性验证
在以下环境验证通过:
- RNOH : 0.72.90; SDK : HarmonyOS 6.0.0 Release SDK; IDE : DevEco Studio 6.0.2; ROM: 6.0.0
📦 安装步骤
1. 安装依赖
在项目根目录执行以下命令:
bash
# npm 安装
npm install @react-native-ohos/react-native-fingerprint-scanner@6.1.0-rc.1

# 或者使用 yarn
yarn add @react-native-ohos/react-native-fingerprint-scanner
2. 验证安装
安装完成后,检查 package.json 文件:
json
{
  "dependencies": {
    "@react-native-ohos/react-native-fingerprint-scanner": "^6.1.0"
  }
}
🔧 HarmonyOS 平台配置 ⭐
由于 HarmonyOS 不支持 AutoLink,需要手动配置原生端代码。本文提供 HAR 包引入 和 源码引入 两种方式,可根据实际需求选择。
1. 在工程根目录的 oh-package.json5 添加 overrides 字段(看自己的版本是什么)
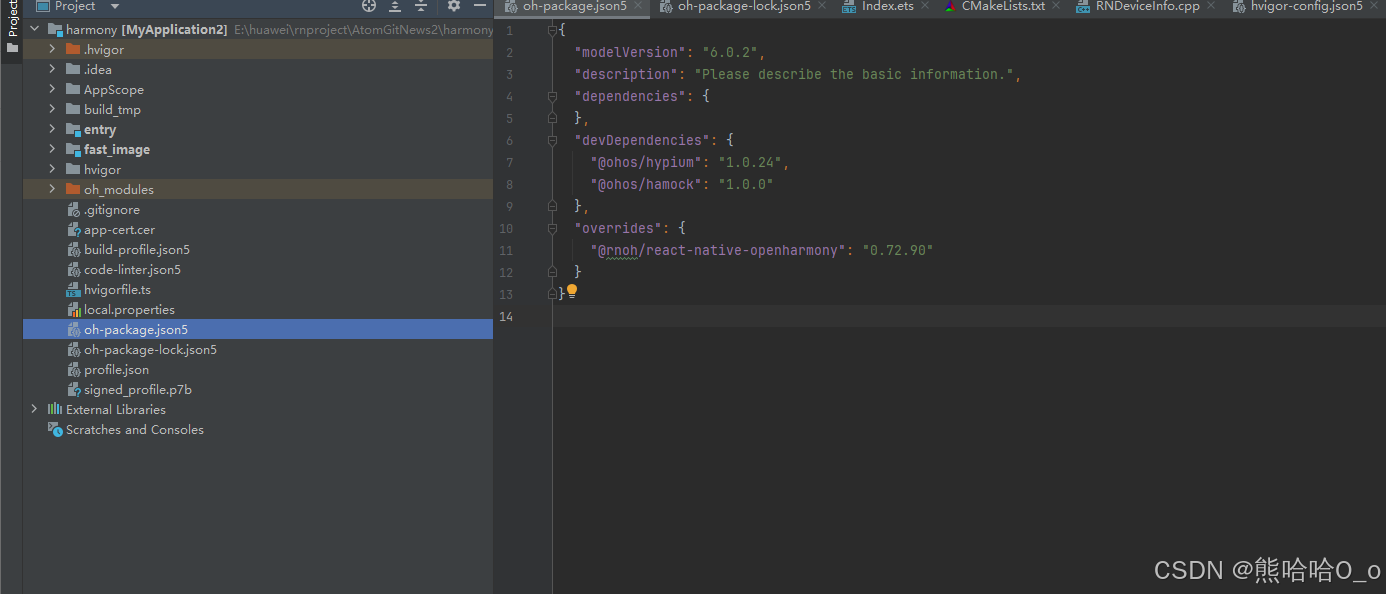
打开 harmony/oh-package.json5,添加以下配置:
json5
{
  "overrides": {
    "@rnoh/react-native-openharmony": "0.72.90"
  }
}
方式一:HAR 包引入(推荐)📦
2.1 在 entry/oh-package.json5 添加依赖
打开 harmony/entry/oh-package.json5,添加以下依赖:
json5
"dependencies": {
  "@react-native-ohos/react-native-fingerprint-scanner": "file:../../node_modules/@react-native-ohos/react-native-fingerprint-scanner/harmony/fingerprint_scanner.har"
}
2.2 同步依赖
点击 DevEco Studio 右上角的 sync 按钮,或者在终端执行:
bash
cd harmony/entry
ohpm install
2.3 配置 CMakeLists.txt
打开 harmony/entry/src/main/cpp/CMakeLists.txt,添加以下配置:
c
project(rnapp)
cmake_minimum_required(VERSION 3.4.1)
set(CMAKE_SKIP_BUILD_RPATH TRUE)
set(RNOH_APP_DIR "${CMAKE_CURRENT_SOURCE_DIR}")
set(NODE_MODULES "${CMAKE_CURRENT_SOURCE_DIR}/../../../../../node_modules")
set(OH_MODULES "${CMAKE_CURRENT_SOURCE_DIR}/../../../oh_modules")
set(RNOH_CPP_DIR "${CMAKE_CURRENT_SOURCE_DIR}/../../../../../../react-native-harmony/harmony/cpp")

add_subdirectory("${RNOH_CPP_DIR}" ./rn)

# 添加 FingerprintScanner 模块
+ add_subdirectory("${OH_MODULES}/@react-native-ohos/react-native-fingerprint-scanner/src/main/cpp" ./fingerprint_scanner)

file(GLOB GENERATED_CPP_FILES "./generated/*.cpp")

add_library(rnoh_app SHARED
    ${GENERATED_CPP_FILES}
    "./PackageProvider.cpp"
    "${RNOH_CPP_DIR}/RNOHAppNapiBridge.cpp"
)
target_link_libraries(rnoh_app PUBLIC rnoh)

# 链接 FingerprintScanner 库
+ target_link_libraries(rnoh_app PUBLIC fingerprint_scanner)
2.4 修改 PackageProvider.cpp
打开 harmony/entry/src/main/cpp/PackageProvider.cpp,添加:
cpp
#include "RNOH/PackageProvider.h"
#include "generated/RNOHGeneratedPackage.h"
+ #include "FingerprintScannerPackage.h"

using namespace rnoh;

std::vector<std::shared_ptr<Package>> PackageProvider::getPackages(Package::Context ctx) {
    return {
        std::make_shared<RNOHGeneratedPackage>(ctx),
        + std::make_shared<FingerprintScannerPackage>(ctx),
    };
}
2.5 在 ArkTs 侧引入 FingerprintScannerPackage
打开 harmony/entry/src/main/ets/RNPackagesFactory.ts,添加:
typescript
import type { RNPackageContext, RNPackage } from 'rnoh/ts';
+ import { RNFingerprintScannerPackage } from '@react-native-ohos/react-native-fingerprint-scanner/ts';

export function createRNPackages(ctx: RNPackageContext): RNPackage[] {
  return [
    // ... 其他包
    + new RNFingerprintScannerPackage(ctx),
  ];
}
方式二:源码引入 📁
2.1 复制源码到 harmony 工程根目录
把 <RN工程>/node_modules/@react-native-ohos/react-native-fingerprint-scanner/harmony 目录下的源码 fingerprint_scanner 复制到 harmony 工程根目录下。
bash
# 复制源码目录
cp -r node_modules/@react-native-ohos/react-native-fingerprint-scanner/harmony/fingerprint_scanner harmony/
2.2 在 build-profile.json5 添加模块
打开 harmony/build-profile.json5,添加以下模块:
json5
modules: [
  // ... 其他模块
  {
    name: 'fingerprint_scanner',
    srcPath: './fingerprint_scanner',
  }
]
2.3 在 entry/oh-package.json5 添加依赖
打开 harmony/entry/oh-package.json5,添加以下依赖:
json5
"dependencies": {
  "@react-native-ohos/react-native-fingerprint-scanner": "file:../fingerprint_scanner"
}
2.4 同步依赖
点击 DevEco Studio 右上角的 sync 按钮,或者在终端执行:
bash
cd harmony/entry
ohpm install
🔐 权限配置
在 harmony/entry/src/main/module.json5 中添加生物识别权限:
json5
{
  "module": {
    "name": "entry",
    "type": "entry",
    "requestPermissions": [
      {
        "name": "ohos.permission.ACCESS_BIOMETRIC",
      }
    ]
  }
}
⚠️ 注意 :
ohos.permission.ACCESS_BIOMETRIC权限等级为system_basic,需要在签名配置中正确设置。
同步并运行 🚀
3. 同步依赖
点击 DevEco Studio 右上角的 sync 按钮,或者在终端执行:
bash
cd harmony/entry
ohpm install
然后编译、运行即可。
📖 API 详解
🔷 isSensorAvailable() - 检测传感器可用性 🔍
检测设备是否支持生物识别传感器,以及传感器当前是否可用。
typescript
import FingerprintScanner from 'react-native-fingerprint-scanner';

FingerprintScanner.isSensorAvailable()
  .then((biometryType) => {
    // biometryType: 'Fingerprint' | 'Face ID' | 'Touch ID'
    console.log('支持的生物识别类型:', biometryType);
  })
  .catch((error) => {
    // 传感器不可用
    console.log('生物识别不可用:', error.message);
});| 返回值 | 类型 | 说明 |
|---|---|---|
biometryType |
string | 返回支持的生物识别类型,如 'Fingerprint'、'Face ID'、'Touch ID' |
| 错误类型 | 说明 |
|---|---|
FingerprintScannerNotSupported |
设备不支持生物识别 |
FingerprintScannerNotEnrolled |
设备未录入生物信息 |
FingerprintScannerNotAvailable |
生物识别传感器不可用 |
使用示例:
typescript
const checkBiometricAvailability = async () => {
  try {
    const biometryType = await FingerprintScanner.isSensorAvailable();
    console.log('设备支持:', biometryType);
    return { available: true, type: biometryType };
  } catch (error) {
    console.log('生物识别不可用:', error.message);
    return { available: false, type: null };
  }
};
🔷 authenticate() - 指纹认证 👆
启动指纹认证流程,显示系统认证对话框。
typescript
import FingerprintScanner from 'react-native-fingerprint-scanner';

FingerprintScanner.authenticate({
  title: '指纹认证',
})
  .then(() => {
    console.log('认证成功');
  })
  .catch((error) => {
    console.log('认证失败:', error.message);
});| 参数 | 类型 | 必填 | 说明 |
|---|---|---|---|
title |
string | 否 | 认证对话框标题(HarmonyOS 支持) |
subTitle |
string | 否 | 认证对话框副标题(HarmonyOS 不支持) |
description |
string | 否 | 认证对话框描述(HarmonyOS 不支持) |
cancelButton |
string | 否 | 取消按钮文本(HarmonyOS 不支持) |
fallbackEnabled |
boolean | 否 | 是否启用回退机制,默认 true(iOS) |
onAttempt |
function | 否 | 认证尝试回调(HarmonyOS 使用 onAttempt 方法) |
使用示例:
typescript
const handleAuthentication = async () => {
  try {
    await FingerprintScanner.authenticate({
      title: '请验证指纹',
    });
    console.log('认证成功,执行后续操作');
    return true;
  } catch (error) {
    console.log('认证失败:', error.message);
    return false;
  }
};
🔷 onAttempt() - 认证尝试监听 📡
监听用户认证尝试,当用户尝试认证但失败时触发回调。
typescript
import FingerprintScanner from 'react-native-fingerprint-scanner';

const attemptListener = FingerprintScanner.onAttempt();| 返回值 | 类型 | 说明 |
|---|---|---|
attemptListener |
object | 包含 message 属性的监听对象 |
使用示例:
typescript
const setupAttemptListener = () => {
  const attemptListener = FingerprintScanner.onAttempt();

  attemptListener.then((result) => {
    console.log('认证尝试:', result.message);
  });

  return attemptListener;
};
🔷 release() - 释放资源 🧹
释放指纹扫描器相关资源,应在组件卸载或认证流程结束时调用。
typescript
import FingerprintScanner from 'react-native-fingerprint-scanner';

FingerprintScanner.release();使用示例:
typescript
import { useEffect } from 'react';

useEffect(() => {
  return () => {
    FingerprintScanner.release();
  };
}, []);
💻 完整代码示例

typescript
import React, { useState, useEffect, useCallback } from 'react';
import {
  View,
  Text,
  StyleSheet,
  TouchableOpacity,
  Alert,
  SafeAreaView,
  ActivityIndicator,
} from 'react-native';
import FingerprintScanner from 'react-native-fingerprint-scanner';

type BiometryType = 'Fingerprint' | 'Face ID' | 'Touch ID' | null;

function FingerprintScannerDemo() {
  const [biometryType, setBiometryType] = useState<BiometryType>(null);
  const [isAvailable, setIsAvailable] = useState(false);
  const [isAuthenticating, setIsAuthenticating] = useState(false);
  const [authStatus, setAuthStatus] = useState<string>('');

  useEffect(() => {
    checkBiometricAvailability();
    return () => {
      FingerprintScanner.release();
    };
  }, []);

  const checkBiometricAvailability = async () => {
    try {
      const type = await FingerprintScanner.isSensorAvailable();
      setBiometryType(type);
      setIsAvailable(true);
      setAuthStatus(`设备支持: ${type}`);
    } catch (error: any) {
      setIsAvailable(false);
      setBiometryType(null);
      setAuthStatus(`生物识别不可用: ${error.message}`);
    }
  };

  const handleAuthentication = useCallback(async () => {
    if (!isAvailable) {
      Alert.alert('提示', '设备不支持生物识别或未录入生物信息');
      return;
    }

    setIsAuthenticating(true);
    setAuthStatus('请进行生物识别认证...');

    try {
      await FingerprintScanner.authenticate({
        title: '安全认证',
      });
      setAuthStatus('认证成功!');
      Alert.alert('成功', '生物识别认证成功', [
        { text: '确定', onPress: () => setAuthStatus('') }
      ]);
    } catch (error: any) {
      setAuthStatus(`认证失败: ${error.message}`);
      Alert.alert('失败', `认证失败: ${error.message}`);
    } finally {
      setIsAuthenticating(false);
    }
  }, [isAvailable]);

  const handleCheckSensor = useCallback(async () => {
    setAuthStatus('正在检测传感器...');
    await checkBiometricAvailability();
  }, []);

  return (
    <SafeAreaView style={styles.container}>
      <View style={styles.header}>
        <Text style={styles.title}>🔐 指纹认证演示</Text>
        <Text style={styles.subtitle}>HarmonyOS 适配版本</Text>
      </View>

      <View style={styles.content}>
        <View style={styles.permissionWarning}>
          <Text style={styles.permissionWarningText}>
            ⚠️ 使用前需在 module.json5 中配置 ohos.permission.ACCESS_BIOMETRIC 权限
          </Text>
        </View>

        <View style={styles.statusCard}>
          <Text style={styles.statusTitle}>设备状态</Text>
          <View style={styles.statusRow}>
            <View style={[styles.statusDot, isAvailable ? styles.dotAvailable : styles.dotUnavailable]} />
            <Text style={styles.statusText}>
              {isAvailable ? `已就绪 (${biometryType})` : '不可用'}
            </Text>
          </View>
        </View>

        <View style={styles.buttonContainer}>
          <TouchableOpacity
            style={[styles.button, styles.checkButton]}
            onPress={handleCheckSensor}
          >
            <Text style={styles.buttonText}>检测传感器</Text>
          </TouchableOpacity>

          <TouchableOpacity
            style={[
              styles.button,
              styles.authButton,
              (!isAvailable || isAuthenticating) && styles.buttonDisabled,
            ]}
            onPress={handleAuthentication}
            disabled={!isAvailable || isAuthenticating}
          >
            {isAuthenticating ? (
              <ActivityIndicator color="#fff" />
            ) : (
              <Text style={styles.buttonText}>开始认证</Text>
            )}
          </TouchableOpacity>
        </View>

        {authStatus ? (
          <View style={styles.statusMessage}>
            <Text style={styles.statusMessageText}>{authStatus}</Text>
          </View>
        ) : null}

        <View style={styles.tipsContainer}>
          <Text style={styles.tipsTitle}>💡 使用提示</Text>
          <Text style={styles.tipText}>• 需要在设备中录入指纹后才能使用</Text>
          <Text style={styles.tipText}>• 需要配置 ohos.permission.ACCESS_BIOMETRIC 权限</Text>
          <Text style={styles.tipText}>• 认证失败连续 5 次将被锁定</Text>
          <Text style={styles.tipText}>• 组件卸载时需调用 release() 释放资源</Text>
        </View>
      </View>
    </SafeAreaView>
  );
}

const styles = StyleSheet.create({
  container: {
    flex: 1,
    backgroundColor: '#F2F2F7',
  },
  header: {
    backgroundColor: '#fff',
    paddingVertical: 20,
    paddingHorizontal: 20,
    borderBottomWidth: 1,
    borderBottomColor: '#E5E5EA',
    alignItems: 'center',
  },
  title: {
    fontSize: 24,
    fontWeight: 'bold',
    color: '#1C1C1E',
  },
  subtitle: {
    fontSize: 14,
    color: '#8E8E93',
    marginTop: 4,
  },
  content: {
    flex: 1,
    padding: 20,
  },
  permissionWarning: {
    backgroundColor: '#FFF3CD',
    borderRadius: 12,
    padding: 16,
    marginBottom: 20,
    borderWidth: 1,
    borderColor: '#FFECB5',
  },
  permissionWarningText: {
    fontSize: 14,
    color: '#856404',
    lineHeight: 20,
  },
  statusCard: {
    backgroundColor: '#fff',
    borderRadius: 12,
    padding: 16,
    marginBottom: 20,
  },
  statusTitle: {
    fontSize: 16,
    fontWeight: '600',
    color: '#1C1C1E',
    marginBottom: 12,
  },
  statusRow: {
    flexDirection: 'row',
    alignItems: 'center',
  },
  statusDot: {
    width: 12,
    height: 12,
    borderRadius: 6,
    marginRight: 10,
  },
  dotAvailable: {
    backgroundColor: '#34C759',
  },
  dotUnavailable: {
    backgroundColor: '#FF3B30',
  },
  statusText: {
    fontSize: 14,
    color: '#3C3C43',
  },
  buttonContainer: {
    flexDirection: 'row',
    justifyContent: 'space-between',
    marginBottom: 20,
  },
  button: {
    flex: 1,
    paddingVertical: 14,
    borderRadius: 12,
    alignItems: 'center',
    justifyContent: 'center',
    marginHorizontal: 6,
  },
  checkButton: {
    backgroundColor: '#5856D6',
  },
  authButton: {
    backgroundColor: '#007AFF',
  },
  buttonDisabled: {
    backgroundColor: '#C7C7CC',
  },
  buttonText: {
    color: '#fff',
    fontSize: 16,
    fontWeight: '600',
  },
  statusMessage: {
    backgroundColor: '#fff',
    borderRadius: 12,
    padding: 16,
    marginBottom: 20,
  },
  statusMessageText: {
    fontSize: 14,
    color: '#3C3C43',
    textAlign: 'center',
  },
  tipsContainer: {
    backgroundColor: '#fff',
    borderRadius: 12,
    padding: 16,
  },
  tipsTitle: {
    fontSize: 16,
    fontWeight: '600',
    color: '#1C1C1E',
    marginBottom: 12,
  },
  tipText: {
    fontSize: 14,
    color: '#8E8E93',
    lineHeight: 22,
  },
});

export default FingerprintScannerDemo;
⚠️ 注意事项
1. 权限配置
必须在 module.json5 中声明 ohos.permission.ACCESS_BIOMETRIC 权限,否则调用认证方法时无响应。
2. 设备要求
- 设备必须支持指纹识别硬件
- 用户需要在系统设置中录入至少一个指纹
- 连续认证失败 5 次后,生物识别将被锁定一段时间
3. 资源管理
在组件卸载或认证流程结束时,务必调用 release() 方法释放资源:
typescript
useEffect(() => {
  return () => {
    FingerprintScanner.release();
  };
}, []);
4. 平台差异
| 特性 | Android | iOS | HarmonyOS |
|---|---|---|---|
| 认证对话框标题 | ✅ | ✅ | ✅ |
| 副标题 | ✅ | ❌ | ❌ |
| 描述文本 | ✅ | ❌ | ❌ |
| 取消按钮文本 | ✅ | ❌ | ❌ |
| 认证尝试回调 | ✅ | ❌ | ✅ (独立方法) |
📊 API 支持情况总览
| 方法 | HarmonyOS 支持 |
|---|---|
| isSensorAvailable() | ✅ |
| authenticate() | ✅ |
| release() | ✅ |
| onAttempt() | ✅ |
📝 总结
react-native-fingerprint-scanner 提供了简单易用的生物认证 API,在 HarmonyOS 平台上可以正常使用指纹识别功能。开发者需要注意权限配置、资源释放以及平台差异,合理处理各种错误情况,为用户提供流畅的生物认证体验。