目录
[2.4.3 VIP切换测试](#2.4.3 VIP切换测试)
1.安装说明
采用2台Linux虚拟机安装了一个最小化的企业版Jumpserver高可用环境。尽量不依赖其他组件,主机故障时能够自动切换到备机。
MySQL 主主复制,Redis 主从复制,共享目录使用rsync定时同步,keepalived虚拟出VIP对外提供服务。
|--------------|-------|-------------|-------------|-------------|-------------|
| 角色 | 主机名 | IP | VIP | 安装组件 | 系统 |
| jumpserver主机 | jms01 | 10.9.254.21 | 10.9.254.20 | MySQL Redis | RockyLinux8 |
| jumpserver备机 | jms02 | 10.9.254.22 | 10.9.254.20 | MySQL Redis | RockyLinux8 |
注意:如果是虚机,一定要确保主机id不同。
2.安装步骤
2.1Rsync同步配置
两个节点都安装sync 和 配置ssh密钥同步
#安装rsync,jms01和jms02执行同样操作
|--------------------------------------------------------------------------------------------------------|
| root@jms01 \~# yum install rsync -y |
| Installed: rsync-3.1.3-23.el8_10.x86_64 Complete! |
| root@jms01 \~# mkdir /data root@jms01 \~# chmod 777 -R /data root@jms01 \~# vim /etc/hosts |
| 10.9.254.21 jms01 10.9.254.22 jms02 |
#配置ssh密钥同步,jms01和jms02执行同样操作
|-------------------------------------------------------------------------------------------------------------------------------------------------------------------------------------------------------------------------------------------------------------------------------------------------------------------------------------------------------------------------------------------------------------------------------------------------------------------------------------------------------------------------------------------------------------------------------------------------------------------------------------------------------------------------------------------------------------------------------------------|
| root@jms01 \~# ssh-keygen -t rsa -b 4096 -N "" -f ~/.ssh/id_rsa |
| Generating public/private rsa key pair. Created directory '/root/.ssh'. Your identification has been saved in /root/.ssh/id_rsa. Your public key has been saved in /root/.ssh/id_rsa.pub. The key fingerprint is: SHA256:HF+AaaJsuVckR5B6DYjoA6345jrtMPgklshh6wQXU8M root@jms01 The key's randomart image is: +---RSA 4096----+ | o oo..+.o. | |o o.E.= * . | |+.o. + O. . | |oo o* ..oo . | |.+o. o .S . | |*.* . . | |*X. . | |=*o | |.=o | +----SHA256-----+ |
| root@jms01 \~# ssh-copy-id root@jms01 |
| /usr/bin/ssh-copy-id: INFO: Source of key(s) to be installed: "/root/.ssh/id_rsa.pub" The authenticity of host 'jms01 (10.9.254.21)' can't be established. ECDSA key fingerprint is SHA256:PusNqh4ZChxGsqH8lLxsym9dotzIohlyUyqvZdanMQE. Are you sure you want to continue connecting (yes/no/fingerprint)? yes /usr/bin/ssh-copy-id: INFO: attempting to log in with the new key(s), to filter out any that are already installed /usr/bin/ssh-copy-id: INFO: 1 key(s) remain to be installed -- if you are prompted now it is to install the new keys root@jms01's password: Number of key(s) added: 1 Now try logging into the machine, with: "ssh 'root@jms01'" and check to make sure that only the key(s) you wanted were added. |
| root@jms01 \~# ssh-copy-id root@jms02 |
| /usr/bin/ssh-copy-id: INFO: Source of key(s) to be installed: "/root/.ssh/id_rsa.pub" The authenticity of host 'jms02 (10.9.254.22)' can't be established. ECDSA key fingerprint is SHA256:PusNqh4ZChxGsqH8lLxsym9dotzIohlyUyqvZdanMQE. Are you sure you want to continue connecting (yes/no/fingerprint)? yes /usr/bin/ssh-copy-id: INFO: attempting to log in with the new key(s), to filter out any that are already installed /usr/bin/ssh-copy-id: INFO: 1 key(s) remain to be installed -- if you are prompted now it is to install the new keys root@jms02's password: Number of key(s) added: 1 Now try logging into the machine, with: "ssh 'root@jms02'" and check to make sure that only the key(s) you wanted were added. |
两个节点都配置数据同步:
jms01 上创建同步脚本 sync_to_jms02.sh
|----------------------------------------------------------------------------|
| root@jms01 \~# vim sync_to_jms02.sh |
| #!/bin/bash rsync -avz /data/ root@jms02:/data/ |
| root@jms01 \~# chmod +x sync_to_jms02.sh root@jms01 \~# crontab -e |
| * * * * * /root/sync_to_jms02.sh |
jms02 上创建同步脚本 sync_to_jms01.sh
|----------------------------------------------------------------------------|
| root@jms02 \~# vim sync_to_jms01.sh |
| #!/bin/bash rsync -avz /data/ root@jms01:/data/ |
| root@jms01 \~# chmod +x sync_to_jms01.sh root@jms01 \~# crontab -e |
| * * * * * /root/sync_to_jms01.sh |
2.2MySQL集群配置
2.2.1安装MySQL
配置mysql软件源,下载mysql源文件,安装mysql,jms01和jms02执行相同操作;
https://dev.mysql.com/downloads/repo/yum/
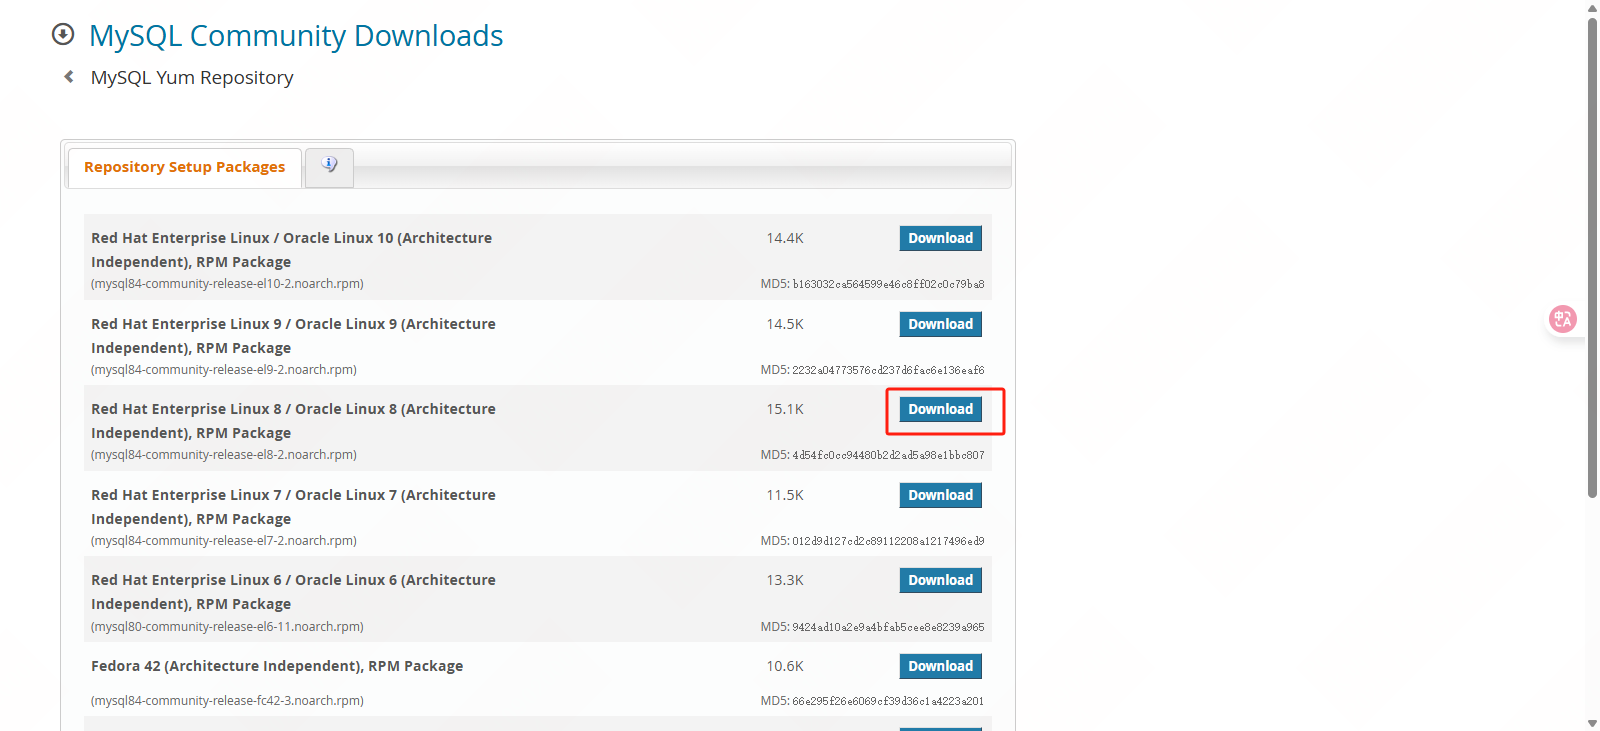

https://dev.mysql.com/get/mysql84-community-release-el8-2.noarch.rpm
|--------------------------------------------------------------------------------------------------------------------------------------------------------------------------------------------------------------------------------------------------------------------------------------------------------------------------------------------------------------------------------------------------------------------------------------------------------------------------------------------------------------------------------------------------------------------------------------------------------------------------------------------------------------------------------------------------------------------------------------------------------------------------------------------------------------------------------------------------------------------------------------------------------------------------------------------------------------------------------------------------------------------------------------------------------------------------------------------------------------------------------------------------------------------------------------------------------------------------------------------------------------------------------------------------------------------------------------------------------------------------------------------------------------------------------------------------------------------------------------------------------------------------------------------------------------------------------------------------------------------------------------------------------------------------------------------------------------------------------------------------------------------------------------------------------------------------------------------------------------------------------------------------------------------------------------------------------------------------------------------------------------------------------------------------------------------------------------------------------------------------------------------------------------------------------------------------------------------------------------------------------------------------------------------------------------------------------------------------------------------------------------------------------------------------|
| root@jms01 \~# wget https://dev.mysql.com/get/mysql84-community-release-el8-2.noarch.rpm root@jms01 \~# ll -lh |
| -rw-r--r-- 1 root root 16K Jul 8 13:02 mysql84-community-release-el8-2.noarch.rpm |
| root@jms01 \~# yum localinstall -y mysql84-community-release-el8-2.noarch.rpm |
| Installed: mysql84-community-release-el8-2.noarch Complete! |
| root@jms01 \~# ll -lh /etc/yum.repos.d/ |
| -rw-r--r-- 1 root root 3.2K Jul 7 13:41 mysql-community-debuginfo.repo -rw-r--r-- 1 root root 2.9K Jul 7 13:41 mysql-community.repo -rw-r--r-- 1 root root 3.0K Jul 7 13:41 mysql-community-source.repo |
| root@jms01 \~# yum -y install mysql-server.x86_64 |
| Upgraded: audit-3.1.2-1.el8.x86_64 audit-libs-3.1.2-1.el8.x86_64 libsemanage-2.9-10.el8_10.x86_64 policycoreutils-2.9-26.el8_10.x86_64 Installed: checkpolicy-2.9-1.el8.x86_64 libicu-60.3-2.el8_1.x86_64 mariadb-connector-c-config-3.1.11-2.el8_3.noarch mecab-0.996-2.module+el8.10.0+1937+28fbbc83.x86_64 mysql-8.0.41-1.module+el8.10.0+1937+28fbbc83.0.1.x86_64 mysql-common-8.0.41-1.module+el8.10.0+1937+28fbbc83.0.1.x86_64 mysql-errmsg-8.0.41-1.module+el8.10.0+1937+28fbbc83.0.1.x86_64 mysql-server-8.0.41-1.module+el8.10.0+1937+28fbbc83.0.1.x86_64 perl-Carp-1.42-396.el8.noarch perl-Data-Dumper-2.167-399.el8.x86_64 perl-Digest-1.17-395.el8.noarch perl-Digest-MD5-2.55-396.el8.x86_64 perl-Encode-4:2.97-3.el8.x86_64 perl-Errno-1.28-422.el8.x86_64 perl-Exporter-5.72-396.el8.noarch perl-File-Path-2.15-2.el8.noarch perl-File-Temp-0.230.600-1.el8.noarch perl-Getopt-Long-1:2.50-4.el8.noarch perl-HTTP-Tiny-0.074-3.el8.noarch perl-IO-1.38-422.el8.x86_64 perl-IO-Socket-IP-0.39-5.el8.noarch perl-IO-Socket-SSL-2.066-4.module+el8.9.0+1517+e71a7a62.noarch perl-MIME-Base64-3.15-396.el8.x86_64 perl-Mozilla-CA-20160104-7.module+el8.9.0+1521+0101edce.noarch perl-Net-SSLeay-1.88-2.module+el8.9.0+1517+e71a7a62.x86_64 perl-PathTools-3.74-1.el8.x86_64 perl-Pod-Escapes-1:1.07-395.el8.noarch perl-Pod-Perldoc-3.28-396.el8.noarch perl-Pod-Simple-1:3.35-395.el8.noarch perl-Pod-Usage-4:1.69-395.el8.noarch perl-Scalar-List-Utils-3:1.49-2.el8.x86_64 perl-Socket-4:2.027-3.el8.x86_64 perl-Storable-1:3.11-3.el8.x86_64 perl-Term-ANSIColor-4.06-396.el8.noarch perl-Term-Cap-1.17-395.el8.noarch perl-Text-ParseWords-3.30-395.el8.noarch perl-Text-Tabs+Wrap-2013.0523-395.el8.noarch perl-Time-Local-1:1.280-1.el8.noarch perl-URI-1.73-3.el8.noarch perl-Unicode-Normalize-1.25-396.el8.x86_64 perl-constant-1.33-396.el8.noarch perl-interpreter-4:5.26.3-422.el8.x86_64 perl-libnet-3.11-3.el8.noarch perl-libs-4:5.26.3-422.el8.x86_64 perl-macros-4:5.26.3-422.el8.x86_64 perl-parent-1:0.237-1.el8.noarch perl-podlators-4.11-1.el8.noarch perl-threads-1:2.21-2.el8.x86_64 perl-threads-shared-1.58-2.el8.x86_64 policycoreutils-python-utils-2.9-26.el8_10.noarch protobuf-lite-3.5.0-15.el8.x86_64 python3-audit-3.1.2-1.el8.x86_64 python3-libsemanage-2.9-10.el8_10.x86_64 python3-policycoreutils-2.9-26.el8_10.noarch python3-setools-4.3.0-5.el8.x86_64 Complete! |
修改mysql配置文件:/etc/my.cnf.d/mysql-server.cnf,改完后启动数据库systemctl enable mysqld --now
|-----------------------------------------------------------------------------------------------------------------------------------------------------------------------------------------------------------------------------------------------------------------------------------------------------------------------------------------------------------------------------------------------------------------------------------------------------------------------------------------------------------------------------------------------------------------------------------------------------------------------------------------------------------------------------------------------------------------------------------------------------------------------------------------------------------------------------------------------------------------------------------------------------------------------------------------------------------------------------------------------------------------------------------------------------------------------------------------------------------------------------------------------------------------------------------------------------------------------------------------------------------------------------------------------------------------------------------------------------------------------------------------------------------|
| root@jms01 \~# vim /etc/my.cnf.d/mysql-server.cnf |
| client default-character-set = utf8mb4 mysqld server-id=1 # jms01 填写1,jms02 填写2 port=3306 lower_case_table_names=1 datadir=/var/lib/mysql socket=/var/lib/mysql/mysql.sock # Disabling symbolic-links is recommended to prevent assorted security risks symbolic-links=0 character-set-server=utf8mb4 collation-server=utf8mb4_general_ci log-error=/var/log/mysql/mysqld.log pid-file=/run/mysqld/mysqld.pid long_query_time=2 slow_query_log_file=/var/log/mysql/mysqld_slowlog.log slow_query_log=1 log-queries-not-using-indexes=off max_connections=1000 max_connect_errors=6000 thread_cache_size=32 group_concat_max_len=102400 skip_ssl explicit_defaults_for_timestamp=true table_open_cache=614 external-locking=FALSE sort_buffer_size=2M join_buffer_size=2M read_buffer_size=1M thread_cache_size=300 tmp_table_size=256M max_heap_table_size=256M myisam_sort_buffer_size=128M myisam_max_sort_file_size=10G innodb_buffer_pool_size=2048M innodb_thread_concurrency=4 innodb_flush_log_at_trx_commit=2 innodb_log_buffer_size=16M innodb_log_file_size=128M innodb_log_files_in_group=3 innodb_max_dirty_pages_pct=90 innodb_lock_wait_timeout=120 innodb_file_per_table=0 log-bin=mysql-bin binlog-format=Row binlog_cache_size=4M max_binlog_cache_size=512M max_binlog_size=512M # bin log 保留时间 expire_logs_days=7 binlog-ignore-db=mysql,performance_schema,information_schema |
| root@jms01 \~# systemctl enable mysqld --now |
| Created symlink /etc/systemd/system/multi-user.target.wants/mysqld.service → /usr/lib/systemd/system/mysqld.service. |
| root@jms01 \~# ss -ntlp |
| State Recv-Q Send-Q Local Address:Port Peer Address:Port Process LISTEN 0 128 0.0.0.0:22 0.0.0.0:* users:(("sshd",pid=1050,fd=4)) LISTEN 0 128 *:3306 *:* users:(("mysqld",pid=6170,fd=29)) LISTEN 0 128 :::22 :::* users:(("sshd",pid=1050,fd=6)) LISTEN 0 70 *:33060 *:* users:(("mysqld",pid=6170,fd=23)) |
2.2.2创建数据库账号
修改root密码,创建mysql复制用的账号;
|---------------------------------------------------------------------------------------|
| root@jms01 \~# mysql -uroot -p Enter password: 空密码 |
| mysql> CREATE USER 'repl'@'%' IDENTIFIED WITH 'mysql_native_password' BY 'Passw0rd'; |
| Query OK, 0 rows affected (0.07 sec) |
| mysql> GRANT REPLICATION SLAVE ON *.* TO 'repl'@'%'; |
| Query OK, 0 rows affected (0.07 sec) |
创建jumpserver数据库和访问账号;
|----------------------------------------------------------------|
| mysql> create database jumpserver default charset 'utf8'; |
| Query OK, 1 row affected, 1 warning (0.08 sec) |
| mysql> create user 'jumpserver'@'%' identified by 'Passw0rd'; |
| Query OK, 0 rows affected (0.13 sec) |
| mysql> grant all on jumpserver.* to 'jumpserver'@'%'; |
| Query OK, 0 rows affected (0.04 sec) |
| mysql> flush privileges; |
| Query OK, 0 rows affected (0.03 sec) |
2.2.3设置主从复制
jms01上执行 show master status; 然后记录下File 和 Position,然后到jms02上去执行复制命令:
jms01上操作
|------------------------------------------------------------------------------------------------------------------------------------------------------------------------------------------------------------------------------------------------------------------------------------------------------------------------------------------------------------------------------------------------------------------------------------------------------------------------------------------------------------------------------------------------|
| mysql> show master status; |
| +------------------+----------+--------------+---------------------------------------------+-------------------+ | File | Position | Binlog_Do_DB | Binlog_Ignore_DB | Executed_Gtid_Set | +------------------+----------+--------------+---------------------------------------------+-------------------+ | mysql-bin.000002 | 1587 | | mysql,performance_schema,information_schema | | +------------------+----------+--------------+---------------------------------------------+-------------------+ 1 row in set (0.00 sec) |
jms02上操作
|--------------------------------------------------------------------------------------------------------------------------------------------------------------------------------------------------------------------------------------------------------------------------------------------------------------------------------------------------------------------------------------------------------------------------------------------------------------------------------------------------------------------------------------------------------------------------------------------------------------------------------------------------------------------------------------------------------------------------------------------------------------------------------------------------------------------------------------------------------------------------------------------------------------------------------------------------------------------------------------------------------------------------------------------------------------------------------------------------------------------------------------------------------------------------------------------------------------------------------------------------------------------------------------------------------------------------------------------------------------------------------------------------------------------------------------------------------------------------------------------------------------------------------------------------------------------------------------------------------------------------------------------------------|
| mysql> CHANGE MASTER TO MASTER_HOST='jms01',MASTER_USER='repl',MASTER_PASSWORD='Passw0rd',MASTER_LOG_FILE='mysql-bin.000002',MASTER_LOG_POS=1587; |
| Query OK, 0 rows affected, 8 warnings (1.06 sec) |
| mysql> start slave; |
| Query OK, 0 rows affected, 1 warning (0.03 sec) |
| mysql> show slave status \G; |
| *************************** 1. row *************************** Slave_IO_State: Waiting for source to send event Master_Host: jms01 Master_User: repl Master_Port: 3306 Connect_Retry: 60 Master_Log_File: mysql-bin.000002 Read_Master_Log_Pos: 1587 Relay_Log_File: jms02-relay-bin.000002 Relay_Log_Pos: 326 Relay_Master_Log_File: mysql-bin.000002 Slave_IO_Running: Yes Slave_SQL_Running: Yes Replicate_Do_DB: Replicate_Ignore_DB: Replicate_Do_Table: Replicate_Ignore_Table: Replicate_Wild_Do_Table: Replicate_Wild_Ignore_Table: Last_Errno: 0 Last_Error: Skip_Counter: 0 Exec_Master_Log_Pos: 1587 Relay_Log_Space: 536 Until_Condition: None Until_Log_File: Until_Log_Pos: 0 Master_SSL_Allowed: No Master_SSL_CA_File: Master_SSL_CA_Path: Master_SSL_Cert: Master_SSL_Cipher: Master_SSL_Key: Seconds_Behind_Master: 0 Master_SSL_Verify_Server_Cert: No Last_IO_Errno: 0 Last_IO_Error: Last_SQL_Errno: 0 Last_SQL_Error: Replicate_Ignore_Server_Ids: Master_Server_Id: 1 Master_UUID: 6636f500-5c9f-11f0-9227-005056a8db76 Master_Info_File: mysql.slave_master_info SQL_Delay: 0 SQL_Remaining_Delay: NULL Slave_SQL_Running_State: Replica has read all relay log; waiting for more updates Master_Retry_Count: 86400 Master_Bind: Last_IO_Error_Timestamp: Last_SQL_Error_Timestamp: Master_SSL_Crl: Master_SSL_Crlpath: Retrieved_Gtid_Set: Executed_Gtid_Set: Auto_Position: 0 Replicate_Rewrite_DB: Channel_Name: Master_TLS_Version: Master_public_key_path: Get_master_public_key: 0 Network_Namespace: 1 row in set, 1 warning (0.00 sec) ERROR: No query specified |
jms02上执行 show master status; 然后记录下File 和 Position,然后到jms01上去执行复制命令:
jms02上操作
|------------------------------------------------------------------------------------------------------------------------------------------------------------------------------------------------------------------------------------------------------------------------------------------------------------------------------------------------------------------------------------------------------------------------------------------------------------------------------------------------------------------------------------------------|
| mysql> show master status; |
| +------------------+----------+--------------+---------------------------------------------+-------------------+ | File | Position | Binlog_Do_DB | Binlog_Ignore_DB | Executed_Gtid_Set | +------------------+----------+--------------+---------------------------------------------+-------------------+ | mysql-bin.000002 | 1587 | | mysql,performance_schema,information_schema | | +------------------+----------+--------------+---------------------------------------------+-------------------+ 1 row in set (0.00 sec) |
jms01上操作
|--------------------------------------------------------------------------------------------------------------------------------------------------------------------------------------------------------------------------------------------------------------------------------------------------------------------------------------------------------------------------------------------------------------------------------------------------------------------------------------------------------------------------------------------------------------------------------------------------------------------------------------------------------------------------------------------------------------------------------------------------------------------------------------------------------------------------------------------------------------------------------------------------------------------------------------------------------------------------------------------------------------------------------------------------------------------------------------------------------------------------------------------------------------------------------------------------------------------------------------------------------------------------------------------------------------------------------------------------------------------------------------------------------------------------------------------------------------------------------------------------------------------------------------------------------------------------------------------------------------------------------------------------------|
| mysql> CHANGE MASTER TO MASTER_HOST='jms02',MASTER_USER='repl',MASTER_PASSWORD='Passw0rd',MASTER_LOG_FILE='mysql-bin.000002',MASTER_LOG_POS=1587; |
| Query OK, 0 rows affected, 8 warnings (0.15 sec) |
| mysql> start slave; |
| Query OK, 0 rows affected, 1 warning (0.04 sec) |
| mysql> show slave status \G; |
| *************************** 1. row *************************** Slave_IO_State: Waiting for source to send event Master_Host: jms02 Master_User: repl Master_Port: 3306 Connect_Retry: 60 Master_Log_File: mysql-bin.000002 Read_Master_Log_Pos: 1587 Relay_Log_File: jms01-relay-bin.000002 Relay_Log_Pos: 326 Relay_Master_Log_File: mysql-bin.000002 Slave_IO_Running: Yes Slave_SQL_Running: Yes Replicate_Do_DB: Replicate_Ignore_DB: Replicate_Do_Table: Replicate_Ignore_Table: Replicate_Wild_Do_Table: Replicate_Wild_Ignore_Table: Last_Errno: 0 Last_Error: Skip_Counter: 0 Exec_Master_Log_Pos: 1587 Relay_Log_Space: 536 Until_Condition: None Until_Log_File: Until_Log_Pos: 0 Master_SSL_Allowed: No Master_SSL_CA_File: Master_SSL_CA_Path: Master_SSL_Cert: Master_SSL_Cipher: Master_SSL_Key: Seconds_Behind_Master: 0 Master_SSL_Verify_Server_Cert: No Last_IO_Errno: 0 Last_IO_Error: Last_SQL_Errno: 0 Last_SQL_Error: Replicate_Ignore_Server_Ids: Master_Server_Id: 2 Master_UUID: 663c33d2-5c9f-11f0-bca7-005056a8a7bd Master_Info_File: mysql.slave_master_info SQL_Delay: 0 SQL_Remaining_Delay: NULL Slave_SQL_Running_State: Replica has read all relay log; waiting for more updates Master_Retry_Count: 86400 Master_Bind: Last_IO_Error_Timestamp: Last_SQL_Error_Timestamp: Master_SSL_Crl: Master_SSL_Crlpath: Retrieved_Gtid_Set: Executed_Gtid_Set: Auto_Position: 0 Replicate_Rewrite_DB: Channel_Name: Master_TLS_Version: Master_public_key_path: Get_master_public_key: 0 Network_Namespace: 1 row in set, 1 warning (0.00 sec) ERROR: No query specified |
检查复制状态:show slave status \G;,如果Slave_IO_Running和Slave_SQL_Running都是Yes代表复制OK
2.3Redis主从
2.3.1安装Redis
两台机分别安装Redis程序,替换配置文件
|----------------------------------------------------------------------------------------------------------------------------------------------------------------------------------------------------------------|
| root@jms01 \~# yum -y install https://rpms.remirepo.net/enterprise/remi-release-8.rpm |
| Upgraded: rocky-release-8.10-1.10.el8.noarch rocky-repos-8.10-1.10.el8.noarch Installed: remi-release-8.10-2.el8.remi.noarch Complete! |
| root@jms01 \~# yum -y install redis |
| Installed: redis-5.0.3-5.module+el8.5.0+657+2674830e.x86_64 Complete! |
| root@jms01 \~# vim /etc/redis.conf |
| 69 bind 0.0.0.0 508 requirepass Passw0rd 598 maxmemory-policy allkeys-lru 294 masterauth Passw0rd |
| 备机配置文件增加以下内容: 287 replicaof jms01 6379 |
2.3.2设置主从
主从机直接启动Redis服务,Redis会自动完成主从同步。systemctl enable redis --now
|----------------------------------------------------------------------------------------------------------------------------------------------------------------------------------------------------------------------------------------------------------------------------------------------------------------------------------------------------------------------------------------------------------|
| root@jms01 \~# systemctl enable redis --now |
| Created symlink /etc/systemd/system/multi-user.target.wants/redis.service → /usr/lib/systemd/system/redis.service. |
| root@jms01 \~# ss -ntlp |
| State Recv-Q Send-Q Local Address:Port Peer Address:Port Process LISTEN 0 128 0.0.0.0:6379 0.0.0.0:* users:(("redis-server",pid=2853,fd=6)) LISTEN 0 128 0.0.0.0:22 0.0.0.0:* users:(("sshd",pid=1050,fd=4)) LISTEN 0 70 *:33060 *:* users:(("mysqld",pid=1174,fd=22)) LISTEN 0 128 *:3306 *:* users:(("mysqld",pid=1174,fd=34)) LISTEN 0 128 :::22 :::* users:(("sshd",pid=1050,fd=6)) |
检查同步状态:redis-cli -a YourPassword -p 6379 info replication
jms01上操作
|------------------------------------------------------------------------------------------------------------------------------------------------------------------------------------------------------------------------------------------------------------------------------------------------------------------------------------------------------------------------------------------------------------------------------------------------------------------------------------|
| root@jms01 \~# redis-cli -a Passw0rd -p 6379 info replication |
| Warning: Using a password with '-a' or '-u' option on the command line interface may not be safe. # Replication role:master connected_slaves:1 slave0:ip=10.9.254.22,port=6379,state=online,offset=266,lag=1 master_replid:d8cc413640d40baa4df2f298e137c2af37146514 master_replid2:0000000000000000000000000000000000000000 master_repl_offset:266 second_repl_offset:-1 repl_backlog_active:1 repl_backlog_size:1048576 repl_backlog_first_byte_offset:1 repl_backlog_histlen:266 |
jms02上操作
|------------------------------------------------------------------------------------------------------------------------------------------------------------------------------------------------------------------------------------------------------------------------------------------------------------------------------------------------------------------------------------------------------------------------------------------------------------------------------------------------------------------------------------------------------------------------------------------------|
| root@jms02 \~# redis-cli -a Passw0rd -p 6379 info replication |
| Warning: Using a password with '-a' or '-u' option on the command line interface may not be safe. # Replication role:slave master_host:jms01 master_port:6379 master_link_status:up master_last_io_seconds_ago:9 master_sync_in_progress:0 slave_repl_offset:378 slave_priority:100 slave_read_only:1 connected_slaves:0 master_replid:d8cc413640d40baa4df2f298e137c2af37146514 master_replid2:0000000000000000000000000000000000000000 master_repl_offset:378 second_repl_offset:-1 repl_backlog_active:1 repl_backlog_size:1048576 repl_backlog_first_byte_offset:1 repl_backlog_histlen:378 |
2.3.3主从切换测试
Keepalived切换IP的时候需要把redis的状态切换过去。
将jms01节点切换为从
|------------------------------------------------------------------------------------------------------|
| root@jms01 \~# redis-cli -a Passw0rd -p 6379 slaveof 10.9.254.22 6379 |
| Warning: Using a password with '-a' or '-u' option on the command line interface may not be safe. OK |
将jms02节点切换为主
|------------------------------------------------------------------------------------------------------|
| root@jms02 \~# redis-cli -a Passw0rd -p 6379 slaveof no one |
| Warning: Using a password with '-a' or '-u' option on the command line interface may not be safe. OK |
查看主从同步状态
|-----------------------------------------------------------------------------------------------------------------------------------------------------------------------------------------------------------------------------------------------------------------------------------------------------------------------------------------------------------------------------------------------------------------------------------------------------------------------------------------------------------------------------------------------------------------------------------------------------------|
| root@jms02 \~# redis-cli -a Passw0rd -p 6379 info replication |
| Warning: Using a password with '-a' or '-u' option on the command line interface may not be safe. # Replication role:master connected_slaves:1 slave0:ip=10.9.254.21,port=6379,state=online,offset=1722,lag=0 master_replid:45b072406a8b8bfc2c69c0b7aefa0a2cf190515c master_replid2:d8cc413640d40baa4df2f298e137c2af37146514 master_repl_offset:1722 second_repl_offset:1653 repl_backlog_active:1 repl_backlog_size:1048576 repl_backlog_first_byte_offset:1 repl_backlog_histlen:1722 |
| root@jms01 \~# redis-cli -a Passw0rd -p 6379 info replication |
| Warning: Using a password with '-a' or '-u' option on the command line interface may not be safe. # Replication role:slave master_host:10.9.254.22 master_port:6379 master_link_status:up master_last_io_seconds_ago:6 master_sync_in_progress:0 slave_repl_offset:1778 slave_priority:100 slave_read_only:1 connected_slaves:0 master_replid:45b072406a8b8bfc2c69c0b7aefa0a2cf190515c master_replid2:d8cc413640d40baa4df2f298e137c2af37146514 master_repl_offset:1778 second_repl_offset:1653 repl_backlog_active:1 repl_backlog_size:1048576 repl_backlog_first_byte_offset:1 repl_backlog_histlen:1778 |
2.4keepalived配置
2.4.1安装keepalived
jms01和jms02执行同样操作
|-----------------------------------------------------------------------------------------------------------------------------------------------------------------------------------------------------------------------------------|
| root@jms01 \~# yum -y install keepalived |
| Installed: keepalived-2.1.5-11.el8_10.x86_64 lm_sensors-libs-3.4.0-23.20180522git70f7e08.el8.x86_64 mariadb-connector-c-3.1.11-2.el8_3.x86_64 net-snmp-agent-libs-1:5.8-30.el8.x86_64 net-snmp-libs-1:5.8-30.el8.x86_64 Complete! |
修改jms01配置文件
|-------------------------------------------------------------------------------------------------------------------------------------------------------------------------------------------------------------------------------------------------------------------------------------------------------------------------------------------------------------------------------------------------------------------------------------------------------------------------------------------------------------------|
| root@jms01 \~# vim /etc/keepalived/keepalived.conf |
| ! Configuration File for keepalived global_defs { script_user root } vrrp_script checkredis { script "/root/check_port_listen.sh 6379" interval 3 weight -20 } vrrp_instance VI_1 { state MASTER # 21是MASTER、22为BACKUP interface eth0 # 网卡名称 virtual_router_id 11 priority 100 # 主机大于备机,21是100,22是90 advert_int 1 authentication { auth_type PASS auth_pass Passw0rd } virtual_ipaddress { 10.9.254.20 } track_script { checkredis } notify_master "/root/redis_master.sh" notify_backup "/root/redis_slave.sh" } |
修改jms02配置文件
|-------------------------------------------------------------------------------------------------------------------------------------------------------------------------------------------------------------------------------------------------------------------------------------------------------------------------------------------------------------------------------------------------------------------------------------------------------------------------------------------------------------------|
| root@jms02 \~# vim /etc/keepalived/keepalived.conf |
| ! Configuration File for keepalived global_defs { script_user root } vrrp_script checkredis { script "/root/check_port_listen.sh 6379" interval 3 weight -20 } vrrp_instance VI_1 { state MASTER # 21是MASTER、22为BACKUP interface eth0 # 网卡名称 virtual_router_id 11 priority 90 # 主机大于备机,21是100,22 是90 advert_int 1 authentication { auth_type PASS auth_pass Passw0rd } virtual_ipaddress { 10.9.254.20 } track_script { checkredis } notify_master "/root/redis_master.sh" notify_backup "/root/redis_slave.sh" } |
2.4.2准备Redis切换脚本
/root/redis_master.sh:本机变为master的时候执行这个脚本(将本机的Redis变为master)
/root/redis_slave.sh:本机变为slave的时候执行这个脚本(将本机的Redis变为slave)
jms01、jms02执行同样操作
编辑/root/redis_master.sh文件:
|----------------------------------------------------------------------------------------------------------------------------------------------------------------------------------------------------------------------------------------------------------------------------------------------------------------------------------------------------------------------------------------|
| root@jms01 \~# vim /root/redis_master.sh |
| #!/bin/bash LOG=/var/log/redis_switch.log date >> LOG echo "\>\> Switching to MASTER \> LOG # 切换为主节点 /usr/bin/redis-cli -a Passw0rd -p 6379 SLAVEOF NO ONE >> LOG 2\>\&1 if \[\[ ? -eq 0 ]]; then echo "Redis successfully switched to MASTER." >> LOG else echo "Failed to switch Redis to MASTER." \>\> LOG exit 1 fi echo ">> MASTER switch complete > $LOG exit 0 |
编辑/root/redis_slave.sh文件:
|----------------------------------------------------------------------------------------------------------------------------------------------------------------------------------------------------------------------------------------------------------------------------------------------------------------------------------------------------------------------------------------------------------------------------------------------------------|
| root@jms01 \~# vim /root/redis_slave.sh |
| #!/bin/bash LOG=/data/paraview/esc/log/redis_switch.log MASTER_IP="jms02" # 这里互相写对方的IP地址 date >> LOG echo "\>\> Switching to SLAVE \> LOG # 切换为从节点 /usr/bin/redis-cli -a Passw0rd -p 6379 slaveof MASTER_IP 6379 \>\> LOG 2>&1 if \[ $? -eq 0 ]; then echo "Redis successfully switched to SLAVE of MASTER_IP." \>\> LOG else echo "Failed to switch Redis to SLAVE." >> LOG exit 1 fi echo "\>\> SLAVE switch complete \> LOG exit 0 |
编辑/root/check_port_listen.sh文件:
|-------------------------------------------------------------------------------------------------------------------------------------------------|
| root@jms01 \~# vim /root/check_port_listen.sh |
| #!/bin/sh PORT=1 pro_count=\`netstat -na \| grep ":PORT " | grep LISTEN | wc -l` if "$pro_count"z != "0"z ;then exit 0 else exit 1 fi |
添加执行权限
|-----------------------------------------|
| root@jms01 \~# chmod +x /root/*.sh |
| root@jms02 \~# chmod +x /root/*.sh |
2.4.3 VIP切换测试
执行systemctl enable keepalived.service --now启动keepalived,然后执行ip a s | grep 10.9.254查看VIP的位置
|------------------------------------------------------------------------------------------------------------------------------|
| root@jms01 \~# systemctl enable keepalived.service --now |
| Created symlink /etc/systemd/system/multi-user.target.wants/keepalived.service → /usr/lib/systemd/system/keepalived.service. |
| root@jms01 \~# ip a s | grep 10.9.254 |
| inet 10.9.254.21/24 brd 10.9.254.255 scope global noprefixroute eth0 inet 10.9.254.20/32 scope global eth0 |
停止主机的keepalived,可以看到VIP地址切换到了备机,同时备机的Redis状态变为了master
|-----------------------------------------------------------------------------------------------------------------------------------------------------------------------------------------------------------------------------------------------------------------------------------------------------------------------------------------------------------------------------------------------------------------------------------------------------------------------------------------|
| root@jms01 \~# systemctl stop keepalived root@jms02 \~# ip a s | grep 10.9.254 |
| inet 10.9.254.22/24 brd 10.9.254.255 scope global noprefixroute eth0 inet 10.9.254.20/32 scope global eth0 |
| root@jms02 \~# redis-cli -a Passw0rd -p 6379 info replication |
| Warning: Using a password with '-a' or '-u' option on the command line interface may not be safe. # Replication role:master connected_slaves:1 slave0:ip=10.9.254.21,port=6379,state=online,offset=4942,lag=1 master_replid:45b072406a8b8bfc2c69c0b7aefa0a2cf190515c master_replid2:d8cc413640d40baa4df2f298e137c2af37146514 master_repl_offset:4942 second_repl_offset:1653 repl_backlog_active:1 repl_backlog_size:1048576 repl_backlog_first_byte_offset:1 repl_backlog_histlen:4942 |
2.5安装jumpserver
2.5.1准备安装包
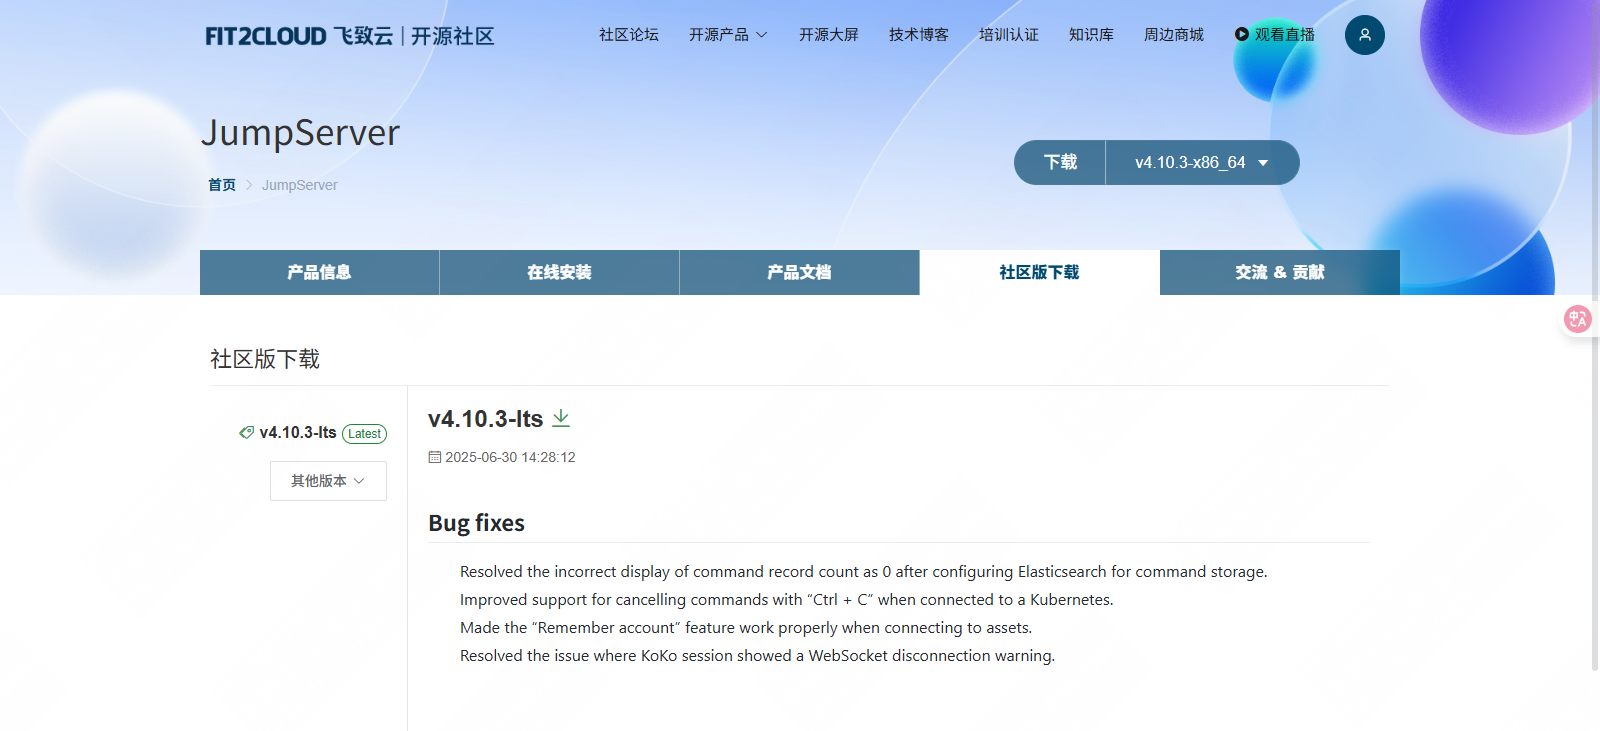
https://community.fit2cloud.com/#/products/jumpserver/downloads
上传安装包到主备机,解压然后修改配置文件config-example.txt。jms01和jms02执行同样操作;
|-------------------------------------------------------------------------------------------------------------------------------------------------------------------------------------------------------------------------------------------------------------------------------------------------------------------------------------------------------------------------------------------------------------------------------------------------------------------------------------------------------------------------------------------------------------------------------|
| root@jms01 \~# ll -lh |
| -rwxr-xr-x 1 root root 157 Jul 9 18:06 check_port_listen.sh -rw-r--r-- 1 root root 1.1G Jul 10 10:18 jumpserver-ce-v4.10.3-x86_64.tar.gz -rw-r--r-- 1 root root 16K Jul 8 13:02 mysql84-community-release-el8-2.noarch.rpm -rwxr-xr-x 1 root root 395 Jul 9 17:58 redis_master.sh -rwxr-xr-x 1 root root 485 Jul 9 18:02 redis_slave.sh -rwxr-xr-x 1 root root 48 Jul 9 16:26 sync_to_jms02.sh |
| root@jms01 \~# tar -zxf jumpserver-ce-v4.10.3-x86_64.tar.gz root@jms01 \~# ll -lh |
| drwxr-xr-x 7 root root 4.0K Jun 30 11:06 jumpserver-ce-v4.10.3-x86_64 |
| root@jms01 \~# cp /root/jumpserver-ce-v4.10.3-x86_64/config-example.txt /root/jumpserver-ce-v4.10.3-x86_64/config-example.txt.bak root@jms01 \~# vim /root/jumpserver-ce-v4.10.3-x86_64/config-example.txt |
| 23 VOLUME_DIR=/data/jumpserver 29 SECRET_KEY=kWQdmdCQKjaWlHYpPhkNQDkfaRulM6YnHctsHLlSPs8287o2kW # 要其他 JumpServer 服务器一致 (*) 36 BOOTSTRAP_TOKEN=Passw0rd #要其他 JumpServer 服务器一致 (*) 115 SESSION_EXPIRE_AT_BROWSER_CLOSE=True #关闭浏览器session过期 56 DB_ENGINE=mysql 57 DB_HOST=10.9.254.21 #可以填写各自的地址,也可以是VIP的地址 58 DB_PORT=3306 59 DB_USER=jumpserver 60 DB_PASSWORD=Passw0rd 61 DB_NAME=jumpserver 71 REDIS_HOST=10.9.254.20 # 填写VIP的地址 72 REDIS_PORT=6379 73 REDIS_PASSWORD=Passw0rd 167 SHARE_ROOM_TYPE=redis # KoKo Lion 使用 redis 共享 168 REUSE_CONNECTION=False # Koko 禁用连接复用 |
2.5.2安装jumpserver
先在主机上执行命令./jmsctl.sh install开始安装jumpserver
在jms01上安装jumpserver
|--------------------------------------------------------------------------------------------------------------------------------------------------------------------------------------------------------------------------------------------------------------------------------------------------------------------------------------------------------------------------------------------------------------------------------------------------------------------------------------------------------------------------------------------------------------------------------------------------------------------------------------------------------------------------------------------------------------------------------------------------------------------------------------------------------------------------------------------------------------------------------------------------------------------------------------------------------------------------------------------------------------------------------------------------------------------------------------------------------------------------------------------------------------------------------------------------------------------------------------------------------------------------------------------------------------------------------------------------------------------------------------------------------------------------------------------------------------------------------------------------------------------------------------------------------------------------------------------------------------------------------------------------------------------------------------------------------------------------------------------------------------------------------------------------------------------------------------------------------------------------------------------------------------------------------------------------------------------------------------------------------------------------------------------------------------------------------------------------------------------------------------------------------------------------------------------------------------------------------------------------------------------------------------------------------------------------------------------------------------------------------------------------------------------------------------------------------------------------------------------------------------------------------------------------------------------------------------------------------------------------------------------------------------------------------------------------------------------------------------------------------------------------------------------------------------------------------------------------------------------------------------------------------------------------------|
| root@jms01 \~# cd /root/jumpserver-ce-v4.10.3-x86_64/ root@jms01 \~/jumpserver-ce-v4.10.3-x86_64# ll -lh |
| drwxr-xr-x 2 root root 4.0K Jun 30 11:05 compose -rw-r--r-- 1 root root 6.8K Jul 10 10:41 config-example.txt -rw-r--r-- 1 root root 6.3K Jul 10 10:27 config-example.txt.bak drwxr-xr-x 7 root root 89 Jun 30 11:05 config_init -rwxr-xr-x 1 root root 5.9K Jun 30 11:05 jmsctl.sh -rw-r--r-- 1 root root 35K Jun 30 11:05 LICENSE drwxr-xr-x 5 root root 44 Jun 30 11:05 locale -rw-r--r-- 1 root root 1.7K Jun 30 11:05 README.md drwxr-xr-x 4 root root 4.0K Jun 30 11:05 scripts -rw-r--r-- 1 root root 26 Jun 30 11:05 static.env drwxr-xr-x 2 root root 41 Jun 30 11:05 utils |
| root@jms01 \~/jumpserver-ce-v4.10.3-x86_64# yum -y install python3 |
| Upgraded: platform-python-3.6.8-70.el8_10.rocky.0.x86_64 platform-python-pip-9.0.3-24.el8.rocky.0.noarch platform-python-setuptools-39.2.0-8.el8_10.noarch python3-libs-3.6.8-70.el8_10.rocky.0.x86_64 Installed: python3-pip-9.0.3-24.el8.rocky.0.noarch python3-setuptools-39.2.0-8.el8_10.noarch python36-3.6.8-39.module+el8.10.0+1910+234ad790.x86_64 Complete! |
| root@jms01 \~/jumpserver-ce-v4.10.3-x86_64# ./jmsctl.sh install |
| ██╗██╗ ██╗███╗ ███╗██████╗ ███████╗███████╗██████╗ ██╗ ██╗███████╗██████╗ ██║██║ ██║████╗ ████║██╔══██╗██╔════╝██╔════╝██╔══██╗██║ ██║██╔════╝██╔══██╗ ██║██║ ██║██╔████╔██║██████╔╝███████╗█████╗ ██████╔╝██║ ██║█████╗ ██████╔╝ ██ ██║██║ ██║██║╚██╔╝██║██╔═══╝ ╚════██║██╔══╝ ██╔══██╗╚██╗ ██╔╝██╔══╝ ██╔══██╗ ╚█████╔╝╚██████╔╝██║ ╚═╝ ██║██║ ███████║███████╗██║ ██║ ╚████╔╝ ███████╗██║ ██║ ╚════╝ ╚═════╝ ╚═╝ ╚═╝╚═╝ ╚══════╝╚══════╝╚═╝ ╚═╝ ╚═══╝ ╚══════╝╚═╝ ╚═╝ Version: v4.10.3-ce 1. Check Configuration File Path to Configuration file: /opt/jumpserver/config /opt/jumpserver/config/config.txt √ /opt/jumpserver/config/loki/promtail.yml √ /opt/jumpserver/config/nginx/cert/server.crt √ /opt/jumpserver/config/nginx/cert/server.key √ >>> Install and Configure Docker 1. Install Docker complete 2. Configure Docker Do you want to support IPv6? (y/n) (default n): n complete 3. Start Docker Created symlink /etc/systemd/system/multi-user.target.wants/docker.service → /etc/systemd/system/docker.service. complete >>> Loading Docker Image >>> Install and Configure JumpServer 1. Configure Private Key complete 2. Configure Persistent Directory Do you need custom persistent store, will use the default directory /data/jumpserver? (y/n) (default n): n complete 3. Configure DB Do you want to use external MySQL? (y/n) (default y): y Please enter DB server IP (default 10.9.254.21): Please enter DB server port (default 3306): Please enter DB database name (default jumpserver): Please enter DB username (default jumpserver): Please enter DB password (default Passw0rd): complete 4. Configure Redis Please enter Redis Engine? (redis/sentinel) (default redis): Do you want to use external Redis? (y/n) (default y): y Please enter Redis server IP (default 10.9.254.20): Please enter Redis server port (default 6379): Please enter Redis password (default Passw0rd): complete 5. Configure External Access Do you need to customize the JumpServer external port? (y/n) (default n): complete 6. Init JumpServer Database + Running 2/2 ✔ Network jms_net Created 0.5s ✔ Container jms_core Started >>> The Installation is Complete 1. You can use the following command to start, and then visit cd /root/jumpserver-ce-v4.10.3-x86_64 ./jmsctl.sh start 2. Other management commands ./jmsctl.sh stop ./jmsctl.sh restart ./jmsctl.sh backup ./jmsctl.sh upgrade For more commands, you can enter ./jmsctl.sh --help to understand 3. Web access http://10.9.254.21:80 Default username: admin Default password: ChangeMe More information Official Website: https://www.jumpserver.com/ Documentation: https://www.jumpserver.com/docs |
| root@jms01 \~/jumpserver-ce-v4.10.3-x86_64# ./jmsctl.sh start |
| + Running 6/6 ✔ Container jms_chen Started 14.4s ✔ Container jms_koko Started 14.4s ✔ Container jms_celery Started 14.6s ✔ Container jms_web Started 14.1s ✔ Container jms_lion Started 13.7s ✔ Container jms_core Started |
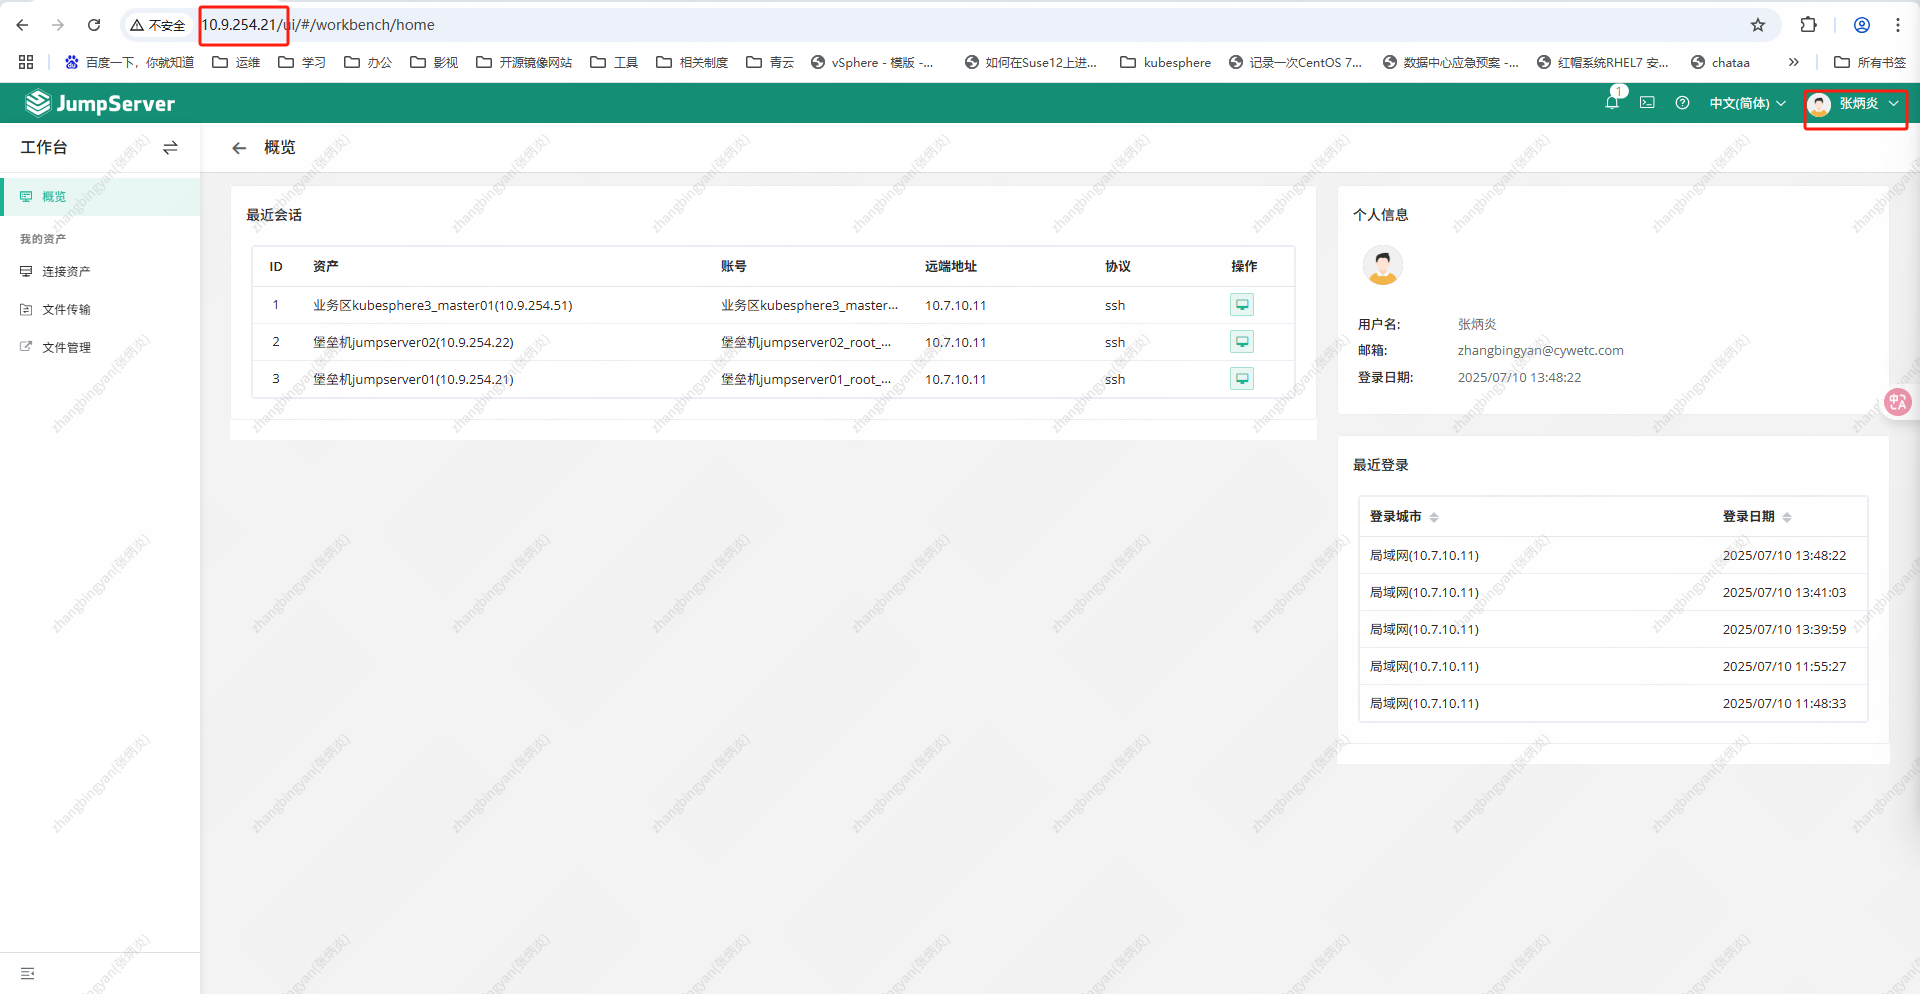
执行命令jmsctl start启动jumpserver,然后通过浏览器访问http://10.9.254.21, 访问成功后,使用相同的方式安装备机。


jms02安装后,通过浏览器访问http://10.9.254.22 (21和22数据库相同,密码已在21修改,22可以直接使用修改后密码登录)

3.验证高可用
3.1测试主备机数据是否同步
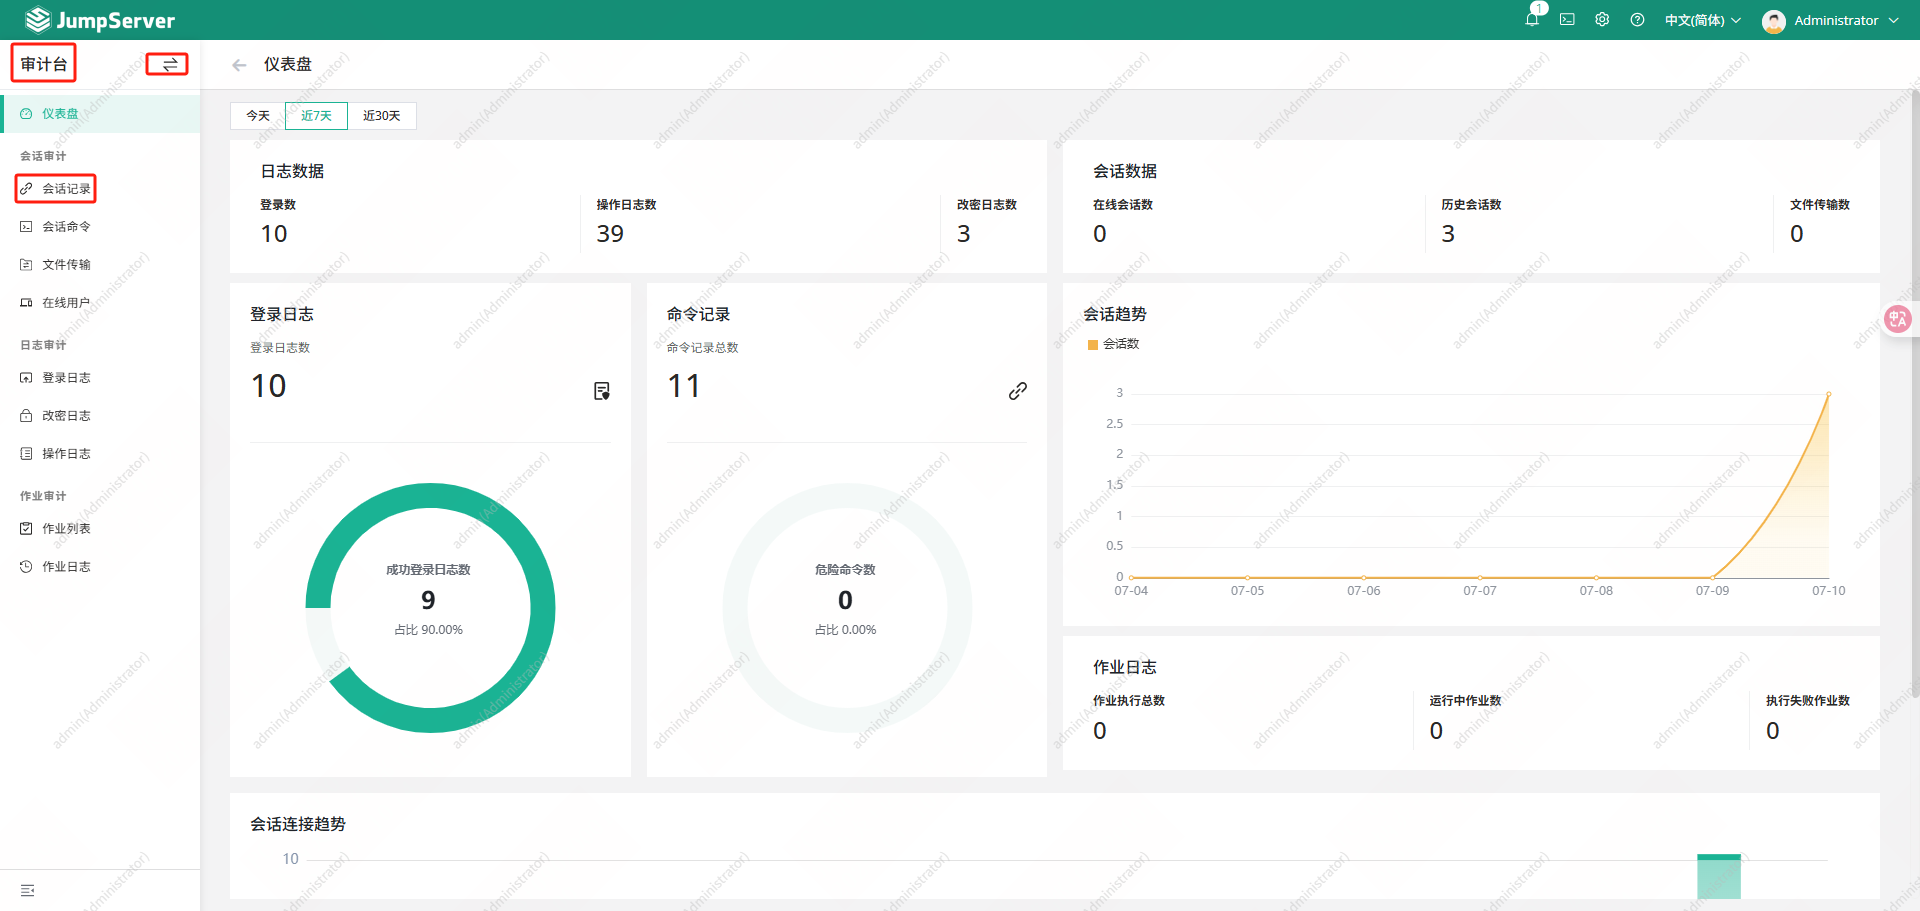
分别从主备机添加资产,然后从主备机分别访问被管资产,可以看到配置数据和录屏数据都可以从主备机上正常查看。其中录屏文件位置:/data/jumpserver/core/data/media/replay/
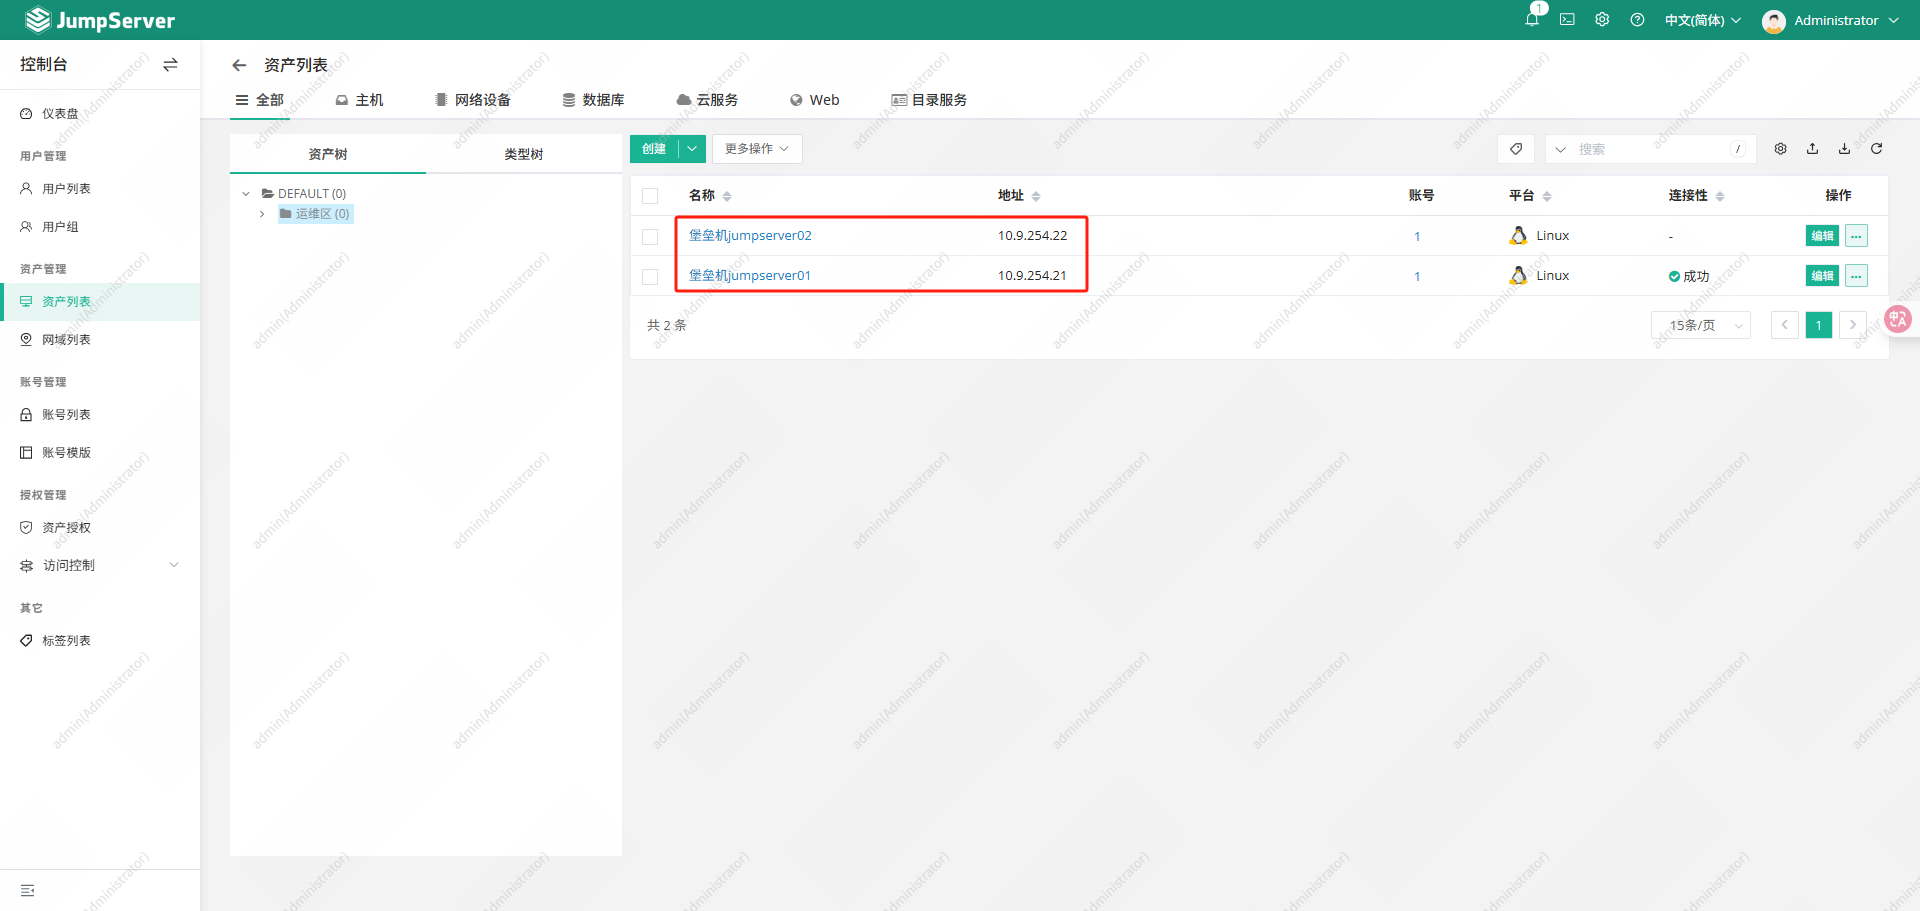
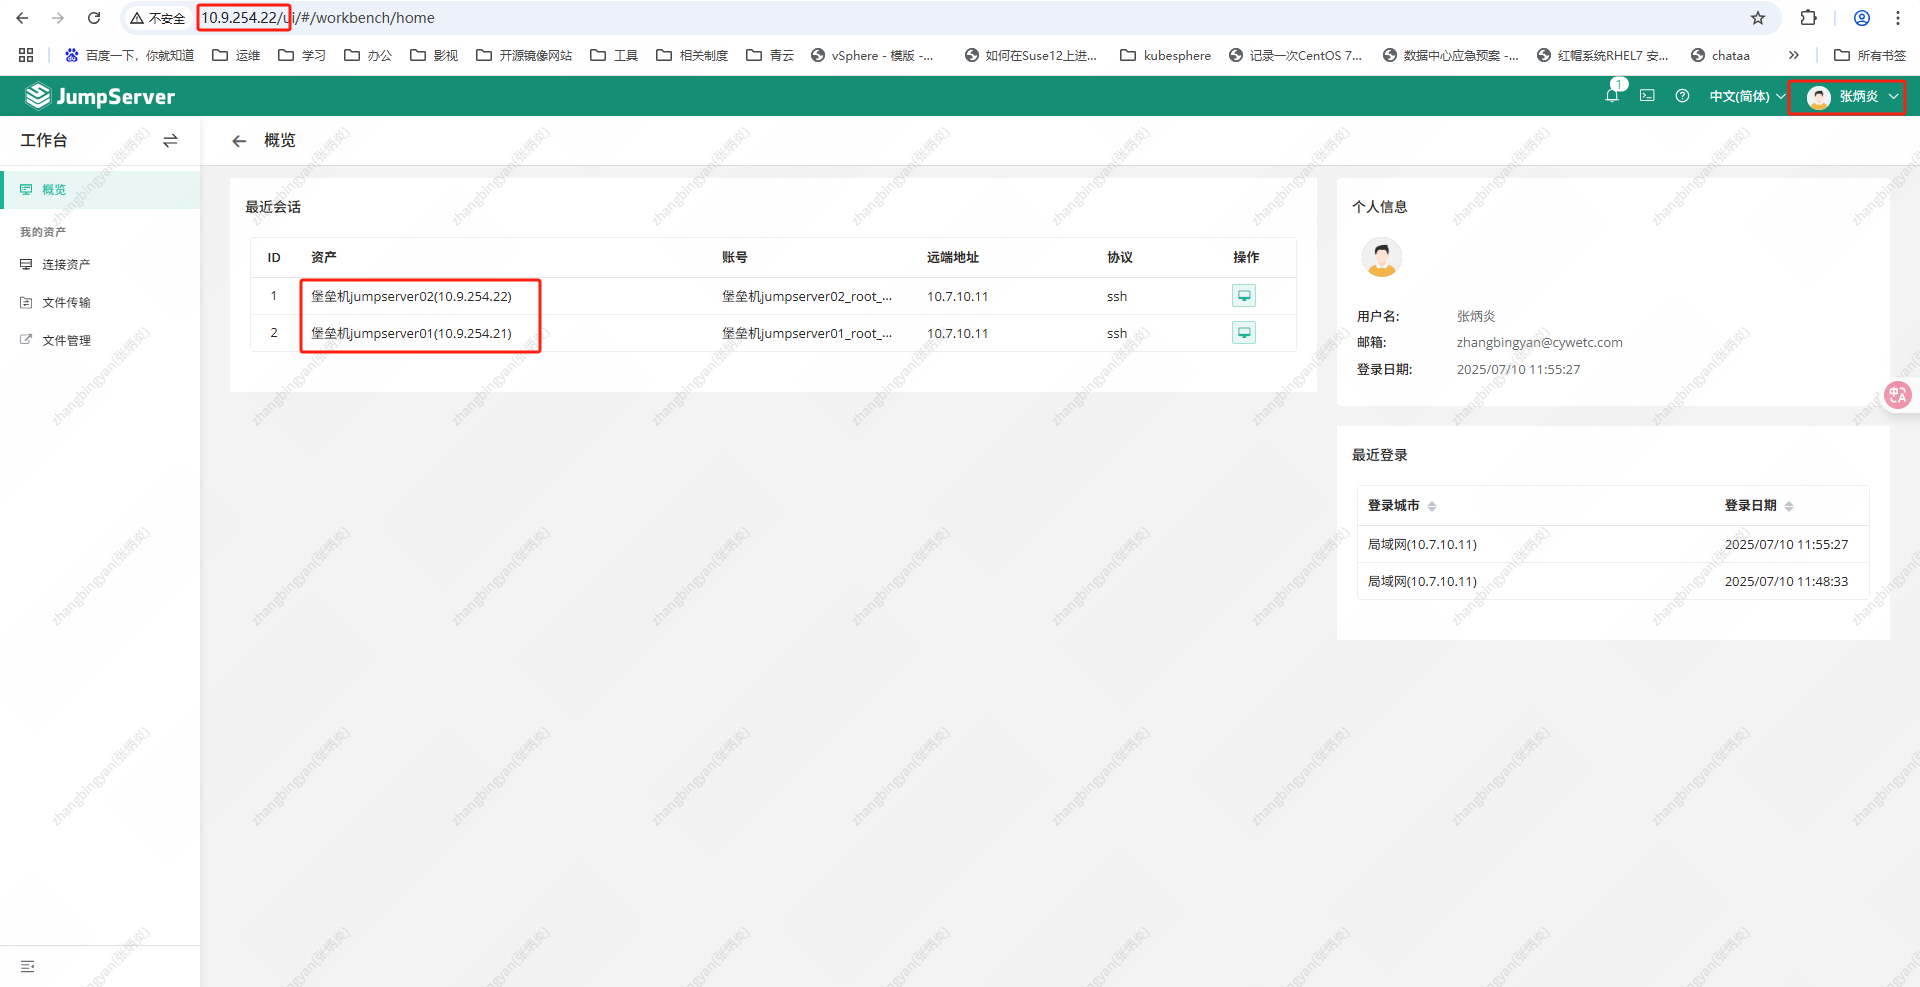
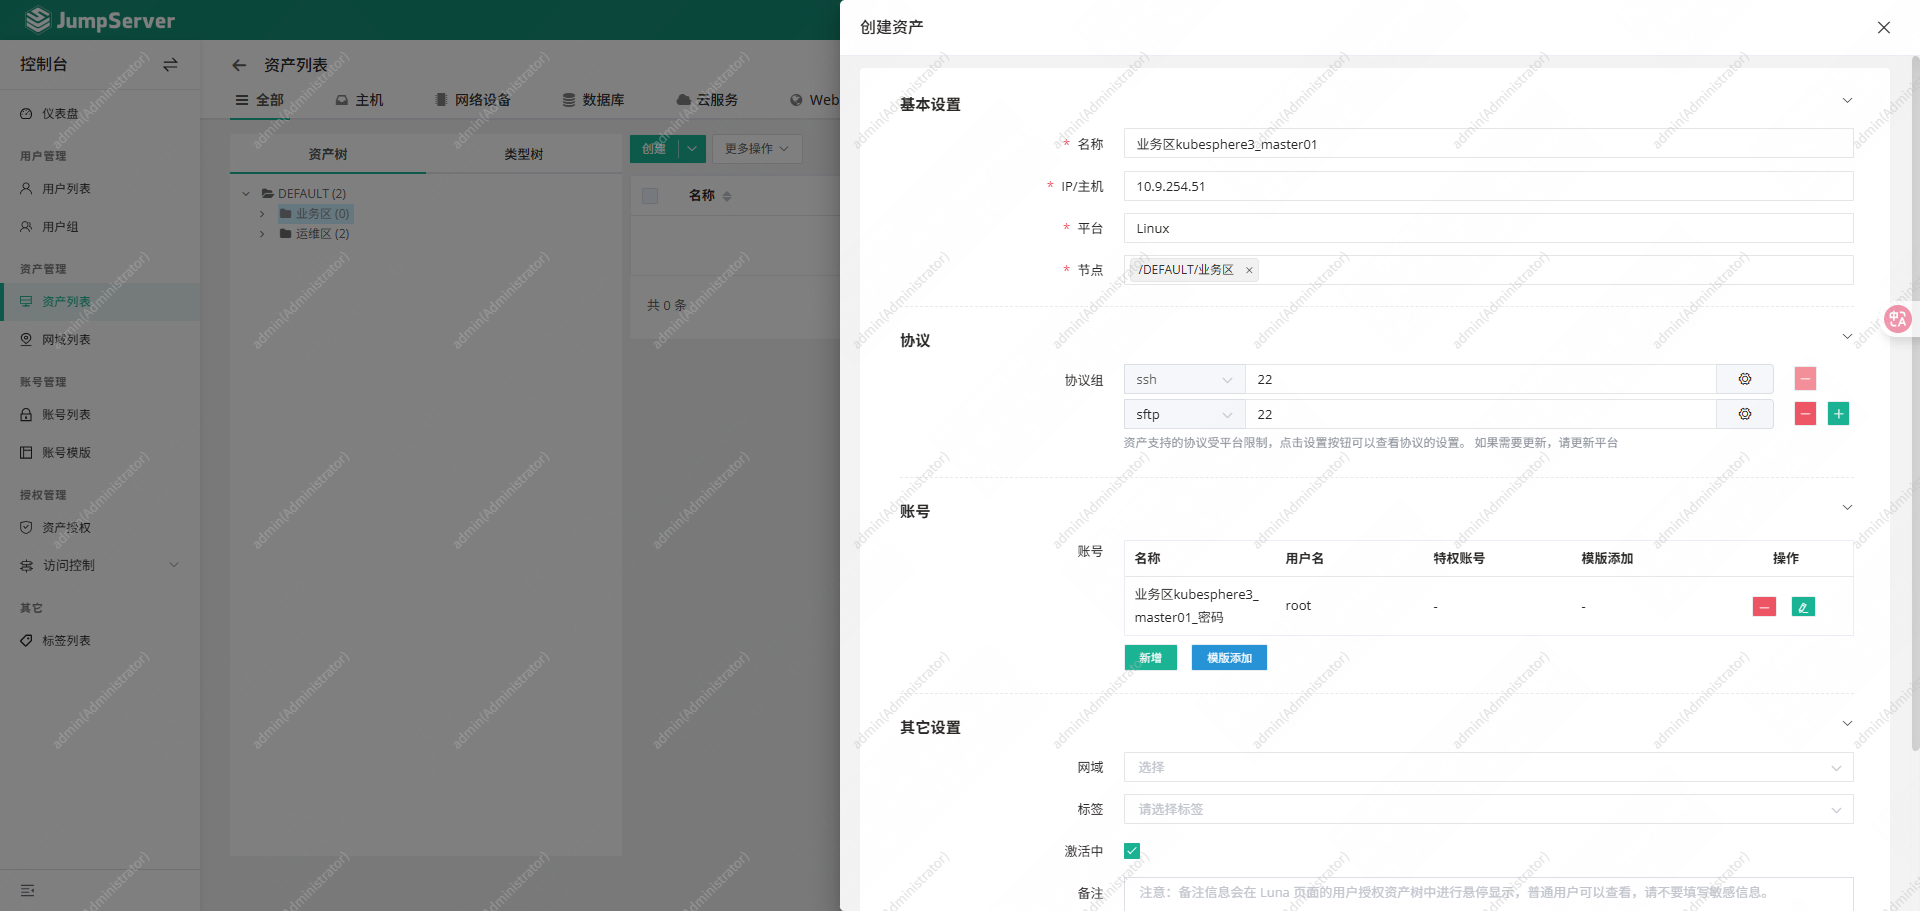
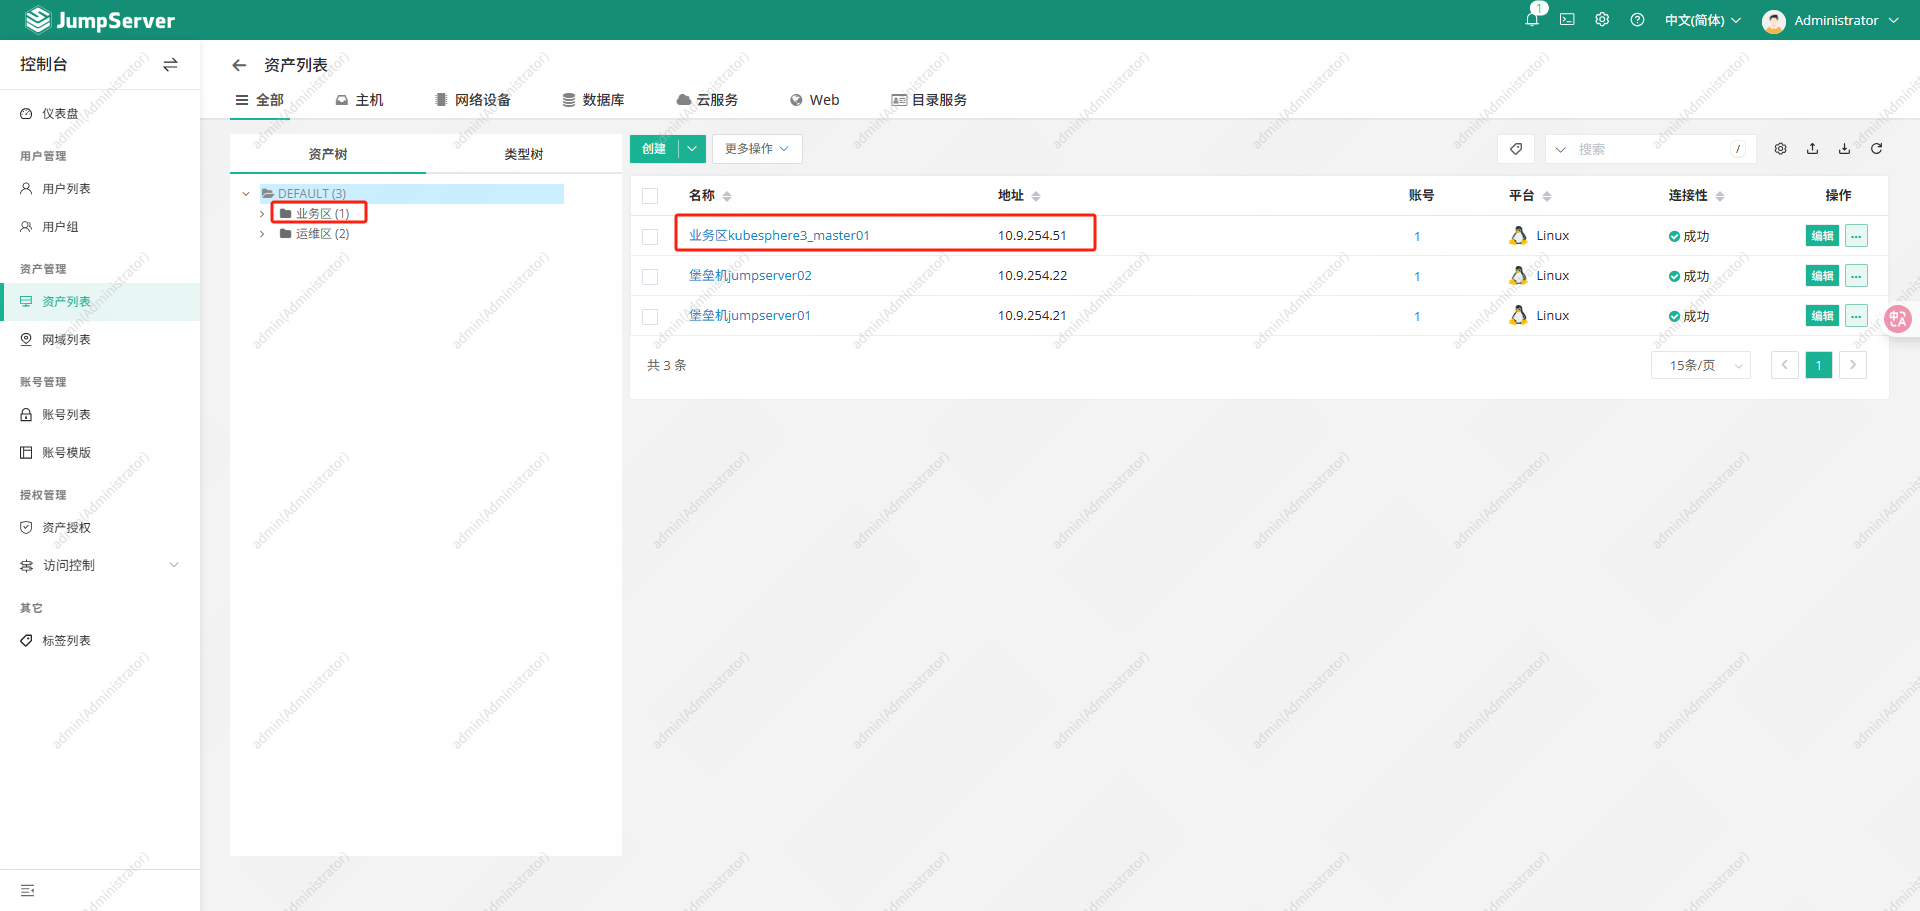
3.1.1主节点创建资源
jms01上创建资源进行访问,查看录像
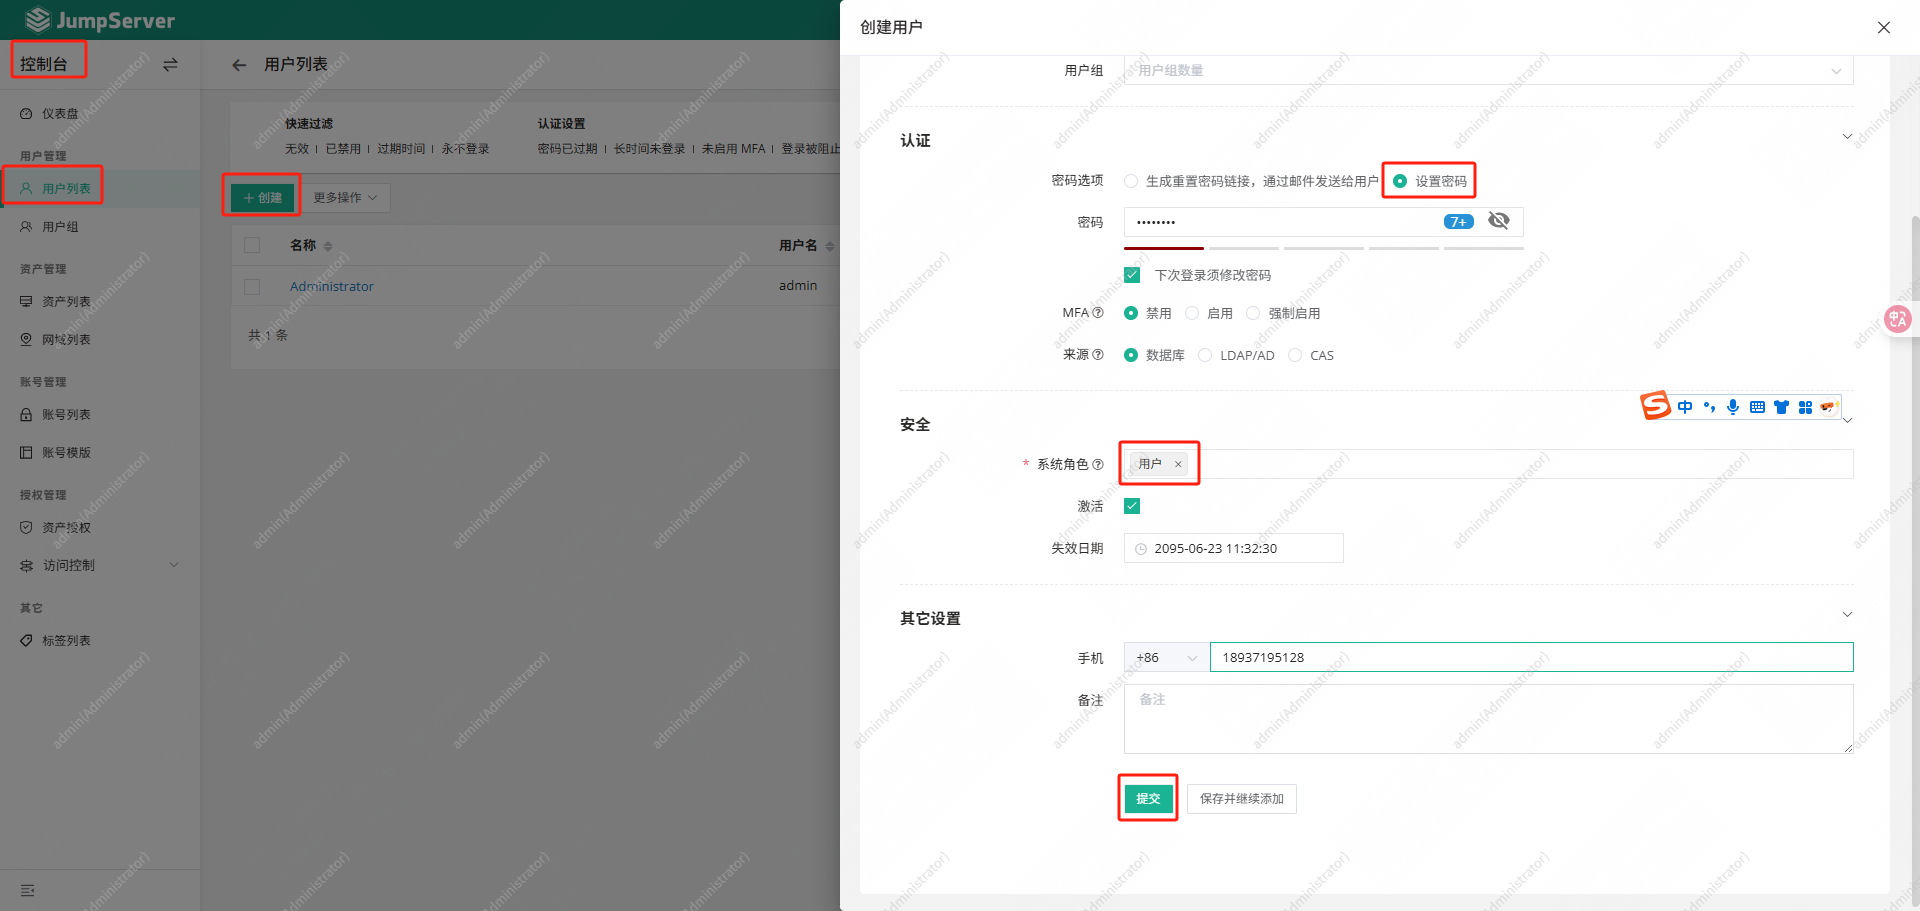
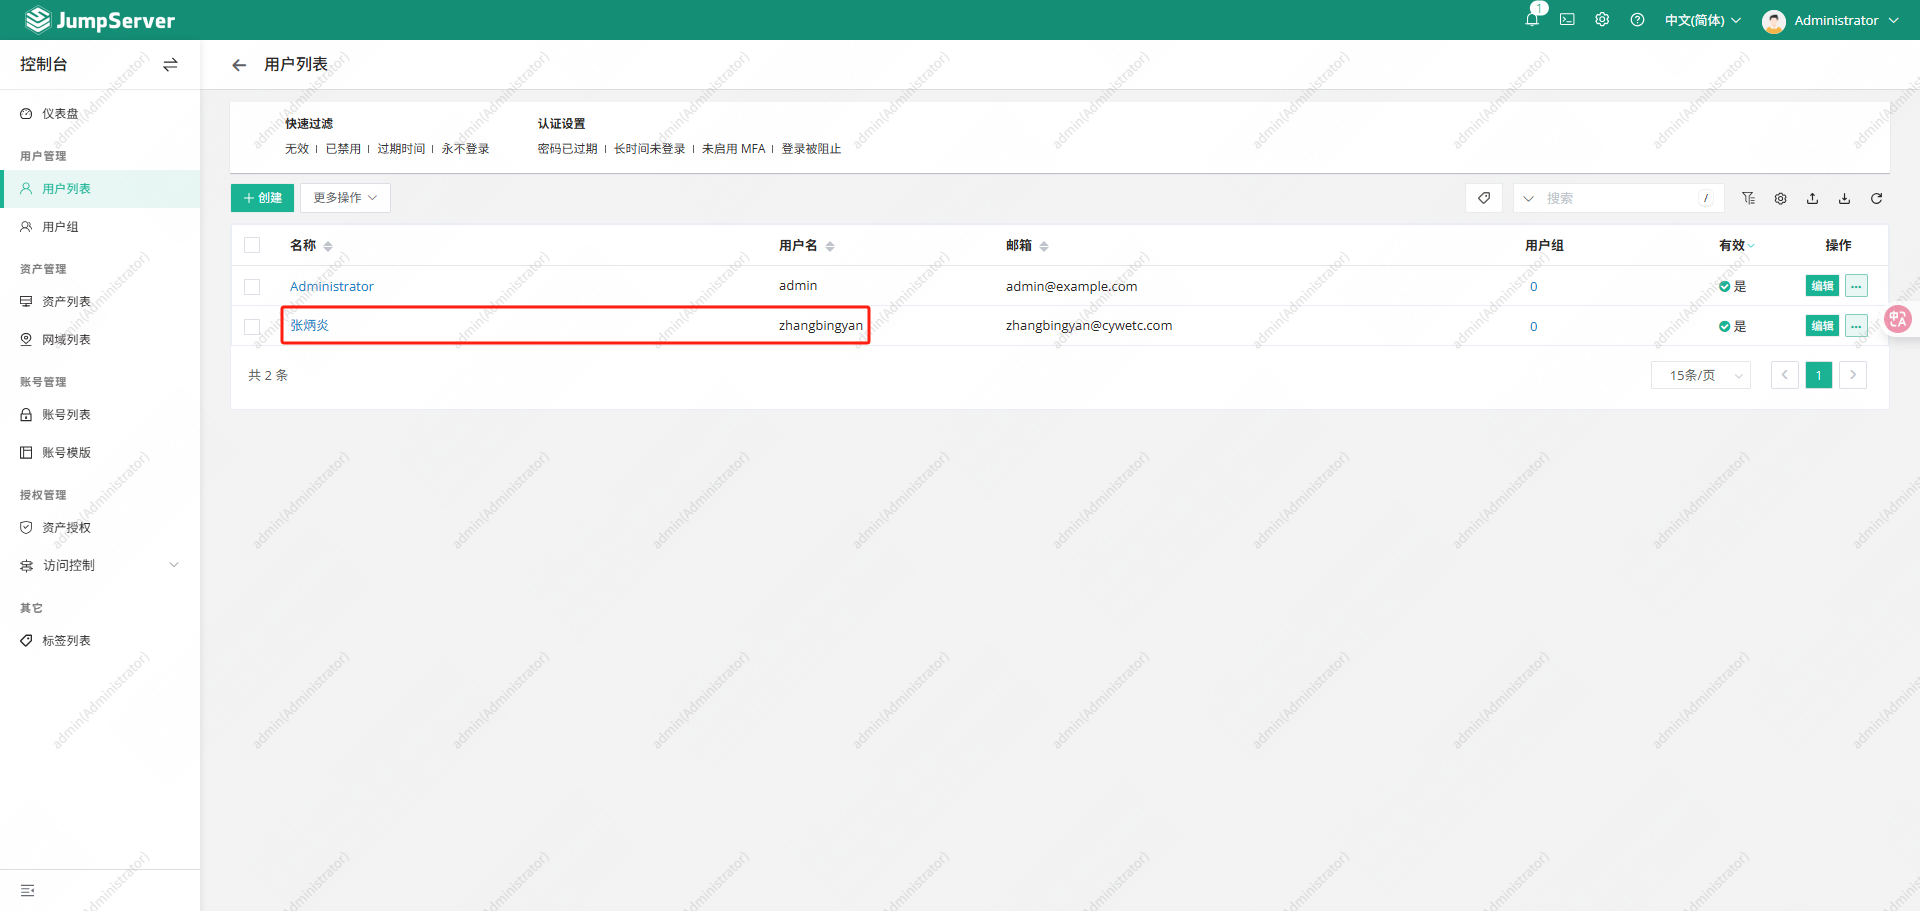
创建用户
添加主机资产
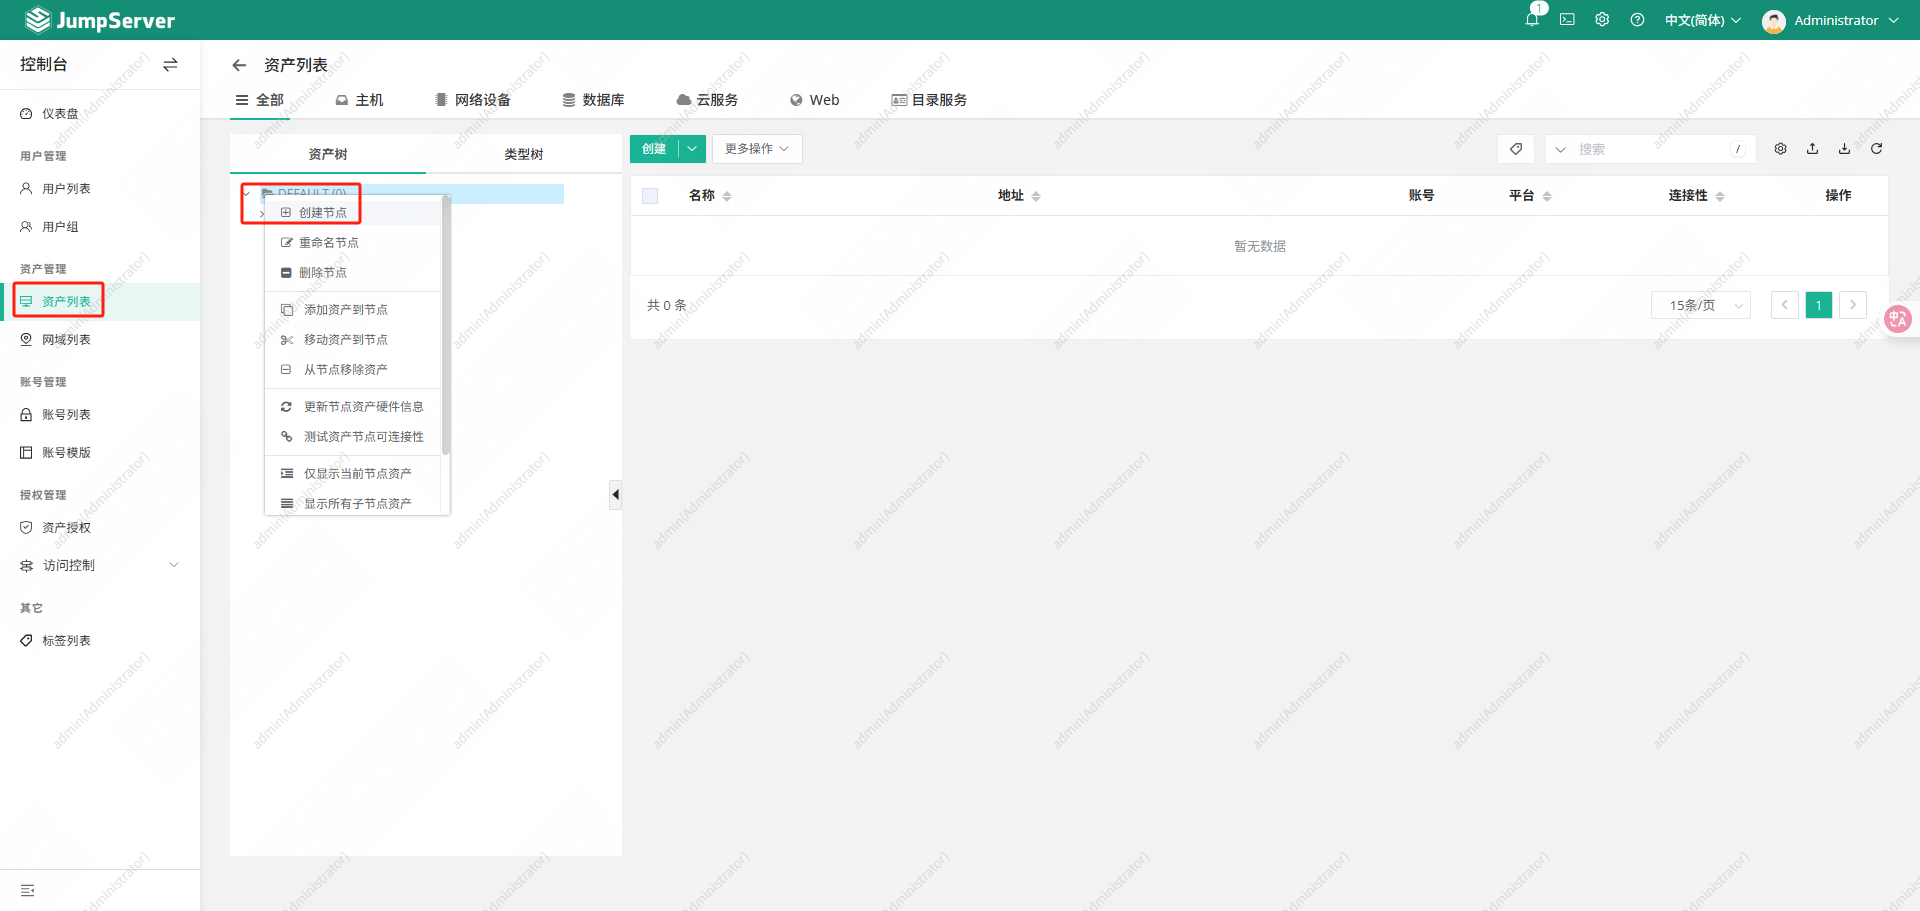
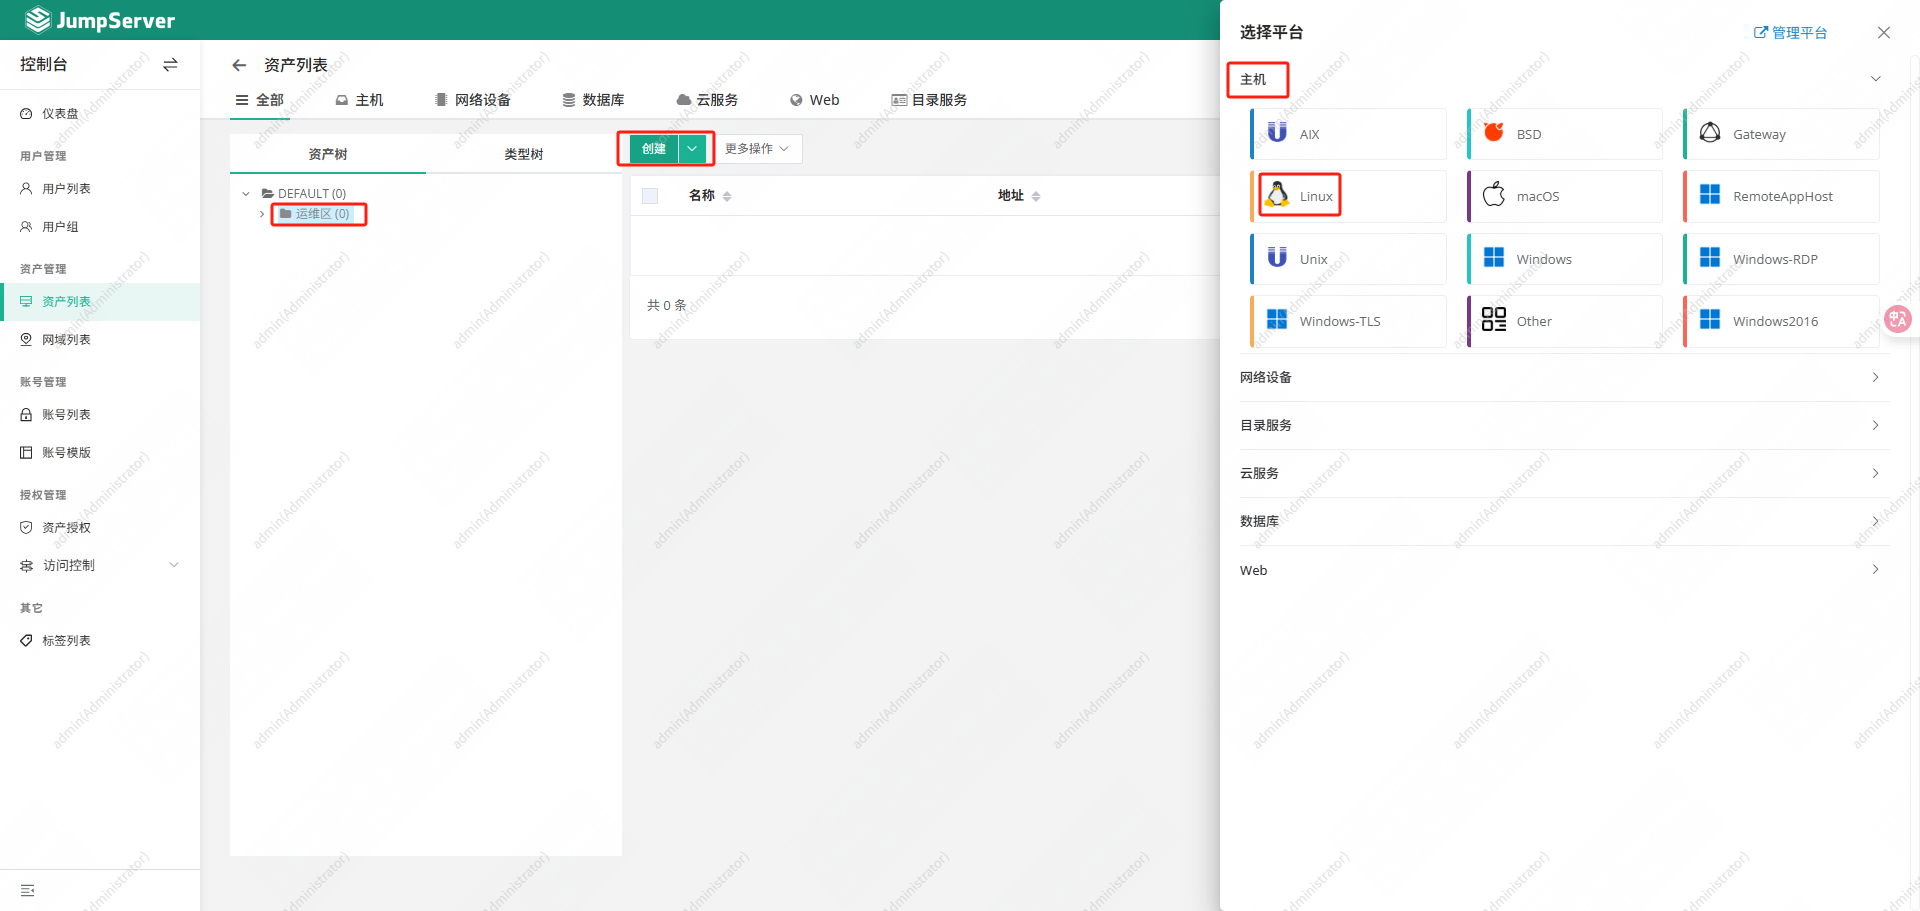

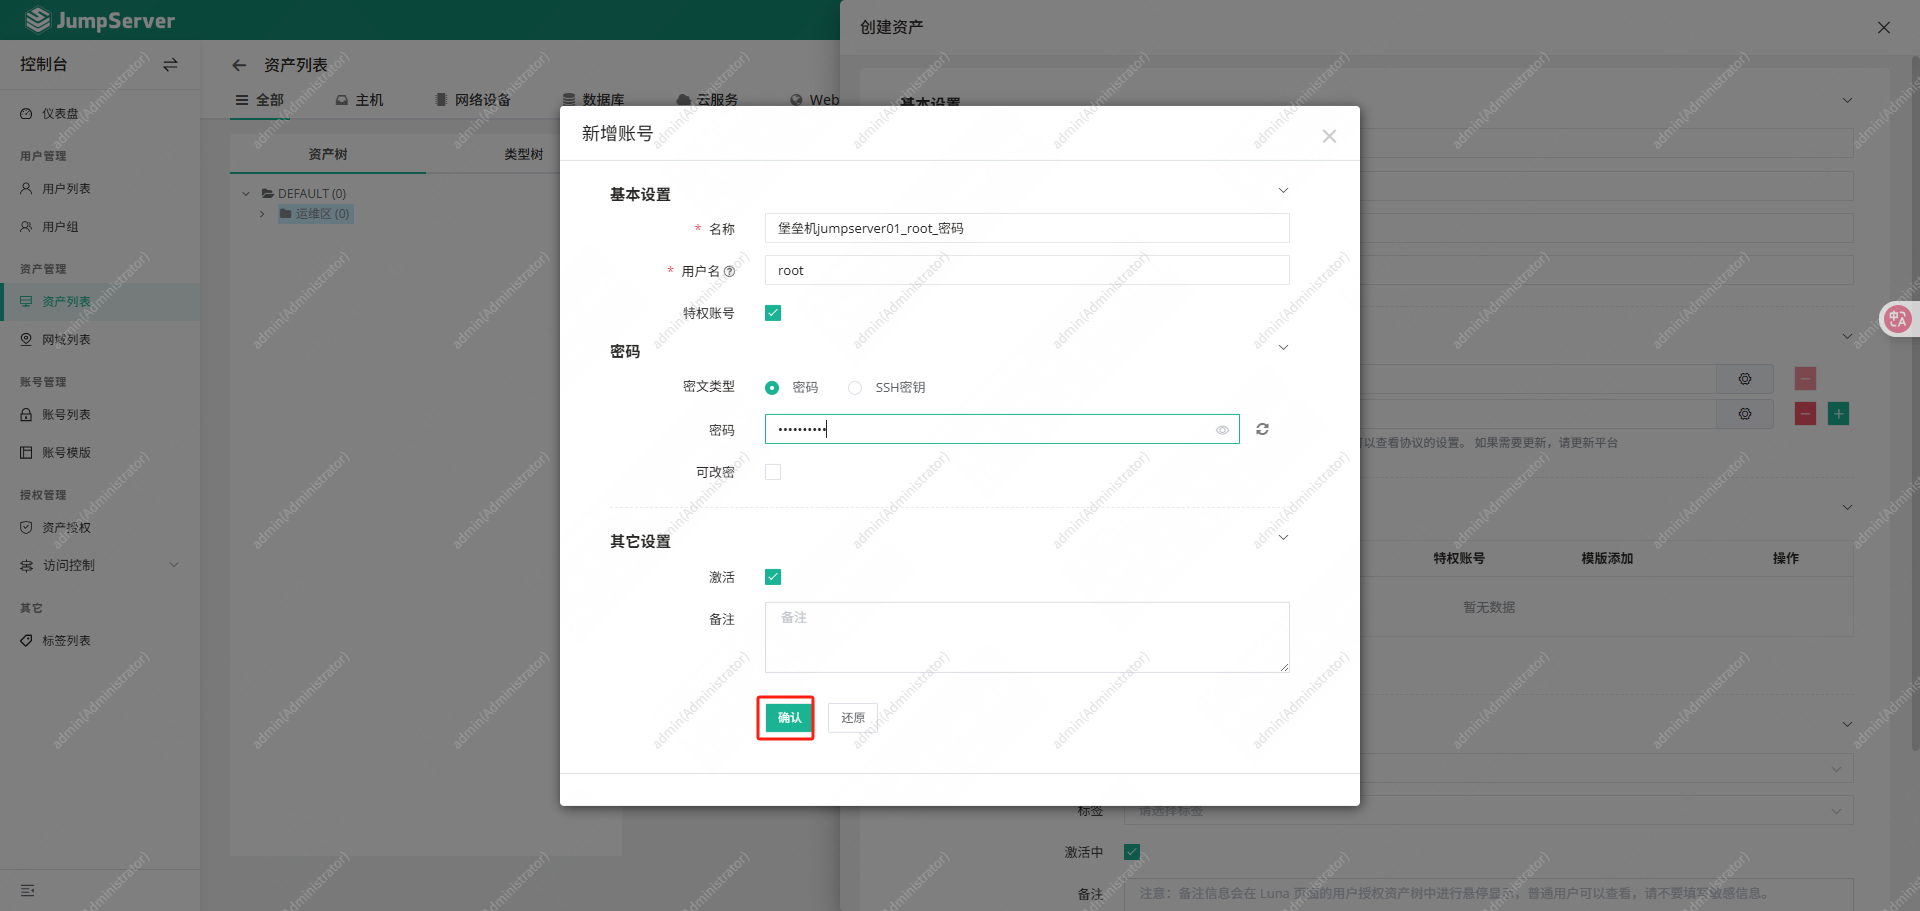

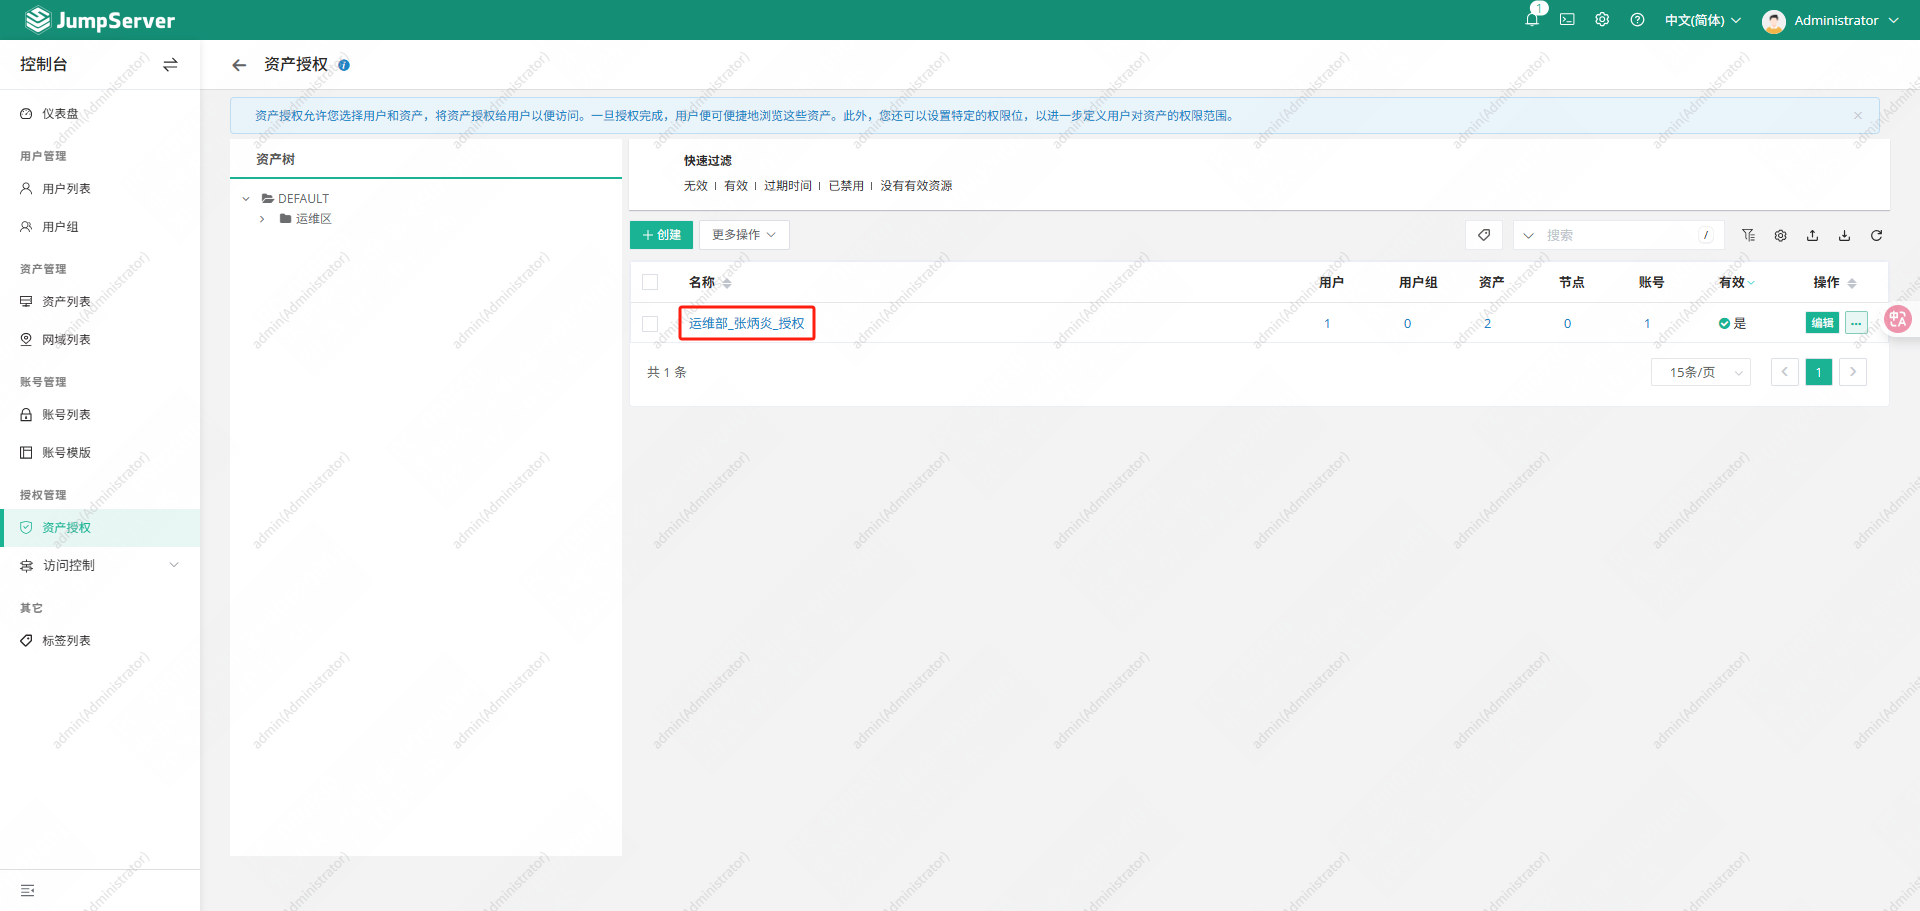
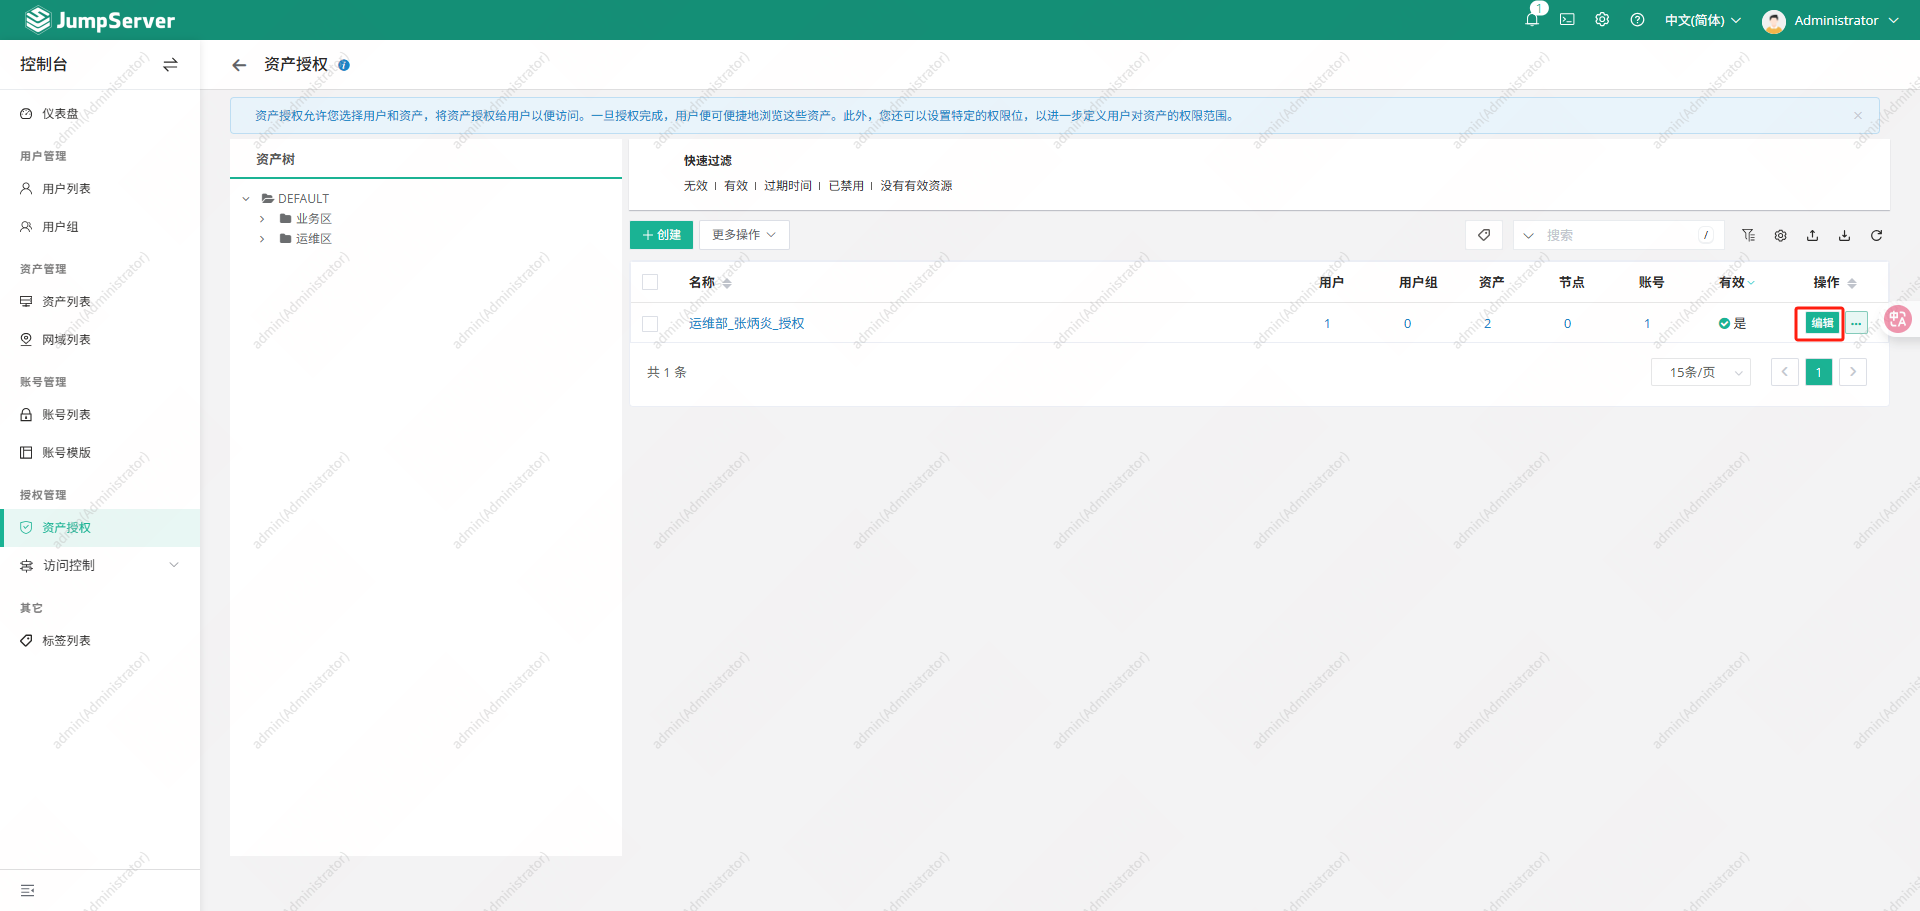
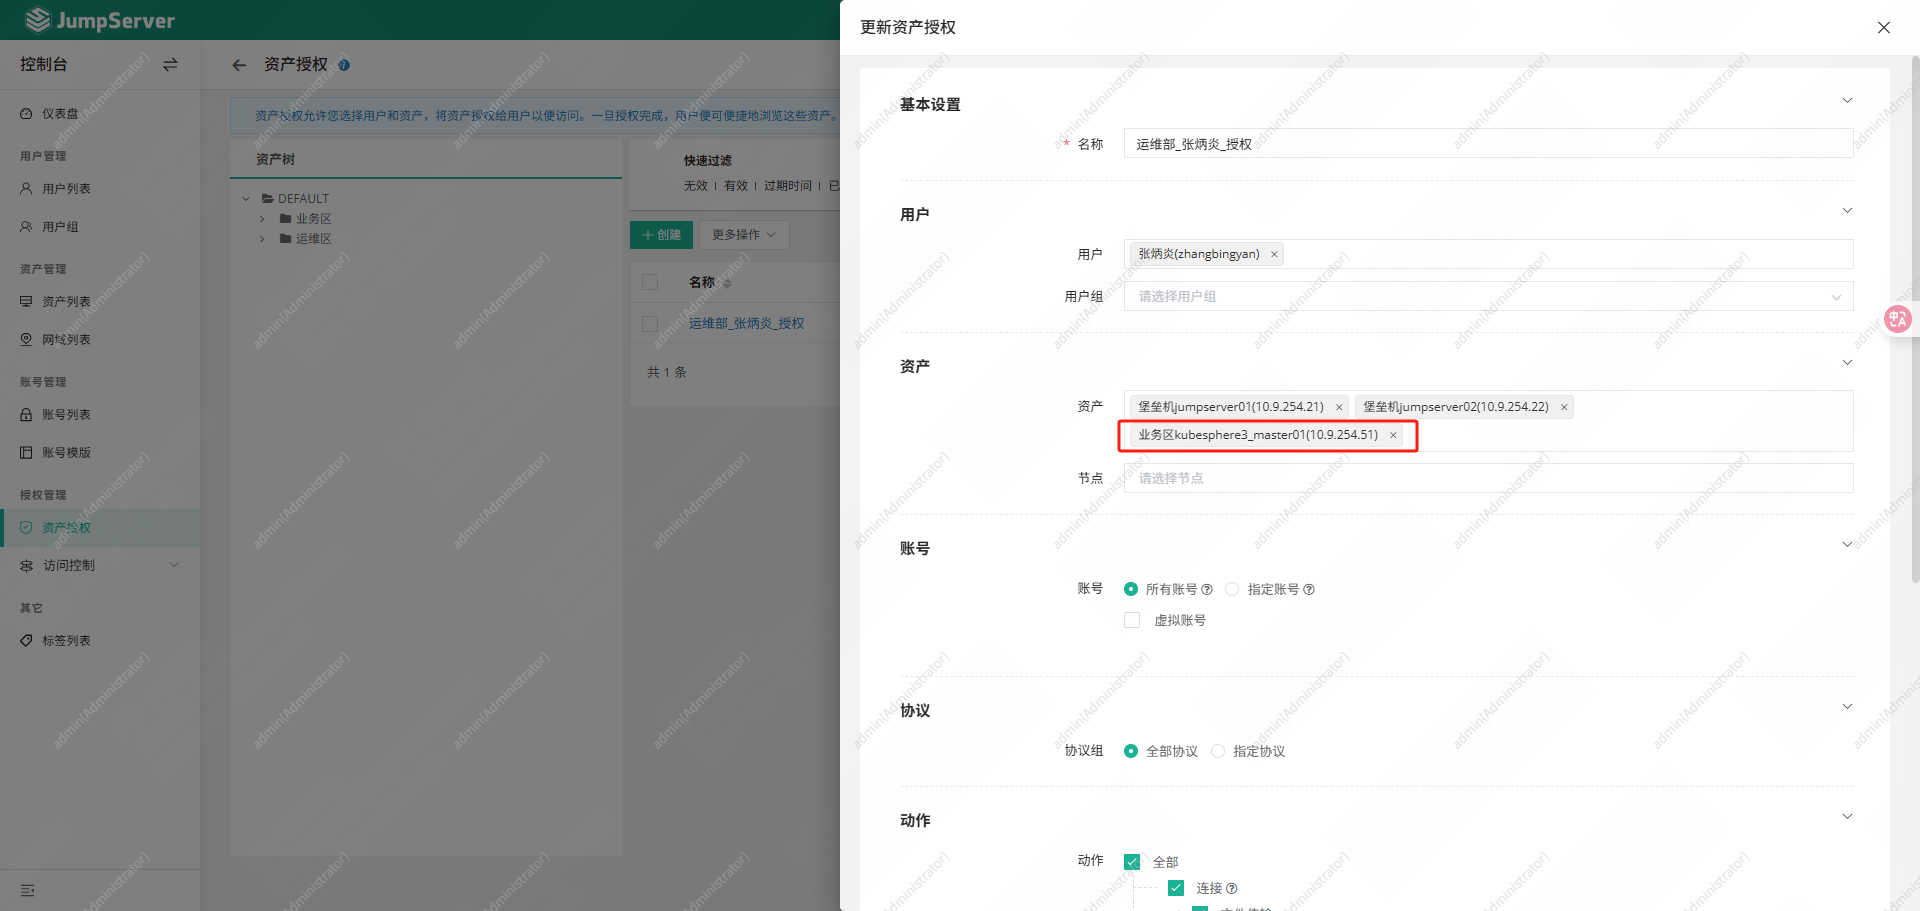
资产授权
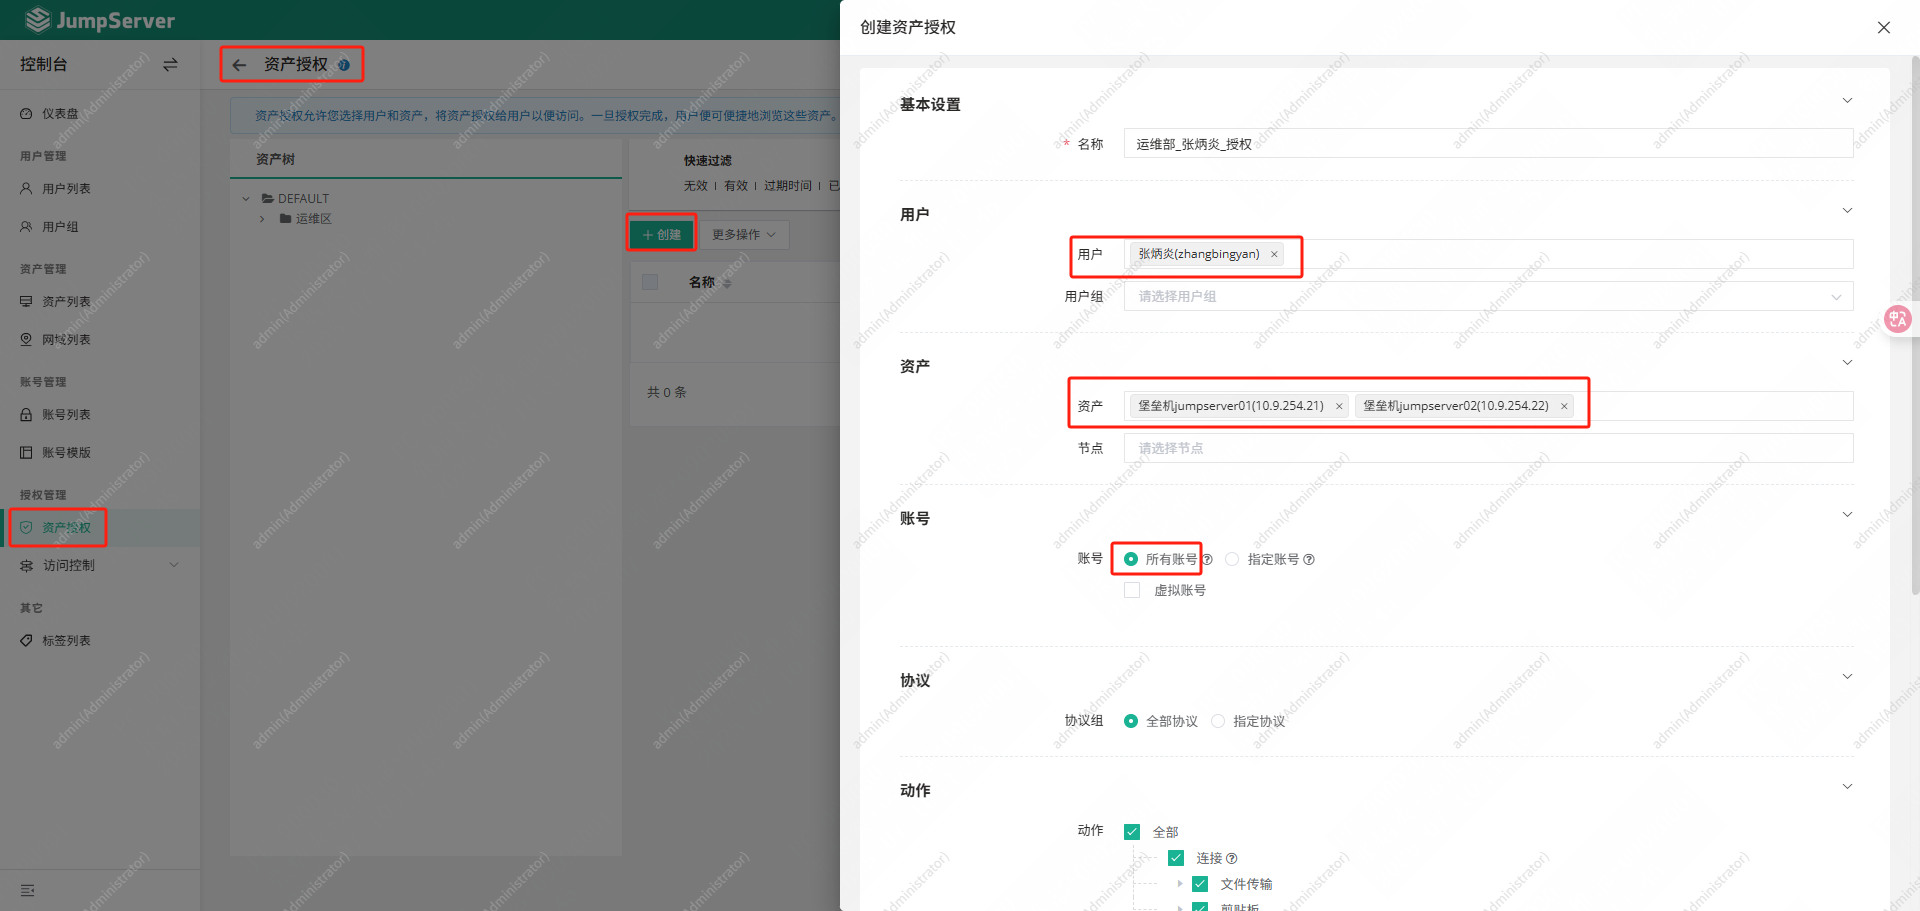
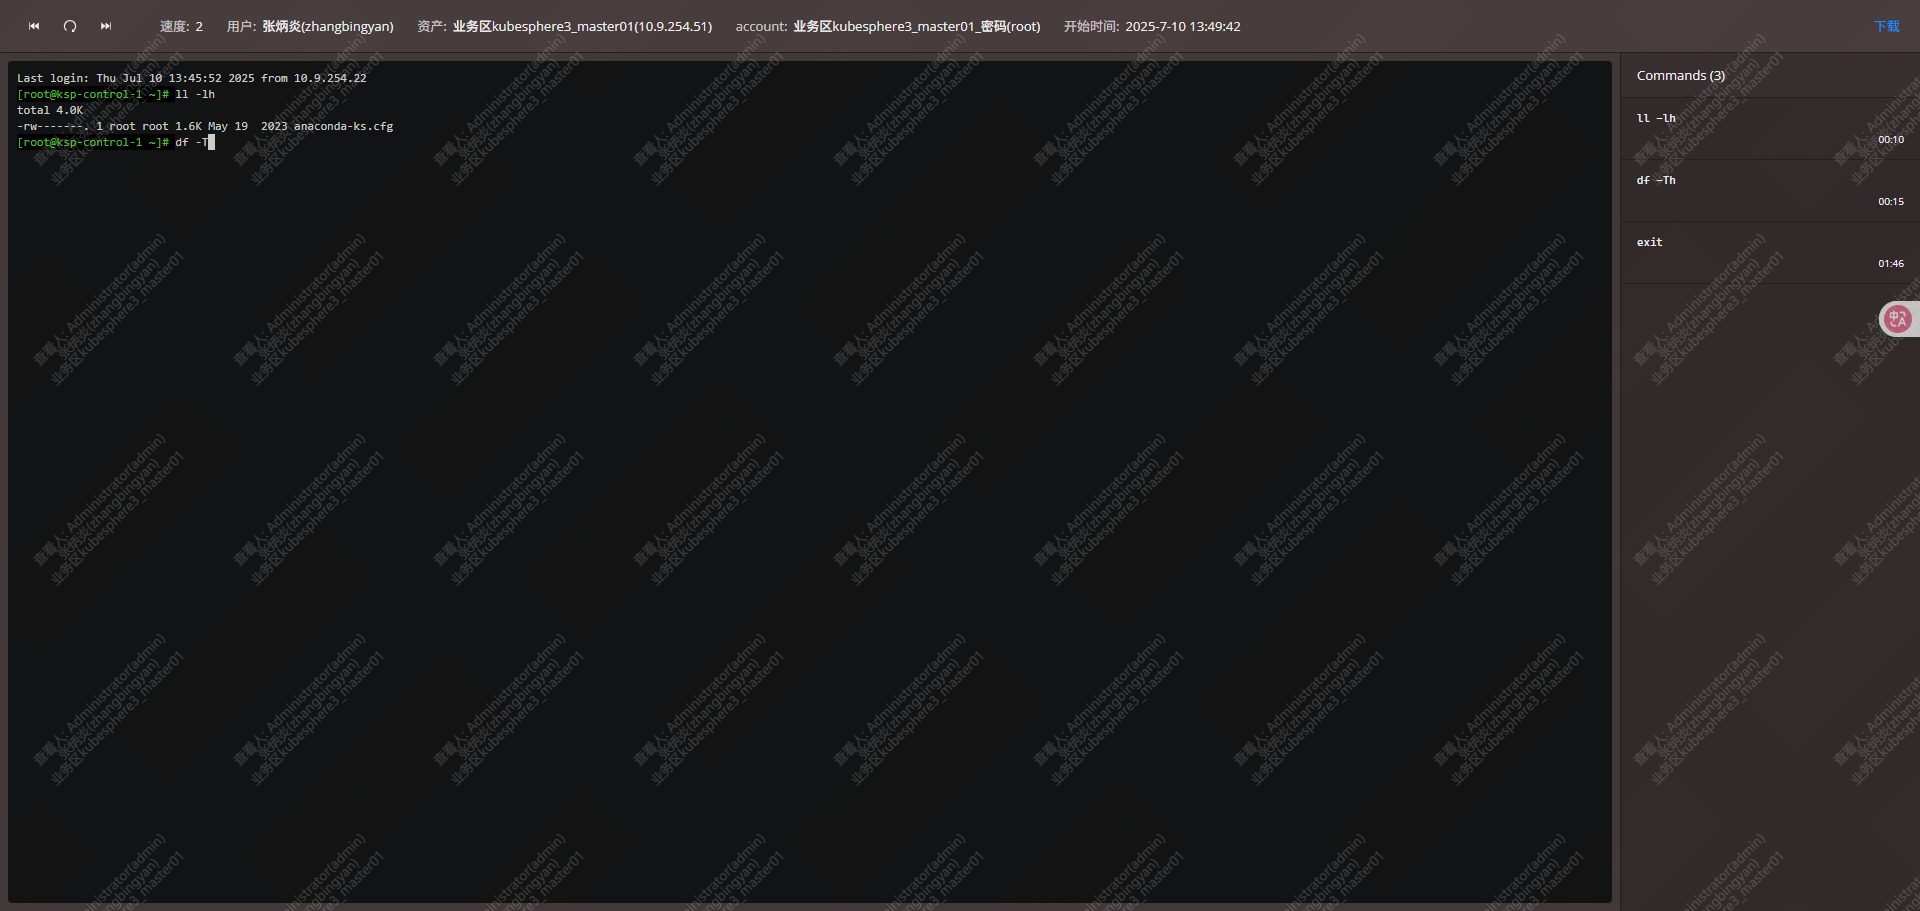
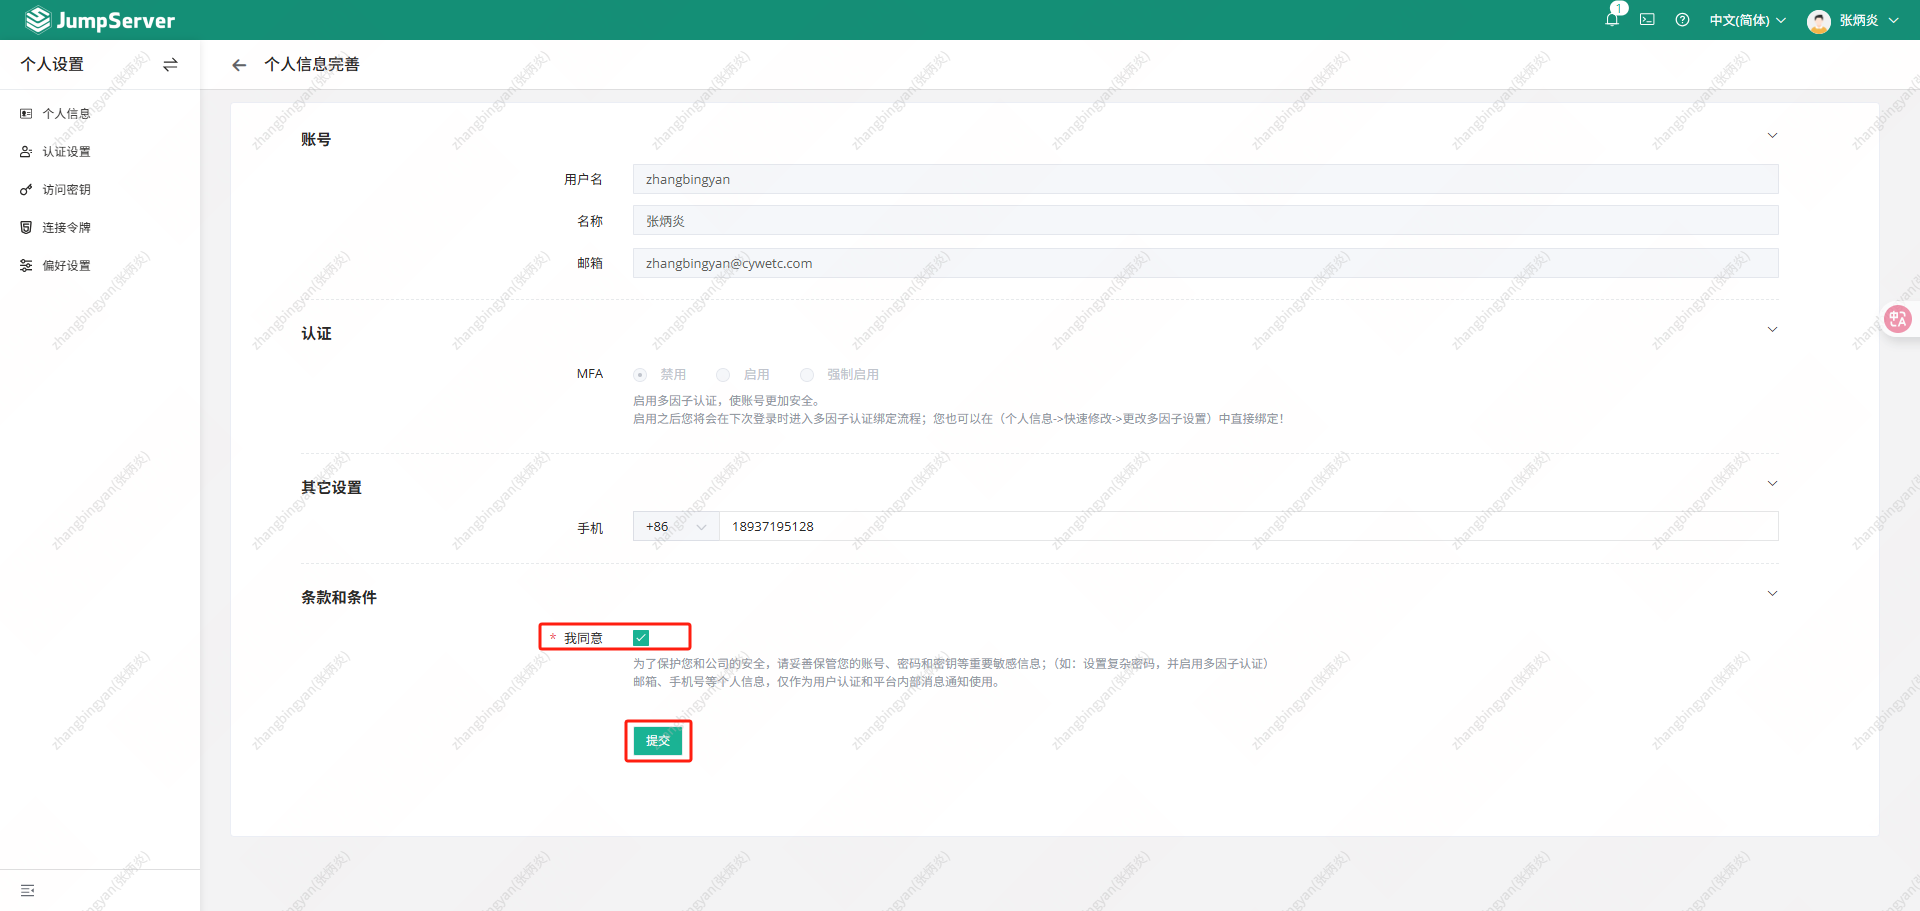
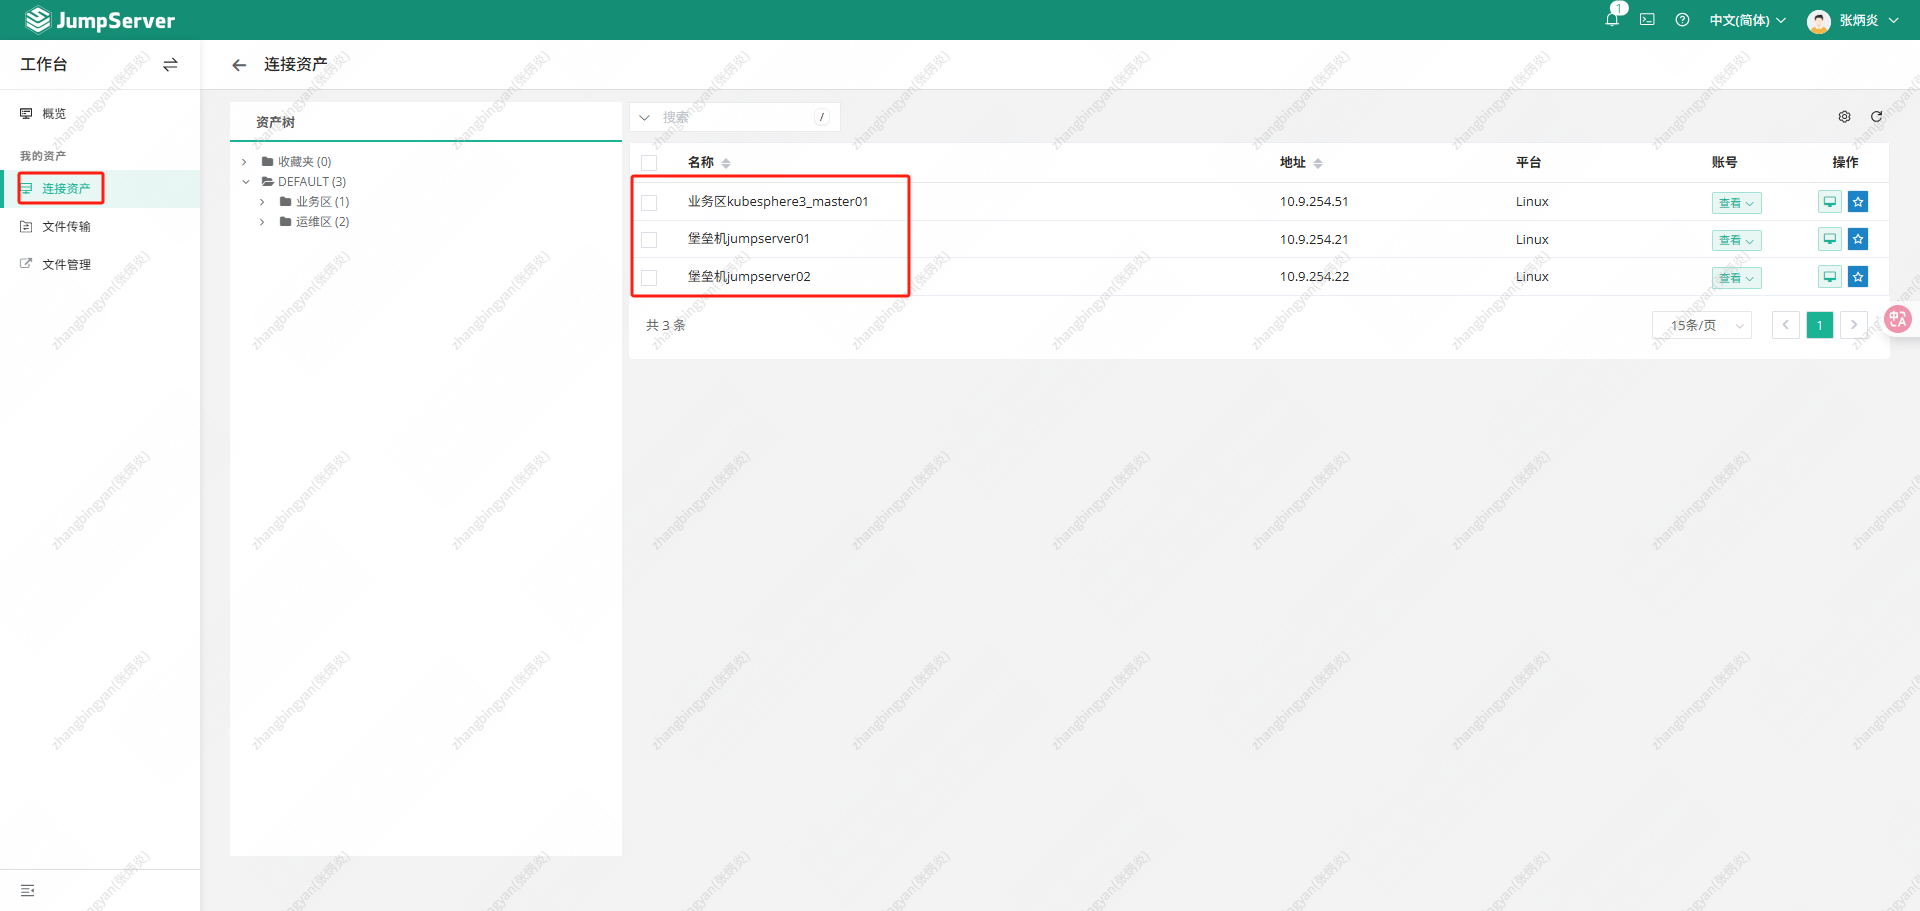
使用张炳炎用户登录进行操作


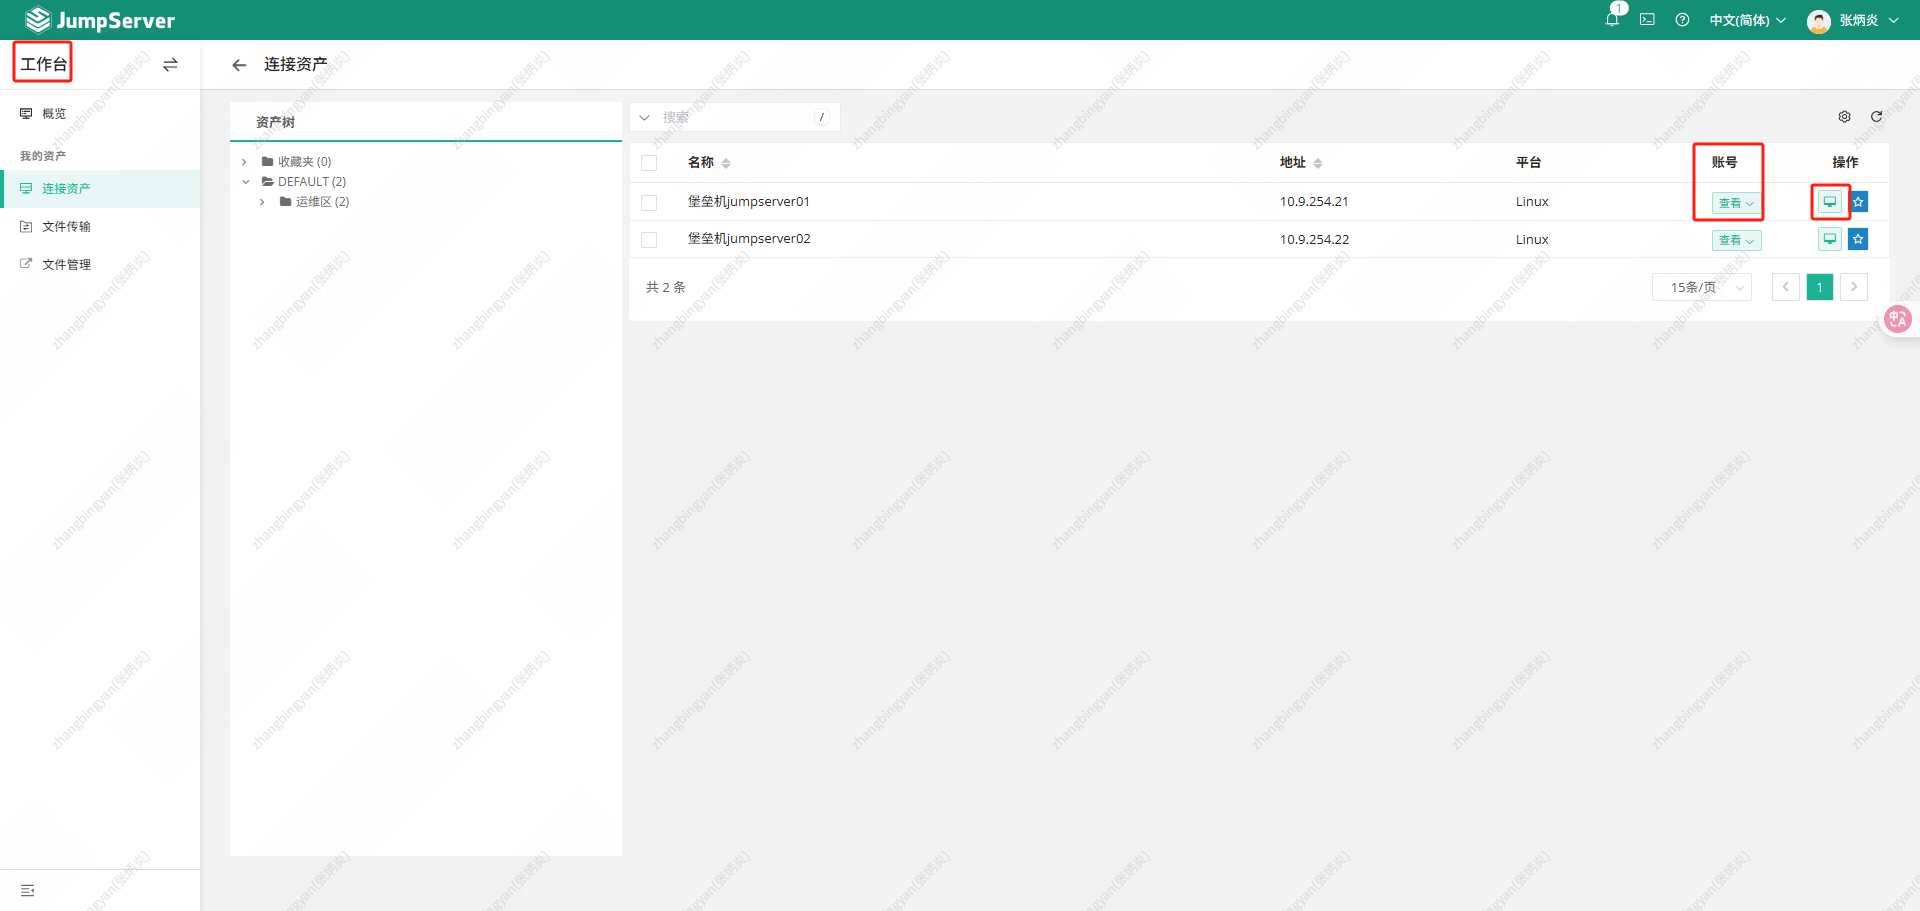
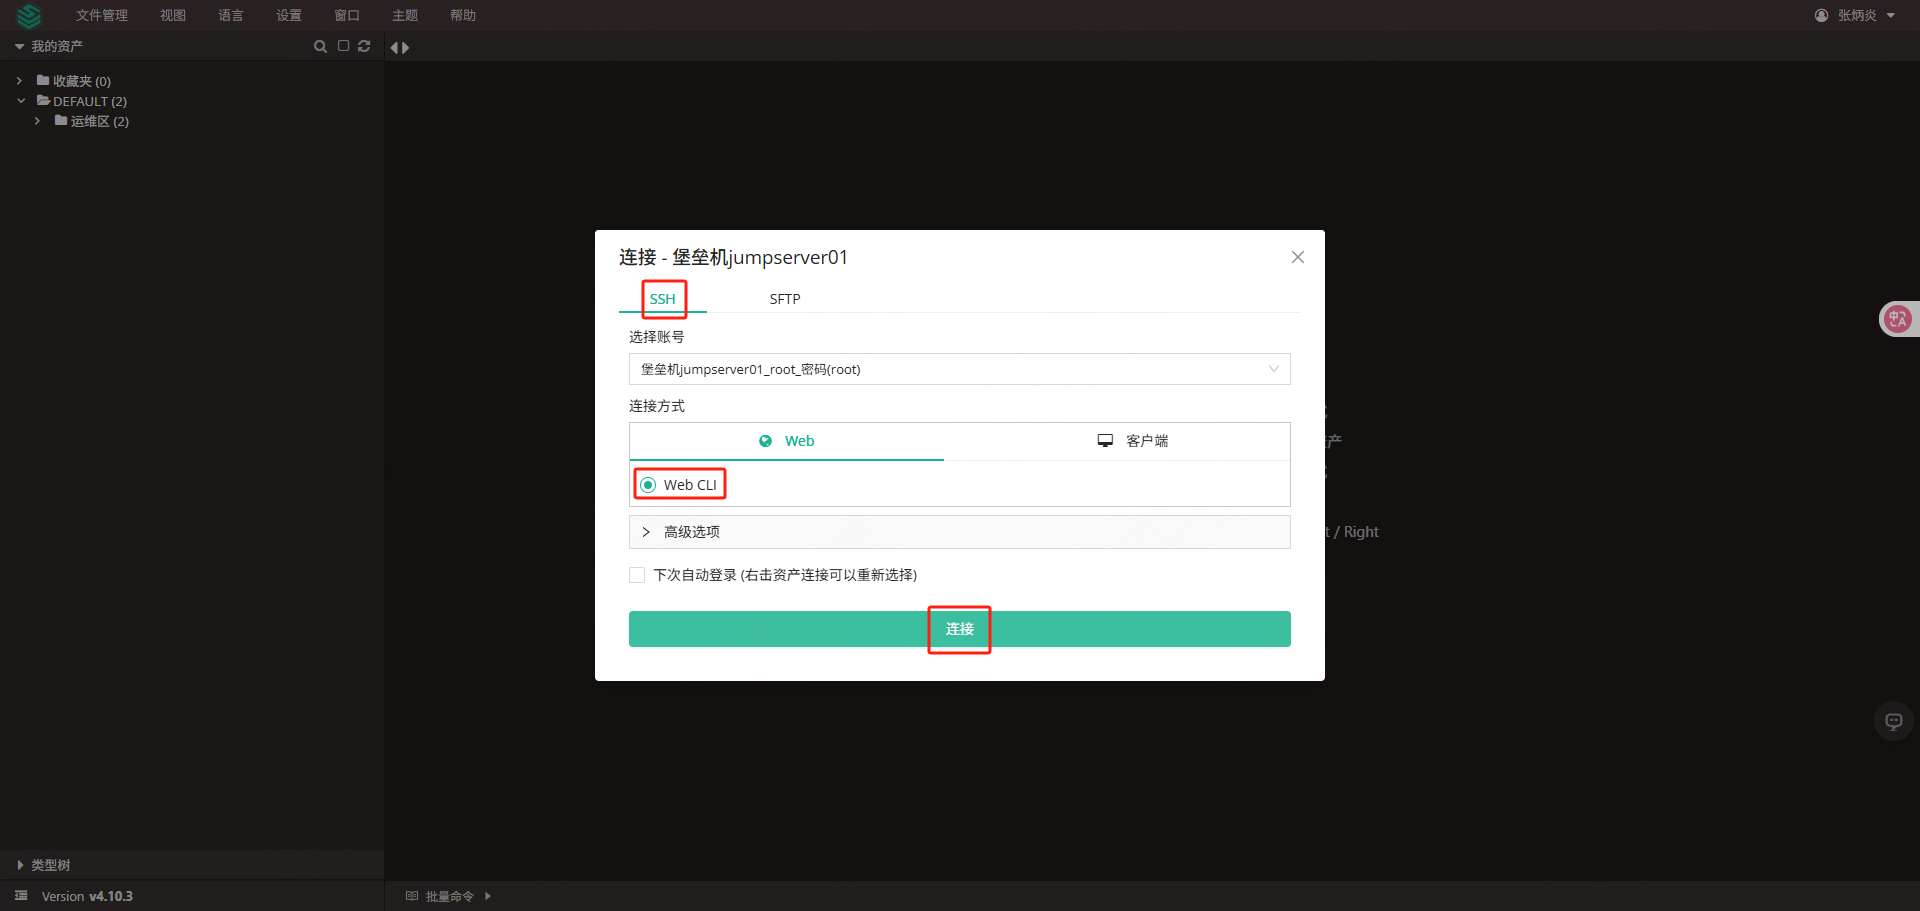
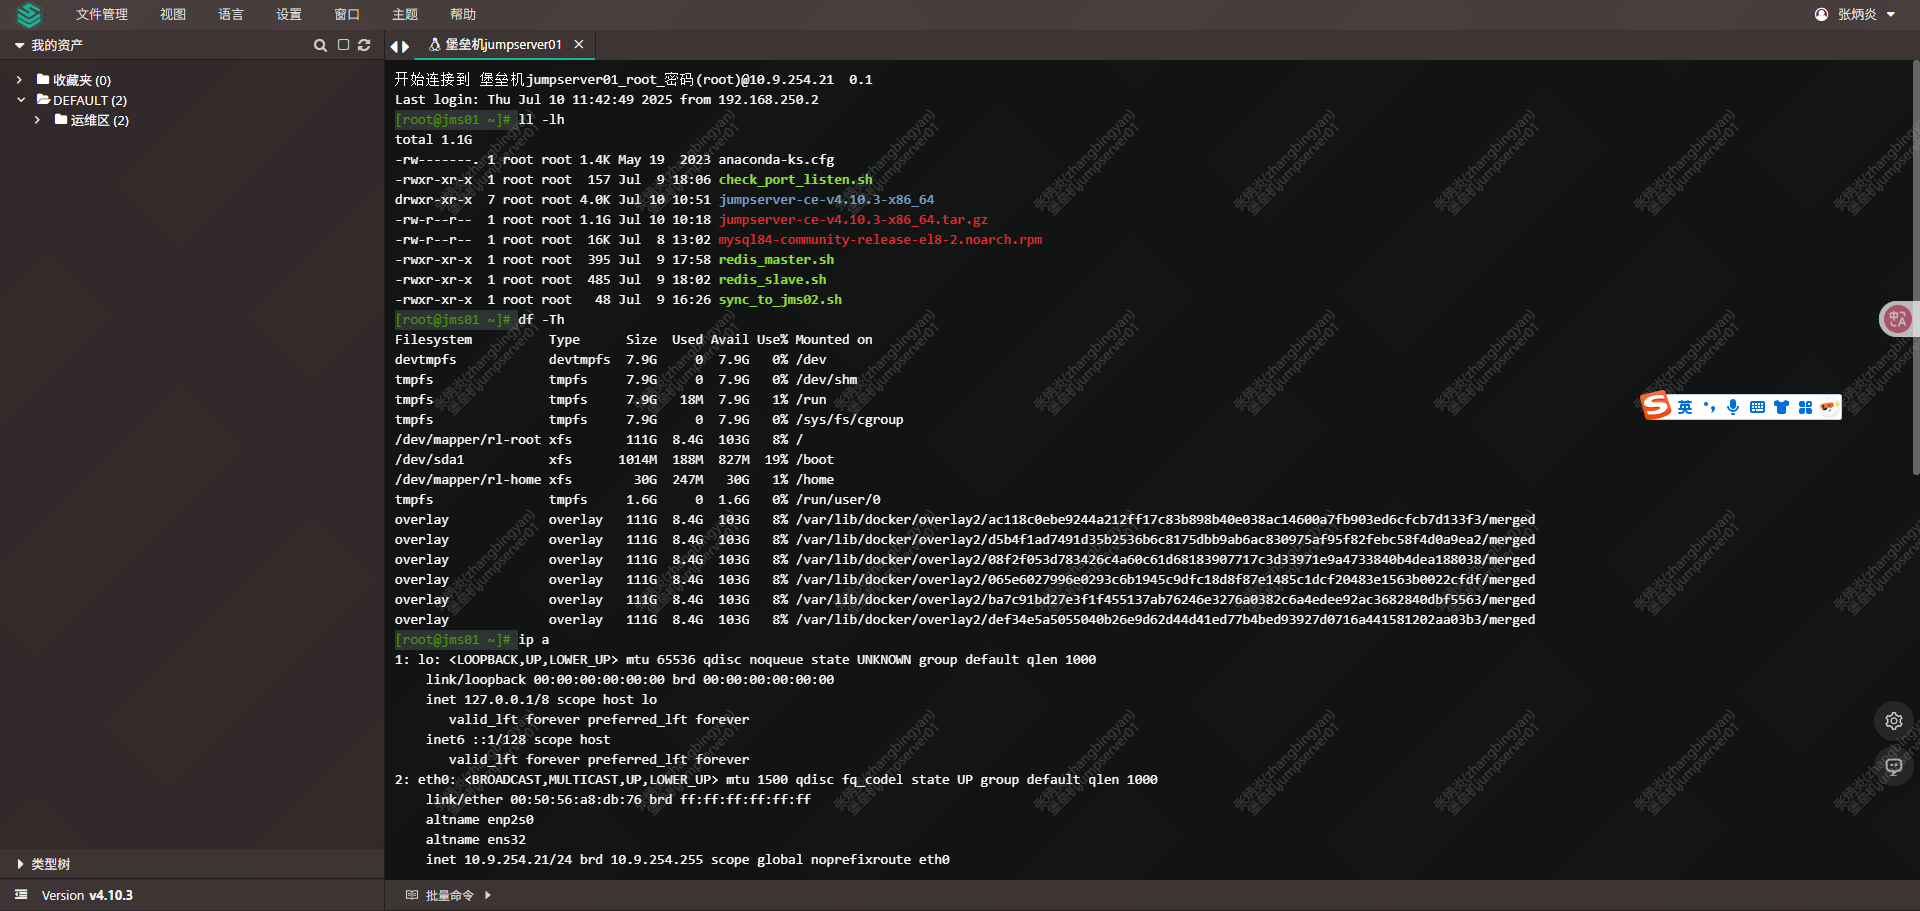
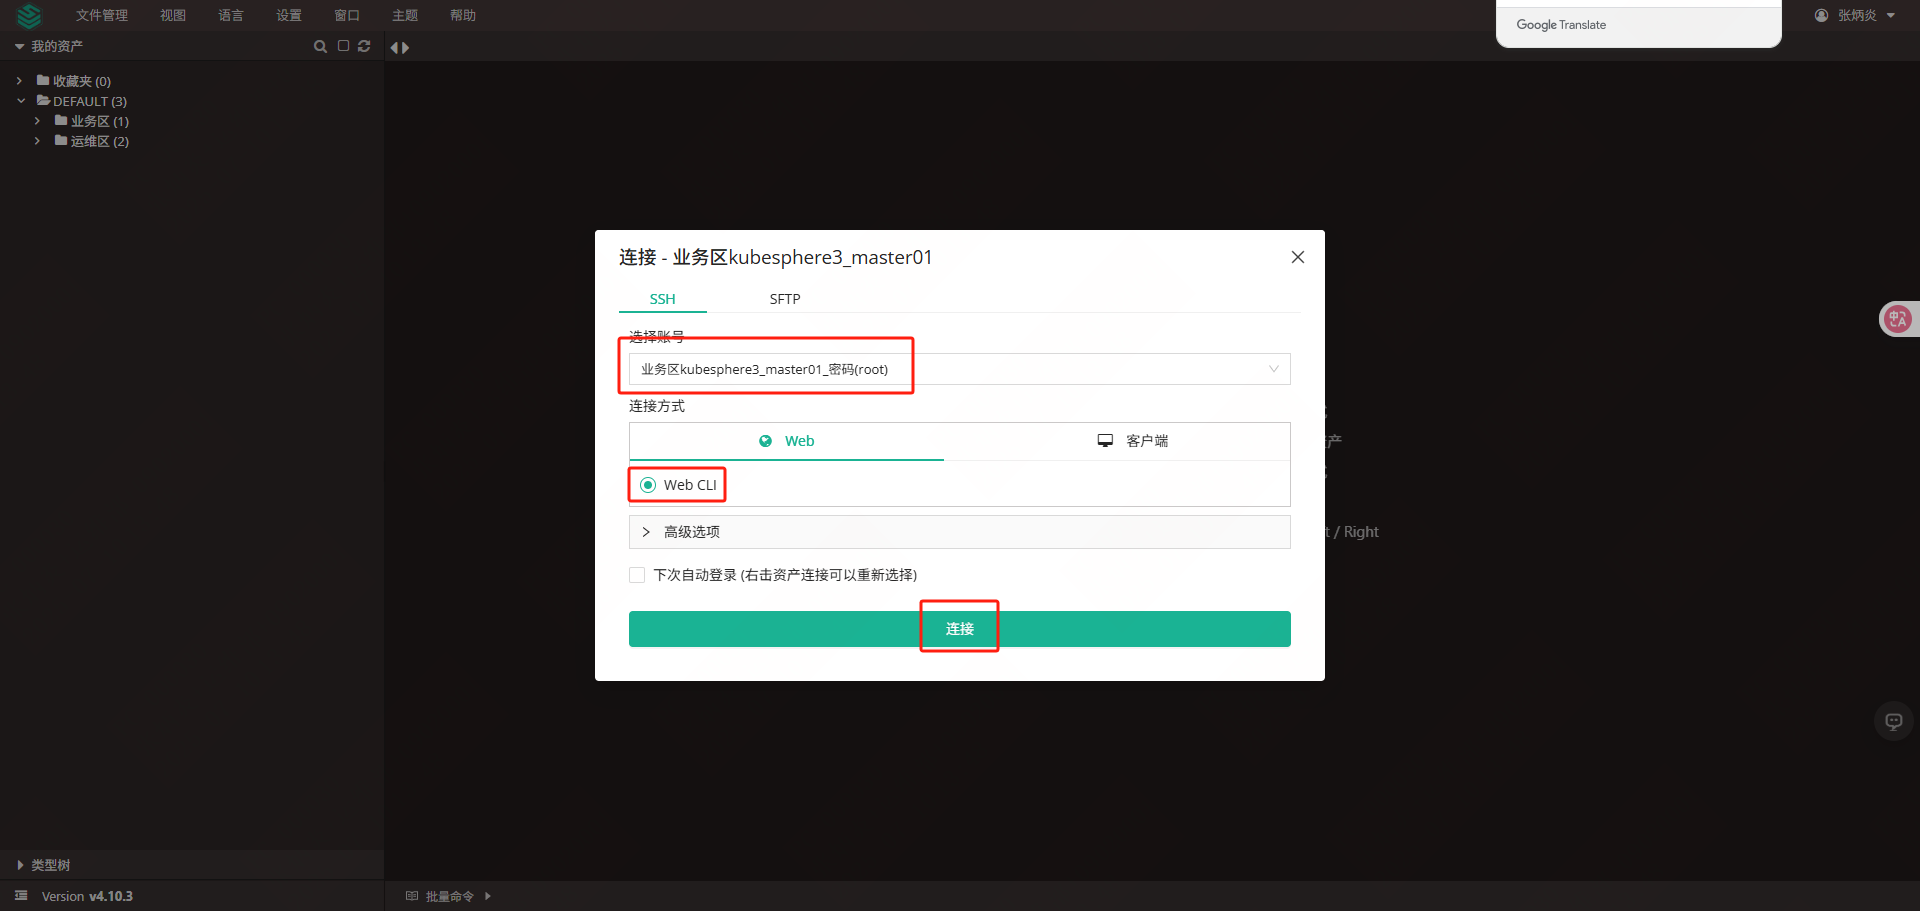
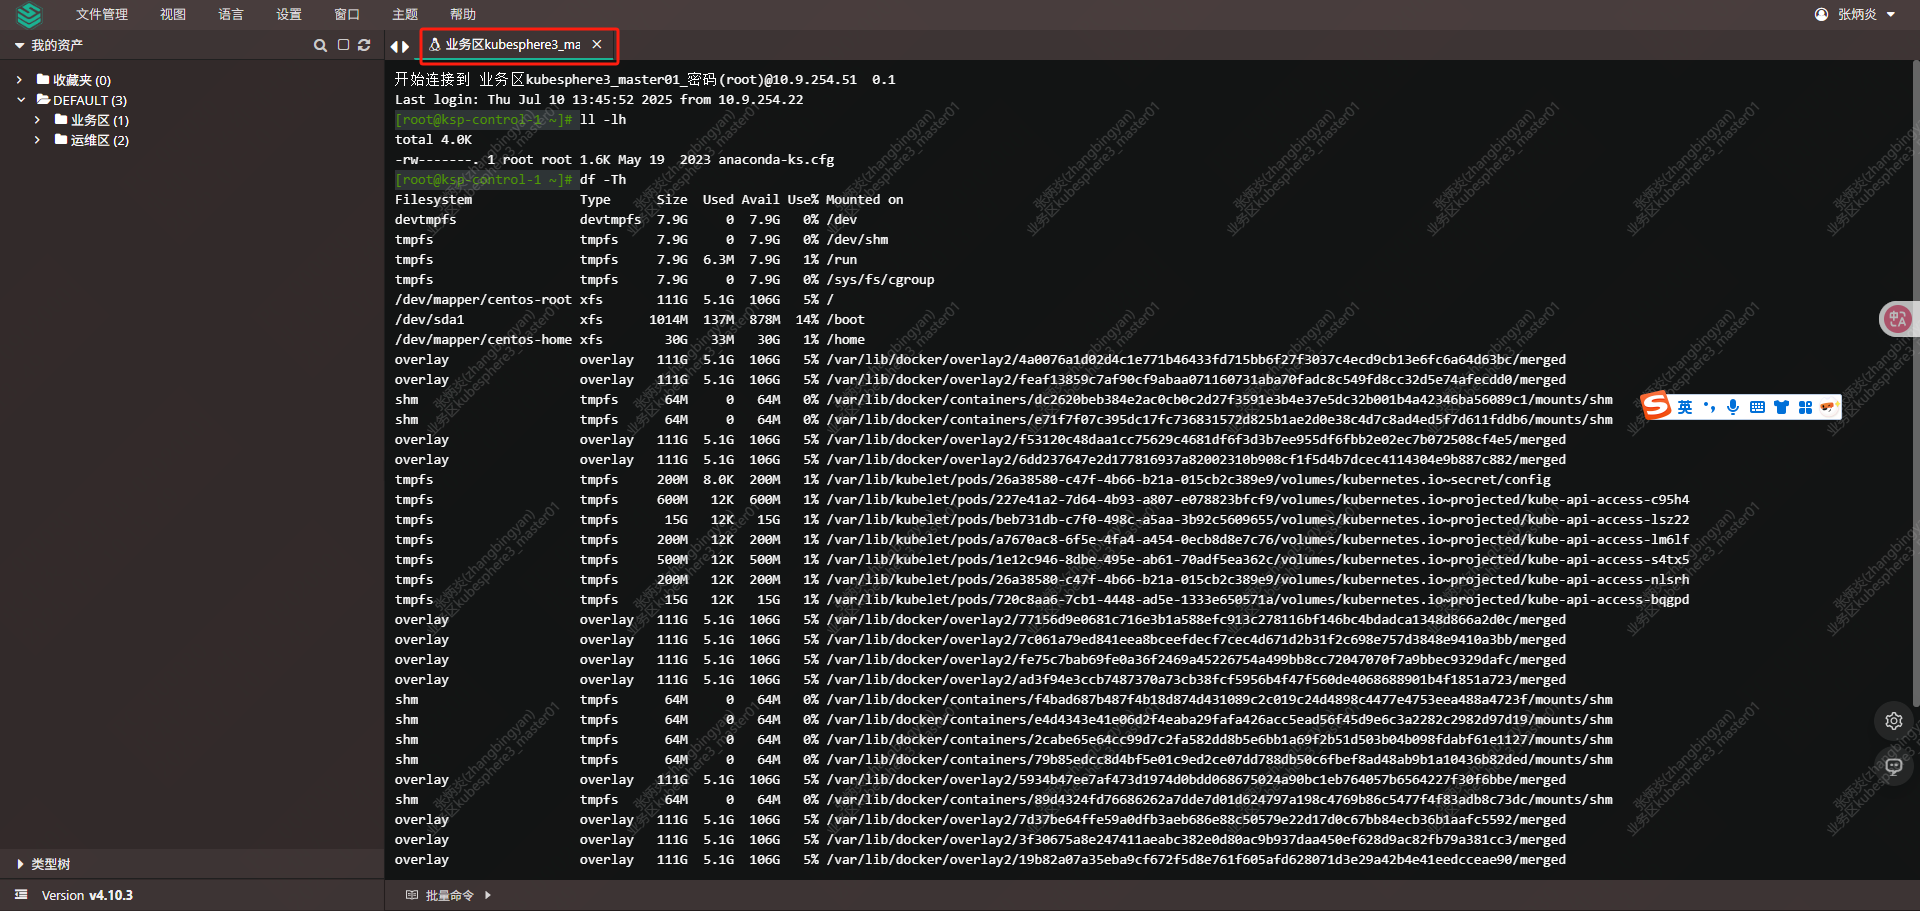
登录jms01服务器查看录像
|--------------------------------------------------------------------------------------------------------------------------------------------------------------------------------|
| root@jms01 \~# tree /data/jumpserver/core/data/media/replay/ |
| /data/jumpserver/core/data/media/replay/ └── 2025-07-10 ├── cc88a23e-dd8e-4e20-a81a-b74f9d5c0a2b.cast.gz └── eb627ced-cca0-4de6-b266-ae18402c05f9.cast.gz 1 directory, 2 files |
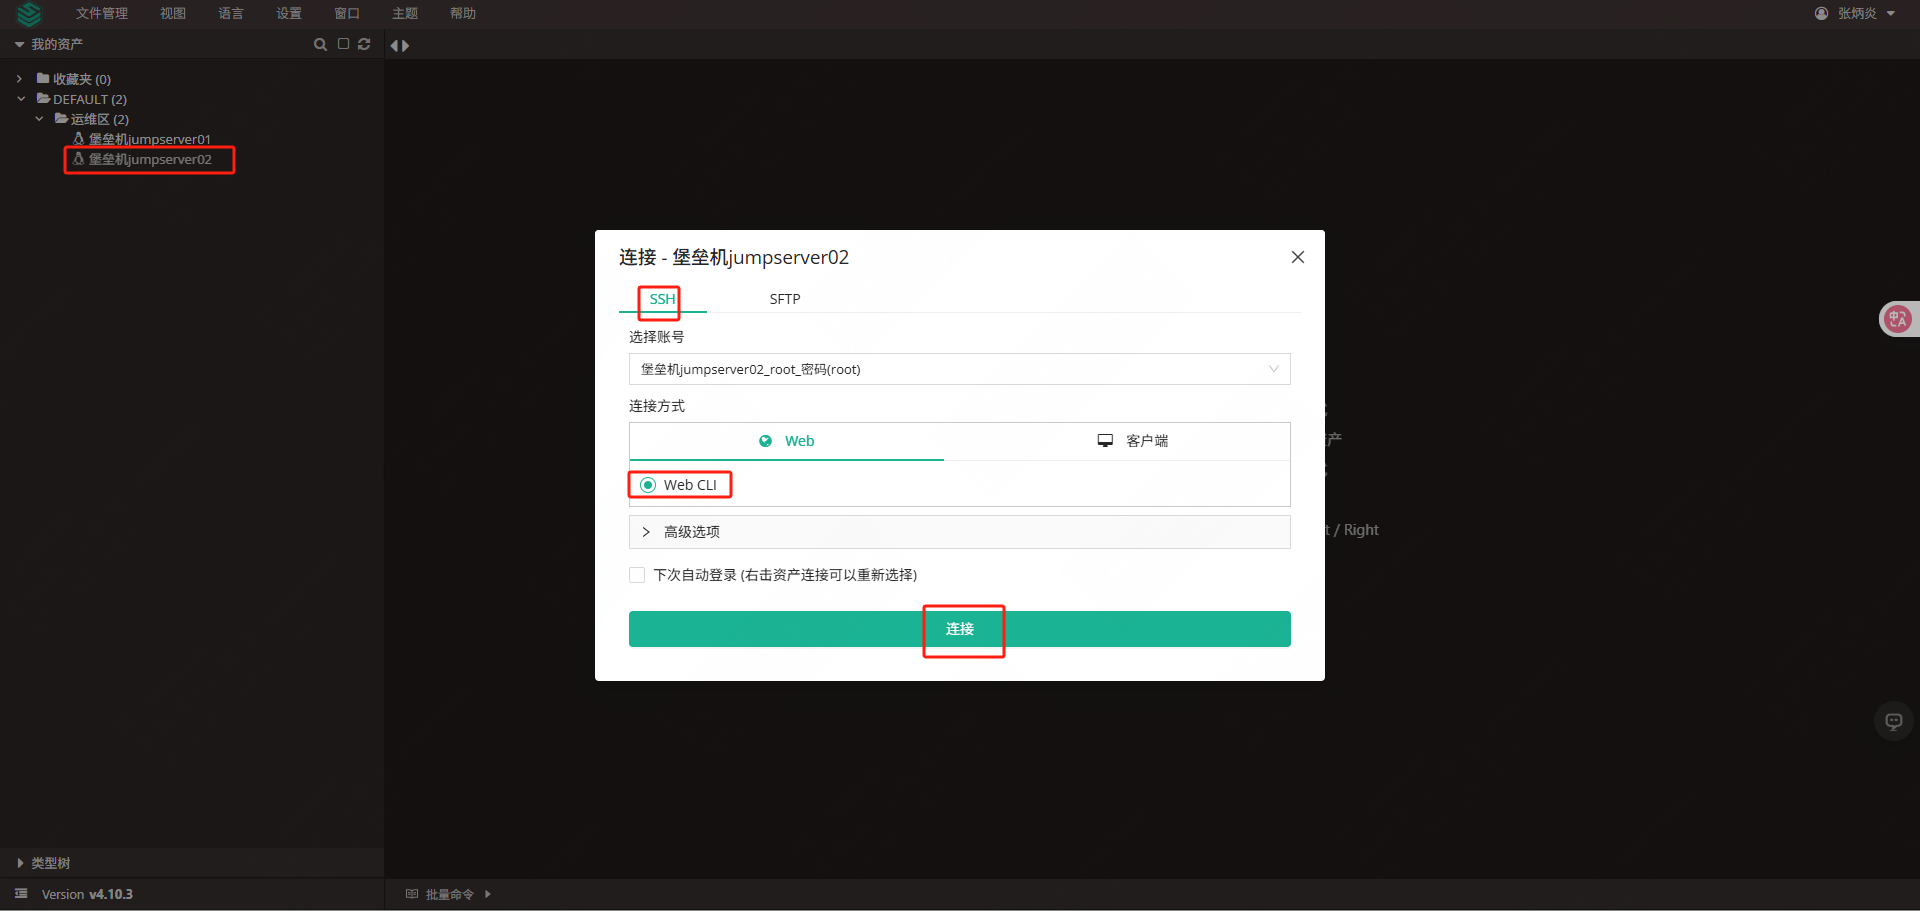
3.1.2从节点查看资源
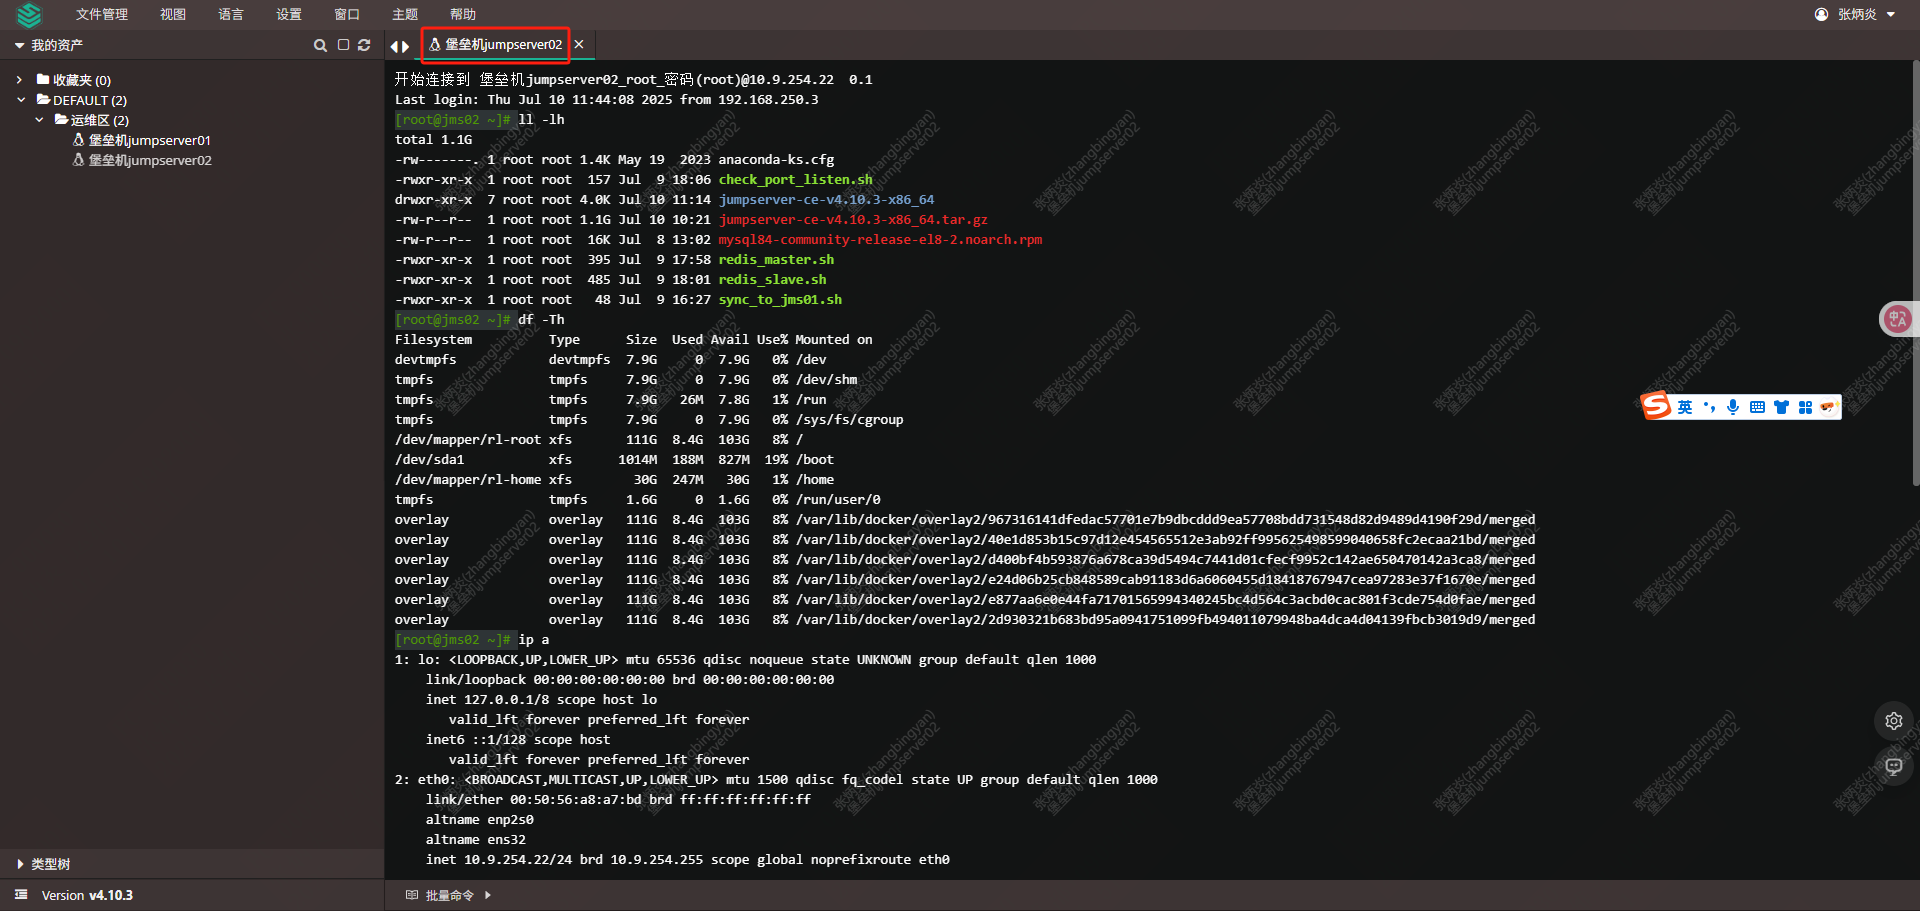
登录jms02服务查看资源和录像
|--------------------------------------------------------------------------------------------------------------------------------------------------------------------------------|
| root@jms02 \~# tree /data/jumpserver/core/data/media/replay/ |
| /data/jumpserver/core/data/media/replay/ └── 2025-07-10 ├── cc88a23e-dd8e-4e20-a81a-b74f9d5c0a2b.cast.gz └── eb627ced-cca0-4de6-b266-ae18402c05f9.cast.gz 1 directory, 2 files |
3.2关闭节点测试
3.2.1关闭jms01节点
查看jms01主机点资源
|------------------------------------------------------------------------------------------------------------------------------------------------------------------------------------------------------------------------------------------------------------------------------------------------------------------------------------------------------------------------------------------------------------------------------------------------------------------------------------------------------|
| root@jms01 \~#redis-cli -a Passw0rd -p 6379 info replication |
| Warning: Using a password with '-a' or '-u' option on the command line interface may not be safe. # Replication role:master connected_slaves:1 slave0:ip=10.9.254.22,port=6379,state=online,offset=6163806,lag=0 master_replid:e84ac637bd762a55a1e98c1b335bb24225817b91 master_replid2:0000000000000000000000000000000000000000 master_repl_offset:6164712 second_repl_offset:-1 repl_backlog_active:1 repl_backlog_size:1048576 repl_backlog_first_byte_offset:5116137 repl_backlog_histlen:1048576 |
| root@jms01 \~# ip a s | grep 10.9.254 |
| inet 10.9.254.21/24 brd 10.9.254.255 scope global noprefixroute eth0 inet 10.9.254.20/32 scope global eth0 jms01上有redis主节点,vip,关闭jms01 |
| root@jms01 \~# shutdown -h now |
查看jms02工作是否正常
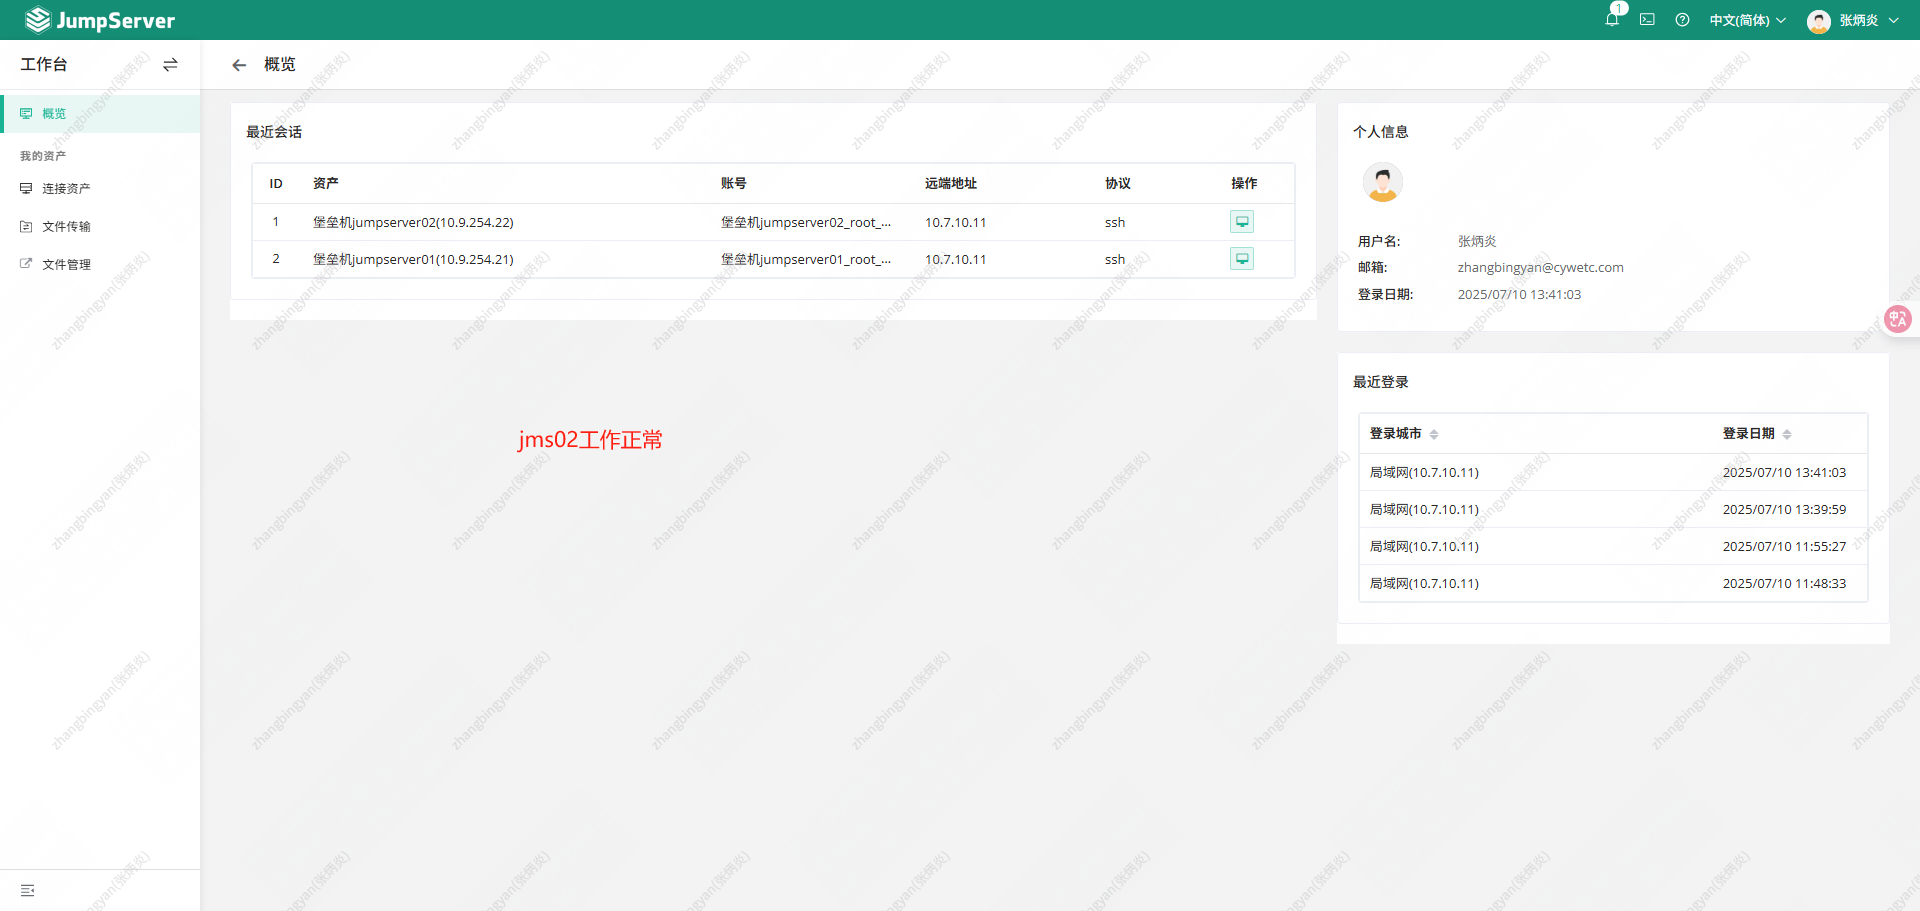
在jms02上添加主机资源并访问
授权
使用zhangbingyan用户进行登录测试
3.2.2关闭jms02节点
在关闭jms02节点之前,先重启jms01
关闭jms02
|-----------------------------------------------------------------------------------------------------------------------------------------------------------------------------------------------------------------------------------------------------------------------------------------------------------------------------------------------------------------------------------------------------------------------------------------|
| root@jms02 \~# redis-cli -a Passw0rd -p 6379 info replication |
| Warning: Using a password with '-a' or '-u' option on the command line interface may not be safe. # Replication role:master connected_slaves:0 master_replid:ef9bb1746b2bc9550ef3a09ddd808017cf333d49 master_replid2:e84ac637bd762a55a1e98c1b335bb24225817b91 master_repl_offset:7419784 second_repl_offset:6402522 repl_backlog_active:1 repl_backlog_size:1048576 repl_backlog_first_byte_offset:6371209 repl_backlog_histlen:1048576 |
| root@jms02 \~# ip a s | grep 10.9.254 |
| inet 10.9.254.22/24 brd 10.9.254.255 scope global noprefixroute eth0 |
| root@jms02 \~# shutdown -h now |
查看jms01主机信息
|------------------------------------------------------------------------------------------------------------------------------------------------------------------------------------------------------------------------------------------------------------------------------------------------------------------------------------------------------------------------------------------------------------------|
| root@jms01 \~# redis-cli -a Passw0rd -p 6379 info replication |
| Warning: Using a password with '-a' or '-u' option on the command line interface may not be safe. # Replication role:master connected_slaves:0 master_replid:dd2cec32e92d6705581e7ee58527413924580e48 master_replid2:0000000000000000000000000000000000000000 master_repl_offset:0 second_repl_offset:-1 repl_backlog_active:0 repl_backlog_size:1048576 repl_backlog_first_byte_offset:0 repl_backlog_histlen:0 |
| root@jms01 \~# ip a s | grep 10.9.254 |
| inet 10.9.254.21/24 brd 10.9.254.255 scope global noprefixroute eth0 inet 10.9.254.20/32 scope global eth0 |
| root@jms01 \~# tree /data/jumpserver/core/data/media/replay/ |
| /data/jumpserver/core/data/media/replay/ └── 2025-07-10 ├── cc88a23e-dd8e-4e20-a81a-b74f9d5c0a2b.cast.gz ├── d1ab1799-bce7-4b82-9a6a-16e3fd15f683.cast.gz └── eb627ced-cca0-4de6-b266-ae18402c05f9.cast.gz |
从jms01上查看审计录像