简介
注释:Spring是Javaweb解决方案,是java最重要框架,没有之一
主要概念:
(1)IOC(控制反转):创建bean权利交给第三方IOC容器负责
(2)DI(依赖注入):Bean与Bean之间的注入关系交给第三方
(3)AOP(面向切面编程):横向功能抽取,增强Bean
1 文件配置
1.1 web.xml
注释:在web.xml中通过上下文监听器,配置Spring的核心配置文件
XML
	<context-param>
	  <param-name>contextConfigLocation</param-name>
	  <param-value>classpath:applicationContext.xml</param-value>
	</context-param>
	<listener>
	  <listener-class>
	    org.springframework.web.context.ContextLoaderListener
	  </listener-class>
	</listener>
1.2 applicationContext.xml
maven工程在 resources下新建 applicationContext.xml
旧版WebContent工程在 WEB-INF根目录下新建 applicationContext.xml
XML
<?xml version="1.0" encoding="UTF-8"?>
<beans xmlns="http://www.springframework.org/schema/beans"
xmlns:xsi="http://www.w3.org/2001/XMLSchema-instance"
xsi:schemaLocation="http://www.springframework.org/schema/beans
http://www.springframework.org/schema/beans/spring-beans.xsd">
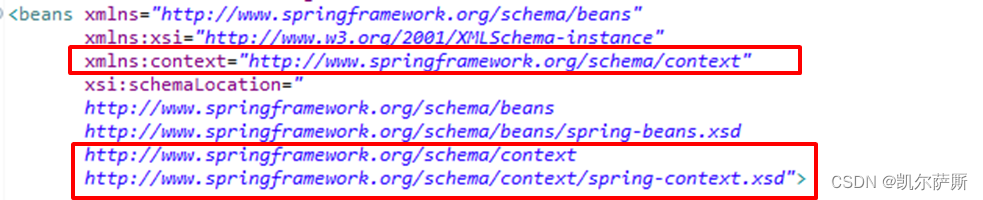
</beans>1.3 包扫描
配置文件:<context:component-scan base-package="包.包"/>
注释:将指定包下有注解@Service, @Repository 等的bean交给容器管理
XML
<?xml version="1.0" encoding="UTF-8"?>
<beans xmlns="http://www.springframework.org/schema/beans"
       ...>

   <context:component-scan base-package="com.example.service" />
</beans>
2 IOC容器
2.1 容器获取
(1) 根据系统配置文件取容器
ApplicationContextctx = new ClassPathXmlApplicationContext("applicationContext.xml");
(2) 根据本地配置文件取容器
ApplicationContextctx = new FileSystemApplicationContext("D:\\xx\applicationContext.xml");
注释:两种方式都可以逗号分隔获取多个配置文件
2.2 通过容器获取Bean
(1) 类 xx = (类) ctx.getBean("bean名称或id");
(2) 类 xx = ctx.getBean("bean名称或id", 类.class);
(3) 类 xx = ctx.getBean(类.calss); // 容器中只能有一个该类型
(4) 旧版 BeanFactory b=new XmlBeanFactory(new ClassPathResource("applicationContext.xml"));
b.getBean(...);
注释:BeanFactory默认延迟加载,获取容器时不调用bean的构造方法。
注释:ApplicationContext默认立即加载,获取容器是调用bean的构造方法。可通过<bean lazy-init="true" />开启延迟加载
2.3 关闭容器
(1) classPathXmlApplication.close() // 直接关闭容器
(2) ctx.tegisterShutdownHook() // 关闭虚拟机前关闭容器
java
public void handleRequest(HttpServletRequest req, HttpServletResponse res) throws Exception {
    String webRoot = req.getServletContext().getRealPath("/"); // 获取 Web 根目录
    FileSystemXmlApplicationContext ctx = new FileSystemXmlApplicationContext(webRoot + "WEB-INF/applicationContext.xml");
    LoginService service = (LoginService)ctx.getBean("loginService");
    ctx.close();
}
3 Bean
3.1 bean基本属性
(1) id: // 唯一标识,依赖注入的ref和getBean都可指定名称获取。
(2) class: // bean的全类名或接口名
(3) name: // 别名逗号分号空格 可分割多个,依赖注入的ref和getBean都可指定名称获取。
XML
<bean id="bean2"
    name="bean_name2 bean_name3"
    class="com.test.dao.Dao01BeanConfigTest" />
(4) scope:scope="prototype多例,singleton默认单例"
注释:适合单例的对象controller,service,dao。多例对象entity
(5) autowire:autowire="byType" //按类型自动装配, byName按名称
(6) lazy-init:lazy-init="true" //开启延迟加载,默认立即加载
其它:init-method,destroy-method, factroy-method, factory-bean
3.2 bean的实例化
(1) 构造器实例化
applicationContext:配置bean
XML
<bean id="bean1" class="com.test.service.Service01BeanConfigTest" />对象类:公开无参构造器
java
public class Service01BeanConfigTest {
	public void test() {
		System.out.println("service...");
	}
}
(2) 静态工厂(旧)
applicationContext:<bean id="xx" class="xx" factory-method="工厂类静态方法" />
XML
	   <bean id="bean3"
	   		class="com.test.service.factory.ServiceBeanFactory"
	   		factory-method="createServiceBean" />
工厂类:公开静态方法,返回对象实例
java
public class ServiceBeanFactory {
	public static Service01BeanConfigTest createServiceBean() {
		return new Service01BeanConfigTest();
	}
}
(3) 实例工厂
applicationContext:<bean id="xx" class="实例工厂全类名" />
<bean id="xxx" factory-method="工厂类方法名" factory-bean="工厂类beanid" />
XML
  	   <bean id="bean4" class="com.test.dao.factory.DaoBeanFactory" />
  	   <bean id="bean5" factory-method="createDaoBean" factory-bean="bean4" />
工厂类:公开方法,返回对象实例
java
public class DaoBeanFactory {
	public Dao01BeanConfigTest createDaoBean() {
		return new Dao01BeanConfigTest();
	}
}
(4) 泛型工厂类
applicationContext:<bean id="xx" class="泛型工厂全类名" />
XML
<bean id="bean6" class="com.test.model.factory.ModelBeanFactory" />工厂类:实现FactoryBean<类>接口
java
public class ModelBeanFactory implements FactoryBean<Model1>{
	@Override
	public Model1 getObject() throws Exception {
		return new Model1();
	}
	@Override
	public Class<?> getObjectType() {
		return Model1.class;
	}
	@Override
	public boolean isSingleton() {
		// true单例,false多例
		return false;
	}
}
3.3 bean的生命周期
(1) 方式1(配置)
bean类:创建公开无参,init, destroy方法
XML
<bean id="bean7"
    class="com.test.model.Model1"
    init-method="init"
    destroy-method="destroy" />
applicationContext:<bean id="xx" class="xx" init-method="init" destroy-method="destroy" />
注释:bean初始化执行init方法,销毁执行destroy方法
(2) 方式2(接口)
bean类:实现InitializingBean, DisposableBean接口
bean类:实现destroy,afterPropertiesSet方法(先执行set方法再执行初期化)
注释:无需配置文件
java
public class Model2 implements InitializingBean, DisposableBean{
	@Override
	public void destroy() throws Exception {
		System.out.println("model2 销毁了");
	}
	@Override
	public void afterPropertiesSet() throws Exception {
		System.out.println("model2 初始化了");
	}
}
4 DI依赖注入
4.1 字面量注入
(1) set函数注入
applicationContext:<property name="类属性名" value="值" />
XML
  	   <bean id="bean13" class="com.test.model.Model03BeanDiSetTest">
  	   		<property name="name" value="zhangsan"/>
  	   </bean>
Bean对象:定义私有变量,公开无返回值set函数
java
public class Model03BeanDiSetTest {
	private String name;
	public void setName(String name) {
		this.name=name;
	}
	public void test() {
		System.out.println("名称:"+name);
	}
}
(2) 构造器注入
applicationContext按名称:<constructor-arg name="构造器参数名" value="值"/>
注释:多个参数可定义多个constructor-arg ,按名称匹配与构造器参数顺序无关
XML
   	   <bean id="bean14" class="com.test.model.Model04BeanDiConstructorTest">
  	   		<constructor-arg name="name" value="zs"/>
            <constructor-arg name="age"  value="18"/>
  	   </bean>
applicationContext按类型:<constructor-arg type="java.long.String" value="值"/>
XML
   	   <bean id="bean15" class="com.test.model.Model04BeanDiConstructorTest">
  	   		<constructor-arg type="String" value="zs"/>
  	   		<constructor-arg type="int"    value="18"/>
  	   </bean>
applicationContext按下标:<constructor-arg index="0" value="值"/>
XML
   	   <bean id="bean15" class="com.test.model.Model04BeanDiConstructorTest">
  	   		<constructor-arg index="0" value="zs"/>
  	   		<constructor-arg index="1" value="18"/>
  	   </bean>
Bean对象:定义公开构造器
java
public class Model04BeanDiConstructorTest {
	private String name;
	private int age;
	public Model04BeanDiConstructorTest(String name, int age) {
		this.name=name;
		this.age=age;
	}
}
4.2 对象注入
注释:set为可选注入,配置文件不指定property,属性可以是空对象。构造器注入必须指定对象。
(1) set函数注入
applicationContext:<property name="类属性名" ref="注入bean的id" />
注释:多个参数可定义多个property
XML
  	   <bean id="bean9" class="com.test.dao.Dao02BeanDiTest"/>
  	   <bean id="bean10" class="com.test.service.Service02BeanDiTest">
  	   		<property name="dao" ref="bean9"/>
            <!-- 可以指定多个<property name="dao" ref="bean9"/>-->
  	   </bean>
Bean对象:定义私有变量,公开无返回值set函数
java
public class Service02BeanDiTest {

	private Dao02BeanDiTest dao;
	public void setDao(Dao02BeanDiTest dao) {
		this.dao = dao;
	}

	public void test() {
		System.out.println("service 执行了");
		dao.test();
	}
}
(2) 构造器注入
applicationContext:<constructor-arg name="构造器参数名" ref="注入bean的id"/>
注释:多个参数可定义多个constructor-arg ,按名称匹配与构造器参数顺序无关
XML
	   <bean id="bean11" class="com.test.dao.Dao03BeanDiConstructorTest"/>
  	   <bean id="bean12" class="com.test.service.Service03BeanDiConstructorTest">
  	   		<constructor-arg name="dao" ref="bean11"/>
  	   </bean>
Bean对象:定义公开构造器
java
public class Service03BeanDiConstructorTest {

	private Dao03BeanDiConstructorTest dao;
	public Service03BeanDiConstructorTest(Dao03BeanDiConstructorTest dao) {
		this.dao = dao;
	}

	public void test() {
		System.out.println("service03 执行了");
		dao.test();
	}
}
4.3 集合注入
(1) 数组
applicationContext:<property name="类属性名"> <array>...
XML
   	   <bean id="bean16" class="com.test.model.Model05BeanDiArrayTest">
  	   		<property name="test1">
  	   			<array>
  	   				<value>zhangsan</value>
  	   				<value>lisi</value>
  	   			</array>
  	   		</property>
  	   </bean>
java
public class Model05BeanDiArrayTest {

	private String[] test1;
	public void setTest1(String[] test1) {
		this.test1 = test1;
	}

	public void test() {
		for (String str : test1) {
			System.out.println("集合1:"+str);
		}

	}
}
(2) List
applicationContext:<property name="类属性名"> <list>...
XML
  	   		<property name="test2">
  	   			<list>
  	   				<value>zhangsan</value>
  	   				<value>zhangsan</value>
  	   			</list>
  	   		</property>
java
	private List<String> test2;
	public void setTest2(List<String> test2) {
		this.test2 = test2;
	}
(3) Set
注释:集合会对内容去重
applicationContext:<property name="类属性名"> <set>...
XML
  	   		<property name="test3">
  	   			<set>
  	   				<value>zhangsan</value>
  	   				<value>zhangsan</value>
  	   			</set>
  	   		</property>
java
	private Set<String> test3;
	public void setTest3(Set<String> test3) {
		this.test3 = test3;
	}
(4) Map
applicationContext:<property name="类属性名"> <map>...
XML
  	   		<property name="test4">
  	   			<map>
  	   				<entry key="key1" value="value1" />
  	   				<entry key="key2" value="value2" />
  	   			</map>
  	   		</property>
java
	private Map<String, String> test4;
	public void setTest4(Map<String, String> test4) {
		this.test4 = test4;
	}
(5) Properties
applicationContext:<property name="类属性名"> <props>...
XML
  	   		<property name="test5">
  	   			<props>
  	   				<prop key="prop1">val1</prop>
  	   				<prop key="prop2">val2</prop>
  	   			</props>
  	   		</property>
java
	private Properties test5;
	public void setTest5(Properties test5) {
		this.test5 = test5;
	}
5 自动装配
注释:不能自动装配基本类型 ,自动装配优先级低于,构造器与setter注入。
5.1 按类型
(1) Bean:定义私有引用变量,定义set方法
(2) 配置:<bean id="xx" class="xx" autowire="byType"></bean>
注释:需在配置文件中有对应类型的Bean
java
public class Service04BeanAutowire {

	private Dao04BeanAutowire dao;
	public void setDao(Dao04BeanAutowire dao) {
		this.dao = dao;
	}

	public void test() {
		System.out.println("service04 执行了");
		dao.test();
	}
}
XML
   	   <bean id="bean17" class="com.test.dao.Dao04BeanAutowire"></bean>
   	   <bean id="bean18" class="com.test.service.Service04BeanAutowire" autowire="byType"></bean>
5.2 按名称
(1) Bean:定义私有引用变量,定义set方法
(2) 配置:<bean id="xx" class="xx" autowire="byName"></bean>
注释:同类型有多个bean时,类变量名要与配置的注入bean的唯一id相同
java
public class Service05BeanAutowireName {
	private Dao04BeanAutowire bean19;
	public void setBean19(Dao04BeanAutowire bean19) {
		this.bean19 = bean19;
	}

	public void test() {
		System.out.println("service05 执行了");
		bean19.test();
	}
}
XML
   	   <bean id="bean17" class="com.test.dao.Dao04BeanAutowire"></bean>
   	   <bean id="bean19" class="com.test.dao.Dao04BeanAutowire"></bean>
	   <bean id="bean20" class="com.test.service.Service05BeanAutowireName" autowire="byName"></bean>
6 第三方Bean
<bean id="xxx" class="第三方包.类">
<property name="三方bean属性" ref="引用类型bean注入"/>
<property name="三方bean属性" value="基本类型注入" />
</bean>
XML
   <bean id="dataSource" class="com.alibaba.druid.pool.DruidDataSource">
       <property name="driverClassName" value="${jdbc.driver}"/>
       <property name="url" value="${jdbc.url}"/>
       <property name="username" value="${jdbc.username}"/>
       <property name="password" value="${jdbc.password}"/>
   </bean>
7 AOP面向切面编程
注释:不动原代码,添加功能。目标方法(连接点),配置方法(切入点)。
7.1 配置命名空间
XML
<beans xmlns="...
	   xmlns:aop="http://www.springframework.org/schema/aop"
	   xsi:schemaLocation="
	   ...
   	   http://www.springframework.org/schema/aop
   	   http://www.springframework.org/schema/aop/spring-aop-4.3.xsd
   	   ">
7.2 详细配置
略
8 数据源与事务控制
8.1 数据源配置
(1) 新建 jdbc.properties

注释:jdbc还可以有其他配置,maxTotal=30,lnaxIdle=10,initialSize=5等等。。
(2) 加载properties
applicationContext:加入引文件需要的配置
XML
<?xml version="1.0" encoding="UTF-8"?>
<beans xmlns="http://www.springframework.org/schema/beans"
	   xmlns:xsi="http://www.w3.org/2001/XMLSchema-instance"
	   xmlns:context="http://www.springframework.org/schema/context"
	   xsi:schemaLocation="
	   http://www.springframework.org/schema/beans
	   http://www.springframework.org/schema/beans/spring-beans.xsd
       http://www.springframework.org/schema/context
   	   http://www.springframework.org/schema/context/spring-context.xsd">
加载properties:<context:property-placeholder location="classpath:jdbc.properties"/>
可选属性:system-properties-mode="never" 不加载系统username等属性
批量加载:方式1:location="x1.properties,x2.properties"
批量加载:方式2:location="classpath:*.properties" // 只能加载当前工程文件
批量加载:方式2:location="classpath*:*.properties" // 可以加载jar包内部文件
XML
<context:property-placeholder location="classpath:jdbc.properties"/>加载属性使用:xx="${jdbc.driver}" //读取配置文件内容
XML
   <bean id="dataSource" class="com.alibaba.druid.pool.DruidDataSource">
       <property name="driverClassName" value="${jdbc.driver}"/>
       <property name="url" value="${jdbc.url}"/>
       <property name="username" value="${jdbc.username}"/>
       <property name="password" value="${jdbc.password}"/>
   </bean>
8.2 管理数据源
注释:用数据库需引jar包 mysql-connector-j-8.0.32.jar
(1) dbcp:driverClassName, url, username, password
(2) druid:driverClassName, url, username, password// 阿里提供,集优点于一身
(3) c3p0:driverClass, jdbcUrl, user, password// 速度稍慢相对稳定
注释:BoneCP (比C3P0/DBCP连接池速度快25倍?)
XML
		<bean id="dataSource1" class="org.apache.commons.dbcp2.BasicDataSource">
			<property name="driverClassName" value="${jdbc.driver}" />
			<property name="url" value="${jdbc.url}"/>
			<property name="username" value="${jdbc.username}"/>
			<property name="password" value="${jdbc.password}"/>
		</bean>
		<bean id="dataSource2" class="com.alibaba.druid.pool.DruidDataSource">
			<property name="driverClassName" value="${jdbc.driver}" />
			<property name="url" value="${jdbc.url}"/>
			<property name="username" value="${jdbc.username}"/>
			<property name="password" value="${jdbc.password}"/>
		</bean>
		<bean id="dataSource3" class="com.mchange.v2.c3p0.ComboPooledDataSource">
			<property name="driverClass" value="${jdbc.driver}" />
			<property name="jdbcUrl" value="${jdbc.url}"/>
			<property name="user" value="${jdbc.username}"/>
			<property name="password" value="${jdbc.password}"/>
		</bean>
8.3 事务控制
需要:spring-tx.jar(PlatformTransactionManager接口)事务管理包,spring-jdbc.jar(DataSourceTransactionManager实现类),
(1) 配置文件事务
applicationContext.xml配置
<bean transactionManager://事务管理器
<tx:annotation-driven: 注册事务驱动,开启事务注解
XML
<beans xmlns="...
	   xmlns:tx="http://www.springframework.org/schema/tx"
	   xsi:schemaLocation="
	   ...
   	   http://www.springframework.org/schema/tx
   	   http://www.springframework.org/schema/tx/spring-tx-4.3.xsd
   	   ">
		<bean id="dataSource" class="org.apache.commons.dbcp2.BasicDataSource">
			<property name="driverClassName" value="${jdbc.driver}" />
			<property name="url" value="${jdbc.url}"/>
			<property name="username" value="${jdbc.username}"/>
			<property name="password" value="${jdbc.password}"/>
		</bean>
	    <bean id="transactionManager" class="org.springframework.jdbc.datasource.DataSourceTransactionManager">
			<property name="dataSource" ref="dataSource"/>
		</bean>

		<tx:annotation-driven transaction-manager="transactionManager"></tx:annotation-driven>
9 整合框架
(1) mybatis-config.xml:
XML
<configuration>
	<typeAliases>
		<package name="com.ssm.pojo"/>  设置对象别名
	</typeALiases>
</configuration>
(2) applicationContext.xml
XML
<bean id="sqlSessionFactory" class="org.mybatis.spring.SqlSessionFactoryBean">
//配置mybatais工程
	<property name="dataSource" ref="dataSource" />  数据源
	<property name="configLocation" value="classpath:mybatis-config.xml"/>  核心文件
</bean>

<bean class="org.mybatis.spring.mapper.MapperScannerConfigurer".
	<property name="basePackage" ref="com.ssm.dao" />  // 配置mapper扫描
</bean>
<context:component-scan base-package="com.ssm.service" /> service扫描
(3) Service实现:
java
@Service
@Transactional  //方法纳入spring事务管理
public class XxService {
    @AutoWired
    private UserDao userDao;
}