参考资料:
参考视频: https://ke.gupaoedu.cn/play/288/5/37603?phaseId=6
准备材料:
1. 下载安装vagrant
01 访问Vagrant官网
02 点击Download
Windows,MacOS,Linux等
03 选择对应的版本
04 傻瓜式安装
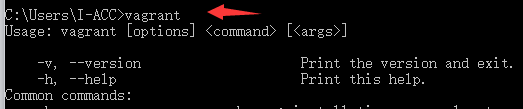
05 命令行输入vagrant,测试是否安装成功
2. 下载安装virtual box
01 访问VirtualBox官网
02 选择左侧的"Downloads"
03 选择对应的操作系统版本
04 傻瓜式安装
05 win10中若出现安装virtualbox快完成时立即回滚,并提示安装出现严重错误
(1)打开服务
(2)找到Device Install Service和Device Setup Manager,然后启动
(3)再次尝试安装
3. 准备镜像
然后最好准备CentOS-7的镜像,virtualbox会自动从网上下载,但是速度很慢,所以建议提前准备。
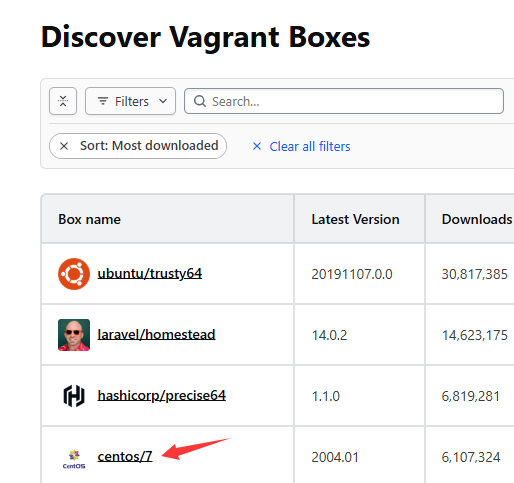
首先需要登录网站: https://vagrantcloud.com/search,搜索**CentOS7进行下载**

安装虚拟镜像:
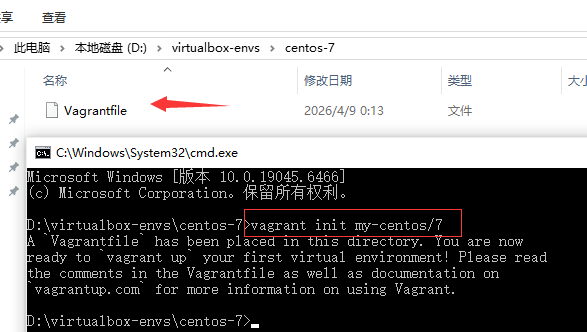
01 创建文件夹,并进入其中目录全路径不要有中文字符

02 在此目录下打开cmd,运行vagrant init my-centos/7
my-centos/7为镜像名可自定义,此时会在当前目录下生成Vagrantfile,同时指定使用的镜像为centos/7
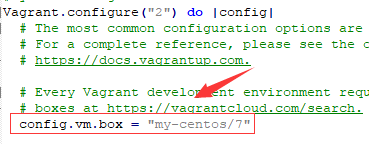
然后用notepad++打开,修改相应的关键配置
ruby
# -*- mode: ruby -*-
# vi: set ft=ruby :
# All Vagrant configuration is done below. The "2" in Vagrant.configure
# configures the configuration version (we support older styles for
# backwards compatibility). Please don't change it unless you know what
# you're doing.
Vagrant.configure("2") do |config|
# The most common configuration options are documented and commented below.
# For a complete reference, please see the online documentation at
# https://docs.vagrantup.com.
# Every Vagrant development environment requires a box. You can search for
# boxes at https://vagrantcloud.com/search.
config.vm.box = "my-centos/7"
# Disable automatic box update checking. If you disable this, then
# boxes will only be checked for updates when the user runs
# `vagrant box outdated`. This is not recommended.
# config.vm.box_check_update = false
# Create a forwarded port mapping which allows access to a specific port
# within the machine from a port on the host machine. In the example below,
# accessing "localhost:8080" will access port 80 on the guest machine.
# NOTE: This will enable public access to the opened port
# config.vm.network "forwarded_port", guest: 80, host: 8080
# Create a forwarded port mapping which allows access to a specific port
# within the machine from a port on the host machine and only allow access
# via 127.0.0.1 to disable public access
# config.vm.network "forwarded_port", guest: 80, host: 8080, host_ip: "127.0.0.1"
# Create a private network, which allows host-only access to the machine
# using a specific IP.
# config.vm.network "private_network", ip: "192.168.33.10"
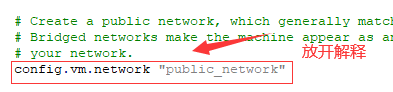
# Create a public network, which generally matched to bridged network.
# Bridged networks make the machine appear as another physical device on
# your network.
config.vm.network "public_network"
# Share an additional folder to the guest VM. The first argument is
# the path on the host to the actual folder. The second argument is
# the path on the guest to mount the folder. And the optional third
# argument is a set of non-required options.
# config.vm.synced_folder "../data", "/vagrant_data"
# Provider-specific configuration so you can fine-tune various
# backing providers for Vagrant. These expose provider-specific options.
# Example for VirtualBox:
#
# config.vm.provider "virtualbox" do |vb|
# # Display the VirtualBox GUI when booting the machine
# vb.gui = true
#
# # Customize the amount of memory on the VM:
# vb.memory = "1024"
# end
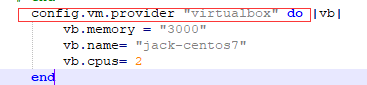
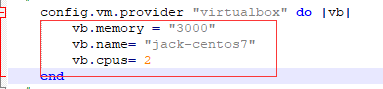
config.vm.provider "virtualbox" do |vb|
vb.memory = "3000"
vb.name= "jack-centos7"
vb.cpus= 2
end
#
# View the documentation for the provider you are using for more
# information on available options.
# Enable provisioning with a shell script. Additional provisioners such as
# Puppet, Chef, Ansible, Salt, and Docker are also available. Please see the
# documentation for more information about their specific syntax and use.
# config.vm.provision "shell", inline: <<-SHELL
# apt-get update
# apt-get install -y apache2
# SHELL
end解释: 主要是修改下面的配置
1. 确认镜像名称
2. 设置网络模式(和主机共享网络)
3. 设置虚拟机的相关信息
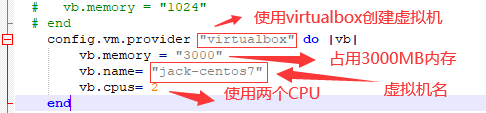
3.1 provider 指定虚拟化工具
Vagrant 可以用 VMware 、virtualbox来创建虚拟机
3.2 内存、CPU、虚拟机名等
03 配置好文件后,将镜像名称和下载的镜像映射关联起来
执行以下命令将配置文件中的镜像名和具体位置关联在一起
vbnet
vagrant box add my-centos/7 D:\software\virtualbox.box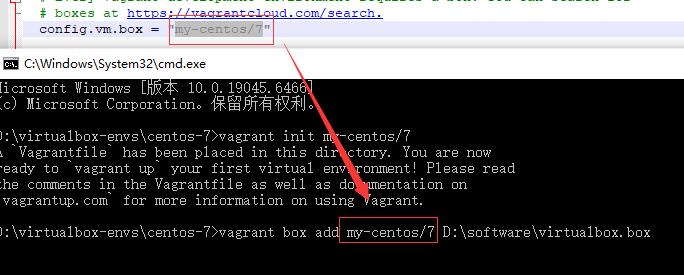

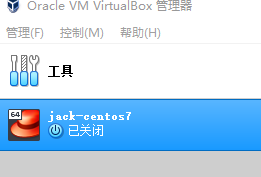
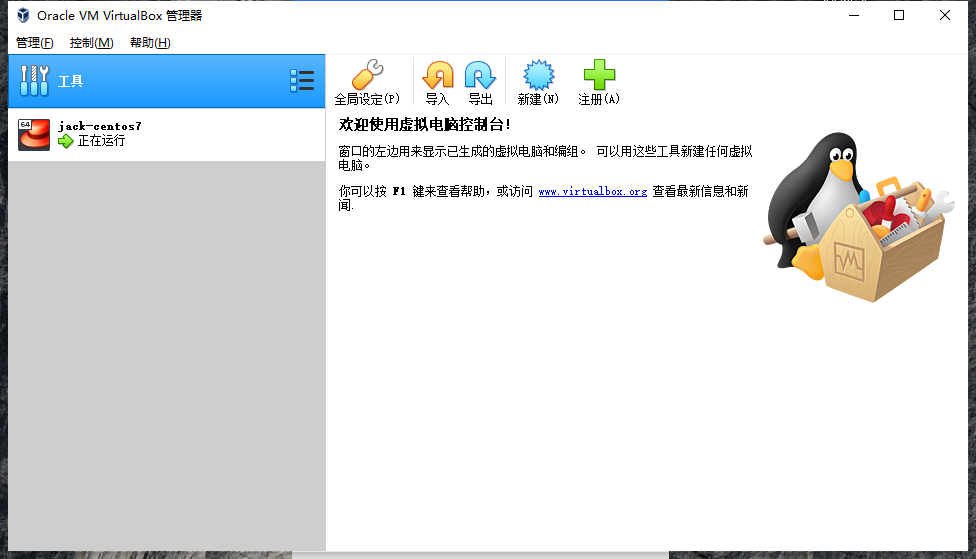
这个时候,打开Oracle VM VirtualBox,可以看到虚拟机
04 然后执行命令安装启动虚拟机
一些vagrant常用的命令
bash
vagrant box list   查看本地的box
vagrant up         启动Vagrantfile文件对应的虚拟机
vagrant halt       关闭虚拟机
vagrant ssh        进入创建的虚拟机中
vagrant status     查看虚拟机的状态
vagrant destroy    删除虚拟机
查看vagrant所有的box

启动虚拟机

这里可能报错:
Call to WHvSetupPartition failed: ERROR_SUCCESS (Last=0xc000000d/87) (VERR_NEM_VM_CREATE_FAILED).
应该是docker或者虚拟机的冲突,执行下面命令,并重启
bash
bcdedit /set hypervisorlaunchtype off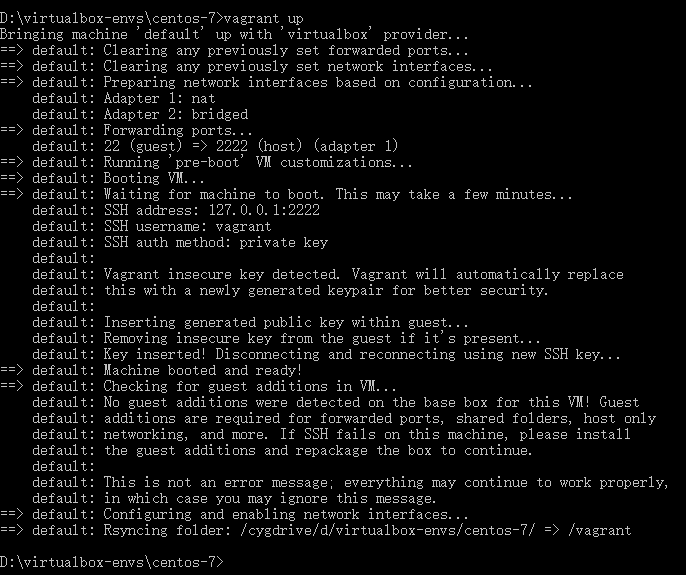
创建账号,修改密码,连接:
在文件夹下,cmd查看配置
bash
vagrant ssh-config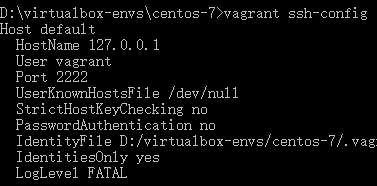
关注:Hostname Port IdentityFile
IP:127.0.0.1
port:2222
用户名:vagrant
密码:vagrant
文件:Identityfile指向的文件private-key
在文件夹下,cmd进入系统
bash
vagrant ssh切换到根目录
bash
sudo -i修改PasswordAuthentication yes
bash
vi /etc/ssh/sshd_config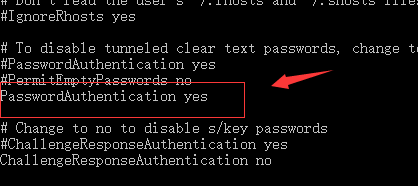
esc并且保存退出
passwd修改密码,比如abc123
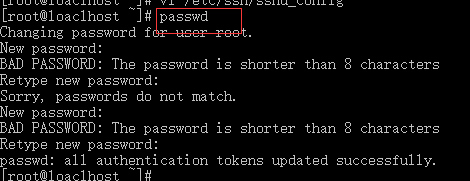
重启网卡
bash
systemctl restart sshd
然后就可以用finalShell进行连接
查看IP地址
bash
ip a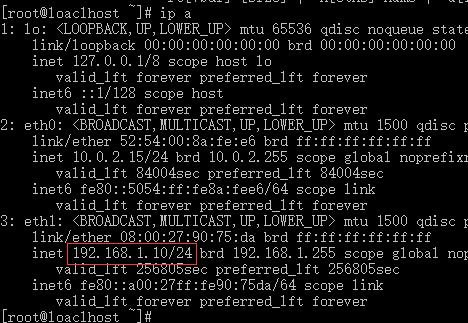
默认端口:22
root的密码前面也改过
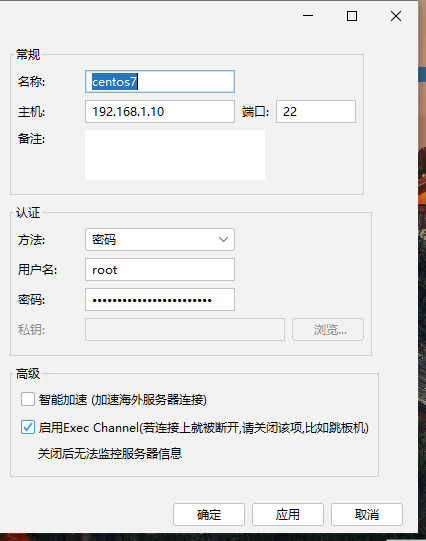
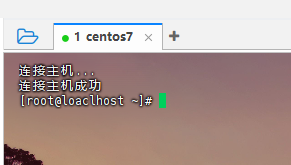
连接成功