【声明】本博客所有内容均为个人业余时间创作,所述技术案例均来自公开开源项目(如Github,Apache基金会),不涉及任何企业机密或未公开技术,如有侵权请联系删除
背景
上篇 blog
【Agent】【OpenCode】本地代理增强版分析(setTimeout)
分析了如果请求没有得到响应,或者对于高并发场景,会有风险,提到从可靠性角度,本地代理可以添加 proxyReq.setTimeout,防止接收处理函数 proxyReq 收不到目标处理器的响应,导致内存泄漏,然后详细分析了 proxyReq.setTimeout 的函数原型,其中 setTimeout() 设置的是整个请求生命周期的超时,Node.js 会在底层 socket 上设置定时器,如果在指定时间内没有任何网络活动,会触发 timeout 事件,如果提供了回调函数,则执行回调函数,另外,触发 timeout 事件不会自动终止请求!需要用户手动调用 .destroy(),接着对 setTimeout 使用方式进行了举例,下面继续分析
OpenCode
综合前面 blog 分析,下面给出日志记录增强版 + 超时保护如下
javascript
// dashscope-proxy.js (日志记录增强版 + 超时保护)

const http = require('http');
const https = require('https');
const fs = require('fs');
const path = require('path');

// 日志目录(可自定义)
const LOG_DIR = path.join(__dirname, 'logs');
if (!fs.existsSync(LOG_DIR)) {
  fs.mkdirSync(LOG_DIR, { recursive: true });
}

// 设置代理请求超时时间(毫秒)------ 建议 30~120 秒
const PROXY_TIMEOUT_MS = 60_000; // 60秒

const server = http.createServer((req, res) => {
  console.log(`📥 Received ${req.method} ${req.url}`);

  if (req.method === 'POST' && req.url === '/v1/chat/completions') {
    let body = '';
    req.on('data', chunk => body += chunk);
    req.on('end', () => {
      // 从原始请求中获取 Authorization 头
      const authHeader = req.headers['authorization'] || '';
      // 解析请求体
      let parsedBody = null;
      try {
        parsedBody = JSON.parse(body);
      } catch (e) {
        console.error('⚠️ Invalid JSON in request body');
        res.writeHead(400);
        res.end('Bad Request');
        return;
      }

      const timestamp = Date.now();
      const logEntry = {
        timestamp,
        request: parsedBody,
        response: null, // 占位
        error: null
      };

      const options = {
        hostname: 'dashscope.aliyuncs.com',
        port: 443,
        path: '/compatible-mode/v1/chat/completions',
        method: 'POST',
        headers: {
          'Authorization': authHeader, // 直接透传!
          'Content-Type': 'application/json',
          'Content-Length': Buffer.byteLength(body)
        }
      };

      const proxyReq = https.request(options, (proxyRes) => {
        res.writeHead(proxyRes.statusCode, proxyRes.headers);

        let responseBody = '';
        proxyRes.on('data', (chunk) => {
          responseBody += chunk.toString();
          res.write(chunk); // 透传给客户端
        });

        proxyRes.on('end', () => {
          // 尝试解析响应(非流式)
          if (!parsedBody.stream) {
            try {
              logEntry.response = JSON.parse(responseBody);
            } catch (e) {
              logEntry.response = responseBody; // 原始字符串(如错误信息)
            }
          } else {
            // 流式响应:只记录原始 chunks(每行一个 data: {...})
            logEntry.response = responseBody;
          }

          // 保存日志到文件
          const logFile = path.join(LOG_DIR, `${timestamp}.json`);
          fs.writeFile(logFile, JSON.stringify(logEntry, null, 2), (err) => {
            if (err) console.error('Failed to write log file:', err.message);
            else console.log(`📝 Saved log to ${logFile}`);
          });

          // 结束客户端 HTTP 响应!
          res.end();
        });
      });

      // 设置超时
      proxyReq.setTimeout(PROXY_TIMEOUT_MS, () => {
        const timeoutMsg = `Proxy request timed out after ${PROXY_TIMEOUT_MS}ms`;
        console.warn(`⏰ ${timeoutMsg}`);

        // 记录超时错误
        logEntry.error = timeoutMsg;

        const logFile = path.join(LOG_DIR, `${timestamp}_timeout.json`);
        fs.writeFile(logFile, JSON.stringify(logEntry, null, 2), (err) => {
          if (err) console.error('Failed to write timeout log:', err.message);
        });

        // 必须 destroy!否则连接会挂起
        proxyReq.destroy();

        // 如果客户端还没收到响应,返回 504
        if (!res.headersSent) {
          res.writeHead(504, { 'Content-Type': 'text/plain' });
          res.end('Gateway Timeout');
        }
      });

      proxyReq.on('error', (e) => {
        const errorMsg = e.message || 'Unknown proxy error';
        logEntry.error = errorMsg;
        const logFile = path.join(LOG_DIR, `${timestamp}_error.json`);
        fs.writeFile(logFile, JSON.stringify(logEntry, null, 2), (err) => {
          if (err) console.error('Failed to write error log:', err.message);
        });
        if (!res.headersSent) {
          res.writeHead(502);
          res.end('Bad Gateway');
        }
      });

      proxyReq.write(body);
      proxyReq.end();
    });
    return;
  }

  res.writeHead(404);
  res.end('Not Found');
});

server.listen(2048, '127.0.0.1', () => {
  console.log('✅ Qwen-Plus proxy with full OpenCode & Ollama compatibility running on http://127.0.0.1:2048');
  console.log(`⏱️  Proxy timeout set to ${PROXY_TIMEOUT_MS / 1000}s`);
});
与之前 blog 【Agent】【OpenCode】本地代理增强(日志记录) 相比,这里的代理加入了 setTimeout() 超时机制,防止代理请求长时间挂起(比如网络卡住,DashScope 无响应等),超时时主动终止请求并记录错误日志,避免内存泄漏或连接堆积
简单总结下与之前仅日志记录版本的不同点
proxyReq.setTimeout(...):设置 60 秒超时(可调)- 超时后自动执行
proxyReq.destroy(),主动断开连接,释放资源 - 超时日志单独保存,文件名带后缀
_timeout.json,便于排查 - 超时时,本地代理返回 504 Gateway Timeout,符合 HTTP 规范
- 防止重复响应,本地代理先检查
!res.headersSent再写头部信息 - 控制台提示超时,方便调试
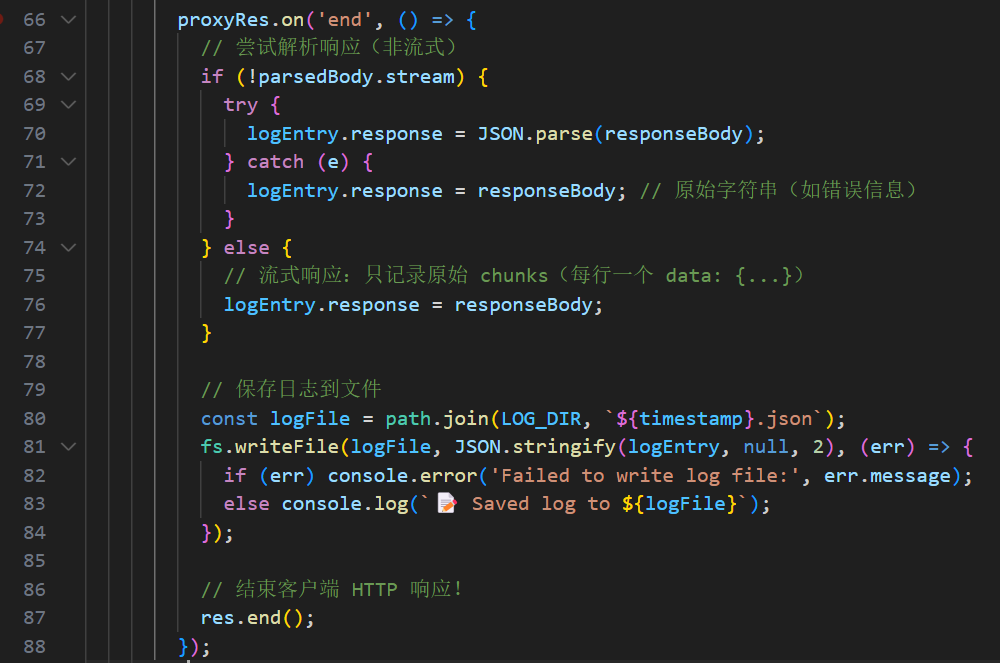
OK,下面继续分析,首先看 proxyRes.on('end', ...) 部分
可以对比之前 blog 【Agent】【OpenCode】本地代理(脚本实现) 中这里的实现,可以看到明显内容多了不少

相比于之前的 .pipe() 自动转发(无法获取中间数据),日志记录需要缓存所有的 chunk 块,所以只能手动拼接 ,在这里,proxyRes.on('end', ...) 是整个代理服务器中处理 DashScope 响应结束(end 事件)的核心逻辑,代理会在收到完整的 DashScope 响应后,智能解析响应内容(区分流式和非流式),保存好结构化日志,并向 OpenCode 客户端发送最终响应结束信号,下面详细分析下
parsedBody.stream:parsedBody是 OpenCode 客户端(注意不是 DashScope 服务器)发来的原始请求解析出的 JS 对象,如果请求中没有设置stream: true,说明 OpenCode 客户端期望的是完整 JSON 响应(非流式),否则就是 SSE 流式响应(每行data: {...}格式)
非流式
javascript
{"choices": [{"message": {"content": "Hello"}}]}流式
javascript
data: {"choices": [{"delta": {"content": "H"}}]}\n\n
data: {"choices": [{"delta": {"content": "i"}}]}\n\n
...
然后是非流式响应的处理,代理会尝试先解析 JSON 格式的字符串
javascript
try {
  logEntry.response = JSON.parse(responseBody);
} catch (e) {
  logEntry.response = responseBody; // 保留原始字符串(如错误信息)
}成功时,将响应存为结构化对象,方便后续分析日志,而失败时,则保留原始字符串,方便分析错误原因,比如 DashScope 返回 401 Unauthorized 时,可能返回 HTML 错误页,而非 JSON

OK,本篇先到这里,如有疑问,欢迎评论区留言讨论,祝各位功力大涨,技术更上一层楼!!!更多内容见下篇 blog
【Agent】【OpenCode】本地代理增强版分析(Unix时间戳)