一、环境介绍
操作系统: openeuler 24.03
dhcp节点1 ip:10.99.50.31
dhcp节点2 ip:10.99.50.32
kea dhcp :hook ha + Memfile
stork节点:10.99.50.32
数据库:postgresql (stork用和主机预留用)
二、基础环境配置
bash
dnf install -y meson ninja-build gcc gcc-c++ boost-devel log4cplus-devel openssl-devel
mkdir -p /etc/kea
## 如果需要使用数据存储租约或者主机预留安装
dnf install -y postgresql postgresql-server postgresql-devel postgresql-contrib
三、编译安装 Kea
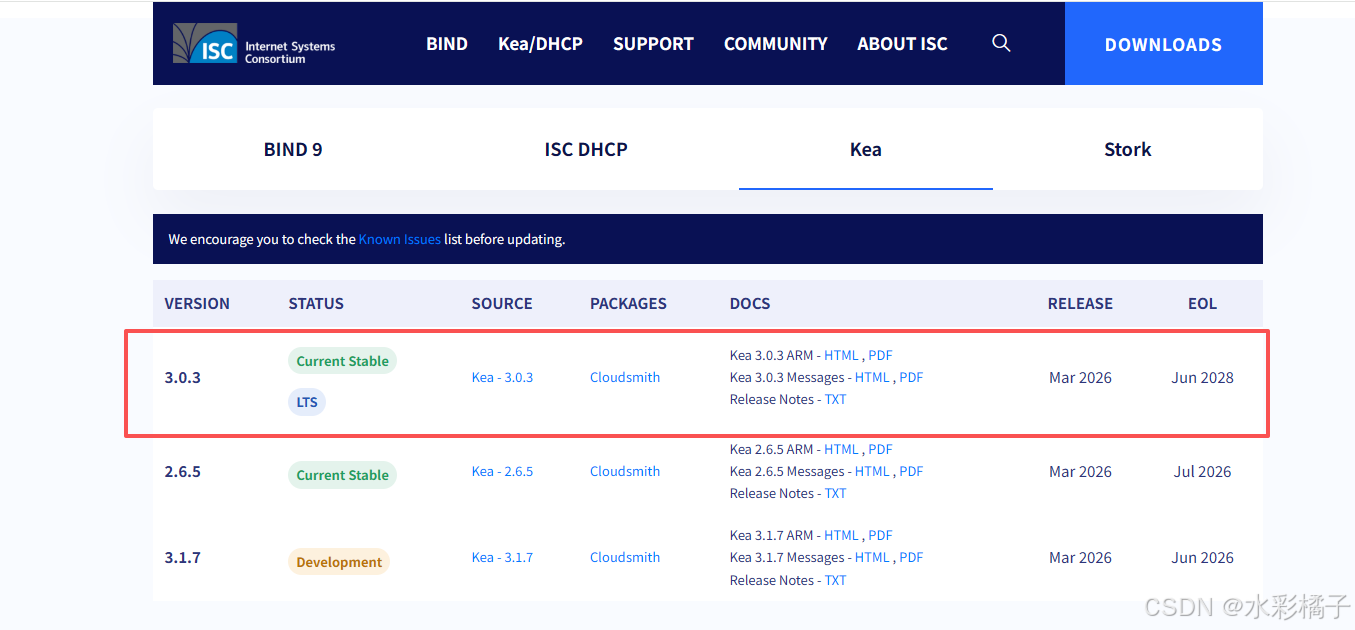
1、下载软件包
https://www.isc.org/download/#Kea
2、编译安装
bash
meson setup build -D postgresql=enabled
meson compile -C build -j 8
meson install -C build
3、配置kea dhcp
(1)、dhcp-server1 配置文件/etc/kea/kea-dhcp4.conf
bash
{
  "Dhcp4": {
    "control-socket": {
      "socket-type": "unix",
      "socket-name": "/usr/local/var/run/kea/kea4-ctrl-socket"
    },
    "interfaces-config": {
      "interfaces": [
        "ens33"
      ]
    },
    "lease-database": {
      "type": "memfile",
      "persist": true,
      "name": "/usr/local/var/lib/kea/kea-dhcp4-leases.csv"
    },
    "hosts-databases": [
      {
        "host": "127.0.0.1",
        "name": "kea",
        "password": "xxx",
        "port": 5432,
        "type": "postgresql",
        "user": "kea"
      }
    ],
    "multi-threading": {
      "enable-multi-threading": true,
      "thread-pool-size": 4
    },
    "reservations-lookup-first": true,
    "cache-threshold": 0.25,
    "calculate-tee-times": true,
    "valid-lifetime": 28800,
    "option-data": [
      {
        "name": "domain-name-servers",
        "data": "10.99.50.114, 10.99.50.124"
      }
    ],
    "hooks-libraries": [
      {
        "library": "/usr/local/lib64/kea/hooks/libdhcp_lease_cmds.so"
      },
      {
        "library": "/usr/local/lib64/kea/hooks/libdhcp_host_cmds.so"
      },
      {
        "library": "/usr/local/lib64/kea/hooks/libdhcp_subnet_cmds.so"
      },
      {
        "library": "/usr/local/lib64/kea/hooks/libdhcp_stat_cmds.so"
      },
      {
        "library": "/usr/local/lib64/kea/hooks/libdhcp_pgsql.so"
      },
      {
        "library": "/usr/local/lib64/kea/hooks/libdhcp_ha.so",
        "parameters": {
          "high-availability": [
            {
              "this-server-name": "server1",
              "mode": "hot-standby",
              "heartbeat-delay": 2000,
              "max-response-delay": 10000,
              "max-ack-delay": 3000,
              "max-unacked-clients": 1,
              "auto-failover": true,
              "peers": [
                {
                  "name": "server1",
                  "url": "http://10.99.50.31:8001/",
                  "role": "primary"
                },
                {
                  "name": "server2",
                  "url": "http://10.99.50.32:8001/",
                  "role": "standby"
                }
              ]
            }
          ]
        }
      }
    ],
    "subnet4": [
      {
        "subnet": "10.99.50.0/24",
        "id": 1,
        "option-data": [
          {
            "name": "routers",
            "data": "10.99.50.254"
          }
        ],
        "pools": [
          {
            "pool": "10.99.50.1-10.99.50.253"
          }
        ]
      }
    ],
    "loggers": [
      {
        "name": "kea-dhcp4",
        "severity": "INFO",
        "output_options": [
          {
            "output": "stdout"
          }
        ]
      }
    ]
  }
}
(2)、dhcp-server2 配置文件/etc/kea/kea-dhcp4.conf
bash
{
  "Dhcp4": {
    "control-socket": {
      "socket-type": "unix",
      "socket-name": "/usr/local/var/run/kea/kea4-ctrl-socket"
    },
    "interfaces-config": {
      "interfaces": [
        "ens33"
      ]
    },
    "lease-database": {
      "type": "memfile",
      "persist": true,
      "name": "/usr/local/var/lib/kea/kea-dhcp4-leases.csv"
    },
    "hosts-databases": [
      {
        "host": "127.0.0.1",
        "name": "kea",
        "password": "xxx",
        "port": 5432,
        "type": "postgresql",
        "user": "kea"
      }
    ],
    "multi-threading": {
      "enable-multi-threading": true,
      "thread-pool-size": 4
    },
    "reservations-lookup-first": true,
    "cache-threshold": 0.25,
    "calculate-tee-times": true,
    "valid-lifetime": 28800,
    "option-data": [
      {
        "name": "domain-name-servers",
        "data": "10.99.50.114, 10.99.50.124"
      }
    ],
    "hooks-libraries": [
      {
        "library": "/usr/local/lib64/kea/hooks/libdhcp_lease_cmds.so"
      },
      {
        "library": "/usr/local/lib64/kea/hooks/libdhcp_host_cmds.so"
      },
      {
        "library": "/usr/local/lib64/kea/hooks/libdhcp_subnet_cmds.so"
      },
      {
        "library": "/usr/local/lib64/kea/hooks/libdhcp_stat_cmds.so"
      },
      {
        "library": "/usr/local/lib64/kea/hooks/libdhcp_pgsql.so"
      },
      {
        "library": "/usr/local/lib64/kea/hooks/libdhcp_ha.so",
        "parameters": {
          "high-availability": [
            {
              "this-server-name": "server2",
              "mode": "hot-standby",
              "heartbeat-delay": 2000,
              "max-response-delay": 10000,
              "max-ack-delay": 3000,
              "max-unacked-clients": 1,
              "auto-failover": true,
              "peers": [
                {
                  "name": "server1",
                  "url": "http://10.99.50.31:8001/",
                  "role": "primary"
                },
                {
                  "name": "server2",
                  "url": "http://10.99.50.32:8001/",
                  "role": "standby"
                }
              ]
            }
          ]
        }
      }
    ],
    "subnet4": [
      {
        "subnet": "10.99.50.0/24",
        "id": 1,
        "option-data": [
          {
            "name": "routers",
            "data": "10.99.50.254"
          }
        ],
        "pools": [
          {
            "pool": "10.99.50.1-10.99.50.253"
          }
        ]
      }
    ],
    "loggers": [
      {
        "name": "kea-dhcp4",
        "severity": "INFO",
        "output_options": [
          {
            "output": "stdout"
          }
        ]
      }
    ]
  }
}
(3)、验证dhcp-server 配置
bash
kea-dhcp4 -T /etc/kea/kea-dhcp4.conf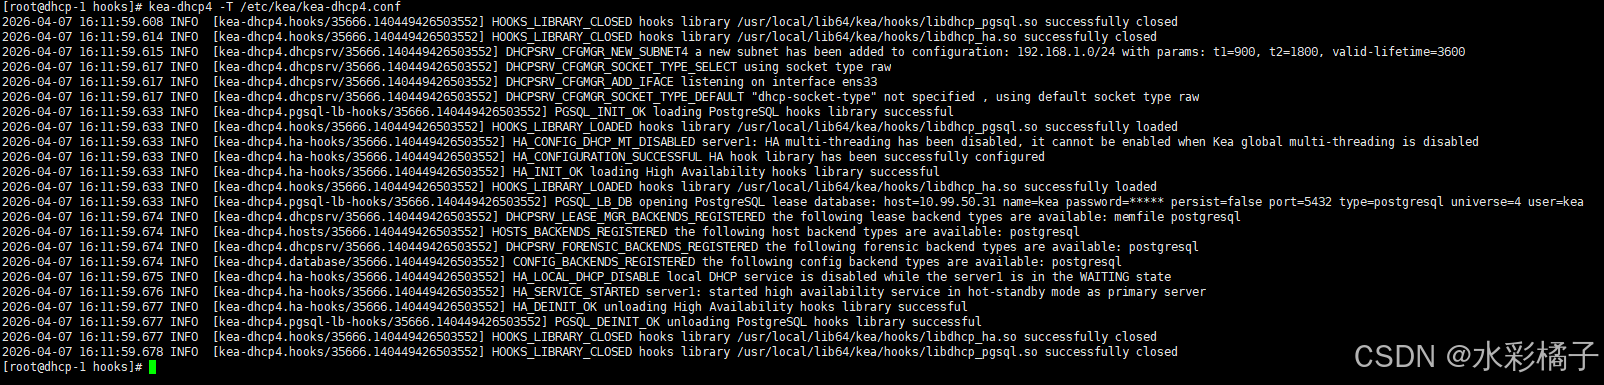
(4)、agent1 配置文件/etc/kea/kea-ctrl-agent.conf
bash
cat > /etc/kea/kea-ctrl-agent.conf << 'EOF'
{
  "Control-agent": {
    "http-host": "10.99.50.31",
    "http-port": 8000,

    "control-sockets": {
      "dhcp4": {
        "socket-type": "unix",
        "socket-name": "/usr/local/var/run/kea/kea4-ctrl-socket"
      }
    },

    "loggers": [
      {
        "name": "kea-ctrl-agent",
        "output-options": [
          {
            "output": "/usr/local/var/log/kea/kea-ctrl-agent.log"
          }
        ],
        "severity": "INFO"
      }
    ]
  }
}
EOF
(5)、agent2 配置文件/etc/kea/kea-ctrl-agent.conf
bash
cat > /etc/kea/kea-ctrl-agent.conf << 'EOF'
{
  "Control-agent": {
    "http-host": "10.99.50.32",
    "http-port": 8000,

    "control-sockets": {
      "dhcp4": {
        "socket-type": "unix",
        "socket-name": "/usr/local/var/run/kea/kea4-ctrl-socket"
      }
    },

    "loggers": [
      {
        "name": "kea-ctrl-agent",
        "output-options": [
          {
            "output": "/usr/local/var/log/kea/kea-ctrl-agent.log"
          }
        ],
        "severity": "INFO"
      }
    ]
  }
}
EOF
(6)、配置主机预留数据库
bash
dnf install -y postgresql postgresql-server postgresql-devel postgresql-contrib
postgresql-setup --initdb
systemctl enable --now postgresql
sudo -u postgres psql
CREATE DATABASE kea;
CREATE USER kea WITH PASSWORD 'xxx';
GRANT ALL PRIVILEGES ON DATABASE kea TO kea;
 \c kea
GRANT ALL PRIVILEGES ON SCHEMA public TO kea;
kea-admin db-init pgsql -u kea -p 'xxx' -n kea -h 127.0.0.1
4、启动集群
agent systemd:
bash
cat > /etc/systemd/system/kea-ctrl-agent.service << 'EOF'
[Unit]
Description=Kea Control Agent
After=network.target

[Service]
ExecStart=/usr/local/sbin/kea-ctrl-agent -c /etc/kea/kea-ctrl-agent.conf
Restart=on-failure

[Install]
WantedBy=multi-user.target
EOF
kea-dhcp4 systemd配置:
bash
cat > /etc/systemd/system/kea-dhcp4.service << 'EOF'
[Unit]
Description=Kea DHCPv4 Server
After=network.target

[Service]
ExecStart=/usr/local/sbin/kea-dhcp4 -c /etc/kea/kea-dhcp4.conf
Restart=on-failure

[Install]
WantedBy=multi-user.target
EOF
启动agent
bash
systemctl daemon-reload
systemctl start kea-ctrl-agent
systemctl enable kea-ctrl-agent
启动dhcp
bash
systemctl start kea-dhcp4
systemctl enable kea-dhcp4
5、验证集群状态
bash
curl -H "Content-Type: application/json" -X POST -d '{ "command": "status-get", "service": [ "dhcp4" ] }' http://10.99.50.31:8000 | jq .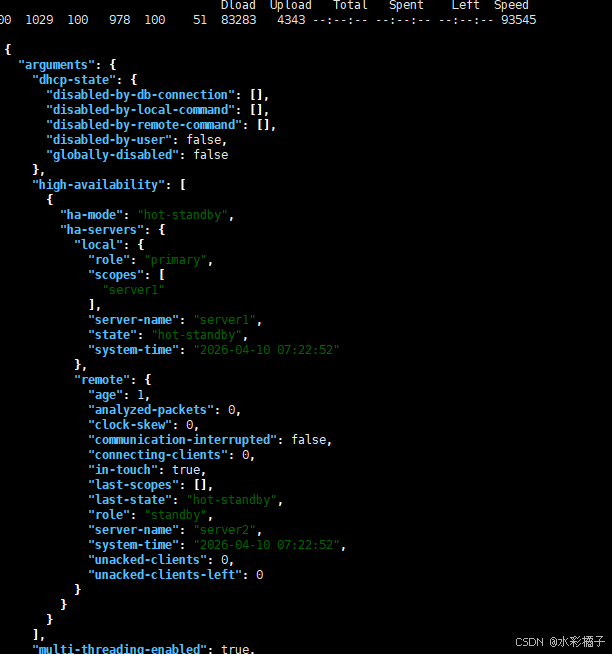
测试可以再另外一台机器上测试:
bash
perfdhcp -4 -r 1 -R 247 -n 20 -l ens33
四、安装stork
注意:我这里之前尝试源码安装,结果注册可以成功,但是无法获取agent状态。说是grpc握手失败,怎么导入证书都不行。
1、安装postgresql数据库
bash
dnf install -y postgresql postgresql-server postgresql-devel postgresql-contrib初始化并启动:
bash
postgresql-setup --initdb
systemctl enable --now postgresql
2、安装stork 软件源
bash
rpm --import 'https://dl.cloudsmith.io/public/isc/stork/gpg.77F64EC28053D1FB.key'
curl -1sLf 'https://dl.cloudsmith.io/public/isc/stork/config.rpm.txt?distro=el&codename=9' > /etc/yum.repos.d/isc-stork.repo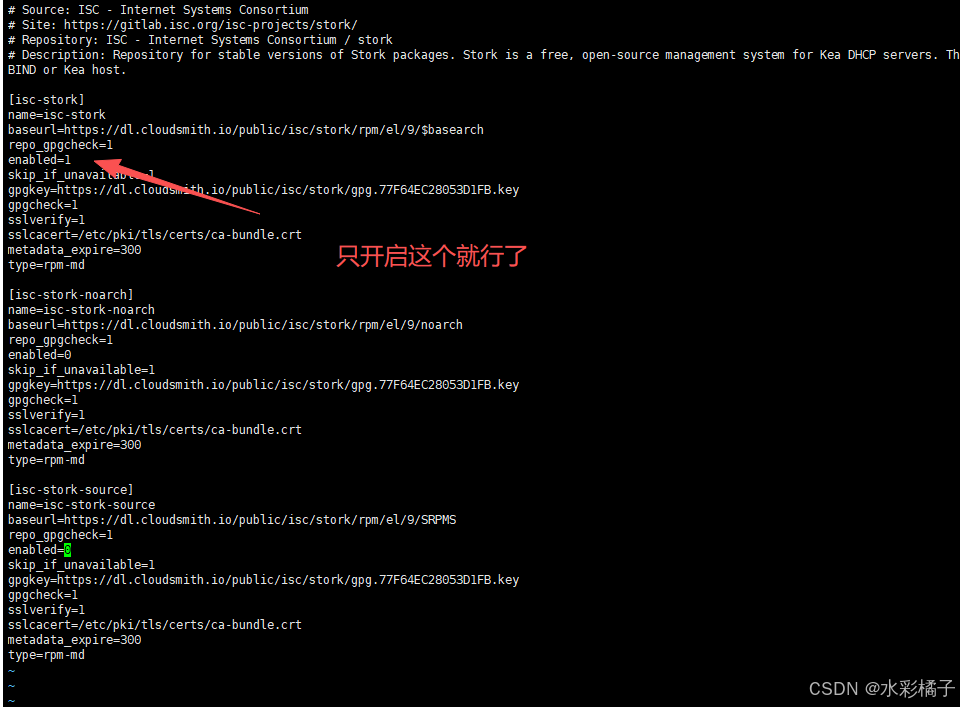
3、安装stork server
bash
dnf install isc-stork-server -y4、初始化数据库
bash
su - postgres
stork-tool db-create --db-name stork --db-user stork-server
记住显示的密码

更改stork用户密码:
bash
sudo -u postgres psql
ALTER USER "stork-server" WITH PASSWORD 'xxx';
更改登录认证:
bash
vi /var/lib/pgsql/data/pg_hba.conf如下:
bash
# TYPE  DATABASE        USER            ADDRESS                 METHOD

# "local" is for Unix domain socket connections only
local   postgres        postgres                                peer
local   all             all                                     md5
# IPv4 local connections:
host    all             all             127.0.0.1/32            md5
# IPv6 local connections:
host    all             all             ::1/128                 ident
# Allow replication connections from localhost, by a user with the
# replication privilege.
local   replication     all                                     peer
host    replication     all             127.0.0.1/32            ident
host    replication     all             ::1/128                 ident
5、修改stork server 配置文件
bash
vi /etc/stork/server.env
bash
### database settings
### the address of a PostgreSQL database
STORK_DATABASE_HOST=127.0.0.1
### the port of a PostgreSQL database
STORK_DATABASE_PORT=5432
### the name of a database
STORK_DATABASE_NAME=stork
### the username for connecting to the database
STORK_DATABASE_USER_NAME=stork-server
### the SSL mode for connecting to the database
### possible values: disable, require, verify-ca, or verify-full
# STORK_DATABASE_SSLMODE=
### the location of the SSL certificate used by the server to connect to the database
# STORK_DATABASE_SSLCERT=
### the location of the SSL key used by the server to connect to the database
# STORK_DATABASE_SSLKEY=
### the location of the root certificate file used to verify the database server's certificate
# STORK_DATABASE_SSLROOTCERT=
### the password for the username connecting to the database
### empty password is set to avoid prompting a user for database password
STORK_DATABASE_PASSWORD=xxx

### REST API settings
### the IP address on which the server listens
# STORK_REST_HOST=
### the port number on which the server listens
# STORK_REST_PORT=
### the file with a certificate to use for secure connections
# STORK_REST_TLS_CERTIFICATE=
### the file with a private key to use for secure connections
# STORK_REST_TLS_PRIVATE_KEY=
### the certificate authority file used for mutual TLS authentication
# STORK_REST_TLS_CA_CERTIFICATE=
### the directory with static files served in the UI
STORK_REST_STATIC_FILES_DIR=/usr/share/stork/www
### the base URL of the UI - to be used only if the UI is served from a subdirectory
# STORK_REST_BASE_URL=
### the URL of the file with current Kea, Stork and BIND 9 software versions metadata
STORK_REST_VERSIONS_URL=https://www.isc.org/versions.json

### enable Prometheus /metrics HTTP endpoint for exporting metrics from
### the server to Prometheus. It is recommended to secure this endpoint
### (e.g. using HTTP proxy).
# STORK_SERVER_ENABLE_METRICS=true

### Logging parameters

### Set logging level. Supported values are: DEBUG, INFO, WARN, ERROR
# STORK_LOG_LEVEL=DEBUG
### disable output colorization
# CLICOLOR=false

### path to the hook directory
# STORK_SERVER_HOOK_DIRECTORY=
6、启动stork server
bash
systemctl start isc-stork-server
systemctl enable isc-stork-server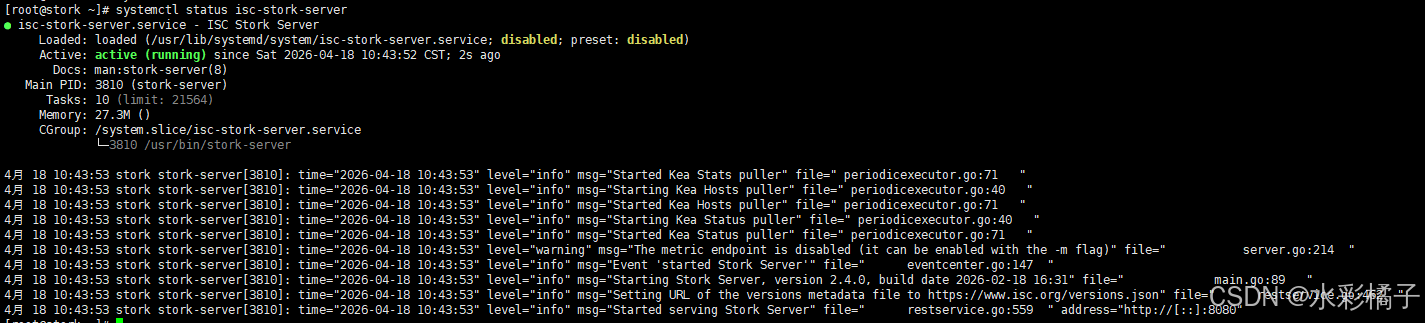
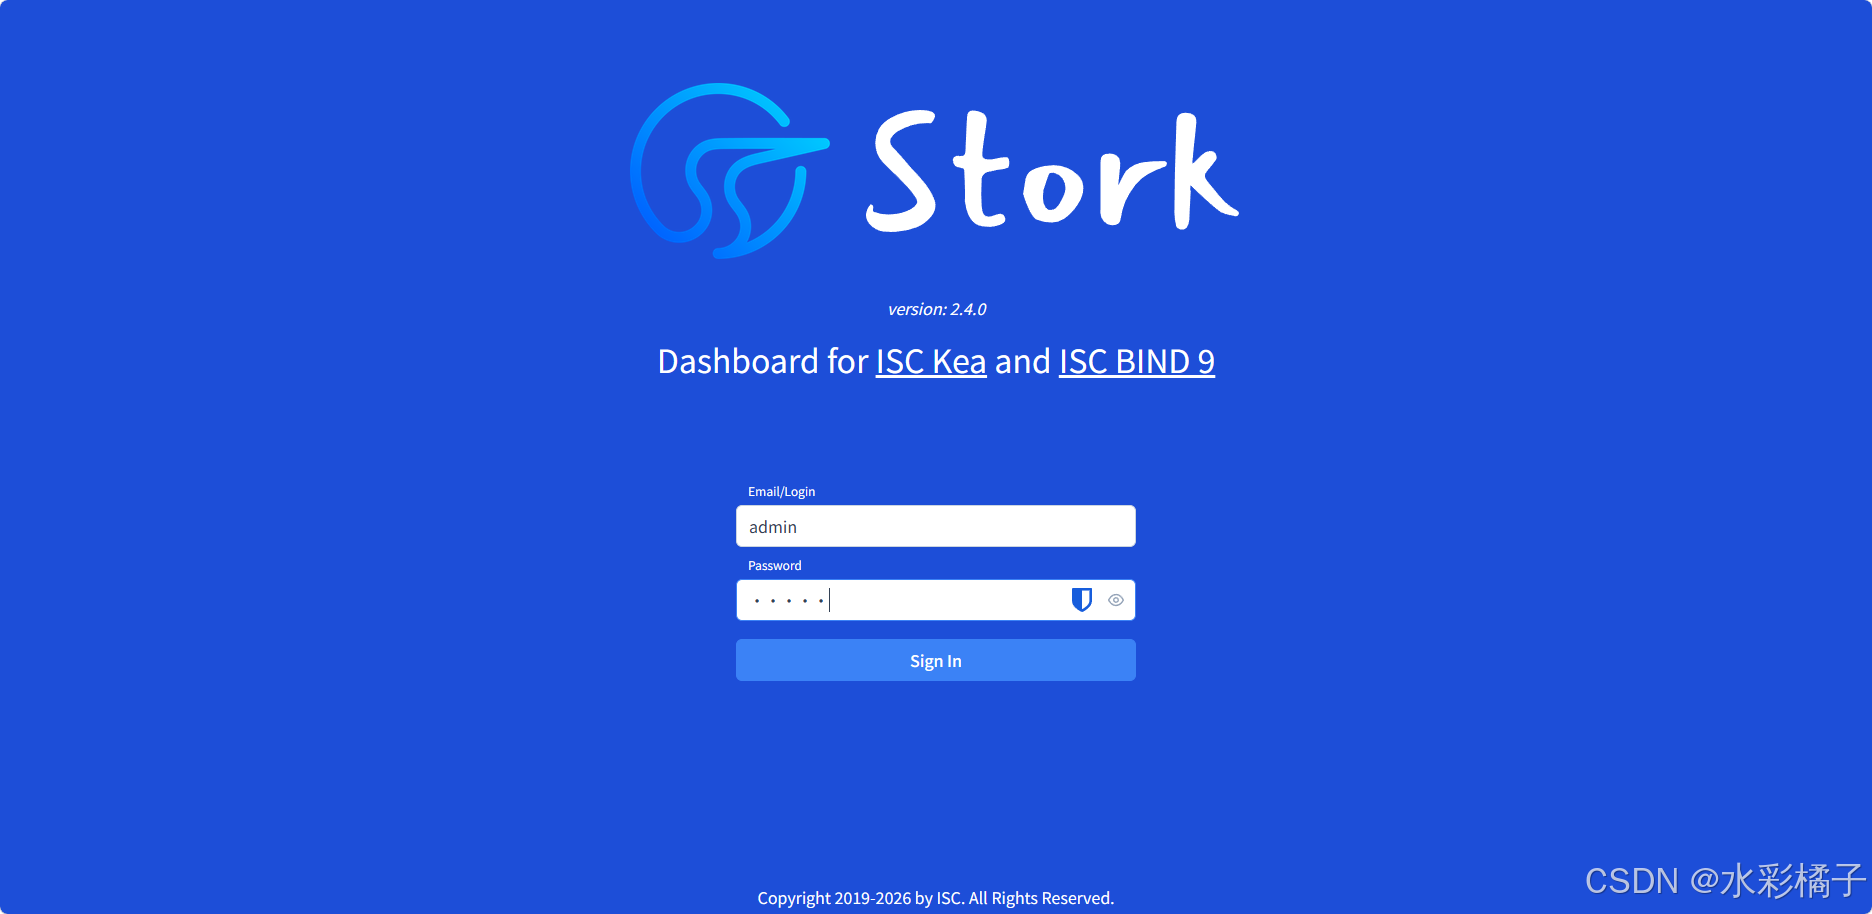
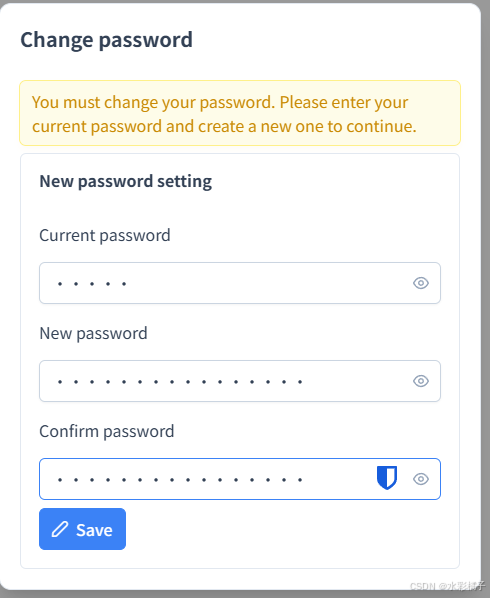
访问服务器ip:8080端口 默认密码admin/admin
更改密码:
7、安装stork agent
下载:
bash
wget https://dl.cloudsmith.io/public/isc/stork/rpm/any-distro/any-version/x86_64/isc-stork-agent-2.4.0.260218163710-1.x86_64.rpm安装:
bash
dnf install isc-stork-agent-2.4.0.260218163710-1.x86_64.rpm -y注册:
bash
stork-agent register -u http://10.99.50.33:8080/修改启动用户为root:
bash
vi /usr/lib/systemd/system/isc-stork-agent.service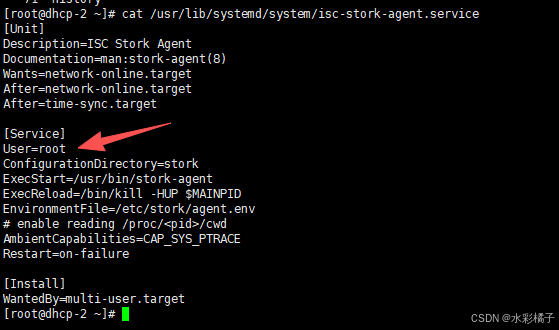
启动
bash
systemctl daemon-reload
systemctl enable isc-stork-agent
systemctl start isc-stork-agent
bash
postgresql-setup --initdb
systemctl enable --now postgresql
sudo -u postgres psql
CREATE DATABASE kea;
CREATE USER kea WITH PASSWORD 'Szzyyry_81008123';
GRANT ALL PRIVILEGES ON DATABASE kea TO kea;
 \c kea
GRANT ALL PRIVILEGES ON SCHEMA public TO kea;
kea-admin db-init pgsql -u kea -p 'Szzyyry_81008123' -n kea -h 127.0.0.1
五、防火墙配置
dhcp server:
bash
firewall-cmd --permanent --zone=public --add-rich-rule='rule family=ipv4 source address=10.0.0.0/8 port port=67 protocol=udp accept'
firewall-cmd --permanent --zone=public --add-rich-rule='rule family=ipv4 source address=10.0.0.0/8 port port=68 protocol=udp accept'
firewall-cmd --permanent --zone=public --add-rich-rule='rule family=ipv4 source address=10.99.50.31 port port=8001 protocol=tcp accept'
firewall-cmd --permanent --zone=public --add-rich-rule='rule family=ipv4 source address=10.99.50.32 port port=8001 protocol=tcp accept'
firewall-cmd --permanent --zone=public --add-rich-rule='rule family=ipv4 source address=10.99.50.31 port port=8000 protocol=tcp accept'
firewall-cmd --permanent --zone=public --add-rich-rule='rule family=ipv4 source address=10.99.50.32 port port=8000 protocol=tcp accept'
firewall-cmd --permanent --zone=public --add-rich-rule='rule family=ipv4 source address=10.99.50.33 port port=8080 protocol=tcp accept'
firewall-cmd --reload
stork server:
bash
 firewall-cmd --permanent --zone=public --add-rich-rule='rule family=ipv4 source address=10.99.50.31 port port=8080 protocol=tcp accept'
firewall-cmd --permanent --zone=public --add-rich-rule='rule family=ipv4 source address=10.99.50.32 port port=8080 protocol=tcp accept'
firewall-cmd --reload
六、补充
1、下发地址前检查ip是否可用
在dhcp 配置文件中添加hooks
bash
{
        "library": "/usr/local/lib64/kea/hooks/libdhcp_ping_check.so",
        "parameters": {
          "enable-ping-check": true,
          "min-ping-requests": 1,
          "ping-channel-threads": 0,
          "ping-cltt-secs": 60,
          "reply-timeout": 100
        }
      },
2、删除租约
bash
curl -X POST -H "Content-Type: application/json" \
  -d '{
        "command": "lease4-del",
        "service": [ "dhcp4" ],
        "arguments": {
            "ip-address": "10.90.101.1"
        }
      }' \
  http://10.99.50.31:8000/
3、查看集群状态
bash
curl -H "Content-Type: application/json" -X POST -d '{ "command": "status-get", "service": [ "dhcp4" ] }' http://10.99.50.31:8000 | jq .