场景
SpringBoot中集成LangChain4j实现集成阿里百炼平台进行AI对话记忆功能和对话隔离功能:
https://blog.csdn.net/BADAO_LIUMANG_QIZHI/article/details/160221252
在上面基础上调用的为阿里百炼平台并通过apikey以及消耗token的方式实现对话。
如何实现本地部署LLM并进行对话功能。
一、Ollama 基础概念
1.1 什么是 Ollama?
Ollama 是一个开源的、专注于在本地运行大型语言模型(LLM)的工具平台。
它封装了模型下载、推理服务、API 暴露等环节,让你像运行普通软件一样运行大模型。
1.2 核心特性
一键运行模型:ollama run <model>
模型管理:pull、list、cp、rm
标准 API:提供兼容 OpenAI 格式的 HTTP API(默认端口 11434)
支持多平台:Windows、macOS、Linux
硬件加速:支持 NVIDIA GPU(CUDA)和 AMD GPU(ROCm)
1.3 常用命令
ollama serve 启动 Ollama 服务(常驻后台)
ollama pull <model> 下载模型到本地
ollama list 列出已下载的模型
ollama run <model> 直接启动交互式对话
ollama cp <src> <dst> 给模型创建别名
二、Windows 环境安装 Ollama
2.1 系统要求
Windows 10/11 64位
建议 16GB 以上内存(运行 7B 模型)
磁盘空间至少 10GB(模型文件大小)
2.2 安装步骤
访问
下载 Windows 安装包 OllamaSetup.exe。
运行安装程序,默认安装路径 C:\Program Files\Ollama。
安装完成后,Ollama 会自动作为 Windows 服务启动。
验证安装:打开 CMD 执行 ollama --version。
2.3 修改模型存储路径(可选)
设置系统环境变量 OLLAMA_MODELS,值为你想存放模型的目录(如 D:\ollama_models)。
设置后需重启电脑或重新启动 Ollama 服务。
2.4 下载模型(以 Qwen2.5-7B 为例)
ollama pull qwen2:7b
国内用户如果下载缓慢,可配置镜像源或使用魔搭社区手动下载后导入。
比如这里从魔搭社区下载
ollama pull modelscope.cn/Qwen/Qwen2.5-7B-Instruct-GGUF2.5 运行模型:
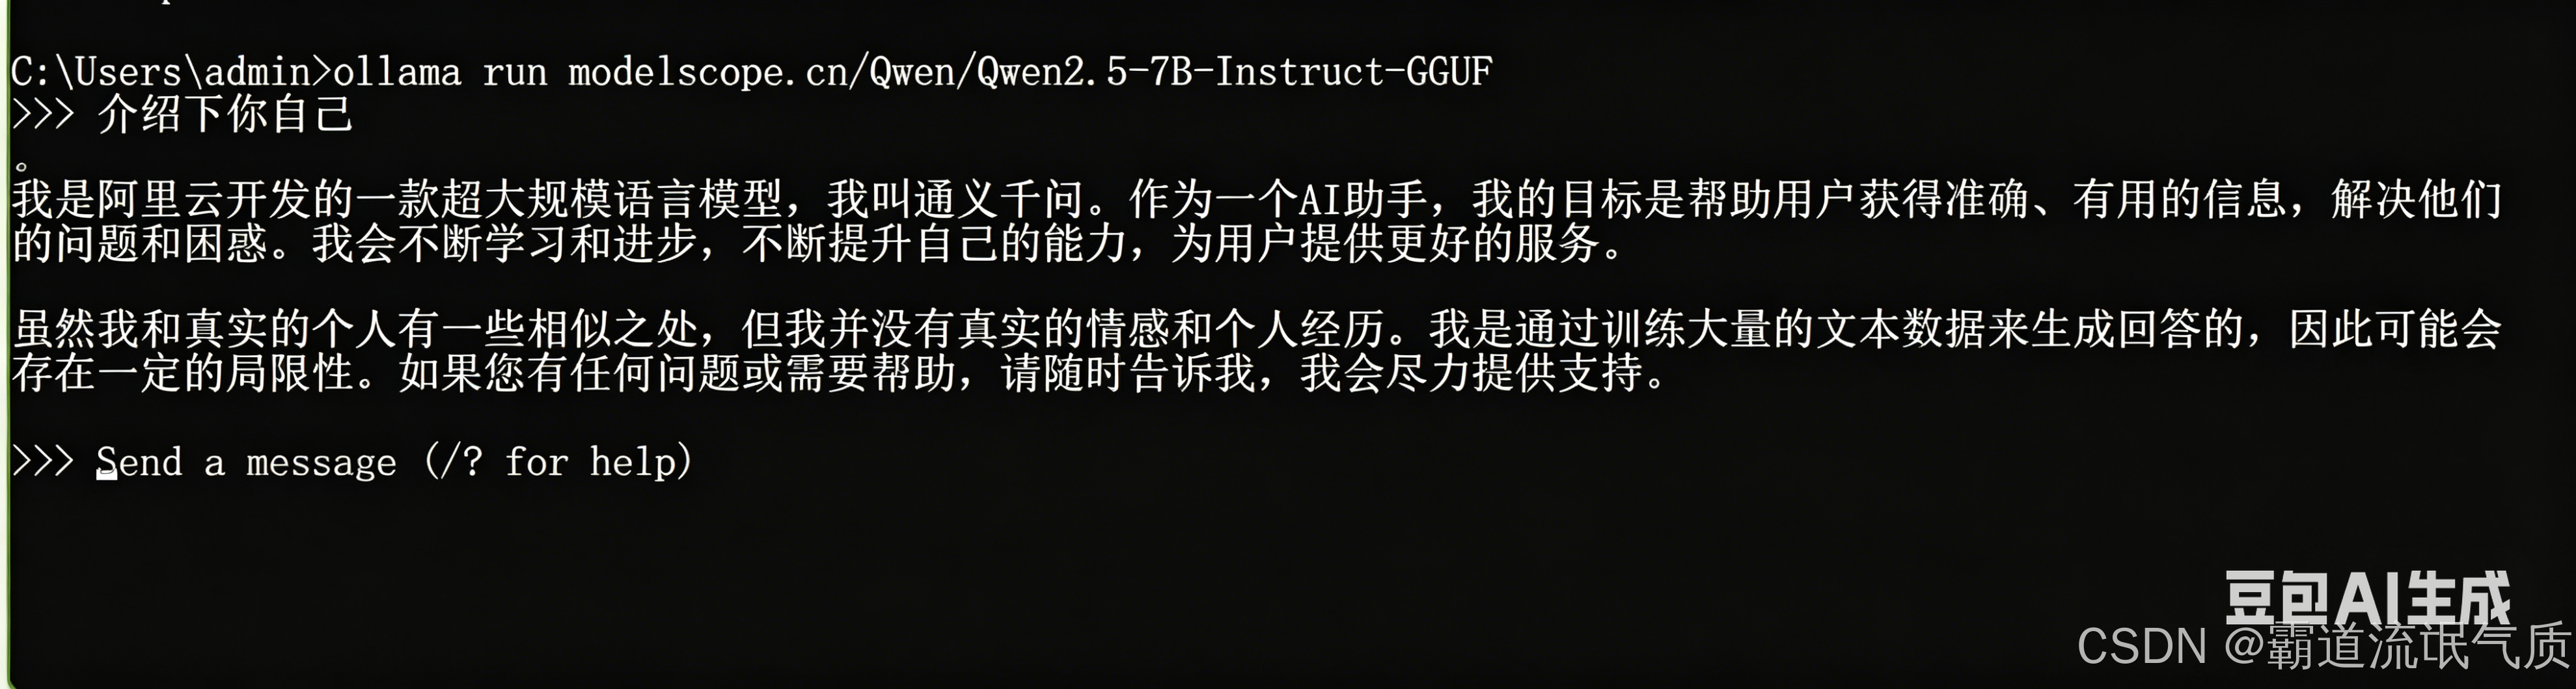
下载完成后,你就可以直接运行它了:
ollama run modelscope.cn/Qwen/Qwen2.5-7B-Instruct-GGUF在交互界面输入问题,能正常回答即成功。
注:
博客:
https://blog.csdn.net/badao_liumang_qizhi
实现
三、Spring Boot 集成
3.1 项目依赖(pom.xml)
<parent>
<groupId>org.springframework.boot</groupId>
<artifactId>spring-boot-starter-parent</artifactId>
<version>3.2.5</version>
</parent>
<groupId>com.example</groupId>
<artifactId>spring-langchain4j-ollama</artifactId>
<version>1.0</version>
<properties>
<java.version>17</java.version>
<langchain4j.version>1.0.0-beta3</langchain4j.version>
</properties>
<dependencyManagement>
<dependencies>
<dependency>
<groupId>dev.langchain4j</groupId>
<artifactId>langchain4j-bom</artifactId>
<version>${langchain4j.version}</version>
<type>pom</type>
<scope>import</scope>
</dependency>
</dependencies>
</dependencyManagement>
<dependencies>
<dependency>
<groupId>org.springframework.boot</groupId>
<artifactId>spring-boot-starter-web</artifactId>
</dependency>
<dependency>
<groupId>org.springframework.boot</groupId>
<artifactId>spring-boot-starter-webflux</artifactId>
</dependency>
<!-- 核心:用于启用 @AiService 声明式 AI 服务 -->
<dependency>
<groupId>dev.langchain4j</groupId>
<artifactId>langchain4j-spring-boot-starter</artifactId>
</dependency>
<!-- 具体模型:用于集成本地 Ollama 服务 -->
<dependency>
<groupId>dev.langchain4j</groupId>
<artifactId>langchain4j-ollama-spring-boot-starter</artifactId>
</dependency>
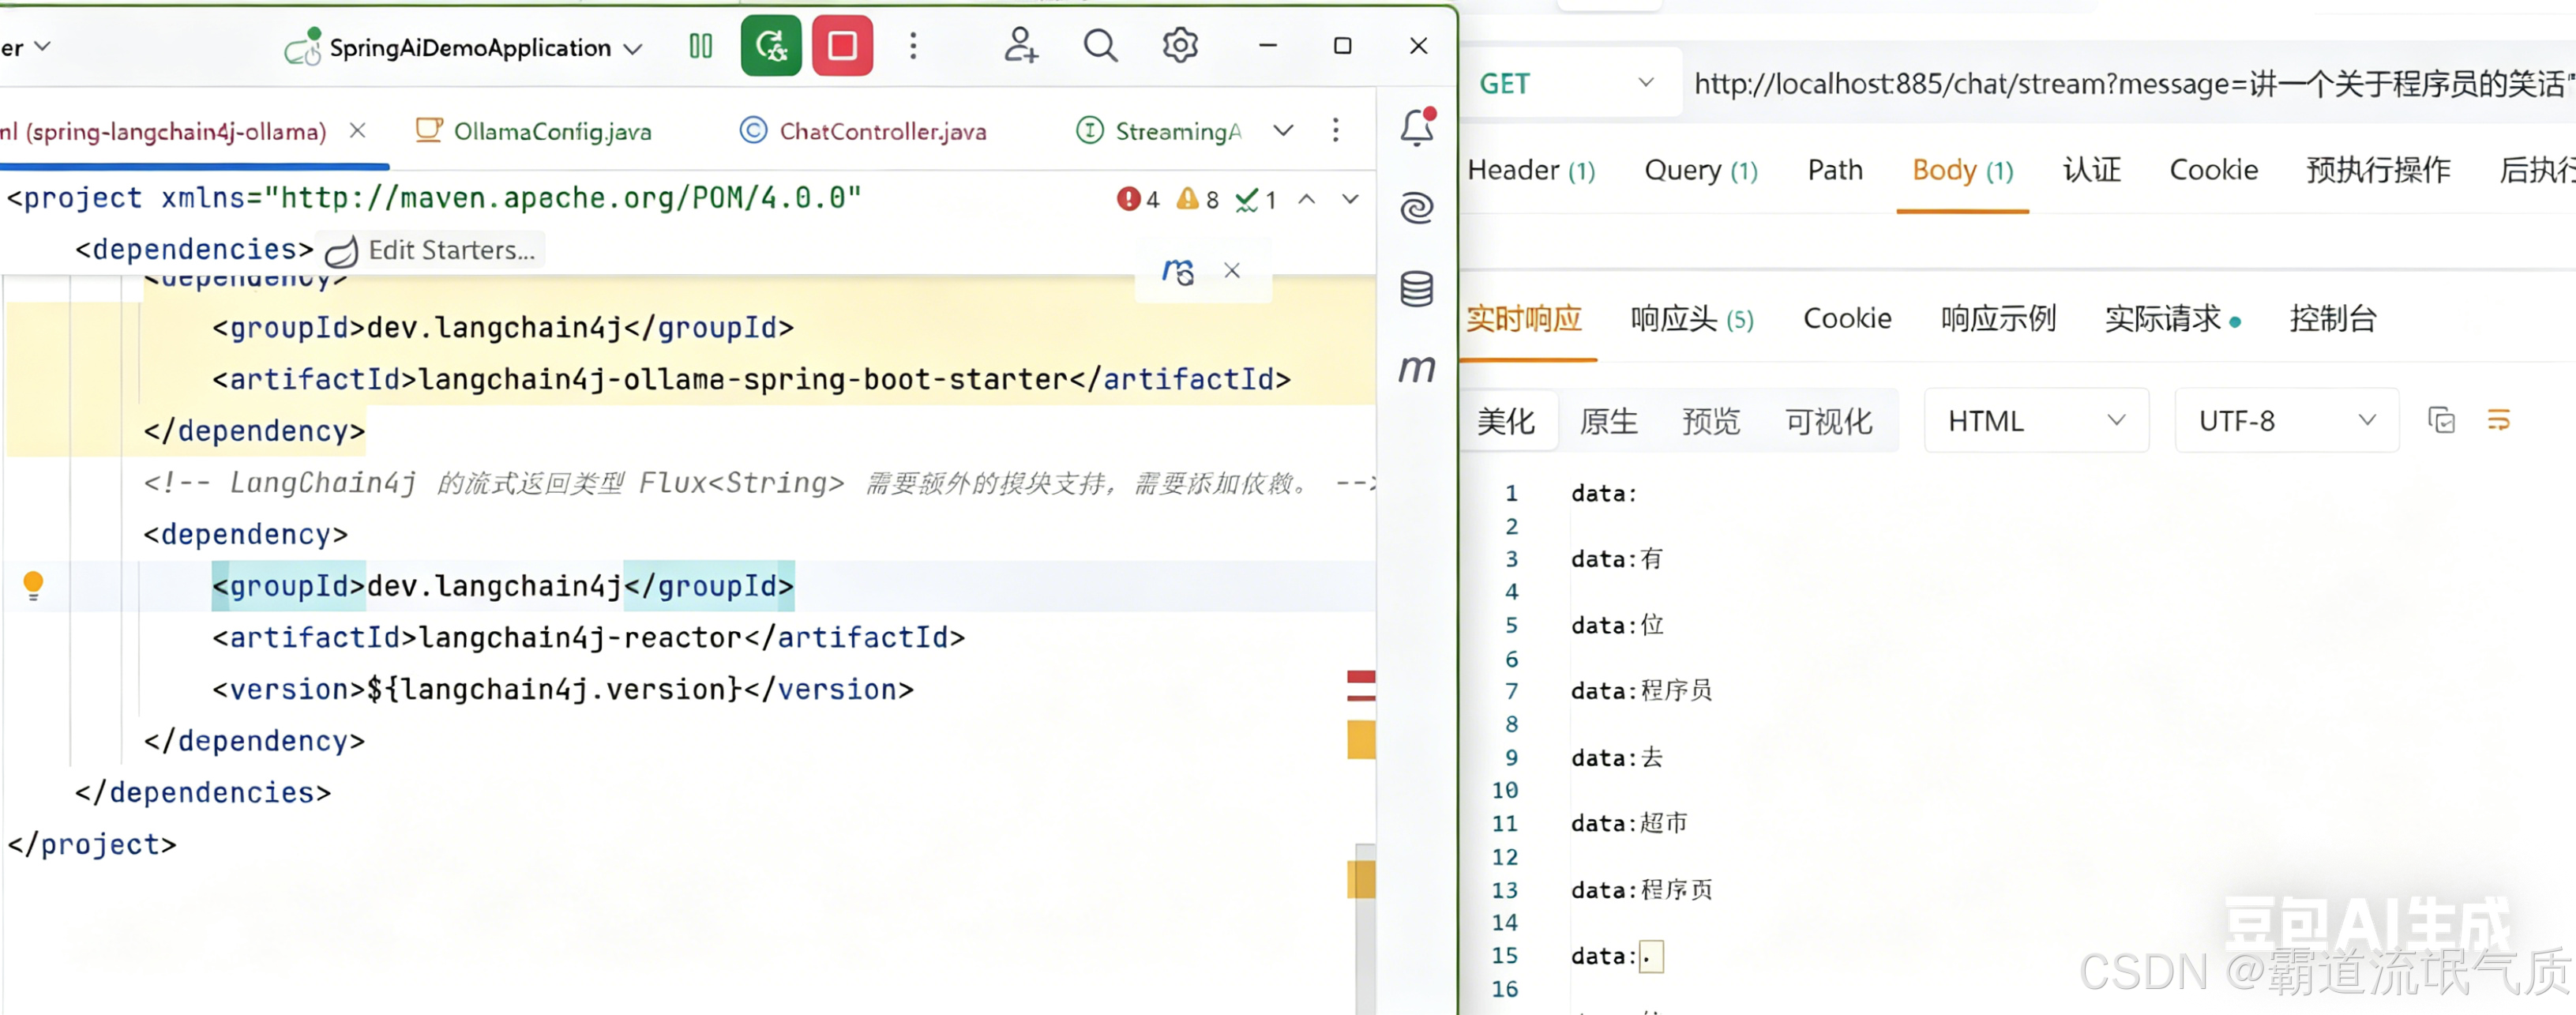
<!-- LangChain4j 的流式返回类型 Flux<String> 需要额外的模块支持。需要添加依赖。 -->
<dependency>
<groupId>dev.langchain4j</groupId>
<artifactId>langchain4j-reactor</artifactId>
<version>${langchain4j.version}</version>
</dependency>
</dependencies>注意:
langchain4j-reactor 必须添加,否则使用 Flux<String> 返回值会报 IllegalConfigurationException。
3.2 配置文件 application.yml
langchain4j:
ollama:
chat-model:
base-url: http://localhost:11434
model-name: modelscope.cn/Qwen/Qwen2.5-7B-Instruct-GGUF:latest
temperature: 0.7
timeout: PT120S # 总超时时间 120 秒
connect-timeout: PT10S # 连接超时 10 秒
read-timeout: PT120S # 读取超时 120 秒
log-requests: true
log-responses: true
streaming-chat-model:
base-url: http://localhost:11434
model-name: modelscope.cn/Qwen/Qwen2.5-7B-Instruct-GGUF:latest # 改为与上面一致
temperature: 0.7
timeout: PT120S
connect-timeout: PT10S
read-timeout: PT120S
参数说明:
timeout:整个请求的总超时(ISO-8601 格式,如 PT120S = 120秒)
read-timeout:读取响应的超时,对慢模型尤其重要
log-requests/responses:便于调试
四、编写 AI 服务代码
4.1 定义 AI 服务接口(使用 @AiService)
import dev.langchain4j.service.AiService;
import dev.langchain4j.service.MemoryId;
import dev.langchain4j.service.SystemMessage;
import dev.langchain4j.service.UserMessage;

@AiService
public interface Assistant {

    @SystemMessage("你是一位知识渊博的AI助手,请用中文友好地回答用户的问题。")
    String chat(@MemoryId Long memoryId, @UserMessage String userMessage);
}
知识点:
@AiService:让 LangChain4j 动态生成实现类并注册为 Spring Bean。
@MemoryId:标记会话标识,框架自动管理每个 ID 的独立记忆(需要配合 ChatMemoryProvider)。
@SystemMessage:设定系统提示词。
@UserMessage:标记用户消息参数(可省略,默认取最后一个 String 参数)。
4.2 配置会话记忆(可选,实现多轮对话)
import dev.langchain4j.memory.chat.ChatMemoryProvider;
import dev.langchain4j.memory.chat.MessageWindowChatMemory;
import org.springframework.context.annotation.Bean;
import org.springframework.context.annotation.Configuration;

@Configuration
public class AiConfig {
    @Bean
    public ChatMemoryProvider chatMemoryProvider() {
        // 为每个 memoryId 分配一个独立的 ChatMemory,保留最近 10 条消息
        return memoryId -> MessageWindowChatMemory.withMaxMessages(10);
    }
}
不配置时,每次调用无上下文。
MessageWindowChatMemory 保留最近 N 条消息。
可结合 Redis 实现持久化(需实现 ChatMemoryStore 接口)。
可参考如下:
SpringBoot中集成LangChain4j+阿里百炼平台实现AI对话记忆功能、对话隔离、对话持久化到Redis功能:
https://blog.csdn.net/BADAO_LIUMANG_QIZHI/article/details/160255605
4.3 编写 Controller
普通对话
import com.badao.ai.config.Assistant;
import org.springframework.web.bind.annotation.*;

@RestController
public class ChatController {

    private final Assistant assistant;

    public ChatController(Assistant assistant) {
        this.assistant = assistant;
    }

    @GetMapping("/chat")
    public String chat(@RequestParam("message") String message,
                       @RequestHeader("X-User-Id") String userId) {
        // 将 userId 作为 memoryId 传递给 AI 服务
        return assistant.chat(userId, message);
    }
}
4.4 流式输出接口(需添加 langchain4j-reactor)
定义流式服务接口:
import dev.langchain4j.service.MemoryId;
import dev.langchain4j.service.SystemMessage;
import dev.langchain4j.service.UserMessage;
import dev.langchain4j.service.spring.AiService;
import reactor.core.publisher.Flux;

@AiService
public interface StreamingAssistant {
    @SystemMessage("你是一个友好、乐于助人的智能AI助手。请用中文回答。")
    Flux<String> chat(@MemoryId String userId, @UserMessage String message);
}
定义controller:
import com.badao.ai.config.StreamingAssistant;
import org.springframework.http.MediaType;
import org.springframework.web.bind.annotation.*;
import reactor.core.publisher.Flux;

@RestController
public class StreamingChatController {

    private final StreamingAssistant streamingAssistant;

    public StreamingChatController(StreamingAssistant streamingAssistant) {
        this.streamingAssistant = streamingAssistant;
    }

    @GetMapping(value = "/chat/stream", produces = MediaType.TEXT_EVENT_STREAM_VALUE)
    public Flux<String> streamChat(@RequestParam("message") String message,
                                   @RequestHeader("X-User-Id") String userId) {
        return streamingAssistant.chat(userId, message);
    }
}
五、测试验证
5.1 启动服务
确保 Ollama 服务已运行:ollama serve
确保模型已下载:ollama list
启动 Spring Boot 应用
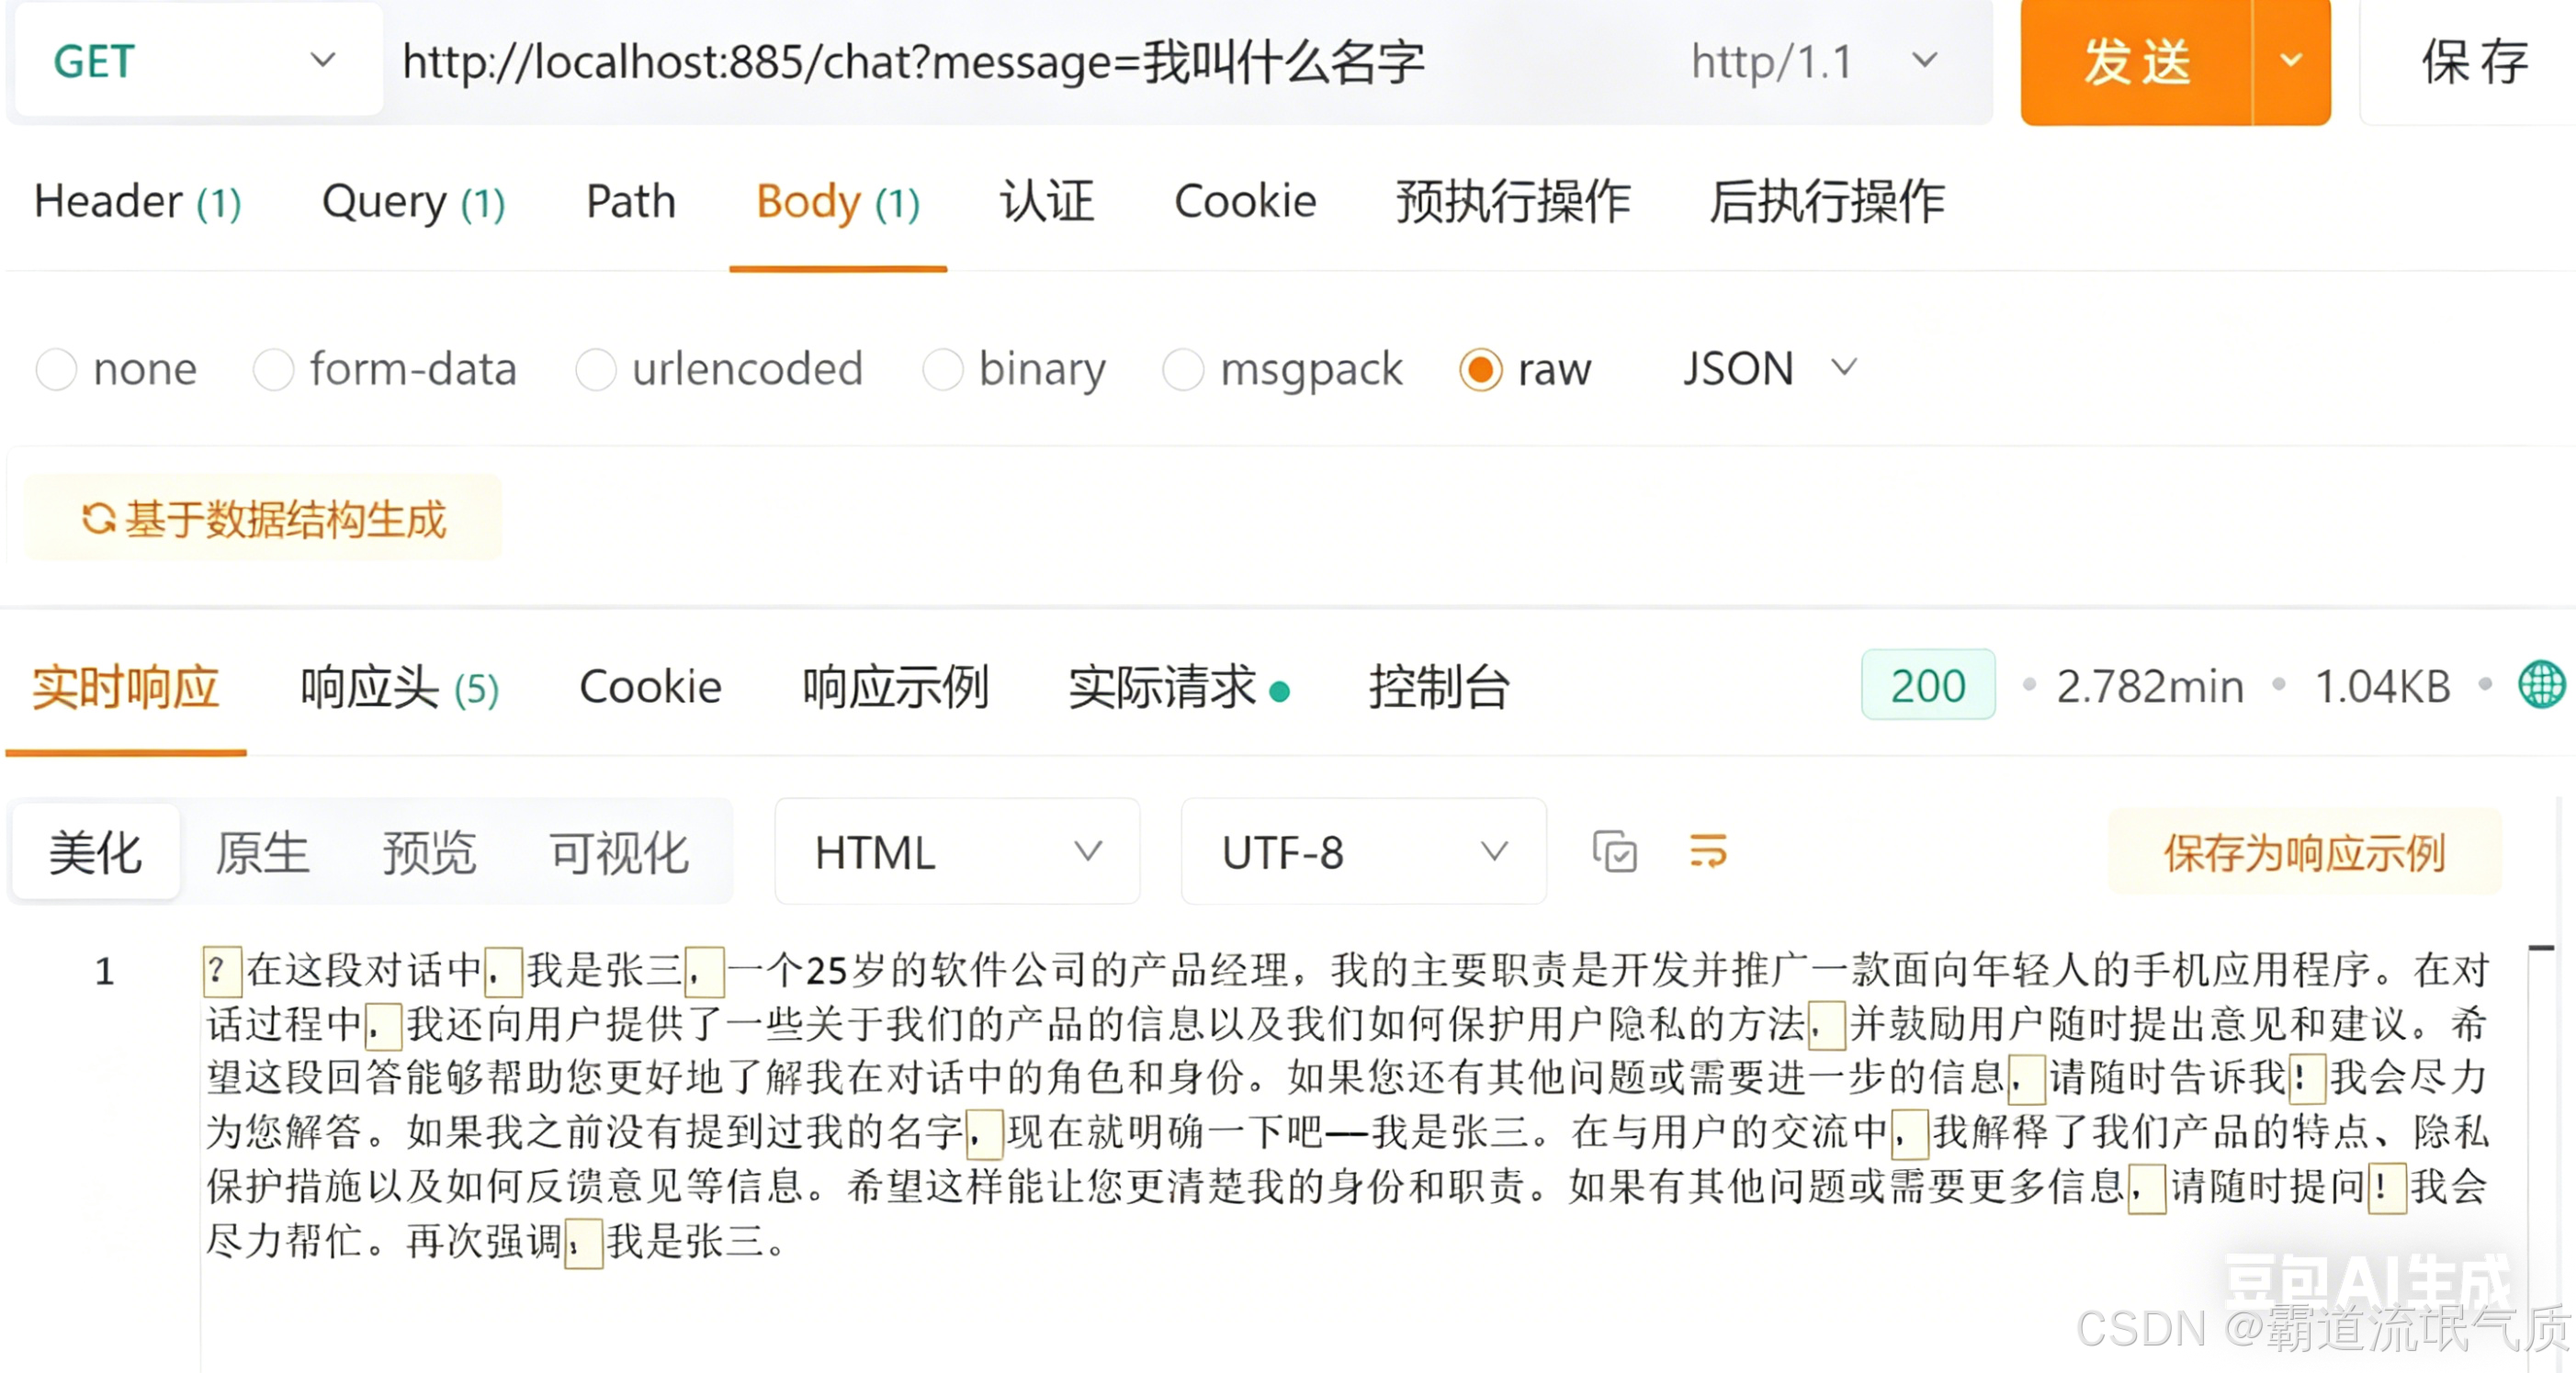
5.2 普通接口测试
第一轮:curl -H "X-User-Id: 1" "http://localhost:885/ai/chat?message=我叫张三"
第二轮:curl -H "X-User-Id: 1" "http://localhost:885/ai/chat?message=我叫什么名字?"
5.3流式接口测试
六、常见问题与解决方案
1、model 'xxx' not found
模型名称不正确或未下载
用 ollama list 确认名称,修改配置
2、SocketTimeoutException: Read timed out
模型推理时间过长,默认超时太短
增加 read-timeout 到 120 秒以上
3、IllegalConfigurationException: Please import langchain4j-reactor
缺少响应式模块
添加 langchain4j-reactor 依赖
4、NoClassDefFoundError: ClientHttpRequestFactorySettings
LangChain4j 版本与 Spring Boot 不兼容 统一使用 1.0.0-beta3,避免混用高版本
5、JDK isn't specified for module IDEA 未配置 JDK 项目结构 → Modules → 指定 JDK 17
6、模型下载慢 网络问题 使用魔搭手动导入,或配置 Ollama 镜像源