Vite 深度剖析(一)
- [1. Vite 概述](#1. Vite 概述)
- [2. 快速开始](#2. 快速开始)
-
- [2.1 初始化项目](#2.1 初始化项目)
- [2.2 安装依赖](#2.2 安装依赖)
- [2.3 添加资源](#2.3 添加资源)
- [2.4 运行](#2.4 运行)
- [2.5 修改package.json文件,添加script命令](#2.5 修改package.json文件,添加script命令)
- [2.6 打包](#2.6 打包)
- [2.7 支持 ES 模块化](#2.7 支持 ES 模块化)
- [2.8 预览打包后的情况](#2.8 预览打包后的情况)
- [3. 配置项和一些常见问题](#3. 配置项和一些常见问题)
-
- [3.1 根目录下创建 vite.config.ts](#3.1 根目录下创建 vite.config.ts)
- [3.2 类型提示问题](#3.2 类型提示问题)
- [3.3 环境问题](#3.3 环境问题)
-
- [3.3.1 node 环境(需要修改package.json的type为module)](#3.3.1 node 环境(需要修改package.json的type为module))
- [3.3.2 浏览器环境(使用npm包需要使用全路径)](#3.3.2 浏览器环境(使用npm包需要使用全路径))
- [3.4 ts 文件的引入处理](#3.4 ts 文件的引入处理)
- [4. 环境变量](#4. 环境变量)
-
- [4.1 .env 文件的基本使用](#4.1 .env 文件的基本使用)
- [4.2 创建读取 .env 文件函数](#4.2 创建读取 .env 文件函数)
- [4.3 浏览器读取环境变量](#4.3 浏览器读取环境变量)
- [4.4 浏览器读取环境变量类型提示报错修改](#4.4 浏览器读取环境变量类型提示报错修改)
- [4.5 不同的 .env 文件及其配置(生产环境删除console为例)](#4.5 不同的 .env 文件及其配置(生产环境删除console为例))
- [5. 框架加入](#5. 框架加入)
-
- [5.1 加入 vue 框架](#5.1 加入 vue 框架)
- [5.2 加入 React 库](#5.2 加入 React 库)
- [6. 依赖预构建](#6. 依赖预构建)
-
- [6.1 依赖预构建的作用](#6.1 依赖预构建的作用)
- [6.2 如果不执行依赖预构建(引发请求瀑布流的问题)](#6.2 如果不执行依赖预构建(引发请求瀑布流的问题))
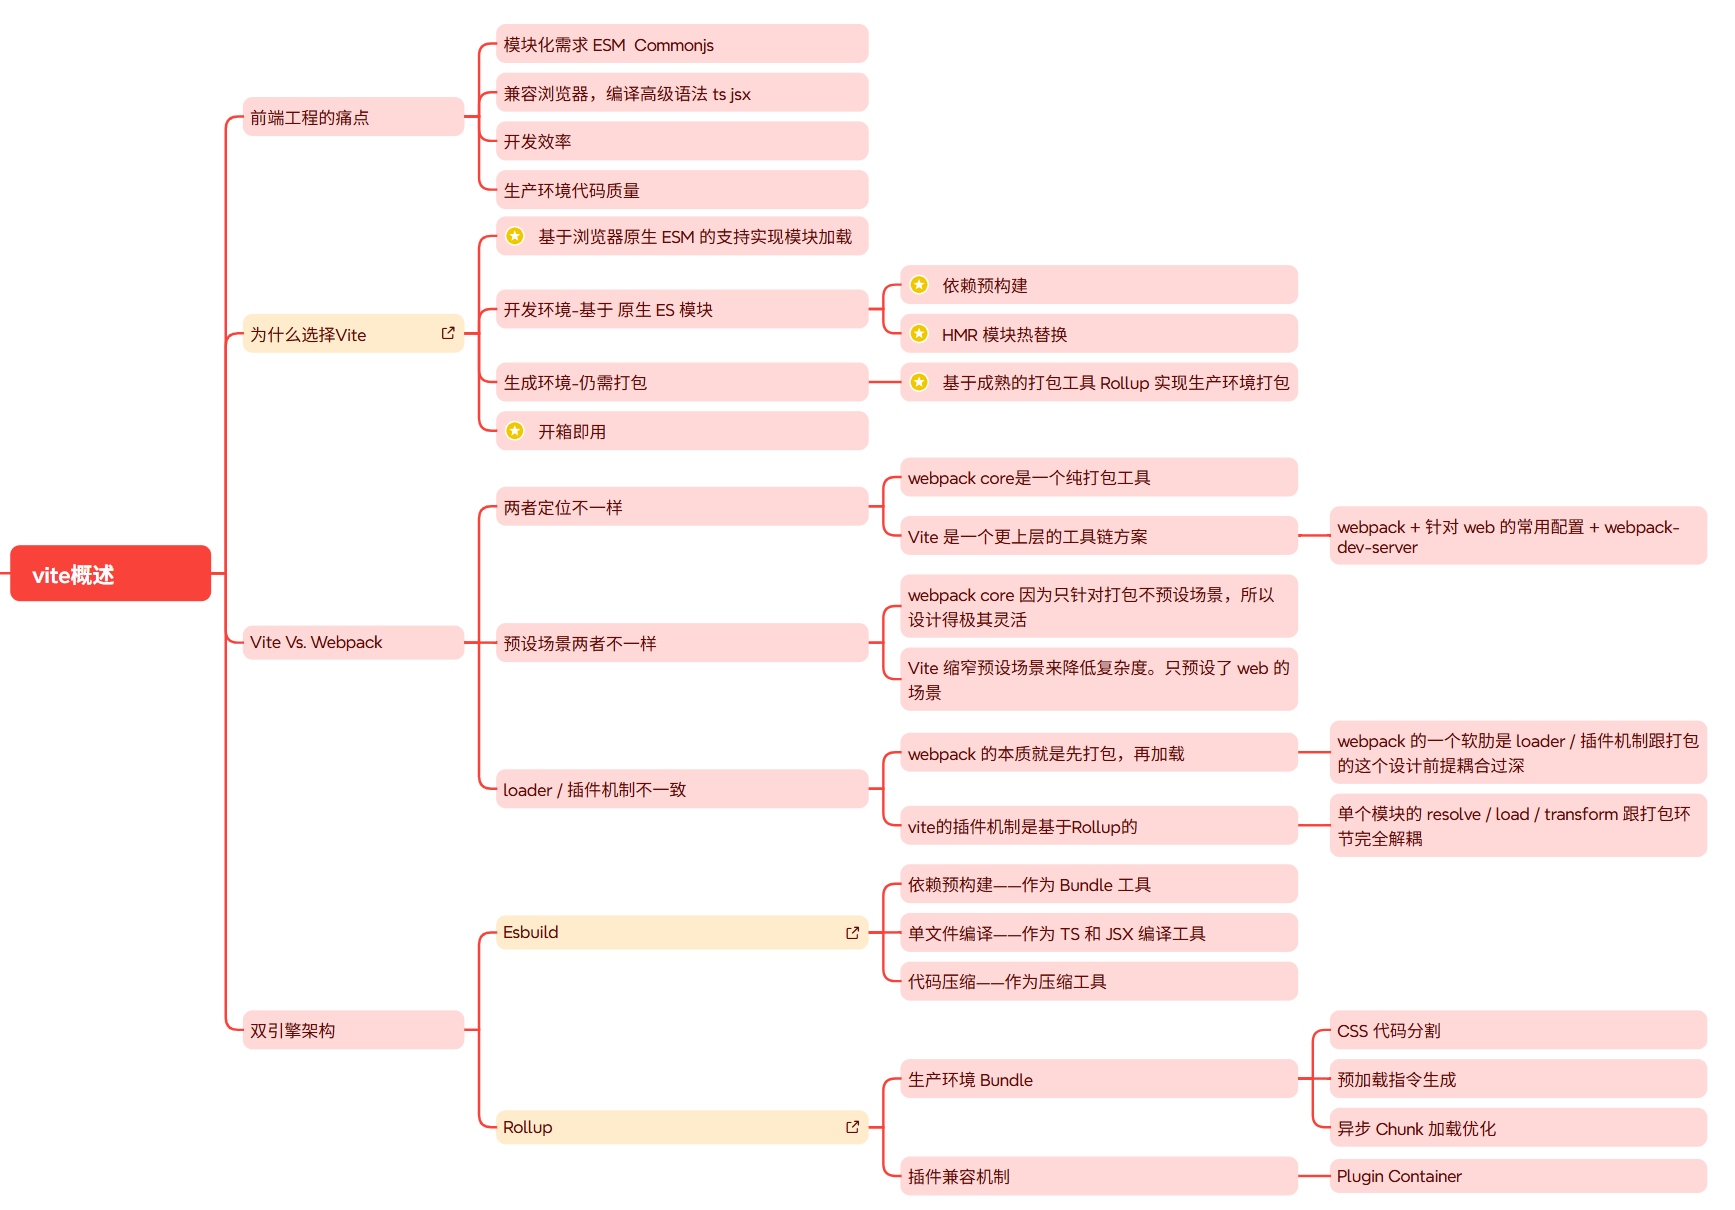
1. Vite 概述
官网:https://cn.vitejs.dev/guide/
2. 快速开始
代码可参考:https://cn.vitejs.dev/guide/ 的vanilla-ts预设模版
2.1 初始化项目
shell
mkdir vite-demo
cd vite-demo
pnpm init
2.2 安装依赖
shell
pnpm add vite -D
pnpm add typescript -D
2.3 添加资源
index.html ( 和webpack或者vue2项目不同,vite直接将index.html放在根目录下,而不是在public文件夹中):
html
<!doctype html>
<html lang="en">
  <head>
    <meta charset="UTF-8" />
    <meta name="viewport" content="width=device-width, initial-scale=1.0" />
    <title>Document</title>
  </head>
  <body>
  		<!-- 在 index.html 中引入 src/index.ts // 直接支持ts文件,不需要配置webpack的loader。 -->
    <script src="./src/index.ts"></script>
  </body>
</html>
src/index.ts:
typescript
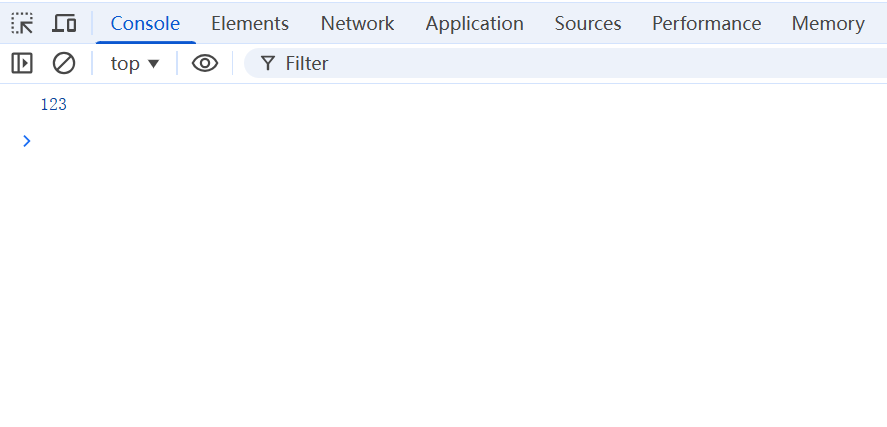
console.log(123)2.4 运行
typescript
npx vite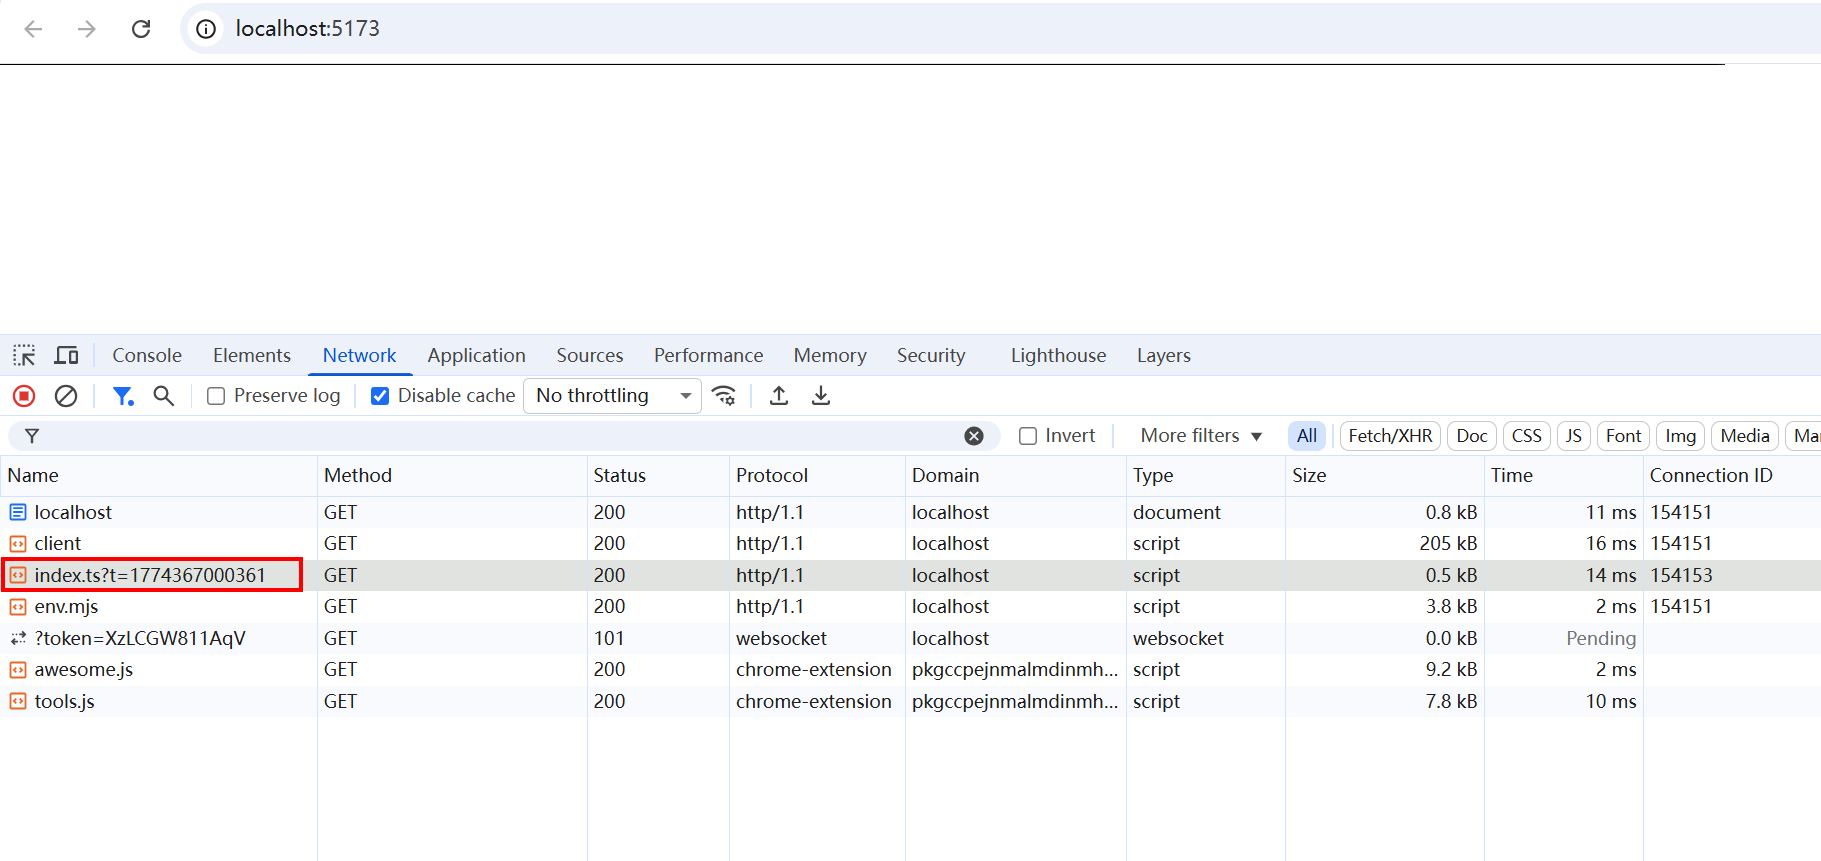
发现,浏览器不认识ts,但是vite帮我们做了处理。
2.5 修改package.json文件,添加script命令
json
{
  "name": "vite-demo",
  "version": "1.0.0",
  "description": "",
  "main": "index.js",
  "scripts": {
    "dev": "vite",
    "preview": "vite preview",
    "build": "vite build"
  },
  "keywords": [],
  "author": "",
  "license": "ISC",
  "packageManager": "pnpm@10.21.0",
  "devDependencies": {
    "typescript": "^6.0.2",
    "vite": "^8.0.2"
  }
}
2.6 打包
shell
npm run build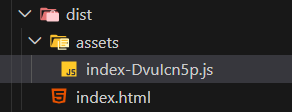
2.7 支持 ES 模块化
(1)index.html 添加 type="module"
javascript
<!doctype html>
<html lang="en">
  <head>
    <meta charset="UTF-8" />
    <meta name="viewport" content="width=device-width, initial-scale=1.0" />
    <title>Document</title>
  </head>
  <body>
    <div id="app"></div>
    <!-- 在 index.html 中引入 src/index.ts // 直接支持ts文件,不需要配置webpack的loader。 -->
    <script type="module" src="./src/index.ts"></script>
  </body>
</html>
(2)添加 src/counter.ts:
javascript
export function setupCounter(element: HTMLButtonElement) {
  let counter = 0;
  const setCounter = (count: number) => {
    counter = count;
    element.innerHTML = `Counter: ${counter}`;
  };
  setCounter(0);
  element.addEventListener("click", () => setCounter(counter + 1));
}
(3)src/index.ts 引入:
javascript
import { setupCounter } from "./counter";

document.querySelector("#app")!.innerHTML = `
  <div>
    <button id="counter" type="button"></button>
  </div>
`;
setupCounter(document.querySelector("#counter") as HTMLButtonElement);
(4)查看运行情况
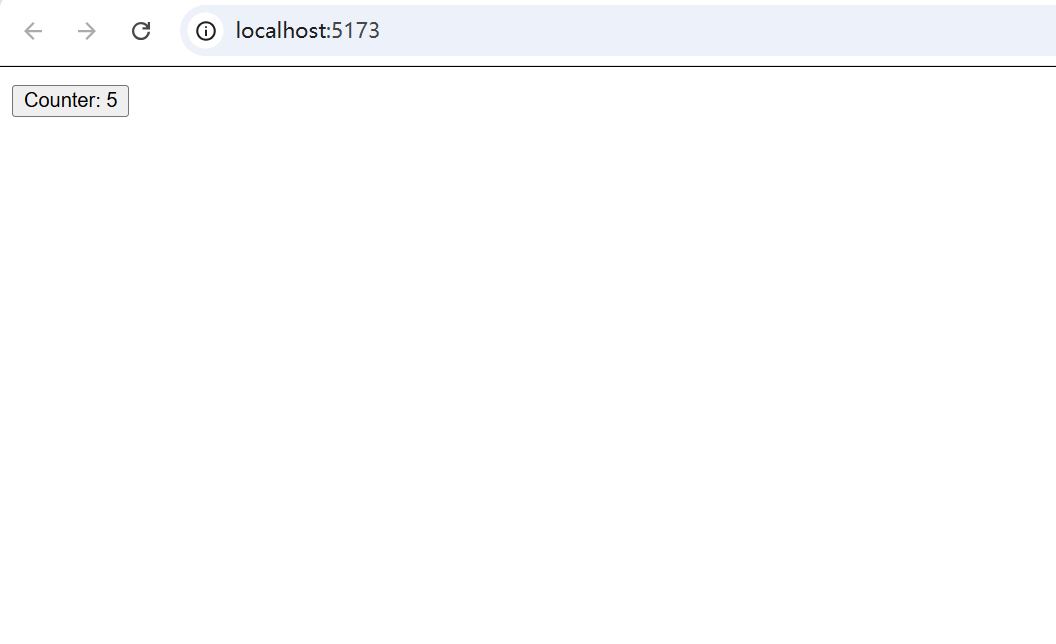
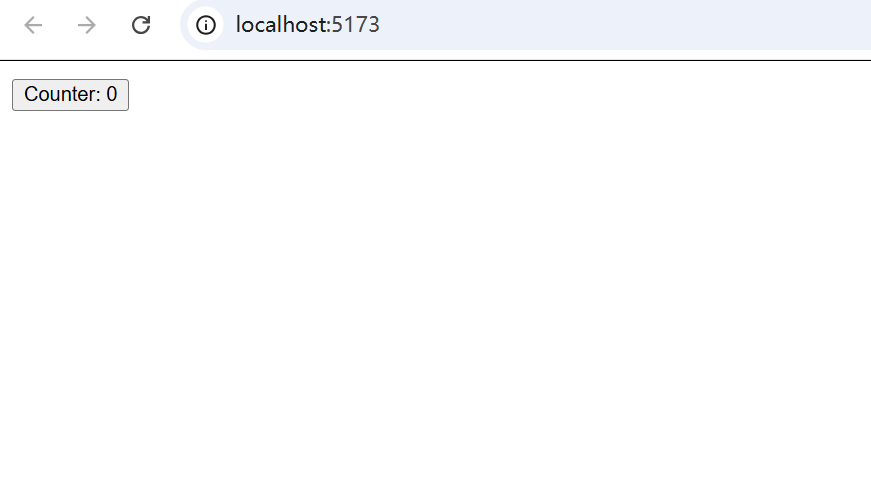 点击触发
点击触发
2.8 预览打包后的情况
shell
npm run preview需要注意的是,这条指令看到的是上次运行npm run build打包后的dist文件夹中的内容。
所以想看到最新的内容,需要先再打包一次再预览。
如果希望每次看到的都是最新的打包后的情况,可以往package.json额外添加一条指令,结合打包和预览:
shell
"bp": "vite build && vite preview"然后执行 npm run bp 即可。
3. 配置项和一些常见问题
配置 Vite 可参考 https://cn.vitejs.dev/config/,以开发服务器的打开配置 server.open 为例。
3.1 根目录下创建 vite.config.ts
(1)配置如下:
typescript
export default {
  server: {
    // 默认5173
    port: 3000,
    // 是否默认打开
    // open: true,
    // 也可以设置打开的页面
    open: "./index1.html",
  },
};
(2)使用 defineConfig 工具函数,获取类型提示
typescript
import { defineConfig} from "vite";
export default defineConfig({
  server: {
    port: 3000,
    open: true,
  },
});
(3)可以将配置项提取成函数,进行更多操作:
typescript
const config = () => {
  // 可以执行一些自定义函数
  console.log(111);
  return {
    server: {
      port: 3000,
      open: true,
    },
  };
};
export default defineConfig(config);
(4)config 是 defineConfig 默认配置对象,有mode、command等属性
typescript
import { defineConfig, ConfigEnv} from "vite";
export default defineConfig((config: ConfigEnv) => {
  // config 是默认配置对象,有mode、command等属性
  console.log(config);
  return {
    server: {
      port: 3000,
      open: true,
    },
  };
});
不同命令执行后,终端输出的config都有所不同。但是,我们通常只查看command和mode两个参数,并习惯使用解构的方式输出。
typescript
import { defineConfig, ConfigEnv, UserConfig } from "vite";
export default defineConfig(({ command, mode }: ConfigEnv): UserConfig => {
  // config 是默认配置对象,有command、mode等属性
  // 执行npm run build或者npm run test 时,可以看到对应的,命令和模式
  console.log(command);
  console.log(mode);
  // 可以根据不同的命令和模式,返回不同的配置对象
  return {
    server: {
      port: 3000,
      open: true,
    },
  };
});
3.2 类型提示问题
(1)npm 包的TS类型问题
shell
pnpm add lodash-es下载对应包,引入时需要有对应的类型提示包,否则同样会有报错提示。
shell
pnpm add @types/lodash-es -D(2)node 的TS类型问题。
在ts文件中,使用 import path from 'path' 同样会有类型提示问题。
shell
pnpm add @types/node -D3.3 环境问题
3.3.1 node 环境(需要修改package.json的type为module)
创建src/test2.js:
typescript
export default function test2() {
  console.log("test2");
}
创建 src/index1.js:
typescript
// 如果 cd src,运行node test1.js,会报错
// 需要修改package.json的type字段为module,才能使node运行js文件
import test2 from "./test2.js";
test2();
如果 cd src,运行node test1.js,会报错。需要修改package.json的type字段为module,才能使node运行js文件。
3.3.2 浏览器环境(使用npm包需要使用全路径)
创建index1.html:
html
<!doctype html>
<html lang="en">
  <head>
    <meta charset="UTF-8" />
    <meta name="viewport" content="width=device-width, initial-scale=1.0" />
    <title>Document</title>
  </head>
  <body>
    <h1>HTML</h1>
    <script type="module" src="./src/test1.js"></script>
  </body>
</html>
修改src/test1.js:
javascript
import { debounce } from "lodash-es"; // bare import  ESM默认不支持
// import debounce from "../node_modules/lodash-es/debounce.js"; // 如果在html中直接使用script引入index1.js,需要使用全路径
debounce(() => console.log("test1"), 1000)();
import test2 from "./test2.js";
test2();
使用live-server打开index1.html,会有路径问题。
因为浏览器的ESM默认不支持自动补全路径,需要使用全路径。
typescript
import debounce from "../node_modules/lodash-es/debounce.js"; // 如果在html中直接使用script引入index1.js,需要使用全路径
debounce(() => console.log("test1"), 1000)();
import test2 from "./test2.js";
test2();
当然,如果是vite项目运行则没有问题,因为它内部帮我们做了处理。
3.4 ts 文件的引入处理
在引入其他ts文件时,如果加上.ts后缀,可能会有报错(我用的最新版本没有),需要创建tsconfig.json进行处理:
json
{
  "compilerOptions": {
    "target": "ES2020",
    "module": "ESNext",
    "lib": [
      "DOM",
      "DOM.Iterable",
      "ESNext"
    ],
    "isolatedModules": true,
    "useDefineForClassFields": true,
    "skipLibCheck": true,
    "moduleResolution": "Bundler",
    "esModuleInterop": true,
    "allowSyntheticDefaultImports": true,
    "resolveJsonModule": true,
    "allowImportingTsExtensions": true,
    "noEmit": true
  },
  "include": [
    "src",
    "vite.config.ts"
  ]
}
4. 环境变量
(1)当前模块路径和 node.js 进程的工作目录所在路径
typescript
// 当前模块所在路径
console.log(__dirname);
// node.js 进程的工作目录路径
console.log(process.cwd());
二者可能相同,但是并非同一个概念。
4.1 .env 文件的基本使用
(1)在项目根路径创建 .env 文件
typescript
#标题
VITE_APP_TITLE='Vite App'
#端口
VITE_PORT=5173
#是否自动打开浏览器
VITE_OPEN=true
(2)在 vite.config.ts 配置文件中使用
typescript
import { defineConfig, ConfigEnv, UserConfig, loadEnv } from "vite";
export default defineConfig(({ command, mode }: ConfigEnv): UserConfig => {

  // mode 表示当前情景,默认development
  // root 表示项目根目录
  // '' 表示前缀,默认读取所有环境变量
  // 可以借助这个函数读取.env文件中的环境变量
  // const env = loadEnv(mode, root, "");
  // 这样只读取以VITE_开头的环境变量
  const env = loadEnv(mode, root, "VITE_");

  // 通常我们会使用解构获取自定义的环境变量,但是注意,读取到的都是string类型,需要转换为对应的类型
  const { VITE_PORT, VITE_OPEN } = env;
  const port = Number(VITE_PORT) || 3000;
  const open = VITE_OPEN === "true" ? true : false;

  console.log(env);
  // 可以根据不同的命令和模式,返回不同的配置对象
  return {
    root,
    server: {
      port: port,
      open: open,
    },
  };
});
4.2 创建读取 .env 文件函数
(1)创建src/vite-env.d.ts:
typescript
declare interface ViteEnv {
  VITE_TITLE: string;
  VITE_PORT: number;
  VITE_OPEN: boolean;
}
(2)创建 build/getEnv.ts:
typescript
type Recordable<T = any> = Record<string, T>;
export function wrapperEnv(envConfig: Recordable): ViteEnv {
  const ret: any = {};
  for (const envName of Object.keys(envConfig)) {
    let realName = envConfig[envName].replace(/\\n/g, "\n");
    realName =
      realName === "true" ? true : realName === "false" ? false : realName;
    if (envName === "VITE_PORT") {
      realName = Number(realName);
    }
    ret[envName] = realName;
  }
  return ret;
}
(3)在 vite.config.ts 中引入:
typescript
import { defineConfig, ConfigEnv, UserConfig, loadEnv } from "vite";
import { wrapperEnv } from "./build/getEnv";

export default defineConfig(({ command, mode }: ConfigEnv): UserConfig => {
  // 这样只读取以VITE_开头的环境变量
  const env = loadEnv(mode, root, "VITE_");
  console.log(env);

  const viteEnv = wrapperEnv(env);

  // 可以根据不同的命令和模式,返回不同的配置对象
  return {
    root,
    server: {
      port: viteEnv.VITE_PORT,
      open: viteEnv.VITE_OPEN,
    },
  };
});
4.3 浏览器读取环境变量
(1)读取环境变量
typescript
console.log(import.meta.env);src/counter.ts:
typescript
export function setupCounter(element: HTMLButtonElement) {
  // 会报错,因为是运行在浏览器端的,所以没有__dirname等全局变量
  // console.log(__dirname);
  // console.log("process", process.cwd());
  console.log(import.meta.env);
  let counter = 0;
  const setCounter = (count: number) => {
    counter = count;
    element.innerHTML = `Counter: ${counter}`;
  };
  setCounter(0);
  element.addEventListener("click", () => setCounter(counter + 1));
}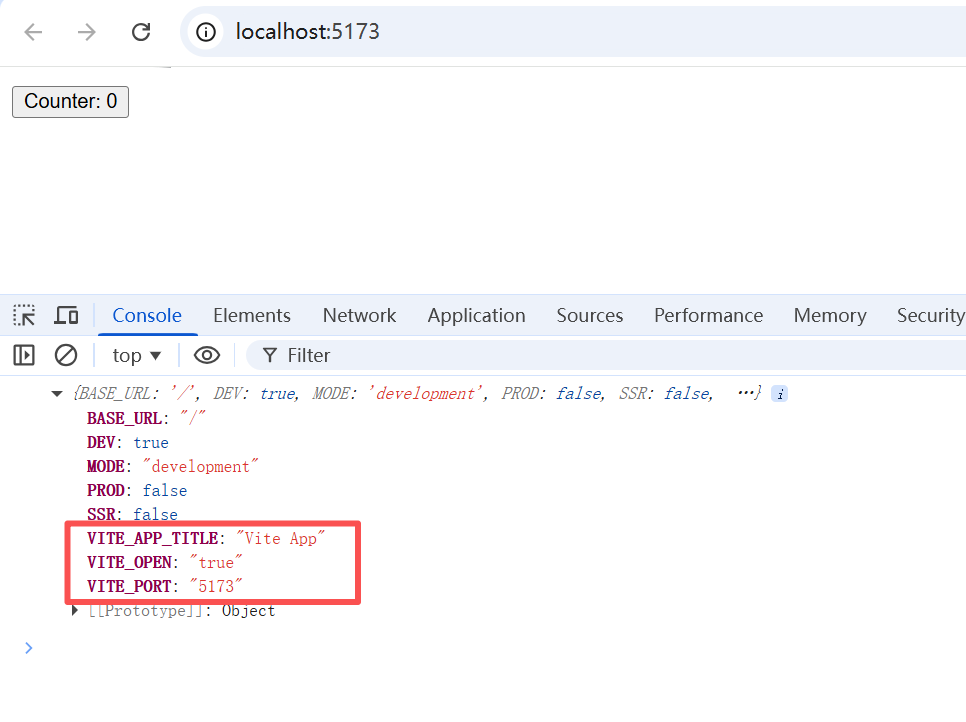
(2)限制
只能读取到有限的环境变量以及以VITE开头的环境变量。
typescript
#标题
VITE_APP_TITLE='Vite App'
#端口
VITE_PORT=5173
#是否自动打开浏览器
VITE_OPEN=true
APP_TEST=XXX
这里加的APP_TEST则读取不到。
(3)修改限制。
可以通过修改共享选项envPrefix,但是没有必要。
4.4 浏览器读取环境变量类型提示报错修改
src/vite-env.d.ts 加入ImportMeta 和 ImportMetaEnv :
typescript
declare interface ViteEnv {
  VITE_TITLE: string;
  VITE_PORT: number;
  VITE_OPEN: boolean;
}

// 定义后,浏览器读取env也会有对应提示
// interface ImportMetaEnv {
//   readonly VITE_APP_TITLE: string;
//   readonly VITE_PORT: number;
//   readonly VITE_OPEN: boolean;
// }

//  定义映射类型,将类型设置为只读
type ReadonlyProps<T> = {
  readonly [P in keyof T]: T[P];
};

interface ImportMetaEnv extends ReadonlyProps<ViteEnv> {}

// 浏览器读取import.meta.env时不报错
interface ImportMeta {
  readonly env: ImportMetaEnv;
}
4.5 不同的 .env 文件及其配置(生产环境删除console为例)
(1).env.development(开发环境):
typescript
#开发环境端口
VITE_PORT=8848
#是否删除console打印日志
VITE_DROP_CONSOLE=false
(2).env.production(生产环境):
typescript
#是否删除console打印日志
VITE_DROP_CONSOLE=true
(3)src/vite-env.d.ts 添加 VITE_DROP_CONSOLE:
typescript
declare interface ViteEnv {
  VITE_TITLE: string;
  VITE_PORT: number;
  VITE_OPEN: boolean;
  VITE_DROP_CONSOLE: boolean;
}

// 定义后,浏览器读取env也会有对应提示
// interface ImportMetaEnv {
//   readonly VITE_APP_TITLE: string;
//   readonly VITE_PORT: number;
//   readonly VITE_OPEN: boolean;
// }

//  定义映射类型,将类型设置为只读
type ReadonlyProps<T> = {
  readonly [P in keyof T]: T[P];
};

interface ImportMetaEnv extends ReadonlyProps<ViteEnv> {}

// 浏览器读取import.meta.env时不报错
interface ImportMeta {
  readonly env: ImportMetaEnv;
}
(4)配置 build 属性,控制浏览器是否输出 console.log 和 debug 语句。
vite.config.ts:
typescript
// defineConfig 用于自动提示配置项
import { defineConfig, ConfigEnv, UserConfig, loadEnv } from "vite";
import { wrapperEnv } from "./build/getEnv";

export default defineConfig(({ command, mode }: ConfigEnv): UserConfig => {

  const root = process.cwd();
  // 这样只读取以VITE_开头的环境变量
  const env = loadEnv(mode, root, "VITE_");
  // console.log(env);

  const viteEnv = wrapperEnv(env);
  console.log(viteEnv);

  // 可以根据不同的命令和模式,返回不同的配置对象
  return {
    root,
    server: {
      port: viteEnv.VITE_PORT,
      open: viteEnv.VITE_OPEN,
    },
    // esbuild 已弃用,看官网使用build配置
    // esbuild: {
    //   pure: viteEnv.VITE_DROP_CONSOLE ? ["console.log", "debugger"] : [],
    // },
    build: {
      // 使用该选项需要 pnpm add -D terser
      // 参考 https://cn.vitejs.dev/config/build-options#build-minify
      minify: "terser",
      terserOptions: {
        compress: {
          drop_console: viteEnv.VITE_DROP_CONSOLE,
          drop_debugger: viteEnv.VITE_DROP_CONSOLE,
        },
      },
    },
  };
});
(5)执行 pnpm dev
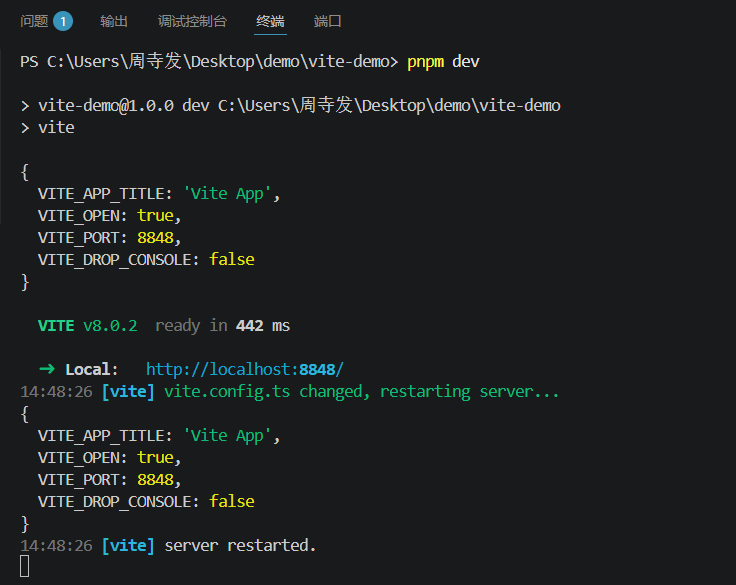
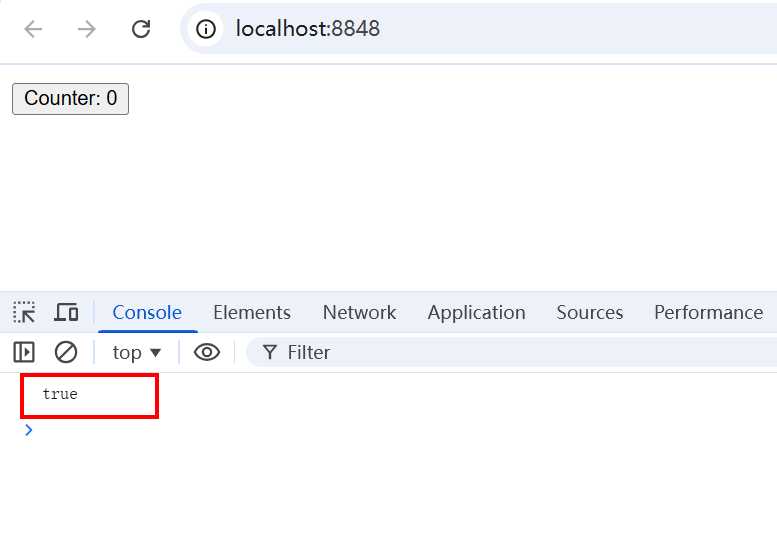
发现端口号变了,浏览器仍然有输出。
(6)执行 pnpm bp
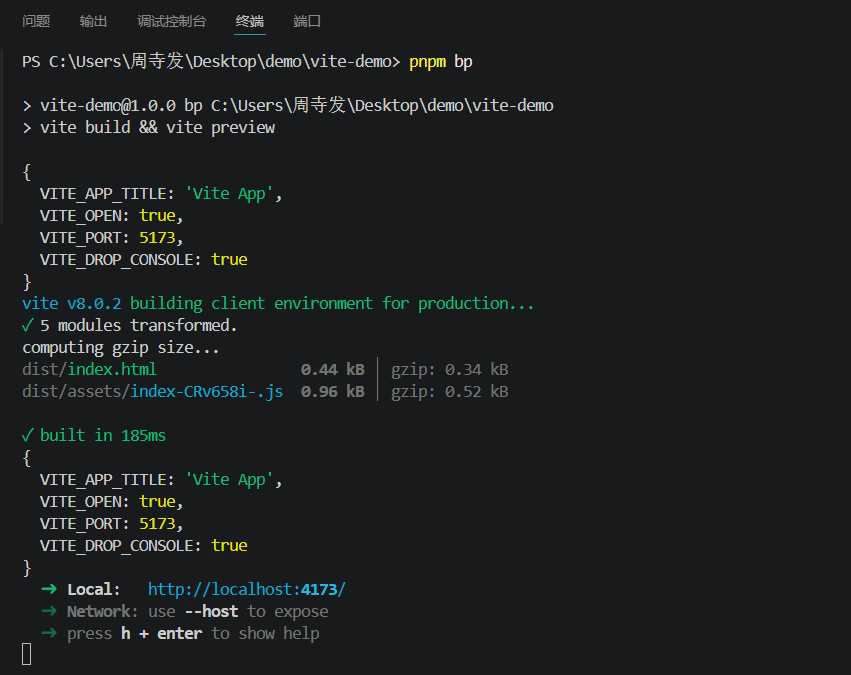
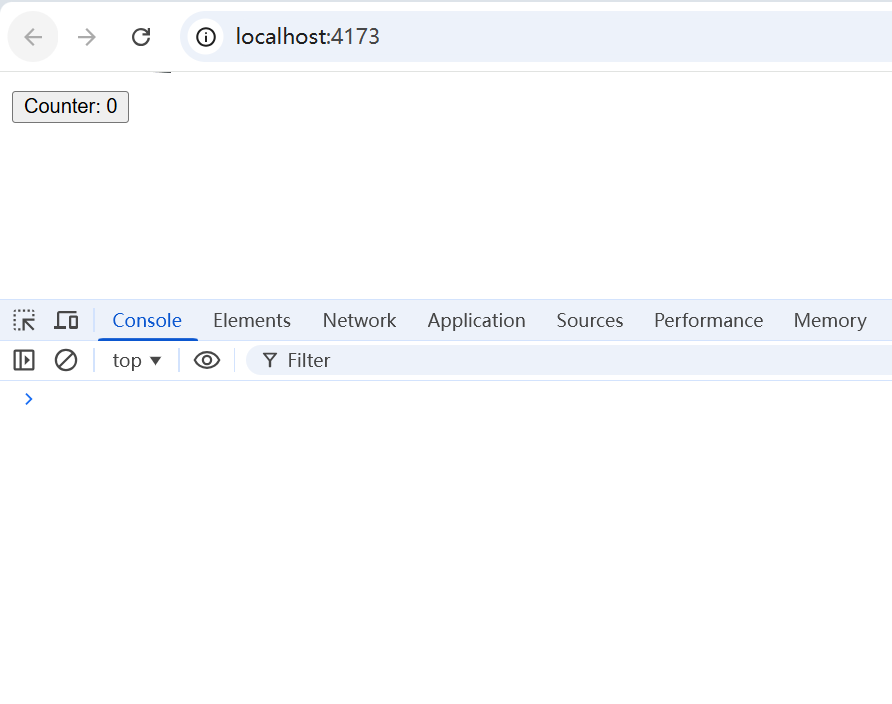
果然,浏览器的console输出消失了。
5. 框架加入
5.1 加入 vue 框架
(1)复制一份vite-demo,更名为vite-vue-demo。删除node_modules重新下载。
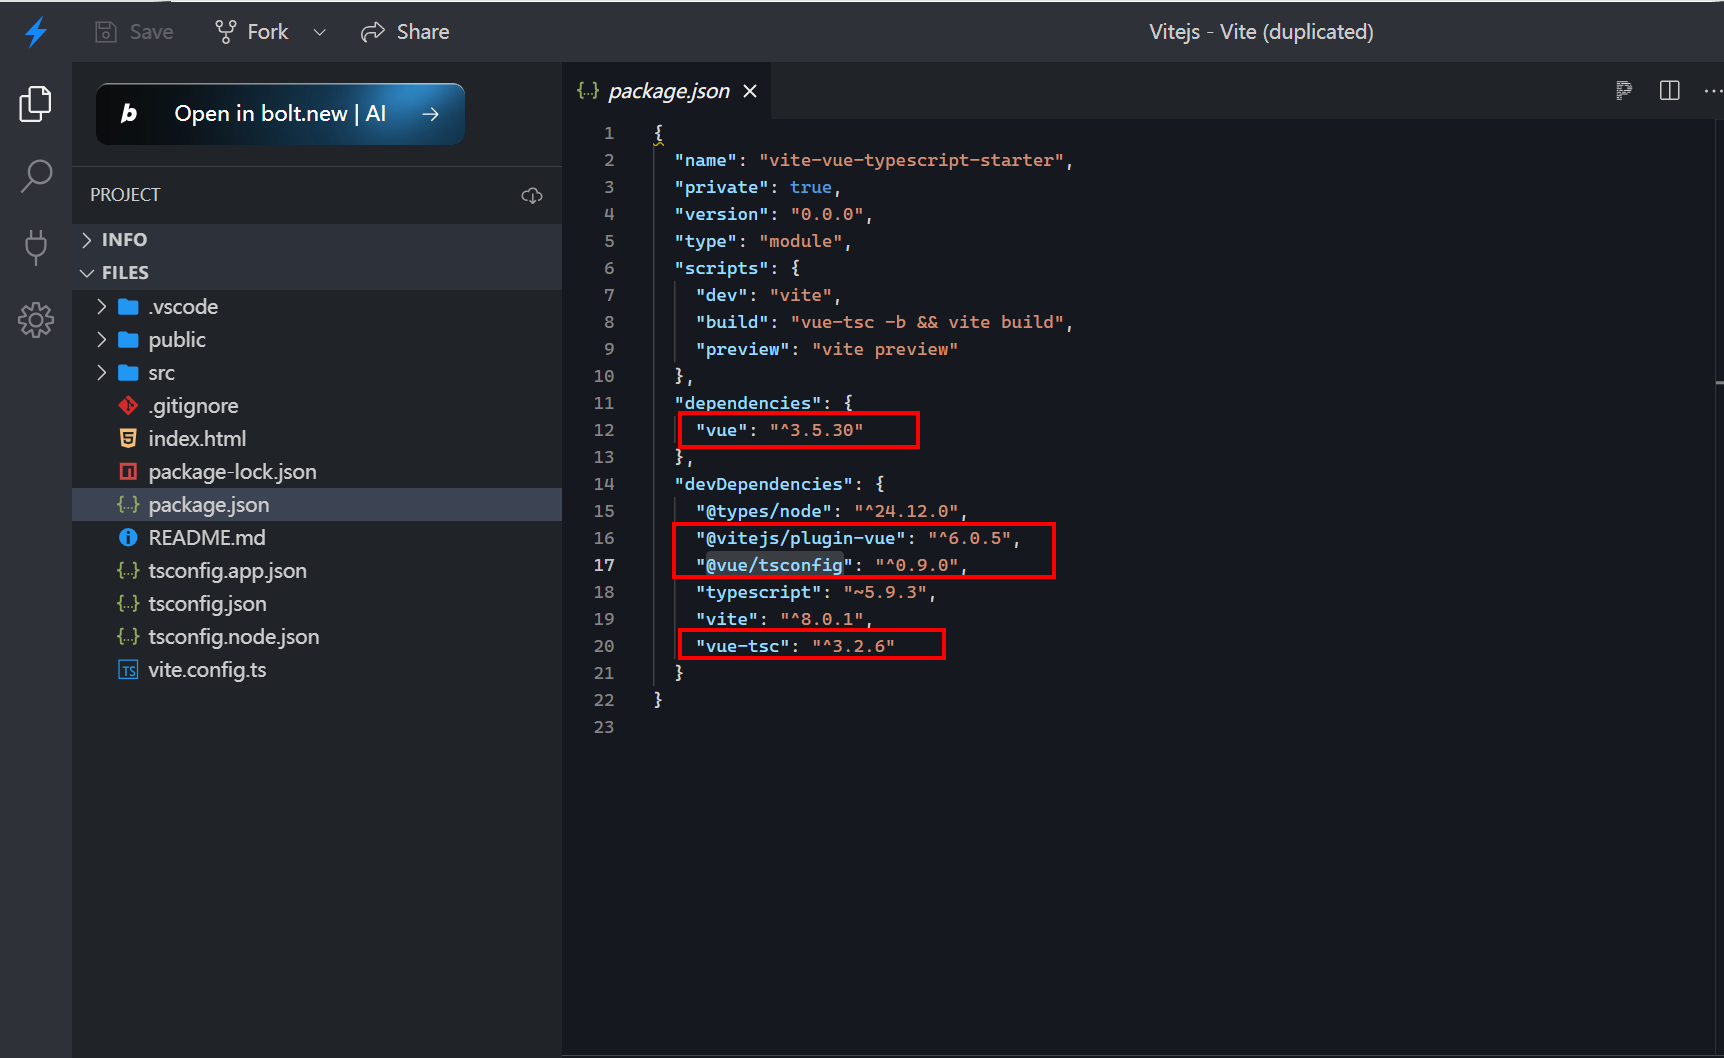
(2)下载vue相关的npm包
typescript
pnpm add vue
pnpm add @vitejs/plugin-vue -D
pnpm add @vue/tsconfig -D
pnpm add vue-tsc -D
参照 https://cn.vitejs.dev/guide/ 中的 vue-ts 预设,查看package.json,就知道需要下载哪些包了。
其中 @vitejs/plugin-vue 提供:
- 单文件组件支持
- 热重载
- 生产优化
详细使用参考 https://www.npmjs.com/package/@vitejs/plugin-vue
(3)在 ts.config.ts 中加入 vue 相关配置。关键代码:
typescript
import { defineConfig } from 'vite'
import vue from '@vitejs/plugin-vue'

// https://vite.dev/config/
export default defineConfig({
  plugins: [vue()],
})
(4)创建 src/App.vue:
typescript
<template>
  <div>
    <h2>Welcome</h2>
    <button @click="handleCounter">count is {{ count }}</button>
  </div>
</template>

<script setup>
import { ref } from "vue";
const count = ref(0);
const handleCounter = () => {
  count.value++;
};
</script>

<style lang="scss" scoped></style>
(5)创建 src/main.ts:
typescript
import { createApp } from "vue";
import App from "./App.vue";

createApp(App).mount("#app");
(6)在 index.html 引入:
typescript
<!doctype html>
<html lang="en">
<head>
<meta charset="UTF-8" />
<meta name="viewport" content="width=device-width, initial-scale=1.0" />
<title>Document</title>
</head>
<body>
<div id="app"></div>
<!-- 在 index.html 中引入 src/index.ts // 直接支持ts文件,不需要配置webpack的loader。 -->
<!-- <script type="module" src="./src/index.ts"></script> -->
<script type="module" src="./src/main.ts"></script>
</body>
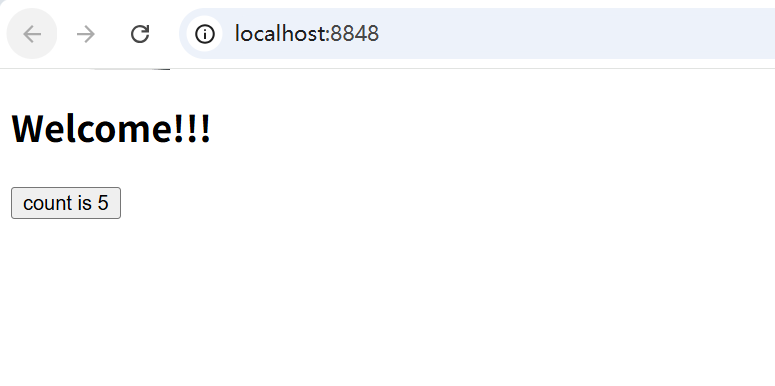
</html>(7)运行 pnpm dev
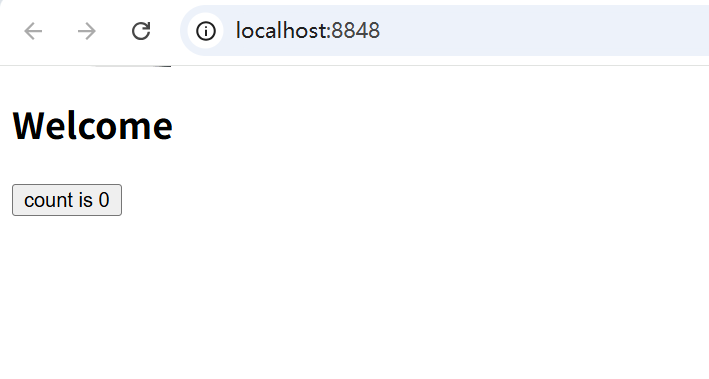
点击按钮,修改代码Welcome 为Welcome!!!,你会发现,并不会整个页面刷新,而是实现了局部热更新(counter 的数字不会归零)。
5.2 加入 React 库
(1)复制一份vite-demo,更名为vite-react-demo。删除node_modules重新下载。
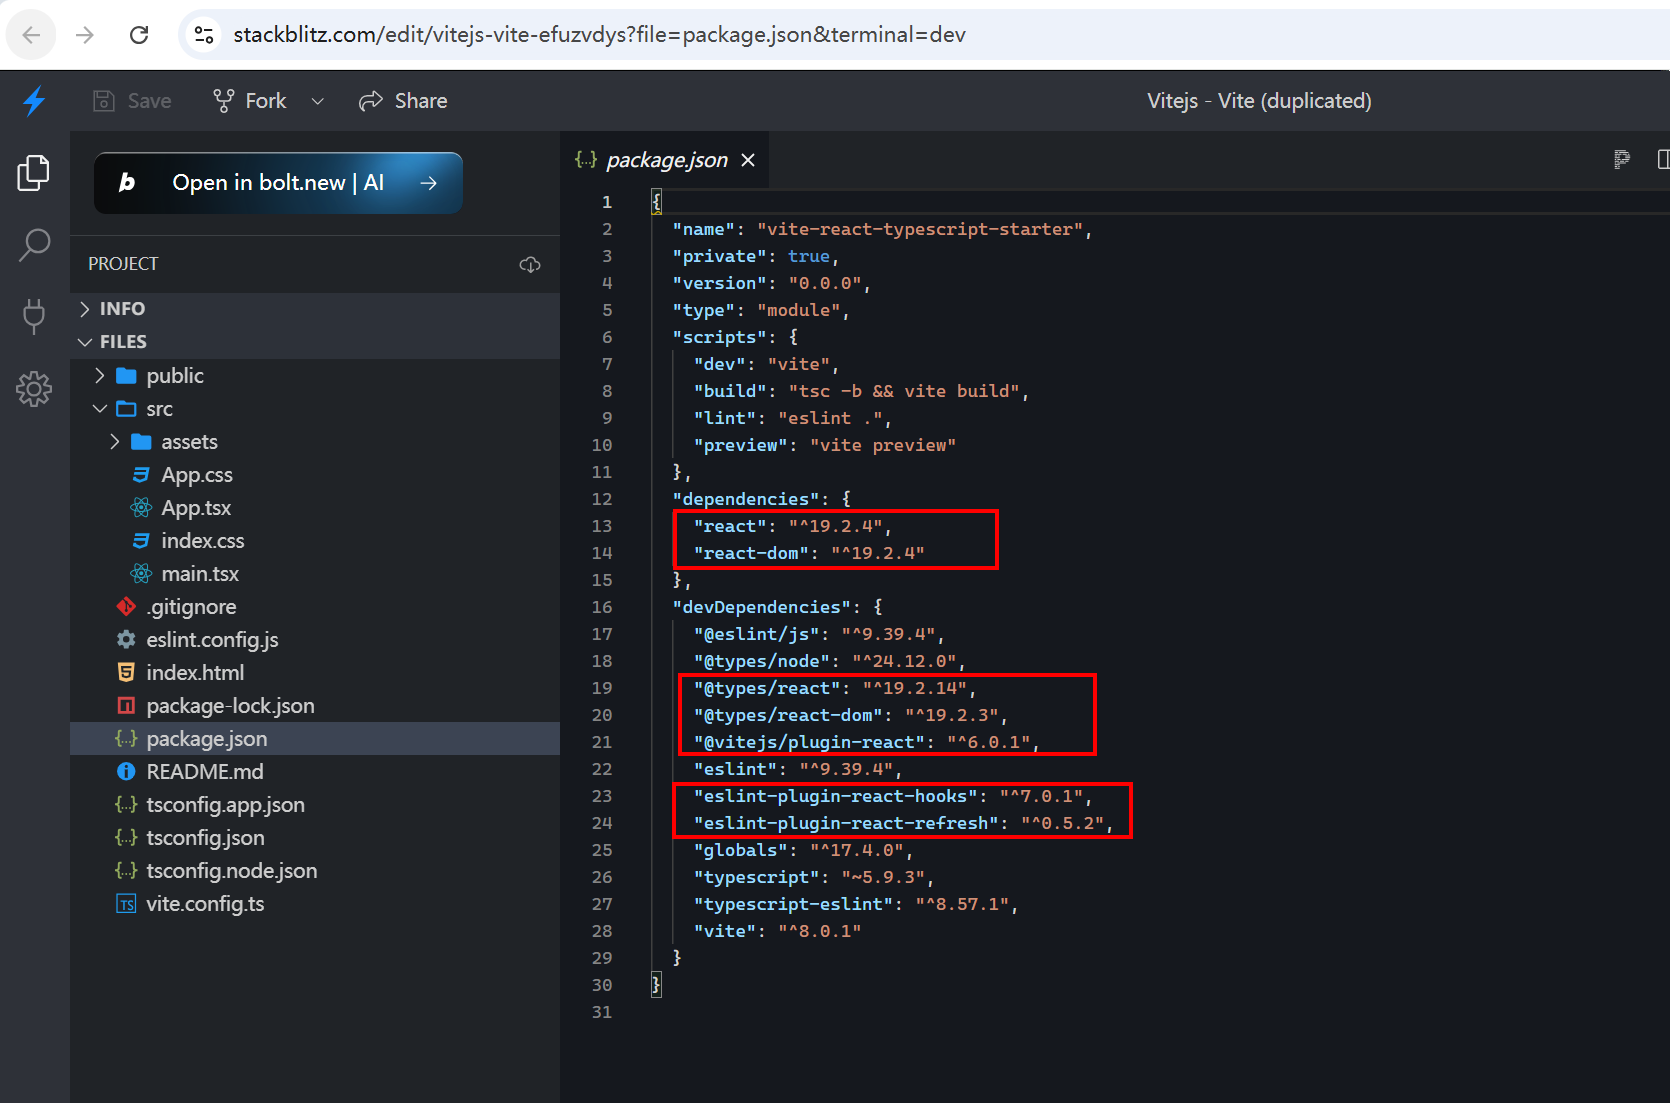
(2)下载react相关的npm包
typescript
pnpm add react
pnpm add dom
pnpm add @types/react -D
pnpm add @types/react-dom -D
pnpm add @vitejs/plugin-react -D
pnpm add eslint -D
pnpm add eslint-plugin-react-hooks -D
pnpm add eslint-plugin-react-refresh -D
pnpm add typescript-eslint -D
参照 https://cn.vitejs.dev/guide/ 中的 react-ts 预设,查看package.json,就知道需要下载哪些react相关包了。
(3)tsconfig.json 加入对应语法支持,关键代码:
typescript
{
  "compilerOptions": {
    "jsx": "preserve"
  }
}
(4)创建 src/App.tsx:
typescript
import React, { useState } from 'react';
export default () => {
  const [count, setCount] = useState(0)
  return (
    <div>
      <h2>Hello World</h2>
      <button onClick={
        () => {
          setCount(count + 1);
        }
      }>count is { count }</button>
    </div>
  )
}
(5)创建src/main.tsx:
typescript
import React from 'react'
import ReactDOM from 'react-dom/client'

import App from './App.tsx'

ReactDOM.createRoot(document.getElementById('root')!).render(
  <React.StrictMode>
    <App />
  </React.StrictMode>
)
(6)在index.html中引入:
typescript
<!doctype html>
<html lang="en">
  <head>
    <meta charset="UTF-8" />
    <meta name="viewport" content="width=device-width, initial-scale=1.0" />
    <title>Document</title>
  </head>
  <body>
    <div id="root"></div>
    <!-- 在 index.html 中引入 src/index.ts // 直接支持ts文件,不需要配置webpack的loader。 -->
    <script type="module" src="./src/main.tsx"></script>
  </body>
</html>
(7)运行 pnpm dev
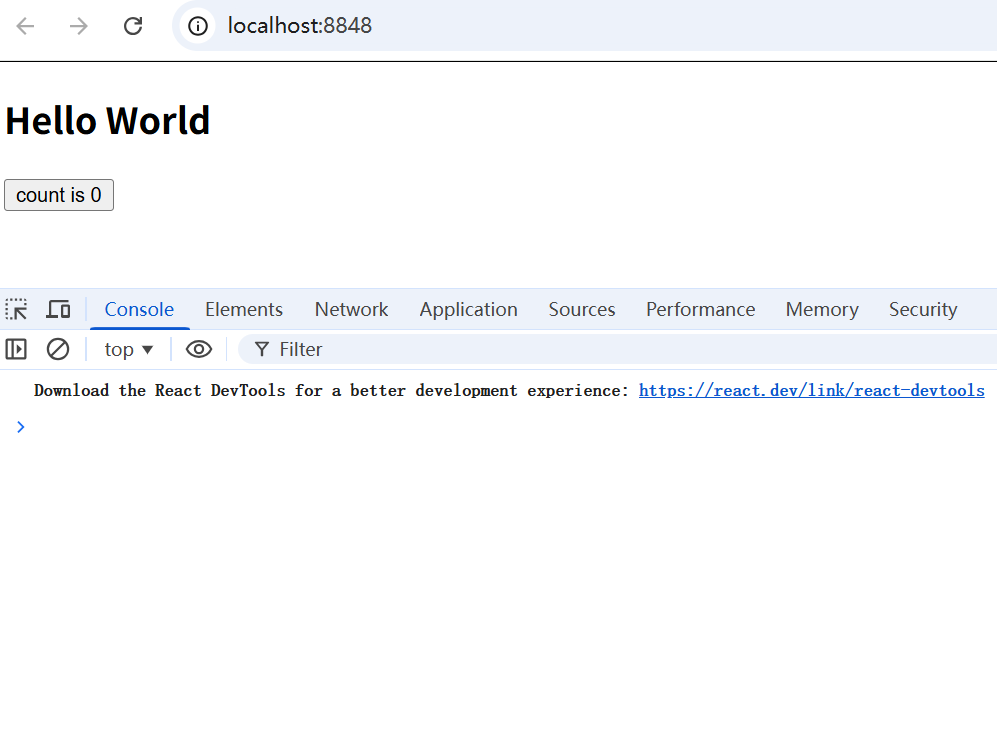
(8)模块热更新。
vite.config.ts 加入 @vitejs/plugin-react,关键代码:
typescript
import { defineConfig } from 'vite'
import react from '@vitejs/plugin-react'

// https://vite.dev/config/
export default defineConfig({
  plugins: [react()],
})
但是此时还不能做到模块热更新,需要修改 App.tsx 为固定格式:
typescript
import React, { useState } from 'react';
const App = () => {
const [count, setCount] = useState(0)
return (
<div>
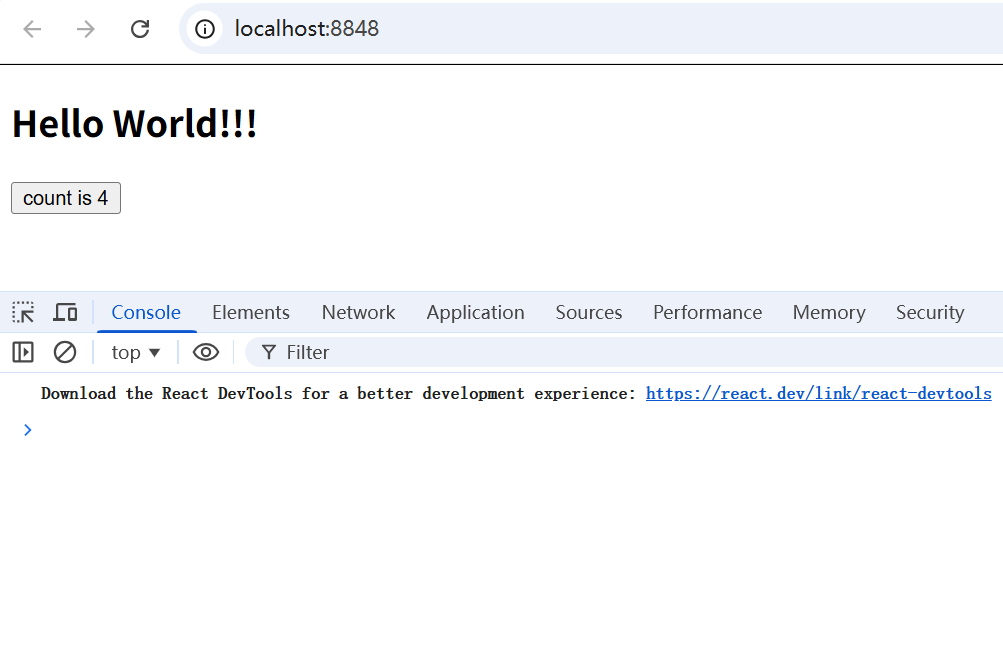
<h2>Hello World!!!</h2>
<button onClick={
() => {
setCount(count + 1);
}
}>count is { count }</button>
</div>
)
}
export default App;此时就支持模块热更新了。
(9)eslint 相关。
创建 eslintrc.config.cjs:
typescript
module.exports = {
  root: true,
  env: { browser: true, es2020: true },
  extends: [
    "eslint:recommended",
    "plugin:@typescript-eslint/recommended",
    "plugin:react-hooks/recommended",
  ],
  ignorePatterns: ["dist", ".eslintrc.cjs"],
  parser: "@typescript-eslint/parser",
  plugins: ["react-refresh"],
  rules: {
    "react-refresh/only-export-components": [
      "warn",
      { allowConstantExport: true },
    ],
  },
};
记得下载VSCode的 ESLint 插件。
6. 依赖预构建
参考: https://cn.vitejs.dev/guide/why
6.1 依赖预构建的作用
Vite 通过在一开始将应用中的模块区分为 依赖 和 源码 两类,改进了开发服务器启动时间。
依赖 大多为在开发时不会变动的纯 JavaScript。一些较大的依赖(例如有上百个模块的组件库)处理的代价也很高。依赖也通常会存在多种模块化格式(例如 ESM 或者 CommonJS)。
Vite 将会使用 esbuild 预构建依赖。esbuild 使用 Go 编写,并且比以 JavaScript 编写的打包器预构建依赖快 10-100 倍。
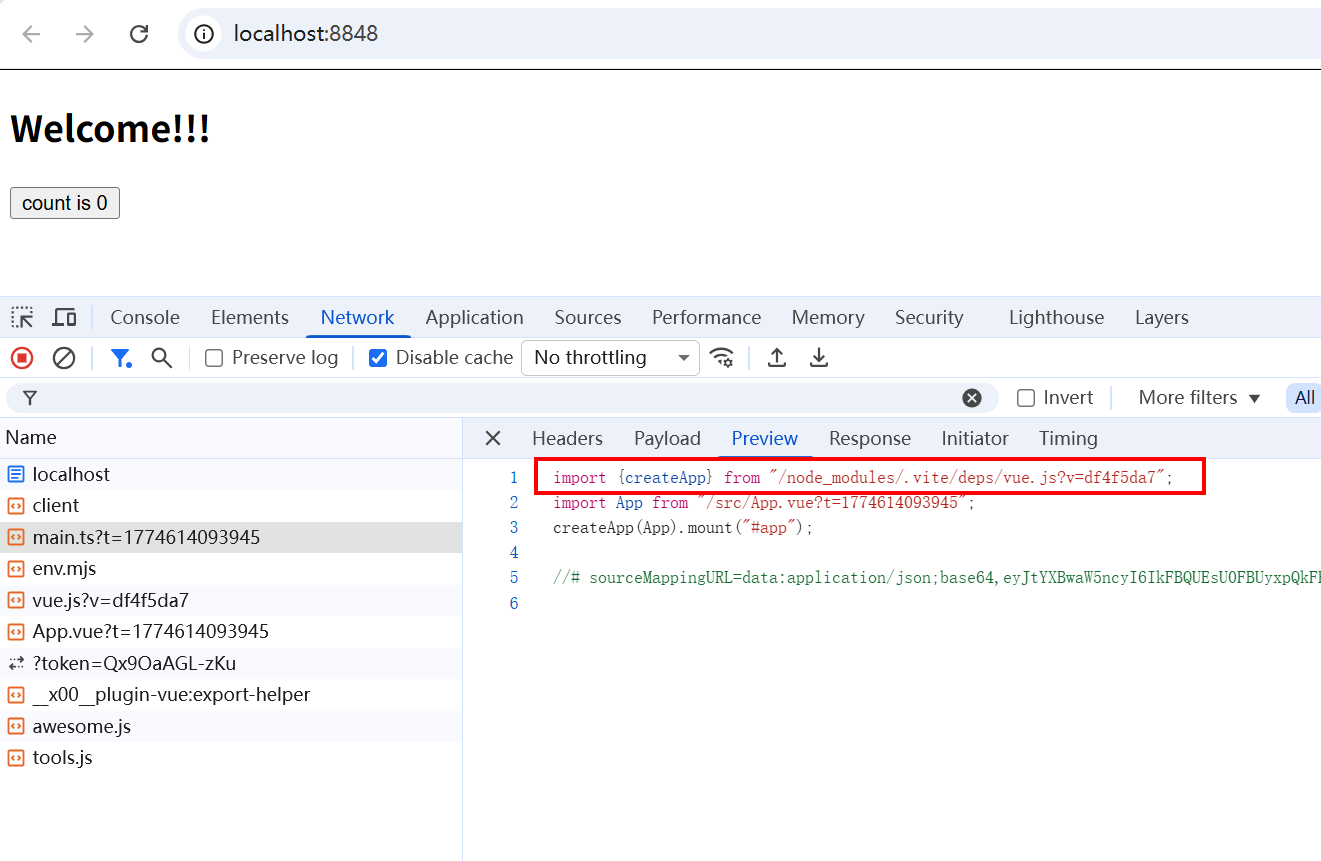
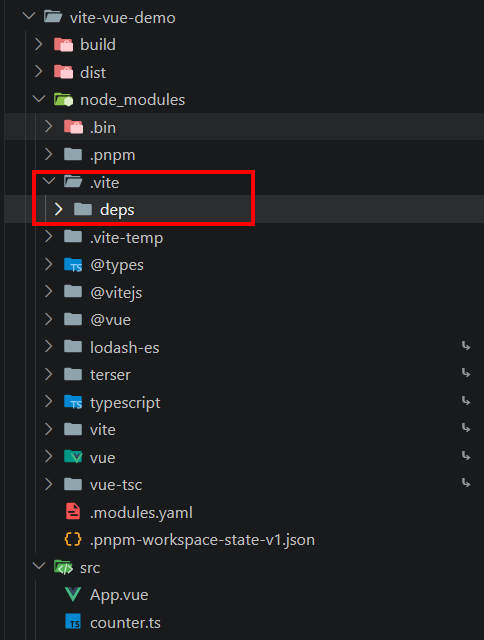
可以看到,每次执行 pnpm dev 都进行依赖预构建,生成 node_modules/.vite 文件夹,即使删除,下次执行还是会生成。
后续请求包中的文件时,只需要引入与构建的文件即可。
比如,我们在App.vue中引入lodash-es:
typescript
<template>
  <div>
    <h2>Welcome!!!</h2>
    <input type="text" @input="handleInput" />
    <button @click="handleCounter">count is {{ count }}</button>
  </div>
</template>

<script lang="ts" setup>
import { ref } from "vue";
import { debounce } from "lodash-es";
const count = ref(0);
const handleCounter = () => {
  count.value++;
};
const handleInput = debounce((e: Event) => {
  console.log((e.target as HTMLInputElement).value);
}, 1000);
</script>

<style lang="scss" scoped></style>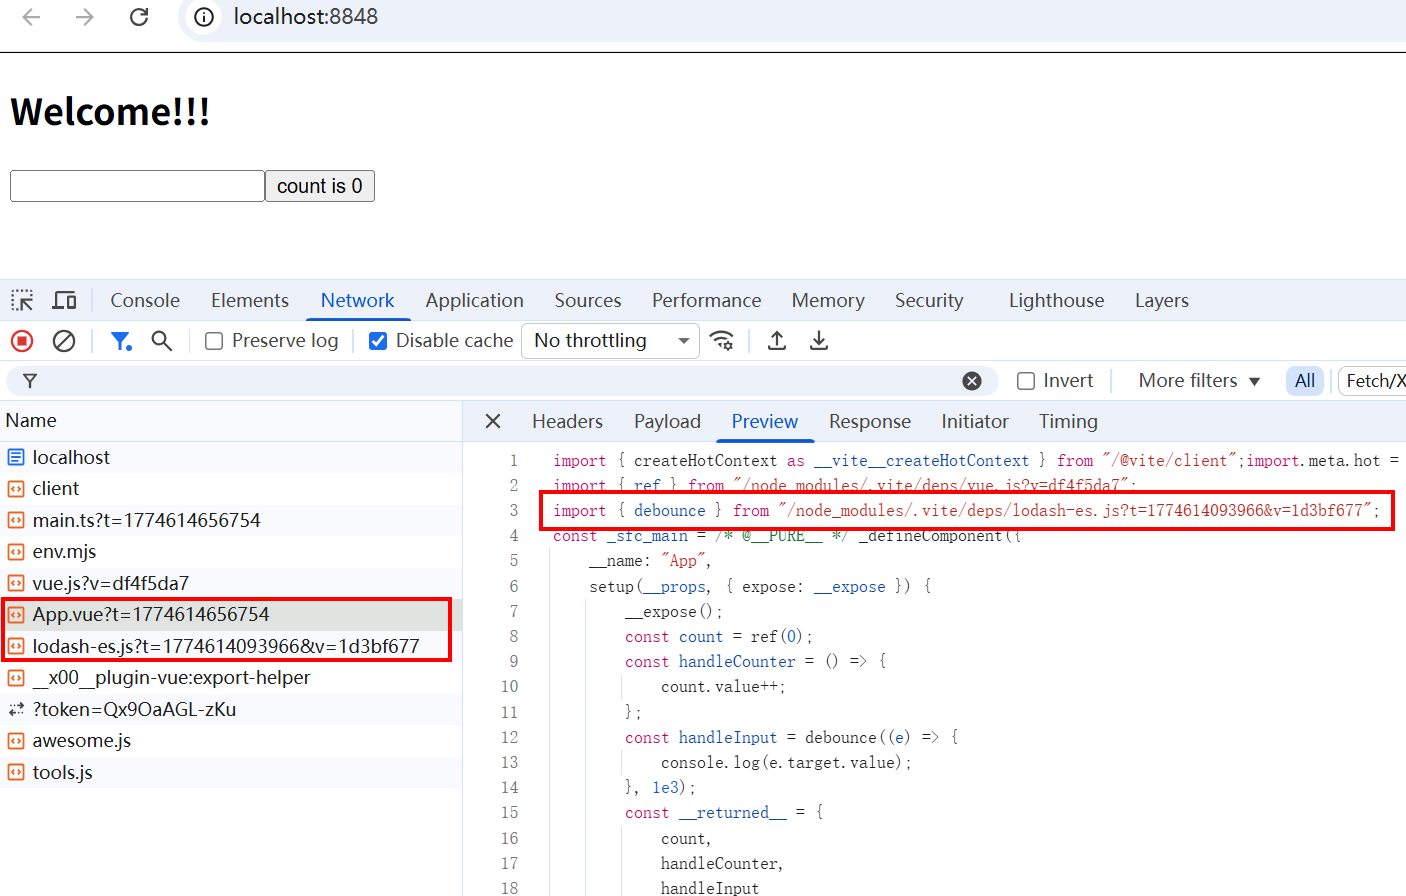
就会在依赖预构建文件夹中生成相关代码,从而直接使用。
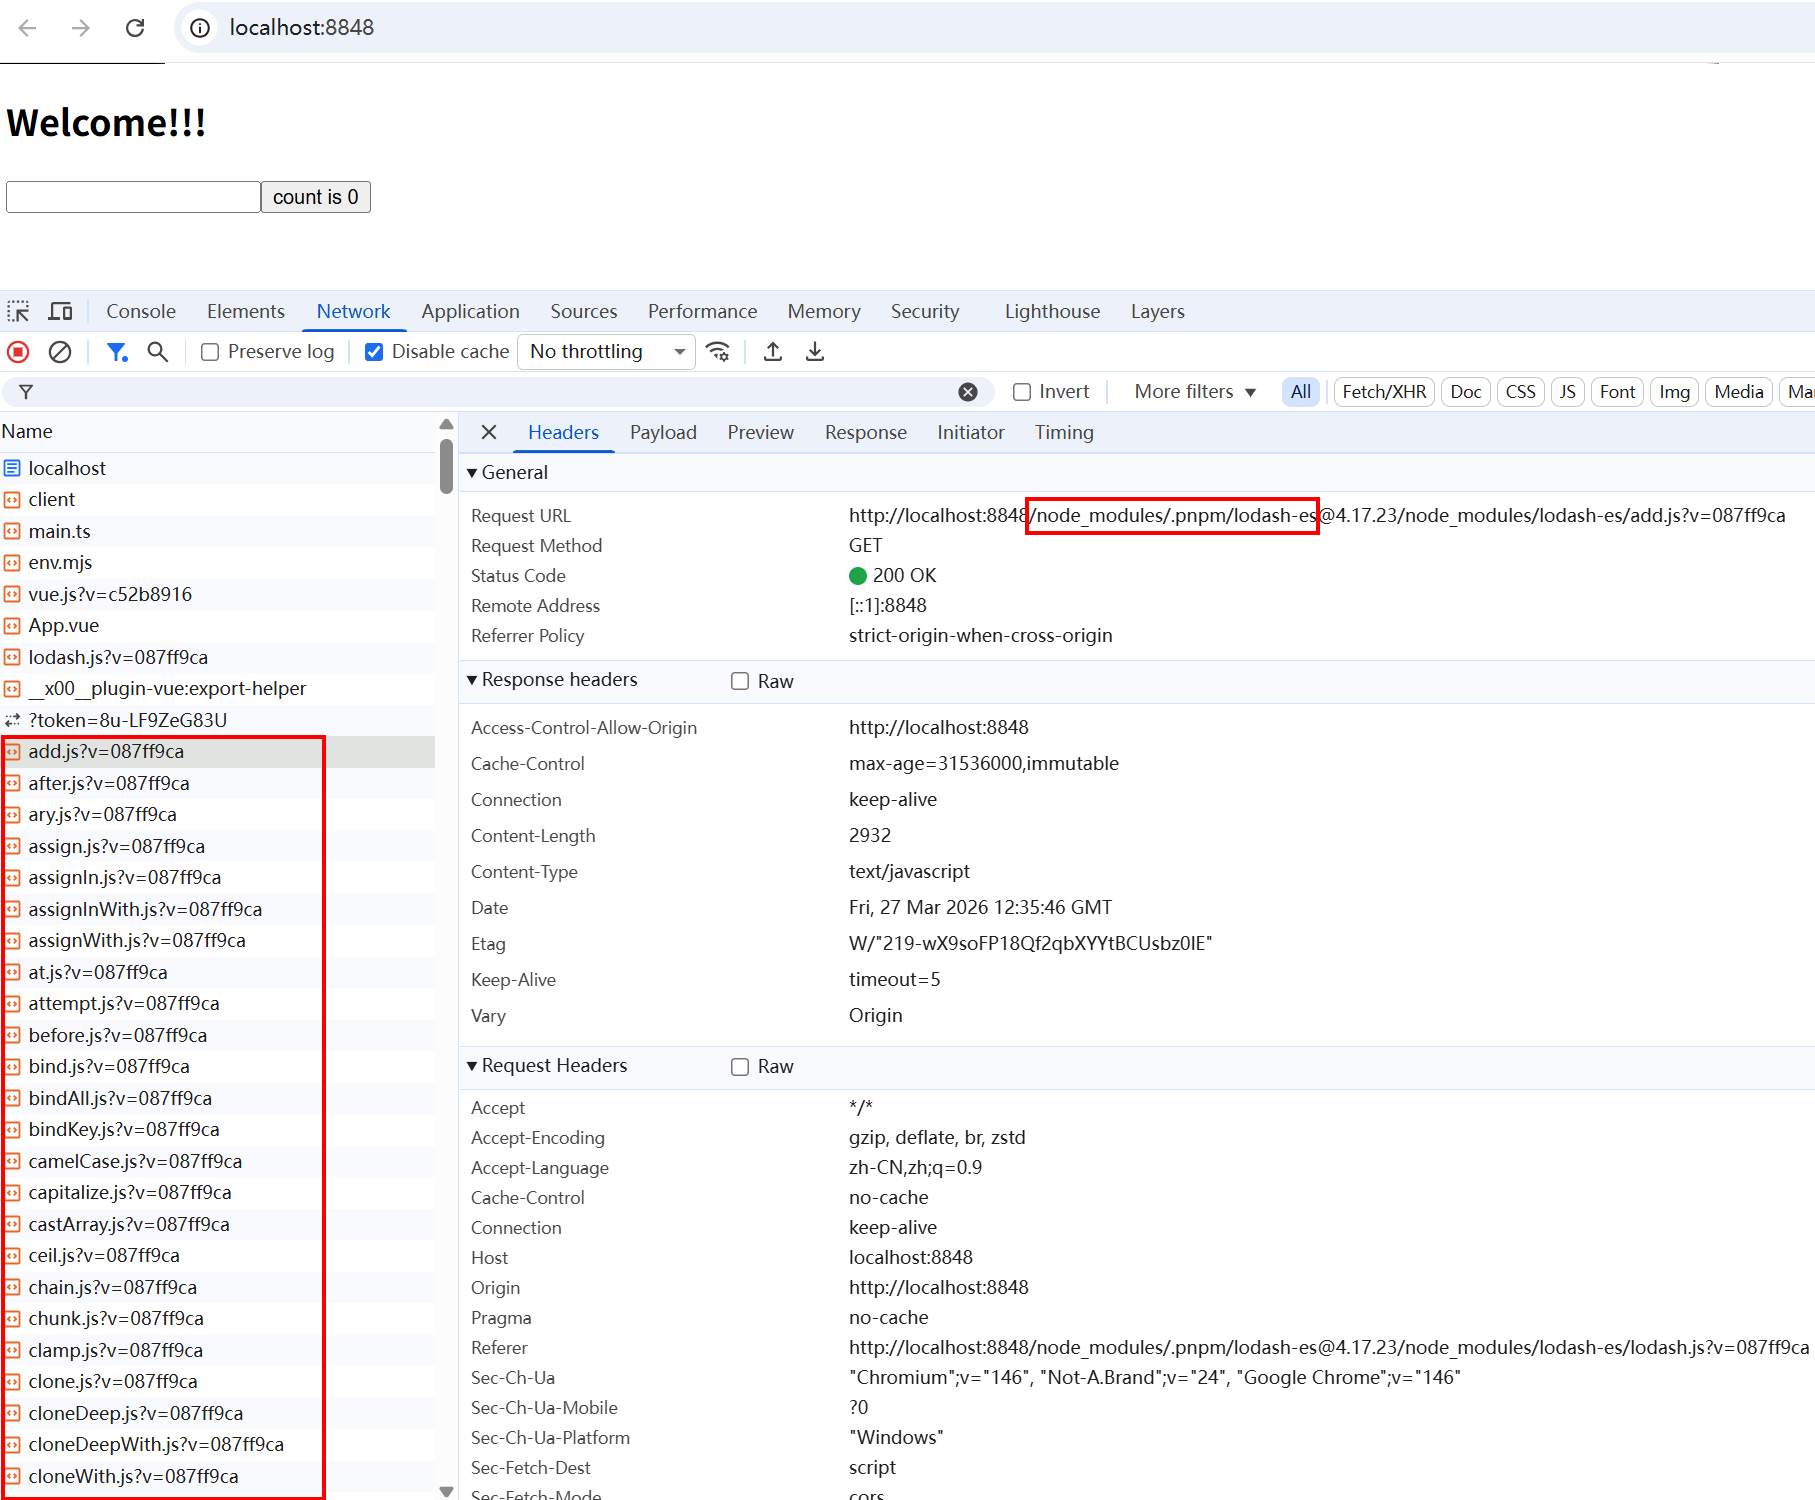
6.2 如果不执行依赖预构建(引发请求瀑布流的问题)
vite.config.ts 的 return 中加入关键代码:
typescript
optimizeDeps: {
  exclude: ["lodash-es"],
},
关闭依赖预构建的话,所有的node_modules/lodash-es中所有的模块都会直接以请求瀑布流的方式进行获取,十分恐怖。
vite 系列文章: