平台:rk3576
第一层AIDL框架层
1.首先进入源码/hardware/interfaces
2.创建testtld总文件夹
3.接着再testtld文件夹中创建aidl文件:
aidl/android/hardware/testtld/IHelloTest.aidl
bash
package android.hardware.testtld;


@VintfStability
interface IHelloTest {
    int getTestOne(in int event, in String name);
}
4.创建配置.bp文件
aidl/Android.bp
bash
package {
    // See: http://go/android-license-faq
    // A large-scale-change added 'default_applicable_licenses' to import
    // all of the 'license_kinds' from "hardware_interfaces_license"
    // to get the below license kinds:
    //   SPDX-license-identifier-Apache-2.0
    default_applicable_licenses: ["hardware_interfaces_license"],
}

aidl_interface {
    name: "android.hardware.testtld",
    vendor_available: true,
    srcs: ["android/hardware/testtld/*.aidl"],
    stability: "vintf",
    owner: "tld",
    backend: {
        cpp: {
            enabled: true,
        },
        java: {
            sdk_version: "module_current",
        },
        ndk: {
            enabled: true,
        },
    },

    frozen: true,
    versions_with_info: [
        {
            version: "1",
            imports: [],
        },
    ],

}
5.编译模块
bash
m  android.hardware.testtld-update-api

mmm hardware/interfaces/testtld

mm  android.hardware.testtld-freeze-api
第二层服务层
1.创建testtld/aidl/default文件夹
2.新建 Android.bp
bash
cc_binary {
    name: "android.hardware.testtld-service",
    init_rc: ["HelloTest-default.rc"],
    vintf_fragments: ["HelloTest-default.xml"],
    relative_install_path: "hw",
    vendor: true,
    srcs: [
        "service.cpp",
        "HelloTest.cpp",
    ],
    shared_libs: [
        "libbase",
        "libbinder",
        "libbinder_ndk",
        "libutils",
        "liblog",
        "libcutils",
        "libutils",
        "libdl",
        "android.hardware.testtld-V1-ndk",
    ],
    cflags: [
        "-Wall",
        "-Werror",
    ],
}
3.新建 HelloTest-default.rc
bash
service android.hardware.testtld-service /vendor/bin/hw/android.hardware.testtld-service
    class hal
    user system
    group system
4.新建 HelloTest-default.xml
html
<manifest version="1.0" type="device">
    <hal format="aidl">
        <name>android.hardware.testtld</name>
        <version>1</version>
        <fqname>IHelloTest/default</fqname>
    </hal>
</manifest>
5.新建 HelloTest.cpp
cpp
#define LOG_TAG "android.hardware.testtld-service"

#include <utils/Log.h>
#include <log/log.h>
#include <iostream>
#include <HelloTest.h>

namespace aidl {

    namespace android {

        namespace hardware {

            namespace testtld {

                ndk::ScopedAStatus HelloTest::getTestOne(int32_t in_event, const std::string& in_name, int32_t* _aidl_return) {
                    ALOGD("======getTestOne====1");
                    std::int32_t ret = in_event;
                    std::string name = in_name;
                    *_aidl_return = 2;
                    ALOGD("======getTestOne====2===in_event:%d",ret);
                    ALOGD("%s: this = %p, name = %s ", __FUNCTION__, this, name.c_str());
                    return ndk::ScopedAStatus::ok();
                }


            }  // namespace testtld

        }  // namespace hardware

    }  // namespace android

}  // namespace aidl
6.新建 HelloTest.h
cpp
#include <aidl/android/hardware/testtld/BnHelloTest.h>

namespace aidl {

    namespace android {

        namespace hardware {

            namespace testtld {

                class HelloTest  : public BnHelloTest {
                public:
                    ndk::ScopedAStatus getTestOne(int32_t in_event, const std::string& in_name, int32_t* _aidl_return);
                };


            }  // namespace testtld

        }  // namespace hardware

    }  // namespace android

}  // namespace aild
7.新建 service.cpp
cpp
#define LOG_TAG "android.hardware.testtld-service"
#include <android-base/logging.h>
#include <android/binder_manager.h>
#include <android/binder_process.h>
#include <binder/ProcessState.h>
#include <binder/IServiceManager.h>
#include "HelloTest.h"

using aidl::android::hardware::testtld::HelloTest;
using std::string_literals::operator""s;

int main() {
    // Enable vndbinder to allow vendor-to-venfor binder call
    android::ProcessState::initWithDriver("/dev/vndbinder"); //使用vnbinder的配置

    ABinderProcess_setThreadPoolMaxThreadCount(0); // vnbinder的线程池独立,需要单独配置
    ABinderProcess_startThreadPool();

    std::shared_ptr<HelloTest> helloTest = ndk::SharedRefBase::make<HelloTest>();
    const std::string desc = HelloTest::descriptor + "/default"s;

    if (helloTest != nullptr) {
        if(AServiceManager_addService(helloTest->asBinder().get(), desc.c_str()) != STATUS_OK) {
            ALOGE("Failed to register IHelloTest service");
            return -1;
        }
    } else {
        ALOGE("Failed to get IHelloTest instance");
        return -1;
    }

    ALOGD("IHelloTest service starts to join service pool");
    ABinderProcess_joinThreadPool();

    return EXIT_FAILURE;  // should not reached
}
8.在源码/device/rockchip/rk3576/rk3576_u(这里的rk3576替换你的型号)中新建framework_compatibility_matrix.xml文件:
html
<?xml version="1.0" encoding="UTF-8"?>
<compatibility-matrix version="1.0" type="framework">
    <hal format="aidl" optional="true">
        <name>android.hardware.testtld</name>
        <version>1</version>
        <interface>
            <name>IHelloTest</name>
            <instance>default</instance>
        </interface>
    </hal>
</compatibility-matrix>
9.在板级.mk文件(rk3576_u.mk)添加:
bash
DEVICE_FRAMEWORK_COMPATIBILITY_MATRIX_FILE += device/rockchip/rk3576/rk3576_u/framework_compatibility_matrix.xml第三步selinux
1.在源码/device/rockchip/rk3576/rk3576_u(这里的rk3576替换你的型号)中新增sepolicy文件夹
2.新增 file_contexts
bash
/vendor/bin/hw/android\.hardware\.testtld-service u:object_r:hal_hellotest_exec:s04.新增 hal_hellotest.te
bash
type hal_hellotest, domain;
type hal_hellotest_exec, vendor_file_type, exec_type, file_type;
init_daemon_domain(hal_hellotest)
5.新增hwservice_contexts
bash
android.hardware.testtld::IHelloTest u:object_r:hal_hellotest_hwservice:s06.新增hwservice.te
bash
type hal_hellotest_hwservice, hwservice_manager_type, protected_hwservice;7.在BoardConfig.mk中添加
bash
BOARD_SEPOLICY_DIRS += device/rockchip/rk3576/rk3576_u/sepolicy然后全编译
第四步编写测试文件
1.先创建testtld/aidl/test_aidl_hal文件夹
2.创建.cpp文件
cpp
#define LOG_TAG "Test-HAL"
#define LOG_NDEBUG 0

#include <log/log.h>
#include <aidl/android/hardware/testtld/IHelloTest.h>
#include <android/binder_manager.h>
#include <android/binder_process.h>
#include <stdio.h>

using aidl::android::hardware::testtld::IHelloTest;

int main() {
    ndk::SpAIBinder binder = ndk::SpAIBinder(
        AServiceManager_waitForService("android.hardware.testtld.IHelloTest/default")
    );

    auto service = IHelloTest::fromBinder(binder);
    ALOGD("get service = %p\n", service.get());

    if (service == nullptr) {
        return -1;
    }

    int32_t result;
    service->getTestOne(1, "hello", &result);
    ALOGD("getTestOne result = %d", result);

    return 0;
}
3.Android.bp
bash
cc_binary {
    name: "test_aidl_hal",
    vendor: true,
    shared_libs: [
        "android.hardware.testtld-V1-ndk",
        "libbinder",
        "liblog",
        "libbase",
        "libcutils",
        "libutils",
        "libbinder_ndk",
    ],
    srcs: [
        "main.cpp",
    ],
}
4.最后进入test_aidl_hal文件夹输入mm编译
5.最后在\alp\out\target\product\rk3576_u\vendor\bin找出编译使用adb推向开发板的/data/local/tmp/文件夹
bash
adb push .\test_aidl_hal /data/local/tmp/6.最后执行并输入:
bash
logcat | grep Test-HAL即可查看:
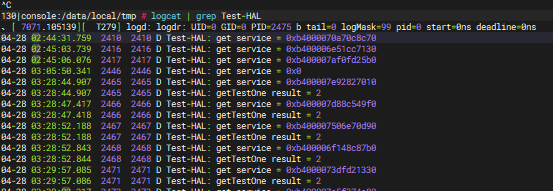
程序讲解
1.service.cpp
cpp
#define LOG_TAG "android.hardware.testtld-service"
#include <android-base/logging.h>
#include <android/binder_manager.h>
#include <android/binder_process.h>
#include <binder/ProcessState.h>
#include <binder/IServiceManager.h>
#include "HelloTest.h"

using aidl::android::hardware::testtld::HelloTest;
using std::string_literals::operator""s;

int main() {
    // Enable vndbinder to allow vendor-to-venfor binder call
    android::ProcessState::initWithDriver("/dev/vndbinder"); //使用vnbinder的配置

    ABinderProcess_setThreadPoolMaxThreadCount(0); // vnbinder的线程池独立,需要单独配置
    ABinderProcess_startThreadPool();

    std::shared_ptr<HelloTest> helloTest = ndk::SharedRefBase::make<HelloTest>();
    const std::string desc = HelloTest::descriptor + "/default"s;

    if (helloTest != nullptr) {
        if(AServiceManager_addService(helloTest->asBinder().get(), desc.c_str()) != STATUS_OK) {
            ALOGE("Failed to register IHelloTest service");
            return -1;
        }
    } else {
        ALOGE("Failed to get IHelloTest instance");
        return -1;
    }

    ALOGD("IHelloTest service starts to join service pool");
    ABinderProcess_joinThreadPool();

    return EXIT_FAILURE;  // should not reached
}
1.1 头文件和命名空间
cpp
#include <android-base/logging.h>
#include <android/binder_manager.h>
#include <android/binder_process.h>
#include <binder/ProcessState.h>
#include <binder/IServiceManager.h>
#include "HelloTest.h"
android-base/logging.h:提供 C++ 风格的日志宏(如 ALOGD, ALOGE),最终也是写入 logd。 android/binder_manager.h:NDK 的服务管理器,提供 AServiceManager_addService 等函数。 android/binder_process.h:NDK 的进程级 binder 线程池管理,提供 ABinderProcess_* 系列函数。
binder/ProcessState.h:旧版 C++ libbinde
1.2. 驱动初始化:ProcessState::initWithDriver
cpp
android::ProcessState::initWithDriver("/dev/vndbinder");ProcessState 是 libbinder 中的一个进程单例,代表本进程与 binder 驱动之间的连接。 每个使用 binder 的进程,必须第一次并唯一一次打开 binder 驱动,ProcessState 负责这个工作。 /dev/vndbinder 是 vendor binder 的设备节点。Android 为了隔离框架 (system) 和供应商 (vendor) 组件,提供了两个 binder 域: /dev/binder → servicemanager 主要管理系统和应用的注册查询。
/dev/vndbinder 是 vendor binder 的设备节点。Android 为了隔离框架 (system) 和供应商 (vendor) 组件,提供了两个 binder 域:
/dev/binder → servicemanager 主要管理系统和应用的注册查询。
/dev/vndbinder → vndservicemanager 专用于 vendor HAL 服务。
因为我们写的是 vendor HAL 服务(它由供应商提供,运行在 vendor 分区),所以必须使用 /dev/vndbinder,这样它注册的服务才会出现在 vndservicemanager 管理的命名空间里,客户端在 vendor 进程中才查得到。 如果这里错误地使用了 /dev/binder,那么框架侧的应用可能找不到服务,或者违反 Treble 兼容性要求。
1.3 配置并启动 NDK binder 线程池
bash
ABinderProcess_setThreadPoolMaxThreadCount(0);
ABinderProcess_startThreadPool();
前面 ProcessState::initWithDriver 只打开了驱动,但并没有创建线程来处理 binder 请求。这两个函数来自 NDK 的 binder 库(c语言),它们创建并启动了线程池。 ABinderProcess_setThreadPoolMaxThreadCount(0):设置最大线程数为 0,这是一个特殊值,表示让系统根据负载自动决定(通常默认就足够)。 ABinderProcess_startThreadPool():真正启动线程池。调用后,内部会创建若干个线程,每个线程循环
1.4 创建服务实例
cpp
std::shared_ptr<HelloTest> helloTest = ndk::SharedRefBase::make<HelloTest>();HelloTest 是我们自定义的类,继承自 BnHelloTest(AIDL 生成的 Stub),实现了 getTestOne 方法。这个对象就是真正的业务逻辑所在。
ndk::SharedRefBase::make<HelloTest>() 是 NDK 提供的智能指针构造方式,类似于 std::make_shared,但它使用了 binder 内部的引用计数,能在跨进程传递时正确管理生命周期。 返回的 std::shared_ptr<HelloTest> 持有了这个对象的引用,确保它在服务运行期间一直存活。
1.5 构造服务描述字符串
bash
const std::string desc = HelloTest::descriptor + "/default"s;1.6 注册服务到 ServiceManager
bash
if(AServiceManager_addService(helloTest->asBinder().get(), desc.c_str()) != STATUS_OK) {
    ALOGE("Failed to register IHelloTest service");
    return -1;
}
1.7 加入线程池,进入服务循环
bash
ABinderProcess_joinThreadPool();1.8 整体流程串讲
initWithDriver("/dev/vndbinder"):把本进程绑定到 vendor binder 域。
启动线程池:准备好处理并发请求的 workers。
创建 HelloTest 实例:业务逻辑的实体。
注册到 vndservicemanager:公告"我在这里,名叫 IHelloTest/default"。
joinThreadPool:主线程也投入工作,服务开始等待并处理客户端请求。
之后,当你的测试客户端 test_aidl_hal 调用 service->getT
2.HelloTest.cpp
cpp
#define LOG_TAG "android.hardware.testtld-service"

#include <utils/Log.h>
#include <log/log.h>
#include <iostream>
#include <HelloTest.h>

namespace aidl {

    namespace android {

        namespace hardware {

            namespace testtld {

                ndk::ScopedAStatus HelloTest::getTestOne(int32_t in_event, const std::string& in_name, int32_t* _aidl_return) {
                    ALOGD("======getTestOne====1");
                    std::int32_t ret = in_event;
                    std::string name = in_name;
                    *_aidl_return = 2;
                    ALOGD("======getTestOne====2===in_event:%d",ret);
                    ALOGD("%s: this = %p, name = %s ", __FUNCTION__, this, name.c_str());
                    return ndk::ScopedAStatus::ok();
                }


            }  // namespace testtld

        }  // namespace hardware

    }  // namespace android

}  // namespace aidl
2.1 头文件和命名空间
cpp
#define LOG_TAG "android.hardware.testtld-service"定义日志标签,在 logcat 中过滤时用。之前用 logcat -s android.hardware.testtld-service 就能看到这些日志。
cpp
#include <utils/Log.h>
#include <log/log.h>
#include <iostream>
#include <HelloTest.h>
utils/Log.h 和 log/log.h 都是日志头文件,提供 ALOGD 等宏。
iostream 是标准 C++ 输出流,这里没用到,可能是遗留。
HelloTest.h 是我们自己写的头文件,声明了 HelloTest 类。
2.2 命名空间嵌套
cpp
namespace aidl {
    namespace android {
        namespace hardware {
            namespace testtld {
                // 实现代码
            }
        }
    }
}
这是 C++11 支持的多层嵌套命名空间写法,等价于 namespace aidl::android::hardware::testtld { ... }。
因为 AIDL 生成的接口 IHelloTest 就在这个命名空间里,我们的实现类 HelloTest 也必须放在同一个命名空间里,否则编译器会认为是两个不同的类。
2.3 方法签名详解
cpp
ndk::ScopedAStatus HelloTest::getTestOne(
    int32_t in_event,
    const std::string& in_name,
    int32_t* _aidl_return)
ndk::ScopedAStatus:
这是 AIDL 方法的返回类型,用于指示 binder 调用本身的状态(成功/失败/异常)。
它不是业务返回值,而是通信层面的状态码。例如:
ndk::ScopedAStatus::ok() 表示调用成功,没有错误。
ndk::ScopedAStatus::fromExceptionCode(...) 表示抛出了异常。
ndk::ScopedAStatus::fromStatus(...) 用于传递更具体的错误码。
在客户端调用时,可以通过 status.isOk() 检查这个状态。
HelloTest::getTestOne:
这是 成员函数,属于 HelloTest 类。
由于它覆写了 AIDL 生成的 Stub 中的纯虚函数,签名必须与 AIDL 定义完全一致。
参数列表:
-
int32_t in_event:客户端传入的第一个参数,对应 AIDL 中的int in_event。HAL 可以读取它来决定行为。 -
const std::string& in_name:客户端传入的第二个参数,对应 AIDL 中的String in_name。引用传递,避免拷贝。 -
int32_t* _aidl_return:这是一个输出参数 ,是 AIDL 方法的实际返回值 。因为 AIDL 的方法可以有返回值(非 void),在 C++ 后端中,这个返回值通过额外的输出参数实现。客户端定义的int32_t result变量会通过这个指针被填充。
当客户端写 service->getTestOne(1, "hello", &result);,实际执行时:
-
in_event= 1 -
in_name= "hello" -
_aidl_return= &result
你的服务端在这里填 *_aidl_return = 2;,客户端那边的 result 就变成了 2。
2.4 方法体中的业务逻辑
bash
ALOGD("======getTestOne====1");
std::int32_t ret = in_event;
std::string name = in_name;
*_aidl_return = 2;
ALOGD("======getTestOne====2===in_event:%d", ret);
ALOGD("%s: this = %p, name = %s ", __FUNCTION__, this, name.c_str());
return ndk::ScopedAStatus::ok();
ALOGD(...):输出调试日志,标签为 "android.hardware.testtld-service",优先级 DEBUG。
ret 和 name 只是把输入参数保存到局部变量,这里没有做任何实际硬件操作,只是一个示例,证明可以拿到客户端传来的值。
*_aidl_return = 2:直接将返回值设为 2。这就是为什么客户端 result 得到 2 的原因。
FUNCTION:预定义宏,展开为当前函数名,这里就是 "getTestOne"。
this:当前 HelloTest 对象的地址,用于区分不同实例。
name.c_str():把 std::string 转为 C 字符串以便 %s 打印。
return ndk::ScopedAStatus::ok();:告诉 binder 框架"本次调用成功完成"。
2.5 与客户端、AIDL 定义的对应关系
回顾一下 AIDL 定义(假设):
bash
package android.hardware.testtld;
interface IHelloTest {
    int getTestOne(int in_event, String in_name);
}-
客户端调用:
int result; service->getTestOne(1, "hello", &result); -
服务端实现返回
2,客户端result变成2,并且status为ok。
整个调用链:
客户端 main.cpp
   └─ service->getTestOne(1, "hello", &result);
        └─ binder 通信 → 服务端线程池接到请求
              └─ BnHelloTest 解析参数,调用 HelloTest::getTestOne(1, "hello", &_aidl_return)
                   └─ 业务执行:*_aidl_return = 2; return ok;
              └─ 打包结果送回客户端
   └─ result 被赋值 2,status.isOk() == true
2.6 整体流程
-
HelloTest.cpp就是 HAL 服务的"业务核心",你可以在getTestOne函数里读写硬件、计算数据等。 -
ndk::ScopedAStatus是通信层面的状态,返回ok()表示调用顺利。 -
_aidl_return是业务返回值,客户端通过它拿到真正的输出数据。 -
这套模式对所有 AIDL HAL 服务都是通用的:继承 Stub → 覆写接口方法 → 实现具体逻辑 → 返回
ok()。
2.7 调用过程
具体过程如下:
| 客户端代码 | 服务端(这个函数) |
|---|---|
int32_t result; |
|
service->getTestOne(1, "hello", &result); |
|
int32_t* _aidl_return = &result;(binder 序列化时传递了地址) |
|
*_aidl_return = 2;(直接写入 result 的内存) |
|
printf("%d", result); → 输出 2 |
3.客户端cpp
cpp
#define LOG_TAG "Test-HAL"
#define LOG_NDEBUG 0

#include <log/log.h>
#include <aidl/android/hardware/testtld/IHelloTest.h>
#include <android/binder_manager.h>
#include <android/binder_process.h>
#include <stdio.h>

using aidl::android::hardware::testtld::IHelloTest;

int main() {
    // ABinderProcess_initWithDriver("/dev/vndbinder");  // 删除这一行

    ndk::SpAIBinder binder = ndk::SpAIBinder(
        AServiceManager_waitForService("android.hardware.testtld.IHelloTest/default")
    );

    auto service = IHelloTest::fromBinder(binder);
    ALOGD("get service = %p\n", service.get());

    if (service == nullptr) {
        return -1;
    }

    int32_t result;
    service->getTestOne(1, "hello", &result);
    ALOGD("getTestOne result = %d", result);

    return 0;
}
3.1 头部配置
cpp
#define LOG_TAG "Test-HAL"       // 日志标签,logcat 用
#define LOG_NDEBUG 0             // 0 表示开启 debug 日志(NDEBUG 非真)
#include <log/log.h>             // ALOGD/ALOGE 等宏
#include <aidl/android/hardware/testtld/IHelloTest.h>  // 生成的接口头
#include <android/binder_manager.h>      // AServiceManager_waitForService
#include <android/binder_process.h>      // NDK binder 进程相关(这里未用)
#include <stdio.h>                       // 可选,为了 printf
3.2 引入接口类
cpp
using aidl::android::hardware::testtld::IHelloTest;3.2 main 函数
cpp
int main() {
    // 获取服务
    ndk::SpAIBinder binder = ndk::SpAIBinder(
        AServiceManager_waitForService("android.hardware.testtld.IHelloTest/default")
    );
AServiceManager_waitForService(名字):
在 vndservicemanager(因为客户端是 vendor 进程或手动启动在 vendor 域)中阻塞查找名为 "android.hardware.testtld.IHelloTest/default" 的服务。若服务尚未就绪,会等待一段超时时间;如果找不到则返回 nullptr。
ndk::SpAIBinder:一个智能指针,自动管理返回的 AIBinder* 的引用计数,防止泄漏。
cpp
auto service = IHelloTest::fromBinder(binder);将原始的 AIBinder 对象转换成具有具体接口类型的代理对象。IHelloTest 是 AIDL 生成的接口类,fromBinder 会返回一个 std::shared_ptr<IHelloTest>,实际上指向一个 BpIHelloTest(客户端代理)。
如果 binder 为空或接口不匹配,会返回 nullptr。
cpp
ALOGD("get service = %p\n", service.get());用 service.get() 取出原生指针并打印(输出到 logcat,不是终端)。
cpp
    if (service == nullptr) {
        return -1;    // 获取失败,静默退出
    }
注意:这里没有 printf,所以终端上你看不到任何错误消息。
cpp
 int32_t result;
    service->getTestOne(1, "hello", &result);
调用远程方法 getTestOne,传入参数 1 和 "hello",通过 &result 接收返回值(对应服务端的 _aidl_return)。
这种调用会堵塞直到服务端处理完成并返回。
bash
ALOGD("getTestOne result = %d", result);把结果输出到 logcat,如果成功会输出 getTestOne result = 2(因为服务端硬编码返回 2)。