对py自升级
利用海康vm的文本行识别
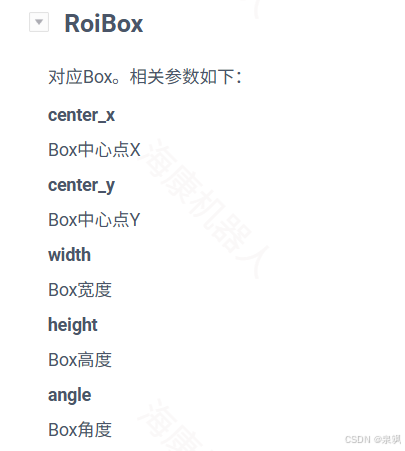
得出文本行的rol矩形框,
导入python脚本,
python脚本塞入参考
C:\Program Files\VisionMaster4.4.0\Applications\ModuleProxy\x64
python
import sys
sys.argv=['']
from ioHelper import *
import cv2 as cv
import numpy as np

def Process(data) -> int:
    moduleVar = IoHelper(data, INIT_MODULE_VAR)
    globalVar = IoHelper(data, INIT_GLOBAL_VAR)
    localVar = IoHelper(data, INIT_LOCAL_VAR)

    try:
        # 只保留灰度图输入(彩色全部删除)
        imagedata_gray = moduleVar.in3  # 灰度图像源
        width = moduleVar.in1           # 图像宽
        height = moduleVar.in2          # 图像高

        # 灰度图字节流转 numpy
        img_np_gray = np.frombuffer(imagedata_gray.buffer, np.uint8)
        gray = np.reshape(img_np_gray, [height, width])  # 直接重塑为灰度图

        # 二值化
        ret, img_threshold = cv.threshold(gray, 127, 255, cv.THRESH_BINARY)

        # 轮廓检测
        contours, hierarchy = cv.findContours(img_threshold, cv.RETR_TREE, cv.CHAIN_APPROX_SIMPLE)

        # 在灰度图上绘制红色轮廓(保持视觉效果)
        img_contour = cv.cvtColor(gray, cv.COLOR_GRAY2BGR)  # 转彩色用于画轮廓
        cv.drawContours(img_contour, contours, -1, (0, 0, 255), 2)
        img_contour_gray = cv.cvtColor(img_contour, cv.COLOR_BGR2GRAY)  # 转回灰度

        # 腐蚀(图像收缩)
        kernel = np.ones((5, 5), np.uint8)
        erosion = cv.erode(img_threshold, kernel, iterations=1)

        # 输出:腐蚀后的灰度图
        img_out1 = imagedata_gray
        img_out1.buffer = erosion.tobytes()
        moduleVar.out0 = img_out1

        # 输出:带轮廓的灰度图
        img_out2 = imagedata_gray
        img_out2.buffer = img_contour_gray.tobytes()
        moduleVar.out1 = img_out2

    except BaseException as e:
        PrintMsg(e)
return 0python -m pip install --upgrade pip setuptools wheel -i https://mirrors.aliyun.com/pypi/simple/ --trusted-host mirrors.aliyun.com
为嵌入的python添加指定的库
pip install opencv-python
pip 安装:pip install opencv-python(基础功能)
或pip install opencv-contrib-python(包含额外模块)
安装时包名为opencv-python,但导入时使用import cv2
常用操作与代码示例
图像读取与显示:
读取:cv2.imread('image.jpg'),默认采用 BGR 通道顺序。27
显示:cv2.imshow('window', img)配合cv2.waitKey(0)使用。7
保存:cv2.imwrite('output.jpg', img)3
图像处理基础:
颜色转换:cv2.cvtColor(img, cv2.COLOR_BGR2GRAY)将彩色图转为灰度图。25
图像缩放:cv2.resize(img, (width, height))3
图像翻转:cv2.flip(img, flipcode),flipcode=0 垂直翻转,1 水平翻转,-1 同时翻转。3
滤波与边缘检测:
高斯滤波:cv2.GaussianBlur(img, (5,5), 0)去除高斯噪声。37
中值滤波:cv2.medianBlur(img, 5)适合处理椒盐噪声。3
Canny 边缘检测:cv2.Canny(gray, 100, 200)提取图像边缘。37转成除矩形框外全部白色
python
import cv2
import numpy as np

def keep_multi_roi_white_bg(image_path, output_path, roi_list):
    """
    多个ROI区域保留原图,其余全部变白
    :param image_path: 输入图片路径
    :param output_path: 输出保存路径
    :param roi_list: 列表嵌套,每个元素是一个四边形四点坐标
                     格式: [[[x1,y1],[x2,y2],[x3,y3],[x4,y4]], 第二个ROI, ...]
    """
    img = cv2.imread(image_path)
    h, w = img.shape[:2]

    # 初始化全白画布
    white_bg = np.ones_like(img) * 255
    # 初始化掩码
    mask = np.zeros((h, w), dtype=np.uint8)

    # 遍历所有ROI,逐个填充掩码
    for roi_pts in roi_list:
        pts = np.array(roi_pts, dtype=np.int32)
        cv2.fillPoly(mask, [pts], 255)

    # 掩码区域贴原图,其余保持白色
    white_bg[mask == 255] = img[mask == 255]

    cv2.imwrite(output_path, white_bg)
    print("多ROI处理完成,已保存!")

if __name__ == "__main__":
    # ========== 只需要修改这里 ==========
    INPUT = "input.png"
    OUTPUT = "output.png"

    # 多个ROI示例:两个长方形
    ROI_LIST = [
        # 第一个ROI四点
        [
            [50, 50],
            [300, 50],
            [300, 200],
            [50, 200]
        ],
        # 第二个ROI四点
        [
            [350, 80],
            [600, 80],
            [600, 250],
            [350, 250]
        ]
        # 你可以继续添加第三个、第四个...
    ]
    # =================================

    keep_multi_roi_white_bg(INPUT, OUTPUT, ROI_LIST)
python
import sys
sys.argv=['']
from ioHelper import *
import cv2 as cv
import numpy as np

def Process(data) -> int:
    moduleVar = IoHelper(data, INIT_MODULE_VAR)
    globalVar = IoHelper(data, INIT_GLOBAL_VAR)
    localVar = IoHelper(data, INIT_LOCAL_VAR)

    try:
        # 获取灰度图输入
        imagedata_gray = moduleVar.in3  # 黑白图像
        width = moduleVar.in1           # 宽
        height = moduleVar.in2          # 高

        # 字节流转灰度图
        img_np_gray = np.frombuffer(imagedata_gray.buffer, np.uint8)
        gray = np.reshape(img_np_gray, [height, width])

        # ===================== 你只需要改这里的ROI坐标 =====================
        ROI_LIST = [
            [[50, 50], [300, 50], [300, 200], [50, 200]],       # 第一个区域
            [[350, 80], [600, 80], [600, 250], [350, 250]],     # 第二个区域
            # 可继续加第三个、第四个...
        ]

        # 创建全白背景
        white_bg = np.ones_like(gray) * 255
        mask = np.zeros((height, width), dtype=np.uint8)

        # 填充所有ROI区域
        for roi_pts in ROI_LIST:
            pts = np.array(roi_pts, dtype=np.int32)
            cv.fillPoly(mask, [pts], 255)

        # ROI保留原图,其余变白
        white_bg[mask == 255] = gray[mask == 255]

        # 输出结果(out0 和 out1 输出同一张图)
        img_out = imagedata_gray
        img_out.buffer = white_bg.tobytes()
        moduleVar.out0 = img_out
        moduleVar.out1 = img_out

    except BaseException as e:
        PrintMsg(e)
    return 0
在其他ocr里进行识别(嵌入式的py受限)
ocr识别
ocr识别 tessera
百度飞桨
python
import sys
sys.argv=['']
from ioHelper import *
import cv2 as cv
import numpy as np

def Process(data) -> int:
    moduleVar = IoHelper(data, INIT_MODULE_VAR)
    globalVar = IoHelper(data, INIT_GLOBAL_VAR)
    localVar = IoHelper(data, INIT_LOCAL_VAR)

    try:
        imagedata_gray = moduleVar.in0
        width = moduleVar.in1
        height = moduleVar.in2

        img_np_gray = np.frombuffer(imagedata_gray.buffer, np.uint8)
        gray = np.reshape(img_np_gray, [height, width])

        # ===================== 从变量读取多ROI Box =====================
        center_x = moduleVar.in3.center_x
        center_y = moduleVar.in3.center_y
        box_w = moduleVar.in3.width
        box_h = moduleVar.in3.height

        white_bg = np.ones_like(gray) * 255
        mask = np.zeros((height, width), dtype=np.uint8)

        # 批量生成ROI
        for cx, cy, w, h in zip(center_x, center_y, box_w, box_h):
            x1 = int(cx - w / 2)
            y1 = int(cy - h / 2)
            x2 = int(cx + w / 2)
            y2 = int(cy + h / 2)
            roi_pts = [[x1, y1], [x2, y1], [x2, y2], [x1, y2]]
            pts = np.array(roi_pts, dtype=np.int32)
            cv.fillPoly(mask, [pts], 255)

        white_bg[mask == 255] = gray[mask == 255]

        img_out = imagedata_gray
        img_out.buffer = white_bg.tobytes()
        moduleVar.out0 = img_out
        moduleVar.out1 = img_out

    except BaseException as e:
        PrintMsg(e)
    return 0