目录
前言
HTTP (超文本传输协议) 是应用层一个重要的协议,它定义了客户端与服务器之间如何通信,以交换或传输超文本 (如HTML文档) 。HTTP是客户端与服务器之间通信的基础,客户端通过HTTP协议向服务器发送请求,服务器收到请求后处理并返回响应。HTTP是一个无连接、无状态的协议,每次请求都需要建立新的连接,且服务器不会保存客户端的状态信息。本文将围绕HTTP协议展开,深度解析HTTP请求、响应报文格式,并基于HTTP协议原理实现客户端与服务器通信。
一、HTTP
1、URL
平时所见到的网址,本质上就是URL。URL结构如下所示:
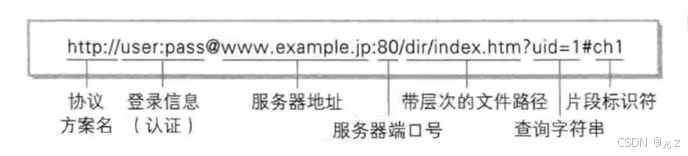
像 / ?等这样的字符,已经被URL当做特殊意义理解,因此这些字符不能随意出现。如果某个参数中带有这些特殊字符,就必须先对这些特殊字符进行转义。

如上所示,+被转义成了%2B。
2、HTTP请求
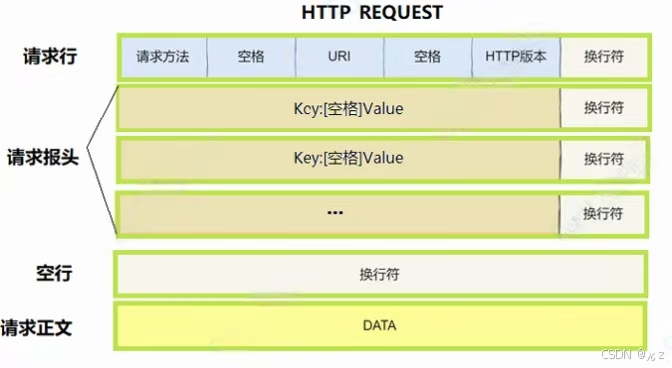
HTTP请求结构如下:
下面一个为完整的HTTP请求:
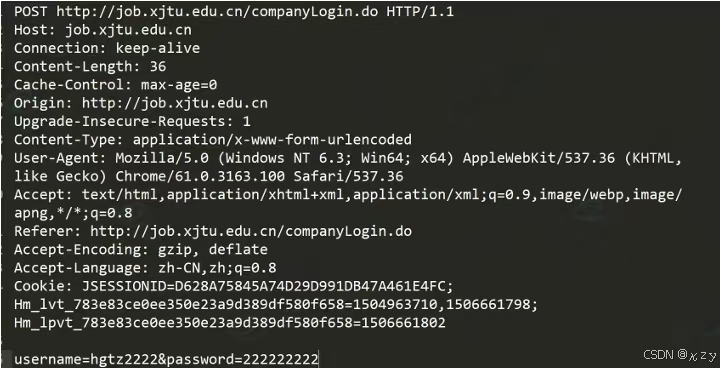

POST http://job.xjtu.edu.cn/companyLogin.do HTTP/1.1为首行,首行结构为方法+URL+版本,POST为方法,http://job.xjtu.edu.cn/companyLogin.do为URL,HTTP/1.1为版本号。
Header:为请求的相关属性,为冒号分割的键值对,如Host:job.xjtu.edu.cn,Connection:keep-alive,每组属性之间使用\r\n分隔,遇到空行表示Header部分结束。

Body:空行后面的内容都是Body,Body允许为空字符串。如果Body存在,则在Header中会有一个Content-Length属性来标识Body的长度。
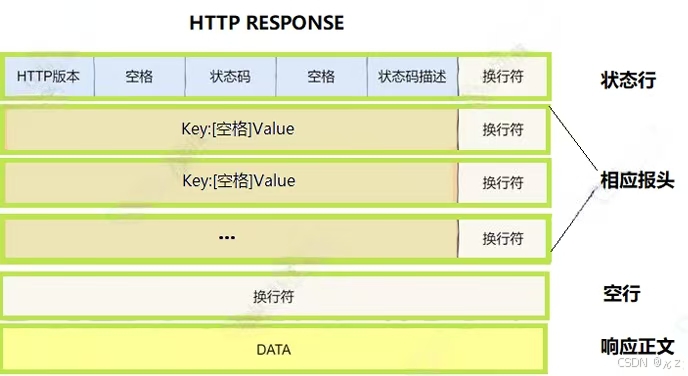
3、HTTP响应
HTTP响应结构如下:
下面为一个完整的HTTP响应:
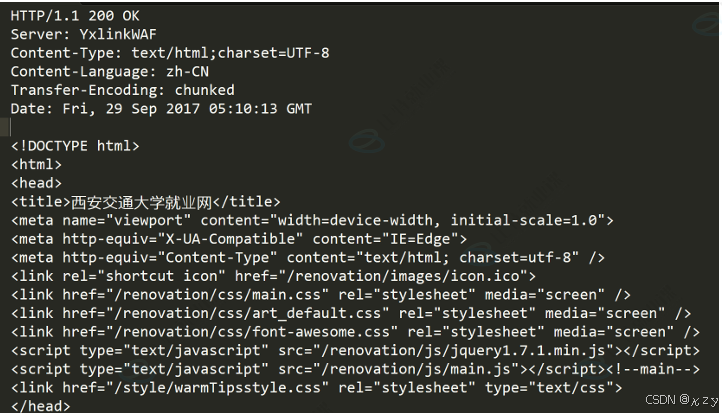
HTTP/1.1 200 OK为首行,首行结构为:版本号+状态码+状态码解释,HTTP/1.1为版本号,200为状态码,OK为状态码解释。

Header:为请求的属性,为冒号分割的键值对,如Server:YxlinkWAF,Content-Type:text/html;charset=UTF-8,每组属性之间使用\r\n分隔,遇到空行表示Header部分结束。
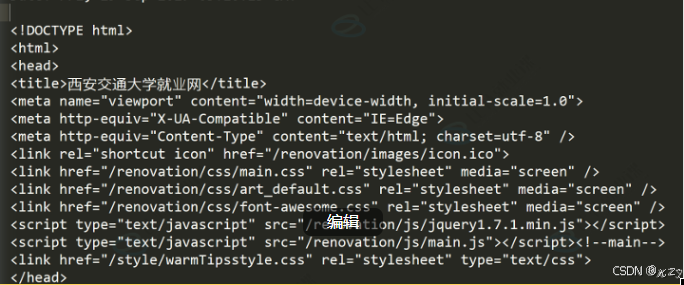
Body:空行后面的内容为Body,Body允许为空字符串,如果Body存在,则在Header中会有一个Content-Length属性来标识Body的长度,如果服务器返回了一个html页面,那么html页面内容就在body中。
4、HTTP方法
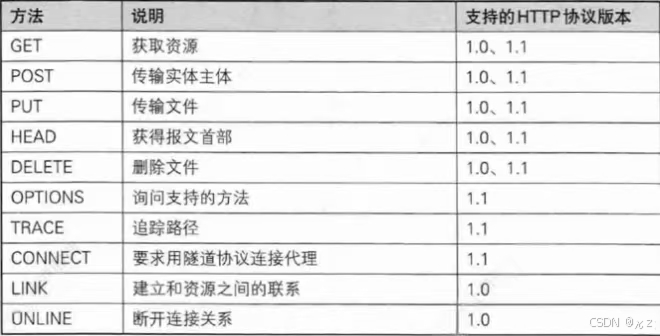
(1)GET
用途:用于请求URL指定的资源。
示例:GET/index.html HTTP/1.1
特性:指定资源经服务器端解析后返回响应内容。
(2)POST
用途:用于传输实体的主体,通常用于提交表单数据。
示例:POST /submit.cgi HTTP/1.1
特性:可以发送大量的数据给服务器,并且数据包含在请求体中。
(3)PUT
用途:用于传输文件,将请求报文主体中的文件保存到请求URL指定的位置。
示例:PUT /example.html HTTP/1.1
特性:不太常用,但在某些情况下,如RESTful API中,用于更新资源。
(4)HEAD
用途:与GET方法类似,但不返回报文主体部分,仅返回响应头。
示例:HEAD /index.html HTTP/1.1
特性:用于确认URL的有效性及资源更新的日期时间等。
(5)DELETE
用途:用于删除文件,是PUT的相反方法。
示例:DELETE /example.html HTTP/1.1
特性:按请求URL删除指定的资源。
(6)OPTIONS
用途:用于查询针对请求URL指定的资源支持的方法。
示例:OPTIONS*HTTP/1.1
特性:返回允许的方法,如GET、POST等。
5、HTTP状态码
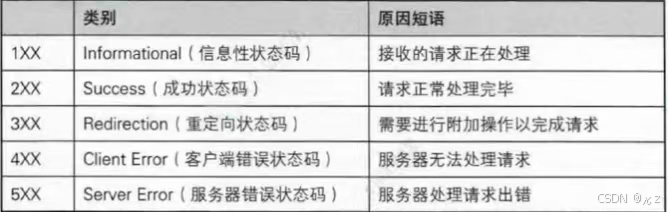
|-----|-----------------------|-------------------------------|
| 状态码 | 含义 | 应用 |
| 100 | continue | 上传大文件时,服务器告诉客户端可以继续上传 |
| 200 | ok | 访问网站首页,服务器返回网页内容 |
| 201 | created | 发布新文章,服务器返回文章创建成功的信息 |
| 204 | no content | 删除文章后,服务器返回"无内容"表示操作成功 |
| 301 | moved permanently | 网站换域名后,自动跳转到新域名,搜索引擎更新网站链接时使用 |
| 302 | found或see other | 用户登录成功后,重定向到用户首页 |
| 304 | not modified | 浏览器缓存机制,对未修改的资源返回304状态码 |
| 400 | bad request | 填写表单时,格式不正确导致提交失败 |
| 401 | unauthorized | 访问需要登录的页面时,未登录或认证失败 |
| 403 | forbidden | 尝试访问你没有权限查看的页面 |
| 404 | not found | 访问不存在的网页链接 |
| 500 | internal server error | 服务器崩溃或数据库错误导致页面无法加载 |
| 502 | bad gateway | 使用代理服务器时,代理服务器无法从上游服务器获取有效响应 |
| 503 | service unavailable | 服务器维护或过载,暂时无法处理请求 |
与重定向相关的状态码:
|-----|--------------------|----------|--------------------------------|
| 状态码 | 含义 | 是否为临时重定向 | 应用 |
| 301 | moved permanently | 否(永久重定向) | 网站换域名后,自动跳转到新域名,搜索引擎更新网站链接时使用。 |
| 302 | found 或 see other | 是(临时重定向) | 用户登录成功后,重定向到用户首页 |
| 307 | temporary redirect | 是(临时重定向) | 临时重定向资源到新的位置 |
| 308 | permanent redirect | 否(永久重定向) | 永久重定向资源到新的位置 |
HTTP状态码301(永久重定向)和302(临时重定向)都依赖Location选项:
当服务器返回HTTP301状态码时,表示请求的资源已经被永久移动到新的位置,在这种情况下,服务器会在响应中添加一个Location头部,用于指定资源的新位置。这个Location头部包含了新的URL地址,浏览器会自动重定向到该地址。
当HTTP返回301状态码时,可以看到类似于以下的头部信息:
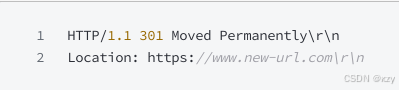
当服务器返回HTTP 302状态码时,表示请求的资源临时被移动到新的位置。
同样地,服务器也会在响应中添加一个Location头部来指定资源的新位置。浏览器会暂时使用新的URL进行后续的请求,但不会缓存这个重定向。
当服务器返回HTTP 302状态码时,可以看到类似于以下的头部信息:

无论是HTTP 301还是HTTP 302重定向,都需要依赖Location选项来指定资源的新位置。这个Location选项是一个标准的HTTP响应头部,用于告诉浏览器应该将请求重定向到哪个新的URL地址。
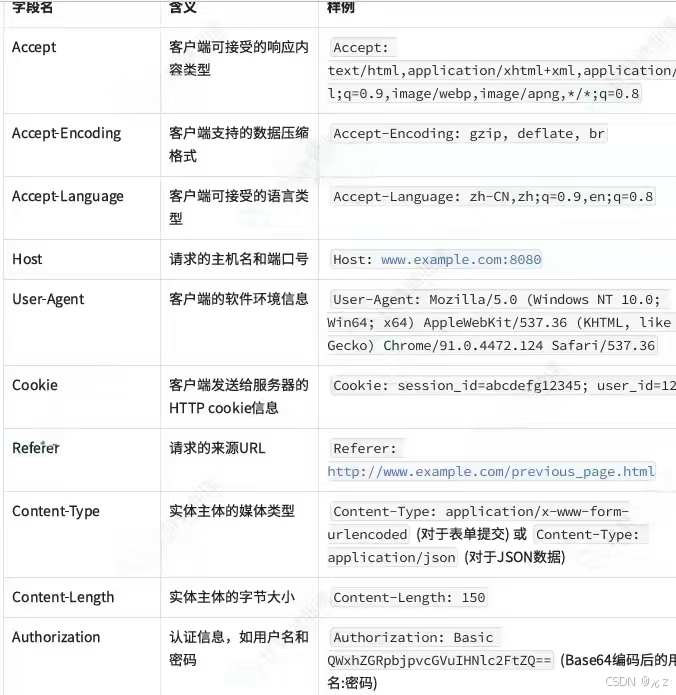
6、HTTP报头
Content-Type:数据类型(text/html等)
Content-Length:Body的长度
Host:客户端告知服务器,所请求的资源是在哪个主机的哪个端口上
User-Agent:声明用户的操作系统和浏览器版本信息
Referer:当前页面是从哪个页面跳转过来的
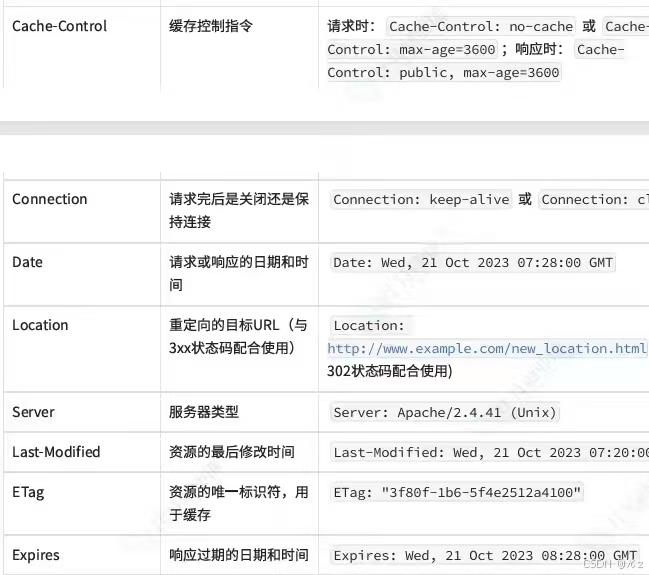
Location:搭配3xx状态码使用,告诉客户端接下来要去哪里访问
Cookie:用于在客户端存储少量信息,通常用于实现会话的功能
HTTP中的connection字段是HTTP报文头的一部分,主要用于控制和管理客户端与服务器之间的连接状态。connection字段还用于管理长连接,长连接允许客户端和服务器在请求/响应完成后不立即关闭TCP连接,以便在同一个连接上发送多个请求和接收多个响应。
长连接:
HTTP/1.1:在HTTP/1.1协议中,默认使用长连接,当客户端和服务器都不明确指定关闭连接时,连接将保持打开状态,以便后续的请求和响应可以复用同一个连接。
HTTP/1.0:在HTTP/1.0协议时,默认连接是短连接,如果希望在HTTP/1.0上实现长连接,需要在请求头中显式设置Connection:keep-alive。
Connection:keep-alive 表示希望保持连接以复用TCP连接
Connection:close 表示请求/响应完成后,应该关闭TCP连接
HTTP常见header表格:
二、HTTP服务器
下面将实现一个功能较为完整的HTTP服务器,该服务器包含了网络通信底层模块,包括socket的封装、TCP服务器管理、地址处理、以及HTTP协议解析和响应生成、日志模块,下面将分别实现服务器的这几个模块。
1、common
common模块包含了服务器通用的头文件、错误码定义以及一个禁止拷贝的基类。
common.hpp
cpp
#ifndef _COMMON_HPP_
#define _COMMON_HPP_
#include<iostream>
#include<functional>
#include<unistd.h>
#include<string>
#include<cstring>
#include<sys/types.h>
#include<sys/socket.h>
#include<arpa/inet.h>
#include<netinet/in.h>
using namespace std;
enum exitcode
{
    OK=0,
    USAGE_ERR,
    SOCKET_ERR,
    BIND_ERR,
    LISTEN_ERR,
    CONNECT_ERR,
    FORK_ERR,
    OPEN_ERR
};
class nocopy
{
public:
    nocopy(){}
    nocopy(const nocopy& )=delete;
    const nocopy& operator=(const nocopy& )=delete;
    ~nocopy(){}
};
#define CONV(addr) ((struct sockaddr*)&addr)
#endif
exitcode枚举类型定义了一组程序退出时的状态码,每个枚举值对应一种可能的错误场景,nocopy类拷贝构造和拷贝赋值函数被显式删除,即nocopy类禁止拷贝和赋值,用于管理唯一资源。宏CONV(addr)用于接受一个地址参数,并将其强制类型转化为struct sockaddr*类型。
2、inetaddr
inetaddr模块用于封装IP、端口号,以此来简化sockaddr_in结构体的使用。
inetaddr.hpp
(1)构造函数
cpp
#ifndef _INETADDR_HPP_
#define _INETADDR_HPP_
#include"common.hpp"
using namespace std;
class inetaddr
{
public:
    inetaddr(){}
    inetaddr(struct sockaddr_in& addr)
    {
        setaddr(addr);
    }
    inetaddr(const string& ip,uint16_t port)
    :_ip(ip)
    ,_port(port)
    {
        memset(&_addr,0,sizeof(_addr));
        _addr.sin_family=AF_INET;
        inet_pton(AF_INET,_ip.c_str(),&_addr.sin_addr);
        _addr.sin_port=htons(_port);
    }
    inetaddr(uint16_t port)
    :_port(port)
    ,_ip()
    {
        memset(&_addr,0,sizeof(_addr));
        _addr.sin_family=AF_INET;
        _addr.sin_port=htons(_port);
        _addr.sin_addr.s_addr=INADDR_ANY;
    }
    void setaddr(struct sockaddr_in& addr)
    {
        _addr=addr;
        _port=ntohs(_addr.sin_port);
        char ipbuffer[64];
        inet_ntop(AF_INET,&_addr.sin_addr,ipbuffer,sizeof(_addr));
        _ip=ipbuffer;
    }
    ~inetaddr()
    {}
private:
    struct sockaddr_in _addr;
    uint16_t _port;
    string _ip;
};
#endif
inetaddr通过三个构造函数来应对不同场景,setaddr用于从填充好的sockaddr_in对象中回填类的内部成员,_addr=addr,保存传入的地址结构体,_port=ntohs(_addr.sin_port),使用ntohs转换端口号,inet_ntop(AF_INET,&_addr.sin_addr,ipbuffer,sizeof(_addr)),_ip=ipbuffer,并调用inet_ntop将二进制IP地址转换为点分十进制字符串存储在_ip成员中。第一个构造函数接收一个现有的sockaddr_in结构体,通过调用setaddr方法从中提取端口和IP地址。第二个构造函数通过接收IP和端口,memset(&_addr,0,sizeof(_addr)),先清空内部地址结构体,_addr.sin_family=AF_INET,设置地址族为IPv4,inet_pton(AF_INET,_ip.c_str(),&_addr.sin_addr),_addr.sin_port=htons(_port),将IP字符串转换为二进制格式,并将主机字节序的端口_port转换为网络字节序存储。最后一个构造函数只接收端口号,适用于服务器绑定本地所有可用接口的场景,_addr.sin_addr.s_addr=INADDR_ANY,它会将IP地址设置为INADDR_ANY。
(2)访问器
cpp
uint16_t port()
{
    return _port;
}
string ip()
{
    return _ip;
}
const struct sockaddr_in& netaddr()
{
    return _addr;
}
const struct sockaddr* netaddrptr()
{
    return CONV(_addr);
}
socklen_t netaddrlen()
{
    return sizeof(_addr);
}
bool operator==(const inetaddr& addr)
{
    return _ip==addr._ip && _port==addr._port;
}
string StringAddr()
{
    return _ip+":"+to_string(_port);
}
port和ip用于返回主机字节序的端口号和点分十进制的IP字符串,netaddr返回内部存储的sockaddr_in常量引用,供需要直接操作结构体的场合使用,netaddrptr用于将sockaddr_in*转换为通用的sockaddr*,适用于bind、connect等系统调用,netaddrlen用于返回地址结构体的长度,StringAddr以"IP:端口"格式返回字符串,operator==重载用于比较两个地址是否相同。
3、mutex
mutex模块用于实现互斥锁的封装,包含两个核心类:mutex、lockguard。
cpp
#pragma once
#include<iostream>
#include<pthread.h>
using namespace std;
namespace mutexmodule
{
    class mutex
    {
    public:
        mutex()
        {
            pthread_mutex_init(&_mutex,nullptr);
        }
        void lock()
        {
            int n=pthread_mutex_lock(&_mutex);
            (void)n;
        }
        void unlock()
        {
            int n=pthread_mutex_unlock(&_mutex);
            (void)n;
        }
        ~mutex()
        {
            pthread_mutex_destroy(&_mutex);
        }
    private:
        pthread_mutex_t _mutex;
    };
    class lockguard
    {
    public:
        lockguard(mutex& mutex):_mutex(mutex)
        {
            _mutex.lock();
        }
        ~lockguard()
        {
            _mutex.unlock();
        }
    private:
        mutex& _mutex;
    };
}
mutex类对pthread_mutex_t进行了封装,pthread_mutex_init(&_mutex,nullptr),构造函数调用pthread_mutex_init初始化互斥锁,int n=pthread_mutex_lock(&_mutex),int n=pthread_mutex_unlock(&_mutex),lock、unlock分别调用pthread_mutex_lock和pthread_mutex_unlock进行加锁和解锁操作,pthread_mutex_destroy(&_mutex),析构函数调用pthread_mutex_destroy销毁互斥锁,确保资源被正确释放。
lockguard类实现RAII风格的锁管理,_mutex.lock(),在构造函数中接收一个mutex对象的引用并立即对其加锁,_mutex.unlock(),在析构函数中自动解锁,使锁的生命周期与lockguard对象绑定,当lockguard对象离开作用域时会自动释放锁。
4、log
log模块实现了一个功能完整的日志系统,设计上采用了策略模式和RAII机制,支持多线程安全地输出日志到控制台或文件。
(1)logstrategy
cpp
#ifndef _LOG_HPP_
#define _LOG_HPP_
#include<iostream>
#include<string>
#include<cstdio>
#include<filesystem>
#include<fstream>
#include<sstream>
#include<memory>
#include<ctime>
#include<unistd.h>
#include"mutex.hpp"
using namespace std;
namespace logmodule
{
    using namespace mutexmodule;
    const string gsep ="\r\n";
    class logstrategy
    {
    public:
        virtual ~logstrategy()=default;
        virtual void synclog(const string& message)=0;
    };
    class consolelogstrategy:public logstrategy
    {
    public:
        consolelogstrategy(){}
        void synclog(const string& message) override
        {
            lockguard guard(_mutex);
            cout<<message<<gsep;
        }
        ~consolelogstrategy(){}
    private:
        mutex _mutex;
    };
    const string defaultpath="/var/log/";
    const string defaultfile="my.log";
    class filelogstrategy:public logstrategy
    {
    public:
        filelogstrategy(const string& path=defaultpath,const string& file=defaultfile)
                        :_path(path),
                        _file(file)
                        {
                            lockguard guard(_mutex);
                            if(filesystem::exists(_path))
                            {
                                return;
                            }
                            try
                            {
                              filesystem::create_directories(_path);
                            }
                            catch(const filesystem::filesystem_error& e)
                            {
                                cerr<<e.what()<<endl;
                            }
                        }
        void synclog(const string& message) override
        {
            lockguard guard(_mutex);
            string filename=_path+(_path.back()=='/'?"":"/")+_file;
            ofstream out(filename,ios::app);
            if(!out.is_open())
            {
                return;
            }
            out<<message<<gsep;
            out.close();
        }
        ~filelogstrategy(){}
    private:
        string _path;
        string _file;
        mutex _mutex;
    };
}
#endif
logstrategy是核心抽象基类,synclog是日志同步接口,控制台策略类consolelogstrategy和文件策略类filelogstrategy通过继承logstrategy类分别实现了向控制台和文件写入日志的功能。lockguard guard(_mutex),cout<<message<<gesp,控制台策略使用lockguard加锁,直接使用cout输出,而文件策略filelogstrategy会检查并创建日志目录,默认值为/var/log和my.log,lockguard guard(_mutex),string filename=_path+(_path.back()=='/'?"":"/")+_file,加锁后拼接完整文件路径,out<<message<<gsep,然后以追加方式打开文件写入,二者都使用互斥锁保证多线程环境下日志不会交错混乱。
(2)日志辅助函数
cpp
enum class loglevel
{
    DEBUG,
    INFO,
    WARNING,
    ERROR,
    FATAL
};
string levelstr(loglevel lev)
{
    switch(lev)
    {
        case loglevel::DEBUG: return "DEBUG";
        case loglevel::INFO: return "INFO";
        case loglevel::WARNING: return "WARNING";
        case loglevel::ERROR: return "ERROR";
        case loglevel::FATAL: return "FATAL";
        default: return "UNKNOWN";
    }
}
string gettimestamp()
{
    time_t t=time(nullptr);
    struct tm curr_tm;
    localtime_r(&t,&curr_tm);
    char timebuffer[128];
    snprintf(timebuffer, sizeof(timebuffer),"%4d-%02d-%02d %02d:%02d:%02d",
        curr_tm.tm_year+1900,
        curr_tm.tm_mon+1,
        curr_tm.tm_mday,
        curr_tm.tm_hour,
        curr_tm.tm_min,
        curr_tm.tm_sec
    );
    return timebuffer;
}
loglevel为日志级别枚举类,levelstr负责将日志级别枚举转换为对应的字符串,gettimestamp用于获取当前时间的格式化字符串,使用localtime_r获取本地时间,并格式化为"年-月-日 时:分:秒"的标准格式。
(3)logmessage
cpp
class logmessage
{
public:
    logmessage(const string& src,loglevel level,int num,logger& logger)
        :_pid(getpid())
        ,_src(src)
        ,_num(num)
        ,_curr_time(gettimestamp())
        ,_level(level)
        ,_logger(logger)
        {
            stringstream ss;
            ss<<"["<<_curr_time<<"]"<<"["<<levelstr(_level)<<"]"<<"["<<_pid<<"]"<<"["<<_src<<"]"<<"["<<_num<<"]"<<"-";
            _loginfo=ss.str();
        }
        template<class K>
        logmessage& operator<<(const K& info)
        {
            stringstream ss;
            ss<<info;
            _loginfo+=ss.str();
            return *this;
        }
        ~logmessage()
        {
            if(_logger._ptr)
            {
                _logger._ptr->synclog(_loginfo);
            }
        }
private:
    string _curr_time;
    loglevel _level;
    pid_t _pid;
    string _src;
    int _num;
    string _loginfo;
    logger& _logger;
};ss<<""\<\<_curr_time\<\<""<<""\<\
(4)logger
cpp
class logger
{
public:
    logger():_ptr(nullptr)
    {
        enableconsolelogstrategy();
    }
    void enableconsolelogstrategy()
    {
        _ptr=make_unique<consolelogstrategy>();
    }
    void enablefilelogstrategy()
    {
        _ptr=make_unique<filelogstrategy>();
    }
    class logmessage
    {
    public:
        logmessage(const string& src,loglevel level,int num,logger& logger)
        :_pid(getpid())
        ,_src(src)
        ,_num(num)
        ,_curr_time(gettimestamp())
        ,_level(level)
        ,_logger(logger)
        {
            stringstream ss;
            ss<<"["<<_curr_time<<"]"<<"["<<levelstr(_level)<<"]"<<"["<<_pid<<"]"<<"["<<_src<<"]"<<"["<<_num<<"]"<<"-";
            _loginfo=ss.str();
        }
        template<class K>
        logmessage& operator<<(const K& info)
        {
            stringstream ss;
            ss<<info;
            _loginfo+=ss.str();
            return *this;
        }
        ~logmessage()
        {
            if(_logger._ptr)
            {
                _logger._ptr->synclog(_loginfo);
            }
        }
    private:
        string _curr_time;
        loglevel _level;
        pid_t _pid;
        string _src;
        int _num;
        string _loginfo;
        logger& _logger;
    };
    logmessage operator()(loglevel lev,const string& name,int line)
    {
        return logmessage(name,lev,line,*this);
    }
    ~logger()
    {

    }
private:
    unique_ptr<logstrategy> _ptr;
};
enableconsolelogstrategy(),logger构造函数调用enableconsolelogstrategy设置默认的控制台输出策略,_ptr=make_unique<consolelogstrategy>(),_ptr=make_unique<filelogstrategy>(),enableconsolelogstrategy、enablefilelogstrategy分别为控制台、文件输出策略。operator()重载使logger对象可以像函数一样调用,通过接收日志级别、源文件名和行号,返回一个临时的logmessage对象,实现流式日志语法。
(5)全局实例与宏
cpp
static logger log;
#define LOG(level) logmodule::log(level,__FILE__,__LINE__)
#define Enable_Console_Log_Strategy() logmodule::log.enableconsolelogstrategy()
#define Enable_File_Log_Strategy() logmodule::log.enablefilelogstrategy()
static logger log为静态全局logger对象,整个服务器程序共享同一个日志实例。
LOG(level)宏展开后将调用log对象的函数调用运算符,Enable_Console_Log_Strategy()、Enable_File_Log_Strategy()宏分别为控制台日志输出策略、文件日志输出策略。
5、socket
socket模块构建了一个面向对象的socket封装库,位于socketmodule命名空间,主要用于简化TCP网络编程。
(1)抽象基类
cpp
#ifndef _SOCKET_HPP_
#define _SOCKET_HPP_
#include<iostream>
#include<string>
#include<unistd.h>
#include<sys/types.h>
#include<sys/socket.h>
#include<netinet/in.h>
#include<arpa/inet.h>
#include<cstdlib>
#include"common.hpp"
#include"log.hpp"
#include"inetaddr.hpp"
using namespace std;
namespace socketmodule
{
    using namespace logmodule;
    const static int gbacklog=16;
    class socket
    {
    public:
        virtual ~socket(){}
        virtual void socketordie()=0;
        virtual void bindordie(uint16_t port)=0;
        virtual void listenordie(int backlog)=0;
        virtual void Close()=0;
        virtual int recv(string* out)=0;
        virtual int send(const string& message)=0;
        virtual shared_ptr<socket> accept(inetaddr* addr)=0;
        virtual int connect(const string& ip,uint16_t port)=0;
    public:
        void buildtcpsocket(uint16_t port,int backlog=gbacklog)
        {
            socketordie();
            bindordie(port);
            listenordie(backlog);
        }
        void buildclient()
        {
            socketordie();
        }
    };
}
#endif
基类socket用于提供纯虚接口,socketordie用于创建套接字;bindordie用于绑定端口;listenordie用于监听;Close用于关闭套接字,释放文件描述符;recv用于接收数据,存入out字符串,返回接收字节数;send用于发送数据,返回发送字节数;accept用于接收客户端连接,返回新的客户端套接字对象,并通过addr参数返回客户端地址;connect用于客户端连接到指定IP和端口的服务器;buildtcpsocket为服务器一站式构建方法,依次完成创建、绑定、监听三个步骤,backlog默认值为16,buildclient为客户端一站式构建方法,只创建套接字,连接时需单独调用connect。
(2)tcpsocket
tcpsocket继承自socket,用来实现TCP协议的具体操作。
cpp
const static int defaultfd=-1;
class tcpsocket:public socket
{
public:
    tcpsocket()
    :_sockfd(defaultfd)
    {}
    tcpsocket(int fd)
    :_sockfd(fd)
    {}
    tcpsocket(const string& ip,uint16_t port)
    {}
    ~tcpsocket()
    {}
    void socketordie() override
    {
        _sockfd=::socket(AF_INET,SOCK_STREAM,0);
        if(_sockfd<0)
        {
            LOG(loglevel::FATAL)<<"socket error";
            exit(SOCKET_ERR);
        }
        LOG(loglevel::INFO)<<"sock success";
    }
    void bindordie(uint16_t port) override
    {
        inetaddr addr(port);
        int n=::bind(_sockfd,addr.netaddrptr(),addr.netaddrlen());
        if(n<0)
        {
            LOG(loglevel::FATAL)<<"bind error";
            exit(BIND_ERR);
        }
        LOG(loglevel::INFO)<<"bind success";
    }
    void listenordie(int backlog) override
    {
        int n=listen(_sockfd,backlog);
        if(n<0)
        {
            LOG(loglevel::FATAL)<<"listen error";
            exit(LISTEN_ERR);
        }
        LOG(loglevel::INFO)<<"listen success";
    }
    shared_ptr<socket> accept(inetaddr* addr) override
    {
        struct sockaddr_in peer;
        socklen_t len=sizeof(peer);
        int fd=::accept(_sockfd,CONV(peer),&len);
        if(fd<0)
        {
            LOG(loglevel::WARNING)<<"accept error";
            return nullptr;
        }
        addr->setaddr(peer);
        return make_shared<tcpsocket>(fd);
    }
    int recv(string* out) override
    {
        char buffer[4096*2];
        ssize_t n=::recv(_sockfd,buffer,sizeof(buffer)-1,0);
        if(n>0)
        {
            buffer[n]=0;
            *out+=buffer;
        }
        return n;
    }
    int send(const string& message) override
    {
        return ::send(_sockfd,message.c_str(),message.size(),0);
    }
    void Close() override
    {
        if(_sockfd>=0)
        {
            ::close(_sockfd);
        }
    }
    int connect(const string& ip,uint16_t port) override
    {
        inetaddr addr(ip,port);
        return ::connect(_sockfd,addr.netaddrptr(),addr.netaddrlen());
    }
private:
    int _sockfd;
};
默认构造初始化文件描述符为-1,参数构造用已有文件描述符构造对象,用于accept后创建会话套接字;_sockfd=::socket(AF_INET,SOCK_STREAM,0),socketordie通过调用socket创建IPv4 TCP套接字;int n=::bind(_sockfd,addr.netaddrptr(),addr.netaddrlen()),bindordie通过调用bind来绑定端口,利用inetaddr对象封装端口为INADDR_ANY地址;int n=listen(_sockfd,backlog),listenordie通过调用listen开始监听,backlog为指定连接队列长度;int fd=::accept(_sockfd,CONV(peer),&len),accept用于接受客户端连接,addr->setaddr(peer),成功时通过addr返回客户端地址,return make_shared<tcpsocket>(fd),并创建新的tcpsocket对象返回;ssize_t n=::recv(_sockfd,buffer,sizeof(buffer)-1,0),recv用于接收数据,buffern=0,预留1字节放\0,收到数据后追加到out字符串末尾,return n,返回接收字节数;return ::send(_sockfd,message.c_str(),message.size(),0);send用于发送字符串内容,返回实际发送字节数;::close(_sockfd),close用于关闭有效套接字,将文件描述符归还系统;TCP客户端连接服务器,inet接收IP字符串和端口,addr addr(ip,port),内部使用inetaddr封装地址,return ::connect(_sockfd,addr.netaddrptr(),addr.netaddrlen()),调用系统connect,返回连接结果。
6、tcpserver
tcpserver模块用于实现一个多进程并发TCP服务器,通过创建子进程处理客户端连接。
cpp
#include"socket.hpp"
#include<iostream>
#include<memory>
#include<sys/wait.h>
#include<functional>
using namespace std;
using namespace socketmodule;
using namespace logmodule;
using ioservice_t=function<void(shared_ptr<socketmodule::socket>& sock,inetaddr& addr)>;
class tcpserver
{
public:
    tcpserver(uint16_t port)
        :_port(port)
        ,_listensocketptr(make_unique<tcpsocket>())
        ,_isrunning(false)
        {
            _listensocketptr->buildtcpsocket(_port);
        }
    void start(ioservice_t cb)
    {
        _isrunning=true;
        while(_isrunning)
        {
            inetaddr client;
            auto sock=_listensocketptr->accept(&client);
            if(sock==nullptr)
            {
                continue;
            }
            LOG(loglevel::DEBUG)<<"accept success";
            pid_t id=fork();
            if(id<0)
            {
                LOG(loglevel::FATAL)<<"fork error";
                exit(FORK_ERR);
            }
            else if(id==0)
            {
                _listensocketptr->Close();
                if(fork()>0)
                exit(OK);
                cb(sock,client);
                sock->Close();
                exit(OK);
            }
            else
            {
                sock->Close();
                pid_t rid=::waitpid(id,nullptr,0);
                (void)rid;
            }
        }
        _isrunning=false;
    }
    ~tcpserver()
    {}
private:
    uint16_t _port;
    unique_ptr<socketmodule::socket> _listensocketptr;
    bool _isrunning;
};
using ioservice_t=function<void(shared_ptr<socketmodule::socket>& sock,inetaddr& addr)>,定义回调函数类型,通过接收客户端套接字和客户端地址,来处理具体任务。
构造函数用于初始化服务器,_port保存监听端口,_listensocketptr(make_unique<tcpsocket>()),创建tcpsocket智能指针,_isrunning初始化为false,表示服务未启动,_listensocketptr->buildtcpsocket(_port),调用buildtcpsocket完成监听套接字的创建、绑定和监听三步操作。
auto sock=_listensocketptr->accept(&client),accept阻塞等待客户端连接,连接成功将返回客户端套接字。pid_t id=fork(),调用fork创建一个子进程,_listensocketptr->close(),if(fork()>0) exit(OK),再次fork()创建孙子进程,之后子进程退出。cb(sock,client),sock->Close(),exit(OK),孙子进程调用回调函数cb处理任务,任务处理完成后关闭客户端套接字并退出。sock->Close(),pid_t rid=::waitpid(id,nullptr,0),父进程关闭客户端套接字,调用waitpid等待子进程退出,回收资源。
7、util
util为工具类模块,全部成员函数均为静态方法,提供文件操作和字符串处理的功能。
cpp
#ifndef _UTIL_HPP_
#define _UTIL_HPP_
#include<iostream>
#include<fstream>
#include<string>
using namespace std;
class util
{
public:
    static bool readfilecontent(const string& filename,string*out)
    {
        int fsize=filesize(filename);
        if(fsize>0)
        {
            ifstream in(filename);
            if(!in.is_open())
            {
                return false;
            }
            out->resize(fsize);
            in.read((char*)(out->c_str()),fsize);
            in.close();
        }
        else
        {
            return false;
        }
        return true;
    }
    static bool readoneline(string& bigstr,string*out,const string& sep)
    {
        auto pos=bigstr.find(sep);
        if(pos==string::npos)
        {
            return false;
        }
        *out=bigstr.substr(0,pos);
        bigstr.erase(0,pos+sep.size());
        return true;
    }
    static int filesize(const string& file)
    {
        ifstream in(file,std::ios::binary);
        if(!in.is_open()) return -1;
        in.seekg(0,in.end);
        int filesize=in.tellg();
        in.seekg(0,in.beg);
        in.close();
        return filesize;
    }
};
#endif
filesize用于获取文件大小,ifstream in(file,std::ios::binary),以二进制模式打开文件,in.seekg(0,in.end),将读指针移动到文件末尾,int filesize=in.tellg(),通过tellg获取当前位置,in.seek(0,in.beg),in.close(),复位读指针并关闭文件,return filesize,读取成功返回文件大小,失败返回-1。
readfilecontent用于读取整个文件的内容到输出字符串,int fsize=filesize(filename),调用filesize获取文件大小,若文件大小大于0,ifstream in(filename),打开文件,out->resize(fsize),将输出字符串out调整为文件大小,in.read((char*)(out->c_str()),fsize),in.close(),return true,调用read将文件内容读入字符串内部缓冲区,关闭文件返回true。
auto pos=bigstr.find(sep),readoneline用于从输入的bigstr中查找第一个分隔符sep,*out=bigstr.substr(0,pos),将其之前的内容提取到out中,bigstr.erase(0,pos+sep.size()),并从原字符串中删除该部分。
8、http
http模块实现了一个完整的HTTP服务器框架,包含请求解析、响应生成、静态文件服务和动态路由功能。
(1)httprequest
httprequest类用于解析HTTP请求报文,将原始的文本数据转化为结构化的C++对象,方便上层代码获取请求信息。
cpp
#ifndef _HTTP_HPP_
#define _HTTP_HPP_
#include"socket.hpp"
#include"tcpserver.hpp"
#include"util.hpp"
#include"log.hpp"
#include<iostream>
#include<string>
#include<memory>
#include<sstream>
#include<functional>
#include<unordered_map>
using namespace socketmodule;
using namespace logmodule;
const string gspace=" ";//空格分隔符
const string glinespace="\r\n";//HTTP行结束符
const string glsep=": ";//头部键值分隔符
const string webroot="./wwwroot";//Web根目录
const string homepage="index.html";//默认首页
const string page404="/404.html";//404错误页面
class httprequest
{
public:
    httprequest()
    :_isinteract(false)
    {}
    string serialize()
    {
        return string();
    }
    void parsereqline(string& reqline)
    {
        stringstream ss(reqline);
        ss>>_method>>_url>>_version;
    }
    bool deserialize(string& request)
    {
        string reqline;
        bool res=util::readoneline(request,&reqline,glinespace);
        LOG(loglevel::DEBUG)<<reqline;
        parsereqline(reqline);
        if(_url=="/")
            _url=webroot+_url+homepage;
        else
            _url=webroot+_url;
        if(_method=="POST")
        {
            _isinteract=true;
            while(true)
            {
                util::readoneline(request,&reqline,glinespace);
                if(reqline!=glinespace)
                {

                }
                else
                {
                    break;
                }
            }
        }
        LOG(loglevel::DEBUG)<<"method: "<<_method;
        LOG(loglevel::DEBUG)<<"url: "<<_url;
        LOG(loglevel::DEBUG)<<"version: "<<_version;
        const string tmp="?";
        auto pos=_url.find(tmp);
        if(pos==string::npos)
        {
            return true;
        }
        _args=_url.substr(pos+tmp.size());
        _url=_url.substr(0,pos);
        _isinteract=true;
        return true;
    }
    string url(){return _url;}
    bool isinteract(){ return _isinteract;}
    string args(){return _args;}
    ~httprequest()
    {}
private:
    string _method;//请求方法 GET/POST
    string _url;//请求 URL
    string _version;//HTTP 版本
    unordered_map<string,string> _headers;//请求头部
    string _blankline;//空行
    string _text;//请求体
    string _args;//URL 参数
    bool _isinteract;//是否为动态交互请求
};
parsereqline用于解析请求行,stringstream ss(reqline), ss>>_method>>_url>>_version,用于从请求行字符串中提取_method、_url、_version。deserialize用于反序列化完整请求,bool res=util::readoneline(request,&reqline,glinespace),parsereqline(reqline),利用util::readoneline按\r\n分隔读取第一行,然后解析。_url=webroot+_url,随后将请求路径转换为实际文件系统路径。_args=_url.substr(pos+tmp.size()),_url=_url.substr(0,pos),提取URL参数。
(2)httpresponse
httpresponse用于构建HTTP响应报文,将响应状态、头部信息和响应体组装成符合HTTP协议规范的字符串,发送给客户端。
cpp
class httpresponse
{
public:
    httpresponse()
    :_blankline(glinespace)
    ,_version("HTTP/1.1")
    ,_code(200)
    ,_desc("OK")
    {}
    string serialize()
    {
        string staticline=_version+gspace+to_string(_code)+gspace+_desc+glinespace;
        string httprep;
        for(auto& head:_headers)
        {
            string str=head.first+glsep+head.second+glinespace;
            httprep+=str;
        }
        return staticline+httprep+_blankline+_text;
    }
    void settargetfile(const string& target)
    {
        _targetfile=target;
    }
    void setcode(int code)
    {
        _code=code;
        switch(_code)
        {
        case 200:
            _desc="OK";
            break;
        case 404:
            _desc="Not Found";
            break;
        case 301:
            _desc="Moved Permanently";
            break;
        case 302:
            _desc="See Other";
            break;
        default:
            break;
        }
    }
    void setheader(const string& key,const string& value)
    {
        auto pos=_headers.find(key);
        if(pos!=_headers.end()) return;
        _headers.insert(make_pair(key,value));
    }
    string url2suffix(const string& targetfile)
    {
        auto pos=targetfile.rfind(".");
        if(pos==string::npos)
        {
            return "text/html";
        }
        string suffix=targetfile.substr(pos);
        if(suffix==".htm"  || suffix==".html")
        {
            return "text/html";
        }
        else if(suffix==".jpg")
        {
            return "image/jpg";
        }
        else if(suffix=="png")
        {
            return "image/png";
        }
        else
            return "";
    }
    bool makeresponse()
    {
        if(_targetfile=="./wwwroot/favicon.ico")
        {
            LOG(loglevel::DEBUG)<<"用户请求:"<<_targetfile<<"忽略";
            return false;
        }
        if(_targetfile=="./wwwroot/redir_test")
        {
            setcode(301);
            setheader("location","https://www.baidu.com/");
            return true;
        }
        int filesize=0;
        bool res=util::readfilecontent(_targetfile,&_text);
        if(!res)
        {
            _text="";
            LOG(loglevel::WARNING)<<_targetfile<<"Not Found";
            setcode(404);
            _targetfile=webroot+page404;
            filesize=util::filesize(_targetfile);
            util::readfilecontent(_targetfile,&_text);
            string suffix=url2suffix(_targetfile);
            setheader("Content-Type",suffix);
            setheader("Content-Length",to_string(filesize));
        }
        else
        {
            LOG(loglevel::DEBUG)<<"读取文件: "<<_targetfile;
            setcode(200);
            filesize=util::filesize(_targetfile);
            string suffix=url2suffix(_targetfile);
            setheader("Content-Type",suffix);
            setheader("Content-Length",to_string(filesize));
            setheader("Set-Cookie","username=zhangsan;");
            setheader("Set-Cookie","passwd=123456;");
        }
        return true;
    }
    void settext(const string& str)
    {
        _text=str;
    }
    bool deserialize(string& req)
    {
        return true;
    }
    ~httpresponse()
    {}
public:
    string _version;//版本号
    int _code;//状态码
    string _desc;//状态
    unordered_map<string,string> _headers;//响应头映射
    vector<string> _cookie;//Cookie
    string _blankline;// \r\n
    string _text;//响应体内容
    string _targetfile;//要返回的文件路径
};
构造函数初始化一个默认的成功响应,setcode用于设置HTTP状态码,并自动填充对应的标准描述文本,setheader用于响应头的设置,_headers.insert(make_pair(key,value)),添加响应头字段,settext、settargetfile用于设置响应体、设置目标文件,url2suffix将根据文件扩展名返回对应的Content-Type,serialize用于序列化为HTTP响应,string staticline=_version+gspace+to_string(_code)+gspace+_desc+glinespace,进行状态行的构建,通过范围for构建所有头部,return staticline+httprep+_blankline+_text,最后进行HTTP响应的拼接。makeresponse负责根据目标文件路径构建HTTP文件响应,对favicon.ico网站图标请求选择静默忽略,不返回任何响应。setcode(301),setheader("location","https://www.baidu.com/"),./wwwroot/redir_test为重定向功能测试。文件读取成功,setcode(200),设置响应状态为200,string suffix=url2suffix(_targetfile),根据文件扩展名推断Content-Type,设置Content-Length为文件大小,设置示例Cookie。如果文件读取失败,setcode(404),设置状态码为404,_targetfile=webroot+page404,将目标文件改为404错误页面路径,util::readfilecontent(_targetfile,&_text),string suffix=url2suffix(_targetfile),读取404页面内容,setheader("Content-Type",suffix),setheader("Content-Length",to_string(util::filesize(_targetfile))),设置相应的Content-Type和Content-Length。
(3)http
http类是HTTP服务器的核心控制类,它整合了TCP服务器、请求解析、响应生成和路由分发功能,对外提供间接的接口。
cpp
using httpfun_t=function<void(httprequest&,httpresponse&)>;
class http
{
public:
    http(uint16_t port)
    :_tp(make_unique<tcpserver>(port))
    {}
    void handlerhttp(shared_ptr<socketmodule::socket>& sock,inetaddr& client)
    {
         string httpstr;
         int n=sock->recv(&httpstr);
         if(n>0)
         {
             httprequest httpreq;
             httpresponse httprep;
             httpreq.deserialize(httpstr);
            if(httpreq.isinteract())
            {
                if(_handlers.find(httpreq.url())==_handlers.end())
                {

                }
                else
                {
                    _handlers[httpreq.url()](httpreq,httprep);
                    string str=httprep.serialize();
                    sock->send(str);
                }
            }
            else
            {
                httprep.settargetfile(httpreq.url());
                if(httprep.makeresponse())
                {
                    string str=httprep.serialize();
                    sock->send(str);
                }
            }
        }
    }
    void start()
    {
        _tp->start([this](shared_ptr<socketmodule::socket>& sock,inetaddr& client){
            this->handlerhttp(sock,client);
        });
    }
    void registerservice(const string& name,httpfun_t hfunc)
    {
        string key=webroot+name;
        auto pos=_handlers.find(key);
        if(pos==_handlers.end())
        {
            _handlers.insert(make_pair(key,hfunc));
        }
    }
    ~http()
    {}
private:
    unique_ptr<tcpserver> _tp;
    unordered_map<string,httpfun_t> _handlers;
};
unique_ptr<tcpserver> _tp,使用unique_ptr管理tcpserver生命周期,unordered_map<string,httpfun_t> _handlers,路由表使用哈希表。_tp(make_unique<tcpserver>(port)),构造函数通过传入端口号,创建tcpserver实例,tcpserver构造时会自动完成socket创建、绑定和监听。registerservice用于注册路由,_handlers.insert(make_pair(key,hfunc)),将URL路径与处理函数绑定。handlerhttp是整个HTTP服务器最核心的函数,负责处理每个客户端连接,int n=sock->recv(&httpstr),调用recv从客户端套接字读取HTTP请求字符串,httpreq.deserialize(httpstr),解析HTTP请求报文,_handlershttpreq.url()(httpreq,httprep),对动态请求进行处理,对于静态文件请求,httprep.settargetfile(httpreq.url()),设置目标文件路径,string str=httprep.serialize(),sock->send(str),通过makeresponse读取文件并构建响应,并将响应发送给客户端。_tp->start(this(shared_ptr<socketmodule::socket>& sock,inetaddr& client){ this->handlerhttp(sock,client);})调用tcpserver的start方法,传入lambda回调,将handlerhttp绑定到每个客户端连接。
9、main
main模块实现了一个HTTP服务器入口和业务处理逻辑。
cpp
#include"http.hpp"
void login(httprequest& httpreq,httpresponse& httprep)
{
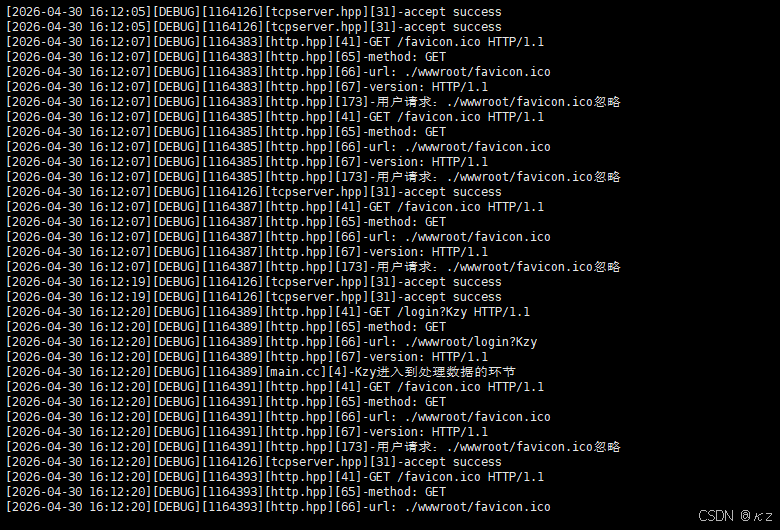
LOG(loglevel::DEBUG)<<httpreq.args()<<"进入到处理数据的环节";
string text="hello: "+httpreq.args();
httprep.setcode(200);
httprep.setheader("Content-Type","text/plain");
httprep.setheader("Content-Length",to_string(text.size()));
httprep.settext(text);
}
int main(int argc,char*argv[])
{
if(argc!=2)
{
cout<<"usage"<<argv[0]<<"port"<<endl;
exit(USAGE_ERR);
}
uint16_t port=stoi(argv[1]);
unique_ptr<http> hp=make_unique<http>(port);
hp->registerservice("/login",login);
hp->start();
return 0;
}uint16_t port=stoi(argv1),将字符串端口转换为整数,unique_ptr<http> hp=make_unique<http>(port),通过port来创建一个http服务器对象,hp->registerservice("/login",login),调用registerservice方法将路径/login与login函数绑定,login接收httprequest对象获取URL参数,LOG(loglevel::DEBUG)<<httpreq.args()<<"进入到处理数据的环节",在日志中记录参数内容,string text="hello: "+httpreq.args(),构造一个以"hello: "开头的文本响应字符串,httprep.setcode(200),设置响应状态码为200,httprep.setheader("Content-Length",to_string(text.size())),计算响应体长度并设置对应的头部,httprep.settext(text),最后调用settext将响应体写入。hp->start(),调用start方法启动服务器,开始监听并处理客户端请求。
10、Makefile
整个HTTP服务器项目的目录结构如下所示:
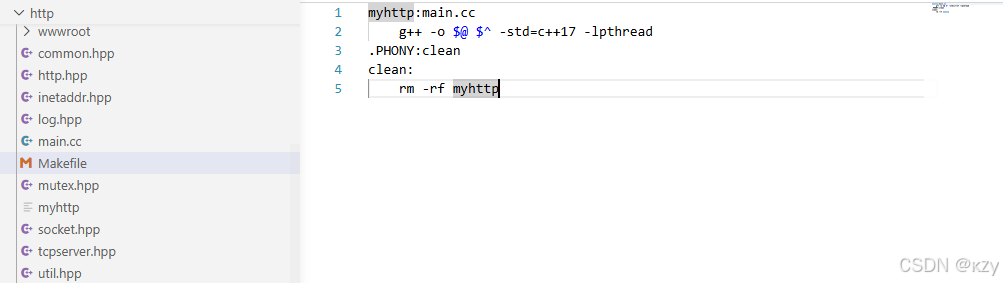
bash
myhttp:main.cc
g++ -o $@ $^ -std=c++17 -lpthread
.PHONY:clean
clean:
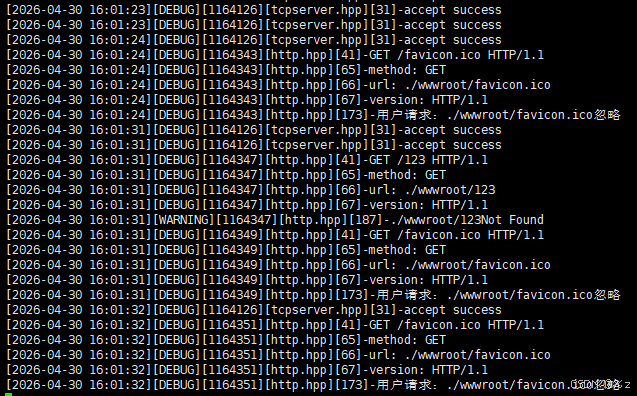
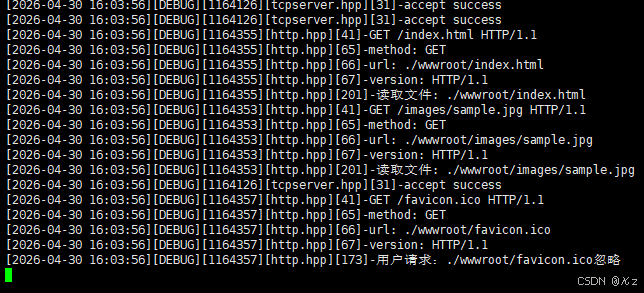
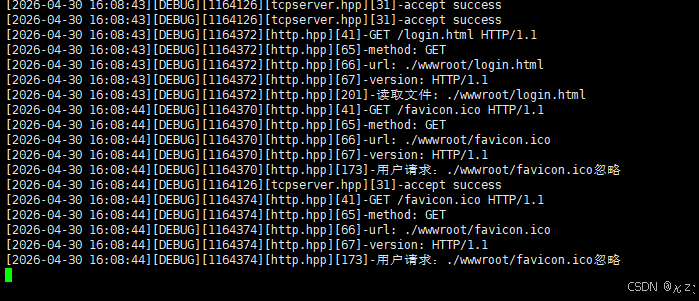
rm -rf myhttp通过Makefile即可实现一键化编译,g++ -o @ ^ -std=c++17 -lpthread,采取c++17标准,-lpthread链接线程库,编译通过后将生成myhttp可执行文件,执行myhttp需绑定端口号,如8908,结果如下所示:

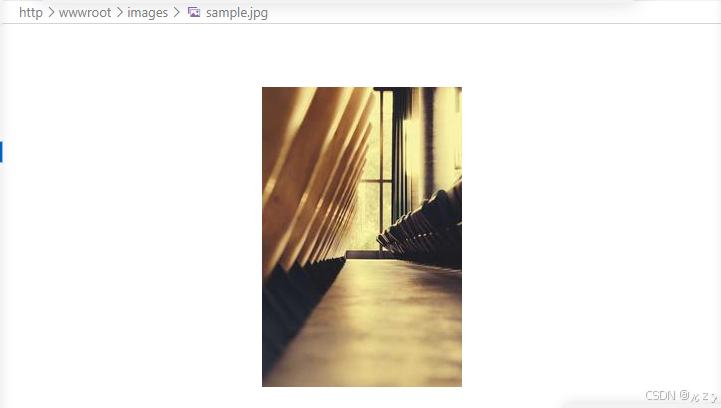
11、wwwroot
wwwroot模块用于提供一个完整静态网站的素材,包括图片文件夹、404页面以及几个测试和前端页面,这些文件会被服务器用来处理静态资源请求,同时为/login、/register等动态接口提供前端界面。

image/sample.jpg:用于展示图片
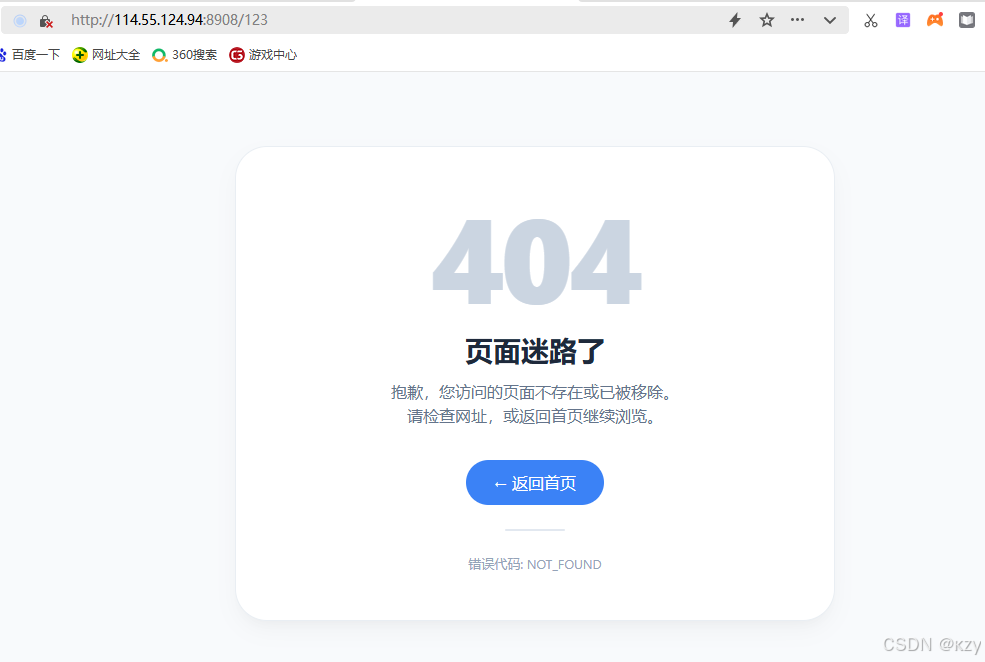
404.html:用于返回404错误页面
html
<!DOCTYPE html>
<html lang="zh-CN">
<head>
    <meta charset="UTF-8">
    <meta name="viewport" content="width=device-width, initial-scale=1.0, user-scalable=yes">
    <title>404 - 页面未找到</title>
    <style>
        * {
            margin: 0;
            padding: 0;
            box-sizing: border-box;
        }

        body {
            font-family: -apple-system, BlinkMacSystemFont, "Segoe UI", Roboto, "Helvetica Neue", Arial, sans-serif;
            background: #f8fafc;
            min-height: 100vh;
            display: flex;
            align-items: center;
            justify-content: center;
            padding: 24px;
        }

        .error-container {
            max-width: 600px;
            width: 100%;
            text-align: center;
            background: white;
            border-radius: 32px;
            padding: 48px 32px;
            box-shadow: 0 10px 25px -5px rgba(0, 0, 0, 0.05), 0 8px 10px -6px rgba(0, 0, 0, 0.02);
            border: 1px solid #e9eef3;
        }

        .error-code {
            font-size: 120px;
            font-weight: 800;
            line-height: 1;
            color: #cbd5e1;
            letter-spacing: -4px;
            margin-bottom: 16px;
        }

        .title {
            font-size: 28px;
            font-weight: 600;
            color: #1e293b;
            margin-bottom: 12px;
        }

        .message {
            font-size: 16px;
            color: #64748b;
            line-height: 1.5;
            margin-bottom: 32px;
        }

        .home-link {
            display: inline-flex;
            align-items: center;
            gap: 8px;
            background: #3b82f6;
            color: white;
            text-decoration: none;
            padding: 12px 28px;
            border-radius: 40px;
            font-weight: 500;
            font-size: 16px;
            transition: all 0.2s ease;
            border: none;
            cursor: pointer;
        }

        .home-link:hover {
            background: #2563eb;
            transform: translateY(-2px);
            box-shadow: 0 8px 20px rgba(59, 130, 246, 0.3);
        }

        .home-link:active {
            transform: translateY(0);
        }
        .divider {
            width: 60px;
            height: 2px;
            background: #e2e8f0;
            margin: 24px auto 16px;
            border-radius: 1px;
        }

        .hint {
            font-size: 13px;
            color: #94a3b8;
            margin-top: 24px;
        }

        @media (max-width: 480px) {
            .error-container {
                padding: 32px 20px;
            }
            .error-code {
                font-size: 90px;
            }
            .title {
                font-size: 24px;
            }
        }
    </style>
</head>
<body>
    <div class="error-container">
        <div class="error-code">404</div>
        <div class="title">页面迷路了</div>
        <div class="message">
            抱歉,您访问的页面不存在或已被移除。<br>
            请检查网址,或返回首页继续浏览。
        </div>
        <a href=" " class="home-link">
            ← 返回首页
        </a >
        <div class="divider"></div>
        <div class="hint">
            错误代码: NOT_FOUND
        </div>
    </div>
</body>
</html>
页面如下所示:
favicon.ico:浏览器标签页图标,服务器中已有忽略它的特殊处理。
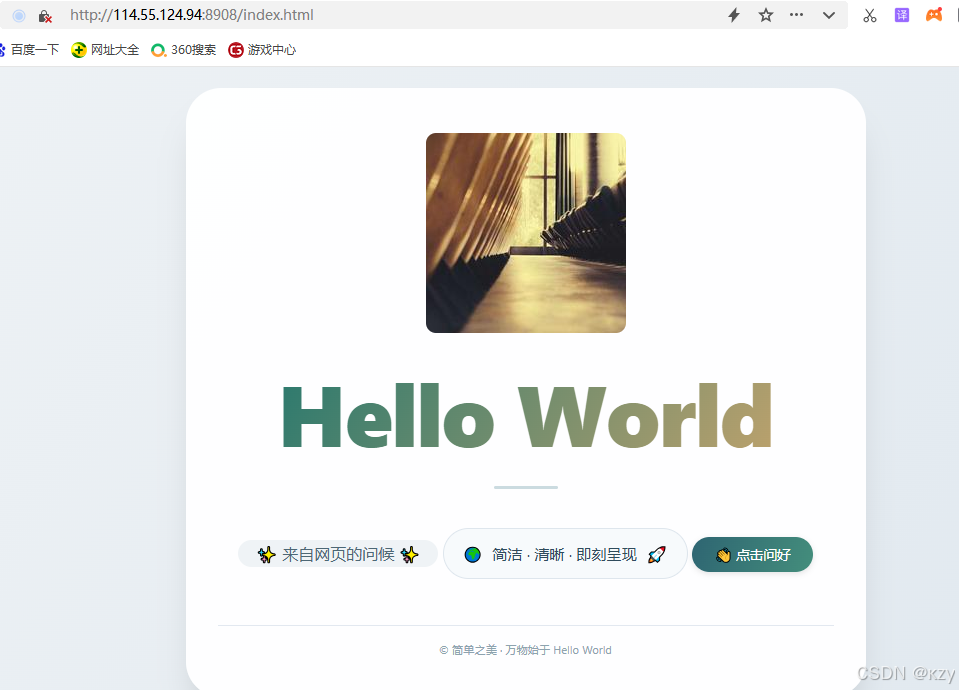
index.html:带有问候动画和按钮的默认首页
html
<!DOCTYPE html>
<html lang="zh-CN">
<head>
    <meta charset="UTF-8">
    <meta name="viewport" content="width=device-width, initial-scale=1.0, user-scalable=yes">
    <title>简约 · Hello World</title>
    <style>
        * {
            margin: 0;
            padding: 0;
            box-sizing: border-box;
        }

        body {
            background: linear-gradient(125deg, #eef2f5 0%, #e0e8ef 100%);
            font-family: 'Segoe UI', Roboto, 'Helvetica Neue', system-ui, -apple-system, sans-serif;
            min-height: 100vh;
            display: flex;
            align-items: center;
            justify-content: center;
            padding: 1.5rem;
        }
        .card {
            max-width: 680px;
            width: 100%;
            background: rgba(255, 255, 255, 0.97);
            border-radius: 2.2rem;
            box-shadow: 0 20px 35px -12px rgba(0, 0, 0, 0.12), 0 5px 12px rgba(0, 0, 0, 0.05);
            text-align: center;
            padding: 2.8rem 2rem 2.5rem 2rem;
            transition: transform 0.2s ease, box-shadow 0.25s ease;
        }

        .card:hover {
            transform: translateY(-3px);
            box-shadow: 0 28px 38px -14px rgba(0, 0, 0, 0.18);
        }
        .hello {
            font-size: clamp(3.2rem, 12vw, 5.4rem);
            font-weight: 800;
            letter-spacing: -0.02em;
            background: linear-gradient(125deg, #1f4c5c, #2e7a6e, #e2ac6c);
            background-size: 200% 200%;
            -webkit-background-clip: text;
            background-clip: text;
            color: transparent;
            animation: gentleFlow 10s ease infinite;
            margin-bottom: 0.6rem;
        }

        @keyframes gentleFlow {
            0% { background-position: 0% 30%; }
            50% { background-position: 100% 70%; }
            100% { background-position: 0% 30%; }
        }
        .divider {
            width: 64px;
            height: 3px;
            background: #cbdbe0;
            border-radius: 3px;
            margin: 1rem auto 1.2rem auto;
        }
        .subline {
            font-size: 1rem;
            color: #4d6775;
            background: #eff3f6;
            display: inline-block;
            padding: 0.2rem 1.1rem;
            border-radius: 40px;
            font-weight: 450;
            margin-bottom: 1.6rem;
        }
        .description {
            color: #2e4b5c;
            font-size: 0.95rem;
            background: #f7fafc;
            padding: 0.9rem 1.2rem;
            border-radius: 1.8rem;
            display: inline-flex;
            align-items: center;
            gap: 0.6rem;
            flex-wrap: wrap;
            justify-content: center;
            border: 1px solid #dee6ed;
        }
        .greet-btn {
            margin-top: 1.8rem;
            background: #386e7c;
            border: none;
            color: white;
            font-size: 0.85rem;
            font-weight: 500;
            padding: 0.5rem 1.4rem;
            border-radius: 60px;
            cursor: pointer;
            transition: 0.15s;
            box-shadow: 0 2px 6px rgba(0, 0, 0, 0.1);
            background: linear-gradient(110deg, #2e6572, #448e7c);
        }

        .greet-btn:hover {
            transform: scale(0.96);
            background: linear-gradient(110deg, #235a66, #358071);
            box-shadow: 0 1px 3px rgba(0, 0, 0, 0.1);
        }
        .footer-note {
            margin-top: 2rem;
            font-size: 0.7rem;
            color: #8da3af;
            border-top: 1px solid #e2e8f0;
            padding-top: 1rem;
        }
    </style>
</head>
<body>

<div class="card">
    <img src="/images/sample.jpg" alt="示例图片"
         style="width: 200px; height: 200px; border-radius: 10px;
                object-fit: cover; margin-bottom: 1rem;">
    <div class="hello">Hello World</div>
    <div class="divider"></div>
    <div class="subline">✨ 来自网页的问候 ✨</div>

    <div class="description">
        <span>🌍</span> 简洁 · 清晰 · 即刻呈现 <span>🚀</span>
    </div>
    <button class="greet-btn" id="sayHiBtn">👋 点击问好</button>

    <div class="footer-note">
        © 简单之美 · 万物始于 Hello World
    </div>
</div>

<script>
    (function() {
        const btn = document.getElementById('sayHiBtn');
        if (!btn) return;
        btn.addEventListener('click', function() {
            const oldToast = document.querySelector('.dynamic-toast');
            if (oldToast) oldToast.remove();

            const toast = document.createElement('div');
            toast.className = 'dynamic-toast';
            toast.textContent = '💬 你好,世界!愿你编码愉快。';
            toast.style.position = 'fixed';
            toast.style.bottom = '28px';
            toast.style.left = '50%';
            toast.style.transform = 'translateX(-50%)';
            toast.style.backgroundColor = '#1e3a42';
            toast.style.color = '#f0f7f0';
            toast.style.padding = '8px 22px';
            toast.style.borderRadius = '50px';
            toast.style.fontSize = '0.85rem';
            toast.style.fontWeight = '500';
            toast.style.boxShadow = '0 10px 20px rgba(0,0,0,0.15)';
            toast.style.zIndex = '999';
            toast.style.backdropFilter = 'blur(6px)';
            toast.style.background = 'rgba(28, 58, 65, 0.92)';
            toast.style.fontFamily = 'inherit';
            toast.style.pointerEvents = 'none';
            toast.style.whiteSpace = 'nowrap';

            document.body.appendChild(toast);

            setTimeout(() => {
                toast.style.transition = 'opacity 0.35s ease';
                toast.style.opacity = '0';
                setTimeout(() => {
                    if (toast.parentNode) toast.parentNode.removeChild(toast);
                }, 380);
            }, 2200);
        });
    })();
</script>
</body>
</html>
默认页面如下所示:
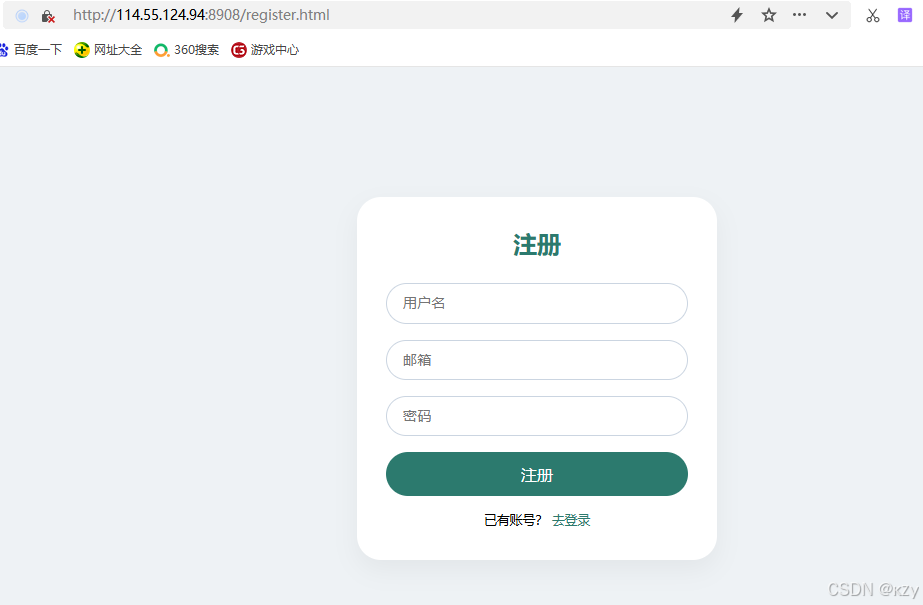
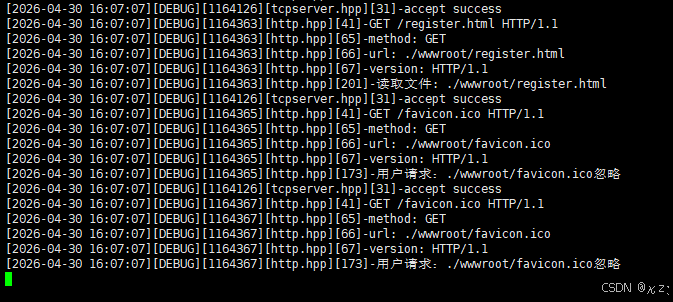
register.html:为注册表单页面,使用前端JS模拟交互。
html
<!DOCTYPE html>
<html lang="zh-CN">
<head>
    <meta charset="UTF-8">
    <meta name="viewport" content="width=device-width, initial-scale=1.0">
    <title>注册</title>
    <style>
        * {
            margin: 0;
            padding: 0;
            box-sizing: border-box;
        }
        body {
            background: #eef2f5;
            font-family: system-ui, 'Segoe UI', sans-serif;
            min-height: 100vh;
            display: flex;
            align-items: center;
            justify-content: center;
            padding: 1rem;
        }
        .card {
            background: white;
            width: 100%;
            max-width: 360px;
            border-radius: 1.5rem;
            box-shadow: 0 10px 25px rgba(0,0,0,0.05);
            padding: 2rem 1.8rem;
        }
        h2 {
            text-align: center;
            margin-bottom: 1.5rem;
            color: #2c7a6e;
            font-weight: 600;
        }
        input {
            width: 100%;
            padding: 0.7rem 1rem;
            border: 1px solid #cbd5e1;
            border-radius: 2rem;
            font-size: 0.9rem;
            outline: none;
            margin-bottom: 1rem;
        }
        input:focus {
            border-color: #2c7a6e;
        }
        button {
            width: 100%;
            background: #2c7a6e;
            color: white;
            border: none;
            padding: 0.7rem;
            border-radius: 2rem;
            font-size: 1rem;
            font-weight: 500;
            cursor: pointer;
        }
        button:hover {
            background: #23685e;
        }
        .link {
            text-align: center;
            margin-top: 1rem;
            font-size: 0.8rem;
        }
        .link a {
            color: #2c7a6e;
            text-decoration: none;
        }
    </style>
</head>
<body>
<div class="card">
    <h2>注册</h2>
    <input type="text" id="username" placeholder="用户名">
    <input type="email" id="email" placeholder="邮箱">
    <input type="password" id="password" placeholder="密码">
    <button id="registerBtn">注册</button>
    <div class="link">
        已有账号? <a href=" ">去登录</a >
    </div>
</div>
<script>
    document.getElementById('registerBtn').onclick = function() {
        var name = document.getElementById('username').value.trim();
        var email = document.getElementById('email').value.trim();
        var pwd = document.getElementById('password').value.trim();
        if (!name || !email || !pwd) {
            alert('请填写完整信息');
            return;
        }
        if (pwd.length < 3) {
            alert('密码至少3位');
            return;
        }
        alert('注册成功!请登录');
        window.location.href = 'login.html';
    };
</script>
</body>
</html>
注册页面如下所示:
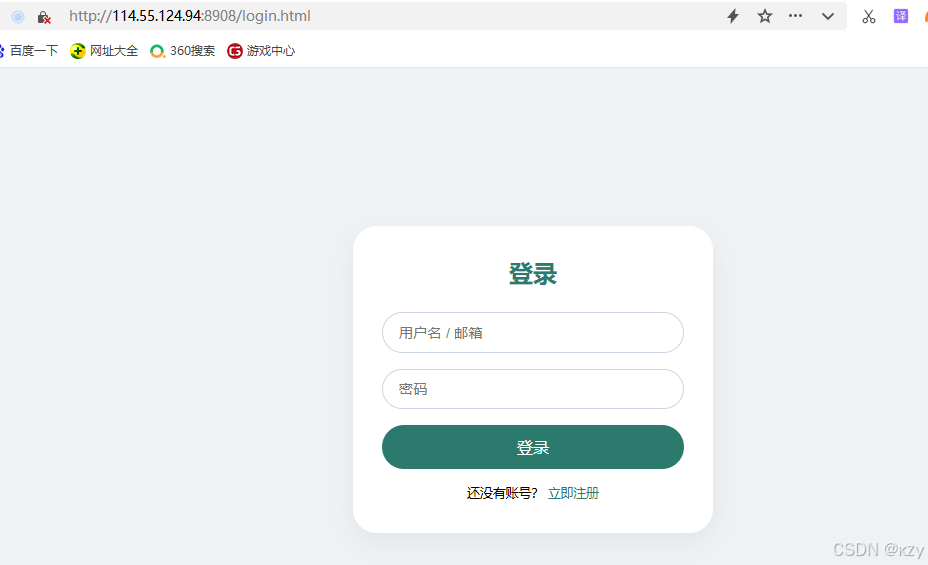
login.html:为登录表单页面,使用前端JS模拟交互。
html
<!DOCTYPE html>
<html lang="zh-CN">
<head>
    <meta charset="UTF-8">
    <meta name="viewport" content="width=device-width, initial-scale=1.0">
    <title>登录</title>
    <style>
        * {
            margin: 0;
            padding: 0;
            box-sizing: border-box;
        }
        body {
            background: #eef2f5;
            font-family: system-ui, 'Segoe UI', sans-serif;
            min-height: 100vh;
            display: flex;
            align-items: center;
            justify-content: center;
            padding: 1rem;
        }
        .card {
            background: white;
            width: 100%;
            max-width: 360px;
            border-radius: 1.5rem;
            box-shadow: 0 10px 25px rgba(0,0,0,0.05);
            padding: 2rem 1.8rem;
        }
        h2 {
            text-align: center;
            margin-bottom: 1.5rem;
            color: #2c7a6e;
            font-weight: 600;
        }
        input {
            width: 100%;
            padding: 0.7rem 1rem;
            border: 1px solid #cbd5e1;
            border-radius: 2rem;
            font-size: 0.9rem;
            outline: none;
            margin-bottom: 1rem;
        }
        input:focus {
            border-color: #2c7a6e;
        }
        button {
            width: 100%;
            background: #2c7a6e;
            color: white;
            border: none;
            padding: 0.7rem;
            border-radius: 2rem;
            font-size: 1rem;
            font-weight: 500;
            cursor: pointer;
        }
        button:hover {
            background: #23685e;
        }
        .link {
            text-align: center;
            margin-top: 1rem;
            font-size: 0.8rem;
        }
        .link a {
            color: #2c7a6e;
            text-decoration: none;
        }
    </style>
</head>
<body>
<div class="card">
    <h2>登录</h2>
    <input type="text" id="username" placeholder="用户名 / 邮箱">
    <input type="password" id="password" placeholder="密码">
    <button id="loginBtn">登录</button>
    <div class="link">
        还没有账号? <a href=" ">立即注册</a >
    </div>
</div>
<script>
    document.getElementById('loginBtn').onclick = function() {
        var user = document.getElementById('username').value.trim();
        var pwd = document.getElementById('password').value.trim();
        if (!user || !pwd) {
            alert('请输入用户名和密码');
            return;
        }
        alert('登录成功,欢迎 ' + user);
    };
</script>
</body>
</html>
登录页面如下所示:
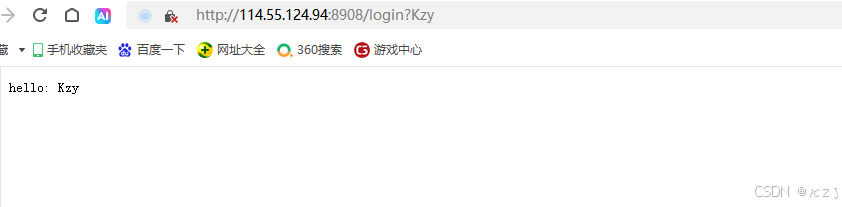
调用/login路径的处理函数,处理函数将在请求参数前拼接"hello:"后,到响应中返回,页面如下所示:
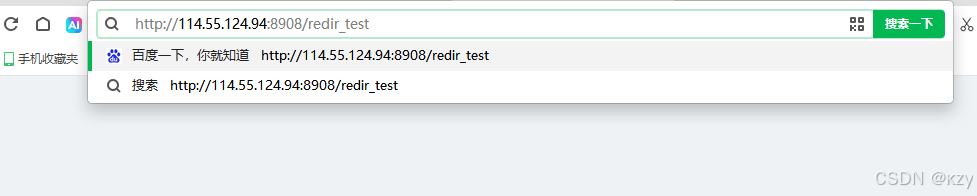
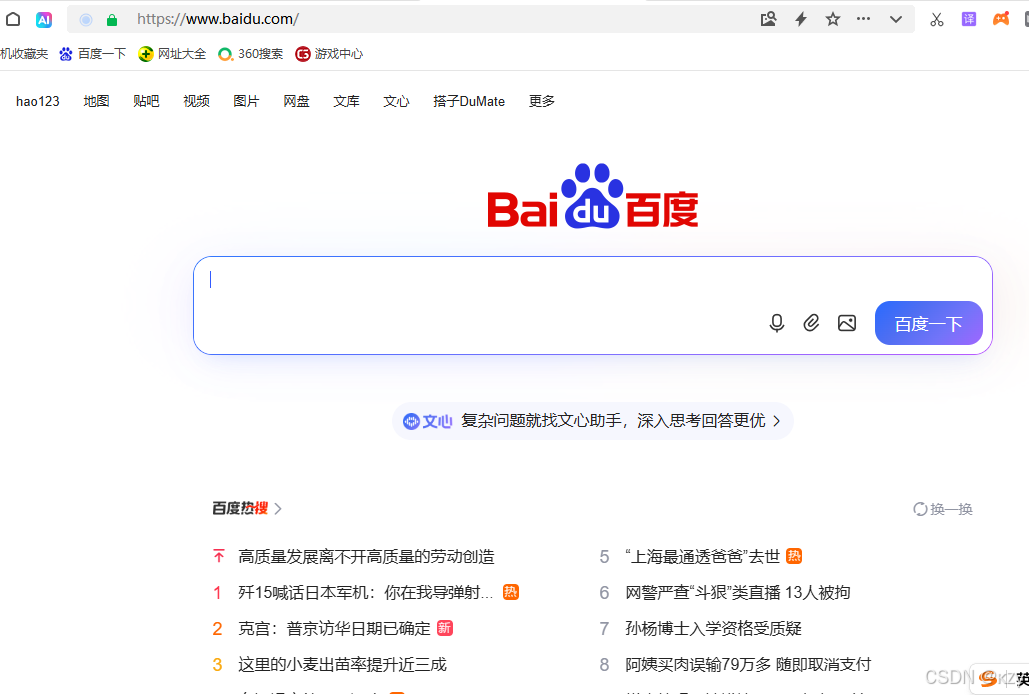
redir_test:是一个特殊文件,收到这个路径时会返回301重定向到百度。
页面如下所示:

结语
HTTP(超文本传输协议)作为互联网中浏览器和服务器间通信的基石,经历了从简单到复杂、从单一到多样的发展过程。HTTP协议本质上是一套请求-响应的规则文本,通过解析和组装这些文本,浏览器和服务器就能实现通信。HTTP服务器项目的核心实现在于将理论协议转化为实际,从最底层的socket编程开始,接着封装了TCP连接管理、实现了HTTP请求的解析与响应的构建,网络层负责字节流的收发,协议层负责报文的解析与组装,业务层则专注于路由处理,最终搭建出一个支持静态文件访问和动态路由注册的完整服务器。服务器的实现,清晰地展示了HTTP最核心的骨架,理解这些请求行、状态码、头部、方法的实际表现,是后续实现更完整Web服务的基础。