最终教程步骤在最下方已整理,这上面是踩坑流水记录
K230 开发板 SDK 固件版本
首先面临的第一个问题,连不上电脑,
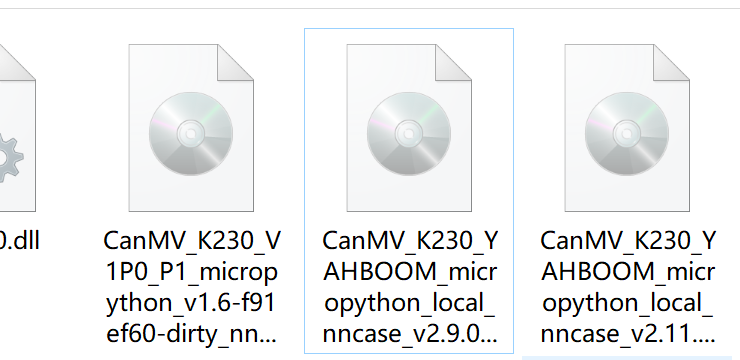
重新刷了固件刷的CanMV_K230_YAHBOOM_micropython_local_nncase_v2.9.0.img
这个版本,能够进系统了。后面因为精度问题又重新刷了v2.11.0也能行
刷固件,需要首先格式化内存卡,使用zadig.exe安装上对应的驱动,要显示K230才刷机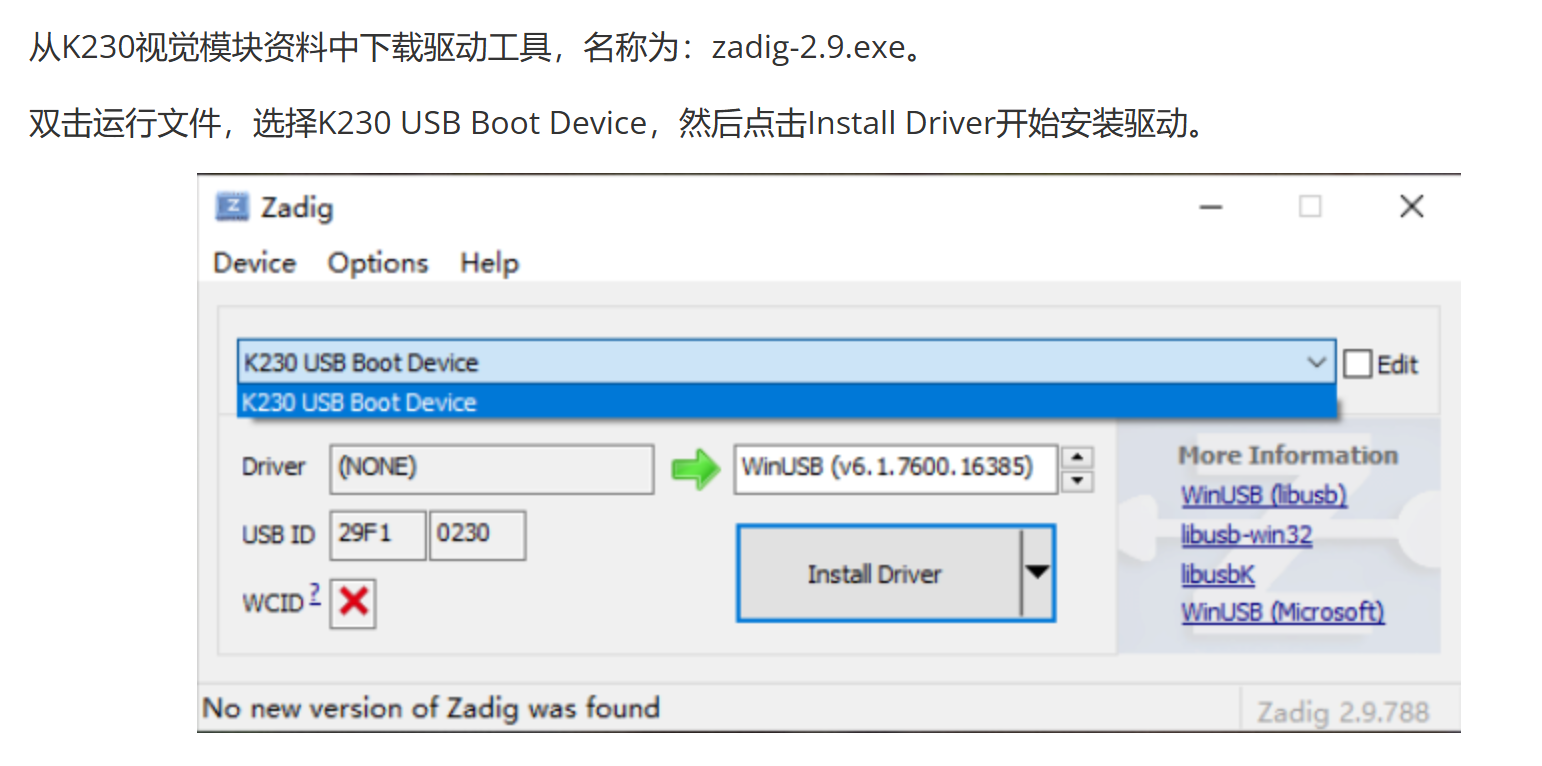
https://www.yahboom.com/build.html?id=13232&cid=705
刷机安装上这个驱动,install driver
然后现在打开这个刷机的软件
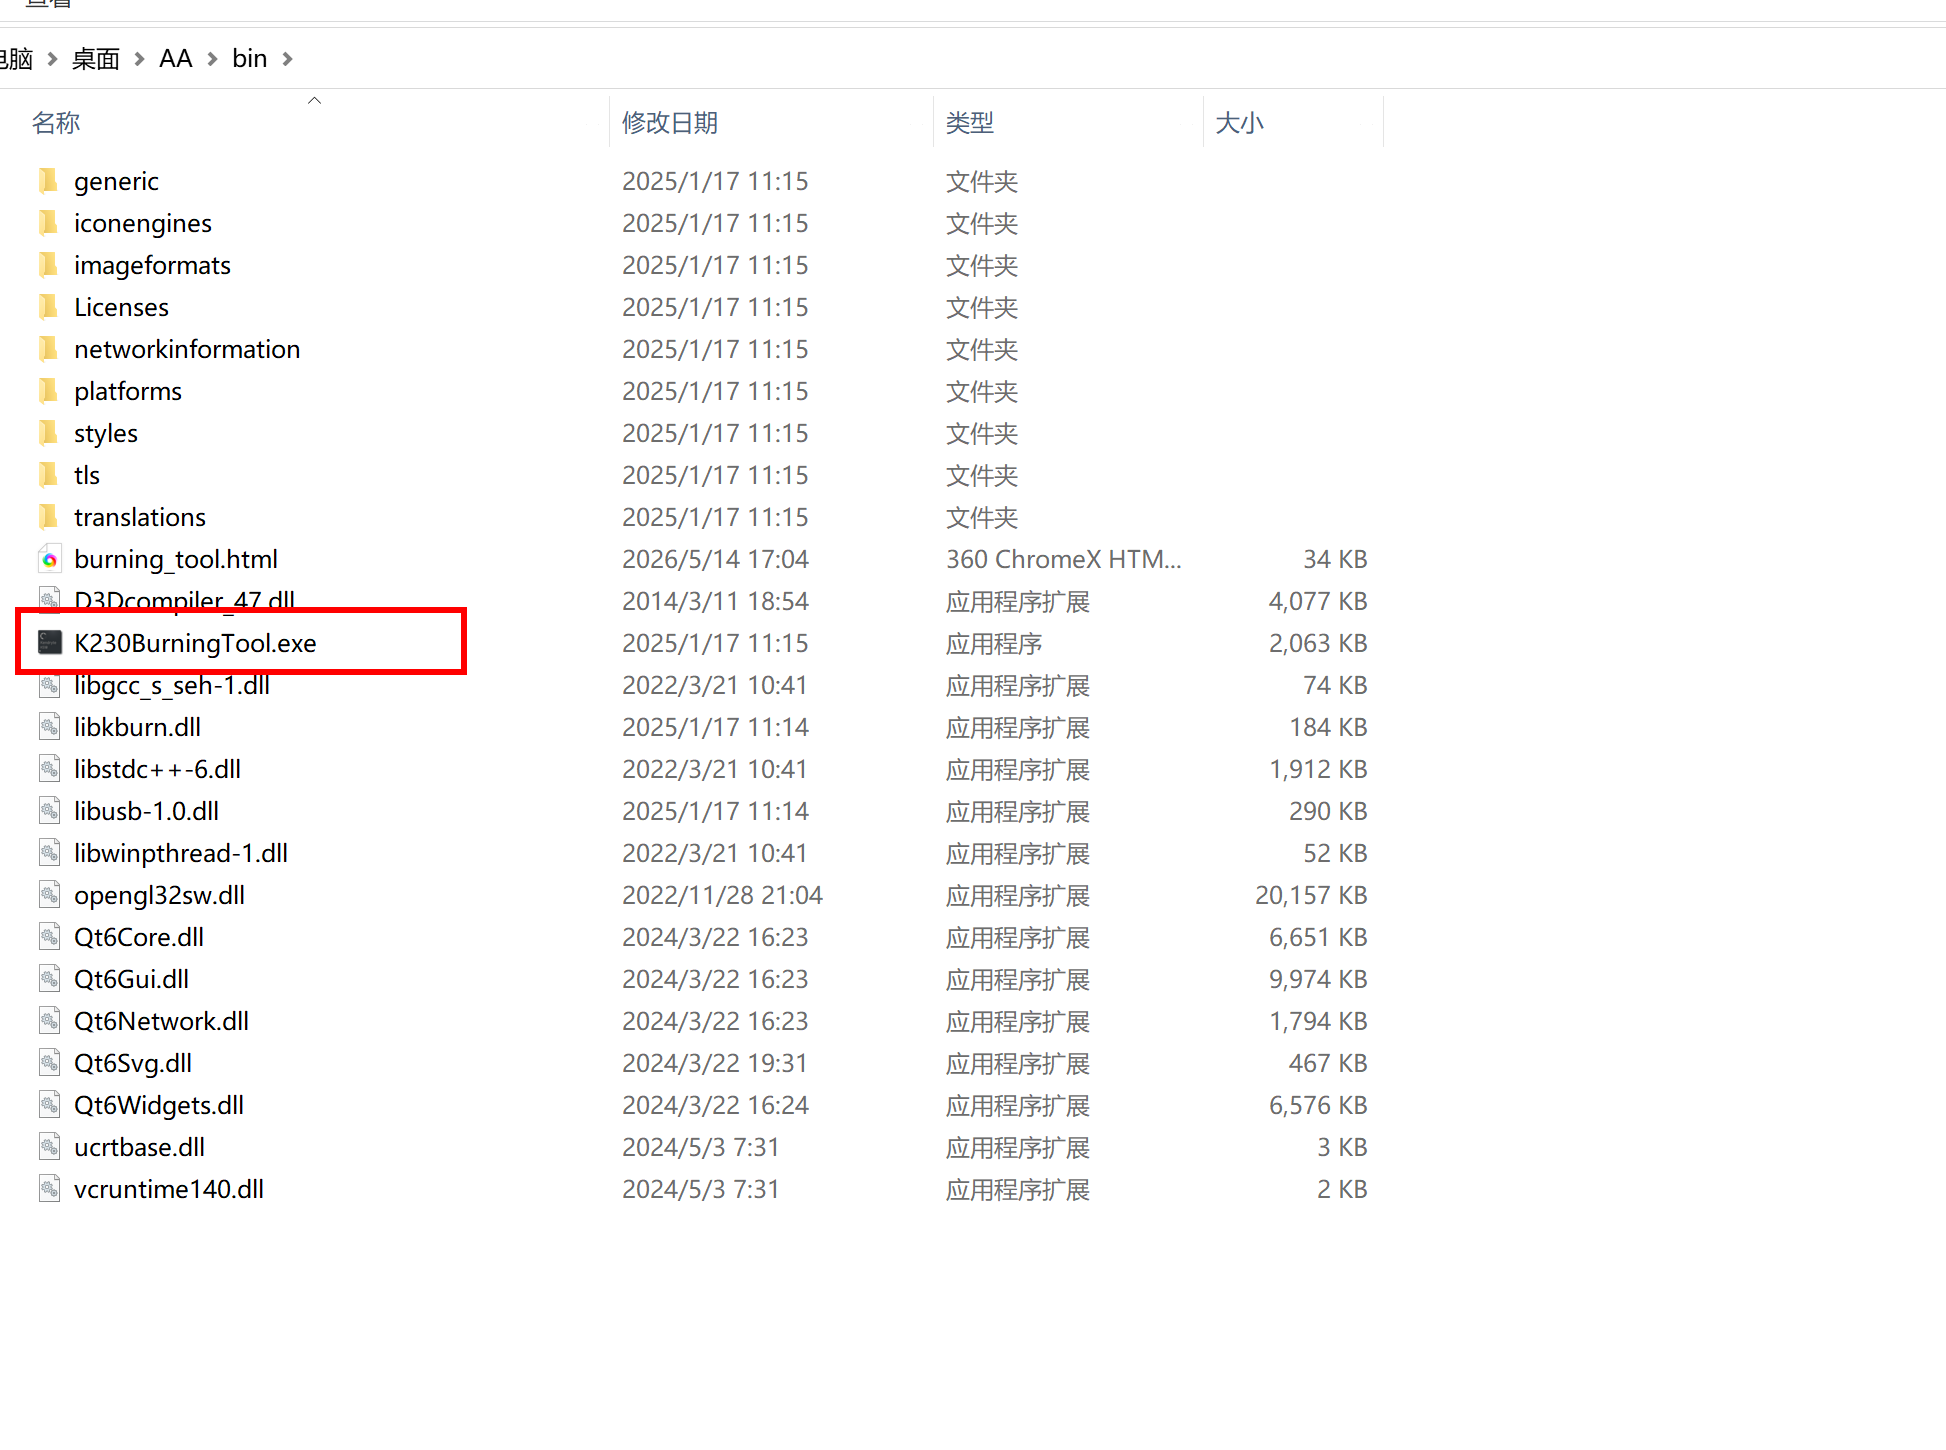
刷入固件,官网的那个不太对劲,刷进去用不了
问技术要的2.9.0版本的可以了
刷了好几次机,终于开机了,开机后可以选择语言我选中文
然后打开
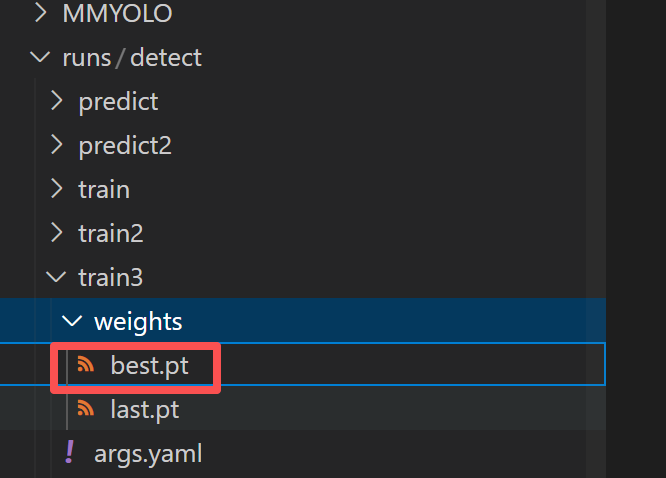
我已经在服务器上练好了YOLO模型,名字叫best.pt于是我用转换的代码转换一下
先转换成ONNX
from ultralytics import YOLO

model = YOLO("best.pt")
model.export(
    format="onnx",
    opset=12,
    imgsz=640,      # 必须和训练时完全一致
    simplify=True,
    half=False
)
print("✅ best.onnx (640×640) 已生成")
成功后,
然后转换成kmodel在data文件夹下放了35张图,水母的,方便校准
import nncase
import numpy as np
import os
from PIL import Image
# ================== 校准数据集生成器 ==================
def representative_dataset(calib_dir="data", target_size=(640, 640)):
"""
从 calib_dir 中读取所有图片,缩放到 target_size,归一化,
每次 yield 一个 [input_data] 列表。
"""
for fname in os.listdir(calib_dir):
fpath = os.path.join(calib_dir, fname)
try:
# 只处理常见图片格式
if not fname.lower().endswith(('.jpg', '.jpeg', '.png', '.bmp')):
continue
img = Image.open(fpath).convert("RGB")
# 按比例缩放并中心裁剪为正方形(避免变形),这里简单用 resize 保持比例也可
# 为了简单,直接 resize 到 target_size,可能会有轻微拉伸,但校准影响不大
img = img.resize(target_size, Image.BILINEAR)
img_data = np.array(img, dtype=np.float32) / 255.0 # 归一化 [0,1]
img_data = np.transpose(img_data, (2, 0, 1)) # HWC → CHW
img_data = img_data[np.newaxis, :, :, :] # [1,3,H,W]
yield [img_data]
except Exception as e:
print(f"跳过 {fname}: {e}")
continue
# ================== 转换函数 ==================
def convert_onnx_to_kmodel(onnx_path, kmodel_path, input_shape=[1,3,640,640]):
print(f"开始转换: {onnx_path} → {kmodel_path}")
compile_options = nncase.CompileOptions()
compile_options.target = "k230"
compile_options.input_type = "float32"
compile_options.input_shape = input_shape
compile_options.dump_dir = "dump_kmodel"
compiler = nncase.Compiler(compile_options)
# 导入 ONNX
print("正在导入 ONNX 模型...")
with open(onnx_path, "rb") as f:
onnx_model = f.read()
import_options = nncase.ImportOptions()
compiler.import_onnx(onnx_model, import_options)
# 设置量化参数
compile_options.quantize = True
compile_options.calibration_dataset = representative_dataset(
calib_dir="data", # 你的图片文件夹
target_size=(input_shape[2], input_shape[3])
)
compile_options.preprocess = False
print("开始量化编译(约 3~8 分钟)...")
compiler.compile()
kmodel = compiler.gencode_tobytes()
with open(kmodel_path, "wb") as f:
f.write(kmodel)
print(f"🎉 转换成功!量化模型已保存至: {kmodel_path}")
# ================== 主程序 ==================
if __name__ == "__main__":
onnx_file = "best.onnx"
kmodel_file = "best.kmodel"
if not os.path.exists(onnx_file):
print(f"❌ 错误:找不到 {onnx_file}")
elif not os.path.isdir("data"):
print("❌ 错误:找不到 data 文件夹")
else:
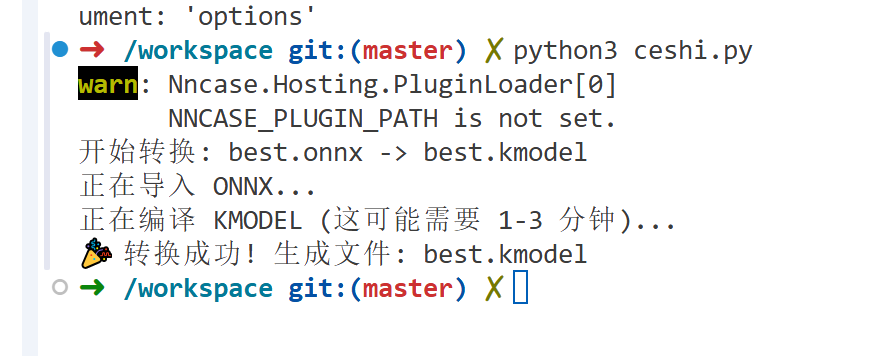
convert_onnx_to_kmodel(onnx_file, kmodel_file, input_shape=[1,3,640,640])转换好后
运行起来就是这样
缺少什么什么报错,然后下载了这个软件
https://dotnet.microsoft.com/zh-cn/download/dotnet/thank-you/sdk-7.0.410-windows-x64-installer
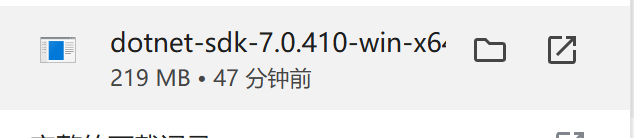
安装上就能转换成功了
https://www.kendryte.com/zh/products 或者在这个官网说是可以直接转换,我没找到在哪
我试了没找到,只好本地转
https://github.com/kendryte/nncase
找到了github链接,主要pip安装上用不了报错
pip install nncase nncase-kpu
github是这个链接,好像他*的nncase-kpu不支持windows这个kpu库,linux才支持,操**作得很
日**windows用户数最多,你不支持,去你***
好你个*儿子,不可能我去下载一个linux吧
去服务器转一下吧,幸好服务器是linux
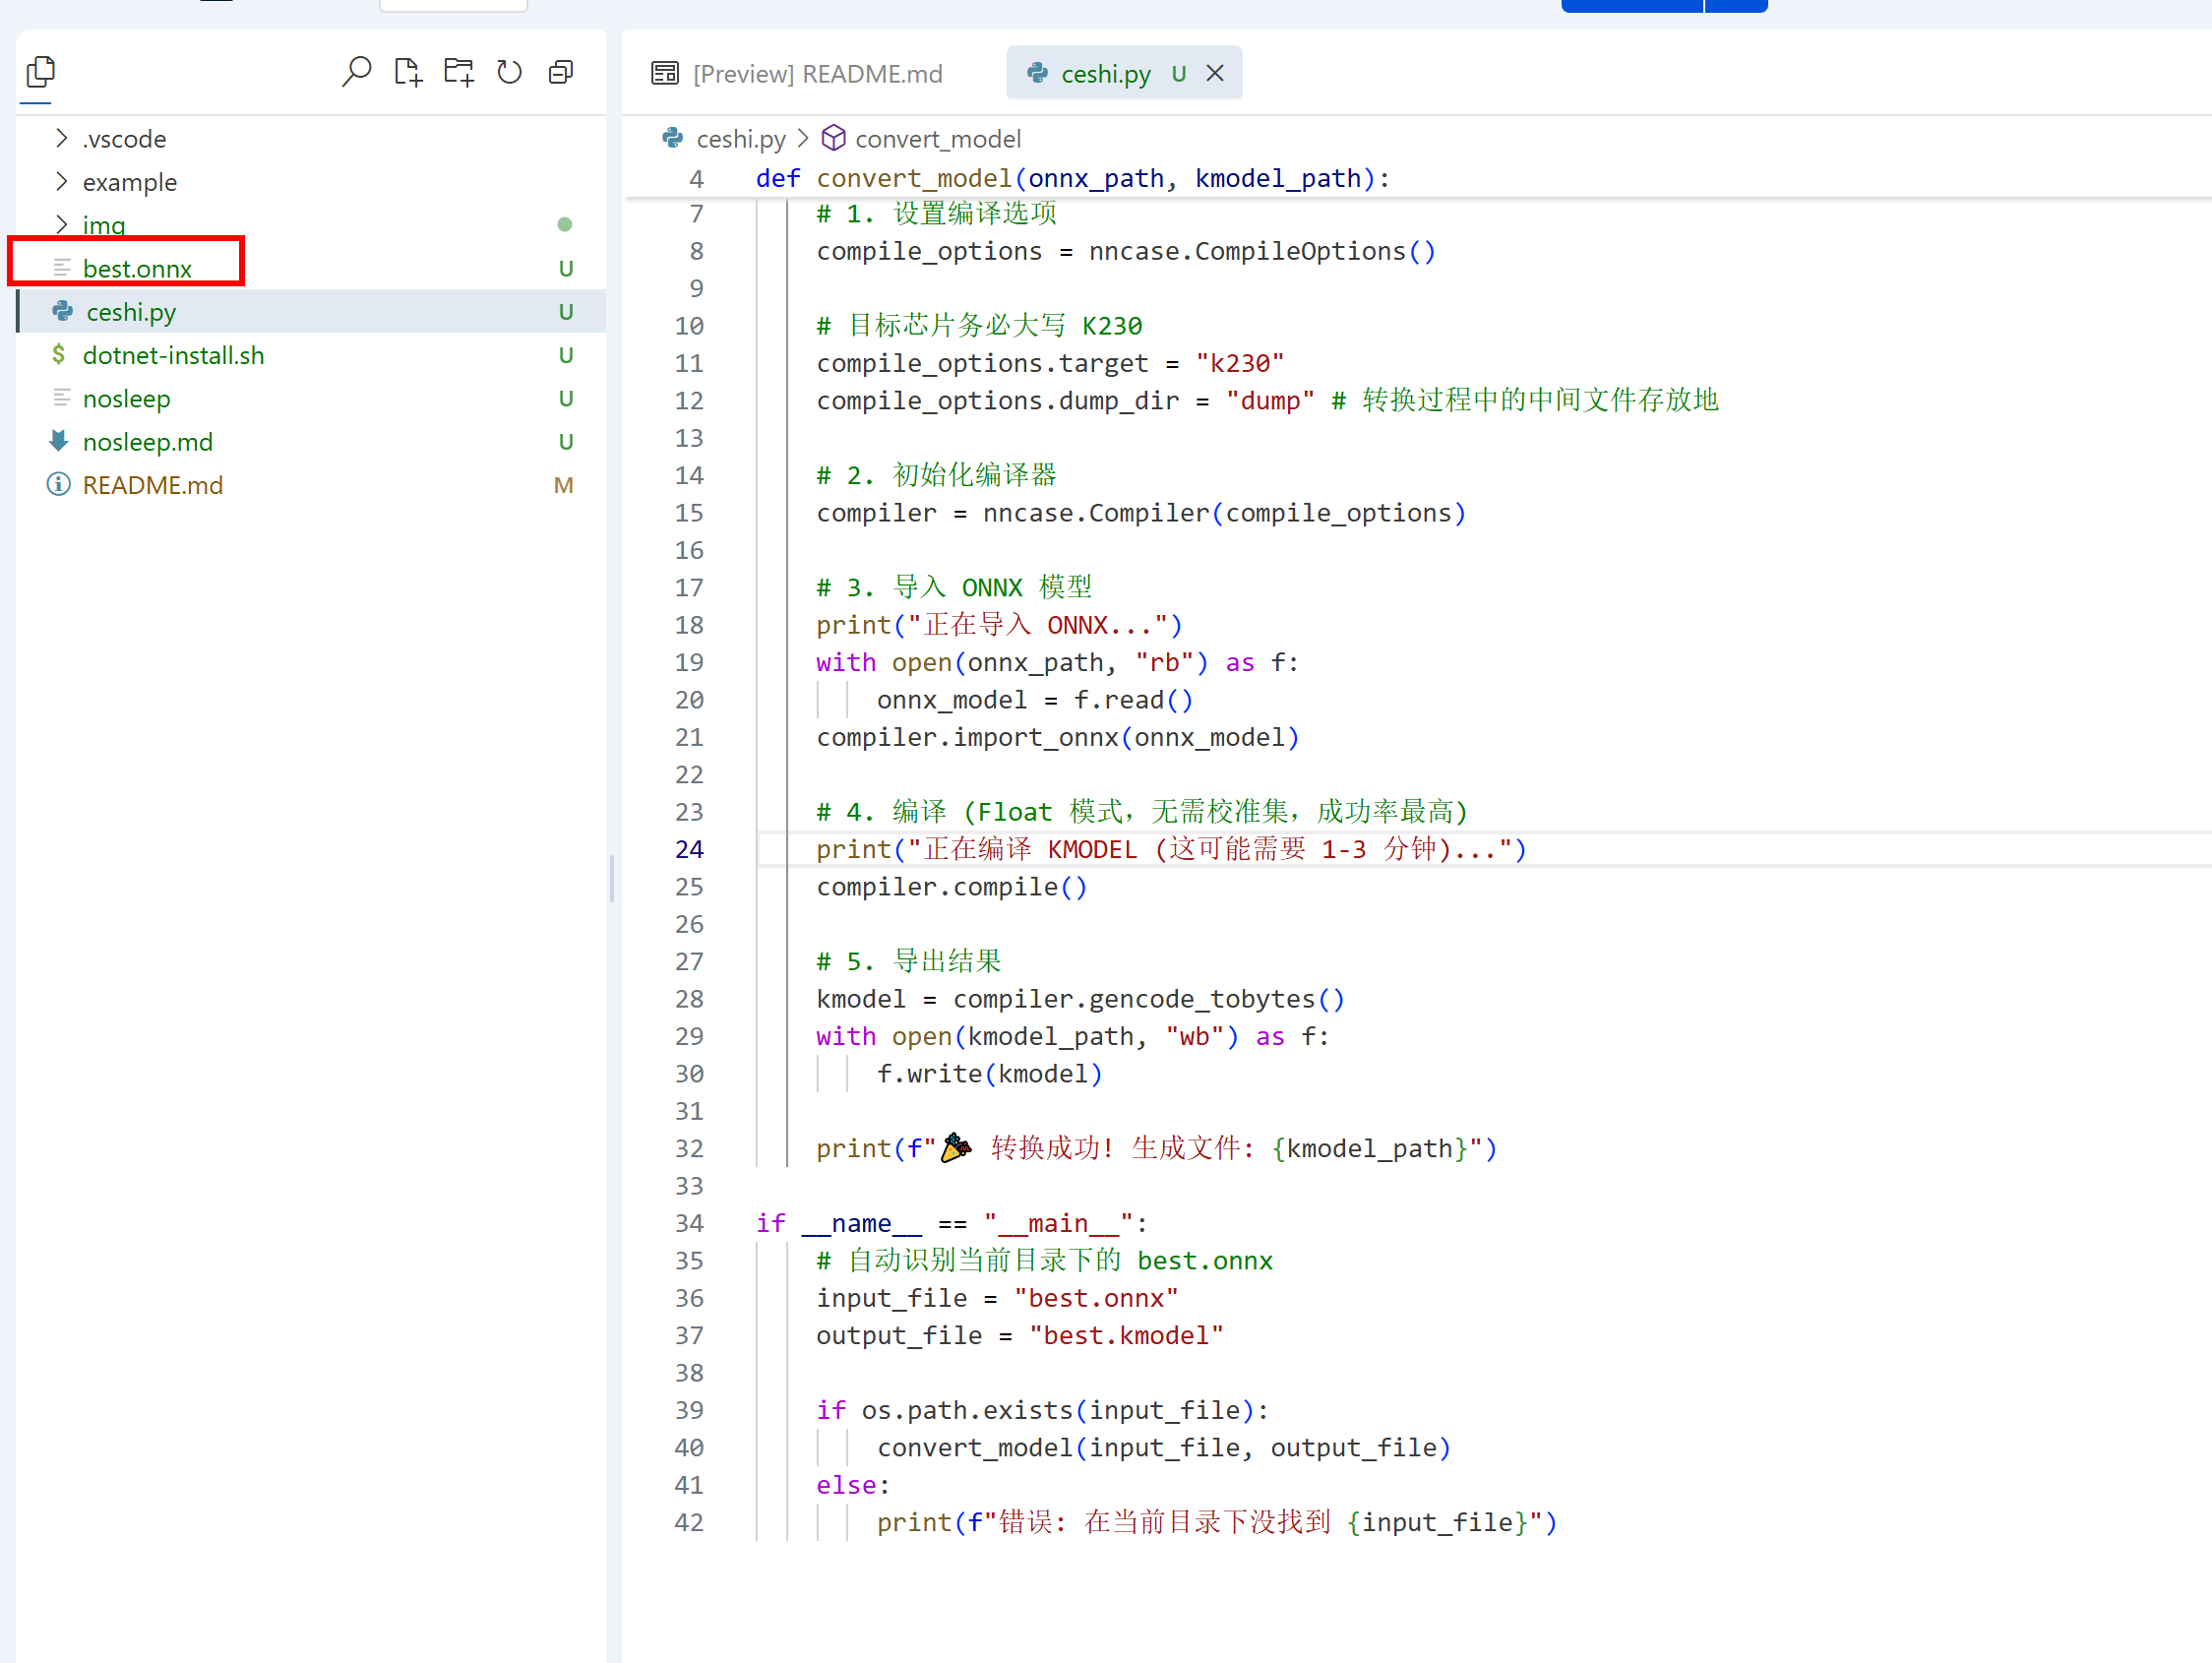
传上去后,新建一个ceshi。py代码
import nncase
import numpy as np
import os
from PIL import Image

# ================== 校准数据集生成器 ==================
def representative_dataset(calib_dir="data", target_size=(640, 640)):
    """
    从 calib_dir 中读取所有图片,缩放到 target_size,归一化,
    每次 yield 一个 [input_data] 列表。
    """
    for fname in os.listdir(calib_dir):
        fpath = os.path.join(calib_dir, fname)
        try:
            # 只处理常见图片格式
            if not fname.lower().endswith(('.jpg', '.jpeg', '.png', '.bmp')):
                continue
            img = Image.open(fpath).convert("RGB")
            # 按比例缩放并中心裁剪为正方形(避免变形),这里简单用 resize 保持比例也可
            # 为了简单,直接 resize 到 target_size,可能会有轻微拉伸,但校准影响不大
            img = img.resize(target_size, Image.BILINEAR)
            img_data = np.array(img, dtype=np.float32) / 255.0  # 归一化 [0,1]
            img_data = np.transpose(img_data, (2, 0, 1))        # HWC → CHW
            img_data = img_data[np.newaxis, :, :, :]            # [1,3,H,W]
            yield [img_data]
        except Exception as e:
            print(f"跳过 {fname}: {e}")
            continue

# ================== 转换函数 ==================
def convert_onnx_to_kmodel(onnx_path, kmodel_path, input_shape=[1,3,640,640]):
    print(f"开始转换: {onnx_path} → {kmodel_path}")

    compile_options = nncase.CompileOptions()
    compile_options.target = "k230"
    compile_options.input_type = "float32"
    compile_options.input_shape = input_shape
    compile_options.dump_dir = "dump_kmodel"

    compiler = nncase.Compiler(compile_options)

    # 导入 ONNX
    print("正在导入 ONNX 模型...")
    with open(onnx_path, "rb") as f:
        onnx_model = f.read()
    import_options = nncase.ImportOptions()
    compiler.import_onnx(onnx_model, import_options)

    # 设置量化参数
    compile_options.quantize = True
    compile_options.calibration_dataset = representative_dataset(
        calib_dir="data",                  # 你的图片文件夹
        target_size=(input_shape[2], input_shape[3])
    )
    compile_options.preprocess = False

    print("开始量化编译(约 3~8 分钟)...")
    compiler.compile()

    kmodel = compiler.gencode_tobytes()
    with open(kmodel_path, "wb") as f:
        f.write(kmodel)
    print(f"🎉 转换成功!量化模型已保存至: {kmodel_path}")

# ================== 主程序 ==================
if __name__ == "__main__":
    onnx_file = "best.onnx"
    kmodel_file = "best.kmodel"

    if not os.path.exists(onnx_file):
        print(f"❌ 错误:找不到 {onnx_file}")
    elif not os.path.isdir("data"):
        print("❌ 错误:找不到 data 文件夹")
    else:
        convert_onnx_to_kmodel(onnx_file, kmodel_file, input_shape=[1,3,640,640])
粘贴到
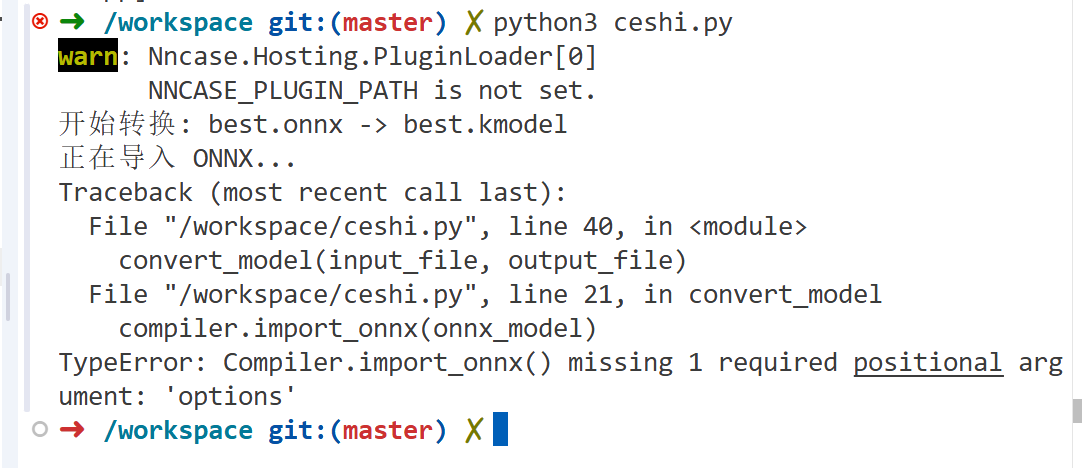
还是需要安装哪个什么玩意
pip install nncase nncase-kpu
安装上后报错缺少这个什么什么net
# 1. 下载微软官方安装脚本
wget https://dot.net/v1/dotnet-install.sh -O dotnet-install.sh

# 2. 赋予执行权限
chmod +x dotnet-install.sh

# 3. 安装 .NET 7.0 运行时
./dotnet-install.sh --channel 7.0 --runtime dotnet
安装上后,输入命令验证。
dotnet --list-runtimes
验证的版本号是6.0什么什么的,应该不对
# 1. 赋予脚本执行权限
chmod +x dotnet-install.sh

# 2. 安装 .NET 7.0 运行时 (Runtime)
./dotnet-install.sh --channel 7.0 --runtime dotnet
再次验证
dotnet --list-runtimes
我的服务器是zsh
# 1. 确保安装脚本在当前目录,并开始安装
chmod +x dotnet-install.sh
./dotnet-install.sh --channel 7.0 --runtime dotnet

# 强制把 $HOME/.dotnet 放到 PATH 的最开头
export DOTNET_ROOT=$HOME/.dotnet
export PATH=$HOME/.dotnet:$PATH

# 验证一下,现在必须看到 7.0
dotnet --list-runtimes
然后正常了
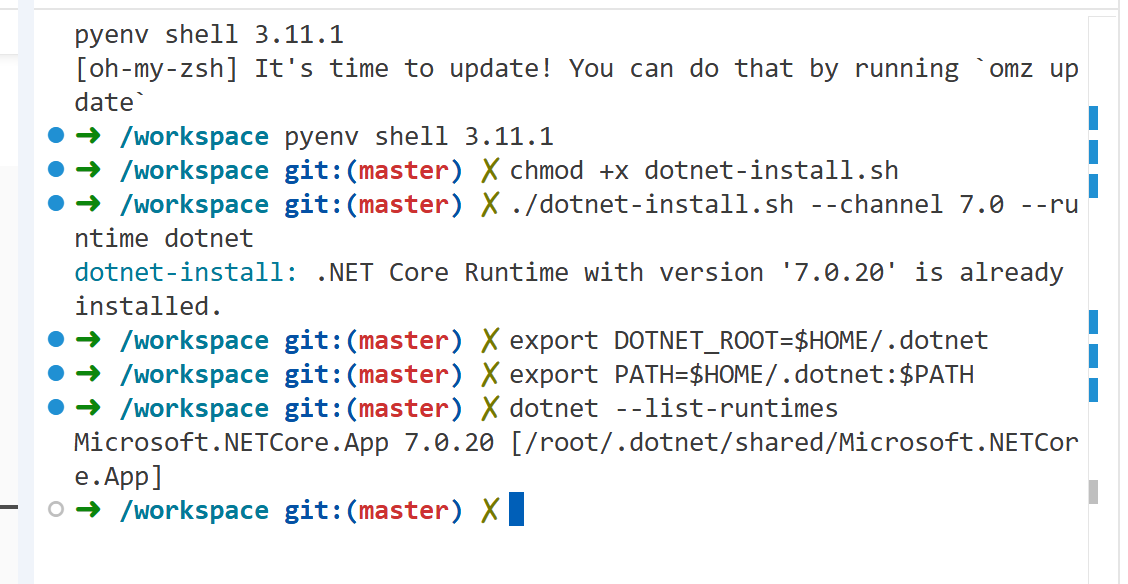
正常了
现在试试转换
嗯
转换成功了
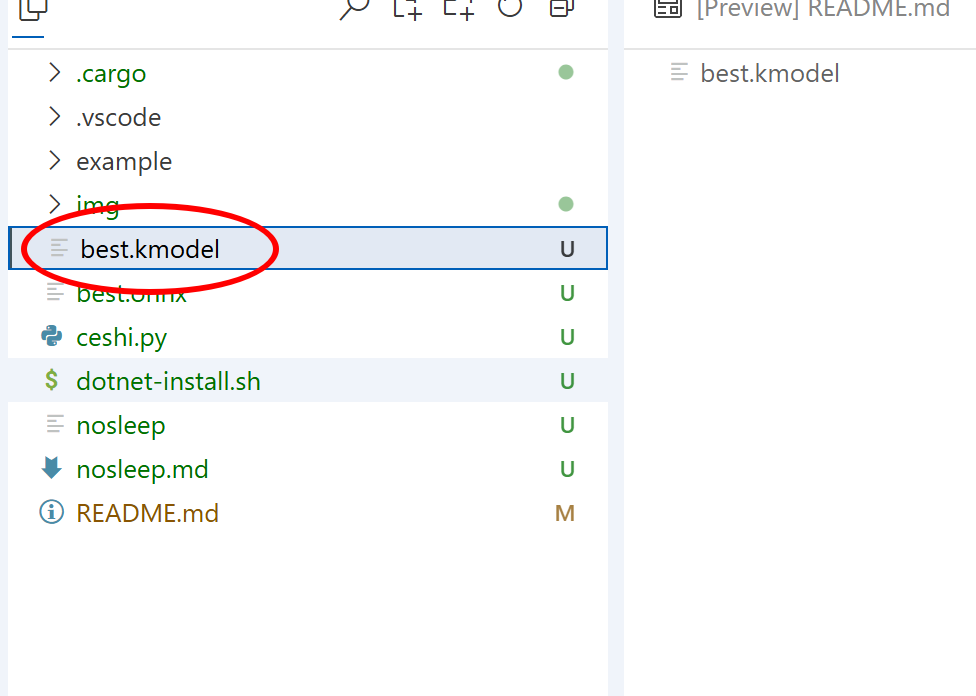
下载下来
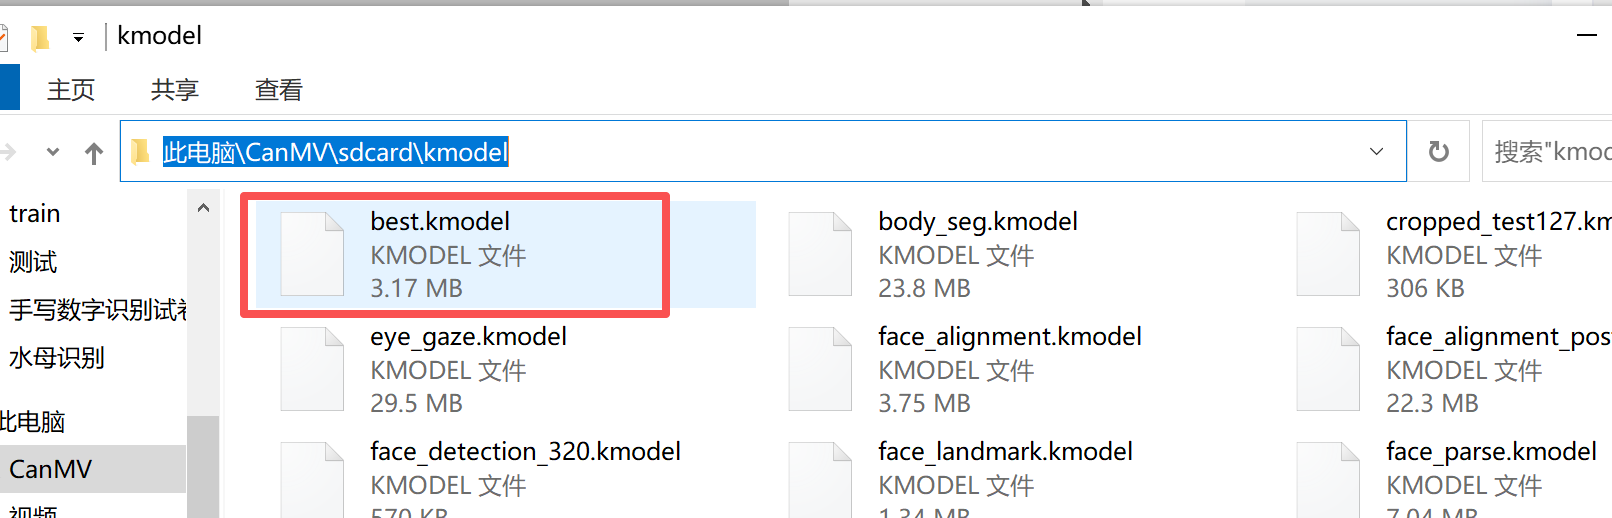
终于模型转换好了,模型放到Kmodel文件夹下,没有的话新建这个文件夹然后放进去
蜂鸣器代码如下测试一下
# 导入蜂鸣器库 (Import buzzer library)
from ybUtils.YbBuzzer import YbBuzzer
# 导入时间库 (Import time library)
import time
# 创建蜂鸣器实例 (Create buzzer instance)
buzzer = YbBuzzer()
# 示例1:短鸣一声 (Example 1: Short beep)
buzzer.beep() # 使用默认参数发出蜂鸣声 (Make a beep with default parameters)
# 等待3秒 (Wait for 3 seconds)
time.sleep(3)
# 示例2:自定义频率和持续时间 (Example 2: Custom frequency and duration)
buzzer.on(2000, 50, 0.5) # 2000Hz,音量50%,持续0.5秒 (2000Hz, volume 50%, duration 0.5 seconds)
# 等待3秒 (Wait for 3 seconds)
time.sleep(3)
# 示例3:警报声效果 (Example 3: Alarm sound effect)
for i in range(3): # 循环3次 (Loop 3 times)
buzzer.on(1000, 50, 0.1) # 1000Hz,音量50%,持续0.1秒 (1000Hz, volume 50%, duration 0.1 seconds)
time.sleep(0.1) # 短暂停顿0.1秒 (Brief pause for 0.1 seconds)
# 定义音符频率(Hz)(Define note frequencies in Hz)
C5 = 523 # 1 - 中央C (Middle C)
D5 = 587 # 2 - 中央D (Middle D)
E5 = 659 # 3 - 中央E (Middle E)
F5 = 698 # 4 - 中央F (Middle F)
G5 = 784 # 5 - 中央G (Middle G)
A5 = 880 # 6 - 中央A (Middle A)
B5 = 988 # 7 - 中央B (Middle B)
# 定义音符持续时间 (Define note duration)
BEAT = 0.3 # 一拍的时间(单位:秒)(Duration of one beat in seconds)
# 演奏旋律 (Play melody)
def play_twinkle():
"""
演奏《一闪一闪亮晶晶》(小星星)的旋律
(Play the melody of "Twinkle Twinkle Little Star")
"""
# 一闪一闪亮晶晶的音符序列 (Note sequence for "Twinkle Twinkle Little Star")
notes = [
(C5, BEAT), (C5, BEAT), (G5, BEAT), (G5, BEAT), # 1 1 5 5 (音乐简谱:小星星)
(A5, BEAT), (A5, BEAT), (G5, BEAT*2), # 6 6 5- (亮晶晶)
(F5, BEAT), (F5, BEAT), (E5, BEAT), (E5, BEAT), # 4 4 3 3 (满天都是)
(D5, BEAT), (D5, BEAT), (C5, BEAT*2), # 2 2 1- (小星星)
]
# 遍历音符列表并演奏 (Iterate through the notes list and play)
for freq, duration in notes:
# 播放当前音符 (Play current note)
# 参数:频率、音量50%、持续时间 (Parameters: frequency, volume 50%, duration)
buzzer.on(freq, 50, duration)
# 音符之间的短暂停顿,增加清晰度 (Brief pause between notes for clarity)
time.sleep(0.1)
# 结束后关闭蜂鸣器 (Turn off the buzzer after playing)
buzzer.off()
# 程序入口点 (Program entry point)
if __name__ == "__main__":
# 调用函数演奏旋律 (Call function to play the melody)
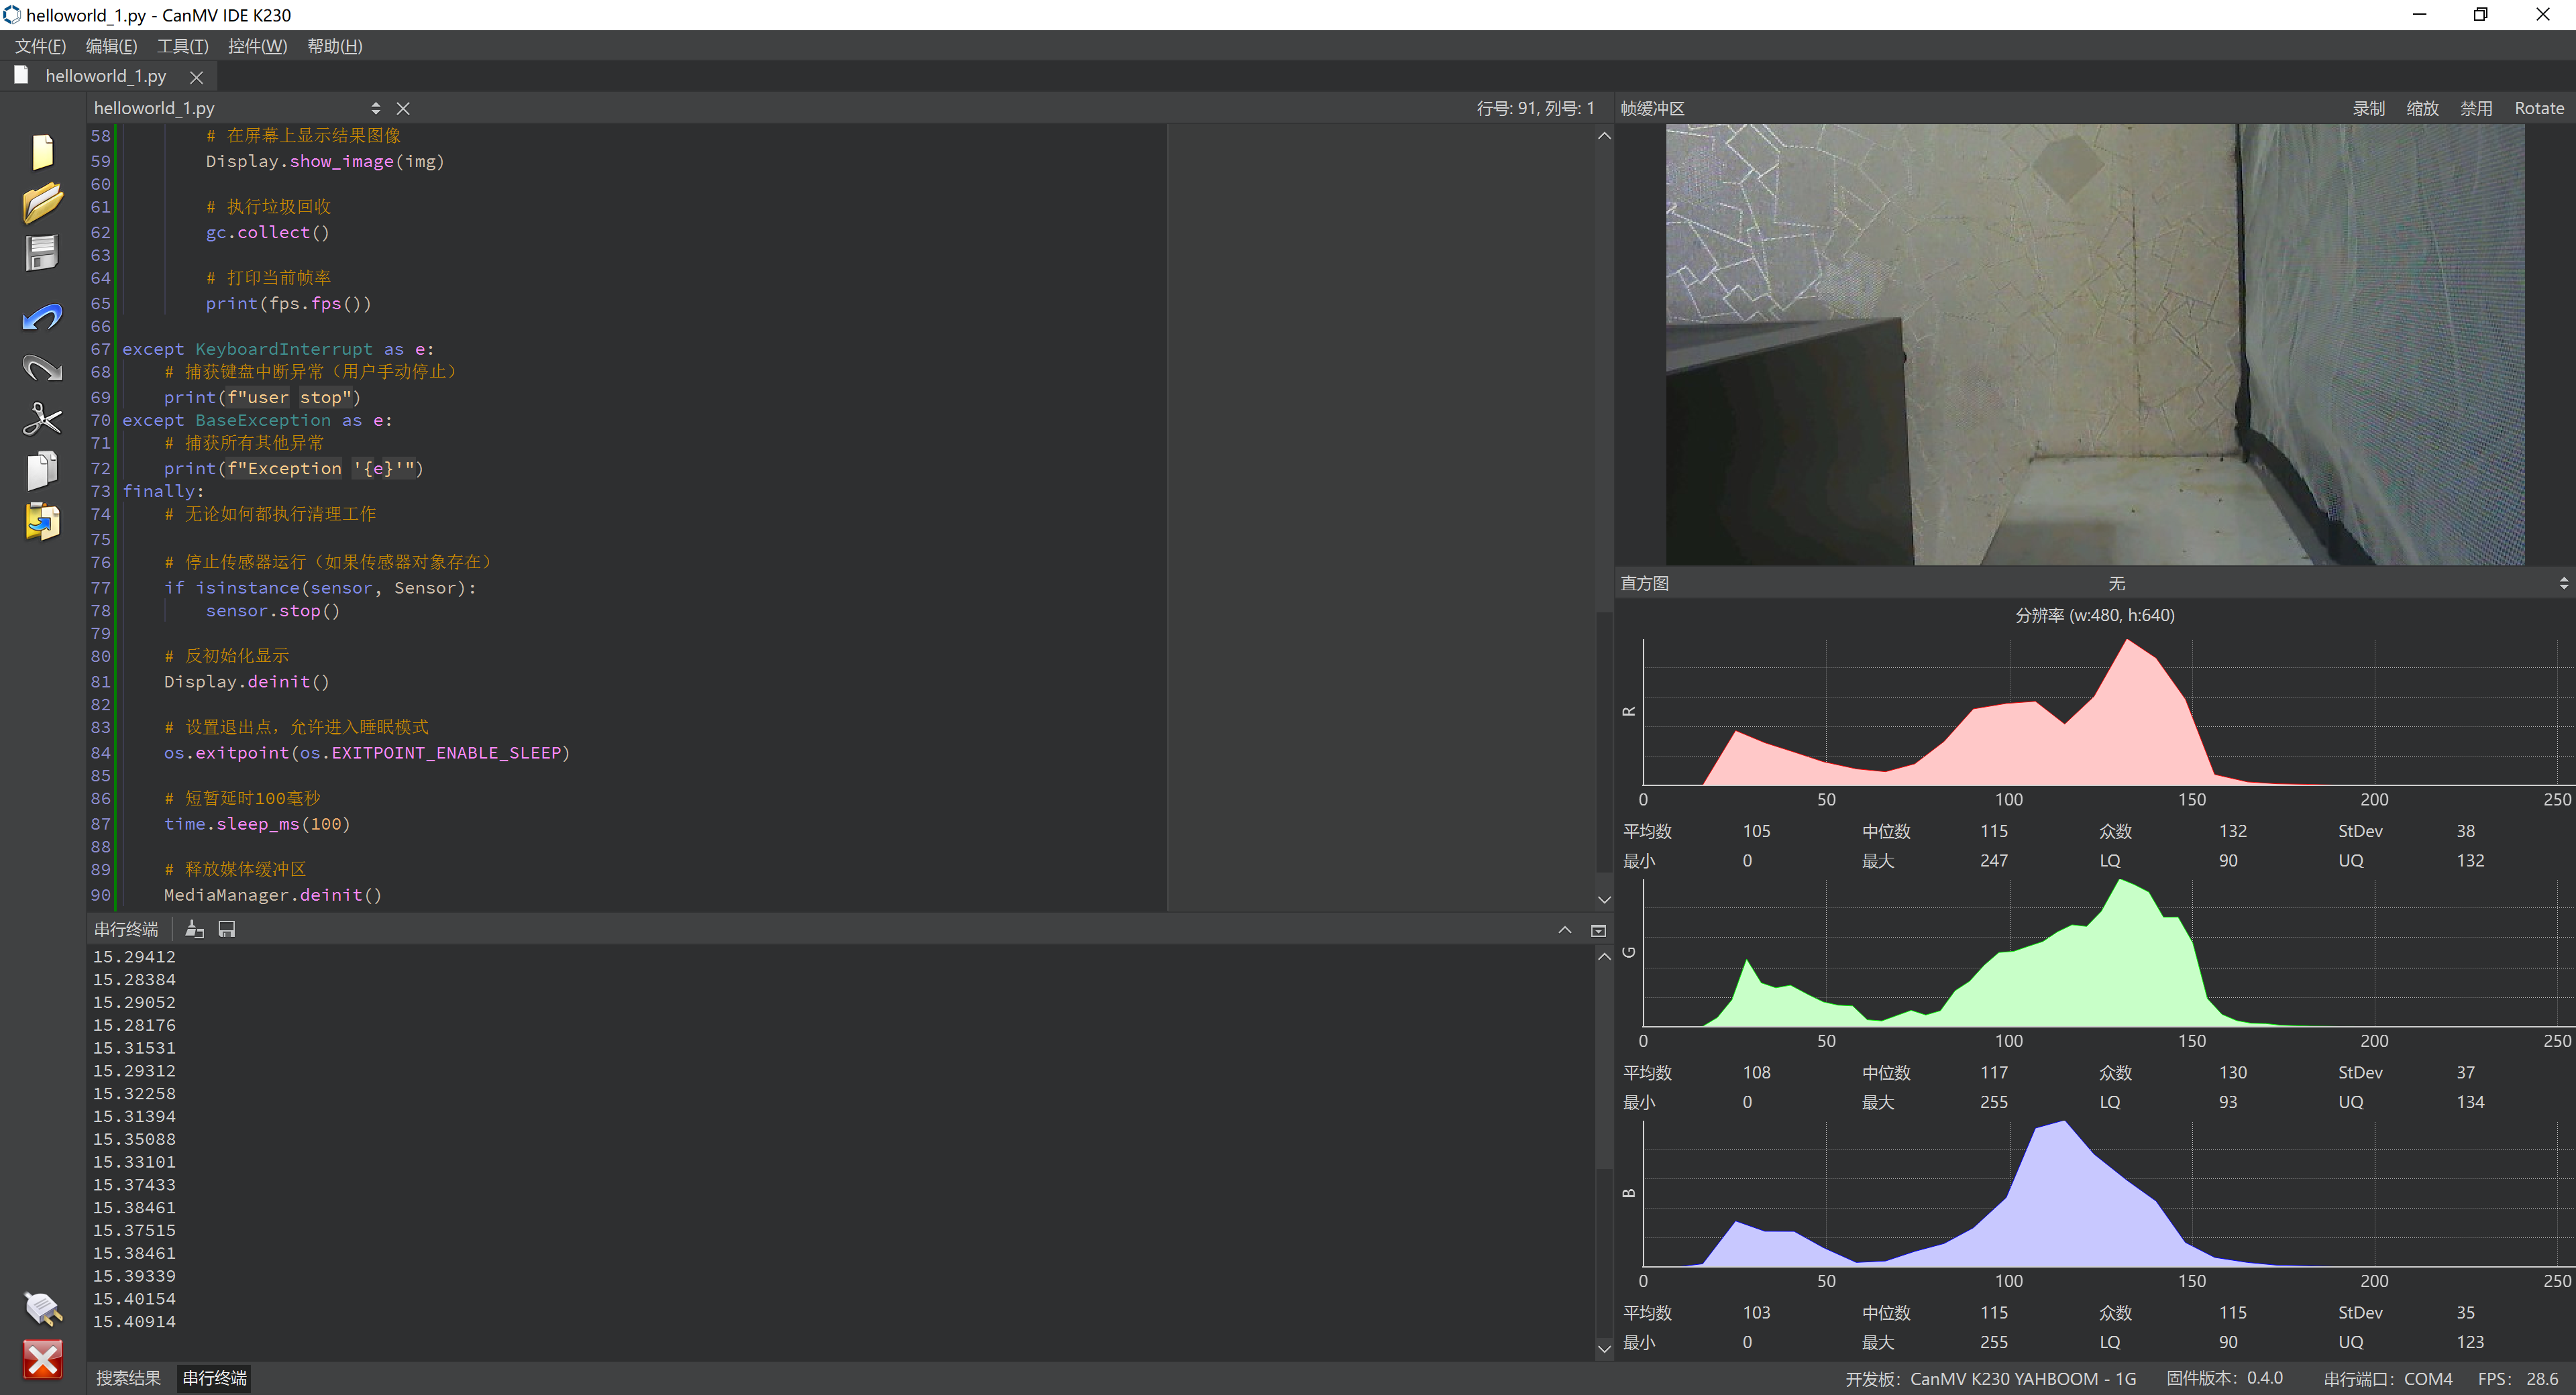
play_twinkle()现在试试视频代码,也是能够运行
# 导入必要的模块
import time, math, os, gc, sys

# 导入媒体相关模块
from media.sensor import *
from media.display import *
from media.media import *

# 定义图像宽度和高度常量
WIDTH = 640
HEIGHT = 480

# 初始化传感器变量为空
sensor = None

try:
    # 使用默认配置构造传感器对象,设置指定宽度和高度
    sensor = Sensor(width = WIDTH, height = HEIGHT, fps=30)

    # 传感器复位
    sensor.reset()

    # 设置水平镜像(当前被注释)
    # sensor.set_hmirror(False)

    # 设置垂直翻转(当前被注释)
    # sensor.set_vflip(False)

    # 设置通道0的输出尺寸
    sensor.set_framesize(width = WIDTH, height = HEIGHT)

    # 设置通道0的输出格式为RGB565
    sensor.set_pixformat(Sensor.RGB565)

    # 使用IDE作为输出目标初始化显示
    Display.init(Display.ST7701, width = WIDTH, height = HEIGHT, to_ide = True)

    # 初始化媒体管理器
    MediaManager.init()

    # 启动传感器运行
    sensor.run()

    # 创建时钟对象用于计算帧率
    fps = time.clock()

    # 主循环
    while True:
        # 帧率计时器tick
        fps.tick()

        # 检查是否应该退出程序
        os.exitpoint()

        # 从传感器获取一帧图像
        img = sensor.snapshot()
        img = img.rotation_corr(rotation=90)
        # 在屏幕上显示结果图像
        Display.show_image(img)

        # 执行垃圾回收
        gc.collect()

        # 打印当前帧率
        print(fps.fps())

except KeyboardInterrupt as e:
    # 捕获键盘中断异常(用户手动停止)
    print(f"user stop")
except BaseException as e:
    # 捕获所有其他异常
    print(f"Exception '{e}'")
finally:
    # 无论如何都执行清理工作

    # 停止传感器运行(如果传感器对象存在)
    if isinstance(sensor, Sensor):
        sensor.stop()

    # 反初始化显示
    Display.deinit()

    # 设置退出点,允许进入睡眠模式
    os.exitpoint(os.EXITPOINT_ENABLE_SLEEP)

    # 短暂延时100毫秒
    time.sleep_ms(100)

    # 释放媒体缓冲区
    MediaManager.deinit()
https://www.kendryte.com/zh/training/dataset/1W35BvZN
去官网训练吧,
训练了640*640的模型不行
训练了320*320的模型也不行,太大了加载不了,无法量化
import os
import nncase
import numpy as np
from PIL import Image

# 1. 强制指定插件路径(请根据你的实际路径微调)
os.environ["NNCASE_PLUGIN_PATH"] = "/root/miniconda/envs/PY39/lib/python3.9/site-packages/nncase"

def convert_320_model():
    onnx_path = "best.onnx"
    kmodel_path = "best.kmodel"
    img_size = 320  # 修改为 320

    # 2. 构造编译选项
    compile_options = nncase.CompileOptions()
    compile_options.target = "k230"
    compile_options.input_type = "float32"
    compile_options.input_shape = [1, 3, img_size, img_size] # 修改输入形状
    compile_options.model_layout = "NCHW"

    # 开启量化
    compile_options.quant_type = "uint8"
    compile_options.w_quant_type = "uint8"

    compiler = nncase.Compiler(compile_options)

    # 3. 导入模型
    print(f"正在导入 320 尺寸模型: {onnx_path}...")
    with open(onnx_path, "rb") as f:
        compiler.import_onnx(f.read(), nncase.ImportOptions())

    # 4. 模拟官方 PTQOptions 的结构类
    class MyPTQStructure:
        def __init__(self):
            self.cali_data = []         # 存放 Tensor 的列表
            self.samples_count = 0      # 样本数量属性
            self.quant_method = "l2"    # 量化算法
            self.w_quant_type = "uint8" # 权重量化位宽
            self.a_quant_type = "uint8" # 激活值量化位宽

    ptq_instance = MyPTQStructure()

    # 5. 处理校准数据
    print("正在处理 320x320 校准数据...")
    calib_dir = "data"  # 确保你的 data 文件夹里有图片
    if not os.path.exists(calib_dir):
        raise RuntimeError(f"未找到校准文件夹: {calib_dir}")

    files = [f for f in os.listdir(calib_dir) if f.lower().endswith(('.jpg', '.png'))][:20]

    for f in files:
        # 尺寸改为 320
        img = Image.open(os.path.join(calib_dir, f)).convert("RGB").resize((img_size, img_size))
        data = np.array(img, dtype=np.float32) / 255.0
        data = np.transpose(data, (2, 0, 1))[np.newaxis, :] # [1, 3, 320, 320]

        # 转换为 RuntimeTensor
        rt_tensor = nncase.RuntimeTensor.from_numpy(data)

        # 针对单输入模型,直接添加 tensor (不带中括号)
        ptq_instance.cali_data.append(rt_tensor)

    ptq_instance.samples_count = len(ptq_instance.cali_data)

    # 6. 调用量化引擎
    print(f"开始量化分析 (样本数: {ptq_instance.samples_count})...")
    try:
        compiler.use_ptq(ptq_instance)
        print("✅ 量化引擎启动成功")
    except Exception as e:
        print(f"❌ 量化配置失败,报错信息: {e}")
        print("提示: 如果报 RuntimeTensor 参数不匹配,请尝试将 .append(rt_tensor) 改为 .append([rt_tensor])")

    # 7. 最终编译
    print("正在编译 KModel (这可能需要几分钟)...")
    compiler.compile()
    kmodel = compiler.gencode_tobytes()

    with open(kmodel_path, "wb") as f:
        f.write(kmodel)

    # 8. 结果校验
    final_size = len(kmodel)
    size_mb = final_size / (1024 * 1024)
    print("-" * 30)
    print(f"🏁 任务完成!")
    print(f"📦 模型名称: {kmodel_path}")
    print(f"📊 模型大小: {final_size} 字节 ({size_mb:.2f} MB)")

    # YOLOv8n (320 尺寸) 的 FP32 模型约 3MB,INT8 应该在 1MB 以内
    if size_mb < 2.0:
        print("🔥 状态: 量化成功!")
    else:
        print("⚠️ 状态: 大小未见显著缩小,量化可能未生效。")

if __name__ == "__main__":
    convert_320_model()
量化成功了
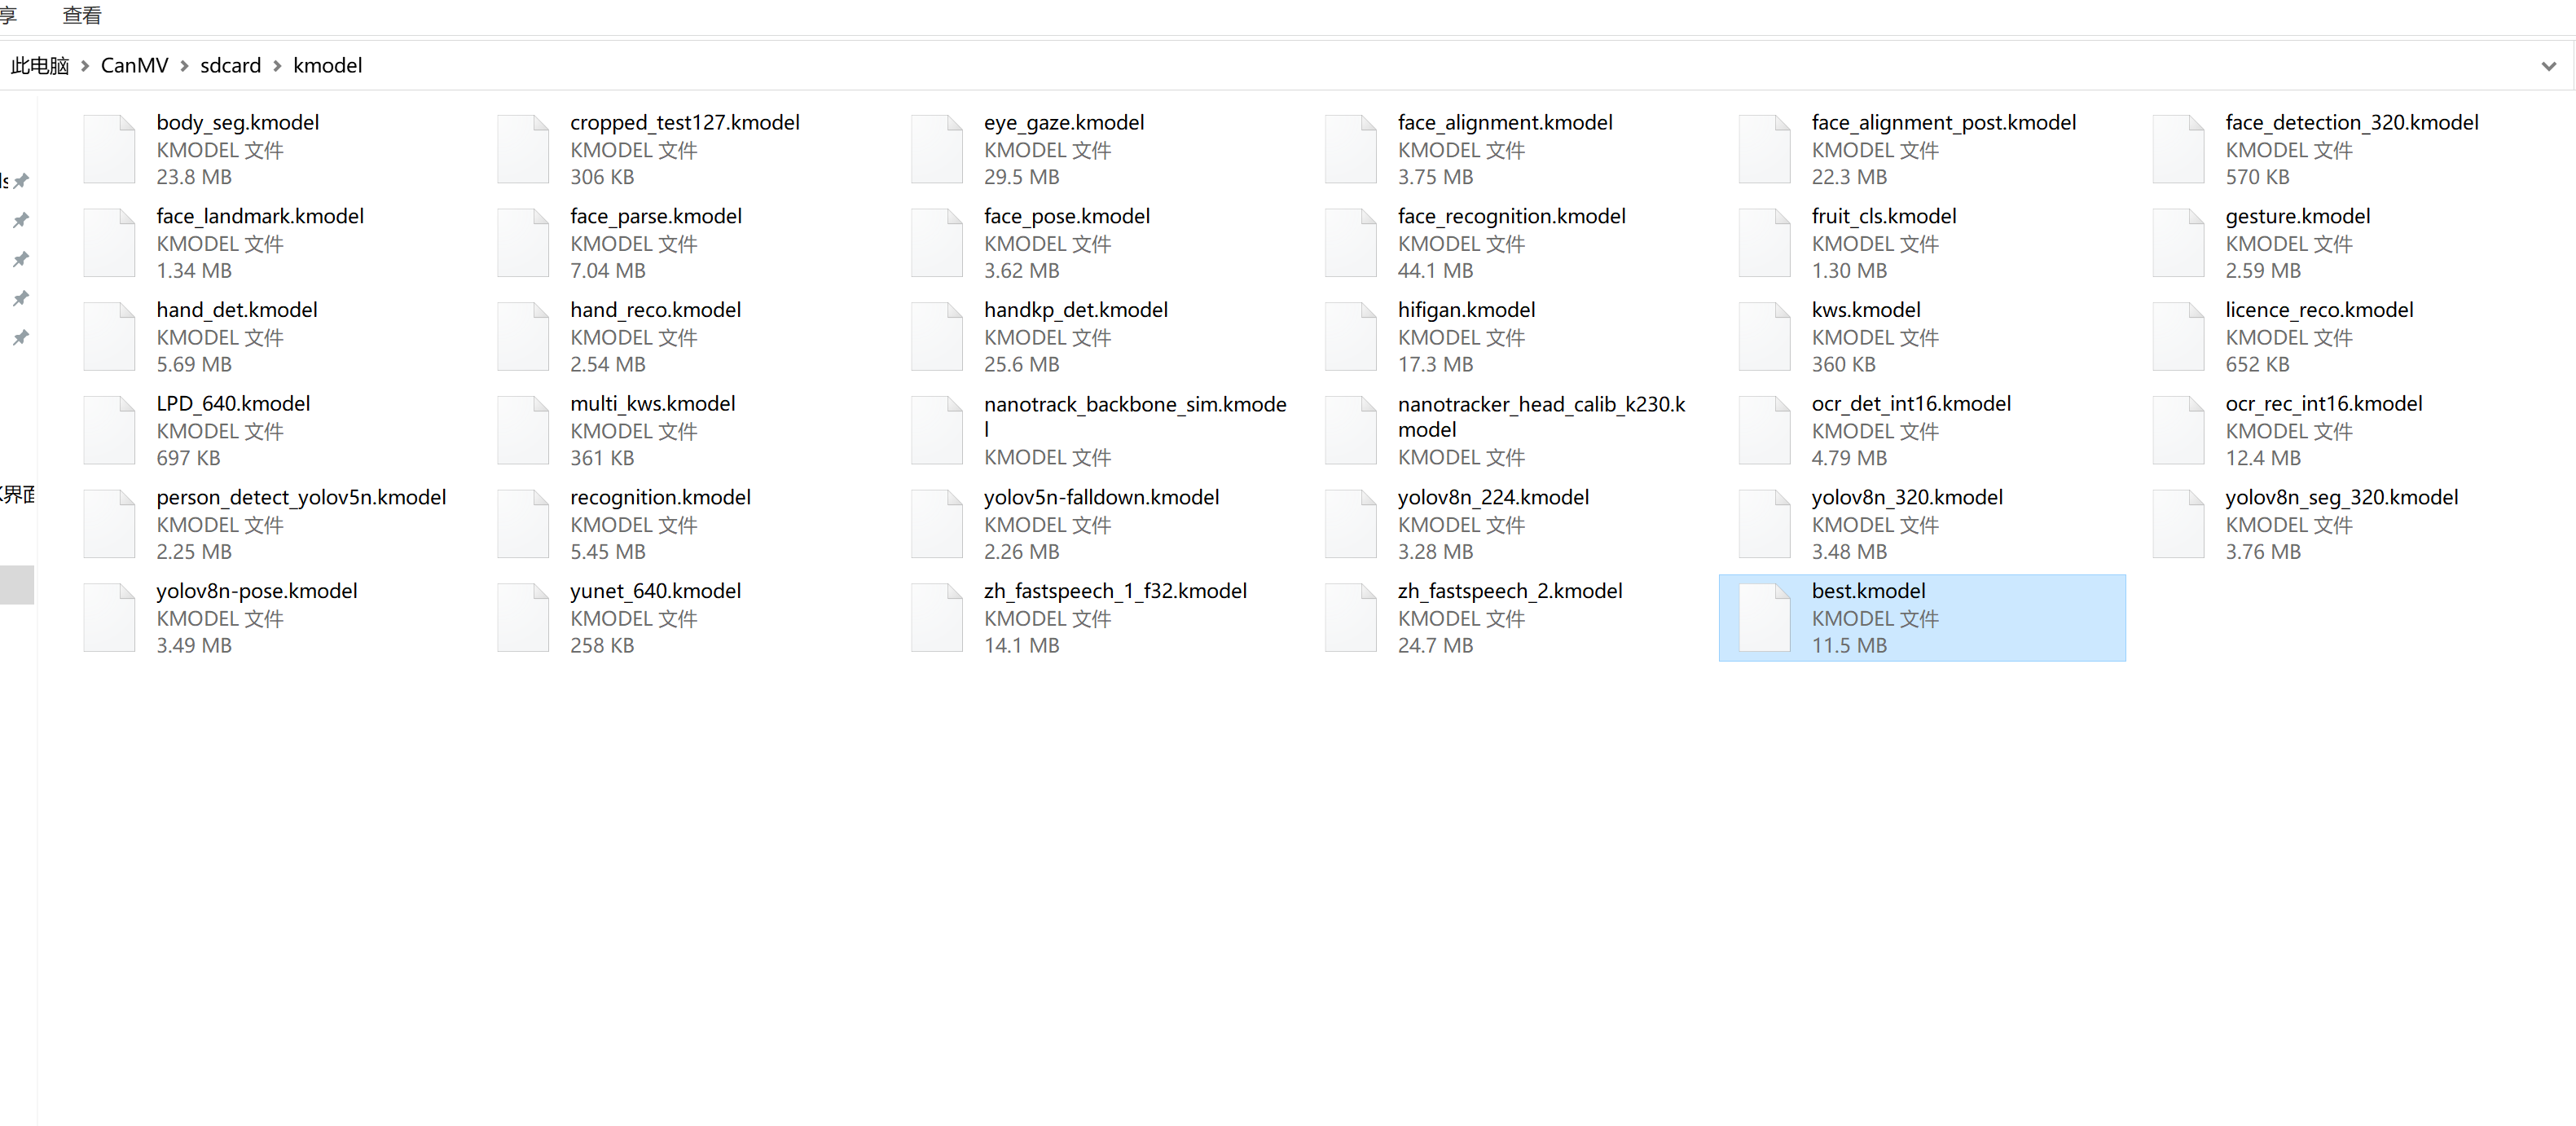
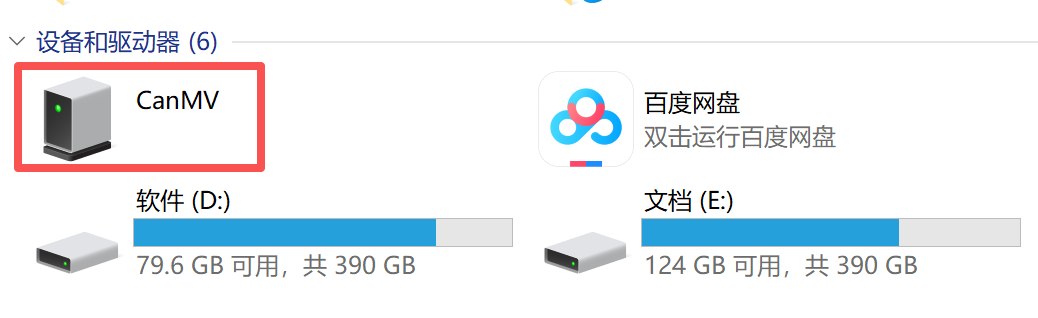
然后模型放置到
此电脑\CanMV\sdcard\kmodel
文件夹下
将这三个代码拼接起来
这玩意有他*的内存,不应用起来,**的照着python代码不就好了,直接这些包安装进去不就好了,
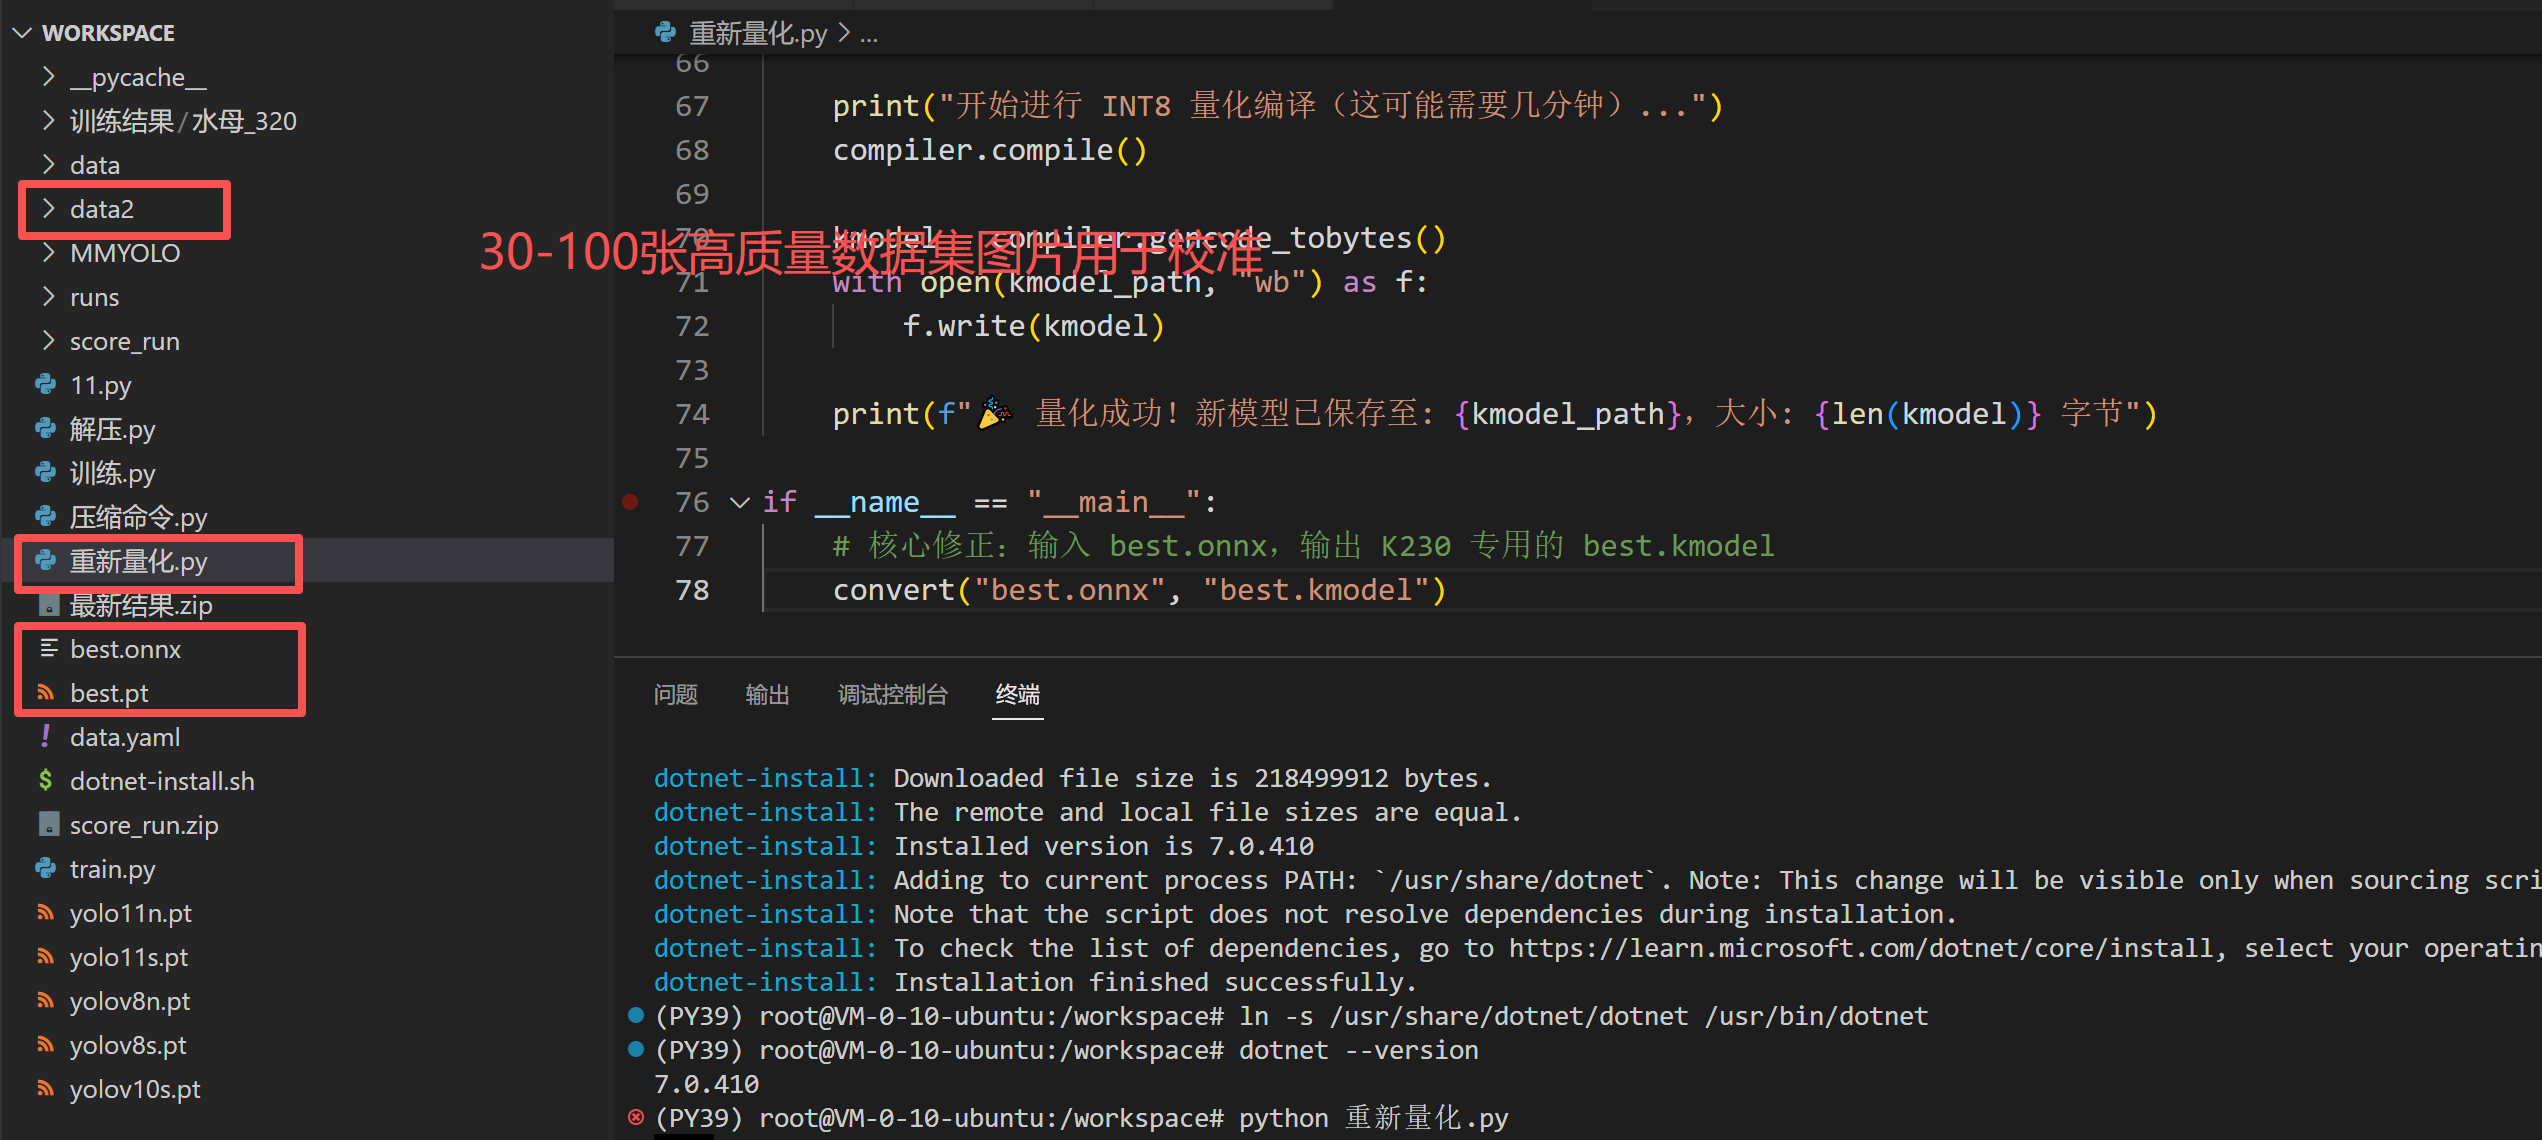
现在重新弄了一下
重新量化
import os
import sys
import numpy as np
from PIL import Image
from ultralytics import YOLO
import nncase

# ================== 绝对路径定点配置(已对齐多尺度训练输出) ==================
PT_PATH = "/workspace/牛马/牛马结果/weights/best.pt"
ONNX_PATH = "/workspace/牛马/牛马结果/weights/best.onnx"
KMODEL_PATH = "/workspace/best.kmodel"
CALIB_DIR = "/workspace/data2"  # 确保这个文件夹里有你的牛马校准图
# ====================================================

def export_pt_to_onnx():
    print("\n========== [第一步: 正在将 PT 权重导出为标准的 ONNX] ==========")
    if not os.path.exists(PT_PATH):
        raise FileNotFoundError(f"❌ 找不到预期的权重文件: {PT_PATH},请确认新训练是否已结束。")

    model = YOLO(PT_PATH)
    print(f"成功加载 640 规格 YOLOv8n 模型,正在执行像素级锁死导出...")

    model.export(
        format="onnx",
        opset=11,          # 完美兼容 nncase 2.9.0
        imgsz=640,         # 640 高分辨率
        simplify=True,     # 强制剪枝冗余算子
        half=False,
        nms=False,         # 剥离后处理,交由亚博板载 C 库解决
        dynamic=False      # 锁死静态内存,确保 K230 顺利分配硬件缓存
    )
    print(f"✅ ONNX 导出成功!")


def convert_onnx_to_kmodel():
    print("\n========== [第二步: 启动适配 开天 K230 的 640 规格 INT8 量化编译] ==========")
    if not os.path.exists(ONNX_PATH):
        raise FileNotFoundError(f"❌ 未找到导出的 ONNX 文件: {ONNX_PATH}")

    compile_options = nncase.CompileOptions()
    compile_options.target = "k230"
    compile_options.input_shape = [1, 3, 640, 640]  # 【升级】KPU 硬件输入入口形状同步对齐 640
    compile_options.input_layout = "NCHW"
    compile_options.dump_dir = "dump"

    # 迎合 亚博 libs.YOLO 库内部黑箱,入口保持 Float32 完美交接
    compile_options.preprocess = False
    compile_options.input_type = "float32"

    # 初始化编译器
    compiler = nncase.Compiler(compile_options)

    with open(ONNX_PATH, "rb") as f:
        onnx_data = f.read()
    compiler.import_onnx(onnx_data, nncase.ImportOptions())

    # ================== 【核心:精准注入 nncase 2.x 专属量化器】 ==================
    ptq_options = nncase.PTQTensorOptions()
    ptq_options.quant_type = "uint8"        # KPU 内部激活层采用 uint8 硬件全速运转
    ptq_options.w_quant_type = "uint8"      # KPU 权重固化为 uint8 彻底瘦身
    ptq_options.calibrate_method = "NoClip" # 经典高效校准算法

    # 手动加载校准数据集到内存中
    images_list = []
    if not os.path.exists(CALIB_DIR):
        raise RuntimeError(f"❌ 找不到用于量化校准的 '{CALIB_DIR}' 文件夹!")

    for f in os.listdir(CALIB_DIR):
        if f.lower().endswith(('.jpg', '.jpeg', '.png', '.bmp')):
            try:
                # 【升级】校准图片缩放尺寸必须与模型输入(640x640)绝对一致
                img = Image.open(os.path.join(CALIB_DIR, f)).convert("RGB").resize((640, 640), Image.BILINEAR)
                arr = np.array(img, dtype=np.float32) / 255.0
                arr = np.transpose(arr, (2, 0, 1))[np.newaxis, ...]
                images_list.append(arr)
                if len(images_list) >= 30:  # 挑选 30 张真实图片建立校准映射即可
                    break
            except Exception as e:
                print(f"读取校准图出错: {e}")

    print(f" -> 成功加载 640 规格量化校准图片: {len(images_list)} 张")

    if len(images_list) == 0:
        raise RuntimeError(f"❌ '{CALIB_DIR}' 文件夹里没有检测到有效图片!")

    ptq_options.samples_count = len(images_list)
    ptq_options.set_tensor_data([images_list]) # 注入嵌套的校准列表

    # 强行命令编译器挂载这套 PTQ 量化流程
    compiler.use_ptq(ptq_options)
    # ===============================================================================

    print("🚀 [关键动作] nncase 2.9.0 正在执行真正的 640 规格 INT8 压缩量化...")
    compiler.compile()

    kmodel = compiler.gencode_tobytes()
    with open(KMODEL_PATH, "wb") as f:
        f.write(kmodel)

    print(f"\n====== 🎉🎉🎉 640x640 增强版模型量化完全成功! ======")
    print(f" └─> 生成路径: {KMODEL_PATH}")
    print(f" └─> 真正量化后的文件大小: {len(kmodel)} 字节 (约为 {len(kmodel)/1024/1024:.2f} MB)")
    print("========================================================\n")

if __name__ == "__main__":
    export_pt_to_onnx()
    convert_onnx_to_kmodel()
量化报错,缺少这个什么什么文件,然后按照这些步骤安装上然后
# 1. 下载微软官方的 .NET 安装脚本
wget https://dot.net/v1/dotnet-install.sh -O dotnet-install.sh

# 2. 赋予脚本执行权限
chmod +x dotnet-install.sh

# 3. 安装 .NET 7.0 并指定安装到系统的标准全局路径 /usr/share/dotnet
#(nncase 默认会去这个系统路径下死抠 hostfxr,必须装在这里)
./dotnet-install.sh --channel 7.0 --install-dir /usr/share/dotnet

# 4. 创建系统全局快捷方式(软链接),让 dotnet 命令在全局生效
ln -s /usr/share/dotnet/dotnet /usr/bin/dotnet

# 5. 验证是否安装成功
dotnet --version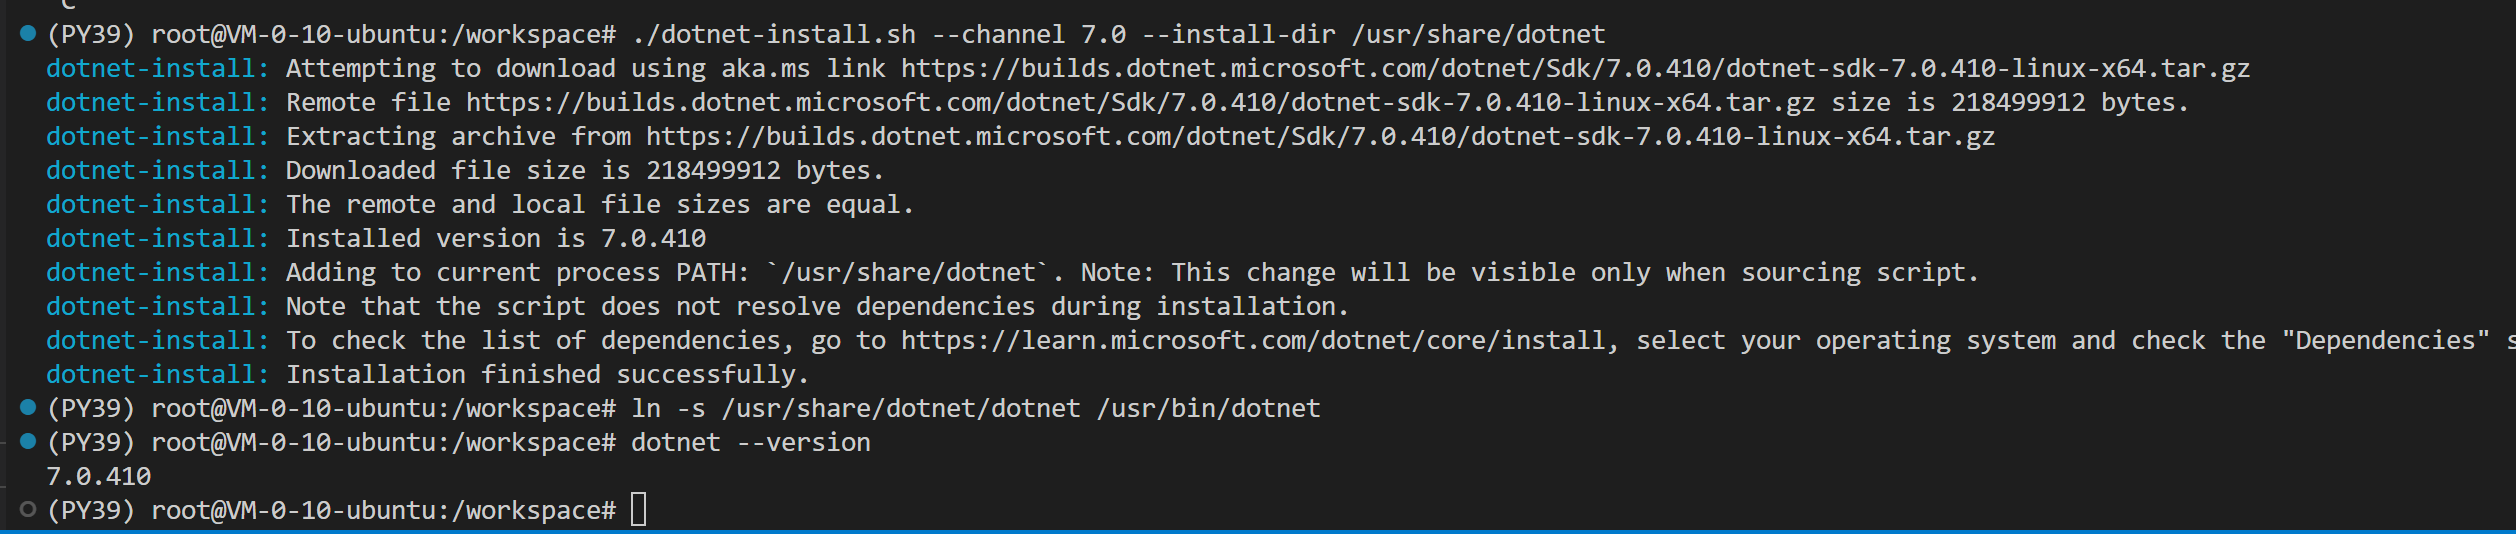
成功了,重新量化一下
我用的V8S练出来的模型所以量化后也有11MB
在开发板的板子上运行这个,看看是不是nncase这个版本的问题导致现在YOLO检测死锁
import nncase_runtime as nn

print("==============================")
try:
    # 尝试打印内置版本号
    print("你的开发板内置 nncase 版本为:", nn.__version__)
except AttributeError:
    try:
        print("你的开发板内置 nncase 版本为:", nn.version())
    except AttributeError:
        # 如果无法直接打印,看它里面有哪些方法
        print("无法直接打印版本,支持的接口列表为:", dir(nn))
print("==============================")
==============================
你的开发板内置 nncase 版本为: 2.9.0
==============================
MPY: soft reboot
CanMV v1.4.3(based on Micropython e00a144) on 2026-01-20; k230_canmv_yahboom with K230
现在
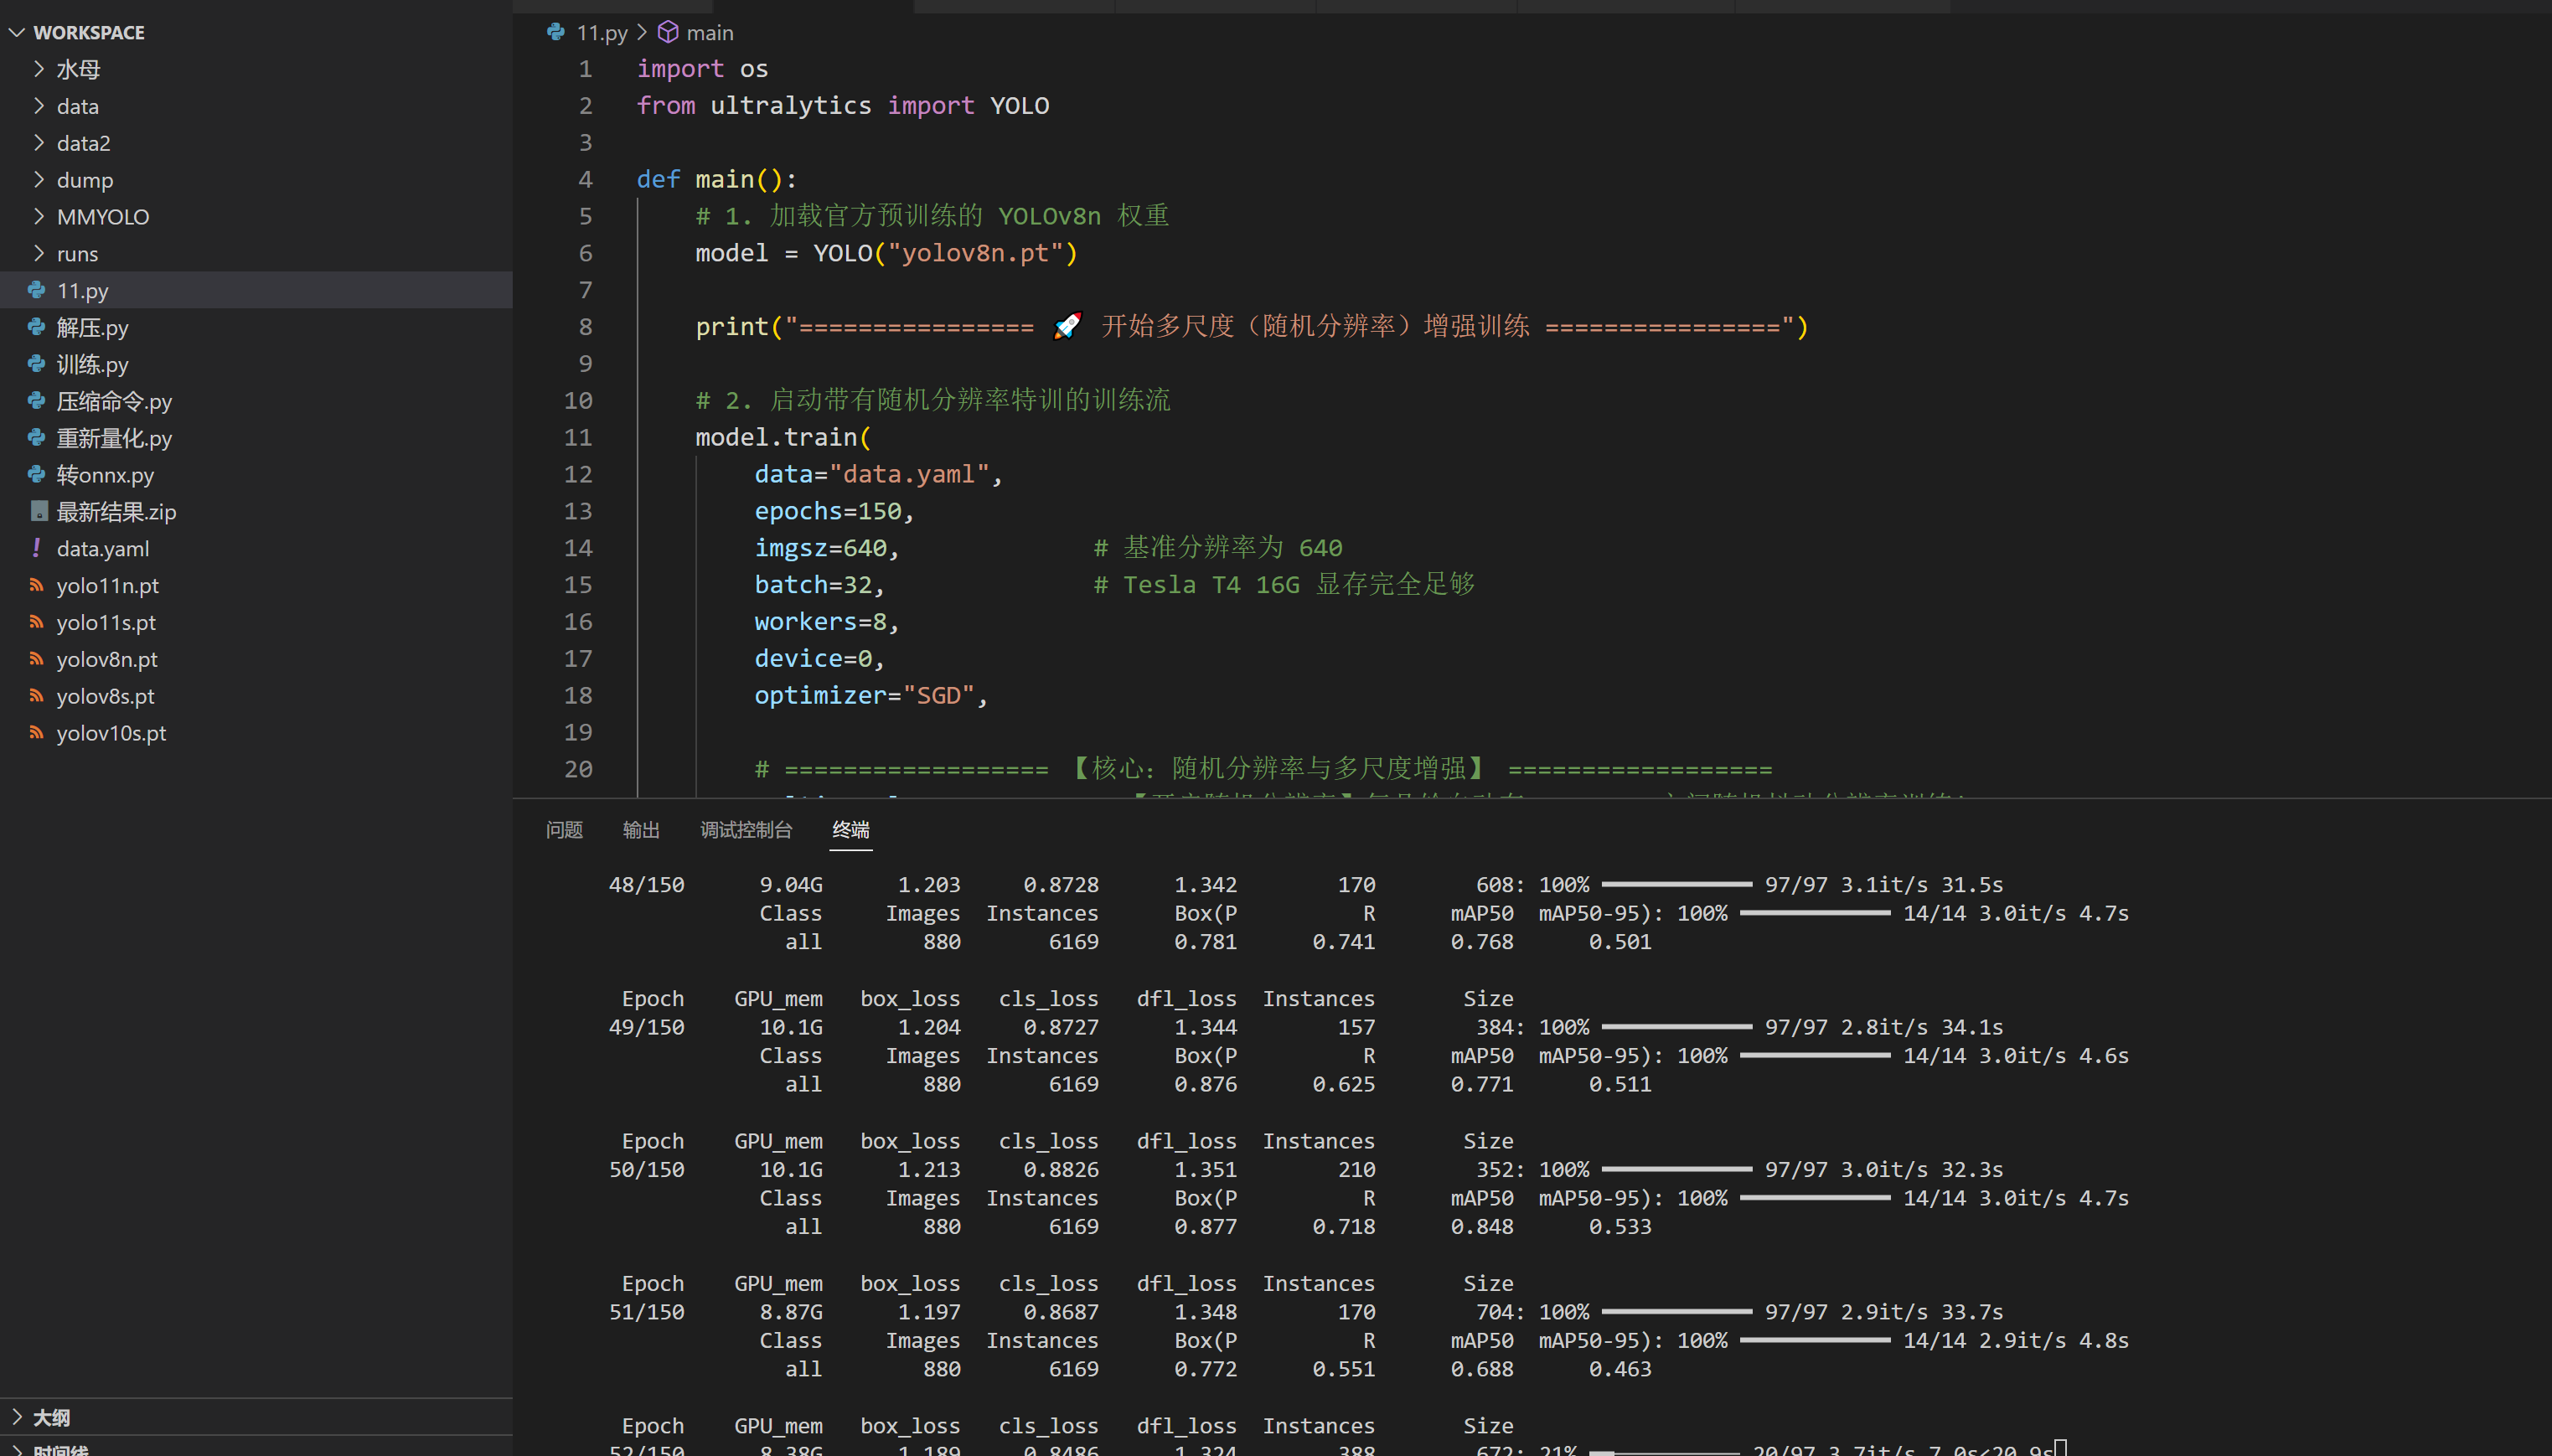
重新量化一下,这个K230支持的是yolov8n.pt基于这个训练的模型,我开始的时候灵感来了用的yolov8s训练的,在这耽误了大概三个小时。
最好还是就用yolov8n训练640尺寸的图
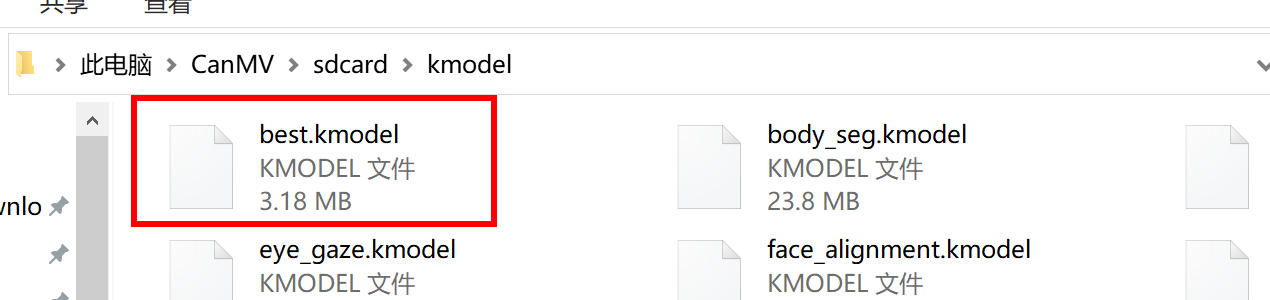
现在重新花了几个小时训练了一个yolov8n.pt的模型,然后量化后的模型应该是3.几MB才是正确的
---------------------------------最终步骤-----------------------------
0.刷固件,能够打开K230能进IDE,在里面能显示(如果有任何步骤不行的看上面的流水账)
1.训练YOLO模型训练好pt模型
2.量化模型至3-5MB左右
3.部署到K230上,粘贴代码测试能运行
4.将代码从IDE拷贝到K230里,这样直接打开就能运行了
实施:
----------------------第0步:刷固件能连电脑能开机---------------

输入固件2.11.0
这三个适配我的K230,我是2026/05/16这天测试的,由于可能更新,以更新的为主
最主要能连接上K230就算是成功能够打开K230能进IDE,在里面能显示,在我的电脑里面有显示
IDE里和K230里都能正常显示摄像头画面就算是成功
------------------------第1步:训练一个YOLO模型-----------------------
这边在服务器训练的大概三四个小时,如果不会可以联系我帮你,这个就是yolov8n的有做增强分辨率,平移旋转这些增强,弄太复杂可能会导致后面无法识别或者kpu崩溃,k230不一定支持强大的模型,就整基础的
最终得到模型
---------------第2步转换为K230支持的kmodel模型-------------
量化需要先转onnx,然后转为kmodel模型的时候与你的训练代码一致以免精度损失
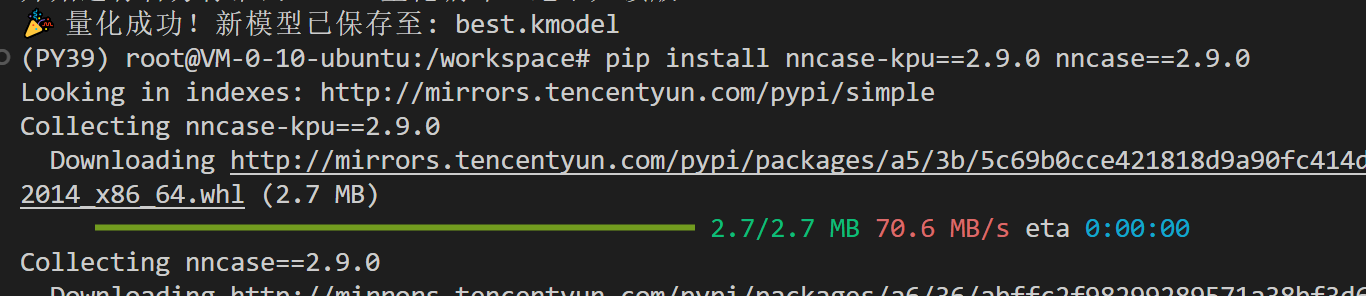
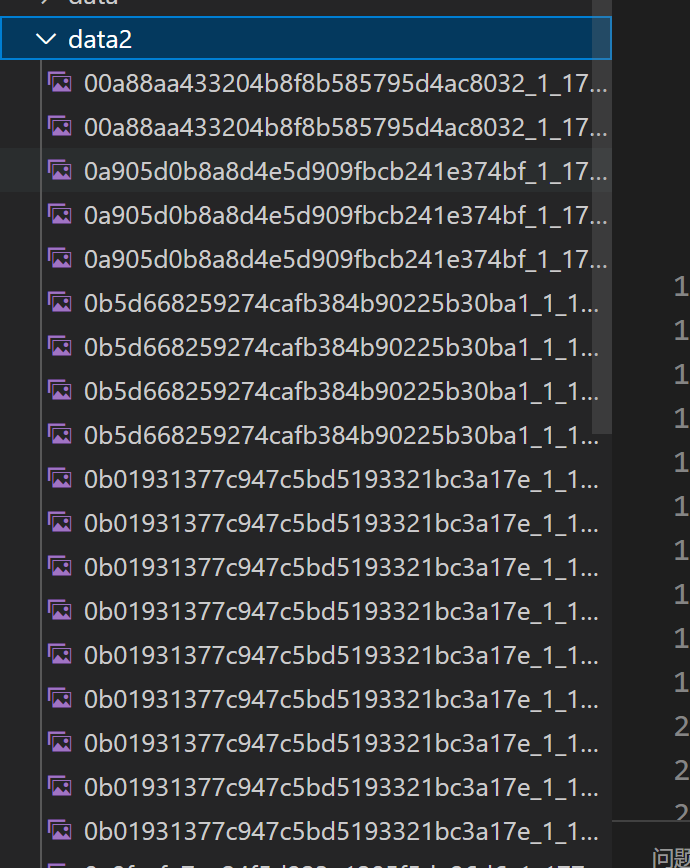
这步只支持linux系统转,需要安装pip install nncase==2.9.0 nncase-kpu==2.9.0,我的k230是这个版本可以在上方找到我的测试代码,以确定版本,如果版本跟你的K230不一致可能会导致报错,可以找某宝或者联系我转成kmodel,将代码里面的路径改成你的模型的路径,并且在文件夹下新建一个data2文件夹,文件夹里面要放30-100张你的精选数据集,以用于量化校准。没图的话精度损失严重。
onnx转换后一定要测试效果,以免精度损失,量化成kmodel损失就更严重了
import os, sys, numpy as np
from PIL import Image
from ultralytics import YOLO
import nncase

# ================== 路径与参数配置 ==================
PT_PATH = "/workspace/水母/水母结果/weights/best.pt"
ONNX_PATH = "/workspace/水母/水母结果/weights/best.onnx"
KMODEL_PATH = "/workspace/best.kmodel"
CALIB_DIR = "/workspace/data2"          # 校准图片文件夹
TARGET_SIZE = 640
# 🔥 关键修正:板端 AI2D 使用 [128,128,128](RGB 顺序)
FILL_COLOR = (128, 128, 128)            # 与板端完全一致的灰度填充
CALIB_SAMPLES = 200                     # 200 张校准图片

# ================== 与板端 AI2D 一致的 Letterbox ==================
def letterbox(img, target_size=640, color=FILL_COLOR):
    """等比缩放并居中填充灰边,返回 PIL Image (RGB)"""
    w, h = img.size
    scale = min(target_size / w, target_size / h)
    new_w, new_h = int(w * scale), int(h * scale)
    resized = img.resize((new_w, new_h), Image.BILINEAR)
    canvas = Image.new("RGB", (target_size, target_size), color)
    x_offset = (target_size - new_w) // 2
    y_offset = (target_size - new_h) // 2
    canvas.paste(resized, (x_offset, y_offset))
    return canvas

# ================== 步骤1:导出 ONNX(如果没有或需要重新生成) ==================
def export_onnx():
    print("=" * 50)
    print("[1/2] 导出 ONNX(无图简化)...")
    if os.path.exists(ONNX_PATH):
        print("ONNX 已存在,跳过导出。若需重新导出请删除旧文件。")
        return
    model = YOLO(PT_PATH)
    model.export(
        format="onnx",
        imgsz=TARGET_SIZE,
        opset=11,
        simplify=False,           # 保持计算精度
        half=False,
        nms=False,
        dynamic=False
    )
    print(f"✅ ONNX 已生成: {ONNX_PATH}")

# ================== 步骤2:量化生成 kmodel ==================
def quantize():
    print("=" * 50)
    print("[2/2] INT8 量化(灰度 128 填充 + 200 张校准)...")
    if not os.path.exists(ONNX_PATH):
        raise FileNotFoundError(f"❌ 未找到 ONNX: {ONNX_PATH}")

    compile_options = nncase.CompileOptions()
    compile_options.target = "k230"
    compile_options.input_shape = [1, 3, TARGET_SIZE, TARGET_SIZE]
    compile_options.input_layout = "NCHW"
    compile_options.dump_dir = "dump"
    compile_options.preprocess = False
    compile_options.input_type = "float32"

    compiler = nncase.Compiler(compile_options)
    with open(ONNX_PATH, "rb") as f:
        compiler.import_onnx(f.read(), nncase.ImportOptions())

    ptq = nncase.PTQTensorOptions()
    ptq.quant_type = "uint8"
    ptq.w_quant_type = "uint8"
    ptq.calibrate_method = "NoClip"

    # 加载校准图片
    images = []
    if not os.path.exists(CALIB_DIR):
        raise RuntimeError(f"❌ 校准文件夹不存在: {CALIB_DIR}")

    print(f"从 '{CALIB_DIR}' 加载校准图片(目标 {CALIB_SAMPLES} 张)...")
    for f in os.listdir(CALIB_DIR):
        if f.lower().endswith(('.jpg','.jpeg','.png','.bmp')):
            try:
                img = Image.open(os.path.join(CALIB_DIR, f)).convert("RGB")
                img = letterbox(img, TARGET_SIZE, FILL_COLOR)   # 使用 128 灰度填充
                arr = np.array(img, dtype=np.float32) / 255.0
                arr = np.transpose(arr, (2,0,1))[np.newaxis, ...]
                images.append(arr)
                if len(images) >= CALIB_SAMPLES:
                    break
            except Exception as e:
                print(f"跳过 {f}: {e}")

    print(f" → 成功加载 {len(images)} 张校准图片")
    if not images:
        raise RuntimeError("无有效图片!")

    ptq.samples_count = len(images)
    ptq.set_tensor_data([images])
    compiler.use_ptq(ptq)

    print("🚀 nncase 编译中...")
    compiler.compile()

    kmodel = compiler.gencode_tobytes()
    with open(KMODEL_PATH, "wb") as f:
        f.write(kmodel)

    print(f"✅ kmodel 生成: {KMODEL_PATH}")
    print(f"   文件大小: {len(kmodel)/1024/1024:.2f} MB")
    print("=" * 50)

if __name__ == "__main__":
    export_onnx()
    quantize()
按照K230的默认背景转换,转换好后,就得到了最终的best.kmodel文件,我们只需要这个下载后放到k230里面
------------第3步部署到K230上,粘贴代码测试能运行----------
链接IDE把模型放进去了后,就可以测试一下了
YOLO识别需要的RGB888格式图,K230默认的RGB565图,这是容易错的地方,用下面这个代码我是能够运行了
import time, os, gc, sys
from libs.PipeLine import PipeLine, ScopedTiming
from libs.YOLO import YOLOv8
from ybUtils.YbBuzzer import YbBuzzer      # 蜂鸣器
from ybUtils.YbRGB import YbRGB            # RGB LED
import math

# 类别顺序:索引2为水母
labels = ["1", "13", "Jellyfish", "Mushroom"]
kmodel_path = "/sdcard/kmodel/best.kmodel"

# 颜色定义(RGB)
COLOR_RED   = (255, 0, 0)
COLOR_GREEN = (0, 255, 0)
COLOR_YELLOW = (255, 255, 0)

# 初始化蜂鸣器与RGB灯
buzzer = YbBuzzer()
rgb = YbRGB()

# 呼吸灯效果函数(复用你提供的代码)
def breath_effect(r, g, b, duration=2):
    steps = 1000
    for i in range(steps):
        brightness = math.sin(i / steps * math.pi)
        current_r = int(r * brightness)
        current_g = int(g * brightness)
        current_b = int(b * brightness)
        rgb.show_rgb([current_r, current_g, current_b])
        time.sleep(duration / (2 * steps))
    for i in range(steps-1, -1, -1):
        brightness = math.sin(i / steps * math.pi)
        current_r = int(r * brightness)
        current_g = int(g * brightness)
        current_b = int(b * brightness)
        rgb.show_rgb([current_r, current_g, current_b])
        time.sleep(duration / (2 * steps))

try:
    print("正在初始化多媒体硬件流水线...")
    pl = PipeLine(rgb888p_size=[640, 360], display_size=[640, 480], display_mode="lcd")
    pl.create()
    display_size = pl.get_display_size()

    print("正在加载水母检测模型...")
    yolo = YOLOv8(
        task_type="detect",
        mode="video",
        kmodel_path=kmodel_path,
        labels=labels,
        rgb888p_size=[640, 360],
        model_input_size=[640, 640],
        display_size=display_size,
        conf_thresh=0.2,
        nms_thresh=0.7
    )
    yolo.config_preprocess()
    print("====== 水母检测启动(带报警)======")

    # 报警状态跟踪
    last_alarm_state = 0  # 0=安全, 1=1~5只, 2=>5只

    while True:
        os.exitpoint()
        pl.osd_img.clear()

        img = pl.get_frame()
        if img is None:
            continue

        res = yolo.run(img)

        jellyfish_count = 0
        if res and len(res[0]) > 0:
            for i in range(len(res[0])):
                box = res[0][i]
                class_id = res[1][i]
                score = res[2][i] if len(res) > 2 else 1.0
                if class_id == 2:   # 水母
                    jellyfish_count += 1
                    x, y, w, h = int(box[0]), int(box[1]), int(box[2]), int(box[3])
                    pl.osd_img.draw_rectangle(x, y, w, h, color=(255, 0, 255, 0), thickness=3)
                    pl.osd_img.draw_string_advanced(x, y - 25, 20,
                                                    f"Jellyfish: {score:.2f}",
                                                    color=(255, 255, 255, 255))

        # 确定当前报警状态
        if jellyfish_count == 0:
            current_state = 0
        elif jellyfish_count <= 5:
            current_state = 1
        else:
            current_state = 2

        # 状态变化处理
        if current_state != last_alarm_state:
            if current_state == 1:  # 刚进入1~5只报警
                buzzer.beep()       # 短鸣一声
                rgb.show_rgb(COLOR_RED)  # 立即亮红灯,之后呼吸效果由主循环维持
            elif current_state == 2:  # >5只,只亮黄灯,不叫
                rgb.show_rgb(COLOR_YELLOW)
            else:  # 回到安全状态
                rgb.show_rgb(COLOR_GREEN)
            last_alarm_state = current_state

        # 根据状态持续更新LED效果(呼吸)
        if current_state == 1:
            breath_effect(255, 0, 0, 2)    # 红灯呼吸
        elif current_state == 2:
            breath_effect(255, 255, 0, 2)  # 黄灯呼吸
        else:
            breath_effect(0, 255, 0, 2)    # 绿灯呼吸

        # 屏幕显示水母数量
        count_text = f"Jellyfish: {jellyfish_count}"
        pl.osd_img.draw_string_advanced(display_size[0] - 240, 30, 28, count_text,
                                        color=(255, 255, 255, 0))
        pl.show_image()
        gc.collect()

except KeyboardInterrupt:
    print("用户停止")
except BaseException as e:
    print(f"Exception: {e}")
finally:
    # 关闭RGB灯与蜂鸣器
    rgb.show_rgb([0, 0, 0])
    buzzer.off()
    if 'pl' in locals() and pl:
        pl.destroy()
    if 'yolo' in locals() and yolo:
        del yolo
    os.exitpoint(os.EXITPOINT_ENABLE_SLEEP)
    time.sleep_ms(100)
    print("资源已安全释放。")
4.改名main从IDE拷贝到K230里覆盖,这样直接打开就能运行了
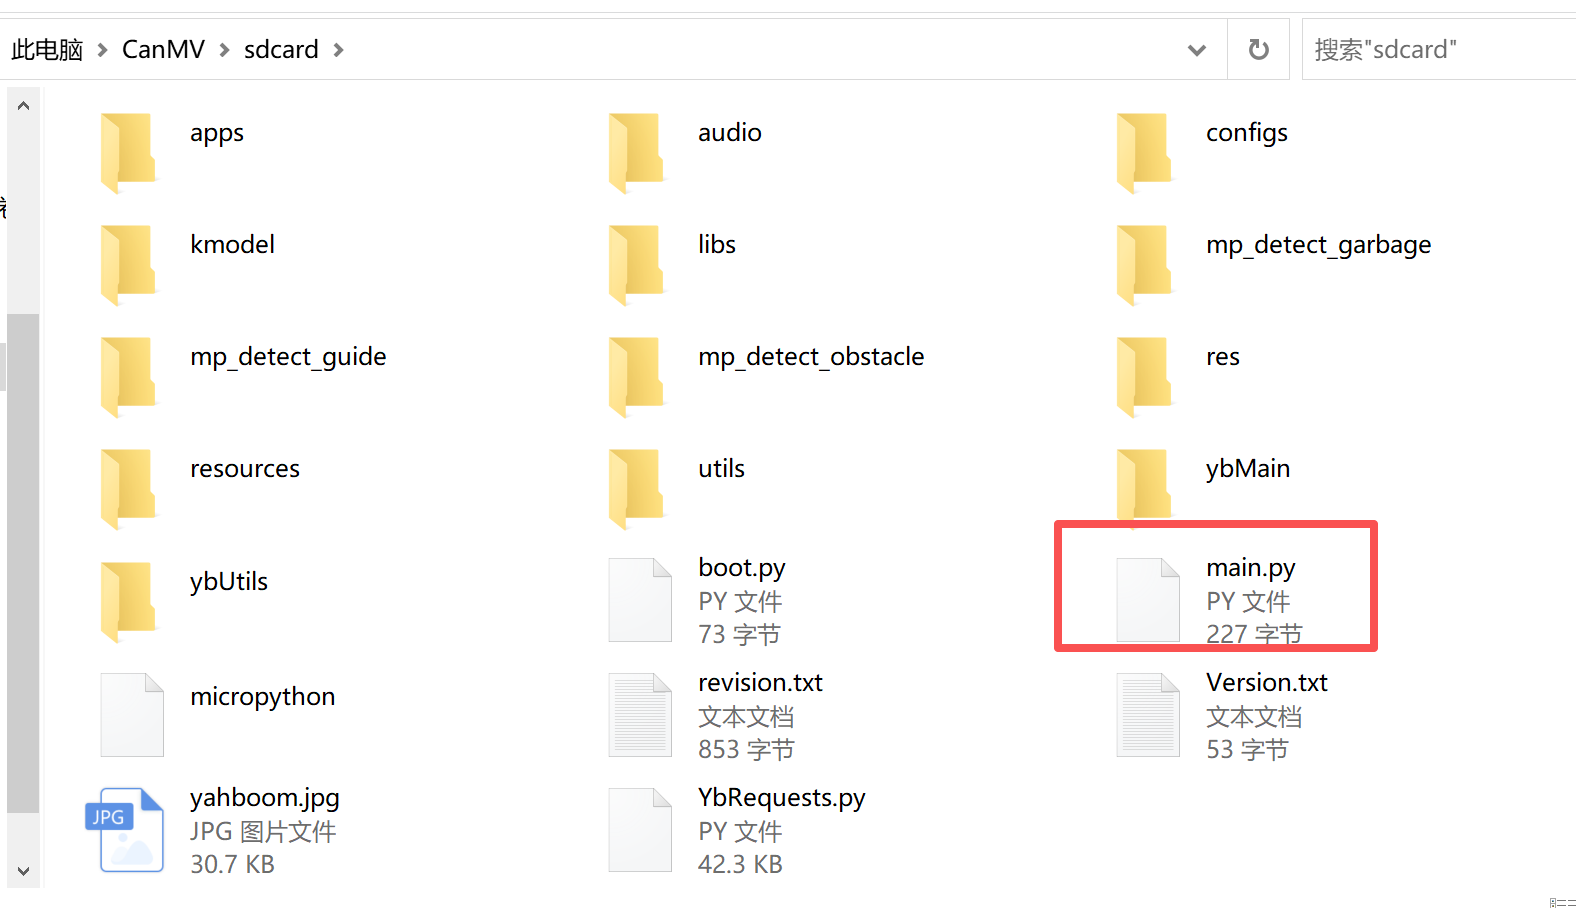
下面是直接插上电脑就能运行了,显示效果如下
以下是我的所有的代码和软件如下,这些代码都可以在IDE里面运行有几个是在服务器运行的,有几个是在PC电脑上能运行的
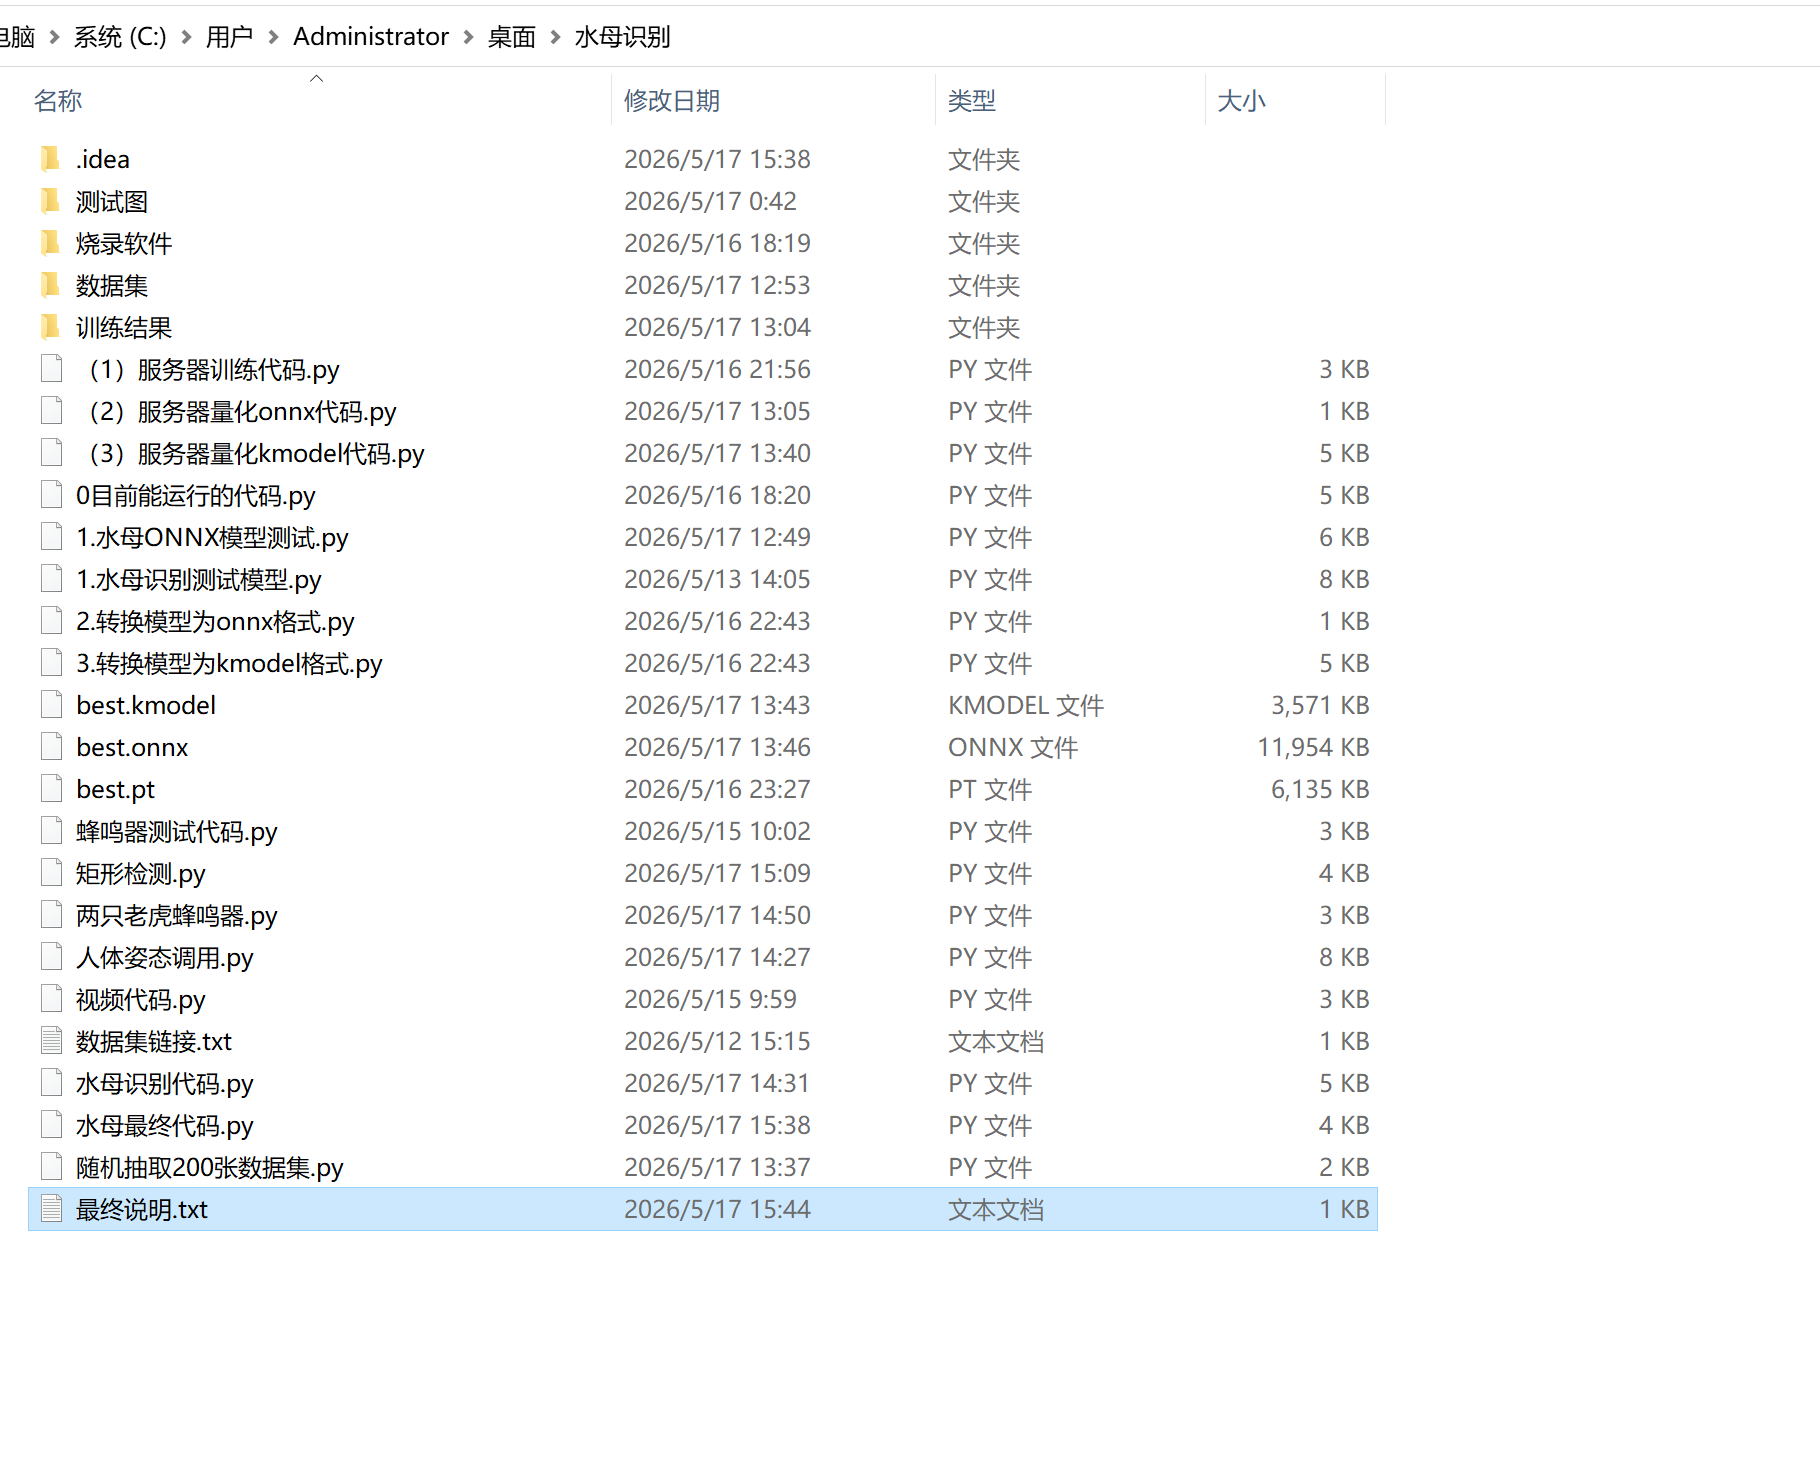
这个目前是能运行的案例,我开始训练的yolov8s模型,一路踩坑,下错资源,训练错,转换错,大概耗时3天,希望后来人看见,由于K230算力有限最终决定使用PC识别,K230传递图像即可。
代码可以看这边
,K230板子就到此结束,看起来简单,踩过的一个坑就是几个小时,哎。 2026/05/16
最终说明.txt链接:https://pan.quark.cn/s/daf3cb36ea72
如有需要,网盘自取