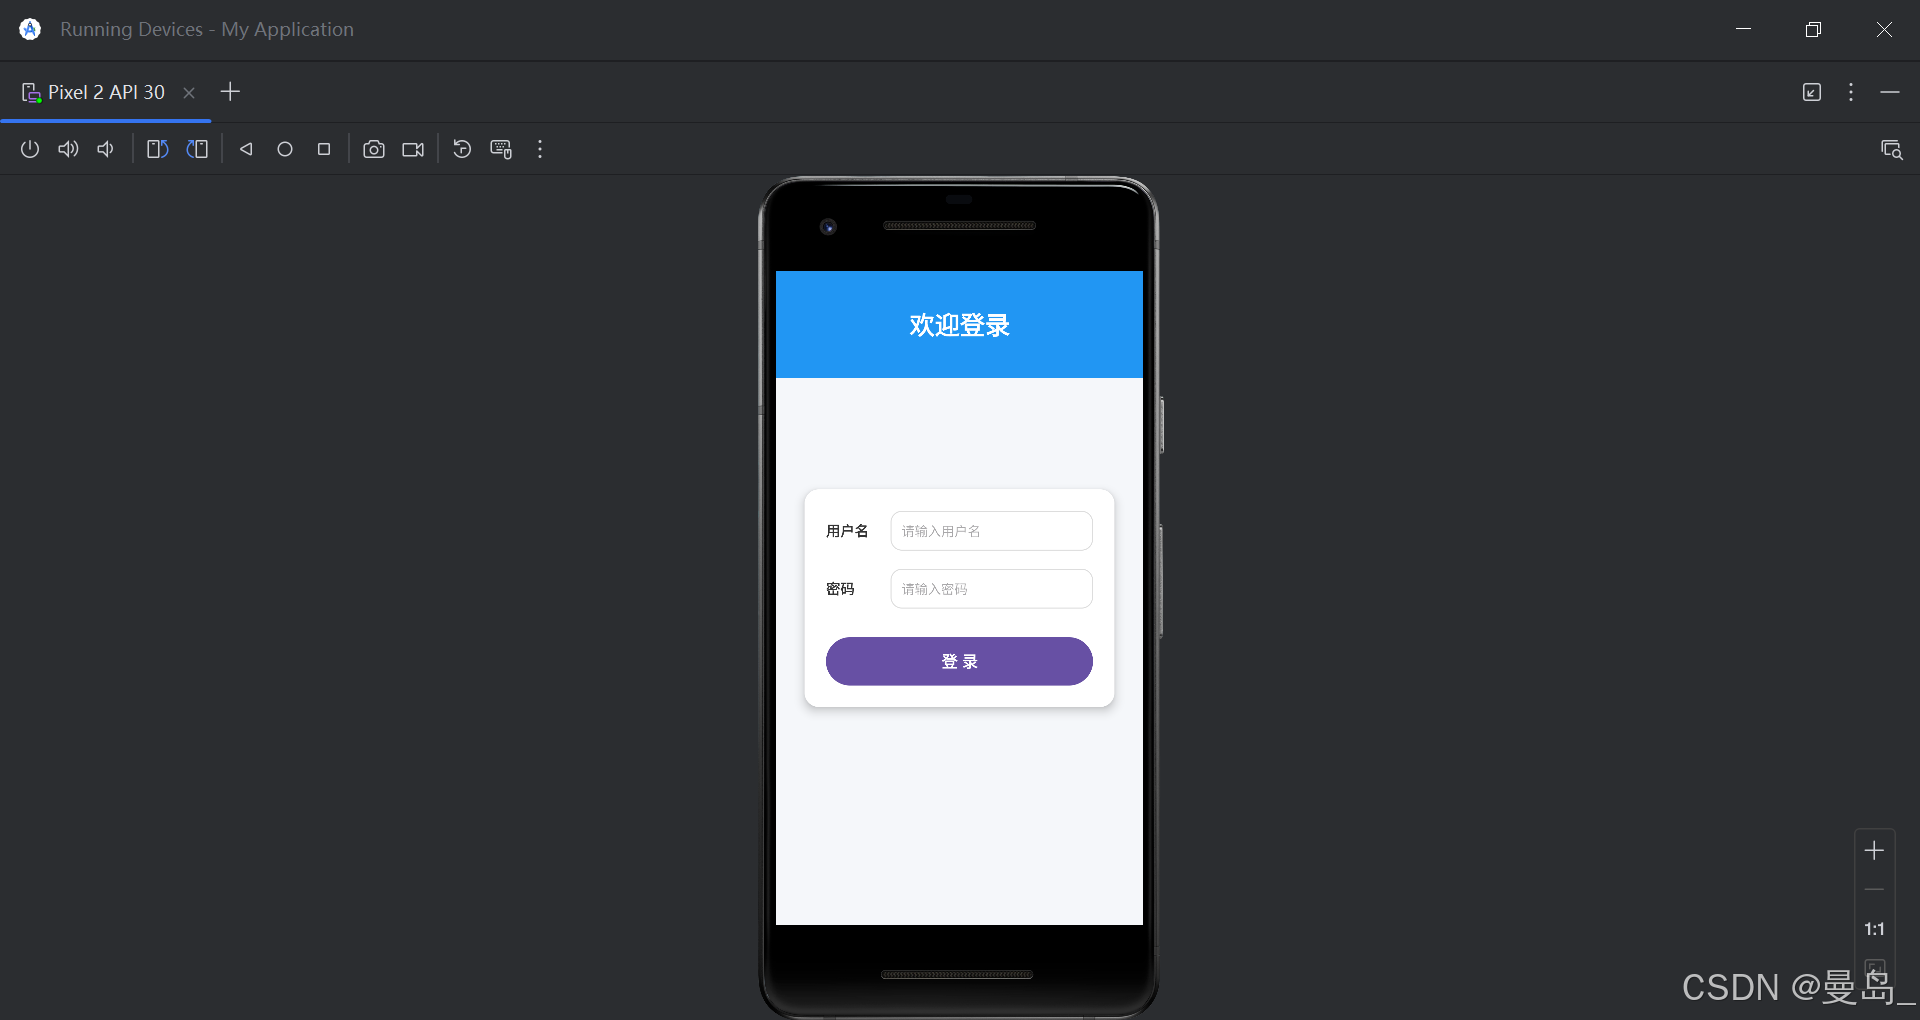
验证图:
一.下载安装开发工具
shell
#Android Studio 下载地址
https://developer.android.google.cn/studio?hl=zh-cn
#自行安装该工具
二.编写项目
2.1 创建项目架构
此次开发工具为Android Studio 为2024.3.1版本
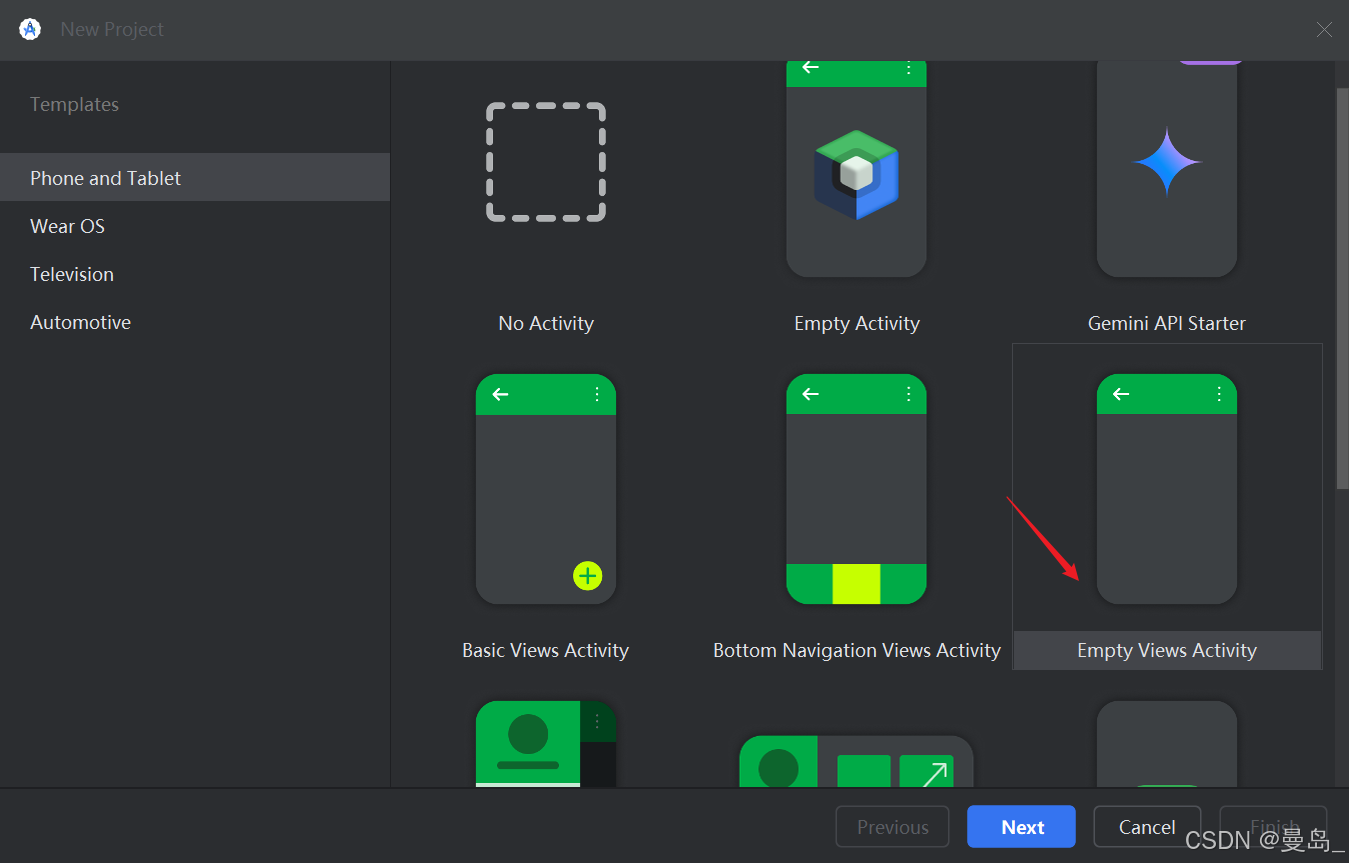
创建项目,选择 Empty Views Activity 模板 ,
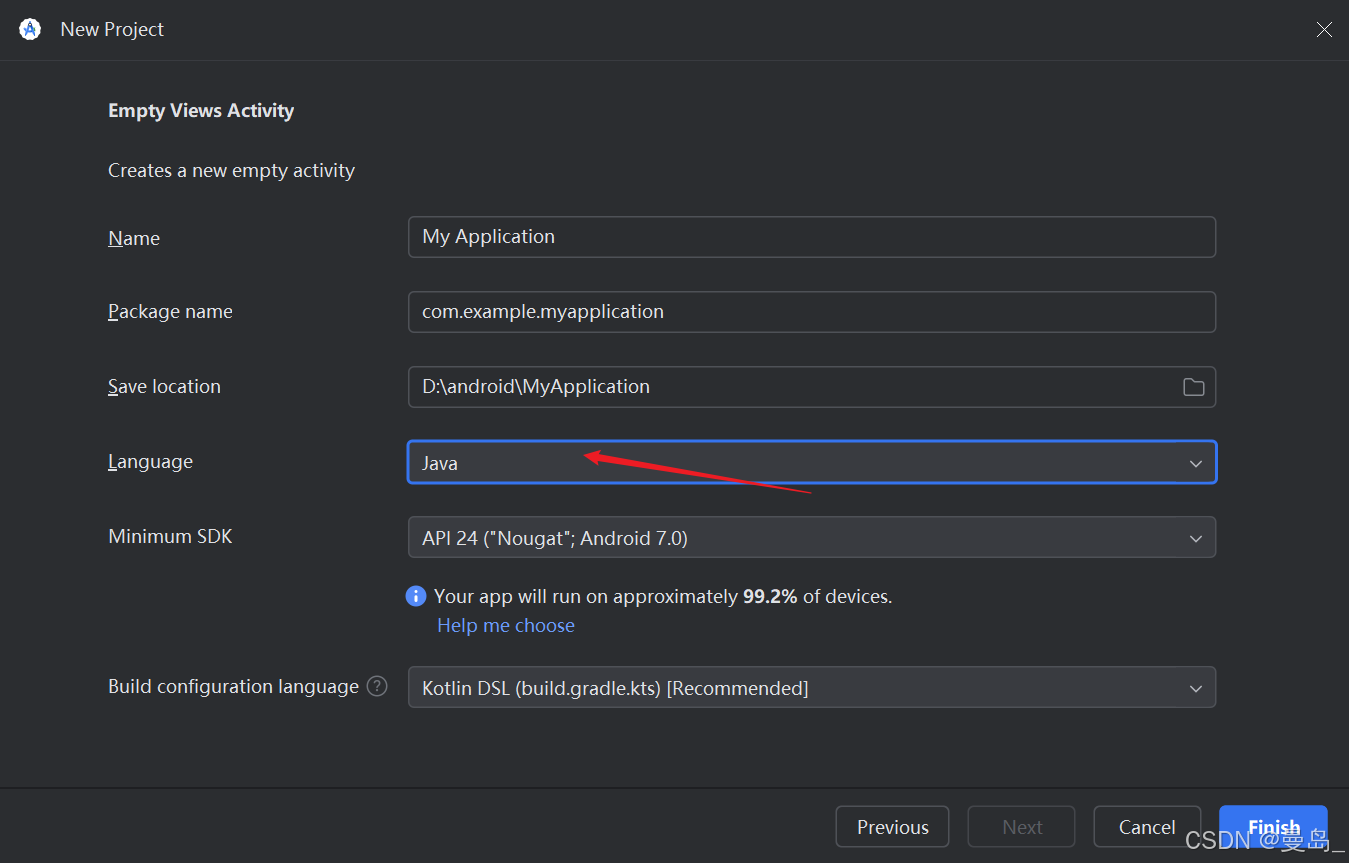
谷歌已经将Kotlin视为Android开发的首选语言 ,此次演示选择Java 语言
2.2 编写登录界面
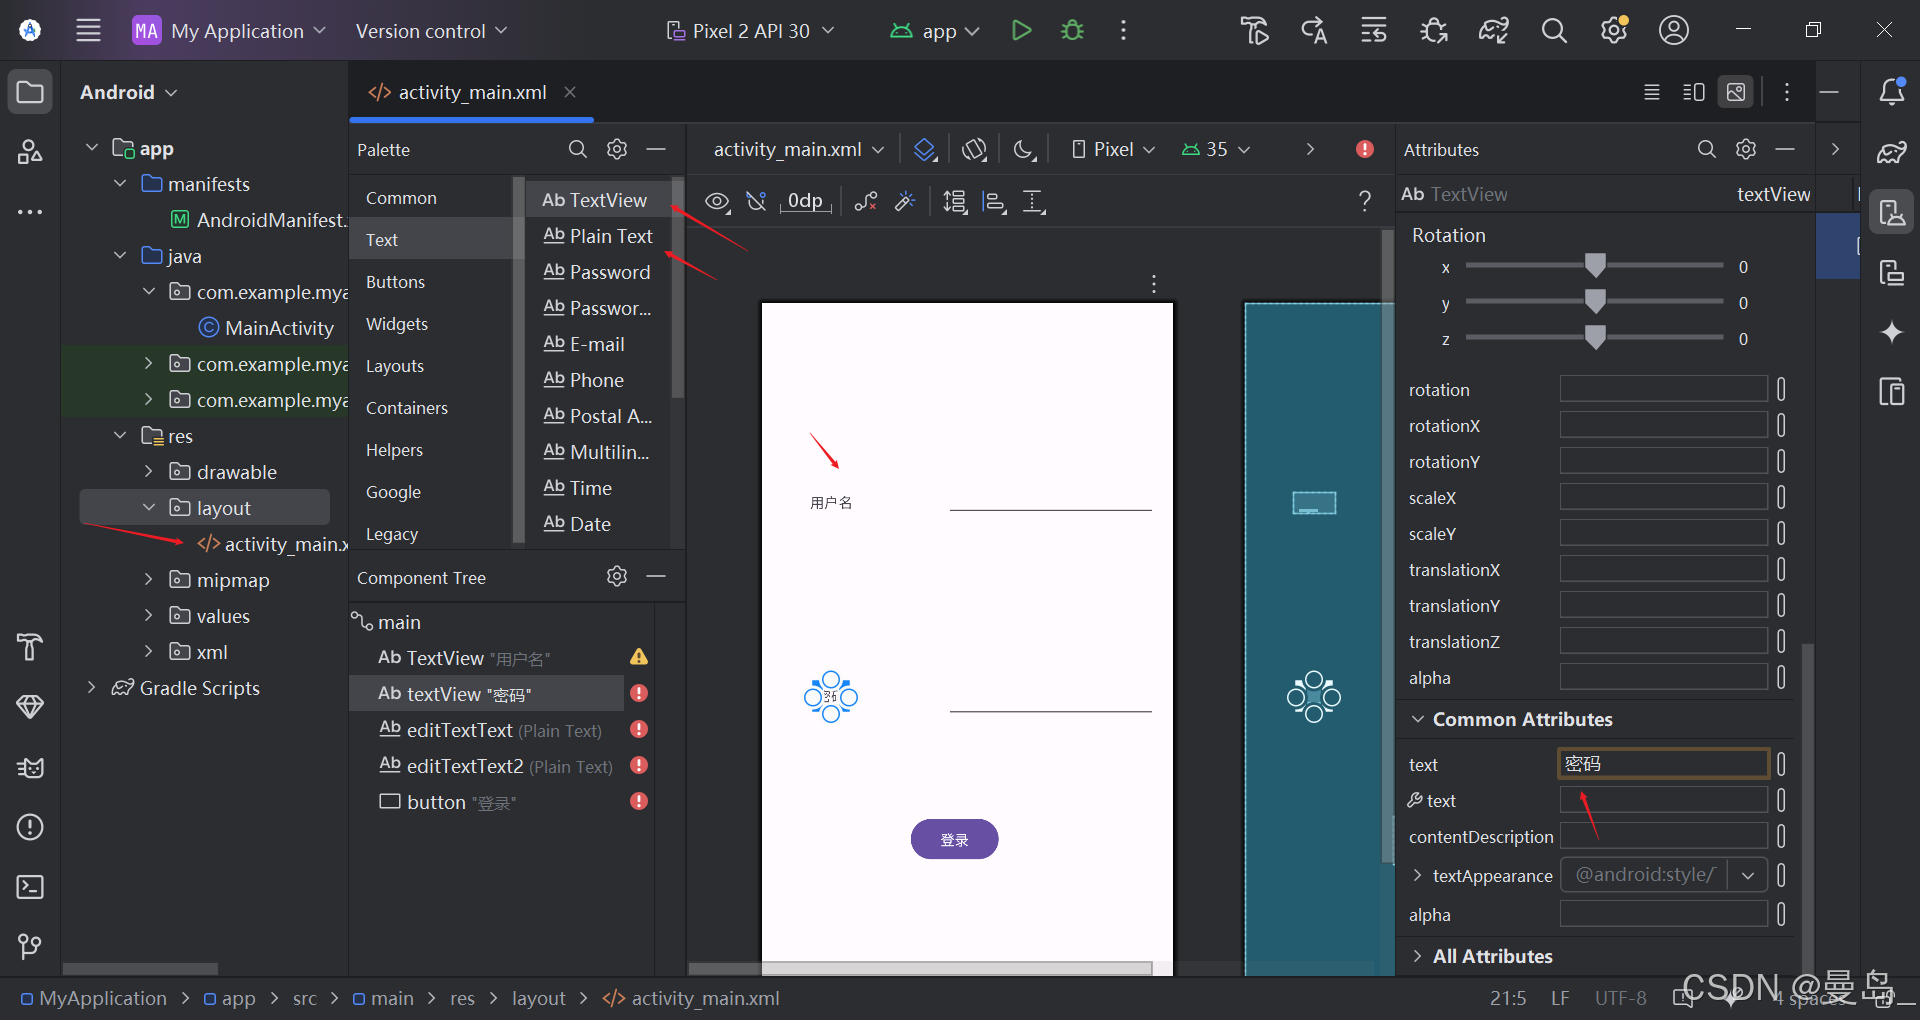
打开activity_main.xml
设置登录界面 拖拉了两个Textview,两个Plain Test和一个Button控件
美化后activity_main.xml登录界面(可以不使用):
xml
<?xml version="1.0" encoding="utf-8"?>
<androidx.constraintlayout.widget.ConstraintLayout xmlns:android="http://schemas.android.com/apk/res/android"
    xmlns:app="http://schemas.android.com/apk/res-auto"
    xmlns:tools="http://schemas.android.com/tools"
    android:id="@+id/main"
    android:layout_width="match_parent"
    android:layout_height="match_parent"
    android:background="#F5F7FA"
    tools:context=".MainActivity">

    <!-- 顶部装饰条 -->
    <View
        android:id="@+id/topBar"
        android:layout_width="0dp"
        android:layout_height="120dp"
        android:background="@color/colorPrimary"
        app:layout_constraintEnd_toEndOf="parent"
        app:layout_constraintStart_toStartOf="parent"
        app:layout_constraintTop_toTopOf="parent" />

    <TextView
        android:id="@+id/title"
        android:layout_width="wrap_content"
        android:layout_height="wrap_content"
        android:text="欢迎登录"
        android:textColor="#FFFFFF"
        android:textSize="28sp"
        android:textStyle="bold"
        app:layout_constraintBottom_toBottomOf="@+id/topBar"
        app:layout_constraintEnd_toEndOf="@+id/topBar"
        app:layout_constraintStart_toStartOf="@+id/topBar"
        app:layout_constraintTop_toTopOf="@+id/topBar" />

    <!-- 卡片容器 -->
    <androidx.cardview.widget.CardView
        android:layout_width="match_parent"
        android:layout_height="wrap_content"
        android:layout_margin="32dp"
        app:cardCornerRadius="16dp"
        app:cardElevation="8dp"
        app:layout_constraintBottom_toBottomOf="parent"
        app:layout_constraintEnd_toEndOf="parent"
        app:layout_constraintStart_toStartOf="parent"
        app:layout_constraintTop_toTopOf="parent">

        <LinearLayout
            android:layout_width="match_parent"
            android:layout_height="wrap_content"
            android:orientation="vertical"
            android:padding="24dp">

            <!-- 用户名行:固定标签宽度,输入框自适应 -->
            <LinearLayout
                android:layout_width="match_parent"
                android:layout_height="wrap_content"
                android:orientation="horizontal"
                android:gravity="center_vertical">

                <TextView
                    android:layout_width="60dp"
                android:layout_height="wrap_content"
                android:text="用户名"
                android:textColor="#333333"
                android:textSize="16sp"
                android:textStyle="bold" />

                <EditText
                    android:id="@+id/etUsername"
                    android:layout_width="0dp"
                    android:layout_height="wrap_content"
                    android:layout_weight="1"
                    android:background="@drawable/edittext_bg"
                    android:hint="请输入用户名"
                    android:padding="12dp"
                    android:inputType="text"
                    android:textSize="15sp"
                    android:layout_marginStart="12dp" />
            </LinearLayout>

            <!-- 密码行:同样固定标签宽度,输入框宽度一致 -->
            <LinearLayout
                android:layout_width="match_parent"
                android:layout_height="wrap_content"
                android:orientation="horizontal"
                android:gravity="center_vertical"
                android:layout_marginTop="20dp">

                <TextView
                    android:layout_width="60dp"
                android:layout_height="wrap_content"
                android:text="密码"
                android:textColor="#333333"
                android:textSize="16sp"
                android:textStyle="bold" />

                <EditText
                    android:id="@+id/etPassword"
                    android:layout_width="0dp"
                    android:layout_height="wrap_content"
                    android:layout_weight="1"
                    android:background="@drawable/edittext_bg"
                    android:hint="请输入密码"
                    android:padding="12dp"
                    android:inputType="textPassword"
                    android:textSize="15sp"
                    android:layout_marginStart="12dp" />
            </LinearLayout>

            <!-- 登录按钮 -->
            <Button
                android:id="@+id/btnLogin"
                android:layout_width="match_parent"
                android:layout_height="54dp"
                android:layout_marginTop="32dp"
                android:background="@drawable/button_bg"
                android:text="登 录"
                android:textColor="#FFFFFF"
                android:textSize="18sp"
                android:textStyle="bold" />

        </LinearLayout>

    </androidx.cardview.widget.CardView>

</androidx.constraintlayout.widget.ConstraintLayout>
同时在res/drawable下增加button_bg.xml和edittext_bg.xml ,res/values下修改colors.xml
button_bg.xml
xml
<?xml version="1.0" encoding="utf-8"?>
<shape xmlns:android="http://schemas.android.com/apk/res/android">
    <solid android:color="#FFFFFF" />
    <corners android:radius="12dp" />
    <stroke android:width="1dp" android:color="#DDDDDD" />
</shape>
edittext_bg.xml
xml
<?xml version="1.0" encoding="utf-8"?>
<selector xmlns:android="http://schemas.android.com/apk/res/android">
    <item android:state_pressed="true">
        <shape>
            <solid android:color="#0066CC" />
            <corners android:radius="27dp" />
        </shape>
    </item>
    <item>
        <shape>
            <solid android:color="#2196F3" />
            <corners android:radius="27dp" />
        </shape>
    </item>
</selector>
colors.xml
xml
<?xml version="1.0" encoding="utf-8"?>
<resources>
    <color name="purple_200">#FFBB86FC</color>
    <color name="purple_500">#FF6200EE</color>
    <color name="purple_700">#FF3700B3</color>
    <color name="teal_200">#FF03DAC5</color>
    <color name="teal_700">#FF018786</color>
    <color name="black">#FF000000</color>
    <color name="white">#FFFFFFFF</color>
    <color name="colorPrimary">#2196F3</color>
</resources>
2.3 编写java代码
打开MainActivity.java
编写MainActivity.java代码
java
package com.example.myapplication;

import android.os.Bundle;
import android.view.View;
import android.widget.Button;
import android.widget.EditText;
import android.widget.Toast;
import androidx.activity.EdgeToEdge;
import androidx.appcompat.app.AppCompatActivity;
import androidx.core.graphics.Insets;
import androidx.core.view.ViewCompat;
import androidx.core.view.WindowInsetsCompat;

public class MainActivity extends AppCompatActivity {

    private EditText etUsername;
    private EditText etPassword;
    private Button btnLogin;

    @Override
    protected void onCreate(Bundle savedInstanceState) {
        super.onCreate(savedInstanceState);
        EdgeToEdge.enable(this);
        setContentView(R.layout.activity_main);

        // 处理状态栏沉浸(保持原样)
        ViewCompat.setOnApplyWindowInsetsListener(findViewById(R.id.main), (v, insets) -> {
            Insets systemBars = insets.getInsets(WindowInsetsCompat.Type.systemBars());
            v.setPadding(systemBars.left, systemBars.top, systemBars.right, systemBars.bottom);
            return insets;
        });

        // 1. 初始化控件(确保 id 与 XML 完全一致)
        try {
            etUsername = findViewById(R.id.etUsername);
            etPassword = findViewById(R.id.etPassword);
            btnLogin = findViewById(R.id.btnLogin);

            // 调试:如果控件为空,会在 Logcat 中打印错误
            if (etUsername == null || etPassword == null || btnLogin == null) {
                Toast.makeText(this, "控件初始化失败,请检查 XML 中的 id", Toast.LENGTH_LONG).show();
                return;
            }
        } catch (Exception e) {
            e.printStackTrace();
            Toast.makeText(this, "初始化出错:" + e.getMessage(), Toast.LENGTH_LONG).show();
            return;
        }

        // 2. 设置登录按钮点击事件
        btnLogin.setOnClickListener(new View.OnClickListener() {
            @Override
            public void onClick(View v) {
                // 获取输入内容
                String username = etUsername.getText().toString().trim();
                String password = etPassword.getText().toString().trim();

                // 简单的验证逻辑
                if (username.isEmpty()) {
                    Toast.makeText(MainActivity.this, "请输入用户名", Toast.LENGTH_SHORT).show();
                } else if (password.isEmpty()) {
                    Toast.makeText(MainActivity.this, "请输入密码", Toast.LENGTH_SHORT).show();
                } else if (username.equals("admin") && password.equals("123456")) {
                    Toast.makeText(MainActivity.this, "登录成功!", Toast.LENGTH_SHORT).show();
                    // 可以在这里添加跳转逻辑
                } else {
                    // 这里就是你说的"用户名或密码错误"
                    Toast.makeText(MainActivity.this, "用户名或密码错误", Toast.LENGTH_SHORT).show();
                }
            }
        });
    }
}
三.打包
3.1 调试版APK打包
-
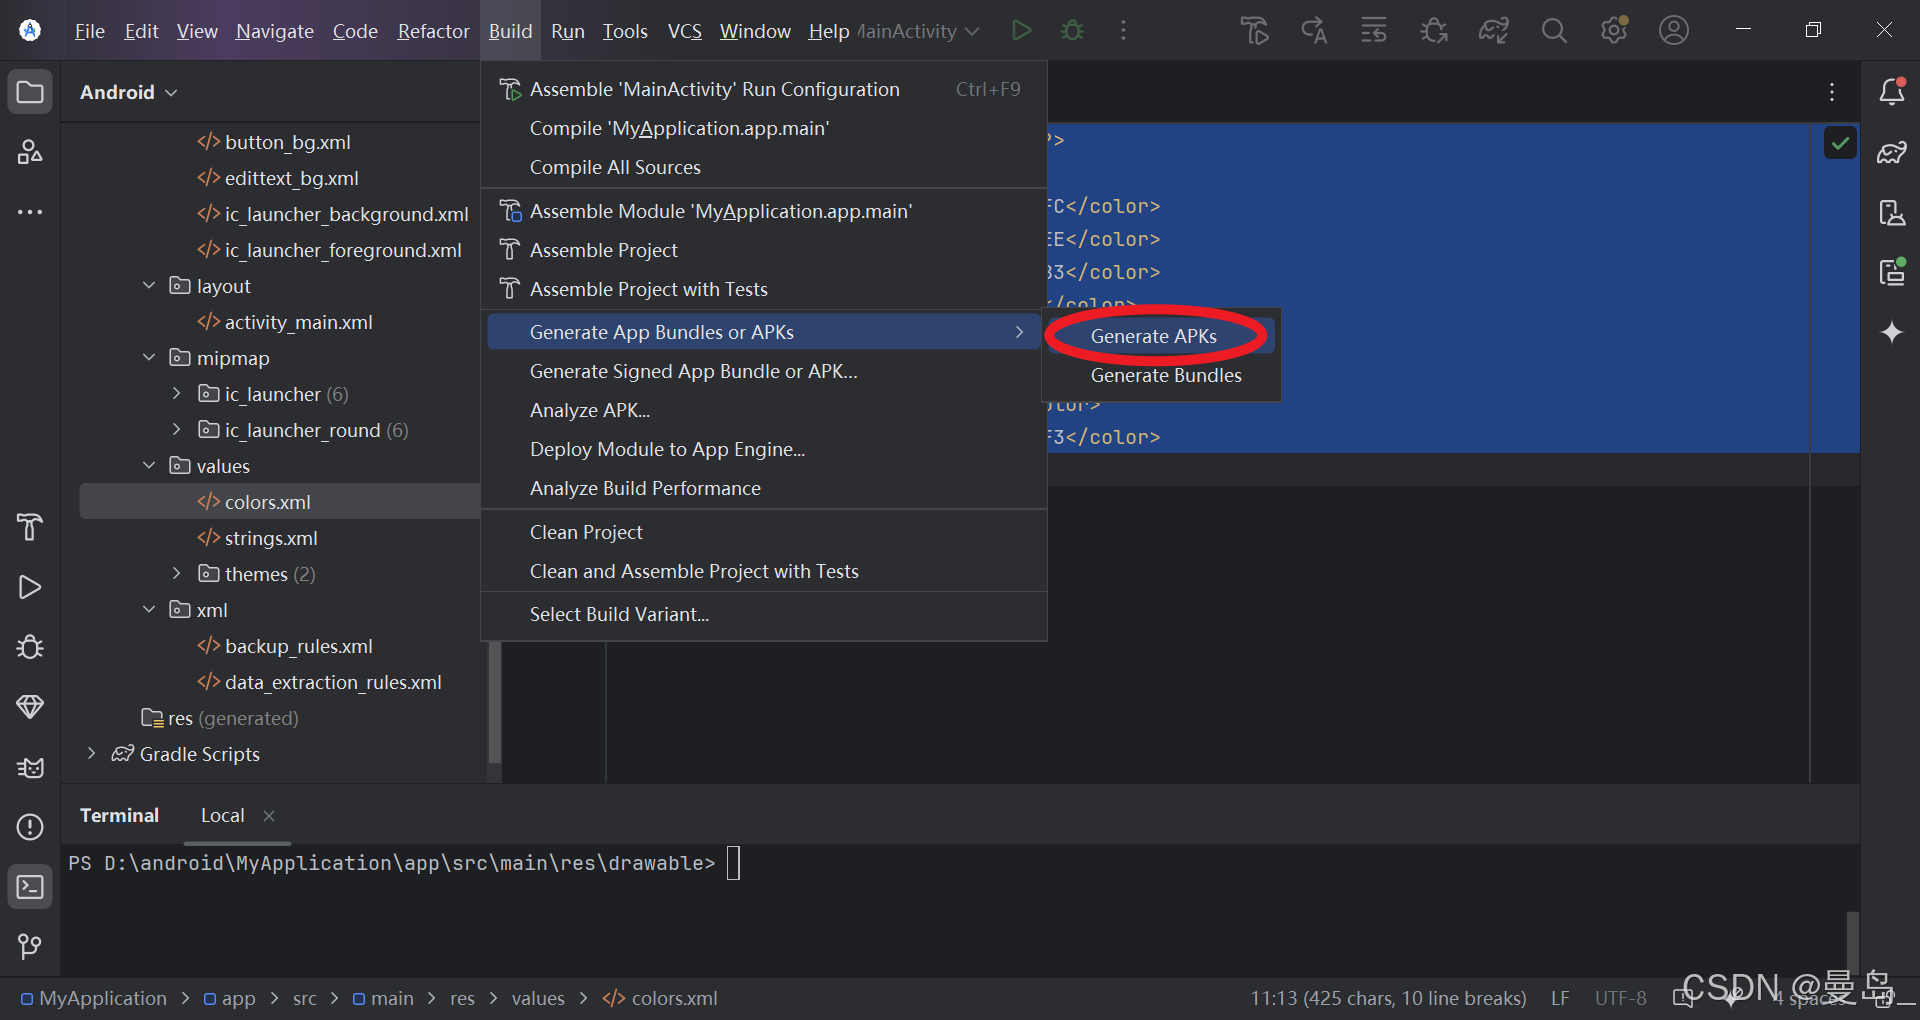
点击菜单栏 Build → Generate App Bundles or APKs → Generate APKs
-
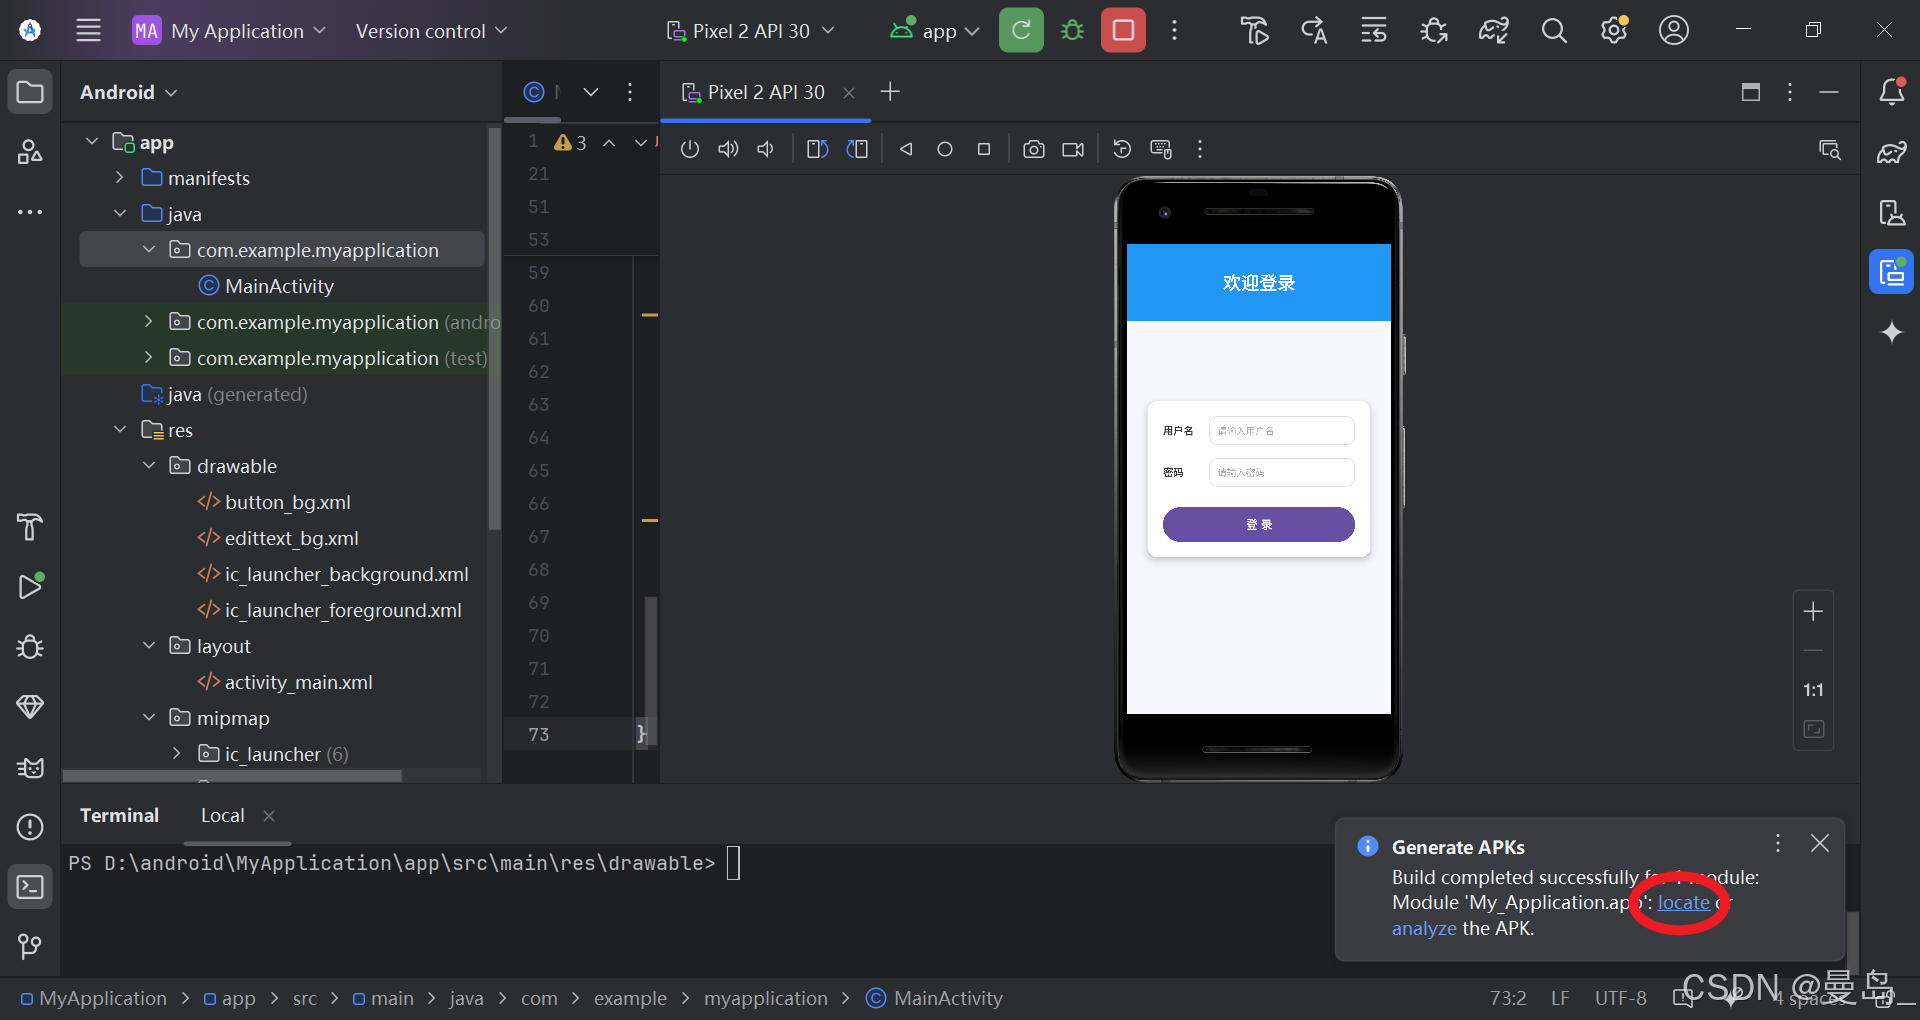
等待底部状态栏出现成功提示,并显示 APK 文件路径
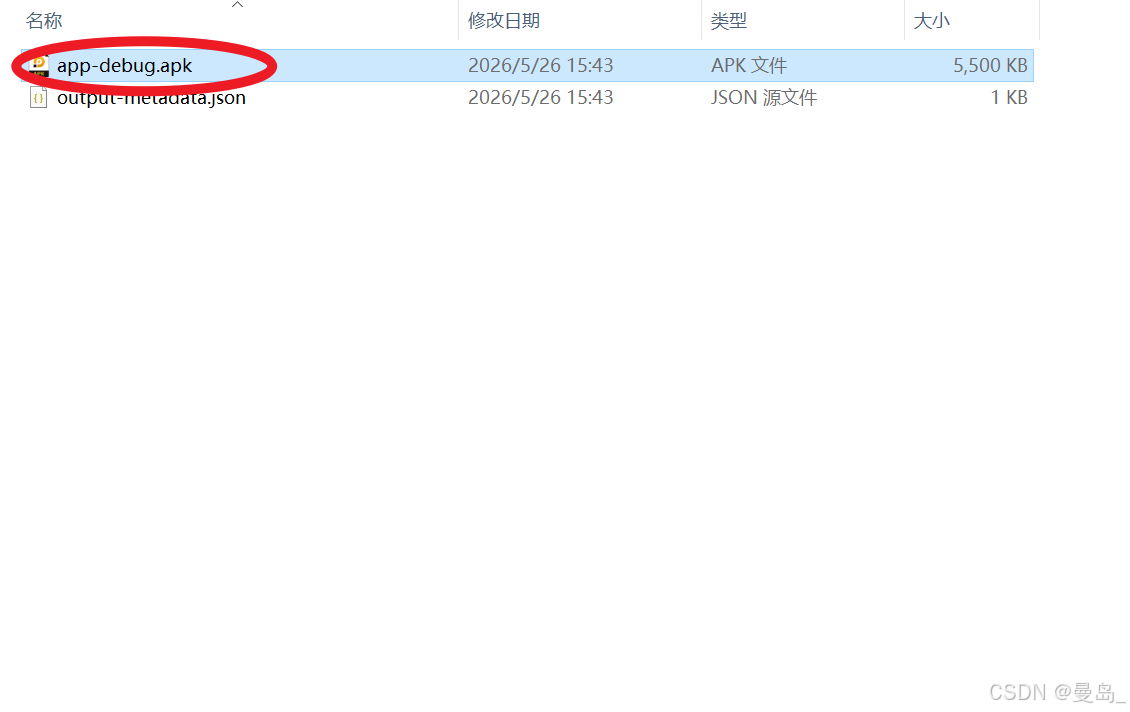
3.点击 locate 直接打开文件夹
3.1 正式签名版APK
如果需要发给别人用,或者要上架应用商店,必须签名。
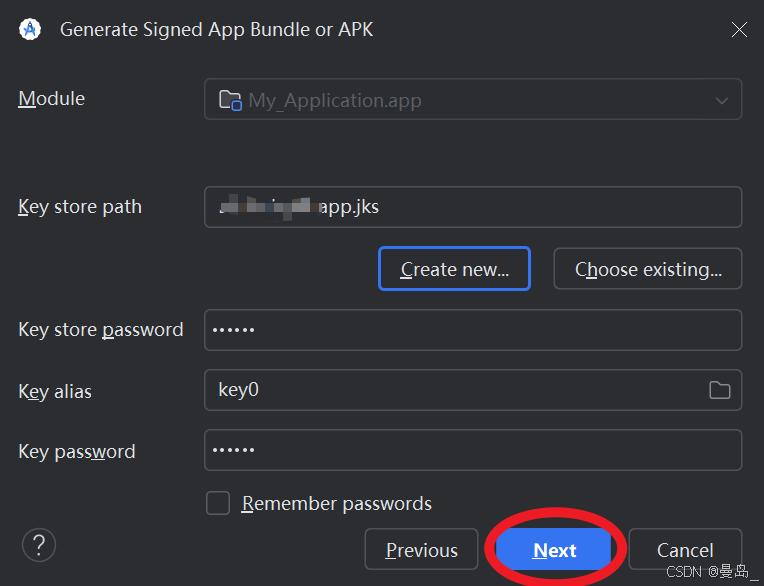
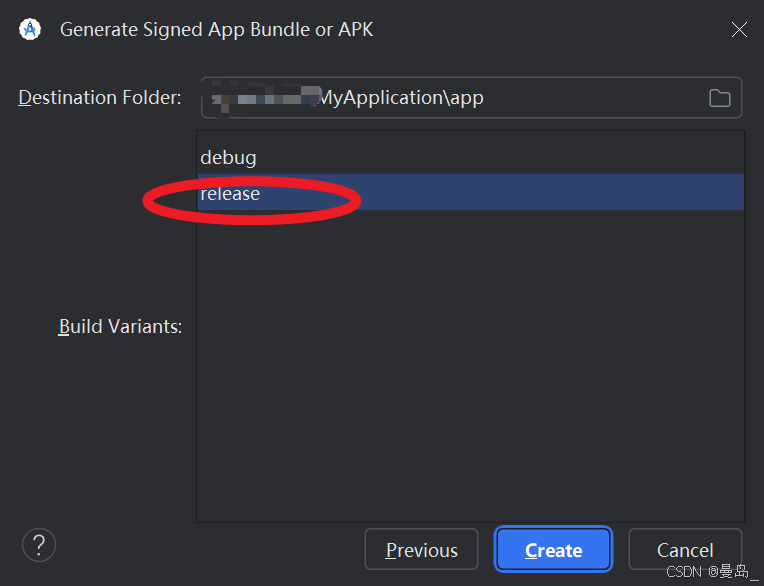
- 点击菜单栏 Build → Generate Signed App Bundle or APK → 选择 APK
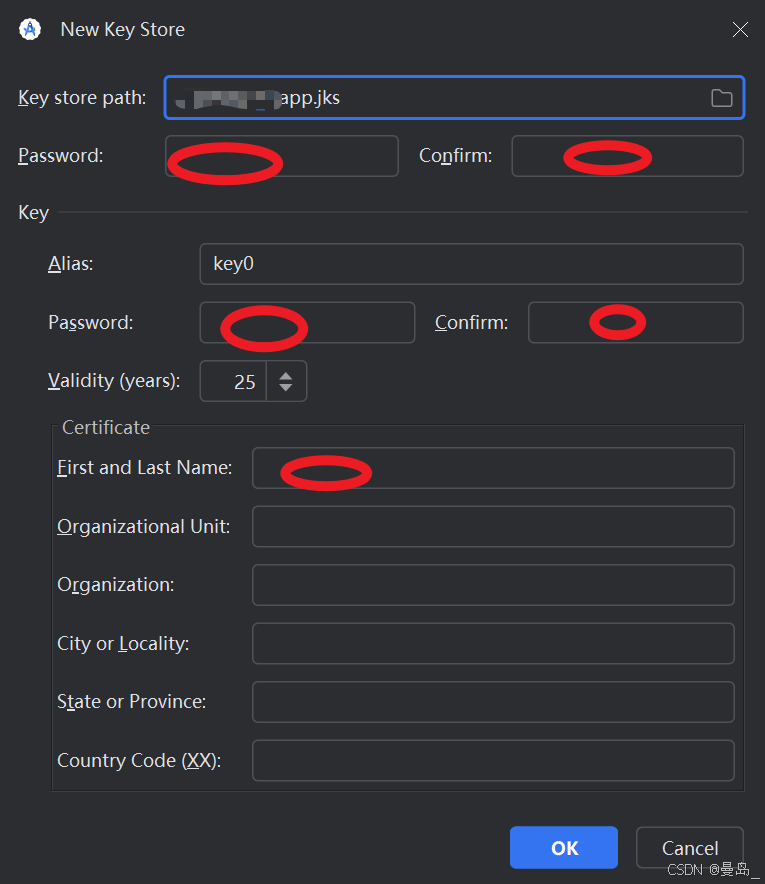
- 点击 Create new 创建签名密钥(只需创建一次)
- Key store path:点击文件夹图标,选择保存位置(如
D:/mykey.jks) - Password:输入密码(记住它)
- Alias:别名(如
mykey) - 其他随便填,至少填一个 Name
- Key store path:点击文件夹图标,选择保存位置(如
- 等待构建完成,点击 locate 打开文件夹
APK 位置 :
项目根目录/app/release/app-release.apk
3.2 正式版安装
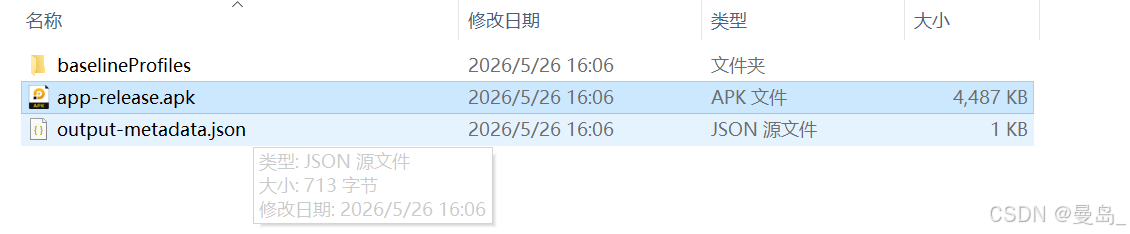
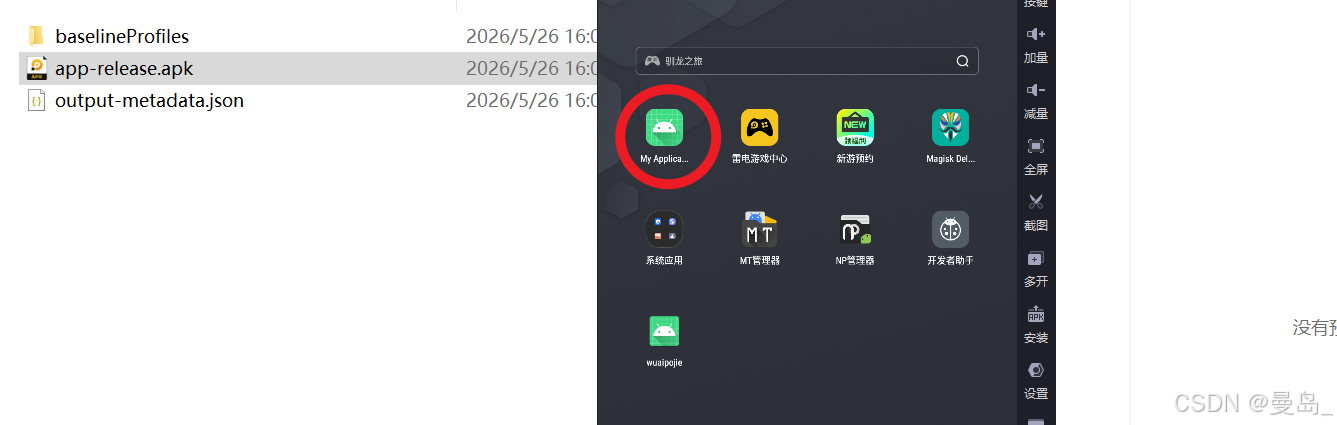
模拟器中安装打包好的签名版APK
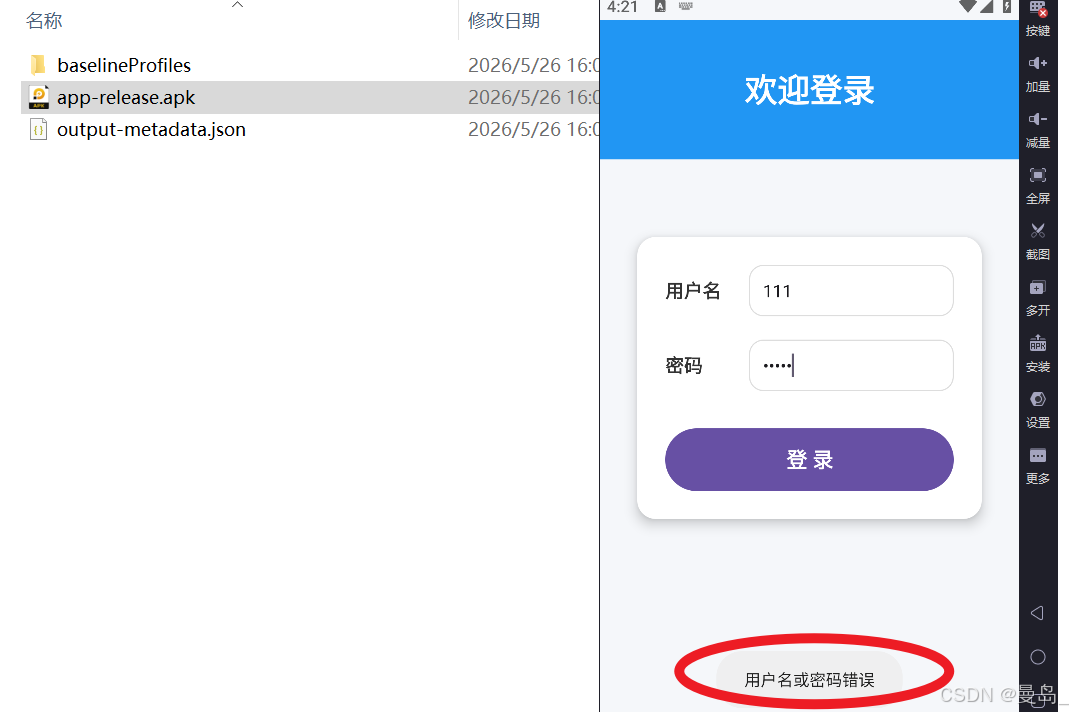
总结
此次演示从项目创建到打包以及安装都做了简单描述,有了这些基础逆向时才会如鱼得水。