基础概念
1. IdentityServer4核心概念解析
IdentityServer4 是基于 .NET Core 构建的开源身份认证与授权中间件,它实现了 OAuth2 和 OpenID Connect(OIDC)协议,用于统一管理多个应用程序之间的身份验证与访问控制。其核心组件包括认证服务、客户端、资源服务器和令牌服务。认证服务负责用户身份验证并颁发令牌,客户端通过授权流程请求访问权限,资源服务器则根据令牌验证访问合法性。
通过 IdentityServer4,开发者可以构建统一的身份中心,实现单点登录(SSO)和跨域授权访问。其灵活性支持多种授权模式,适应 Web、移动端和 API 服务等多场景需求。IdentityServer4 的核心协议:OAuth2 和 OpenID Connect。
2. OAuth2与OpenID Connect协议基础
在现代分布式系统和微服务架构 中,认证与授权机制是保障系统安全性的核心。OAuth2 和 OpenID Connect(OIDC)作为当前最主流的身份认证与授权协议标准,广泛应用于Web、移动、API等多类场景中。本章将深入解析OAuth2的核心概念与OpenID Connect的扩展机制,并结合IdentityServer4的实际应用,帮助读者掌握协议的基本流程、实现方式及常见问题的解决策略。
2.1 OAuth2协议的核心概念
OAuth2 是一个开放标准,允许用户授权第三方应用访问其在某一服务上的资源,而无需共享其凭证。OAuth2的核心是"授权",而非"认证",其重点在于资源的访问控制。在实际开发中,理解OAuth2的不同授权模式、客户端类型以及流程差异,是构建安全系统的第一步。
2.1.1 授权模式与流程概述
OAuth2协议定义了四种主要的授权模式(Grant Types),每种模式适用于不同的客户端类型和使用场景:
|---------|-----------------|-------|
| 授权模式 | 适用场景 | 安全性级别 |
| 授权码模式 | Web应用、后端服务 | 高 |
| 隐式模式 | 单页应用(SPA)、移动应用 | 中 |
| 客户端凭证模式 | 服务到服务的调用,无用户上下文 | 中 |
| 密码模式 | 可信客户端,如内部系统 | 低 |
以 授权码模式 为例,其完整流程如下:
sequenceDiagram
    用户->>客户端: 发起登录请求
    客户端->>授权服务器: 请求授权码(GET /authorize)
    授权服务器->>用户: 显示登录页面并请求授权
    用户->>授权服务器: 输入凭证并同意授权
    授权服务器->>客户端: 返回授权码(code)
    客户端->>授权服务器: 使用授权码换取Token(POST /token)
    授权服务器->>客户端: 返回Access Token
    客户端->>资源服务器: 携带Token访问资源
    资源服务器->>客户端: 返回受保护资源
该流程通过两次请求完成授权码的获取和令牌的交换,增强了安全性。其中, /authorize 和 /token 是OAuth2的关键端点。
快速使用
一般来说,有一个专门的身份认证服务器,多个应用
1、构建IdentityServer4项目
有两种方法,一种是通过模板创建,另一种是创建一个空项目,然后引用IdentityServer4依赖
Duende.IdentityServer,我选择使用第二种
1、创建空白的web api项目
2、引入 Duende.IdentityServer依赖
3、添加Config文件
cs
using Duende.IdentityServer.Models;

namespace ids4Server.config
{
    public static class Config
    {
        // 1. 定义受保护的API资源
        public static IEnumerable<ApiScope> ApiScopes =>
           new List<ApiScope>
           {
                new ApiScope{
                    Name = "api1",
                    DisplayName = "My API"
                }
           };

        // 2. 定义客户端(允许谁来请求Token)
        public static IEnumerable<Client> Clients =>
            new List<Client>
            {
                new Client
                {
                    // 客户端唯一标识
                    ClientId = "ids4.client",
                    // 客户端密钥(加密)
                    ClientSecrets = { new Secret("mysecret".Sha256()) },
                    // 授权模式:ClientCredentials(客户端凭证模式,适用于服务间调用)
                    AllowedGrantTypes = GrantTypes.ClientCredentials,
                    // 允许访问的作用域
                    AllowedScopes = { "api1" },
                     // Duende 需要显式允许明文密码传输
                    RequireClientSecret = true
                }
            };
    }
}
4、注册服务
添加代码
cs
        builder.Services.AddOpenApi();

        builder.Services.AddIdentityServer() //添加IdentityServer
            .AddInMemoryApiScopes(Config.ApiScopes) //添加ApiScope
            .AddInMemoryClients(Config.Clients) //添加客户端
            .AddDeveloperSigningCredential();//自动生成密钥
cs
app.UseIdentityServer();//添加IdentityServer完整代码如下:
cs
using ids4Server.config;

namespace ids4Server
{
    public class Program
    {
        public static void Main(string[] args)
        {
            var builder = WebApplication.CreateBuilder(args);

            // Add services to the container.

            builder.Services.AddControllers();
            // Learn more about configuring OpenAPI at https://aka.ms/aspnet/openapi
            builder.Services.AddOpenApi();

            builder.Services.AddIdentityServer() //添加IdentityServer
                .AddInMemoryApiScopes(Config.ApiScopes) //添加ApiScope
                .AddInMemoryClients(Config.Clients) //添加客户端
                .AddDeveloperSigningCredential();//自动生成密钥


            var app = builder.Build();

            // Configure the HTTP request pipeline.
            if (app.Environment.IsDevelopment())
            {
                app.MapOpenApi();
            }

            app.UseHttpsRedirection();

            app.UseAuthorization();

            app.UseIdentityServer();//添加IdentityServer

            app.MapControllers();

            app.Run();
        }
    }
}
5、测试是否有效
运行项目,会自动生成文件
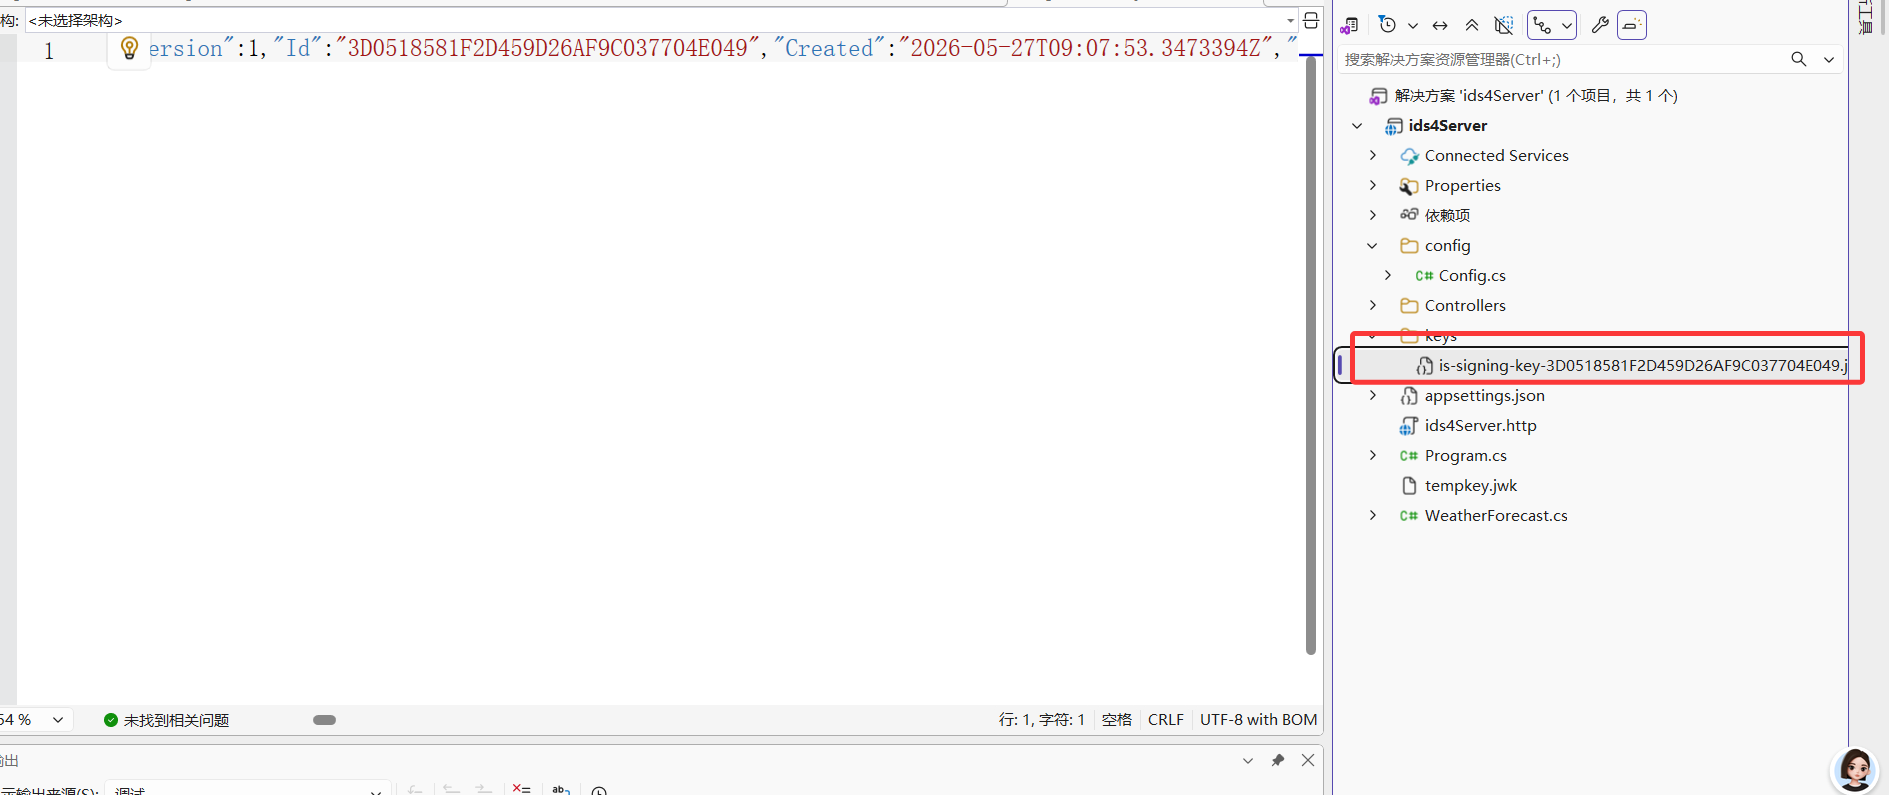
因为我们配置了.AddDeveloperSigningCredential();//自动生成密钥
通过
http://localhost:5096/.well-known/openid-configuration
获取到相应的信息
{
    "issuer": "https://localhost:7195",
    "jwks_uri": "https://localhost:7195/.well-known/openid-configuration/jwks",
    "authorization_endpoint": "https://localhost:7195/connect/authorize",
    "token_endpoint": "https://localhost:7195/connect/token",
    "userinfo_endpoint": "https://localhost:7195/connect/userinfo",
    "end_session_endpoint": "https://localhost:7195/connect/endsession",
    "check_session_iframe": "https://localhost:7195/connect/checksession",
    "revocation_endpoint": "https://localhost:7195/connect/revocation",
    "introspection_endpoint": "https://localhost:7195/connect/introspect",
    "device_authorization_endpoint": "https://localhost:7195/connect/deviceauthorization",
    "backchannel_authentication_endpoint": "https://localhost:7195/connect/ciba",
    "pushed_authorization_request_endpoint": "https://localhost:7195/connect/par",
    "require_pushed_authorization_requests": false,
    "frontchannel_logout_supported": true,
    "frontchannel_logout_session_supported": true,
    "backchannel_logout_supported": true,
    "backchannel_logout_session_supported": true,
    "scopes_supported": [
        "api1",
        "offline_access"
    ],
    "claims_supported": [],
    "grant_types_supported": [
        "authorization_code",
        "client_credentials",
        "refresh_token",
        "implicit",
        "urn:ietf:params:oauth:grant-type:device_code",
        "urn:openid:params:grant-type:ciba"
    ],
    "response_types_supported": [
        "code",
        "token",
        "id_token",
        "id_token token",
        "code id_token",
        "code token",
        "code id_token token"
    ],
    "response_modes_supported": [
        "form_post",
        "query",
        "fragment"
    ],
    "token_endpoint_auth_methods_supported": [
        "client_secret_basic",
        "client_secret_post"
    ],
    "revocation_endpoint_auth_methods_supported": [
        "client_secret_basic",
        "client_secret_post"
    ],
    "introspection_endpoint_auth_methods_supported": [
        "client_secret_basic",
        "client_secret_post"
    ],
    "id_token_signing_alg_values_supported": [
        "RS256"
    ],
    "userinfo_signing_alg_values_supported": [
        "RS256"
    ],
    "introspection_signing_alg_values_supported": [
        "RS256"
    ],
    "subject_types_supported": [
        "public"
    ],
    "code_challenge_methods_supported": [
        "plain",
        "S256"
    ],
    "request_parameter_supported": true,
    "request_object_signing_alg_values_supported": [
        "RS256",
        "RS384",
        "RS512",
        "PS256",
        "PS384",
        "PS512",
        "ES256",
        "ES384",
        "ES512"
    ],
    "prompt_values_supported": [
        "none",
        "login",
        "consent",
        "select_account"
    ],
    "authorization_response_iss_parameter_supported": true,
    "backchannel_token_delivery_modes_supported": [
        "poll"
    ],
    "backchannel_user_code_parameter_supported": true,
    "backchannel_authentication_request_signing_alg_values_supported": [
        "RS256",
        "RS384",
        "RS512",
        "PS256",
        "PS384",
        "PS512",
        "ES256",
        "ES384",
        "ES512"
    ],
    "dpop_signing_alg_values_supported": [
        "RS256",
        "RS384",
        "RS512",
        "PS256",
        "PS384",
        "PS512",
        "ES256",
        "ES384",
        "ES512"
    ]
}
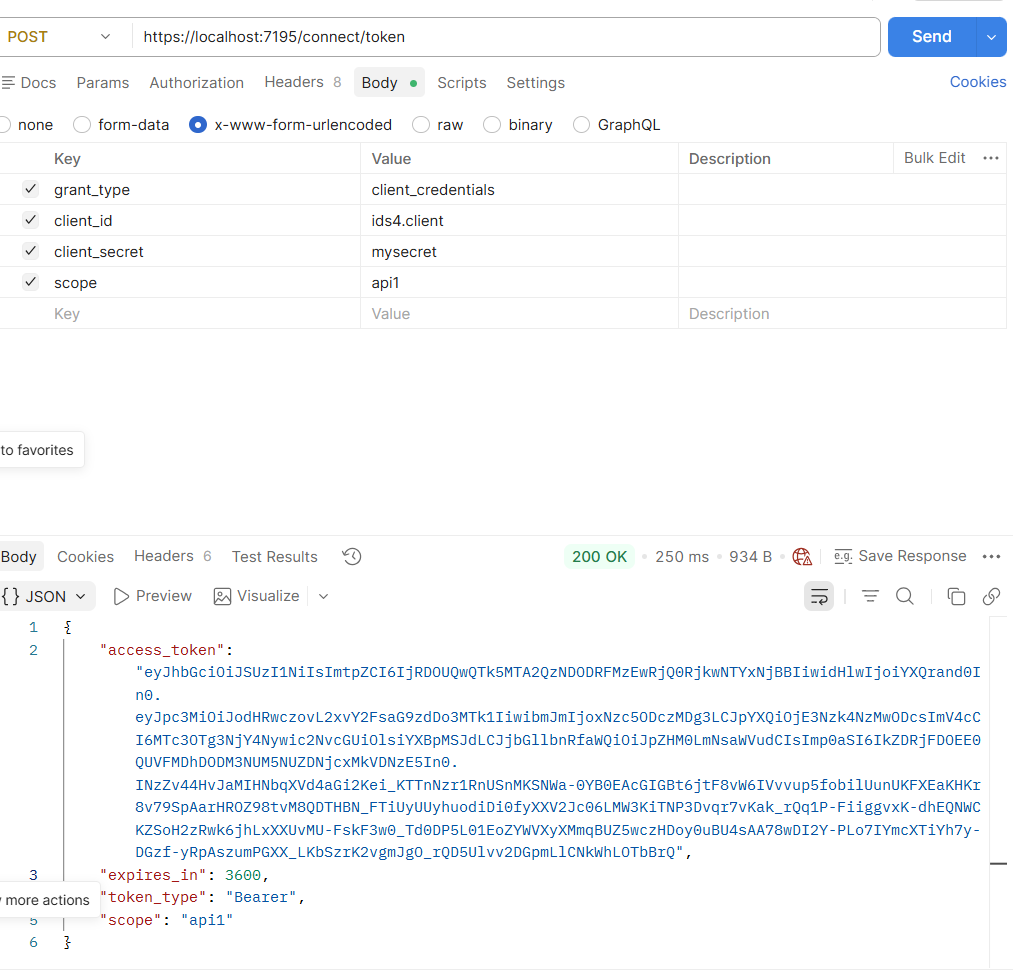
其中token_endpoint 是用来获取token令牌的
通过postman来进行测试
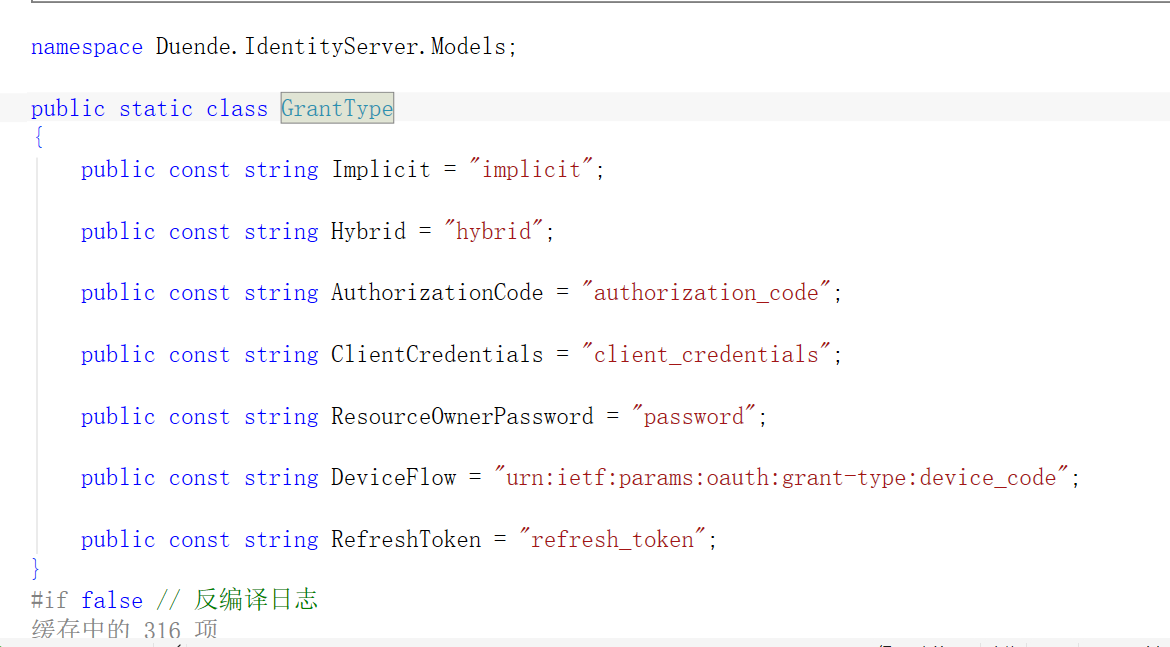
传参需要传这四个参数,因为我选择的是客户端模式,最简单的来做演示,grant_type可以反编译GrantType来查看有哪些
JWT
JWT(JSON Web Token)
一种基于 JSON 的开放标准(RFC 7519),用于在各方之间安全地传递信息。
特点 紧凑(Compact):可通过 URL、POST 参数或 HTTP 头传输
- 自包含(Self-contained):携带了用户的基本身份信息和声明(Claims)
- 可验证(Verifiable):签名保证数据未被篡改
典型场景:用户登录后,服务器颁发一个 JWT,客户端每次请求都携带它,无需再查数据库做 Session 验证。
JWT的结构
| 部分 | 用途 | 示例内容 |
|---|---|---|
| Header(头部) | 指定算法和类型 | {"alg":"HS256","typ":"JWT"} |
| Payload(负载) | 存放声明(Claims),如用户 ID、过期时间等 | {"sub":"1234567890","name":"Alice","exp":1600000000} |
| Signature(签名) | 保证前两部分不被篡改 | HMACSHA256(Base64Url(Header) + "." + Base64Url(Payload), Secret) |
Header 和 Payload 都要做 Base64Url 编码
JWT = Base64Url(Header) + "." + Base64Url(Payload) + "." + Base64Url(Signature)JWT Secret(密钥)介绍
作用
对称签名(HS256/HS384/HS512)中,Secret 用来签发 和验证 Token。
形式 & 长度
高强度随机字节,建议 ≥256 bits(32 bytes)
常见编码:
- URL-Safe Base64
9d6bXFMmZ3RV8Ytp9rz8QpKBuGV9zZ4T5vHSuJEjw8M - Hex
e75ab5c53266774557c62da7dacfc429281b8695f736784f9bc74ae24923c3c30
签名算法(alg)
| 算法名称 | 描述 |
|---|---|
| HS256 | HMAC + SHA-256,对称加密(Shared Secret) |
| HS384 | HMAC + SHA-384 |
| HS512 | HMAC + SHA-512 |
| RS256 | RSA + SHA-256,非对称加密(公钥/私钥对) |
| ES256 | ECDSA + SHA-256,椭圆曲线数字签名算法 |
小项目常用 HS256 ;高安全需求可选 RS256(私钥签发、公钥验签)。
JWT 的工作流程
-
用户登录(提供用户名/密码)
-
服务器验证成功后,签发 JWT
-
客户端保存(LocalStorage / Cookie)
-
后续请求携带 JWT
-
推荐:请求头
Authorization: Bearer <token> -
服务器 验证签名 & 检查声明(如是否过期、是否有权限)
-
验证通过,返回数据;否则
401 UnauthorizedsequenceDiagram
User->>Client: 输入用户名 & 密码
Client->>Server: POST /login
Server-->>Client: 返回 JWT(Header.Payload.Signature)
Client->>Server: GET /profile + Authorization: Bearer
Server-->>Client: 返回 200 OK + 用户信息
签名 & 验证(HS256 示例)
1. 签名生成
令
H = Base64Url(Header)
P = Base64Url(Payload)
Secret = 服务器持有的密钥
LaTeX 公式版:
2. 验证流程
-
拆分
Header.Payload.Signature -
重新计算
HMACSHA256(H+"."+P, Secret) -
对比结果:
-
相同:✅ 数据未被篡改
-
不同:❌ 拒绝访问
优缺点一览
| 优点 | 缺点 |
|---|---|
| 1. 无状态(Stateless),可水平扩展 | 1. 无法即时「撤销」已签发的 Token |
| 2. 携带信息自包含,无需多次查询数据库 | 2. Token 泄露风险大,需妥善存储 |
| 3. 支持跨域认证(适合微服务、移动端) | 3. Payload 明文可读,敏感信息请勿存放 |
客户端api和exe进行身份认证测试
1、api
新建一个net core web api项目,然后引入JWT的依赖(根据自己的net 版本):microsoft.aspnetcore.authentication.jwtbearer
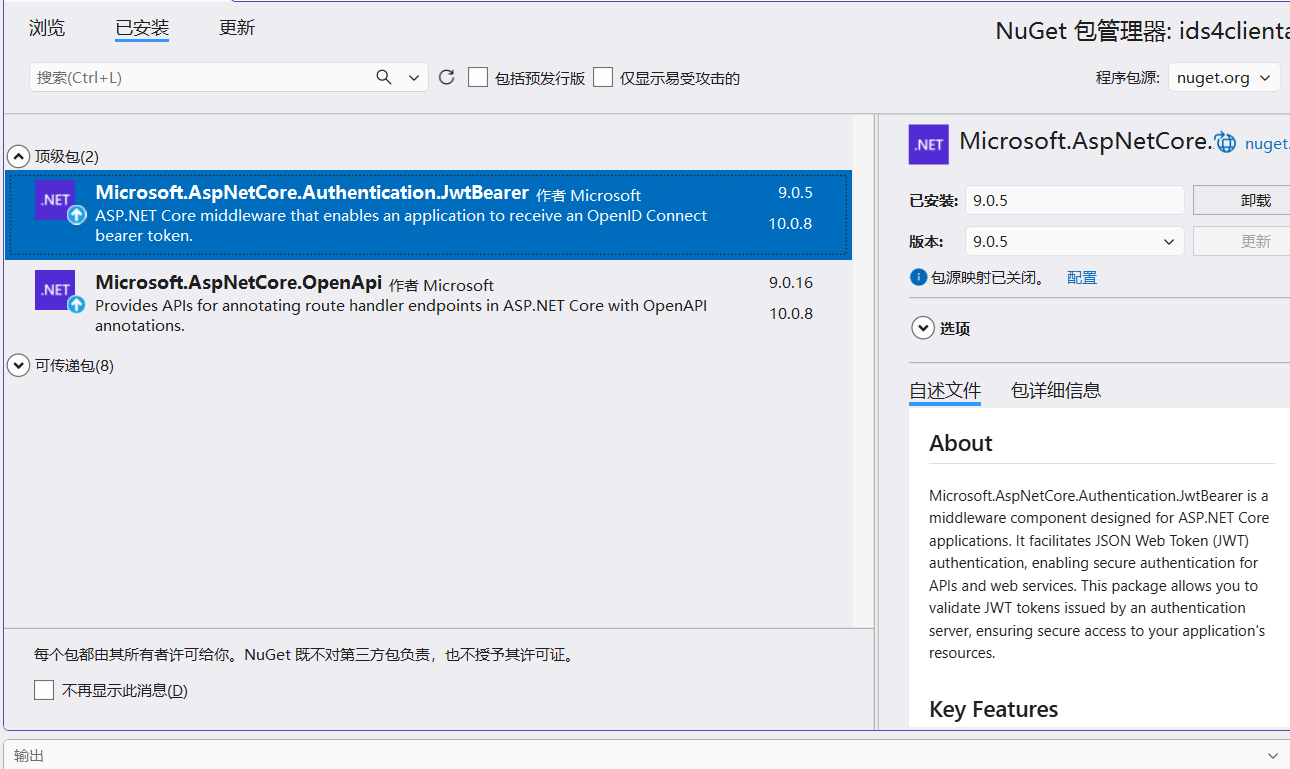
然后在Progam.cs中注册JWT
cs
 builder.Services.AddAuthentication("Bearer")
     .AddJwtBearer("Bearer", option =>
     {
         option.Authority = "https://localhost:7195";
         option.RequireHttpsMetadata = false;
         option.TokenValidationParameters = new Microsoft.IdentityModel.Tokens.TokenValidationParameters
         {
             ValidateAudience = false  // ids4Demo 未配置 Audience,关闭验证
         };

     });//添加认证
cs
          app.UseAuthentication();//添加认证
          app.UseAuthorization();//添加授权
完整代码:
cs
using Microsoft.Extensions.Options;

namespace ids4clientapi
{
    public class Program
    {
        public static void Main(string[] args)
        {
            var builder = WebApplication.CreateBuilder(args);

            // Add services to the container.

            builder.Services.AddControllers();
            // Learn more about configuring OpenAPI at https://aka.ms/aspnet/openapi
            builder.Services.AddOpenApi();

            builder.Services.AddAuthentication("Bearer")
                .AddJwtBearer("Bearer", option =>
                {
                    option.Authority = "https://localhost:7195";
                    option.RequireHttpsMetadata = false;
                    option.TokenValidationParameters = new Microsoft.IdentityModel.Tokens.TokenValidationParameters
                    {
                        ValidateAudience = false  // ids4Demo 未配置 Audience,关闭验证
                    };

                });//添加认证
            var app = builder.Build();

            // Configure the HTTP request pipeline.
            if (app.Environment.IsDevelopment())
            {
                app.MapOpenApi();
            }

            app.UseHttpsRedirection();
            app.UseAuthentication();//添加认证
            app.UseAuthorization();//添加授权


            app.MapControllers();

            app.Run();
        }
    }
}
地址记得改为你实际的认证服务器的地址
添加一个测试用的控制器
cs
using Microsoft.AspNetCore.Authorization;
using Microsoft.AspNetCore.Http;
using Microsoft.AspNetCore.Mvc;

namespace ids4clientapi.Controllers
{
    [Route("api/[controller]/[action]")]
    [ApiController]
    [Authorize]
    public class TestController : ControllerBase
    {
        [HttpGet]
        public  IActionResult Test()
        {
            return new JsonResult(from claim in User.Claims select new {claim.Type,claim.Value});
        }
    }
}
这样就能实现最简单的认证了