第 26 篇把单摄预览会话拆开:CameraInput 负责打开设备,PreviewOutput 负责画面,PhotoOutput 负责拍照,PhotoSession 负责把它们配置到同一个会话里。
学习目标
- 建立 CameraInput、PreviewOutput、PhotoOutput、PhotoSession 的层次关系。
- 理解单摄回退为什么是双摄项目必须有的稳定路径。
- 能读懂 beginConfig、addInput、addOutput、commitConfig、start 的顺序。
- 知道并发能力为空时如何从双摄逻辑回到单摄逻辑。
一、单摄不是备用按钮,而是稳定主链路
双镜记忆相机的最终目标是前后摄同时记录,但真实设备上并发能力不一定存在。训练营项目因此把单摄链路做成完整能力,而不是临时 fallback。只要有一个可用 CameraDevice,页面就能通过单摄预览、单摄拍照和图库保存继续工作。
这篇重点拆 ensureSinglePreview:它把设备输入、预览输出、拍照输出和会话配置串起来。理解这条链路后,再看双摄会话就只是多一组 input/output 和更严格的能力约束。
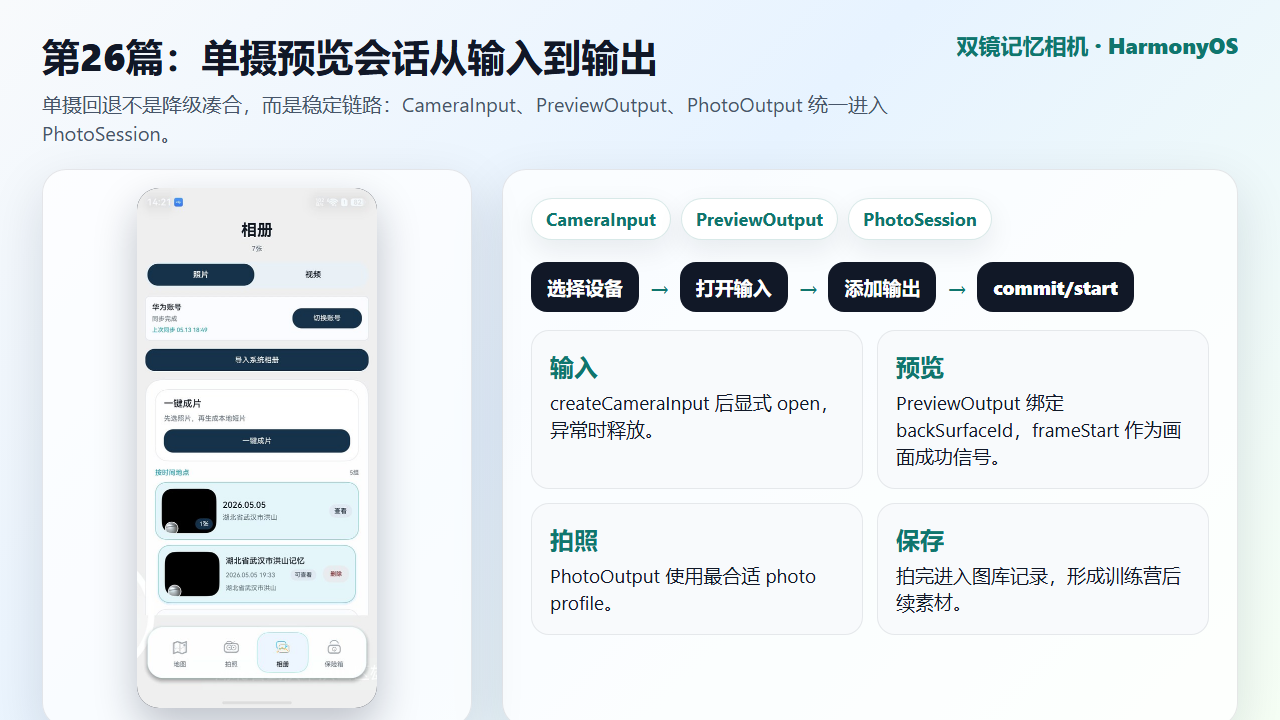
图 1 单摄预览与图库结果形成闭环
二、先看状态字段:每种资源都有自己的位置
Index.ets 里相机相关字段看起来很多,但它们按层次分得很清楚。CameraDevice 表示设备选择;CameraInput 表示已经打开的输入;PreviewOutput 表示预览输出;PhotoOutput 表示拍照输出;PhotoSession 表示已经配置并启动的会话。
把这些字段拆开保存,是为了释放时能逐层关闭,也是为了 UI 能知道当前是单摄 live、后摄 live,还是前后摄都没连上。不要把所有东西塞进一个 currentCamera 对象,否则失败和释放时很难判断谁已经创建、谁还没有。
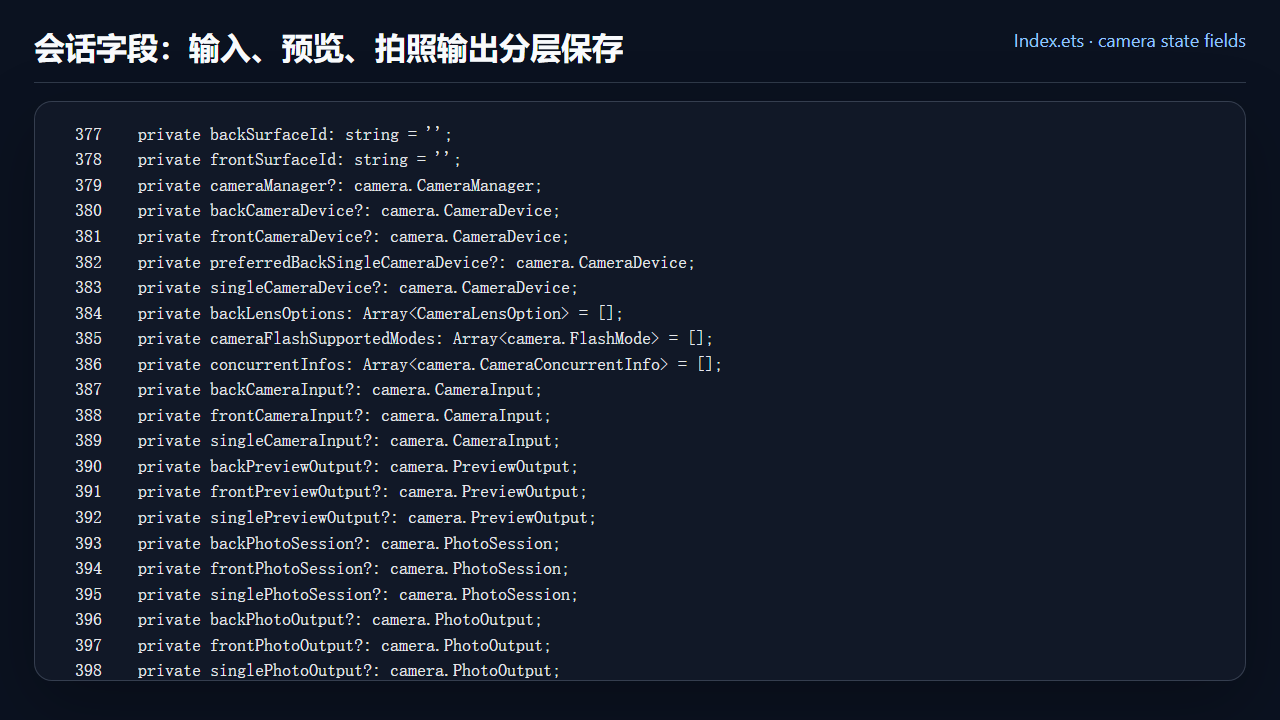
图 2 Index.ets 中按资源层次保存相机字段
ts
private backSurfaceId: string = '';
  private frontSurfaceId: string = '';
  private cameraManager?: camera.CameraManager;
  private backCameraDevice?: camera.CameraDevice;
  private frontCameraDevice?: camera.CameraDevice;
  private preferredBackSingleCameraDevice?: camera.CameraDevice;
  private singleCameraDevice?: camera.CameraDevice;
  private backLensOptions: Array<CameraLensOption> = [];
  private cameraFlashSupportedModes: Array<camera.FlashMode> = [];
  private concurrentInfos: Array<camera.CameraConcurrentInfo> = [];
  private backCameraInput?: camera.CameraInput;
  private frontCameraInput?: camera.CameraInput;
  private singleCameraInput?: camera.CameraInput;
  private backPreviewOutput?: camera.PreviewOutput;
  private frontPreviewOutput?: camera.PreviewOutput;
  private singlePreviewOutput?: camera.PreviewOutput;
  private backPhotoSession?: camera.PhotoSession;
  private frontPhotoSession?: camera.PhotoSession;
  private singlePhotoSession?: camera.PhotoSession;
  private backPhotoOutput?: camera.PhotoOutput;
  private frontPhotoOutput?: camera.PhotoOutput;
  private singlePhotoOutput?: camera.PhotoOutput;
  private pendingCaptureId: string = '';
三、单摄会话的正确顺序
ensureSinglePreview 的顺序非常典型:先判断 activeTab、权限、单摄能力和 surfaceId;再从 capability 中取 previewProfiles 与 photoProfiles;然后 createCameraInput 并 open;接着创建 PreviewOutput 和 PhotoOutput;最后 createSession、beginConfig、addInput、addOutput、commitConfig、start。
这里最容易犯的错是顺序混乱。例如 input 还没 open 就 addInput,或者 previewProfiles 为空还硬取第一个。项目用多层 return 把这些无效状态挡在外面,使真正进入 beginConfig 的时候,资源已经满足会话配置要求。
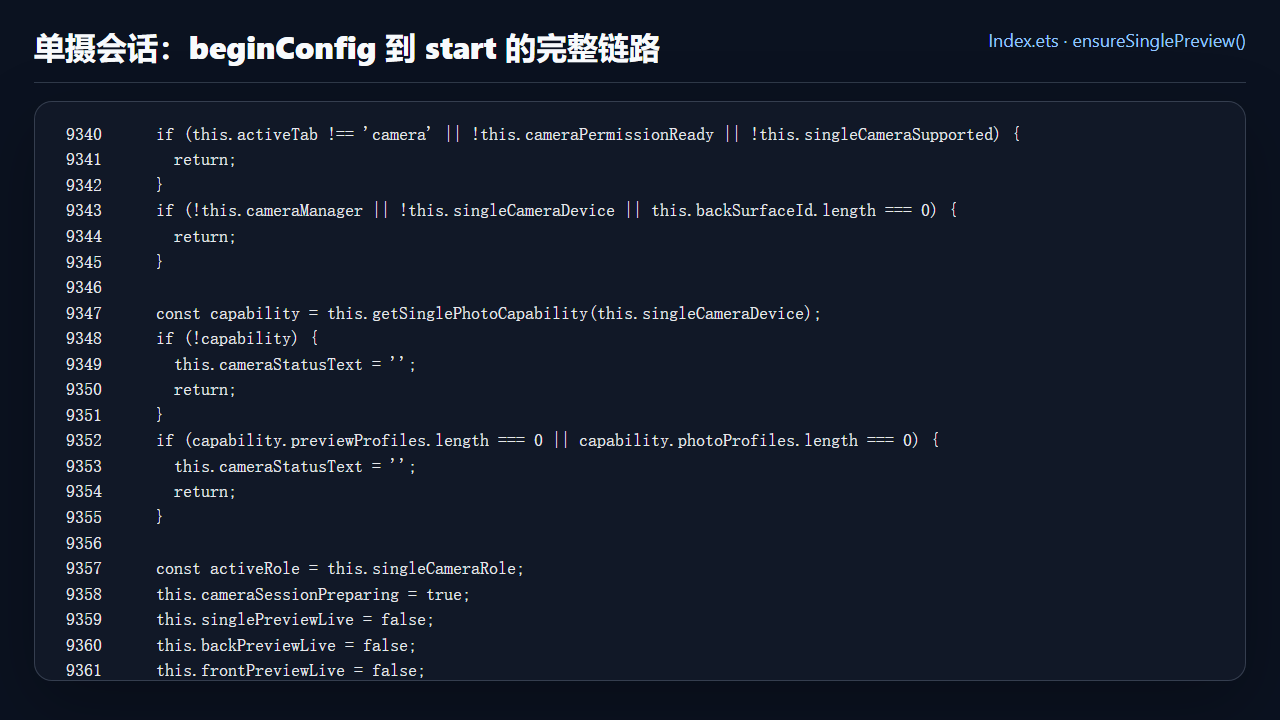
图 3 单摄 PhotoSession 从配置到启动的完整代码
ts
if (this.activeTab !== 'camera' || !this.cameraPermissionReady || !this.singleCameraSupported) {
      return;
    }
    if (!this.cameraManager || !this.singleCameraDevice || this.backSurfaceId.length === 0) {
      return;
    }

    const capability = this.getSinglePhotoCapability(this.singleCameraDevice);
    if (!capability) {
      this.cameraStatusText = '';
      return;
    }
    if (capability.previewProfiles.length === 0 || capability.photoProfiles.length === 0) {
      this.cameraStatusText = '';
      return;
    }

    const activeRole = this.singleCameraRole;
    this.cameraSessionPreparing = true;
    this.singlePreviewLive = false;
    this.backPreviewLive = false;
    this.frontPreviewLive = false;
    this.logCaptureTrace('ensure-single-preview-start', `role=${activeRole}`);
    this.cameraStatusText = `${this.getCameraRoleLabel(activeRole)}预览连接中...`;
    try {
      this.singleCameraInput = this.cameraManager.createCameraInput(this.singleCameraDevice);
      await this.singleCameraInput.open();

      this.singlePreviewOutput = this.cameraManager.createPreviewOutput(
        capability.previewProfiles[0],
        this.backSurfaceId
      );
      this.singlePreviewOutput.on('frameStart', () => {
        this.handleSinglePreviewFrameStart(activeRole);
      });

      this.singlePhotoOutput = this.cameraManager.createPhotoOutput(this.pickBestPhotoProfile(capability.photoProfiles));
      this.bindPhotoOutput(activeRole, this.singlePhotoOutput, 'single');

      this.singlePhotoSession = this.cameraManager.createSession(camera.SceneMode.NORMAL_PHOTO) as camera.PhotoSession;
      this.singlePhotoSession.beginConfig();
      this.singlePhotoSession.addInput(this.singleCameraInput);
      this.singlePhotoSession.addOutput(this.singlePreviewOutput);
      this.singlePhotoSession.addOutput(this.singlePhotoOutput);
      await this.singlePhotoSession.commitConfig();
      await this.singlePhotoSession.start();
      this.cameraSessionActive = true;
      this.syncZoomStateFromSession();
      this.refreshCameraFlashState();
四、双摄能力为空时如何回退
单摄链路的价值来自前面的能力探测。项目先尝试用 getCameraDevice 找官方默认后摄和前摄,再调用 getCameraConcurrentInfos。如果 concurrentInfos 为空,说明设备不提供前后摄同时预览的组合。这种情况下,不应该继续强开双摄,而是保存 fallbackSingleDevice,让 singleCameraSupported 为 true,后面由 ensureCameraPreview 进入单摄预览。
这和"捕获异常后重试"完全不同。异常重试不知道为什么失败,能力回退知道当前设备能做什么。训练营文章后续讲双摄、镜头和闪光灯时,都会把这个能力判断当作前置条件。
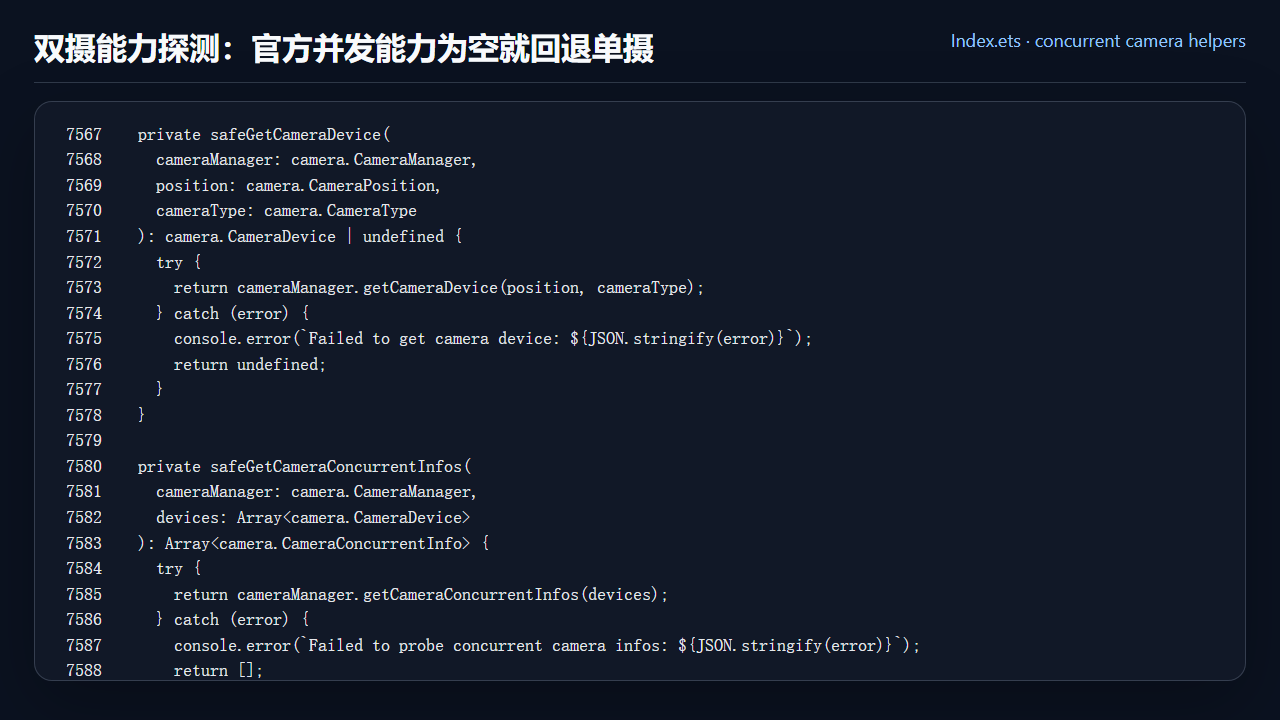
图 4 官方并发能力探测与单摄回退代码
ts
private safeGetCameraDevice(
    cameraManager: camera.CameraManager,
    position: camera.CameraPosition,
    cameraType: camera.CameraType
  ): camera.CameraDevice | undefined {
    try {
      return cameraManager.getCameraDevice(position, cameraType);
    } catch (error) {
      console.error(`Failed to get camera device: ${JSON.stringify(error)}`);
      return undefined;
    }
  }

  private safeGetCameraConcurrentInfos(
    cameraManager: camera.CameraManager,
    devices: Array<camera.CameraDevice>
  ): Array<camera.CameraConcurrentInfo> {
    try {
      return cameraManager.getCameraConcurrentInfos(devices);
    } catch (error) {
      console.error(`Failed to probe concurrent camera infos: ${JSON.stringify(error)}`);
      return [];
    }
  }

  private findCameraDeviceByPosition(
    cameras: Array<camera.CameraDevice>,
    position: camera.CameraPosition
  ): camera.CameraDevice | undefined {
    const defaultDevice = cameras.find((device: camera.CameraDevice) =>
      device.cameraPosition === position && device.cameraType === camera.CameraType.CAMERA_TYPE_DEFAULT
    );
    if (defaultDevice) {
      return defaultDevice;
    }
    return cameras.find((device: camera.CameraDevice) => device.cameraPosition === position);
  }

  private getCameraDevicesByPosition(
    cameras: Array<camera.CameraDevice>,
    position: camera.CameraPosition
  ): Array<camera.CameraDevice> {
    const preferredDevices = cameras.filter((device: camera.CameraDevice) =>
      device.cameraPosition === position && device.cameraType === camera.CameraType.CAMERA_TYPE_DEFAULT
    );
    const fallbackDevices = cameras.filter((device: camera.CameraDevice) =>
      device.cameraPosition === position && device.cameraType !== camera.CameraType.CAMERA_TYPE_DEFAULT
    );
    return preferredDevices.concat(fallbackDevices);
  }

  private findConcurrentCameraPair(
    cameraManager: camera.CameraManager,
    cameras: Array<camera.CameraDevice>
  ): ConcurrentCameraPair {
    const backDevices = this.getCameraDevicesByPosition(cameras, camera.CameraPosition.CAMERA_POSITION_BACK);
    const frontDevices = this.getCameraDevicesByPosition(cameras, camera.CameraPosition.CAMERA_POSITION_FRONT);
    for (const frontDevice of frontDevices) {
      for (const backDevice of backDevices) {
        const concurrentInfos = this.safeGetCameraConcurrentInfos(cameraManager, [frontDevice, backDevice]);
        if (concurrentInfos.length > 0) {
          const concurrentPair: ConcurrentCameraPair = {
            backDevice: backDevice,
            frontDevice: frontDevice,
            concurrentInfos: concurrentInfos
          };
          return concurrentPair;
        }
      }
    }
    const fallbackPair: ConcurrentCameraPair = {
      backDevice: backDevices[0],
      frontDevice: frontDevices[0],
      concurrentInfos: []
    };
    return fallbackPair;
  }

  private getOfficialConcurrentCameraPair(cameraManager: camera.CameraManager): ConcurrentCameraPair {
    const backDevice = this.safeGetCameraDevice(
      cameraManager,
      camera.CameraPosition.CAMERA_POSITION_BACK,
      camera.CameraType.CAMERA_TYPE_DEFAULT
    );
    const frontDevice = this.safeGetCameraDevice(
      cameraManager,
      camera.CameraPosition.CAMERA_POSITION_FRONT,
      camera.CameraType.CAMERA_TYPE_DEFAULT
    );
    if (!backDevice || !frontDevice) {
      const unsupportedPair: ConcurrentCameraPair = {
        backDevice: backDevice,
        frontDevice: frontDevice,
        concurrentInfos: []
      };
      return unsupportedPair;
    }
    const concurrentInfos = this.safeGetCameraConcurrentInfos(cameraManager, [frontDevice, backDevice]);
    const officialPair: ConcurrentCameraPair = {
      backDevice: backDevice,
      frontDevice: frontDevice,
      concurrentInfos: concurrentInfos
    };
五、把单摄会话写成可释放、可重进、可扩展
相机页常见的隐性 bug 是第一次能打开,切到别的页再回来就失败。原因通常是旧 session、output 或 input 没释放干净。项目把单摄资源分别保存,并在 teardownDualPreview 里统一释放,所以单摄会话可以多次进入、多次退出。
另外,单摄模式仍然保留镜头选择、变焦、闪光灯等扩展点。因为这些控制项依赖的是当前 active PhotoSession,而不是"双摄"这个概念。只要单摄会话层次清晰,后面的控制能力可以直接接上。
本篇检查清单
- 单摄启动前检查权限、Surface、设备和 profile。
- CameraInput、PreviewOutput、PhotoOutput、PhotoSession 分别保存,便于释放和状态判断。
- PhotoSession 配置顺序符合 beginConfig、addInput/output、commitConfig、start。
- 并发能力为空时走单摄回退,而不是反复重试双摄。
- 正文配图包含运行结果、字段结构、会话代码和并发能力探测源码。
今日练习
- 在 ensureSinglePreview 中记录 activeRole,确认前后摄切换时日志正确。
- 临时模拟 concurrentInfos 为空,验证页面仍能进入单摄预览。
- 拍一张单摄照片后进入图库页,确认记录能出现在列表中。