本文分析的是 examples/gltfscenerendering/gltfscenerendering.cppgltfscenerendering.cpp。它加载并渲染 Crytek Sponza 这种更接近真实项目规模的 glTF 场景,相比前面的 gltfloading.cpp,它不再只是展示"如何把一个模型画出来",而是加入了复杂场景渲染中更常见的工程要素:
- 外部 KTX 纹理加载。
- base color map + normal map。
- tangent space normal mapping。
- 材质级 descriptor set。
- 每材质 pipeline。
- specialization constants。
- alpha mask。
- double-sided 材质控制背面剔除。
- glTF node 可见性 UI。
如果说 gltfloading.cpp 是"静态 glTF 模型渲染入门",那么 gltfscenerendering.cpp 就是"把 glTF 作为场景资产来渲染"的第一步。它仍然不是完整 glTF/PBR renderer,但已经开始触及真实场景渲染中的资源组织和材质分流问题。
1. 示例定位:从模型到场景
源码摘要写得很直接:
cpp
/*
* Render a complete scene loaded from an glTF file. The sample is based on the glTF model loading sample,
* and adds data structures, functions and shaders required to render a more complex scene using Crytek's Sponza model.
*/
它加载的是:
cpp
models/sponza/sponza.gltfSponza 是实时渲染里非常经典的场景资产。它和 FlightHelmet 这类单体模型不同,有更多 node、mesh primitive、material、texture,也更适合展示:
- 多材质切换。
- normal mapping。
- alpha masked 材质。
- 双面材质。
- 大场景中的节点管理。
这个示例仍然保留教学版设计:它没有直接使用 base/VulkanglTFModel 的完整 loader,而是在 gltfscenerendering.h/.cpp 内定义了一个简化版 VulkanglTFScene。这样每一步 glTF 到 Vulkan 的映射都能直接看到。
2. 和 gltfloading 的主要差异
gltfloading.cpp 已经实现了:
- glTF scene/node/mesh/primitive 递归加载。
- base color texture。
- 全局 vertex/index buffer。
- set 0 scene matrices,set 1 material texture。
- push constant 传 node matrix。
gltfscenerendering.cpp 在此基础上新增:
- 每个 vertex 多了
tangent。 - 每个 material 多了
normalTextureIndex。 - material 记录
alphaMode、alphaCutOff、doubleSided。 - 每个 material 有自己的
VkDescriptorSet。 - 每个 material 有自己的
VkPipeline。 - fragment shader 采样 color map 和 normal map。
- pipeline 创建时用 specialization constants 固化 alpha mask 参数。
- UI 可以开关顶层 scene node 的可见性。
它从"一个 pipeline 画一个模型"升级到了"根据材质动态选择 pipeline 和 descriptor 来画一个场景"。
3. 头文件结构:VulkanglTFScene 和 VulkanExample
这个示例的两个核心类是:
cpp
class VulkanglTFScene
class VulkanExample : public VulkanExampleBase
VulkanglTFScene 负责 glTF scene 的数据和绘制:
- 加载 images/textures/materials。
- 递归加载 node。
- 创建全局 vertex/index buffer 所需的 CPU 数据。
- 保存 material 的 descriptor set 和 pipeline。
- 递归 draw node。
VulkanExample 负责 Vulkan 示例应用层:
- 创建 descriptor pool/layout/set。
- 创建 per-frame uniform buffer。
- 创建 per-material pipelines。
- 每帧更新 camera/light uniform。
- 录制 command buffer。
- 绘制 UI overlay。
这种分层很清晰:scene 类处理资产和 draw traversal,example 类处理 Vulkan frame lifecycle 和 pipeline/descriptor 管理。
4. Vertex Layout:为 normal mapping 增加 tangent
顶点结构:
cpp
struct Vertex {
    glm::vec3 pos;
    glm::vec3 normal;
    glm::vec2 uv;
    glm::vec3 color;
    glm::vec4 tangent;
};
相比 gltfloading,多了:
cpp
glm::vec4 tangent;tangent 是 normal mapping 的关键。fragment shader 要把 normal map 中的 tangent-space normal 转到 world/model space,需要构建 TBN 矩阵:
text
T = tangent
B = bitangent
N = normal
glTF 不直接存 bitangent,而是在 tangent 的 w 分量里保存 handedness。shader 中用:
glsl
vec3 B = cross(inNormal, inTangent.xyz) * inTangent.w;所以 tangent 不是可选小细节,而是 normal mapping 正确性的基础。
5. Material:从一张 color map 到材质渲染状态
材质结构:
cpp
struct Material {
    glm::vec4 baseColorFactor = glm::vec4(1.0f);
    uint32_t baseColorTextureIndex;
    uint32_t normalTextureIndex;
    std::string alphaMode = "OPAQUE";
    float alphaCutOff;
    bool doubleSided = false;
    VkDescriptorSet descriptorSet;
    VkPipeline pipeline;
};
相比基础 glTF loading,这里新增了几个重要字段。
5.1 normalTextureIndex
cpp
uint32_t normalTextureIndex;用于 normal map。读取位置:
cpp
if (glTFMaterial.additionalValues.find("normalTexture") != glTFMaterial.additionalValues.end()) {
    materials[i].normalTextureIndex = glTFMaterial.additionalValues["normalTexture"].TextureIndex();
}
glTF 的 normal texture 在 tinyGLTF 中通过 additionalValues 读取,这是和 base color texture 不一样的地方。
5.2 alphaMode / alphaCutOff
cpp
materials[i].alphaMode = glTFMaterial.alphaMode;
materials[i].alphaCutOff = (float)glTFMaterial.alphaCutoff;
这个示例用它们实现 alpha mask:
alphaMode == "MASK":启用 alpha test。alphaCutOff:低于阈值的 fragment 被 discard。
这类材质常用于树叶、栅栏、布料边缘等需要硬透明的几何。
5.3 doubleSided
cpp
materials[i].doubleSided = glTFMaterial.doubleSided;如果 glTF 材质是 double-sided,pipeline 创建时会关闭背面剔除:
cpp
rasterizationStateCI.cullMode =
    material.doubleSided ? VK_CULL_MODE_NONE : VK_CULL_MODE_BACK_BIT;
这是一个典型的"材质属性影响 pipeline state"的例子。
5.4 descriptorSet 和 pipeline 成为 material 的一部分
cpp
VkDescriptorSet descriptorSet;
VkPipeline pipeline;
这两个字段是本示例最重要的设计变化之一。
在 gltfloading 中,pipeline 是全局的,material 只提供 texture descriptor。这里每个 material 都持有自己的 pipeline,因为不同 material 可能需要不同:
- alpha mask specialization constant。
- alpha cutoff。
- culling mode。
绘制 primitive 时,直接从 material 取 pipeline 和 descriptor set。
6. 外部 KTX 纹理加载
gltfloading.cpp 里图片通常从 glTF image buffer 中取出,再通过 Texture2D::fromBuffer() 上传。
这个示例不同。Sponza 的纹理是外部 KTX 文件:
cpp
images[i].texture.loadFromFile(
    path + "/" + glTFImage.uri,
    VK_FORMAT_R8G8B8A8_UNORM,
    vulkanDevice,
    copyQueue);
这有几个优势:
- KTX 更贴近 GPU texture 数据格式。
- 可以直接包含 mip chain。
- 不需要运行时把 RGB 转 RGBA。
- 大场景加载更快。
头文件里也定义了:
cpp
#define TINYGLTF_NO_STB_IMAGE
#define TINYGLTF_NO_EXTERNAL_IMAGE
这意味着 tinyGLTF 不负责加载外部图片,图片由 Vulkan texture helper 根据 glTF image URI 自己从磁盘加载。对 KTX 资源来说,这是更合理的路径。
7. loadMaterials:读取场景渲染需要的材质属性
材质加载函数:
cpp
void VulkanglTFScene::loadMaterials(tinygltf::Model& input)它读取:
cpp
baseColorFactor
baseColorTexture
normalTexture
alphaMode
alphaCutOff
doubleSided
其中 base color texture:
cpp
if (glTFMaterial.values.find("baseColorTexture") != glTFMaterial.values.end()) {
    materials[i].baseColorTextureIndex =
        glTFMaterial.values["baseColorTexture"].TextureIndex();
}
normal texture:
cpp
if (glTFMaterial.additionalValues.find("normalTexture") != glTFMaterial.additionalValues.end()) {
    materials[i].normalTextureIndex =
        glTFMaterial.additionalValues["normalTexture"].TextureIndex();
}
这个示例仍然没有实现完整 PBR,比如 metallic/roughness、occlusion、emissive 等,但已经从"单贴图材质"扩展到了"贴图 + 渲染状态"的材质模型。
8. loadNode:读取 tangent 并构建全局 geometry buffer
和前面的 glTF 示例一样,node 加载会递归保留 glTF scene graph:
cpp
if (inputNode.children.size() > 0) {
    for (size_t i = 0; i < inputNode.children.size(); i++) {
        loadNode(input.nodes[inputNode.children[i]], input, node, indexBuffer, vertexBuffer);
    }
}
如果 node 有 mesh,就遍历 mesh primitive,读取 attributes。
普通属性:
cpp
POSITION
NORMAL
TEXCOORD_0
新增 tangent:
cpp
if (glTFPrimitive.attributes.find("TANGENT") != glTFPrimitive.attributes.end()) {
    const tinygltf::Accessor& accessor =
        input.accessors[glTFPrimitive.attributes.find("TANGENT")->second];
    const tinygltf::BufferView& view = input.bufferViews[accessor.bufferView];
    tangentsBuffer =
        reinterpret_cast<const float*>(&(input.buffers[view.buffer].data[accessor.byteOffset + view.byteOffset]));
}
组装 vertex:
cpp
vert.pos = glm::vec4(glm::make_vec3(&positionBuffer[v * 3]), 1.0f);
vert.normal = glm::normalize(glm::vec3(normalsBuffer ? glm::make_vec3(&normalsBuffer[v * 3]) : glm::vec3(0.0f)));
vert.uv = texCoordsBuffer ? glm::make_vec2(&texCoordsBuffer[v * 2]) : glm::vec3(0.0f);
vert.color = glm::vec3(1.0f);
vert.tangent = tangentsBuffer ? glm::make_vec4(&tangentsBuffer[v * 4]) : glm::vec4(0.0f);
最终所有 primitive 的顶点和索引仍然被追加到全局数组,上传后变成一份全局 vertex buffer 和一份全局 index buffer。每个 primitive 通过:
cpp
firstIndex
indexCount
materialIndex
定位自己的绘制范围和材质。
9. 几何上传:staging 到 device local
加载完 CPU 侧数组后,代码创建 staging buffer:
cpp
vulkanDevice->createBuffer(
    VK_BUFFER_USAGE_TRANSFER_SRC_BIT,
    VK_MEMORY_PROPERTY_HOST_VISIBLE_BIT | VK_MEMORY_PROPERTY_HOST_COHERENT_BIT,
    &vertexStaging,
    vertexBufferSize,
    vertexBuffer.data());
再创建 device local buffer:
cpp
vulkanDevice->createBuffer(
    VK_BUFFER_USAGE_VERTEX_BUFFER_BIT | VK_BUFFER_USAGE_TRANSFER_DST_BIT,
    VK_MEMORY_PROPERTY_DEVICE_LOCAL_BIT,
    vertexBufferSize,
    &glTFScene.vertices.buffer,
    &glTFScene.vertices.memory);
然后用 copy command 上传:
cpp
vkCmdCopyBuffer(copyCmd, vertexStaging.buffer, glTFScene.vertices.buffer, 1, ©Region);
vkCmdCopyBuffer(copyCmd, indexStaging.buffer, glTFScene.indices.buffer, 1, ©Region);
vulkanDevice->flushCommandBuffer(copyCmd, queue, true);对 Sponza 这种静态场景,把几何放进 device local memory 是正确选择。它避免每帧从 host-visible memory 读取大规模几何数据。
10. Descriptor 设计:set 0 是场景矩阵,set 1 是材质纹理
pipeline layout 使用两个 descriptor set:
cpp
set 0 = matrices
set 1 = material textures
10.1 set 0:Scene UBO
UBO:
cpp
struct UniformData {
    glm::mat4 projection;
    glm::mat4 view;
    glm::vec4 lightPos = glm::vec4(0.0f, 2.5f, 0.0f, 1.0f);
    glm::vec4 viewPos;
} uniformData;
shader:
glsl
layout (set = 0, binding = 0) uniform UBOScene
{
    mat4 projection;
    mat4 view;
    vec4 lightPos;
    vec4 viewPos;
} uboScene;
每个 frame 一个 descriptor set:
cpp
for (auto i = 0; i < uniformBuffers.size(); i++) {
    vkAllocateDescriptorSets(..., &descriptorSets[i]);
    vkUpdateDescriptorSets(...);
}
原因和其他示例一样:camera matrices 每帧更新,per-frame UBO 避免覆盖 GPU 正在读取的数据。
10.2 set 1:每材质 color map + normal map
材质 texture layout 有两个 binding:
cpp
binding 0: color map
binding 1: normal map
代码:
cpp
setLayoutBindings = {
    vks::initializers::descriptorSetLayoutBinding(
        VK_DESCRIPTOR_TYPE_COMBINED_IMAGE_SAMPLER,
        VK_SHADER_STAGE_FRAGMENT_BIT,
        0),
    vks::initializers::descriptorSetLayoutBinding(
        VK_DESCRIPTOR_TYPE_COMBINED_IMAGE_SAMPLER,
        VK_SHADER_STAGE_FRAGMENT_BIT,
        1),
};
shader:
glsl
layout (set = 1, binding = 0) uniform sampler2D samplerColorMap;
layout (set = 1, binding = 1) uniform sampler2D samplerNormalMap;
每个 material 分配一个 descriptor set:
cpp
for (auto& material : glTFScene.materials) {
    vkAllocateDescriptorSets(..., &material.descriptorSet);

    VkDescriptorImageInfo colorMap =
        glTFScene.getTextureDescriptor(material.baseColorTextureIndex);
    VkDescriptorImageInfo normalMap =
        glTFScene.getTextureDescriptor(material.normalTextureIndex);

    vkUpdateDescriptorSets(...);
}
这样绘制 primitive 时,只要绑定 material 的 descriptor set,就能让 fragment shader 同时访问 color map 和 normal map。
11. Pipeline Layout:descriptor sets + push constant
pipeline layout:
cpp
std::array<VkDescriptorSetLayout, 2> setLayouts = {
    descriptorSetLayouts.matrices,
    descriptorSetLayouts.textures
};
还定义了一个 push constant:
cpp
VkPushConstantRange pushConstantRange =
    vks::initializers::pushConstantRange(
        VK_SHADER_STAGE_VERTEX_BIT,
        sizeof(glm::mat4),
        0);
它用于传 node 的 model matrix:
glsl
layout(push_constant) uniform PushConsts {
    mat4 model;
} primitive;
这个设计和 gltfloading 一致:scene UBO 存 camera/light,push constant 存每个 node 的局部到世界矩阵。
12. 每材质 Pipeline:这个示例的核心设计
大多数简单示例会创建一两个固定 pipeline。但这个示例做了一个更接近真实渲染器的选择:
cpp
for (auto &material : glTFScene.materials) {
    ...
    vkCreateGraphicsPipelines(..., &material.pipeline);
}
每个 material 都有自己的 pipeline。
为什么?因为有些材质属性会影响 pipeline state 或 shader 编译常量:
doubleSided影响 cull mode。alphaMode == "MASK"影响 fragment shader 是否执行 alpha discard。alphaCutOff是 shader 中的常量参数。
这些东西如果每次 draw 通过 uniform 分支处理也可以,但示例选择用 specialization constants 和 pipeline state 固化。
13. Specialization Constants:把 alpha mask 参数固化进 shader
fragment shader 中声明:
glsl
layout (constant_id = 0) const bool ALPHA_MASK = false;
layout (constant_id = 1) const float ALPHA_MASK_CUTOFF = 0.0f;
创建每个 material pipeline 时,C++ 填充:
cpp
struct MaterialSpecializationData {
    VkBool32 alphaMask;
    float alphaMaskCutoff;
} materialSpecializationData{};

materialSpecializationData.alphaMask =
    material.alphaMode == "MASK";
materialSpecializationData.alphaMaskCutoff =
    material.alphaCutOff;
然后创建 specialization map:
cpp
std::vector<VkSpecializationMapEntry> specializationMapEntries = {
    vks::initializers::specializationMapEntry(
        0,
        offsetof(MaterialSpecializationData, alphaMask),
        sizeof(MaterialSpecializationData::alphaMask)),
    vks::initializers::specializationMapEntry(
        1,
        offsetof(MaterialSpecializationData, alphaMaskCutoff),
        sizeof(MaterialSpecializationData::alphaMaskCutoff)),
};
绑定到 fragment shader stage:
cpp
shaderStages[1].pSpecializationInfo = &specializationInfo;shader 中使用:
glsl
if (ALPHA_MASK) {
    if (color.a < ALPHA_MASK_CUTOFF) {
        discard;
    }
}
这是一种很典型的 Vulkan 风格优化:对材质不变参数,用 specialization constant 生成不同 pipeline 变体,避免运行时每个 fragment 都依赖动态 uniform 判断。
14. doubleSided:材质控制背面剔除
对 double-sided material:
cpp
rasterizationStateCI.cullMode =
    material.doubleSided ? VK_CULL_MODE_NONE : VK_CULL_MODE_BACK_BIT;
这也是必须做成 pipeline state 的原因之一。Vulkan 中 cull mode 通常是 pipeline 固定状态,不是随便在 draw 中改的状态,除非使用动态状态扩展。
因此每材质 pipeline 在这里很自然:
text
material A: back-face culling
material B: no culling
它们需要不同 pipeline。
15. Vertex Input:pos/normal/uv/color/tangent
pipeline 中定义顶点输入:
cpp
const std::vector<VkVertexInputAttributeDescription> vertexInputAttributes = {
    position -> location 0
    normal   -> location 1
    uv       -> location 2
    color    -> location 3
    tangent  -> location 4
};
shader 对应:
glsl
layout (location = 0) in vec3 inPos;
layout (location = 1) in vec3 inNormal;
layout (location = 2) in vec2 inUV;
layout (location = 3) in vec3 inColor;
layout (location = 4) in vec4 inTangent;
这里有两个值得注意的代码细节:
uv是glm::vec2,但 pipeline 里使用了VK_FORMAT_R32G32B32_SFLOAT。更严谨应使用VK_FORMAT_R32G32_SFLOAT。tangent是glm::vec4,shader 也声明为vec4,但 pipeline 里使用了VK_FORMAT_R32G32B32_SFLOAT。如果要保留 glTF tangent 的whandedness,应使用VK_FORMAT_R32G32B32A32_SFLOAT。
尤其 tangent 的 w 很重要,因为 fragment shader 用它计算 bitangent:
glsl
vec3 B = cross(inNormal, inTangent.xyz) * inTangent.w;如果 w 没有从 vertex buffer 正确读入,部分 normal map 的切线空间方向可能会出错。这个点适合在博客中明确指出:示例代码用于教学展示,但生产渲染器应严格匹配 vertex format。
16. Vertex Shader:输出 normal mapping 所需数据
scene.vert 输入:
glsl
inPos
inNormal
inUV
inColor
inTangent
scene UBO:
glsl
projection
view
lightPos
viewPos
push constant:
glsl
primitive.model位置变换:
glsl
gl_Position =
    uboScene.projection *
    uboScene.view *
    primitive.model *
    vec4(inPos.xyz, 1.0);
输出给 fragment shader:
glsl
outNormal = mat3(primitive.model) * inNormal;
outTangent = inTangent;
outUV = inUV;
outLightVec = uboScene.lightPos.xyz - pos.xyz;
outViewVec = uboScene.viewPos.xyz - pos.xyz;
这里把 normal 和 tangent 传给 fragment shader,用于 per-fragment normal mapping。
17. Fragment Shader:normal mapping 和 alpha mask
scene.frag 先采样颜色:
glsl
vec4 color = texture(samplerColorMap, inUV) * vec4(inColor, 1.0);如果启用 alpha mask:
glsl
if (ALPHA_MASK) {
    if (color.a < ALPHA_MASK_CUTOFF) {
        discard;
    }
}
然后计算 tangent space normal mapping。
17.1 构建 TBN 矩阵
glsl
vec3 N = normalize(inNormal);
vec3 T = normalize(inTangent.xyz);
vec3 B = cross(inNormal, inTangent.xyz) * inTangent.w;
mat3 TBN = mat3(T, B, N);
TBN 的作用是把 normal map 中的 tangent-space normal 转到当前光照计算使用的空间。
normal map 采样值从 [0, 1] 转到 [-1, 1]:
glsl
N = TBN * normalize(texture(samplerNormalMap, inUV).xyz * 2.0 - vec3(1.0));这就是 normal mapping 的核心。它让低模几何表面也能呈现出细节凹凸。
17.2 简单光照
glsl
const float ambient = 0.1;
vec3 L = normalize(inLightVec);
vec3 V = normalize(inViewVec);
vec3 R = reflect(-L, N);
vec3 diffuse = max(dot(N, L), ambient).rrr;
float specular = pow(max(dot(R, V), 0.0), 32.0);
outFragColor = vec4(diffuse * color.rgb + specular, color.a);
这不是完整 PBR,而是一个简单 diffuse + specular 模型。对于本示例的目标,即展示场景加载、normal mapping 和材质 pipeline,已经足够。
18. drawNode:按 node 递归,按 material 切 pipeline
绘制入口:
cpp
void VulkanglTFScene::draw(VkCommandBuffer commandBuffer, VkPipelineLayout pipelineLayout)先绑定全局 vertex/index buffer:
cpp
vkCmdBindVertexBuffers(commandBuffer, 0, 1, &vertices.buffer, offsets);
vkCmdBindIndexBuffer(commandBuffer, indices.buffer, 0, VK_INDEX_TYPE_UINT32);
然后递归绘制顶层 nodes:
cpp
for (auto& node : nodes) {
    drawNode(commandBuffer, pipelineLayout, node);
}
18.1 可见性过滤
cpp
if (!node->visible) {
    return;
}
这是 UI 能控制 node 是否渲染的基础。
18.2 push constant 传 node matrix
cpp
glm::mat4 nodeMatrix = node->matrix;
Node* currentParent = node->parent;
while (currentParent) {
    nodeMatrix = currentParent->matrix * nodeMatrix;
    currentParent = currentParent->parent;
}

vkCmdPushConstants(
    commandBuffer,
    pipelineLayout,
    VK_SHADER_STAGE_VERTEX_BIT,
    0,
    sizeof(glm::mat4),
    &nodeMatrix);
每个 node 的最终矩阵通过 push constant 进入 vertex shader。
18.3 绑定 material pipeline 和 descriptor set
每个 primitive 找到自己的 material:
cpp
Material& material = materials[primitive.materialIndex];然后:
cpp
vkCmdBindPipeline(commandBuffer, VK_PIPELINE_BIND_POINT_GRAPHICS, material.pipeline);
vkCmdBindDescriptorSets(commandBuffer, VK_PIPELINE_BIND_POINT_GRAPHICS, pipelineLayout, 1, 1, &material.descriptorSet, 0, nullptr);
vkCmdDrawIndexed(commandBuffer, primitive.indexCount, 1, primitive.firstIndex, 0, 0);
这体现了本示例的核心渲染策略:
text
primitive -> material -> pipeline + descriptor set -> draw indexed对复杂场景来说,这比一个全局 pipeline 更灵活。
19. buildCommandBuffer:一帧渲染流程
主示例类里每帧录制:
cpp
vkCmdBeginRenderPass(...)
vkCmdSetViewport(...)
vkCmdSetScissor(...)
vkCmdBindDescriptorSets(... set 0 scene matrices ...)
glTFScene.draw(cmdBuffer, pipelineLayout)
drawUI(cmdBuffer)
vkCmdEndRenderPass(...)
set 0 只绑定一次:
cpp
vkCmdBindDescriptorSets(
    cmdBuffer,
    VK_PIPELINE_BIND_POINT_GRAPHICS,
    pipelineLayout,
    0,
    1,
    &descriptorSets[currentBuffer],
    0,
    nullptr);
之后 glTFScene.draw() 内部会根据每个 primitive 的 material 绑定 set 1 和 pipeline。
这种分层很实用:
- frame 级资源在 command buffer 顶部绑定。
- material 级资源在 draw traversal 中绑定。
- node 级 transform 通过 push constants 更新。
20. render:基类负责 frame lifecycle
每帧:
cpp
void VulkanExample::render()
{
    VulkanExampleBase::prepareFrame();
    updateUniformBuffers();
    buildCommandBuffer();
    VulkanExampleBase::submitFrame();
}
和其他示例一样:
prepareFrame()负责 acquire swapchain image 和同步。updateUniformBuffers()更新 camera/light。buildCommandBuffer()录制 scene draw。submitFrame()提交并 present。
场景渲染的重点被限制在 asset/pipeline/draw 逻辑中,而不是每个示例重复写 acquire/submit/present。
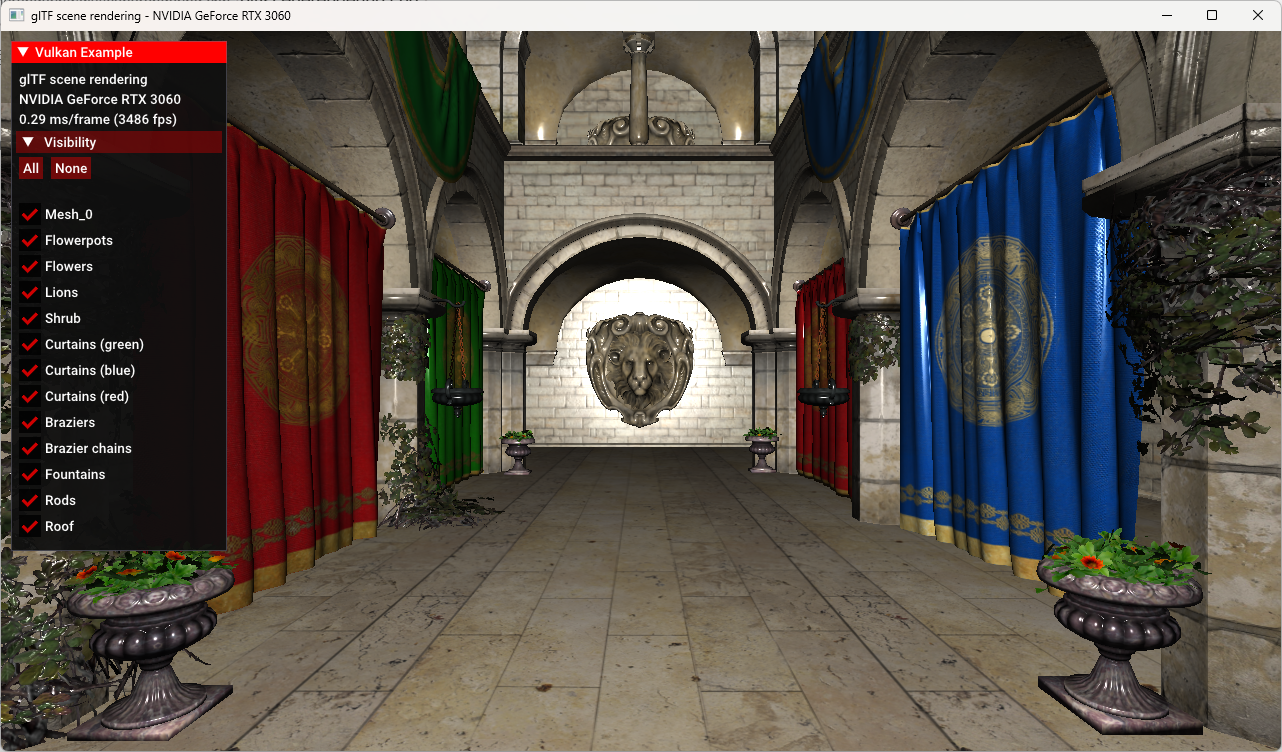
21. UI:按 glTF node 控制可见性
UI overlay:
cpp
if (overlay->header("Visibility")) {
    if (overlay->button("All")) {
        std::for_each(glTFScene.nodes.begin(), glTFScene.nodes.end(), [](Node* node) { node->visible = true; });
    }
    if (overlay->button("None")) {
        std::for_each(glTFScene.nodes.begin(), glTFScene.nodes.end(), [](Node* node) { node->visible = false; });
    }
    for (auto& node : glTFScene.nodes) {
        overlay->checkBox(node->name.c_str(), &node->visible);
    }
}
这只控制顶层 node 的可见性。由于 drawNode() 在 node 不可见时直接 return,子树也会被整体跳过。
这类功能在调试复杂场景时很有用:可以逐个关闭部分场景,检查材质、法线、贴图、draw call 或性能问题。
22. 数据流总览
完整流程可以总结为:
text
sponza.gltf
        |
        v
tinyGLTF LoadASCIIFromFile
        |
        +--> images -> external KTX -> Vulkan Texture2D
        |
        +--> materials
        |       baseColorTexture
        |       normalTexture
        |       alphaMode / alphaCutOff
        |       doubleSided
        |       |
        |       +--> material descriptor set
        |       +--> material pipeline
        |
        +--> nodes / meshes / primitives
        |       POSITION / NORMAL / TEXCOORD_0 / TANGENT
        |       indices
        |       |
        |       v
        |   global vertex/index buffer
        |
        v
render frame
        |
        +--> set 0 scene UBO
        +--> push constant node matrix
        +--> per primitive material pipeline
        +--> set 1 material color+normal maps
        |
        v
scene.vert -> scene.frag
        |
        v
normal mapping + alpha mask + lighting
这就是从 glTF 场景资产到 Vulkan 渲染输出的主路径。
23. 这个示例的高价值设计点
23.1 材质拥有 pipeline
这很接近真实渲染器的资源组织:pipeline 不再是全局固定对象,而是由材质属性派生。
23.2 specialization constants 用于材质常量
alpha mask 和 cutoff 是 pipeline 创建时就确定的常量,适合 specialization constants。它避免 fragment shader 每次都从 uniform 动态读取材质开关。
23.3 normal map 资源链路完整
从 glTF material 的 normalTexture,到 descriptor binding 1,再到 fragment shader TBN 计算,完整展示了 normal mapping 所需的 CPU/GPU 数据链路。
23.4 KTX 外部纹理更适合大场景
直接加载 KTX 比运行时解析普通图片更接近工程实践,尤其是有 mipmap 的大场景纹理。
23.5 node 可见性 UI 有调试价值
复杂 glTF 场景常常需要定位某个 node 或材质问题。可见性开关虽然简单,但对调试非常实用。
24. 局限和可改进点
24.1 不是完整 PBR
Sponza 示例虽然读取了更多材质状态,但 shader 仍是简单 diffuse/specular,不是 glTF 2.0 metallic-roughness PBR。
24.2 缺少 draw call 排序
当前 traversal 按 node/primitive 顺序绘制,可能频繁切换 pipeline 和 descriptor set。真实渲染器通常会按 pipeline/material 排序,减少状态切换。
24.3 alpha mask 有了,但 alpha blend 没有完整处理
MASK 通过 discard 处理,但 BLEND 材质通常需要:
- blend pipeline。
- 深度写入控制。
- 半透明排序。
本示例没有展开这部分。
24.4 顶点 attribute format 应更严格
如前面所说:
- UV 应使用
VK_FORMAT_R32G32_SFLOAT。 - tangent 应使用
VK_FORMAT_R32G32B32A32_SFLOAT。
尤其 tangent.w 是 normal mapping handedness,生产代码不能丢。
24.5 TBN 空间处理仍然简化
vertex shader 用 mat3(primitive.model) 变换 normal,没有完整处理 inverse transpose,也没有考虑 view/world space 的严谨统一。示例可用,但高质量渲染器需要更严格的 normal matrix。
24.6 descriptor pool 计数偏教学化
代码按 image/material 数量粗略估计 descriptor pool,适合示例。工程里通常会有更系统的 descriptor allocator。
25. 后续扩展路线
可以按这个顺序继续增强:
- 修正 vertex attribute format,确保 UV 和 tangent.w 正确。
- 加入 metallic-roughness PBR shader。
- 支持 occlusion、emissive、roughness/metallic texture。
- 区分 opaque、alpha mask、alpha blend 三类 draw pass。
- 按 pipeline/material 对 primitive 排序,减少状态切换。
- 增加 normal matrix,统一 world/view space 光照。
- 为每个 material 构建更完整的 GPU material buffer。
- 增加 frustum culling 或 per-node bounding box。
- 使用 descriptor indexing 或 bindless texture 减少 descriptor set 切换。
- 对 Sponza 这类大场景尝试 clustered/forward+ lighting 或 deferred rendering。
26. 总结
gltfscenerendering.cpp 是从"glTF 模型加载"迈向"glTF 场景渲染"的关键示例。它的核心不是某个单独 API,而是资源组织方式的升级:
text
基础模型渲染:
    一个 pipeline
    一个材质 texture
    一个 draw traversal

场景渲染:
    多材质
    多 texture
    normal map
    alpha mask
    double-sided
    每材质 pipeline
    每材质 descriptor set
    node visibility
它仍然保留教学代码的可读性,但已经展示了真实渲染器会遇到的核心问题:材质如何影响 pipeline、贴图如何组织到 descriptor、normal mapping 需要哪些顶点数据、以及大场景如何按 node/primitive/material 递归绘制。
读完 gltfloading.cpp 后看这个示例,会自然理解为什么"能画模型"只是第一步;当模型变成场景,材质、pipeline、descriptor 和 draw ordering 才开始成为渲染架构的核心。