前言
早些年的时候,当时使用了一个商业库,功能很强大,需要付费使用。
后面在论坛看到有关于破解这个库的帖子,大概看了一下原理,需要修改.NET Framework自带程序集的一些代码,绕过验证。
当时我没有去尝试了,就到网上找了一个现成的库玩了一下,体验还不错。
一时兴起,就反编译了那个程序集,发现里面使用了一种Hook 函数的机制,
在前面的文章中,我介绍过如何使用minHook来Hook win32函数(Unmanaged)(Windows编程系列:Hook Windows API - zhaotianff - 博客园),但是Hook Managed函数的倒是没尝试过。
这里刚好详细讲解一下,如何在C#中Hook Managed函数。
一、使用minHook
最初我以为minHook只能用于Hook native api,后面在网上查找资料发现,minHook同样可以用于 Managed code。
文章链接如下:Zeroed Tech
.NET Framework 的实现方案
在开始实现前,我们需要先了解一下AppDomainManager类型。
AppDomainManager类型
AppDomainManager 是 .NET Framework 中用于深度自定义和扩展应用程序域(AppDomain)生命周期的核心基类。
简单来说,它作为托管代码领域的"宿主总管",让你能在 CLR 启动的早期参与决策。
通俗点来说就是,继续自AppDomainManager的类,会在程序集加载时,自动创建实例,
实例创建后,CLR会依次调用其构造函数和InitializeNewDomain方法,完成初始化。
示例代码如下:
 1 // To replace the default AppDomainManager, identify  the
 2 // replacement assembly and replacement type in the
 3 // APPDOMAIN_MANAGER_ASM and APPDOMAIN_MANAGER_TYPE
 4 // environment variables. For example:
 5 // set APPDOMAIN_MANAGER_TYPE=library.TestAppDomainManager
 6 // set APPDOMAIN_MANAGER_ASM=library, Version=1.0.0.0, Culture=neutral, PublicKeyToken=f1368f7b12a08d72
 7
 8 using System;
 9 using System.Collections;
10 using System.Net;
11 using System.Reflection;
12 using System.Security;
13 using System.Security.Policy;
14 using System.Security.Principal;
15 using System.Threading;
16 using System.Runtime.InteropServices;
17
18 [assembly: System.Security.AllowPartiallyTrustedCallersAttribute()]
19
20 namespace MyNamespace
21 {
22     [GuidAttribute("F4D15099-3407-4A7E-A607-DEA440CF3891")]
23     public class MyAppDomainManager : AppDomainManager
24     {
25         private HostSecurityManager mySecurityManager = null;
26
27         public MyAppDomainManager()
28         {
29             Console.WriteLine(" My AppDomain Manager ");
30             mySecurityManager = AppDomain.CurrentDomain.CreateInstanceAndUnwrap(
31                 "CustomSecurityManager, Version=1.0.0.3, Culture=neutral, " +
32                 "PublicKeyToken=5659fc598c2a503e",
33                 "MyNamespace.MySecurityManager") as HostSecurityManager;
34             Console.WriteLine(" Custom Security Manager Created.");
35         }
36
37         public override void InitializeNewDomain(AppDomainSetup appDomainInfo)
38         {
39             Console.Write("Initialize new domain called:  ");
40             Console.WriteLine(AppDomain.CurrentDomain.FriendlyName);
41             InitializationFlags =
42                 AppDomainManagerInitializationOptions.RegisterWithHost;
43         }
44
45         public override HostSecurityManager HostSecurityManager
46         {
47             get
48             {
49                 return mySecurityManager;
50             }
51         }
52     }
53 }
如果要替换默认的 AppDomainManager,需要在环境变量
APPDOMAIN_MANAGER_ASM 与 APPDOMAIN_MANAGER_TYPE 中指定用于替代的程序集和目标类型。
示例如下:
1 set APPDOMAIN_MANAGER_TYPE=library.TestAppDomainManager
2
3 set APPDOMAIN_MANAGER_ASM=library, Version=1.0.0.0, Culture=neutral, PublicKeyToken=f1368f7b12a08d72
这样操作以后,程序集会在加载时,自动创建APPDOMAIN_MANAGER_TYPE指定的类型实例。
并且它会在应用程序入口点 Main() 方法执行之前完成。
大概的执行流程如下:
CLR 启动 → 创建默认 AppDomain → 加载 AppDomainManager 实例 → 调用 InitializeNewDomain → 执行用户程序 Main 方法
注意:程序集必须完全受信任,并且必须包含在全局程序集缓存或启动应用程序的目录中。
有了AppDomainManager类型的基础以后,我们开始实现。
实现步骤
这里的实现步骤如下:
1、创建一个程序集
在程序集中创建一个继承自AppDomainManager的CustomAppDomainManager类和一个Hook类。在CustomAppDomainManager类中实例化Hook类。
2、在Hook类中调用minHook来hook函数
当程序集被加载时,继承自AppDomainManager的类会被自动创建,这样就间隔创建了Hook类,然后我们在Hook类中调用minHook来hook函数
3、执行测试程序
当函数被hook后,此时我们就可以去执行测试程序查看效果了。
这里我们Hook一下System.IO.File.Create函数
下面我们演示一下实现步骤:
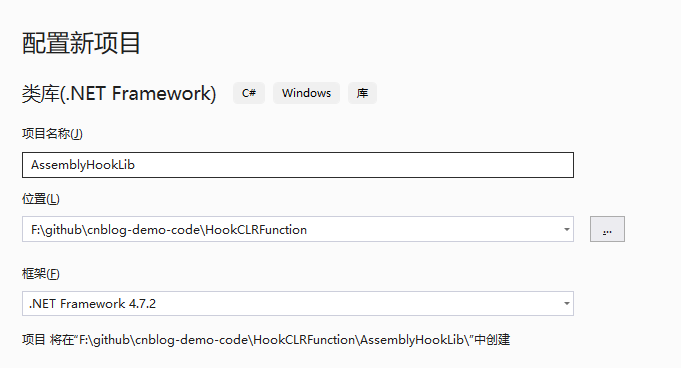
1、创建一个类库工程AssemblyHookLib
2、增加一个minHook映射类
这里的话我们实际上是可以使用DllImport特性来做,就像使用常规WinAPI函数那样。
1 [DllImport("MinHook.x64.dll")]
2 public static extern int MH_CreateHookEx(xxx xxxx)
但是我觉得tandasat老哥的这种动态映射成委托的方式挺好用的,所以就使用了老哥提供的代码
他这里的原理是通过LoadLibrary和GetProcAddress获取函数,再通过Marshal类动态映射成委托。
如果对minHook还不了解的小伙伴,可以参考这个链接:Windows编程系列:Hook Windows API - zhaotianff - 博客园
MinHook.cs
  1  /// <summary>
  2  /// minHook的封装
  3  /// </summary>
  4  /// <remarks>
  5  /// 这个类可以自动加载minHook动态库中的导出函数,源码来自 https://github.com/tandasat/DotNetHooking.git
  6  /// 使用这个类,需要下载minHook的动态库放到程序执行路径下(注意:需要区分x86和x64版本)
  7  /// </remarks>
  8  internal static class MinHook
  9  {
 10      //
 11      // Helper function to install hook using MinHook.
 12      //
 13      internal
 14      static
 15      bool
 16      InstallHook(
 17          IntPtr TargetAddr,
 18          IntPtr HookHandlerAddr,
 19          IntPtr TrampolineAddr
 20          )
 21      {
 22          //
 23          // This code expects either MinHook.x86.dll or MinHook.x64.dll is
 24          // located in any of the DLL search path. Such as the current folder
 25          // and %PATH%.
 26          //
 27          string architecture = (IntPtr.Size == 4) ? "x86" : "x64";
 28          string dllPath = "MinHook." + architecture + ".dll";
 29          IntPtr moduleHandle = LoadLibrary(dllPath);
 30          if (moduleHandle == IntPtr.Zero)
 31          {
 32              Console.WriteLine("[-] An inline hook DLL not found. Did you locate " +
 33                                dllPath + " under the DLL search path?");
 34              return false;
 35          }
 36
 37          var MH_Initialize = GetExport<MH_InitializeType>(moduleHandle, "MH_Initialize");
 38          var MH_CreateHook = GetExport<MH_CreateHookType>(moduleHandle, "MH_CreateHook");
 39          var MH_EnableHook = GetExport<MH_EnableHookType>(moduleHandle, "MH_EnableHook");
 40
 41
 42          MH_STATUS status = MH_Initialize();
 43          Trace.Assert(status == MH_STATUS.MH_OK);
 44
 45          //
 46          // Modify the target method to jump to the HookHandler method. The
 47          // original receives an address of trampoline code to call the
 48          // original implementation of the target method.
 49          //
 50          status = MH_CreateHook(TargetAddr, HookHandlerAddr, out IntPtr original);
 51          Trace.Assert(status == MH_STATUS.MH_OK);
 52
 53          //
 54          // Modify the Trampoline method to jump to the original
 55          // implementation of the target method.
 56          //
 57          status = MH_CreateHook(TrampolineAddr, original, out _);
 58          Trace.Assert(status == MH_STATUS.MH_OK);
 59
 60          //
 61          // Commit and activate the above two hooks.
 62          //
 63          status = MH_EnableHook(MH_ALL_HOOKS);
 64          Trace.Assert(status == MH_STATUS.MH_OK);
 65
 66          return true;
 67      }
 68
 69      //
 70      // Helper function to resolve an export of a DLL.
 71      //
 72      private
 73      static
 74      ProcType
 75      GetExport<ProcType>(
 76          IntPtr ModuleHandle,
 77          string ExportName
 78          ) where ProcType : class
 79      {
 80          //
 81          // Get a function pointer, convert it to delegate, and return it as
 82          // a requested type.
 83          //
 84          IntPtr pointer = GetProcAddress(ModuleHandle, ExportName);
 85          if (pointer == IntPtr.Zero)
 86          {
 87              return null;
 88          }
 89
 90          Delegate function = Marshal.GetDelegateForFunctionPointer(
 91                                                          pointer,
 92                                                          typeof(ProcType));
 93          return function as ProcType;
 94      }
 95
 96      [SuppressUnmanagedCodeSecurity]
 97      internal static class NativeMethods
 98      {
 99          [DllImport("kernel32.dll",
100                      EntryPoint = "LoadLibraryW",
101                      SetLastError = true,
102                      CharSet = CharSet.Unicode)]
103          internal
104          static
105          extern
106          IntPtr
107          LoadLibrary(
108              string FileName
109              );
110
111          [DllImport("kernel32.dll",
112                      EntryPoint = "GetProcAddress",
113                      SetLastError = true,
114                      CharSet = CharSet.Ansi,
115                      BestFitMapping = false)]
116          internal
117          static
118          extern
119          IntPtr
120          GetProcAddress(
121              IntPtr Module,
122              string ProcName
123              );
124
125          //
126          // MinHook specific.
127          //
128          internal static IntPtr MH_ALL_HOOKS = IntPtr.Zero;
129          internal enum MH_STATUS
130          {
131              MH_OK = 0,
132          }
133
134          [UnmanagedFunctionPointer(CallingConvention.Winapi)]
135          internal
136          delegate
137          MH_STATUS
138          MH_InitializeType(
139              );
140
141          [UnmanagedFunctionPointer(CallingConvention.Winapi)]
142          internal
143          delegate
144          MH_STATUS
145          MH_CreateHookType(
146              IntPtr Target,
147              IntPtr Detour,
148              out IntPtr Original
149              );
150
151          [UnmanagedFunctionPointer(CallingConvention.Winapi)]
152          internal
153          delegate
154          MH_STATUS
155          MH_EnableHookType(
156              IntPtr Target
157              );
158      }
159  }
3、增加一个HookCreateFile类
在这个类里面我们会对System.IO.FIle.Create函数进行Hook
  1 using System;
  2 using System.Collections.Generic;
  3 using System.IO;
  4 using System.Linq;
  5 using System.Reflection;
  6 using System.Runtime.CompilerServices;
  7 using System.Text;
  8 using System.Threading.Tasks;
  9
 10 namespace AssemblyHookLib
 11 {
 12     public class HookCreateFile
 13     {
 14         /// <summary>
 15         /// 在CustomAppDomainManager类中创建实例
 16         /// </summary>
 17         internal HookCreateFile()
 18         {
 19             if (!AppDomain.CurrentDomain.IsDefaultAppDomain())
 20                 return;
 21
 22             AppDomain.CurrentDomain.AssemblyLoad += OnAssemblyLoad;
 23         }
 24
 25         private static void OnAssemblyLoad(object sender, AssemblyLoadEventArgs args)
 26         {
 27
 28             var assemblyName = args.LoadedAssembly.GetName().Name;
 29
 30             Console.WriteLine("Load Assembly: " + assemblyName);
 31
 32
 33             //过滤程序集,只Hook所需要的程序集
 34             //这里是System.IO
 35             if (assemblyName != "AssemblyHookTest")
 36             {
 37                 Console.WriteLine("Return");
 38                 return;
 39             }
 40
 41             AppDomain.CurrentDomain.AssemblyLoad -= OnAssemblyLoad;
 42
 43             //获取当前加载的所有程序集
 44             Assembly[] loadedAssemblies = AppDomain.CurrentDomain.GetAssemblies();
 45
 46             foreach (Assembly assembly in loadedAssemblies)
 47             {
 48                 Console.WriteLine("Loaded Aseembly: " + assembly.GetName().Name);
 49             }
 50
 51             //假设mscorlib是第一项
 52             //实际使用时,可根据情况来进行判断
 53             var mscorlib = loadedAssemblies[0];
 54
 55             if (mscorlib == null)
 56             {
 57                 Console.WriteLine("mscorlib Assembly not find...");
 58                 return;
 59             }
 60
 61             var targetMethodClass = mscorlib.GetType("System.IO.File");
 62
 63             Console.WriteLine("Find System.IO.File Type");
 64
 65             var handlerMethodClass = typeof(HookCreateFile);
 66             var tramplineMethodClass = typeof(HookCreateFile);
 67
 68             BindingFlags anyType = BindingFlags.Static |
 69                                         BindingFlags.Instance |
 70                                         BindingFlags.Public |
 71                                         BindingFlags.NonPublic;
 72
 73             Type[] types = new Type[] { typeof(string) };
 74
 75             //System.IO.Create(string)
 76             //target
 77             MethodInfo target = targetMethodClass.GetMethod("Create", anyType, null, types, null);
 78
 79             //handler
 80             MethodInfo handler = handlerMethodClass.GetMethod("CreateHooked", anyType, null, types, null);
 81
 82             //Trampoline
 83             MethodInfo trampoline = tramplineMethodClass.GetMethod("CreateTrampoline", anyType, null, types, null);
 84
 85             Console.WriteLine($"find target={target != null}|find handler={handler != null}|find trampoline={trampoline != null}");
 86
 87             RuntimeHelpers.PrepareMethod(target.MethodHandle);
 88             RuntimeHelpers.PrepareMethod(handler.MethodHandle);
 89             RuntimeHelpers.PrepareMethod(trampoline.MethodHandle);
 90
 91             IntPtr targetMethodPtr = target.MethodHandle.GetFunctionPointer();
 92             IntPtr handlerMethodPtr = handler.MethodHandle.GetFunctionPointer();
 93             IntPtr trampolineMethodPtr = trampoline.MethodHandle.GetFunctionPointer();
 94
 95             if (MinHook.InstallHook(targetMethodPtr, handlerMethodPtr, trampolineMethodPtr))
 96             {
 97                 Console.WriteLine("Install hook success...");
 98             }
 99             else
100             {
101                 Console.WriteLine("Install hook failed...");
102             }
103         }
104
105         private static FileStream CreateHooked(string filePath)
106         {
107             Console.WriteLine("Create Hooked");
108
109             return System.IO.File.Create(filePath, 1024, FileOptions.None);
110         }
111
112         private static FileStream CreateTrampoline(string filePath)
113         {
114             Console.WriteLine("Create trampoline");
115             return null;
116         }
117     }
118 }
4、增加继承自AppDomainManager的CustomAppDomainManager类型
在这个类型里创建HookCreateFile类的实例
1 public class CustomAppDomainManager : AppDomainManager
2 {
3     private readonly HookCreateFile hookCreateFile = new HookCreateFile();
4 }
5、为程序集添加自签名
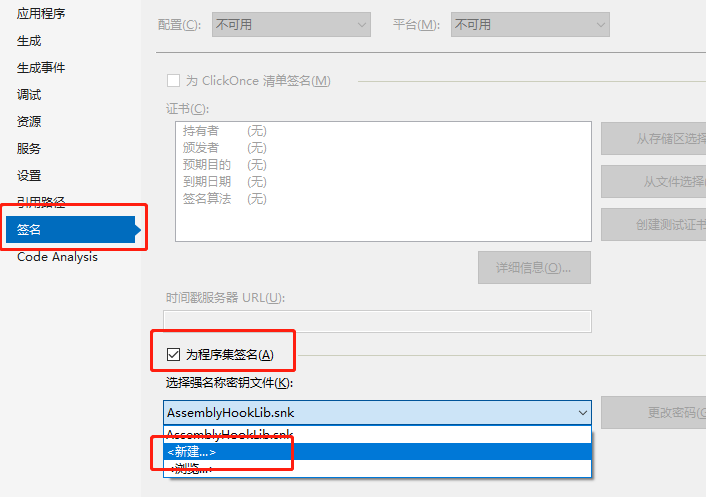
因为前面提到过,包含AppDomainManager类型的程序集必须完全受信任,并且必须包含在全局程序集缓存或启动应用程序的目录中。
所以我们需要给程序集签名。
操作方法也比较简单:打开项目属性,切换到签名页,再勾选 为程序集签名,再新建一个签名即可。
6、查看程序集的完整名称
这个名称在设置环境变量时需要用到,所以我们需要先获取到。
我们可以通过Powershell执行以下脚本
1 [System.Reflection.Assembly]::LoadFrom("程序集的完整路径").FullName
7、设置环境变量
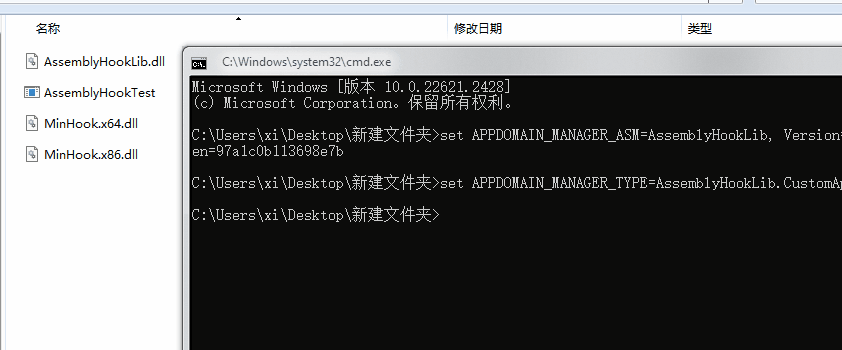
设置APPDOMAIN_MANAGER_ASM=前面获取的程序集完整名称
设置APPDOMAIN_MANAGER_TYPE=AppDomainManager类型的实现类
1 set APPDOMAIN_MANAGER_ASM=AssemblyHookLib, Version=1.0.0.0, Culture=neutral, PublicKeyToken=97a1c0b113698e7b
2
3 set APPDOMAIN_MANAGER_TYPE=AssemblyHookLib.CustomAppDomainManager
8、执行测试程序
创建一个控制台程序,代码如下
1 static void Main(string[] args)
2 {
3 System.IO.File.Create("a.txt");
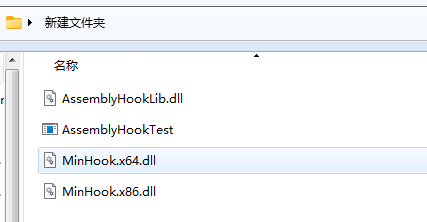
4 }编译后,把AssemblyHookLib.dll和minHook的dll复制到编译输出路径下。
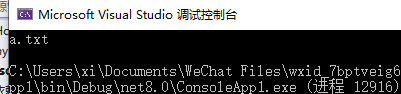
运行效果
可以看到最终创建了a.txt,但是在创建前会输出一句Create Hooked,也就是我们Hook后的函数中输出的内容
1 private static FileStream CreateHooked(string filePath)
2 {
3      Console.WriteLine("Create Hooked");
4
5      return System.IO.File.Create(filePath, 1024, FileOptions.None);
6 }
.NET Core的实现方案
在.NET Core中,运行时架构发生了显著变化,因此上文中的Hook技术已经不适用了。
在.NET Core中,JIT(即时编译器)会优化方法,通过minHook Hook后的函数地址可能已经不再使用了。
在.NET Framework中,即时编译(JIT)行为更加静态。
尽管如此,我们还是可以通过IL重写的方式,来实现这一功能。
这种方式较为复杂,所以我们直接使用框架。也就是本文中的第三种方法。
二、使用DispatchProxy Hook接口方法
注意:这种方法只适用于公用的接口方法,不适用于静态方法、私有方法。
这种方法的主要用到System.Reflection.DispatchProxy类,DispatchProxy类提供实例化代理对象和处理其方法调度的机制。
这里实际上是使用了设计模式里的一种代理模式。
1、首先我们新建一个.NET Framework ProxyHookLib
 1 namespace ProxyHookLib
 2 {
 3     /// <summary>
 4     /// 1.定义接口
 5     /// </summary>
 6     public interface ICalculator
 7     {
 8         int Add(int a, int b);
 9     }
10
11     /// <summary>
12     /// 2. 原始实现类
13     /// </summary>
14     public class Calculator : ICalculator
15     {
16         public int Add(int a, int b) => a + b;
17     }
18 }
2、创建一个控制台工程用于测试
3、增加一个自定义代理类 HookProxy.cs
这里需要安装nuget包System.Reflection.DispatchProxy
 1   /// <summary>
 2   /// 3. 自定义代理类
 3   /// </summary>
 4   /// <typeparam name="T"></typeparam>
 5   public class HookProxy<T> : DispatchProxy where T : class
 6   {
 7       private T _original;
 8       private T _target;
 9
10
11       /// <summary>
12       /// 设置被代理的目标对象
13       /// </summary>
14       /// <param name="target"></param>
15       public void SetOriginal(T original)
16       {
17           _original = original;
18       }
19
20       /// <summary>
21       /// 设置要替换的对象
22       /// </summary>
23       /// <param name="methodInfo"></param>
24       public void SetTarget(T target)
25       {
26           _target = target;
27       }
28
29       /// <summary>
30       /// 拦截所有接口方法
31       /// </summary>
32       /// <param name="targetMethod"></param>
33       /// <param name="args"></param>
34       /// <returns></returns>
35       protected override object Invoke(MethodInfo targetMethod, object[] args)
36       {
37           Console.WriteLine($"Before calling {targetMethod.Name}");
38
39           // 调用原始方法获取原始结果
40           var result = targetMethod.Invoke(_original, args);
41
42           Console.WriteLine($"After calling {targetMethod.Name}, result: {result}");
43
44           // 执行目标对象中的函数
45           var replaceMethod = _target.GetType().GetMethod(targetMethod.Name, BindingFlags.Public | BindingFlags.Instance);
46
47           //未找到
48           if(replaceMethod == null)
49           {
50               return result;
51           }
52
53           return replaceMethod.Invoke(_target, args);
54       }
55   }
4、再增加一个用于替换的类,这里我们把Add里面的运行符号变成乘
 1  public class MyCalculator : ICalculator
 2  {
 3      /// <summary>
 4      /// 替换后的Add函数
 5      /// </summary>
 6      /// <param name="a"></param>
 7      /// <param name="b"></param>
 8      /// <returns></returns>
 9      public int Add(int a, int b)
10      {
11          return a * b;
12      }
13  }
5、在Main函数中调用
1 internal class Program
2 {
3 static void Main()
4 {
5 // 创建代理实例
6 var proxy = DispatchProxy.Create<ICalculator, HookProxy<ICalculator>>();
7 var hookProxy = proxy as HookProxy<ICalculator>;
8
9 // 注入原始对象
10 var original = new Calculator();
11 hookProxy.SetOriginal(original);
12
13 // 设置要替换的对象
14 var target = new MyCalculator();
15 hookProxy.SetTarget(target);
16
17 // 现在 proxy 是一个拦截器,调用其方法会先经过 Invoke
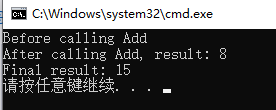
18 int result = proxy.Add(3, 5);
19 Console.WriteLine($"Final result: {result}");
20 }
21 }运行结果
3、使用Harmony包
Harmony 提供了一种简洁优雅、高层级的方式,用来修改用 C# 编写的应用程序功能。
它在游戏场景中表现极佳,并且适用与.NET Framework和.NET Core,已在多款知名游戏中得到广泛应用,
官方文档地址:Introduction
通常情况下,如果我们想要修改 C# 应用程序的运行逻辑,却没有该应用的源代码,基本有两种实现思路:
1、修改磁盘上的动态链接库(DLL)文件
2、重定向方法实现(函数钩子)
根据实际需求和场景,修改 DLL 文件并非总是理想的解决方案。
例如:可能会被反作弊系统拦截、难以与多个并行修改良好兼容、必须在原应用启动前、外部完成操作等
Harmony 库采用了一种改良版的钩子技术,仅专注于运行时修改,不会影响磁盘上的文件,具备以下优势:
- 多个模组之间的冲突更少
- 兼容现有的模组加载器
- 支持动态 / 条件化地实现修改
- 补丁执行顺序可灵活调整
- 也能对其他模组进行补丁修改
- 法律风险更低
Harmony 工作原理
其他补丁库仅能简单替换原有方法,而 Harmony 更进一步,可以提供以下能力:
- 保留原始方法完整不变
- 在原始方法执行之前 / 之后运行自定义代码
- 通过 IL 代码处理器修改原始方法
- 多个 Harmony 补丁可共存运行,互相之间不会产生冲突
运行时补丁的局限性
1、使用 Harmony 只能对方法进行操作,包括构造函数、属性的获取器 / 设置器。
2、仅能处理拥有实际 IL 代码体的方法,也就是能在 dnSpy 这类反编译工具中看到实现代码的方法。
3、体量过小的方法可能会被内联优化,导致你的补丁无法执行。
4、不能向类中新增字段,也不能扩展枚举类型(枚举编译后本质就是整型)。
5、对泛型方法、或是泛型类中的方法进行补丁适配难度较高,运行效果可能不符合预期。
下面我们来看一下如何使用Harmony
还是以Hook System.IO.File.Create函数为例
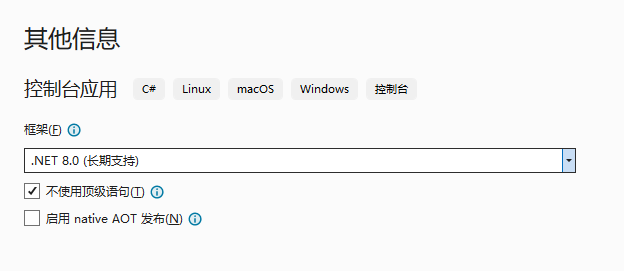
1、创建一个.NET Core控制台项目
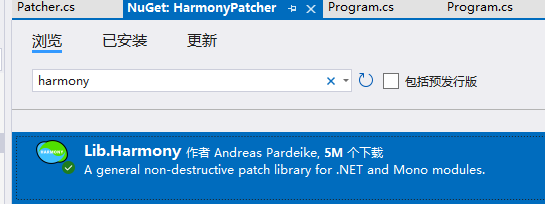
2、nuget安装Lib.Harmony包
3、创建Patcher
 1 using HarmonyLib;
 2 using System;
 3 using System.IO;
 4 using System.Reflection;
 5
 6 namespace HarmonyPatcher
 7 {
 8     // Hook File.Create(string)
 9     [HarmonyPatch]
10     public class FileCreatePatch
11     {
12         /// <summary>
13         /// 选择重载
14         /// File.Create(string path)
15         /// </summary>
16         /// <returns></returns>
17         static MethodBase TargetMethod()
18         {
19             return AccessTools.Method(
20                 typeof(File),
21                 nameof(File.Create),
22                 new Type[] { typeof(string) });
23         }
24
25         /// <summary>
26         /// 在File.Create调用前调用
27         /// </summary>
28         /// <param name="path"></param>
29         /// <returns></returns>
30         static bool Prefix(ref string path)
31         {
32             Console.WriteLine("=================================");
33             Console.WriteLine("[HOOK] File.Create");
34             Console.WriteLine($"原始路径: {path}");
35
36             // 可以修改参数
37             // 例如我把文件路径修改为桌面
38             string newPath = Environment.GetFolderPath(Environment.SpecialFolder.Desktop) + "\\a.txt";
39
40             Console.WriteLine($"重定向后的路径: {newPath}");
41
42             path = newPath;
43
44             Console.WriteLine("=================================");
45
46             // true = 继续执行原始函数
47             return true;
48         }
49
50         /// <summary>
51         /// 在File.Create调用后调用
52         /// </summary>
53         /// <param name="path"></param>
54         /// <param name="__result"></param>
55         static void Postfix(string path, FileStream __result)
56         {
57             Console.WriteLine("[POSTFIX] 文件已经被创建");
58
59             Console.WriteLine($"文件路径: {path}");
60
61             if (__result != null)
62             {
63                 //获取结果
64                 Console.WriteLine($"CanWrite: {__result.CanWrite}");
65             }
66
67             Console.WriteLine();
68         }
69     }
70 }
4、调用
1 namespace HarmonyPatcher
2 {
3 internal class Program
4 {
5 static void Main(string[] args)
6 {
7 HarmonyLib.Harmony harmony = new HarmonyLib.Harmony("test.testid");
8 harmony.PatchAll();
9
10 System.IO.File.Create("a.txt");
11 }
12 }
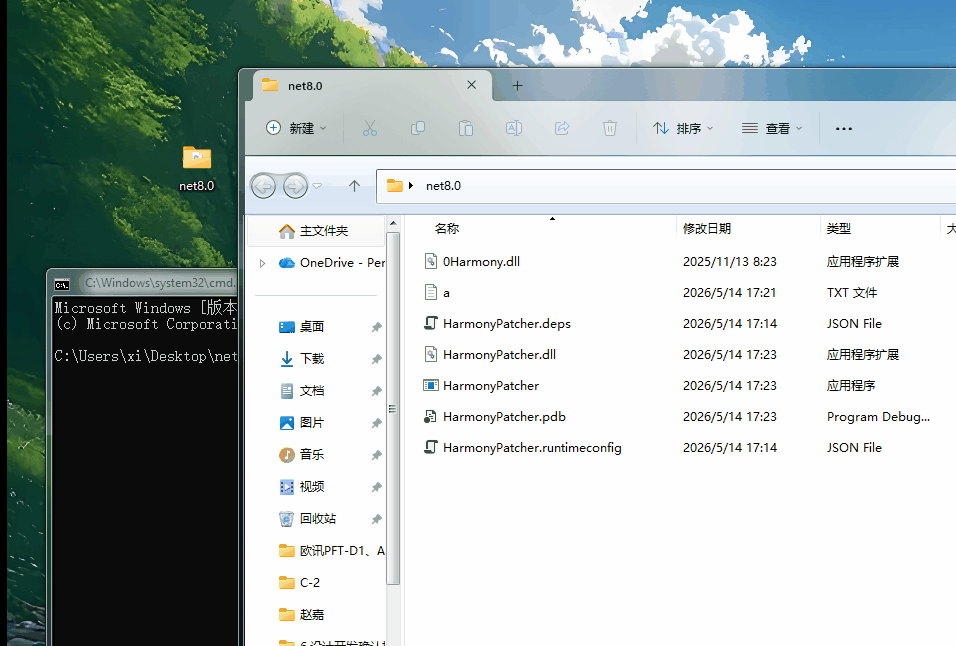
13 }运行效果
这里防止有些小伙伴不清楚Harmony的使用过程,再单独拿出来讲一下。
我们看到下面精简后的代码
 1     [HarmonyPatch]
 2     public class FileCreatePatch
 3     {
 4         /// <summary>
 5         /// 选择要Patcher的函数
 6         /// File.Create(string path)
 7         /// </summary>
 8         /// <returns></returns>
 9         static MethodBase TargetMethod()
10         {
11             return AccessTools.Method(
12                 typeof(File),
13                 nameof(File.Create),
14                 new Type[] { typeof(string) });
15         }
16
17         /// <summary>
18         /// 在目标函数调用前调用
19         /// </summary>
20         /// <param name="path"></param>
21         /// <returns></returns>
22         static bool Prefix(ref string path)
23         {
24             // true = 继续执行原始函数
25             return true;
26         }
27
28         /// <summary>
29         /// 在目标函数调用后调用
30         /// </summary>
31         /// <param name="path"></param>
32         /// <param name="__result"></param>
33         static void Postfix(string path, FileStream __result)
34         {
35
36         }
37     }
我们使用Harmony包进行Hook,大概可以分为下面几个步骤
1、nuget安装Lib.Harmony包
2、创建Patcher类,这里类名根据自己需求创建即可,关键是使用HarmonyPatch特性
1 [HarmonyPatch]
2 public class FileCreatePatch
3 {
4 }
3、指定要Hook的函数
函数名包括参数类型都可以通过参数指定。
这里我们指定的是System.IO.File.Create(string)这个重载
1 static MethodBase TargetMethod()
2 {
3     return AccessTools.Method(
4         typeof(File),
5         nameof(File.Create),
6         new Type[] { typeof(string) });
7 }
这里也可以通过特性直接指定需要Hook的函数
1 [HarmonyPatch(typeof(File))]                   //指定类型
2 [HarmonyPatch("Create")]                       //指定函数
3 [HarmonyPatch(new Type[] { typeof(string) })]  //指定重载类型
4 public class FileCreatePatch
5 {
6     //省略TargetMethod()函数
7 }
4、创建Prefix函数
该函数在执行目标函数前被调用,它的返回值是bool类型,参数跟目标函数的参数一致,但是要修改为引用类型。
1 static bool Prefix(ref string path)
2 {
3     // true = 继续执行原始函数
4     return true;
5 }
5、创建Postfix函数
该函数在执行目标函数后被调用,参数跟目标函数的参数保持一致,在最后会增加一个新的参数,这个参数代表目标函数的返回值
1  static void Postfix(string path, FileStream __result)
2  {
3      //path 为参数
4      //__result 为结果(返回值)
5  }
6、启用Hook
1  static void Main(string[] args)
2  {
3      HarmonyLib.Harmony harmony = new HarmonyLib.Harmony("test.testid");    //id用于标识
4      harmony.PatchAll();
5 }在这里我们使用了harmony.PatchAll()函数,代表Patch所有使用了HarmonyPatch特性的类型。
也可以单独指定需要Patch的函数,
如下所示:
 1 using HarmonyLib;
 2
 3 public class Program
 4 {
 5     public static void Main()
 6     {
 7         MyPatcher.DoPatching();
 8         System.IO.File.Create("a.txt");
 9     }
10 }
11 public class MyPatcher
12 {
13     public static void DoPatching()
14     {
15         var harmony = new Harmony("com.example.patch");
16
17         //查找原始函数
18         var mOriginal = AccessTools.Method(typeof(System.IO.File), nameof(System.IO.File.Create),new Type[] { typeof(string) });
19
20         //创建执行前函数信息
21         var mPrefix = SymbolExtensions.GetMethodInfo((string x) => MyPrefix(ref x));
22
23         //创建执行后函数信息
24         var mPostfix = SymbolExtensions.GetMethodInfo((string x,FileStream fs) => MyPostfix(x,fs));
25
26         //手动Patch
27         harmony.Patch(mOriginal, new HarmonyMethod(mPrefix), new HarmonyMethod(mPostfix));
28     }
29
30     public static bool MyPrefix(ref string path)
31     {
32         return true;
33     }
34
35     public static void MyPostfix(string path,FileStream __result)
36     {
37         Console.WriteLine(path);
38     }
39 }
运行结果
示例代码
cnblog-demo-code/HookCLRFunction at main · zhaotianff/cnblog-demo-code · GitHub