文章目录
- 免费公测
- 摘要
- [1. 采用YOLO26模型](#1. 采用YOLO26模型)
-
- [1.1 原生端到端(NMS-Free):消除后处理瓶颈](#1.1 原生端到端(NMS-Free):消除后处理瓶颈)
- [1.2 边缘优化:CPU 推理速度提升 43%](#1.2 边缘优化:CPU 推理速度提升 43%)
- [1.3 小目标检测增强](#1.3 小目标检测增强)
- [2. 解耦方案](#2. 解耦方案)
- [3. 关键组件详解](#3. 关键组件详解)
-
- [3.1 Redis任务队列实现](#3.1 Redis任务队列实现)
- [3.2 Rabitmq任务队列实现](#3.2 Rabitmq任务队列实现)
- [3.3 Worker弹性伸缩策略](#3.3 Worker弹性伸缩策略)
- [4. 基于调用量的自适应Worker调度系统](#4. 基于调用量的自适应Worker调度系统)
- [5. 项目设计](#5. 项目设计)
-
- [5.1 技术架构概述](#5.1 技术架构概述)
- [5.2 模型训练](#5.2 模型训练)
- [5.3 数据库设计](#5.3 数据库设计)
- [5.4 接口设计](#5.4 接口设计)
- [6. 目前存在的问题](#6. 目前存在的问题)
-
- [6.1 数据验证问题](#6.1 数据验证问题)
- [6.2 监控不足问题](#6.2 监控不足问题)
- 6.3缺少用户反馈机制
免费公测
1️⃣测试网址:还在建设中预计6月底
2️⃣模型持续更新:公测期间将持续新增新的模型类别,扩大验证码识别范围
3️⃣服务级别说明:接口为非商用级别,可能会出现以下情况:
- 🔔偶尔响应超时
- 🔔识别结果错误
- 🔔服务暂时不可用
4️⃣公测目的:验证市场接受度,收集用户反馈,优化系统性能
5️⃣公测福利:
- 🔔新用户注册即送免费无限调用次数
- 🔔每日签到有额外奖励
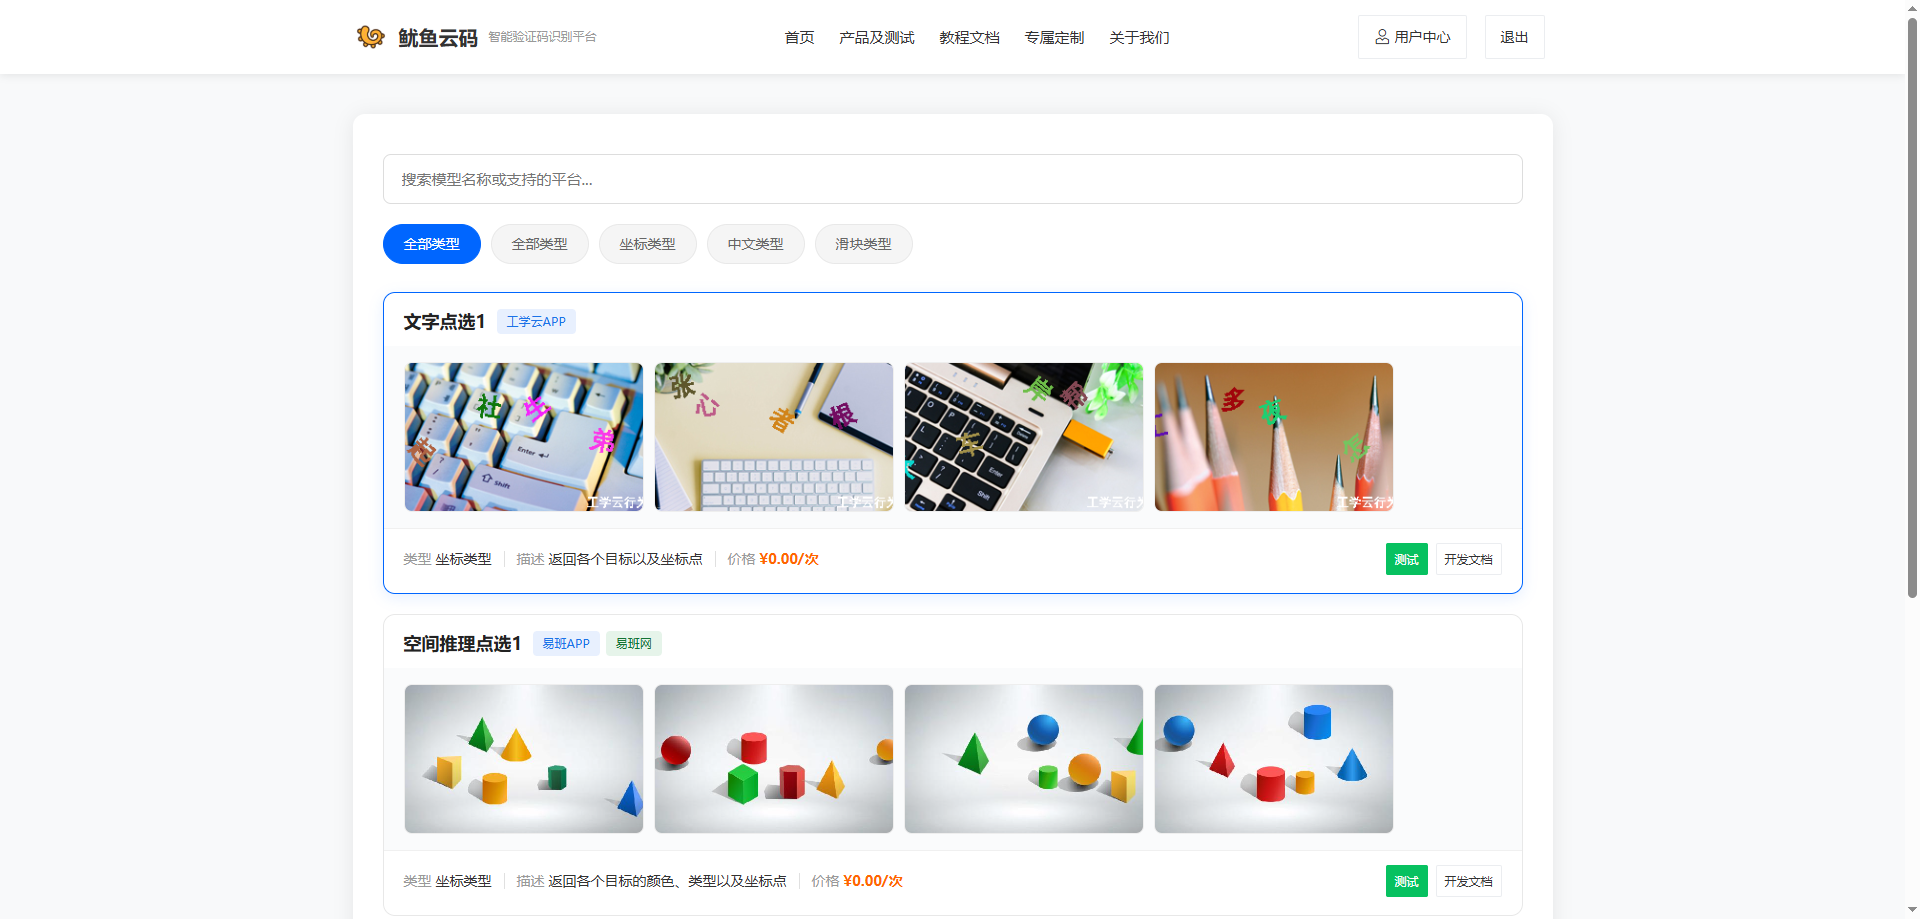
- 🔔可体验全类型验证码支持(字母数字、计算题、滑块、点选、中英文、图标验证码等),没有的可定制
摘要
现有的打码平台1元1000次调用价格略贵,主要是服务器成本高昂,这些成本最终都转嫁给了用户。今天,我们发布鱿鱼云码,一套基于YOLOv26端到端检测和Redis+RabbitMQ异步队列的全新架构,将识别准确率提升至99%+,单次识别成本降低80%,YOLOv5-v11 等模型推理后,必须运行 NMS 算法来去除重复框。这一步在 CPU 上非常耗时,且在高并发下容易成为性能瓶颈,另外我们采用了最新的yolo26,在小目标识别上更有优势。
1. 采用YOLO26模型
1.1 原生端到端(NMS-Free):消除后处理瓶颈
🔔 无 NMS:模型直接输出"去重后"的预测结果,推理管线缩短 30%。
🔔 部署简化:无需在部署环境中额外集成 NMS 模块,降低了 C++/ONNX 部署的复杂性。
🔔 延迟稳定:推理时间更加可控,消除了 NMS 因数据分布不同带来的波动。
bash
# 传统流程(两步)
results = model(image)        # 1. 模型推理
results = nms(results)        # 2. 后处理(耗时)

# YOLOv26 流程(一步)
results = model(image)        # 直接输出最终结果
1.2 边缘优化:CPU 推理速度提升 43%
YOLOv26 移除了分布焦点损失(DFL)模块,并针对 CPU 和边缘设备(如 Jetson、树莓派)进行了指令级优化。
| 模型 | 尺寸(像素) | mAPval 50-95 | 速度CPU ONNX(ms) | 速度T4 TensorRT10(ms) | 参数(M) | FLOPs(B) |
|---|---|---|---|---|---|---|
| YOLO26n | 640 | 40.9 | 38.9 | 1.7 | 2.4 | 5.4 |
| YOLOv8n | 640 | 37.3 | 80.4 | 1.47 | 3.2 | 8.7 |
1.3 小目标检测增强
验证码识别本质上是密集小字符检测。YOLOv26 引入了 STAL(Small-Target-Aware Label Assignment) 策略,专门优化了针对小目标的特征提取能力。
传统问题:验证码字符小且密集,容易漏检。
YOLOv26:在 COCO 数据集的小目标(Small Objects)类别上,mAP 提升约 5-8%。
2. 解耦方案
3. 关键组件详解
3.1 Redis任务队列实现
bash
// 连接 Redis
    $redis = new Redis();
    if (!$redis->connect($redis_host, $redis_port, 2)) {
        throw new Exception("无法连接到Redis服务器");
    }
    if ($redis_password && !$redis->auth($redis_password)) {
        throw new Exception("Redis认证失败");
    }
    $redis->select($redis_db);
3.2 Rabitmq任务队列实现
bash
// 生成任务ID
    $task_id    = str_replace('.', '_', uniqid('task_', true));
    $result_key = "task:{$task_id}";

    // 连接 RabbitMQ 并发送任务到对应队列
    $connection = new AMQPStreamConnection($rabbit_host, $rabbit_port, $rabbit_user, $rabbit_pass, '/');
    $channel    = $connection->channel();
    $channel->queue_declare($queue_name, false, true, false, false);

    $task_data = json_encode([
        'task_id'      => $task_id,
        'image_base64' => $image_base64,
        'type_code'    => $type_code,
    ], JSON_UNESCAPED_UNICODE);

    $msg = new AMQPMessage($task_data, [
        'delivery_mode' => AMQPMessage::DELIVERY_MODE_PERSISTENT
    ]);

    $channel->basic_publish($msg, '', $queue_name);

    $channel->close();
    $connection->close();
3.3 Worker弹性伸缩策略
bash
# docker-compose.yml 关键配置
version: '3.8'
services:
captcha-worker:
image: yuyuyunma/worker:v1.0
environment:
- REDIS_URL=redis://redis:6379
- RABBITMQ_URL=amqp://rabbitmq:5672
- MODEL_PATH=/models/yolov26n.pt
- WORKER_ID=${HOSTNAME}
deploy:
replicas: 3
# 自动扩缩容配置
mode: replicated
placement:
constraints:
- node.role == worker
update_config:
parallelism: 1
delay: 10s
restart_policy:
condition: on-failure
volumes:
- model_volume:/models
# 健康检查
healthcheck:
test: ["CMD", "python", "healthcheck.py"]
interval: 30s
timeout: 10s
retries: 3
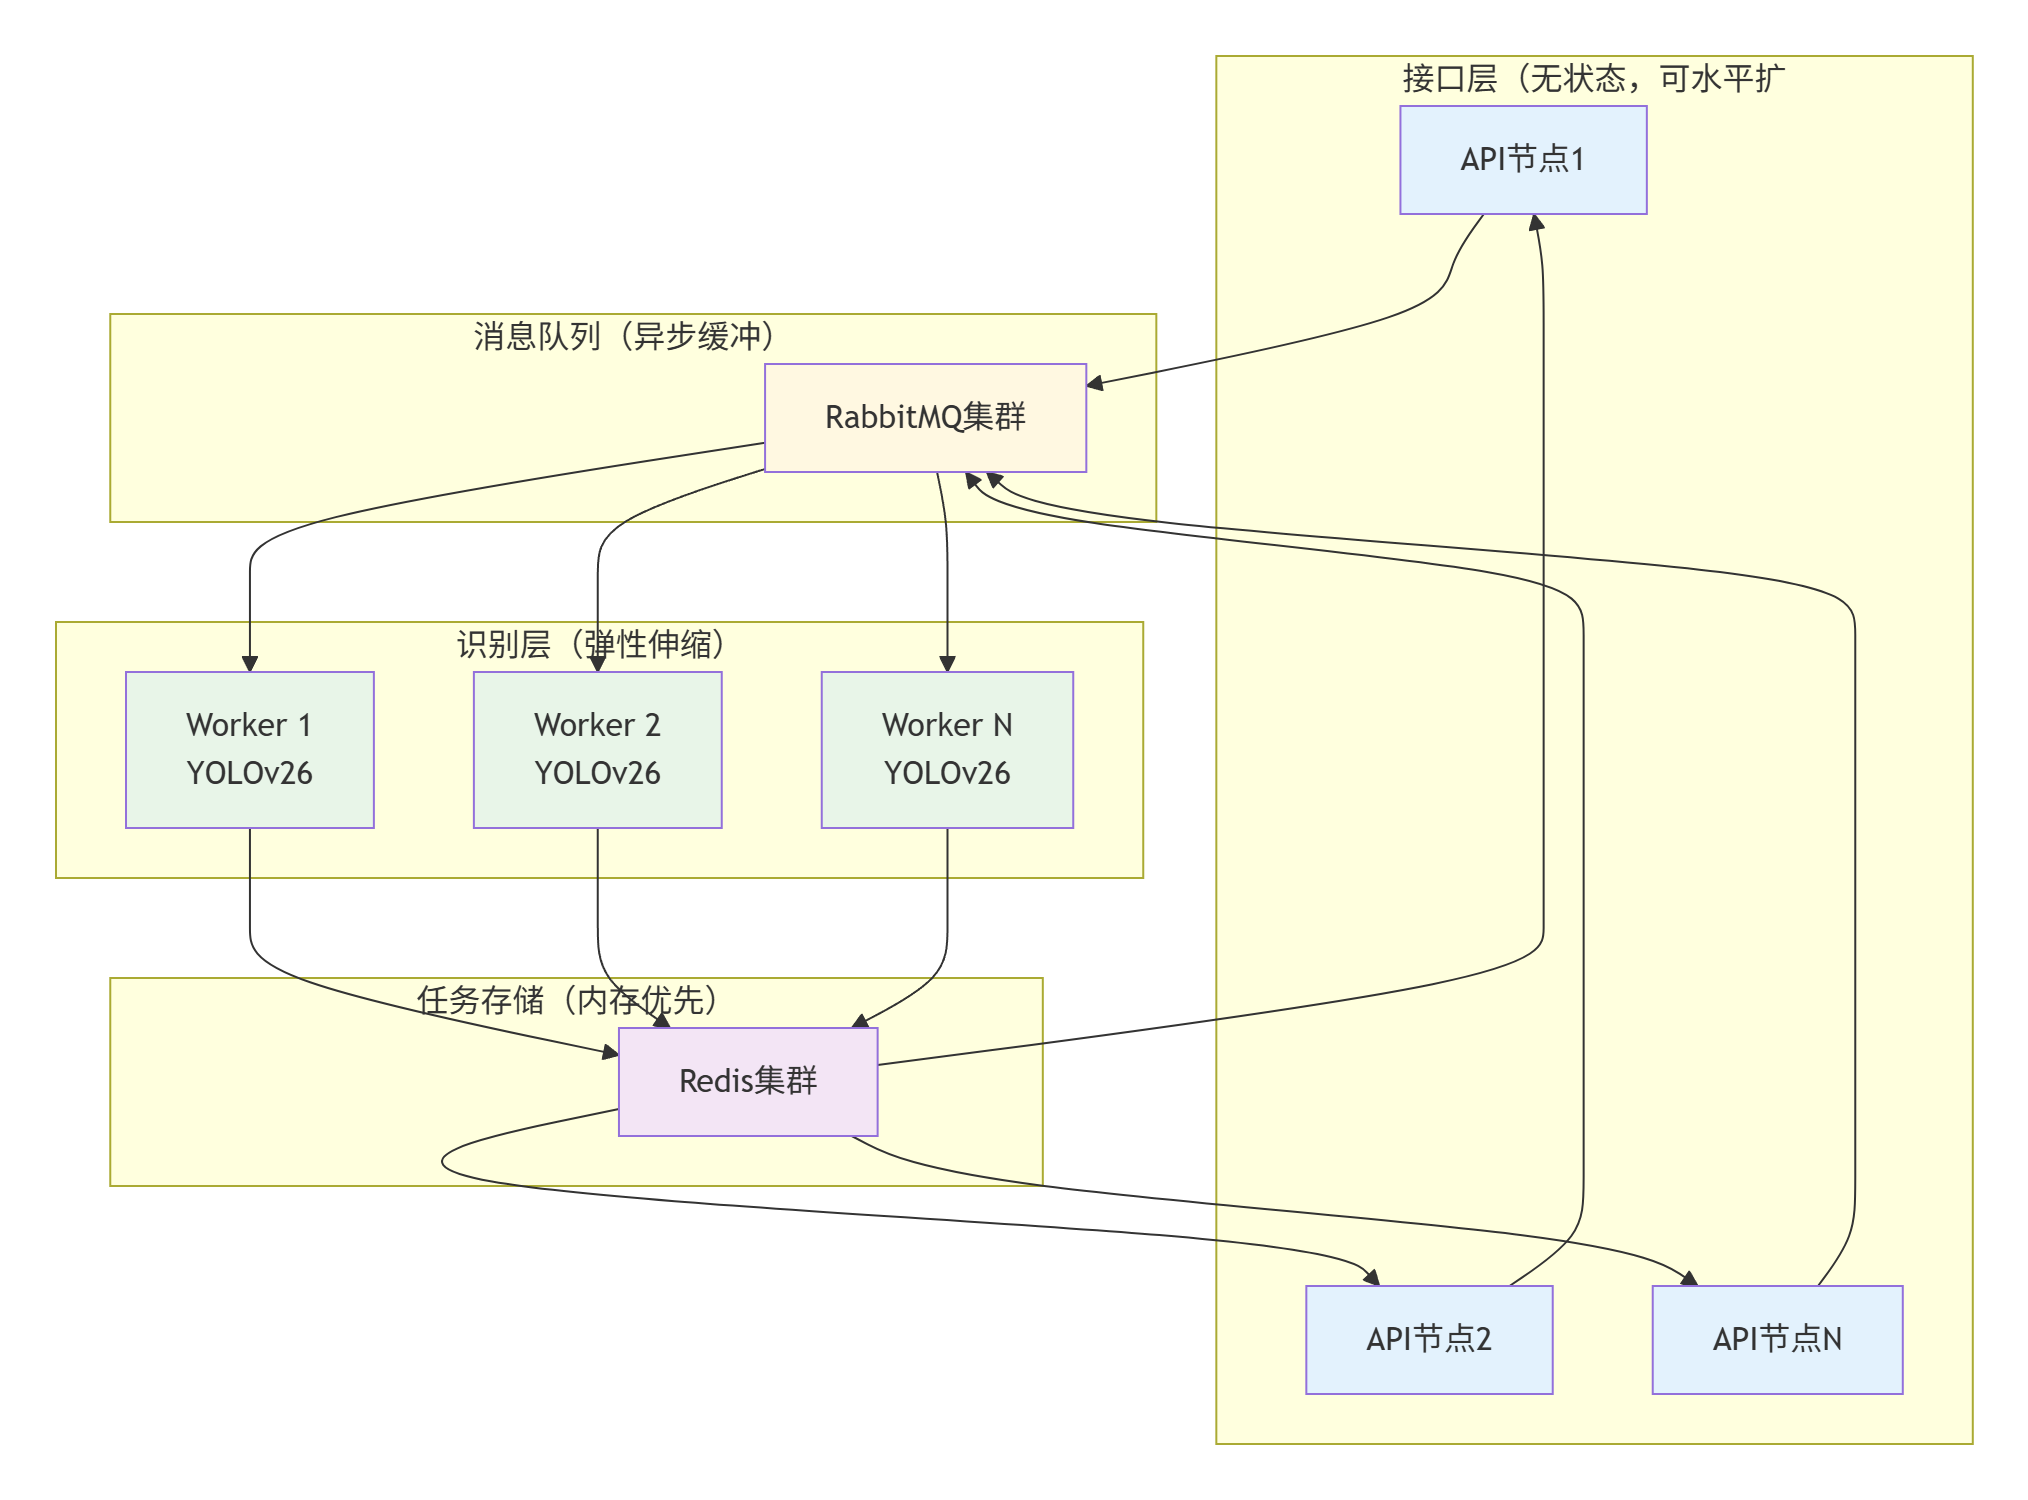
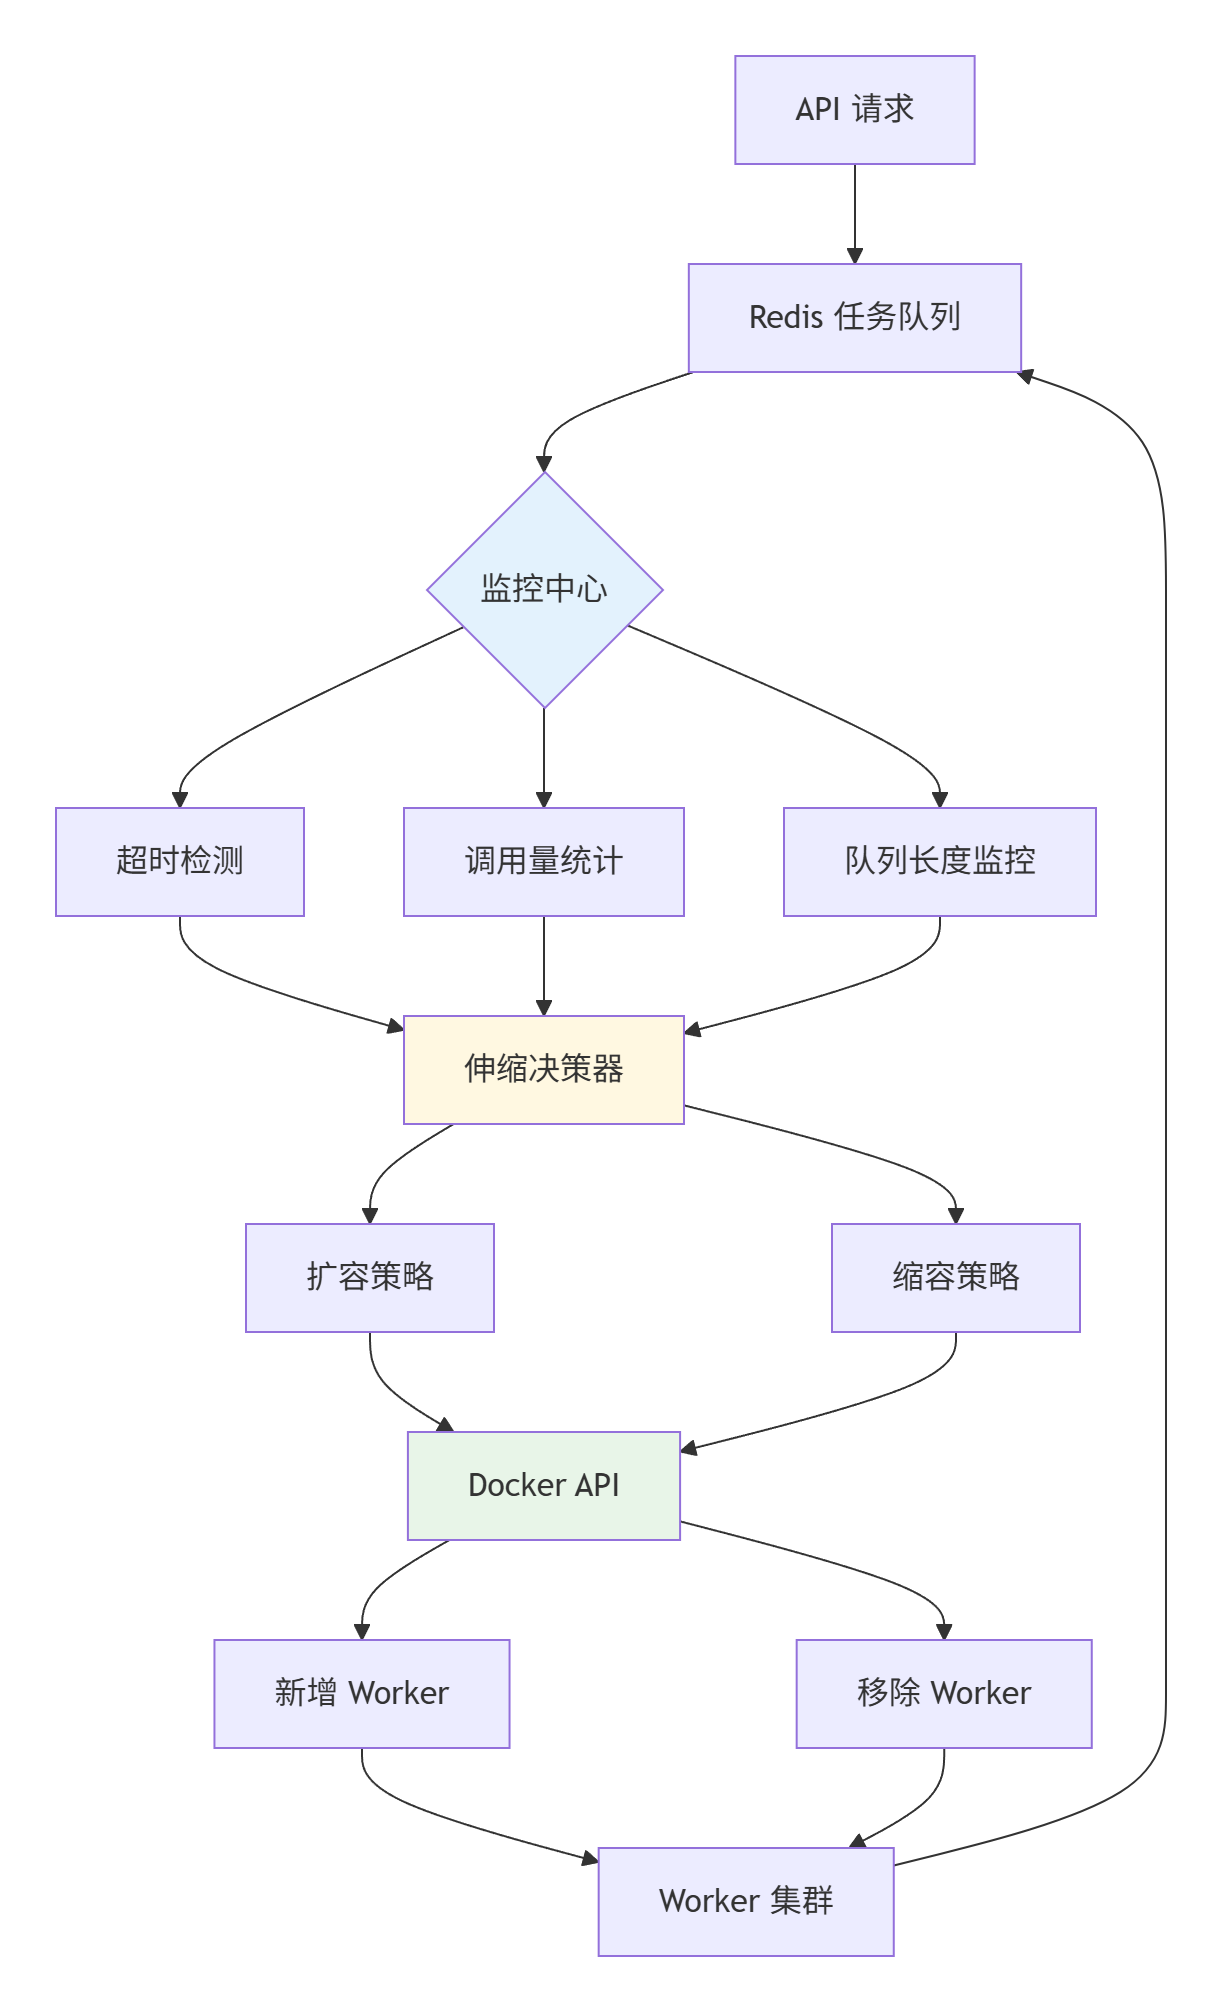
start_period: 40s4. 基于调用量的自适应Worker调度系统
在项目初期,验证码调用量不稳定,存在明显的"潮汐现象",为了节约成本,按需调用,设计了以下架构
5. 项目设计
5.1 技术架构概述
PHP接口层:高并发HTTP接口处理,快速响应
Python Worker:深度学习推理,YOLOv26模型识别
Redis:内存缓存,任务队列,实时状态存储
MySQL:持久化存储,任务历史,用户数据
RabbitMQ:消息队列,异步任务调度
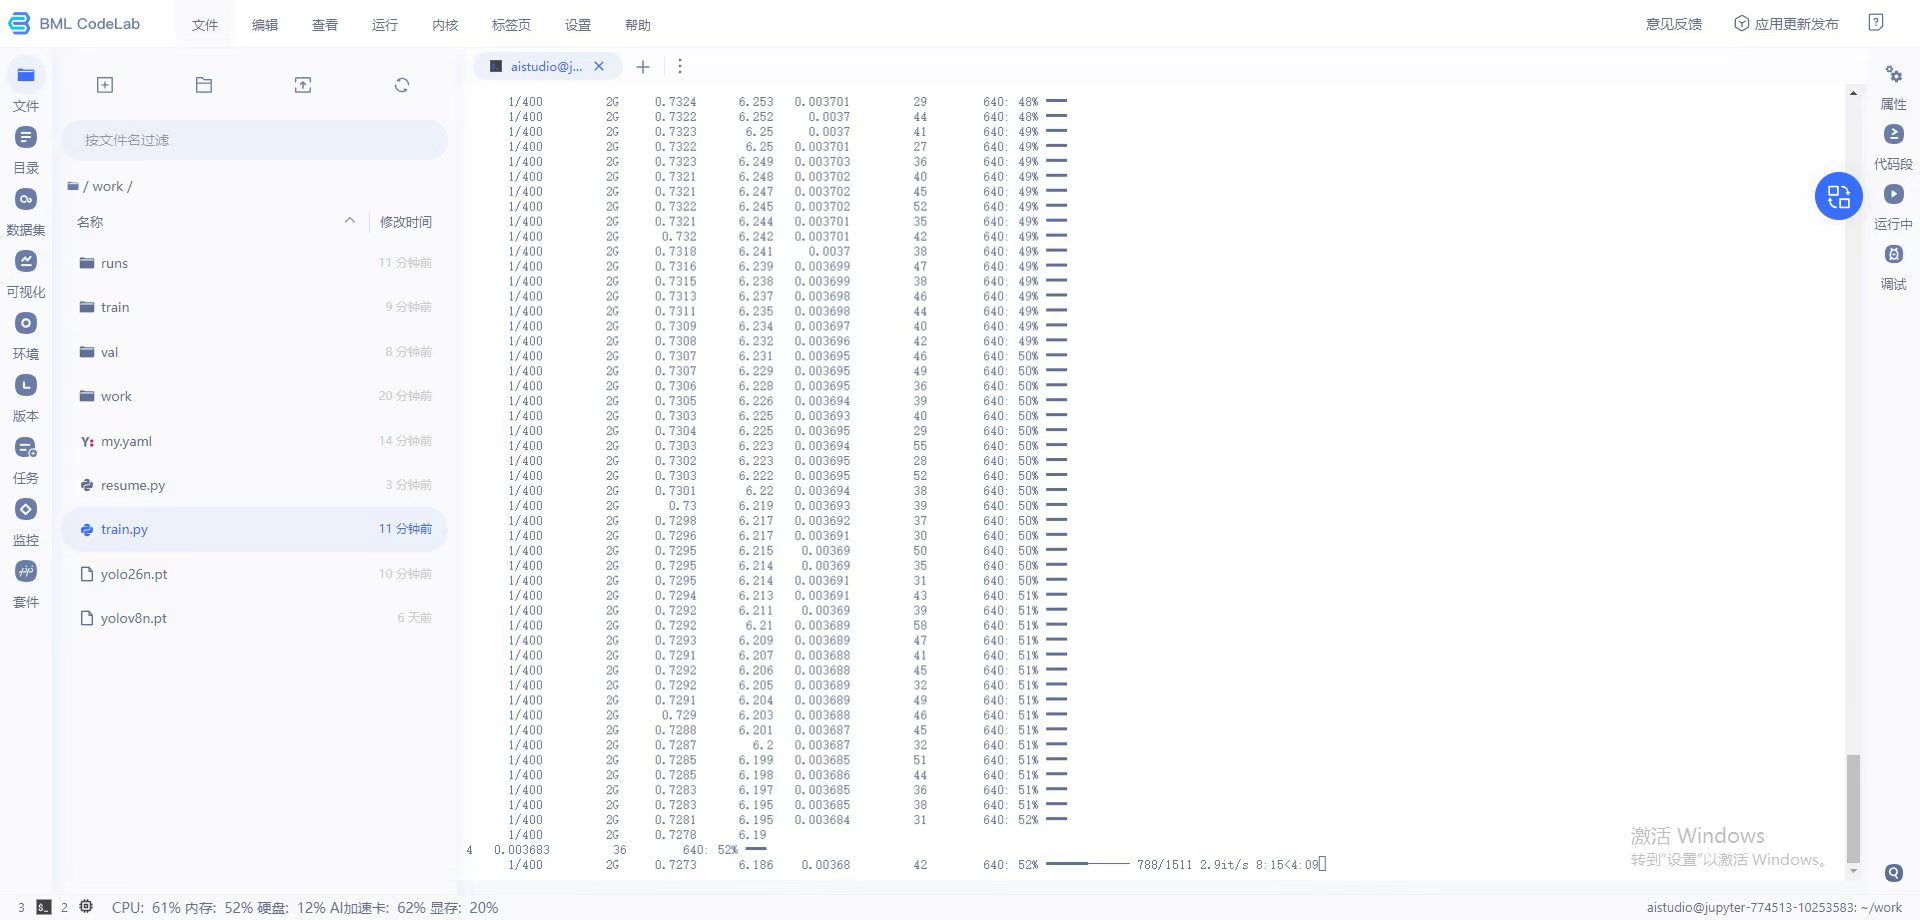
5.2 模型训练
空间推理点选1举例,通过python脚本采集100张数据先做目标检测训练,得到一个基础的模型,然后下载2000张验证码作为新的数据集,用训练好的yolo模型自动标注,标注好后人工核对修改
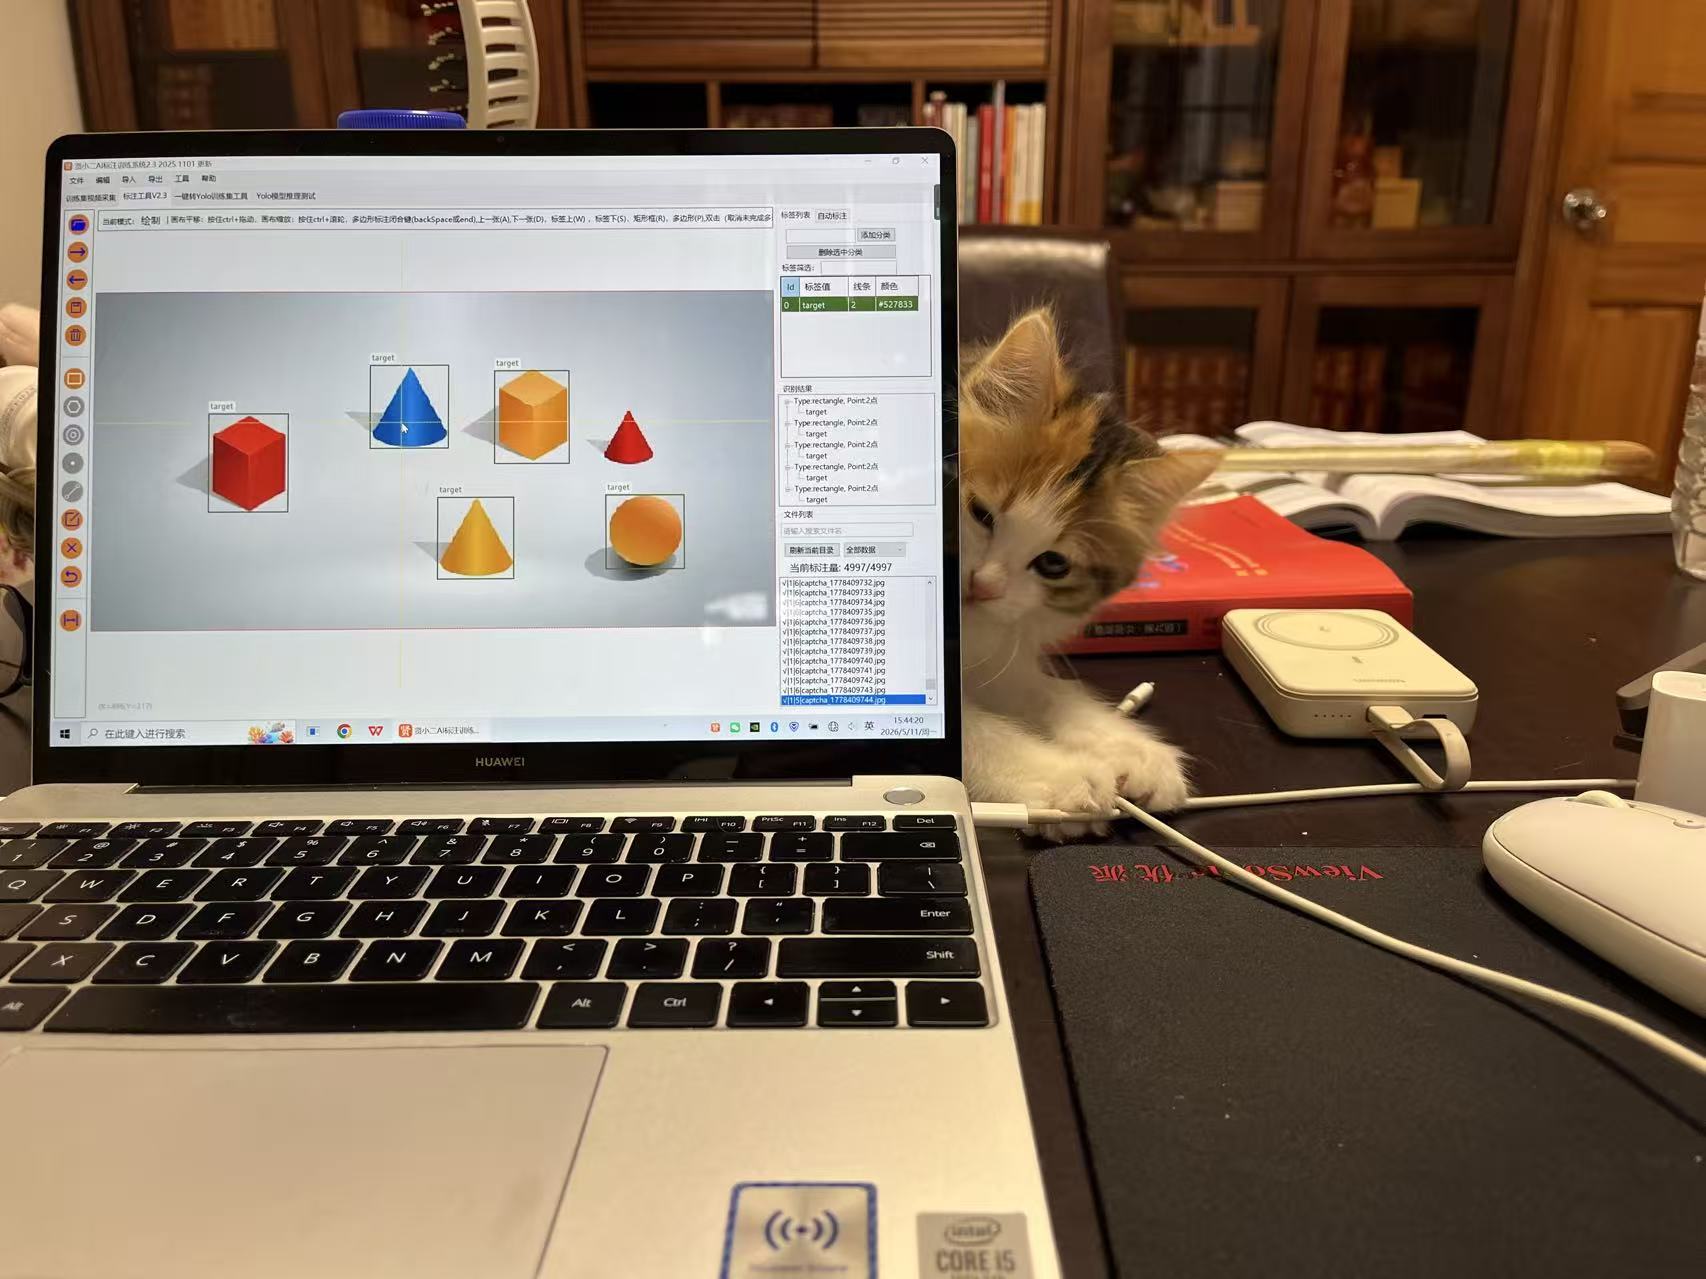
增强数据集后导出进行训练
bash
from ultralytics import YOLO

model = YOLO('/home/aistudio/work/yolo26n.pt')  # 从根目录加载预训练权重
# zip -s 0 test.zip --out train_full.zip
# unzip train_full.zip

# 训练配置pip
model.train(
    data='/home/aistudio/work/my.yaml',
    epochs=100,
    imgsz=640,#统一640
    rect=False,#我现在的架构就是统一进行目标检测traget所以哪怕长方形被拉成圆形,只要能检测到这个目标就可以所以可以关闭
    batch=16,
    patience=15,  # 或保持默认的100
    amp=True,
    device='0'  # 有GPU改为 '0'
)


# # # # # # 检测模型# # # # # # #
# 尺寸固定:640 × 640
# (长边对齐,短边自动填充)

# # # # # # 分类模型公式# # # # #
# 分类尺寸 = ceil(原始目标像素 × 2.5 / 32) × 32
# 38×37 计算过程:
# 原始目标长边:38
# 38 × 2.5 = 95
# 95 / 32 = 2.96875
# ceil(2.96875) = 3
# 3 × 32 = 96
训练好以后导出为onnx模型,以便于部署
bash
from ultralytics import YOLO
model = YOLO('train/weights/best.pt')
model.export(format='onnx', imgsz=256, simplify=True)
得到目标检测模型后,需要进行分类模型训练,可以借助刚刚训练好的目标检测模型进行分割得到剪裁后的字符
bash
"""
验证码检测区域裁剪脚本
功能:使用 yolo26best1.onnx  对验证码图片进行推理,
      将检测到的每个文字区域裁剪保存,供分类模型训练使用。

模型信息:
  输入: [1, 3, 640, 640]  float32
  输出: [1, 300, 6]  -> (x1, y1, x2, y2, conf, cls)  已经过模型内部 NMS

输出目录结构:
  cropped_chars/
    ├── 000001_img1_box0.png
    ├── 000002_img1_box1.png
    └── ...
"""

import os
import glob
import time
import argparse
import logging

import cv2
import numpy as np
import onnxruntime as ort

# ──────────────────────────────────────────────────────────────────────────────
# 配置区(可通过命令行参数覆盖)
# ──────────────────────────────────────────────────────────────────────────────
DEFAULT_MODEL_PATH   = r"C:\Users\Administrator\Desktop\打码平台\yolo26best1.onnx"
DEFAULT_INPUT_DIR    = r"C:\Users\Administrator\Desktop\打码平台\captchas"
DEFAULT_OUTPUT_DIR   = r"cropped_chars"
DEFAULT_INPUT_SIZE   = 640          # 模型输入边长
DEFAULT_CONF_THRESH  = 0.7         # 置信度阈值
DEFAULT_IOU_THRESH   = 0.45         # NMS IoU 阈值
DEFAULT_PADDING      = 4            # 裁剪时在四周额外留出的像素
DEFAULT_MIN_AREA     = 100          # 裁剪区域最小面积(过滤噪点框)
DEFAULT_BATCH_LOG    = 500          # 每处理多少张图片打印一次进度

logging.basicConfig(
    level=logging.INFO,
    format="%(asctime)s [%(levelname)s] %(message)s",
    datefmt="%H:%M:%S",
)
logger = logging.getLogger(__name__)


# ──────────────────────────────────────────────────────────────────────────────
# 工具函数
# ──────────────────────────────────────────────────────────────────────────────

def letterbox(img: np.ndarray, new_size: int = 416) -> tuple[np.ndarray, float, tuple[int, int]]:
    """
    等比例缩放图片并填充至 new_size × new_size(灰色填充)。
    返回: (处理后图片, 缩放比例, (左填充宽, 上填充高))
    """
    h, w = img.shape[:2]
    scale = min(new_size / w, new_size / h)
    nw, nh = int(round(w * scale)), int(round(h * scale))
    img_resized = cv2.resize(img, (nw, nh), interpolation=cv2.INTER_LINEAR)

    pad_w = (new_size - nw) // 2
    pad_h = (new_size - nh) // 2

    img_padded = np.full((new_size, new_size, 3), 114, dtype=np.uint8)
    img_padded[pad_h: pad_h + nh, pad_w: pad_w + nw] = img_resized
    return img_padded, scale, (pad_w, pad_h)


def preprocess(img_bgr: np.ndarray, input_size: int = 416) -> tuple[np.ndarray, float, tuple[int, int]]:
    """BGR -> letterbox -> RGB -> NCHW float32 [0,1]"""
    img_lb, scale, pad = letterbox(img_bgr, input_size)
    img_rgb = cv2.cvtColor(img_lb, cv2.COLOR_BGR2RGB)
    blob = img_rgb.transpose(2, 0, 1).astype(np.float32) / 255.0
    blob = blob[np.newaxis, ...]  # (1, 3, H, W)
    return blob, scale, pad


def xywh2xyxy(boxes_xywh: np.ndarray) -> np.ndarray:
    """将 (cx, cy, w, h) 转换为 (x1, y1, x2, y2)"""
    boxes_xyxy = boxes_xywh.copy()
    boxes_xyxy[:, 0] = boxes_xywh[:, 0] - boxes_xywh[:, 2] / 2
    boxes_xyxy[:, 1] = boxes_xywh[:, 1] - boxes_xywh[:, 3] / 2
    boxes_xyxy[:, 2] = boxes_xywh[:, 0] + boxes_xywh[:, 2] / 2
    boxes_xyxy[:, 3] = boxes_xywh[:, 1] + boxes_xywh[:, 3] / 2
    return boxes_xyxy


def nms(boxes_xyxy: np.ndarray, scores: np.ndarray, iou_thresh: float) -> list[int]:
    """简单 NMS,返回保留框的索引列表"""
    if len(boxes_xyxy) == 0:
        return []

    x1 = boxes_xyxy[:, 0]
    y1 = boxes_xyxy[:, 1]
    x2 = boxes_xyxy[:, 2]
    y2 = boxes_xyxy[:, 3]
    areas = (x2 - x1 + 1) * (y2 - y1 + 1)
    order = scores.argsort()[::-1]

    keep = []
    while order.size > 0:
        i = order[0]
        keep.append(i)
        if order.size == 1:
            break
        xx1 = np.maximum(x1[i], x1[order[1:]])
        yy1 = np.maximum(y1[i], y1[order[1:]])
        xx2 = np.minimum(x2[i], x2[order[1:]])
        yy2 = np.minimum(y2[i], y2[order[1:]])
        inter_w = np.maximum(0, xx2 - xx1 + 1)
        inter_h = np.maximum(0, yy2 - yy1 + 1)
        inter = inter_w * inter_h
        iou = inter / (areas[i] + areas[order[1:]] - inter)
        order = order[1:][iou <= iou_thresh]

    return keep


def postprocess(
    output: np.ndarray,
    orig_h: int,
    orig_w: int,
    scale: float,
    pad: tuple[int, int],
    conf_thresh: float = 0.25,
    iou_thresh: float = 0.45,
) -> list[tuple[int, int, int, int, float]]:
    """
    解析模型输出 [1, 300, 6] → 原图坐标框列表。
    模型输出格式: (x1, y1, x2, y2, conf, cls),坐标在 letterbox 坐标系内,
    已经过模型内部 NMS,无需再做 NMS。
    返回: [(x1, y1, x2, y2, conf), ...]  坐标已映射回原图
    """
    preds = output[0]           # (300, 6)

    # 置信度过滤(第5列是 conf)
    confs = preds[:, 4]
    mask = confs >= conf_thresh
    preds = preds[mask]

    if preds.shape[0] == 0:
        return []

    # 反映射回原图坐标(letterbox 坐标系 → 原图坐标系)
    pad_w, pad_h = pad
    results = []
    for row in preds:
        x1, y1, x2, y2, conf = row[0], row[1], row[2], row[3], row[4]

        # 减去 letterbox 填充,除以缩放比例
        x1 = (x1 - pad_w) / scale
        y1 = (y1 - pad_h) / scale
        x2 = (x2 - pad_w) / scale
        y2 = (y2 - pad_h) / scale

        # 裁剪到原图范围
        x1 = int(max(0, round(x1)))
        y1 = int(max(0, round(y1)))
        x2 = int(min(orig_w, round(x2)))
        y2 = int(min(orig_h, round(y2)))

        results.append((x1, y1, x2, y2, float(conf)))

    # 按 x1 从左到右排序,方便后续按序命名
    results.sort(key=lambda r: r[0])
    return results


# ──────────────────────────────────────────────────────────────────────────────
# 主流程
# ──────────────────────────────────────────────────────────────────────────────

def run(
    model_path:   str  = DEFAULT_MODEL_PATH,
    input_dir:    str  = DEFAULT_INPUT_DIR,
    output_dir:   str  = DEFAULT_OUTPUT_DIR,
    input_size:   int  = DEFAULT_INPUT_SIZE,
    conf_thresh:  float= DEFAULT_CONF_THRESH,
    iou_thresh:   float= DEFAULT_IOU_THRESH,
    padding:      int  = DEFAULT_PADDING,
    min_area:     int  = DEFAULT_MIN_AREA,
    save_debug:   bool = False,
) -> None:
    """
    遍历 input_dir 下所有图片,检测并裁剪文字区域,保存至 output_dir。

    Args:
        model_path:  ONNX 模型路径
        input_dir:   验证码图片目录
        output_dir:  裁剪图片输出目录
        input_size:  模型输入边长(默认 640)
        conf_thresh: 置信度阈值
        iou_thresh:  NMS IoU 阈值
        padding:     裁剪时四周额外扩展像素数
        min_area:    裁剪区域最小像素面积(过滤极小噪点框)
        save_debug:  是否保存带有检测框的调试图(保存到 output_dir/debug/)
    """
    # 加载模型
    logger.info(f"加载模型: {model_path}")
    session = ort.InferenceSession(model_path, providers=["CPUExecutionProvider"])
    input_name = session.get_inputs()[0].name
    logger.info(f"模型输入节点: {input_name}, 大小: {input_size}×{input_size}")

    # 收集图片列表
    exts = ("*.png", "*.jpg", "*.jpeg", "*.bmp", "*.webp")
    img_paths = []
    for ext in exts:
        img_paths.extend(glob.glob(os.path.join(input_dir, ext)))
    img_paths.sort()
    logger.info(f"共发现图片: {len(img_paths)} 张")

    if not img_paths:
        logger.warning("未找到任何图片,请检查 input_dir 路径!")
        return

    # 创建输出目录
    os.makedirs(output_dir, exist_ok=True)
    if save_debug:
        os.makedirs(os.path.join(output_dir, "debug"), exist_ok=True)

    # 统计
    total_crops = 0
    total_skipped = 0
    global_crop_id = 1
    t_start = time.time()

    for idx, img_path in enumerate(img_paths, 1):
        # 使用 np.fromfile + imdecode 绕过 cv2.imread 不支持中文路径的问题
        try:
            img_bgr = cv2.imdecode(np.fromfile(img_path, dtype=np.uint8), cv2.IMREAD_COLOR)
        except Exception:
            img_bgr = None
        if img_bgr is None:
            logger.warning(f"  无法读取图片: {img_path}")
            total_skipped += 1
            continue

        orig_h, orig_w = img_bgr.shape[:2]
        img_name = os.path.splitext(os.path.basename(img_path))[0]

        # 前处理
        blob, scale, pad = preprocess(img_bgr, input_size)

        # 推理
        outputs = session.run(None, {input_name: blob})
        raw_out = outputs[0]  # (1, 5, 3549)

        # 后处理:解析检测框
        detections = postprocess(
            raw_out, orig_h, orig_w, scale, pad,
            conf_thresh=conf_thresh, iou_thresh=iou_thresh
        )

        if not detections:
            logger.debug(f"  [{idx}/{len(img_paths)}] {img_name}: 未检测到目标")
            total_skipped += 1
            continue

        # 可选:保存调试图(带框)
        if save_debug:
            debug_img = img_bgr.copy()
            for (x1, y1, x2, y2, conf) in detections:
                cv2.rectangle(debug_img, (x1, y1), (x2, y2), (0, 255, 0), 2)
                cv2.putText(debug_img, f"{conf:.2f}", (x1, max(0, y1 - 5)),
                            cv2.FONT_HERSHEY_SIMPLEX, 0.5, (0, 255, 0), 1)
            debug_path = os.path.join(output_dir, "debug", f"{img_name}_debug.jpg")
            cv2.imwrite(debug_path, debug_img, [cv2.IMWRITE_JPEG_QUALITY, 90])

        # 裁剪并保存每个检测框
        img_crops = 0
        for box_idx, (x1, y1, x2, y2, conf) in enumerate(detections):
            # 扩展 padding
            x1p = max(0, x1 - padding)
            y1p = max(0, y1 - padding)
            x2p = min(orig_w, x2 + padding)
            y2p = min(orig_h, y2 + padding)

            # 过滤过小区域
            area = (x2p - x1p) * (y2p - y1p)
            if area < min_area:
                continue

            crop = img_bgr[y1p:y2p, x1p:x2p]

            # 文件名: {全局序号:06d}_{原文件名}_box{框序号}.png
            save_name = f"{global_crop_id:06d}_{img_name}_box{box_idx}.png"
            save_path = os.path.join(output_dir, save_name)
            cv2.imwrite(save_path, crop)

            global_crop_id += 1
            img_crops += 1
            total_crops += 1

        # 进度日志
        if idx % DEFAULT_BATCH_LOG == 0 or idx == len(img_paths):
            elapsed = time.time() - t_start
            speed = idx / elapsed
            logger.info(
                f"进度: {idx}/{len(img_paths)} 张  |  "
                f"已裁剪: {total_crops} 块  |  "
                f"速度: {speed:.1f} img/s  |  "
                f"耗时: {elapsed:.1f}s"
            )

    elapsed_total = time.time() - t_start
    logger.info("=" * 60)
    logger.info(f"完成!")
    logger.info(f"  处理图片:  {len(img_paths) - total_skipped} / {len(img_paths)}")
    logger.info(f"  裁剪保存:  {total_crops} 块 → {output_dir}")
    logger.info(f"  跳过图片:  {total_skipped} 张(读取失败或无检测结果)")
    logger.info(f"  总耗时:    {elapsed_total:.1f}s")
    logger.info("=" * 60)


# ──────────────────────────────────────────────────────────────────────────────
# 命令行入口
# ──────────────────────────────────────────────────────────────────────────────

def parse_args():
    parser = argparse.ArgumentParser(
        description="使用 YOLO ONNX 模型裁剪验证码中的文字区域,供分类训练使用"
    )
    parser.add_argument("--model",   default=DEFAULT_MODEL_PATH,  help="ONNX 模型路径")
    parser.add_argument("--input",   default=DEFAULT_INPUT_DIR,   help="验证码图片目录")
    parser.add_argument("--output",  default=DEFAULT_OUTPUT_DIR,  help="裁剪结果输出目录")
    parser.add_argument("--size",    default=DEFAULT_INPUT_SIZE,  type=int,   help="模型输入边长(默认 416)")
    parser.add_argument("--conf",    default=DEFAULT_CONF_THRESH, type=float, help="置信度阈值(默认 0.25)")
    parser.add_argument("--iou",     default=DEFAULT_IOU_THRESH,  type=float, help="NMS IoU 阈值(默认 0.45)")
    parser.add_argument("--padding", default=DEFAULT_PADDING,     type=int,   help="裁剪扩展像素(默认 4)")
    parser.add_argument("--min-area",default=DEFAULT_MIN_AREA,    type=int,   help="最小裁剪面积(默认 100)")
    parser.add_argument("--debug",   action="store_true",                     help="保存带检测框的调试图")
    return parser.parse_args()


if __name__ == "__main__":
    args = parse_args()
    run(
        model_path  = args.model,
        input_dir   = args.input,
        output_dir  = args.output,
        input_size  = args.size,
        conf_thresh = args.conf,
        iou_thresh  = args.iou,
        padding     = args.padding,
        min_area    = args.min_area,
        save_debug  = args.debug,
    )
需要手动更改
DEFAULT_MODEL_PATH =改为你的模型路径(因为yolo26的输出格式和其它版本不同记住你hi吃yolo26)
DEFAULT_INPUT_DIR =改为你的数据集路径
DEFAULT_OUTPUT_DIR = r"cropped_chars"
DEFAULT_INPUT_SIZE = 640 模型输入长度
DEFAULT_CONF_THRESH = 0.7 # 置信度
运行后会得到检测后的字符集
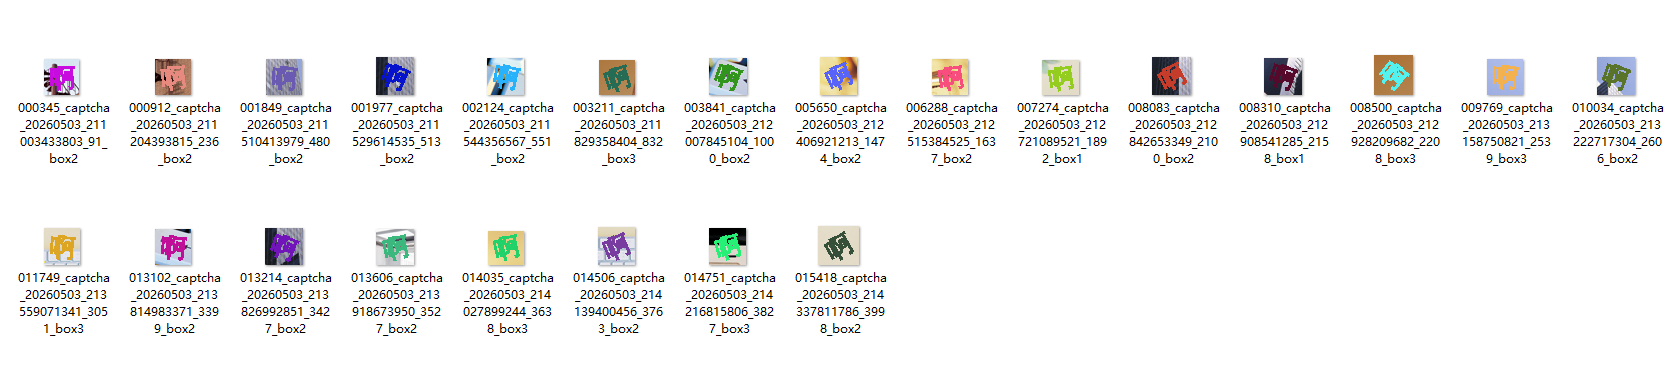
通过百度ocr或者其他ocr将每个字符集图片自动分类
分类后成功率并非100%,我写了个验证代码,发现每个目录有些字符集没识别出来,需要手动调整
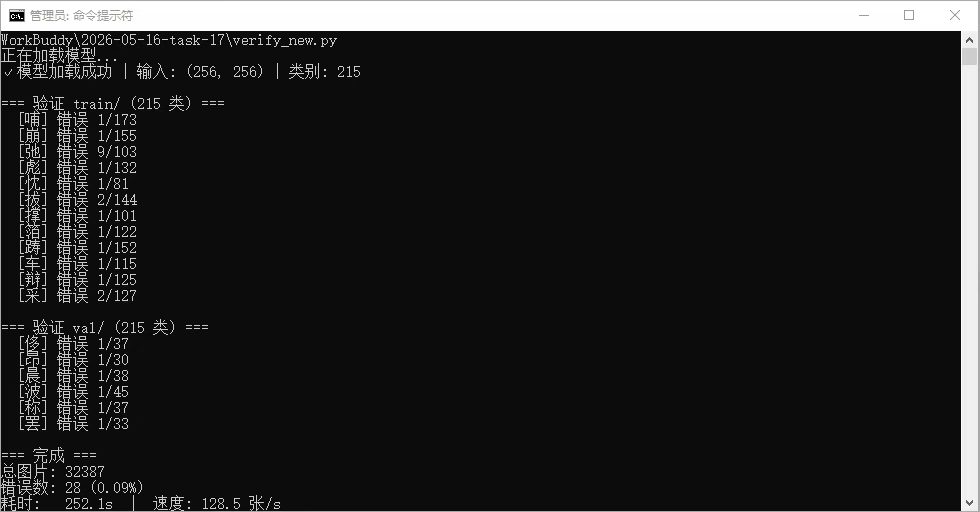
或者你可以手动分类,最后整理后得到目录结构:
bash
汉字验证码数据集/
├── characters/                  # 按字符分类的数据
│   ├── 人/                     # 单个汉字目录
│   │   ├── 人_001.jpg
│   │   ├── 人_002.jpg
│   │   ├── 人_003.jpg
│   ├── 大/
│   ├── 中/
│   ├── 国/
│   ├── 文/
│   ├── 字/
│   ├── 数/
│   └── ...


再次进行训练

```bash
from ultralytics import YOLO

model = YOLO('/home/aistudio/work/yolo26n-cls.pt')

# 最简有效版本
model.train(
    data='/home/aistudio/work/test/',  # 数据集根目录
    epochs=100,
    imgsz=256,      # 你的小图尺寸
    patience=20,   # 早停
    device='0',    # GPU
    amp=True
    # 其他用默认
)
# 检测模型
# 尺寸固定:640 × 640
# (长边对齐,短边自动填充)

# 分类模型公式
# 分类尺寸 = ceil(原始目标像素 × 2.5 / 32) × 32
# 38×37 计算过程:
# 原始目标长边:38
# 38 × 2.5 = 95
# 95 / 32 = 2.96875
# ceil(2.96875) = 3
# 3 × 32 = 96

# LANG=zh_CN.UTF-8 unzip -O GBK 你的压缩包.zip

# unzip -O GBK 1.zip
得到分类模型后,在测试下看看效果如何,识别率很高
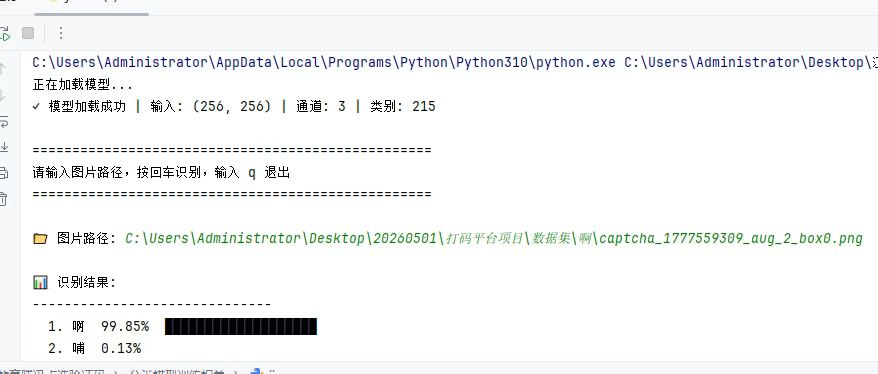
至此,得到了目标检测和分类识别的模型了,接下来就是检测+识别
bash
# -*- coding: utf-8 -*-
"""
工学云点选验证码识别 - 纯 onnxruntime 版
检测:onnxruntime 直接推理 YOLOv26 ONNX(输出格式 [1,300,6] = x1,y1,x2,y2,conf,cls,已含NMS)
分类:onnxruntime 推理
流程:检测框 → 裁剪 → 分类识别 → 输出结果
"""
import os
import cv2
import numpy as np
from PIL import Image
import onnxruntime as ort
# ========== 固定路径 ==========
DETECT_MODEL = r"C:\Users\Administrator\Desktop\打码平台_易班yolo26模板\易班目标检测训练相关\yolo26best1.onnx"
CLASSIFY_MODEL = r"C:\Users\Administrator\Desktop\打码平台_易班yolo26模板\易班分类模型训练相关\best.onnx"
DATASET_PATH = r"C:\Users\Administrator\Desktop\打码平台_易班yolo26模板\易班分类模型训练相关\易班分类模型数据集"
CONF_THRES = 0.25 # 检测置信度阈值
IMG_SIZE = 640 # 检测输入尺寸
CLS_THRES = 0.70 # 分类置信度阈值(只返回>70%的结果)
DEBUG = True # 调试开关,正常后改为 False
# ========== 加载模型 ==========
def load_models():
det_sess = ort.InferenceSession(DETECT_MODEL)
cls_sess = ort.InferenceSession(CLASSIFY_MODEL, providers=['CPUExecutionProvider'])
det_in = det_sess.get_inputs()[0].name
det_out = det_sess.get_outputs()[0].name
cls_in = cls_sess.get_inputs()[0].name
cls_out = cls_sess.get_outputs()[0].name
_, channels, cls_h, cls_w = cls_sess.get_inputs()[0].shape
class_names = sorted([
d for d in os.listdir(DATASET_PATH)
if os.path.isdir(os.path.join(DATASET_PATH, d))
])
print(f"✓ 检测模型 | 输入: 1x3x{IMG_SIZE}x{IMG_SIZE}")
print(f"✓ 分类模型 | 输入: {cls_h}x{cls_w} | 类别数: {len(class_names)}")
return {
'det_sess': det_sess, 'det_in': det_in, 'det_out': det_out,
'cls_sess': cls_sess, 'cls_in': cls_in, 'cls_out': cls_out,
'cls_size': (int(cls_h), int(cls_w)),
'channels': int(channels),
'class_names': class_names,
}
# ========== 第一阶段:目标检测 ==========
def detect(img, models):
"""
输入BGR图片(numpy),返回检测框列表
[{'bbox': [x1,y1,x2,y2], 'conf': float}]
YOLOv26 ONNX 输出格式: [1, 300, 6] -> [x1,y1,x2,y2,conf,cls]
坐标在 640x640 填充图上(像素单位),模型已内置NMS
"""
h, w = img.shape[:2]
# 缩放填充到 IMG_SIZE(和训练时一致的 letterbox)
scale = min(IMG_SIZE / w, IMG_SIZE / h)
nw, nh = int(w * scale), int(h * scale)
# resized = cv2.resize(img, (nw, nh))
# 修正 --- 先转 RGB,和训练时一致
img_rgb = cv2.cvtColor(img, cv2.COLOR_BGR2RGB)
resized = cv2.resize(img_rgb, (nw, nh))
canvas = np.zeros((IMG_SIZE, IMG_SIZE, 3), dtype=np.uint8)
dx, dy = (IMG_SIZE - nw) // 2, (IMG_SIZE - nh) // 2
canvas[dy:dy+nh, dx:dx+nw] = resized
# HWC -> CHW -> NCHW
blob = canvas.astype(np.float32) / 255.0
blob = np.transpose(blob, (2, 0, 1))
blob = np.expand_dims(blob, axis=0)
# 推理
output = models['det_sess'].run([models['det_out']], {models['det_in']: blob})[0]
if DEBUG:
print(f"DEBUG output.shape={output.shape}, 检测数(非0-conf)={np.sum(output[0][:,4] >= CONF_THRES)}")
# 解析 [300, 6] 格式: x1,y1,x2,y2,conf,cls
preds = output[0] # (300, 6)
dets = []
for i in range(preds.shape[0]):
row = preds[i]
conf = float(row[4])
if conf < CONF_THRES:
continue # 低置信度为填充行,可提前 break(可选)
# 640空间的坐标(像素单位)
x1_640 = float(row[0])
y1_640 = float(row[1])
x2_640 = float(row[2])
y2_640 = float(row[3])
# 去掉填充偏移,映射回原图
x1 = int(round((x1_640 - dx) / scale))
y1 = int(round((y1_640 - dy) / scale))
x2 = int(round((x2_640 - dx) / scale))
y2 = int(round((y2_640 - dy) / scale))
# 裁剪到原图边界
x1, y1 = max(0, x1), max(0, y1)
x2 = max(x1+1, min(w-1, x2))
y2 = max(y1+1, min(h-1, y2))
dets.append({'bbox': [x1, y1, x2, y2], 'conf': conf})
return dets
# ========== 第二阶段:分类识别 ==========
def classify(crop_img, models):
"""输入裁剪的BGR区域,返回Top-3类别列表 [(char, conf), ...]"""
cls_size = models['cls_size']
channels = models['channels']
pil = Image.fromarray(cv2.cvtColor(crop_img, cv2.COLOR_BGR2RGB))
pil = pil.convert('L') if channels == 1 else pil.convert('RGB')
pil = pil.resize(cls_size, Image.BILINEAR)
arr = np.array(pil, dtype=np.float32) / 255.0
if channels == 1:
arr = arr[np.newaxis, :, :]
else:
arr = np.transpose(arr, (2, 0, 1))[np.newaxis, :, :, :]
result = models['cls_sess'].run([models['cls_out']], {models['cls_in']: arr})[0][0]
top3_idx = np.argsort(result)[-3:][::-1]
return [(models['class_names'][i], float(result[i])) for i in top3_idx]
# ========== 串联:检测 + 分类 ==========
def recognize(image_path, models):
"""
输入图片路径,返回识别结果列表
每个结果: {'char', 'confidence', 'center_x', 'center_y', 'bbox'}
只返回置信度 > CLS_THRES 的结果
"""
if not os.path.exists(image_path):
return []
img = cv2.imread(image_path)
if img is None:
return []
dets = detect(img, models)
results = []
for det in dets:
x1, y1, x2, y2 = det['bbox']
crop = img[y1:y2, x1:x2]
if crop.size == 0:
continue
top_char, top_conf = classify(crop, models)[0]
if top_conf < CLS_THRES:
continue
cx, cy = (x1 + x2) // 2, (y1 + y2) // 2
results.append({
'char': top_char,
'confidence': round(top_conf, 4),
'center_x': cx,
'center_y': cy,
'bbox': [x1, y1, x2, y2]
})
return results
# ========== 命令行测试 ==========
if __name__ == '__main__':
models = load_models()
print("\n输入图片路径回车识别,输入 q 退出\n")
while True:
path = input("图片路径: ").strip()
if path.lower() in ['q', 'quit', 'exit', '']:
break
results = recognize(path, models)
print(f"识别结果 ({len(results)} 个):")
for r in results:
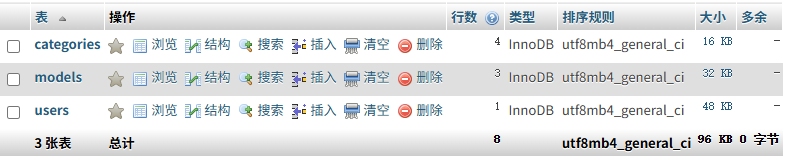
print(f" {r['char']} 置信度:{r['confidence']} 中心:({r['center_x']},{r['center_y']})")5.3 数据库设计
目前仅设计了user表用于存放用户数据,其他两个分别是模型表和分类表,后续应该还要加上统计调用量和用户使用明细等等表,以下仅为初期最简单的设计
5.4 接口设计
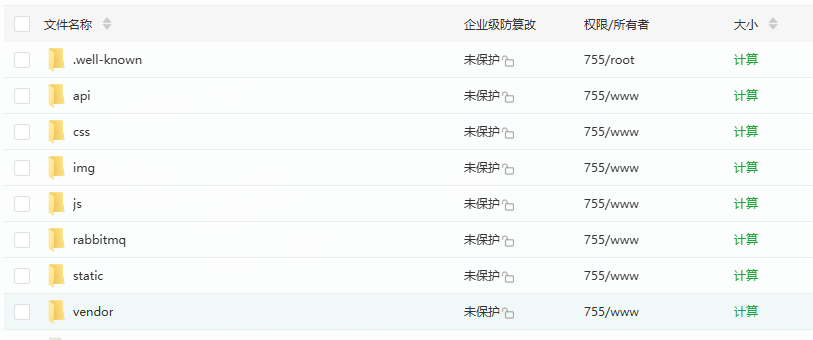
接口我推荐GO语言,但是平台目前用户量不高,还是用了我熟悉的php
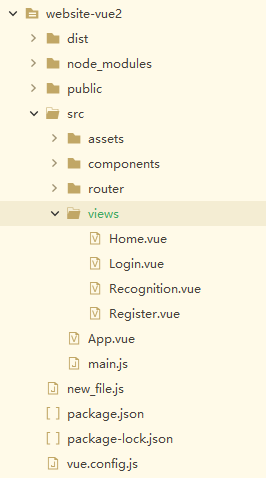
前端采用Vue2 + Element UI 前端实现
后端php部分
6. 目前存在的问题
6.1 数据验证问题
❌ 问题:用户传非Base64数据,Worker处理报错
🔄 影响:RabbitMQ堆积 → Worker重启 → 恶性循环
⏰ 紧急程度:🔥🔥🔥 高
解决方案:三层验证 + 错误隔离
第1层:PHP接口拦截(立即返回错误)
bash
// 简单验证Base64
function checkBase64($data) {
    // 1. 去掉data:image前缀
    if (strpos($data, 'base64,') !== false) {
        $data = explode('base64,', $data)[1];
    }

    // 2. 解码试试
    $decoded = @base64_decode($data, true);
    if ($decoded === false) {
        return false; // 不是Base64
    }

    // 3. 看看是不是图片
    $type = @exif_imagetype('data://image/jpeg;base64,' . $data);
    return $type !== false;
}
第2层:Worker保护(不崩溃)
bash
# Worker处理时加try-catch
try:
    image_data = base64.b64decode(base64_str)
except:
    # 解码失败,记到错误表,不崩溃
    log_error_to_mysql("base64_decode_error", task_id)
    return {"success": False, "error": "图片格式错误"}
第3层:RabbitMQ死信(不堆积)
bash
# 配置RabbitMQ
# 失败3次就进死信队列,不再处理
# 死信队列的消息可以人工处理或自动丢弃
6.2 监控不足问题
❌ 问题:任务超时没记录,不知道什么时候要加Worker
🔄 影响:用户等太久,我们也不知道系统压力多大
⏰ 紧急程度:🔥🔥🔥 高
解决方案:3秒超时 + Redis记录 + 数据库持久化
流程
用户请求 → PHP处理
↓
设置3秒超时
↓
超时? → 是 → 1. 立即返回错误
↓ 2. 记录到Redis
否 3. 异步存到数据库
↓
正常处理
3秒超时检测
bash
// TaskController.php
public function submitTask(Request $request)
{
    $startTime = microtime(true);

    try {
        // 1. 设置3秒超时
        set_time_limit(3);

        // 2. 验证数据
        $validationResult = $this->validateRequest($request);
        if (!$validationResult['valid']) {
            throw new ValidationException($validationResult['error']);
        }

        // 3. 处理任务(这里会调用Redis/RabbitMQ)
        $taskResult = $this->processTask($request);

        $endTime = microtime(true);
        $processTime = round(($endTime - $startTime) * 1000, 2); // 毫秒

        // 4. 记录处理时间
        if ($processTime > 2900) { // 接近3秒
            $this->logSlowRequest($request, $processTime);
        }

        return response()->json([
            'code' => 200,
            'data' => $taskResult
        ]);

    } catch (Exception $e) {
        $endTime = microtime(true);
        $processTime = round(($endTime - $startTime) * 1000, 2);

        // 5. 检查是否超时
        if ($processTime >= 3000) {
            // 超时了,记录到Redis
            $this->recordTimeout($request, $processTime);

            return response()->json([
                'code' => 408,
                'message' => '请求处理超时(3秒限制)',
                'data' => [
                    'process_time' => $processTime . 'ms',
                    'suggestion' => '请稍后重试或联系客服'
                ]
            ], 408);
        }

        // 其他错误
        return response()->json([
            'code' => 400,
            'message' => $e->getMessage()
        ], 400);
    }
}
Redis记录(速度快)
bash
// TimeoutRecorder.php
class TimeoutRecorder
{
    // 记录超时到Redis
    public function recordTimeout($request, $processTime)
    {
        $redis = Redis::connection();

        $timeoutData = [
            'task_id' => $request->input('task_id', uniqid()),
            'user_id' => $request->input('user_id', 'anonymous'),
            'process_time' => $processTime,
            'timestamp' => time(),
            'uri' => $request->getRequestUri(),
            'ip' => $request->ip(),
            'user_agent' => substr($request->userAgent(), 0, 200)
        ];

        // 1. 存到Redis列表.....
6.3缺少用户反馈机制
缺少用户反馈机制,当识别结果错误时,无法收集这些错误样本用于后续模型优化训练。
解决方案:反馈接口 + Redis存储
处理流程
用户提交反馈 → 验证数据 → 存储到Redis队列 → 异步处理 → 分类存储 → 训练样本库
↓
返回成功响应
↓
奖励用户积分