🚀 手把手用 HTML5 Canvas 从零打造飞机大战游戏,代码全开源!
摘要:本文从 Canvas 基础 API 讲起,手把手带你用纯 JavaScript + Canvas 2D 打造一个完整的飞机大战游戏,涵盖视差滚动、粒子特效、碰撞检测、难度递增等核心机制。
📌 前言
上周我让 AI 帮我写个飞机大战,它给了我一个 30 行的"demo"------飞机是一个蓝色方块,子弹是一条直线......我决定自己用 Canvas 从零撸一个真正能玩的版本。
本文记录了整个开发过程,从 Canvas 基础 API 到完整的飞机大战游戏,包含视差星空、粒子特效、波次难度递增等机制。所有代码已开源,文末附项目地址。
🎨 Canvas 2D 不只是画矩形,它能做游戏、做数据可视化、做一切你能想象到的酷炫页面效果。
🎯 本文适合谁
- 想入门 Canvas 2D 绘图的前端开发者
- 对游戏开发感兴趣但不知从何下手的同学
- 想了解 requestAnimationFrame、碰撞检测、粒子系统等游戏开发核心概念的读者
🎮 效果预览
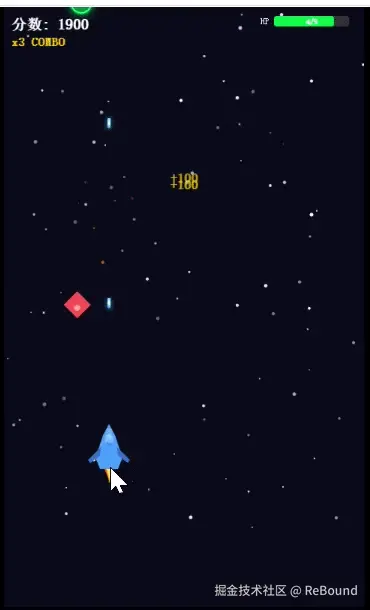
💡 快速体验:
bashgit clone https://gitee.com/zhou-wenqiang-c/ai_doubao_zwq.git cd ai_doubao_zwq/fe/html5/canvas/airplan npm install npm run dev浏览器打开后即可体验完整游戏效果。
一、Canvas 是什么?
HTML5 的 <canvas> 标签提供了一块画布,配合 JavaScript 的 Canvas API,你可以在上面自由绘制任何图形------从简单的矩形、圆形,到复杂的游戏角色和粒子特效。
html
<canvas id="myCanvas" width="600" height="400" style="border: 1px solid #333;">
    你的浏览器不支持 Canvas
</canvas>
⚠️
<canvas>标签内部的文字是降级内容,只有在浏览器不支持 Canvas 时才会显示。现代浏览器基本都支持,但留着它是个好习惯。
核心三步走
js
// 1. 获取 canvas 元素
const canvas = document.querySelector('#myCanvas');

// 2. 获取绘图上下文(2d 或 webgl)
const ctx = canvas.getContext('2d');

// 3. 开始绘制
ctx.fillStyle = '#4299ee';
ctx.fillRect(20, 20, 100, 80); // 矩形
getContext('2d') 是关键 ------它返回一个 CanvasRenderingContext2D 对象,所有绘制操作都通过它完成。如果要做 3D,则使用 getContext('webgl'),配合 Three.js 等库可以实现 WebGL 3D 渲染。
二、Canvas 2D 基础 API
2.1 矩形绘制
Canvas 提供了三种矩形方法:
js
// 填充矩形
ctx.fillStyle = '#4299ee';
ctx.fillRect(20, 20, 100, 80);

// 描边矩形
ctx.strokeStyle = '#f56565';
ctx.lineWidth = 4;
ctx.strokeRect(150, 20, 100, 80);

// 清除矩形区域(擦除)
ctx.clearRect(50, 50, 40, 30);参数说明:fillRect(x, y, width, height)
x, y:矩形左上角坐标(Canvas 坐标系原点在左上角)width, height:宽和高
2.2 颜色系统
js
ctx.fillStyle = '#4299ee';      // 填充色
ctx.strokeStyle = '#f56565';    // 描边色
颜色值支持:
- 十六进制:
#ff0000 - RGB/RGBA:
rgb(255,0,0)/rgba(255,0,0,0.5) - 颜色关键字:
red,blue,transparent
2.3 路径绘制(画任意图形)
矩形只是开胃菜,Canvas 真正强大的地方在于路径绘制:
js
ctx.beginPath();
ctx.moveTo(100, 50);    // 移动到起点
ctx.lineTo(200, 50);    // 画直线到
ctx.lineTo(150, 150);
ctx.closePath();         // 闭合路径
ctx.fillStyle = '#ff6600';
ctx.fill();
绘制圆形/弧线:
js
ctx.beginPath();
ctx.arc(x, y, radius, startAngle, endAngle);
ctx.fill();
📝
arc()的角度用弧度制 ,Math.PI * 2就是一整圈。
2.4 渐变
js
// 线性渐变
const grad = ctx.createLinearGradient(x1, y1, x2, y2);
grad.addColorStop(0, '#a0e0ff');
grad.addColorStop(1, '#2080ff');
ctx.fillStyle = grad;

// 径向渐变
const radGrad = ctx.createRadialGradient(cx, cy, 0, cx, cy, radius);
radGrad.addColorStop(0, '#ffff00');
radGrad.addColorStop(1, '#ff0066');
ctx.fillStyle = radGrad;
2.5 文字绘制
js
ctx.font = 'bold 36px monospace';
ctx.textAlign = 'center';
ctx.fillStyle = '#4a9eff';
ctx.fillText('雷霆战机', canvas.width / 2, 100);
三、动画的灵魂:requestAnimationFrame
为什么不能用 setInterval?
很多初学者会这样写动画:
js
// ❌ 错误示范
setInterval(() => {
    // 更新 + 绘制
}, 16); // 大约 60fps
问题在于:
setInterval的时间精度不稳定,可能和显示器刷新率不同步- 后台标签页仍然在执行,浪费性能
- 无法自动适配高刷屏幕(120Hz、144Hz)
正确姿势:requestAnimationFrame
js
function animate() {
    // 清除画布
    ctx.clearRect(0, 0, canvas.width, canvas.height);

    // 更新位置
    x += speed;

    // 绘制
    ctx.fillRect(x, y, width, height);

    // 递归调用
    requestAnimationFrame(animate);
}

animate(); // 启动动画
requestAnimationFrame 的优势:
- 浏览器自动匹配屏幕刷新率(通常 60fps,高刷屏更高)
- 后台标签页自动暂停,节省资源
- 由浏览器统一调度,避免掉帧
完整的移动矩形示例
js
const canvas = document.querySelector('#myCanvas');
const ctx = canvas.getContext('2d');

let x = 20;
const y = 20;
const width = 100;
const height = 80;
const speed = 3;

function animate() {
    // 1. 擦掉之前的画面
    ctx.clearRect(0, 0, canvas.width, canvas.height);

    // 2. 画上新的位置
    ctx.fillStyle = '#4299ee';
    ctx.fillRect(x, y, width, height);

    // 3. 更新坐标
    x += speed;

    // 4. 超出边界后从左边重新出现
    if (x > canvas.width) {
        x = -width;
    }

    // 5. 请求下一帧
    requestAnimationFrame(animate);
}

animate();
💡 动画三要素:清除 → 更新 → 绘制。这就是所有 Canvas 动画的核心循环。
四、实战:用 Canvas 做一个飞机大战
理论讲完了,来点硬核的------用纯 Canvas 2D 实现一个完整的飞机大战游戏。
4.1 项目架构
bash
airplan/
├── src/
│   ├── main.js          # 入口
│   └── game/
│       ├── Game.js       # 游戏主控制器
│       ├── Player.js     # 玩家飞机
│       ├── Enemy.js      # 敌机系统
│       ├── Bullet.js     # 子弹对象池
│       ├── Background.js # 星空背景
│       ├── Collision.js  # 碰撞检测
│       ├── Explosion.js  # 爆炸特效
│       ├── PowerUp.js    # 道具系统
│       ├── HUD.js        # UI 显示
│       └── utils.js      # 工具函数
├── index.html
└── package.json
4.2 游戏主循环
所有游戏的核心都是一个主循环,每一帧做三件事:更新逻辑、绘制画面、请求下一帧。
js
export class Game {
  constructor(canvas) {
    this.canvas = canvas;
    this.ctx = canvas.getContext('2d');
    this.state = 'menu'; // menu | playing | paused | gameover
    this.lastTime = 0;
    this.running = true;
  }

  start() {
    this.lastTime = performance.now();
    this._loop(this.lastTime);
  }

  _loop(currentTime) {
    if (!this.running) return;

    // 计算 deltaTime(两帧之间的时间差)
    const deltaTime = currentTime - this.lastTime;
    this.lastTime = currentTime;

    this._update(deltaTime);  // 更新逻辑
    this._draw();             // 绘制画面

    requestAnimationFrame((t) => this._loop(t));
  }
}
为什么需要 deltaTime?
不同设备帧率不同,如果直接 x += 3,在 30fps 和 60fps 下移动速度会不一样。用 deltaTime 做时间归一化,确保所有设备上体验一致:
js
_update(deltaTime) {
  // 将速度转换为「每毫秒移动的像素数」,乘以 deltaTime 后
  // 无论帧率高低,每秒移动的像素总量相同
  const speed = 0.3; // 每毫秒 0.3 像素 → 约 18px/帧@60fps
  this.player.x += speed * deltaTime;

  // 同理,射击间隔、粒子生命周期等都基于 deltaTime
  this.shootTimer += deltaTime;
}
4.3 星空背景与视差滚动
游戏背景不是一张静态图,而是三层星星以不同速度滚动,产生视差效果(近处的快、远处的慢):
js
class Star {
  constructor(canvasWidth, canvasHeight) {
    this.x = randomInt(0, canvasWidth);
    this.y = randomInt(0, canvasHeight);
    this.size = randomFloat(0.5, 2.5);
    this.speed = this.size * 0.8; // 大星星更快 → 看起来更近
    this.alpha = randomFloat(0.3, 1.0);
  }

  update() {
    this.y += this.speed;
    if (this.y > this.canvasHeight) {
      this.x = randomInt(0, this.canvasWidth);
      this.y = randomInt(-20, -5);
    }
  }

  draw(ctx) {
    ctx.beginPath();
    ctx.arc(this.x, this.y, this.size, 0, Math.PI * 2);
    ctx.fillStyle = `rgba(255, 255, 255, ${this.alpha})`;
    ctx.fill();
  }
}

export class Background {
  constructor(canvasWidth, canvasHeight) {
    // 三层星星:远景小而慢,近景大而快
    this.layers = [
      this._createStars(40, true),  // 远景
      this._createStars(25, true),  // 中景
      this._createStars(15, true),  // 近景
    ];
  }

  draw(ctx) {
    // 深色背景
    ctx.fillStyle = '#0a0a1a';
    ctx.fillRect(0, 0, this.canvasWidth, this.canvasHeight);

    // 逐层绘制
    for (const layer of this.layers) {
      for (const star of layer) {
        star.draw(ctx);
      }
    }
  }
}
4.4 玩家飞机绘制
用纯代码画一架飞机,不需要任何图片资源:
js
draw(ctx) {
  const cx = this.x + this.width / 2;

  // 机身(多边形)
  ctx.fillStyle = '#4a9eff';
  ctx.beginPath();
  ctx.moveTo(cx, this.y);              // 机头
  ctx.lineTo(cx + 8, this.y + 15);
  ctx.lineTo(cx + 18, this.y + 45);
  ctx.lineTo(cx + 12, this.y + this.height);
  ctx.lineTo(cx - 12, this.y + this.height);
  ctx.lineTo(cx - 18, this.y + 45);
  ctx.lineTo(cx - 8, this.y + 15);
  ctx.closePath();
  ctx.fill();

  // 驾驶舱(渐变椭圆)
  const cockpitGrad = ctx.createLinearGradient(cx, this.y + 12, cx, this.y + 30);
  cockpitGrad.addColorStop(0, '#a0e0ff');
  cockpitGrad.addColorStop(1, '#2080ff');
  ctx.fillStyle = cockpitGrad;
  ctx.beginPath();
  ctx.ellipse(cx, this.y + 22, 5, 8, 0, 0, Math.PI * 2);
  ctx.fill();

  // 机翼
  ctx.fillStyle = '#3070d0';
  ctx.beginPath();
  ctx.moveTo(cx - 10, this.y + 30);
  ctx.lineTo(cx - 28, this.y + 48);
  ctx.lineTo(cx - 25, this.y + 52);
  ctx.lineTo(cx - 12, this.y + 42);
  ctx.closePath();
  ctx.fill();
}
🎨 看到了吗?一架飞机就是几个
moveTo+lineTo组合出来的多边形。Canvas 绘制的本质就是用代码画画。
4.5 敌机系统与难度递增
敌机不是随机出现的,而是有波次系统 和难度曲线:
js
const ENEMY_TYPES = {
  small:  { width: 36, height: 36, hp: 1, speed: 2,   score: 100 },
  medium: { width: 50, height: 50, hp: 3, speed: 1.5, score: 300 },
  large:  { width: 70, height: 70, hp: 8, speed: 1,   score: 800 },
};

// 难度递增:每 10 秒提高一波
if (this.difficultyTimer > 10000) {
  this.difficultyTimer = 0;
  this.spawnInterval = Math.max(500, this.spawnInterval - 100);
  this.waveCount++;
}

// 根据波次调整敌机类型概率
_spawnWave() {
  const roll = Math.random();
  let type;

  if (this.waveCount < 3) {
    // 前期:小飞机为主
    type = roll < 0.7 ? 'small' : roll < 0.95 ? 'medium' : 'large';
  } else if (this.waveCount < 6) {
    // 中期:中型飞机增多
    type = roll < 0.5 ? 'small' : roll < 0.85 ? 'medium' : 'large';
  } else {
    // 后期:大飞机频繁出现
    type = roll < 0.3 ? 'small' : roll < 0.7 ? 'medium' : 'large';
  }
}
不同敌机还有不同的行为模式:
- 小型敌机:左右漂移(正弦波运动)
- 中型敌机:追踪玩家 X 轴位置
- 大型敌机:Boss 级,会发射子弹
4.6 碰撞检测
游戏碰撞检测的核心是矩形相交判断(AABB 碰撞检测):
js
function checkCollision(a, b) {
  return (
    a.x < b.x + b.width &&
    a.x + a.width > b.x &&
    a.y < b.y + b.height &&
    a.y + a.height > b.y
  );
}
💡 这是最简单高效的碰撞检测算法。对于圆形物体,可以用圆心距判断:
distance < r1 + r2。
4.7 粒子特效
飞机尾焰和爆炸效果都是用粒子系统实现的:
js
// 尾迹粒子
_updateTrail() {
  // 获取飞机位置
  const cx = this.player.x + this.player.width / 2;
  const bottom = this.player.y + this.player.height;

  // 随机生成新粒子
  if (Math.random() < 0.3) {
    this.trailParticles.push({
      x: cx + (Math.random() - 0.5) * 8,
      y: bottom + Math.random() * 5,
      vx: (Math.random() - 0.5) * 0.5,
      vy: 0.5 + Math.random(),
      life: 1.0,              // 生命周期
      size: 1 + Math.random() * 2,
    });
  }

  // 更新所有粒子
  for (let i = this.trailParticles.length - 1; i >= 0; i--) {
    const p = this.trailParticles[i];
    p.x += p.vx;
    p.y += p.vy;
    p.life -= 0.03;           // 逐渐消亡
    p.size *= 0.98;           // 逐渐缩小
    if (p.life <= 0) this.trailParticles.splice(i, 1);
  }
}

// 绘制粒子
for (const p of this.trailParticles) {
  ctx.globalAlpha = p.life * 0.5;  // 透明度随生命周期变化
  ctx.fillStyle = '#ff8800';
  ctx.beginPath();
  ctx.arc(p.x, p.y, p.size, 0, Math.PI * 2);
  ctx.fill();
}
4.8 交互控制
支持触摸、鼠标、键盘三种输入方式:
js
// 触摸控制(移动端)
canvas.addEventListener('touchmove', (e) => {
  e.preventDefault();
  const touch = e.touches[0];
  const rect = canvas.getBoundingClientRect();
  player.handleTouchMove(touch.clientX - rect.left, touch.clientY - rect.top);
}, { passive: false });

// 键盘控制(PC 端)
window.addEventListener('keydown', (e) => {
  if (e.key === 'ArrowLeft' || e.key === 'a')
    player.x = Math.max(0, player.x - speed);
  if (e.key === 'ArrowRight' || e.key === 'd')
    player.x = Math.min(canvas.width - player.width, player.x + speed);
  if (e.key === 'ArrowUp' || e.key === 'w')
    player.y = Math.max(0, player.y - speed);
  if (e.key === 'ArrowDown' || e.key === 's')
    player.y = Math.min(canvas.height - player.height, player.y + speed);
});
⚠️ 注意
passive: false和e.preventDefault()的配合------在移动端,如果不阻止默认的触摸行为,页面会跟着滚动。
五、Canvas 数据可视化
除了游戏,Canvas 最常见的应用场景是数据可视化。虽然可以用原生 Canvas API 手动绘制图表,但实际开发中更推荐使用成熟库:
html
<div id="chart" style="width: 100%; height: 600px;"></div>
<script type="module" src="/src/main.js"></script>
js
// ECharts 示例
import * as echarts from 'echarts';

const chart = echarts.init(document.getElementById('chart'));

const option = {
  title: { text: '月度销售数据' },
  xAxis: {
    type: 'category',
    data: ['1月', '2月', '3月', '4月', '5月', '6月',
           '7月', '8月', '9月', '10月', '11月', '12月']
  },
  yAxis: { type: 'value' },
  series: [{
    type: 'bar',
    data: [320, 280, 350, 410, 480, 520, 460, 530, 490, 560, 680, 750]
  }]
};

chart.setOption(option);
ECharts 底层就是用 Canvas(或 SVG)渲染的。理解 Canvas 原理,能帮你更好地理解这些库的工作方式,也方便做自定义渲染和性能优化。
六、总结与实践建议
Canvas 能做什么?
| 场景 | 示例 |
|---|---|
| 2D 游戏 | 飞机大战、贪吃蛇、俄罗斯方块 |
| 数据可视化 | 图表、仪表盘、热力图 |
| 图片处理 | 滤镜、裁剪、水印 |
| 动画特效 | 粒子系统、Loading 动画 |
| 3D 渲染 | 配合 WebGL / Three.js |
学习路线
- 基础:矩形、路径、颜色、文字
- 进阶:动画循环、requestAnimationFrame、deltaTime
- 实战:碰撞检测、粒子系统、对象池
- 高阶:WebGL、Three.js、GPU 加速
性能优化小贴士
- 对象池:子弹、粒子等频繁创建销毁的对象,用对象池复用
- 离屏 Canvas:静态内容先画到离屏 Canvas,再整体贴到主画布
- requestAnimationFrame:永远不要用 setInterval 做动画
- 减少状态切换:批量绘制相同颜色/样式的图形
💬 交流讨论
你用 Canvas 做过什么有趣的项目?欢迎在评论区分享!
如果这篇文章对你有帮助,点赞 👍 + 收藏 ⭐ + 关注 👆,后续会更新更多 Canvas 实战内容:
- 粒子特效进阶:火焰、烟雾、魔法效果
- WebGL 入门:从 2D 到 3D 的跨越
- 性能优化:让你的游戏跑满 120fps
📦 项目地址
完整项目代码已开源,欢迎 Star ⭐
🏷️ 推荐标签
Canvas 前端 JavaScript 游戏开发 HTML5 2D动画
🚀 Canvas 的魅力在于------你写的每一行代码,都在屏幕上留下像素。这种从零创造的掌控感,是任何 UI 框架都无法替代的。
觉得有用?点个赞👍收藏⭐关注👆,下次更新更多 Canvas 玩法!