HarmonyOS APP实战-画图APP - 第6篇:切换绘制模式与交互反馈
1. 开篇
在上一篇中,我们为画图APP实现了完整的画笔属性调节功能:通过色盘选择颜色、滑块控制粗细和透明度,并将这些属性绑定到Pen对象,使得所有后续绘制的图形都遵循这些属性。至此,用户已经可以自由调整画笔样式,但绘制的形状还是固定的------矩形、圆形、自由画笔只能通过修改代码来切换,无法在运行时动态选择。
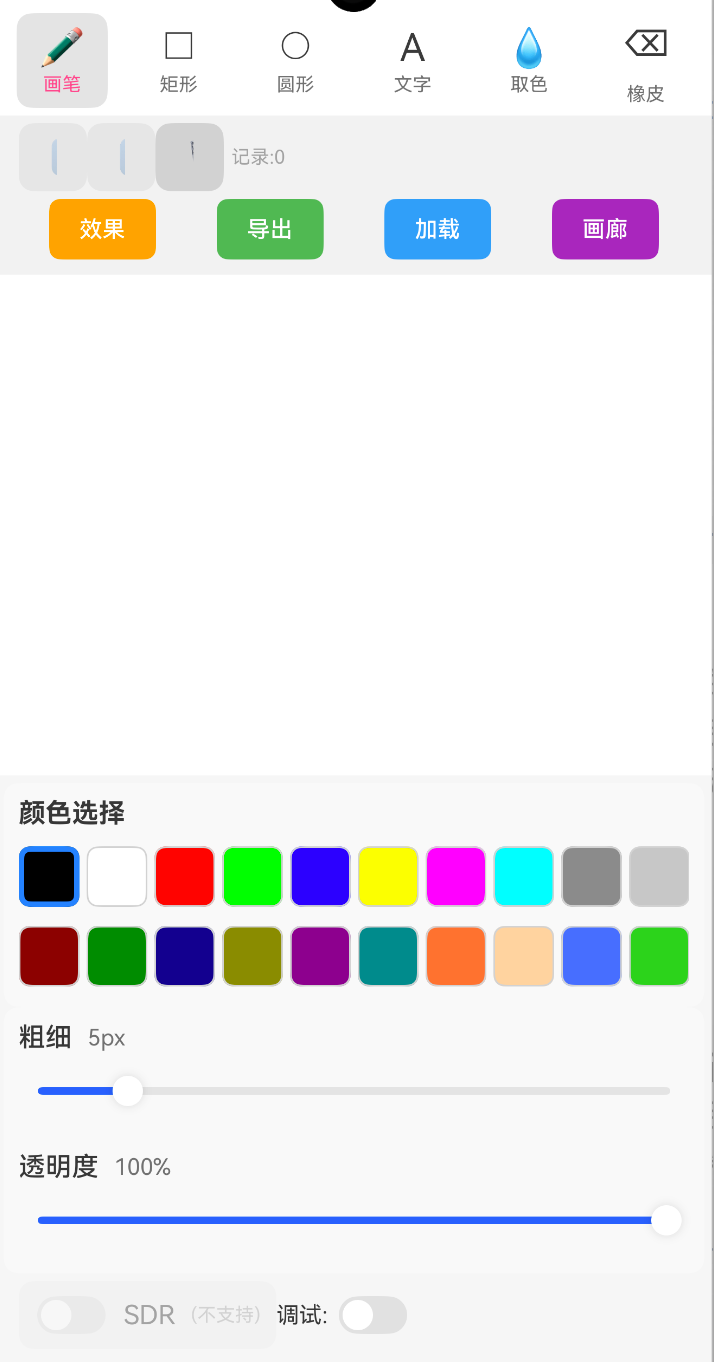
本篇将实现绘制模式切换功能:在工具栏中增加矩形、圆形、自由画笔三个模式按钮,点击后画布触摸事件根据当前模式绘制对应图形。同时优化UI反馈,让选中模式高亮显示,并显示当前模式名称。这个模块的完成将使画图APP从"可调画笔的绘图工具"进化为"真正的多模式绘图应用",操作体验更接近专业的绘画软件。
2. 核心实现
2.1 基础配置
首先在已有的工程中,我们需要确保已导入@ohos.graphics.drawing模块。由于我们在第3篇和第4篇中已经使用过该模块,本篇无需额外导入。在pages/Index.ets中,我们会引入一个新的自定义组件ModeSelector,并列在工具栏区域。
为了管理绘制模式,我们在全局或页面级别定义一个枚举:
typescript
// 定义绘制模式枚举
enum DrawMode {
  RECT = '矩形',
  CIRCLE = '圆形',
  FREEHAND = '自由画笔'
}
然后在主页面中新增一个状态变量记录当前模式:
typescript
@State currentMode: DrawMode = DrawMode.FREEHAND; // 默认自由画笔2.2 ModeSelector 组件实现
ModeSelector组件接收当前模式并回调切换事件。它使用三个Button组件,根据是否选中设置不同样色(高亮)。
typescript
@Component
struct ModeSelector {
  private modes: DrawMode[] = [DrawMode.RECT, DrawMode.CIRCLE, DrawMode.FREEHAND];
  @Link currentMode: DrawMode; // 与父组件双向绑定

  build() {
    Row() {
      ForEach(this.modes, (mode: DrawMode) => {
        Button(mode) // 按钮文字直接显示枚举值的字符串
          .width(80)
          .height(40)
          .backgroundColor(mode === this.currentMode ? '#FF4081' : '#3D5AFE')
          .fontColor(Color.White)
          .fontSize(14)
          .borderRadius(20)
          .margin({ left: 8 })
          .onClick(() => {
            this.currentMode = mode; // 更新当前模式
          })
      }, (mode: DrawMode) => mode)
    }
    .padding({ left: 10 })
    .alignItems(VerticalAlign.Center)
  }
}
关键点说明
@Link双向绑定:当用户点击按钮时,currentMode变化会同步到父组件,父组件再传递给DrawingCanvas。- 高亮逻辑:
backgroundColor(mode === this.currentMode ? '#FF4081' : '#3D5AFE'),选中时用粉色突出。 ForEach遍历枚举数组,确保每个模式对应一个按钮。按钮文字直接使用枚举值的字符串(如"矩形"),用户一目了然。
2.3 DrawingCanvas 组件增强
原来的DrawingCanvas组件中,触摸事件逻辑是固定的(例如之前默认只画矩形)。现在我们需要根据mode决定调用哪个绘制方法。此外,触摸事件需要区分三种模式的交互方式:
- 矩形/圆形:需要记录按下坐标和移动坐标(松开时完成绘制)。
- 自由画笔 :需要连续的
Path轨迹。
我们将DrawingCanvas的mode属性设置为@Prop接收,并在触摸事件onTouch中根据mode分发。
下面是核心的触摸事件处理逻辑:
typescript
@Component
struct DrawingCanvas {
  private canvasWidth: number = 0;
  private canvasHeight: number = 0;
  @State private shapes: ShapeData[] = []; // 存储已绘制的图形数据
  @Prop mode: DrawMode; // 当前模式从父组件传入

  // 临时绘图数据(用于当前正在绘制的图形)
  private startX: number = 0;
  private startY: number = 0;
  private currentPath: drawing.Path = new drawing.Path();

  build() {
    Canvas(this.context)
      .width('100%')
      .height('100%')
      .onReady(() => {
        this.canvasWidth = this.context.width;
        this.canvasHeight = this.context.height;
      })
      .onTouch((event: TouchEvent) => {
        const x = event.touches[0].x;
        const y = event.touches[0].y;
        switch (event.type) {
          case TouchType.Down:
            if (this.mode === DrawMode.RECT || this.mode === DrawMode.CIRCLE) {
              // 记录起始点
              this.startX = x;
              this.startY = y;
            } else if (this.mode === DrawMode.FREEHAND) {
              // 开始新路径
              this.currentPath.moveTo(x, y);
            }
            break;
          case TouchType.Move:
            if (this.mode === DrawMode.FREEHAND) {
              // 路径连线
              this.currentPath.lineTo(x, y);
              // 实时绘制到画布
              this.drawAllShapes(); // 重绘所有图形(包含当前路径)
            }
            break;
          case TouchType.Up:
            if (this.mode === DrawMode.RECT) {
              const rect = {
                x: this.startX, y: this.startY,
                width: x - this.startX, height: y - this.startY
              };
              this.shapes.push({ type: 'rect', params: rect });
              this.drawAllShapes();
            } else if (this.mode === DrawMode.CIRCLE) {
              // 以起点到终点的距离为半径
              const dx = x - this.startX;
              const dy = y - this.startY;
              const radius = Math.sqrt(dx * dx + dy * dy);
              const circle = {
                cx: this.startX, cy: this.startY,
                radius: radius
              };
              this.shapes.push({ type: 'circle', params: circle });
              this.drawAllShapes();
            } else if (this.mode === DrawMode.FREEHAND) {
              // 完成路径,保存当前路径数据
              this.shapes.push({ type: 'path', path: this.currentPath });
              this.currentPath = new drawing.Path(); // 重置路径
              this.drawAllShapes();
            }
            break;
        }
      })
  }

  // 根据 shapes 数组重绘所有图形
  private drawAllShapes() {
    const canvas = this.context;
    canvas.clear();
    for (const shape of this.shapes) {
      // 根据类型绘制(省略具体的画笔属性设置,沿用之前定义的全局Pen)
      // 此处假设已有全局 pen 对象
      canvas.attachPen(pen);
      if (shape.type === 'rect') {
        const r = shape.params as RectParams;
        canvas.drawRect(r.x, r.y, r.x + r.width, r.y + r.height);
      } else if (shape.type === 'circle') {
        const c = shape.params as CircleParams;
        canvas.drawCircle(c.cx, c.cy, c.radius);
      } else if (shape.type === 'path') {
        canvas.drawPath(shape.path);
      }
      canvas.detachPen();
    }
    // 如果当前有正在绘制的路径(自由画笔移动时),也绘制临时路径
    if (this.mode === DrawMode.FREEHAND && this.currentPath) {
      canvas.attachPen(pen);
      canvas.drawPath(this.currentPath);
      canvas.detachPen();
    }
  }
}
关键点说明
- 使用
drawing.Path对象存储自由画笔的连续轨迹,触摸Move时不断追加lineTo并实时重绘。 - 矩形和圆形采用
TouchType.Down记录起点,TouchType.Up完成绘制并保存到shapes数组。 - 每次完成一个图形后调用
drawAllShapes()刷新画布,drawAllShapes会清除画布并重绘所有已保存的图形。 - 为了支持圆形,我们计算了起点到终点的欧氏距离作为半径,实际项目中也可采用用户拖拽的方向定义半径。
- 注意在
drawAllShapes中,临时路径的绘制必须在循环之后。
2.4 主页面整合
将ModeSelector和DrawingCanvas组合到主页面中。主页面布局为:顶部工具栏(包含模式选择按钮和之前的画笔属性控件),中间画布区域。
typescript
@Entry
@Component
struct Index {
  @State currentMode: DrawMode = DrawMode.FREEHAND;

  build() {
    Column() {
      // 工具栏
      Row() {
        ModeSelector({ currentMode: $currentMode })
        // 其他工具栏按钮(颜色、粗细等略)
      }
      .width('100%')
      .height(50)
      .backgroundColor('#F5F5F5')

      // 模式提示文字
      Text(`当前模式: ${this.currentMode}`)
        .fontSize(14)
        .fontColor('#666')
        .width('100%')
        .textAlign(TextAlign.Center)

      // 画布
      DrawingCanvas({ mode: this.currentMode })
        .layoutWeight(1)
    }
    .width('100%')
    .height('100%')
  }
}
关键点说明
$currentMode使用@State的引用传递给ModeSelector的@Link,实现双向绑定。DrawingCanvas通过@Prop接收当前模式,无需双向修改。- 模式提示文字让用户明确当前操作状态,提升交互清晰度。
3. 运行验证
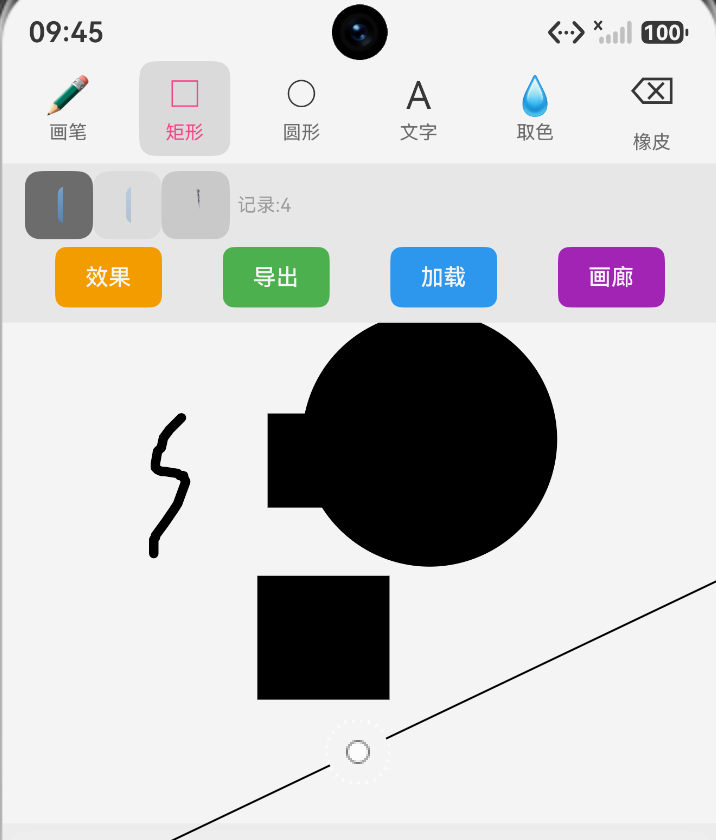
编译运行APP后,顶部工具栏会显示三个圆形按钮,默认选中"自由画笔"(粉色高亮)。点击"矩形"按钮,按钮颜色变为粉色,同时模式提示文字变为"当前模式: 矩形"。此时在画布上按下并拖动,松开后即绘制一个矩形(起点到终点)。切换为"圆形",拖动时根据起点和终点的距离绘制圆形。切换为"自由画笔",手指移动即可连续绘制路径。所有绘制的图形颜色、粗细、透明度均遵循当前画笔属性设置。
4. 小结与预告
本篇实现了三种绘制模式的动态切换:矩形、圆形、自由画笔。通过ModeSelector组件提供了清晰的UI反馈(高亮选中按钮、显示当前模式),DrawingCanvas组件根据模式正确处理触摸事件,使用@ohos.graphics.drawing的drawRect、drawCircle、drawPath完成图形绘制。现在用户可以在APP中方便地切换绘图工具,体验接近专业画图软件。
下一篇「在画布上添加文字」将实现文本绘制功能:用户输入文字内容,选择字体大小、颜色,并拖拽放置在画布上。我们将使用@ohos.graphics.drawing中的文本相关API,让画图APP支持文字标注,进一步完善功能。