HarmonyOS APP实战-基于Image Kit的图像处理APP - 第6篇:滤镜与色彩矩阵
1. 开篇
在上篇「旋转翻转效果」中,我们实现了 RotationPage 页面,用户可以通过点击按钮或滑块对图片进行 90°、180° 旋转以及水平/垂直翻转。核心代码使用了 PixelMap 的 rotate 和 flip 方法,并建立了 RotationManager 工具类封装旋转逻辑,同时通过 image.createPixelMap 创建新的 PixelMap 来保存处理结果。
本篇我们将继续深化图像处理能力,聚焦于滤镜与色彩矩阵 。我们将利用 PixelMap.colorMatrix 属性,实现灰度、怀旧、冷色等预定义滤镜,同时支持用户自定义 RGB 色彩矩阵参数,所有调整均能实时更新预览。这会显著提升 APP 的实用性和视觉效果,让用户能一键为图片赋予不同风格。
2. 核心实现
2.1 基础配置与常量定义
首先,我们需要了解 colorMatrix 的工作原理。它是一个 4×5 的浮点矩阵(共 20 个值),用于控制像素的 RGBA 通道。矩阵格式为:
[ r, r, r, r, r ]  → 控制红色通道
[ g, g, g, g, g ]  → 控制绿色通道
[ b, b, b, b, b ]  → 控制蓝色通道
[ a, a, a, a, a ]  → 控制 Alpha 通道
矩阵与像素颜色值的计算方式为:新颜色 = 矩阵 × 原颜色。
我们将在 ColorMatrixManager 类中预定义几种常见滤镜矩阵:
typescript
// colorMatrixManager.ets
/**
 * 色彩矩阵管理器
 * 提供预定义滤镜矩阵和自定义矩阵工具
 */
import { image } from '@kit.ImageKit';

// 预定义滤镜类型枚举
export enum FilterType {
  NORMAL = '原图',
  GRAY = '灰度',
  VINTAGE = '怀旧',
  COOL = '冷色',
  WARM = '暖色',
  SEPIA = '棕褐色',
  INVERT = '负片'
}

// 各滤镜对应的 4x5 矩阵(20个浮点数)
export const FILTER_MATRICES: Record<string, number[]> = {
  // 灰度滤镜:将RGB转换为亮度值
  [FilterType.GRAY]: [
    0.33, 0.59, 0.11, 0, 0,
    0.33, 0.59, 0.11, 0, 0,
    0.33, 0.59, 0.11, 0, 0,
    0, 0, 0, 1, 0
  ],
  // 怀旧滤镜:降低饱和度,偏黄棕色调
  [FilterType.VINTAGE]: [
    0.5, 0.3, 0.2, 0, 40,
    0.4, 0.6, 0.2, 0, 20,
    0.2, 0.3, 0.4, 0, 10,
    0, 0, 0, 1, 0
  ],
  // 冷色滤镜:增加蓝色、减少红色
  [FilterType.COOL]: [
    0.5, 0.5, 1.0, 0, 0,
    0.5, 0.8, 1.0, 0, 0,
    1.0, 0.8, 1.2, 0, 0,
    0, 0, 0, 1, 0
  ],
  // 暖色滤镜:增加红/黄色
  [FilterType.WARM]: [
    1.2, 0.9, 0.5, 0, 10,
    1.0, 1.0, 0.5, 0, 5,
    0.6, 0.7, 0.8, 0, -10,
    0, 0, 0, 1, 0
  ],
  // 棕褐色滤镜:经典老照片效果
  [FilterType.SEPIA]: [
    0.39, 0.77, 0.19, 0, 0,
    0.35, 0.69, 0.17, 0, 0,
    0.27, 0.53, 0.13, 0, 0,
    0, 0, 0, 1, 0
  ],
  // 负片滤镜:颜色取反
  [FilterType.INVERT]: [
    -1, 0, 0, 0, 255,
    0, -1, 0, 0, 255,
    0, 0, -1, 0, 255,
    0, 0, 0, 1, 0
  ],
  // 原图滤镜:单位矩阵
  [FilterType.NORMAL]: [
    1, 0, 0, 0, 0,
    0, 1, 0, 0, 0,
    0, 0, 1, 0, 0,
    0, 0, 0, 1, 0
  ]
};关键点说明:
- 矩阵的 20 个浮点数对应 4 行 5 列,分别控制 R、G、B、A 通道。第 5 列是颜色偏移值(即亮度 / 对比度调整)。
- 灰度滤镜将彩色转换为亮度值,亮度公式为 0.33R + 0.59G + 0.11B。
- 怀旧和冷色等滤镜通过调整各通道的权重和偏移来改变色温。
- 所有矩阵值都在合理的范围内,避免产生溢出或失真。
2.2 核心逻辑:ColorMatrixManager 类
接下来我们实现 ColorMatrixManager 类,封装应用滤镜的核心操作:
typescript
// colorMatrixManager.ets (续)
/**
 * 色彩矩阵应用管理器
 * 负责将滤镜矩阵应用到 PixelMap 上
 */
export class ColorMatrixManager {
  /**
   * 应用色彩矩阵到 PixelMap
   * @param pixelMap 原始 PixelMap
   * @param matrix 4x5 色彩矩阵(20个浮点数)
   * @returns 处理后的新 PixelMap
   */
  public static async applyColorMatrix(
    pixelMap: image.PixelMap,
    matrix: number[],
    context: Object
  ): Promise<image.PixelMap> {
    if (!pixelMap) {
      throw new Error('PixelMap 不能为空');
    }
    if (matrix.length !== 20) {
      throw new Error('矩阵必须包含 20 个浮点数');
    }

    // 获取原始图片信息
    const imageSize: image.Size = {
      height: pixelMap.size.height,
      width: pixelMap.size.width
    };
    const pixelMapInfo = await pixelMap.getImageInfo();

    // 调用 PixelMap 的 colorMatrix 属性设置色彩矩阵
    // 使用可变区域(mutable)的 PixelMap 进行修改
    pixelMap.colorMatrix(matrix);

    // 返回修改后的 PixelMap(已原地修改)
    return pixelMap;
  }

  /**
   * 应用滤镜并返回新的 PixelMap(不修改原图)
   * @param pixelMap 原始 PixelMap
   * @param filterType 滤镜类型
   * @returns 处理后的新 PixelMap
   */
  public static async applyFilter(
    pixelMap: image.PixelMap,
    filterType: FilterType
  ): Promise<image.PixelMap> {
    // 获取对应滤镜矩阵
    const matrix = FILTER_MATRICES[filterType];
    if (!matrix) {
      throw new Error(`不支持的滤镜类型: ${filterType}`);
    }

    // 将矩阵应用到 PixelMap
    pixelMap.colorMatrix(matrix);

    return pixelMap;
  }

  /**
   * 自定义色彩矩阵
   * @param pixelMap 原始 PixelMap
   * @param customMatrix 自定义的 20 个浮点数矩阵
   * @returns 处理后的 PixelMap
   */
  public static async applyCustomMatrix(
    pixelMap: image.PixelMap,
    customMatrix: number[]
  ): Promise<image.PixelMap> {
    if (customMatrix.length !== 20) {
      throw new Error('自定义矩阵必须包含 20 个浮点数');
    }

    pixelMap.colorMatrix(customMatrix);
    return pixelMap;
  }
}关键点说明:
pixelMap.colorMatrix(matrix)是PixelMap的内置方法,直接传入一个 20 个浮点数的数组即可应用色彩矩阵。- 该方法会原地修改
PixelMap的像素数据,因此我们需要确保传入的 PixelMap 是可变的(mutable)。 - 文档中明确要求矩阵数组长度为 20,否则会抛出异常。
- 我们提供了
applyFilter便捷方法,只需传入滤镜枚举即可一键应用。 - 注意:
colorMatrix方法直接修改原始 PixelMap,若需保留原图,应在调用前先复制一份(通过image.createPixelMap创建副本)。
2.3 完整模块:FilterPage 页面
现在我们来实现完整的 FilterPage 页面,包含滤镜选择和预览功能:
typescript
// FilterPage.ets
/**
 * 滤镜与色彩矩阵页面
 * 支持选择预定义滤镜和自定义色彩矩阵参数
 */
import { image } from '@kit.ImageKit';
import { ColorMatrixManager, FilterType, FILTER_MATRICES } from '../utils/colorMatrixManager';

@Entry
@Component
struct FilterPage {
  @State private currentFilter: FilterType = FilterType.NORMAL;
  @State private selectedFilterIndex: number = 0;
  @State private pixelMap: image.PixelMap | null = null;
  @State private originalPixelMap: image.PixelMap | null = null;
  @State private customMatrix: number[] = [1, 0, 0, 0, 0, 0, 1, 0, 0, 0, 0, 0, 1, 0, 0, 0, 0, 0, 1, 0];

  // 滤镜列表(用于 UI 展示)
  private filterList: FilterType[] = Object.values(FilterType);

  aboutToAppear() {
    // 模拟接收从上一页面传递过来的 PixelMap
    // 实际项目中通过 AppStorage 或页面路由传递
    AppStorage.get<image.PixelMap>('currentPixelMap').then((pixelMap) => {
      if (pixelMap) {
        this.originalPixelMap = pixelMap;
        // 创建副本用于滤镜处理
        this.copyPixelMap(pixelMap);
      }
    });
  }

  /**
   * 复制 PixelMap 用于滤镜处理
   */
  private async copyPixelMap(source: image.PixelMap) {
    const imageInfo = await source.getImageInfo();
    const pixelMap: image.PixelMap = await image.createPixelMap({
      width: imageInfo.size.width,
      height: imageInfo.size.height,
      pixelFormat: image.PixelMapFormats.RGBA_8888,
      alphaType: image.AlphaType.PREMUL,
      scaleMode: image.ScaleMode.FIT_TARGET_SIZE
    });
    // 复制像素数据
    const srcArrayBuffer = source.readPixelsToBuffer();
    await pixelMap.writeBufferToPixels(srcArrayBuffer);
    this.pixelMap = pixelMap;
  }

  /**
   * 应用滤镜
   */
  private async applyFilter(filterType: FilterType) {
    if (!this.pixelMap || !this.originalPixelMap) {
      console.error('PixelMap 未就绪');
      return;
    }

    try {
      // 重置为原图
      await this.copyPixelMap(this.originalPixelMap);
      // 应用滤镜
      await ColorMatrixManager.applyFilter(this.pixelMap!, filterType);
      this.currentFilter = filterType;
    } catch (error) {
      console.error('应用滤镜失败:', JSON.stringify(error));
    }
  }

  /**
   * 应用自定义矩阵
   */
  private async applyCustomMatrix() {
    if (!this.pixelMap || !this.originalPixelMap) {
      return;
    }

    try {
      await this.copyPixelMap(this.originalPixelMap);
      await ColorMatrixManager.applyCustomMatrix(this.pixelMap!, this.customMatrix);
      this.currentFilter = FilterType.NORMAL;
    } catch (error) {
      console.error('应用自定义矩阵失败:', error);
    }
  }

  build() {
    Column() {
      // 图片预览区域
      if (this.pixelMap) {
        Image(this.pixelMap)
          .width('100%')
          .height(300)
          .objectFit(ImageFit.Contain)
          .margin({ top: 10 })
      } else {
        Text('请先选择图片')
          .width('100%')
          .height(300)
          .textAlign(TextAlign.Center)
          .backgroundColor('#f0f0f0')
      }

      // 当前滤镜名称显示
      Text(`当前滤镜: ${this.currentFilter}`)
        .fontSize(16)
        .fontWeight(FontWeight.Bold)
        .margin({ top: 10 })

      // 预定义滤镜列表
      Scroll() {
        Column() {
          ForEach(this.filterList, (filter: FilterType) => {
            Button(filter)
              .width('90%')
              .height(48)
              .margin({ top: 6 })
              .backgroundColor(filter === this.currentFilter ? '#007DFF' : '#E0E0E0')
              .fontColor(filter === this.currentFilter ? '#FFFFFF' : '#333333')
              .onClick(() => {
                this.applyFilter(filter);
              })
          })
        }
        .width('100%')
        .padding({ left: 16, right: 16 })
      }
      .height(150)

      // 自定义矩阵参数滑块(简化示例)
      Text('自定义颜色调整')
        .fontSize(14)
        .margin({ top: 10 })

      Row() {
        Text('红色:')
        Slider({
          value: this.customMatrix[0],
          min: 0.0,
          max: 2.0,
          step: 0.1
        })
          .onChange((value: number) => {
            this.customMatrix[0] = value;
            this.applyCustomMatrix();
          })
      }
      .padding({ left: 16, right: 16 })

      Row() {
        Text('绿色:')
        Slider({
          value: this.customMatrix[6],
          min: 0.0,
          max: 2.0,
          step: 0.1
        })
          .onChange((value: number) => {
            this.customMatrix[6] = value;
            this.applyCustomMatrix();
          })
      }
      .padding({ left: 16, right: 16 })

      Row() {
        Text('蓝色:')
        Slider({
          value: this.customMatrix[12],
          min: 0.0,
          max: 2.0,
          step: 0.1
        })
          .onChange((value: number) => {
            this.customMatrix[12] = value;
            this.applyCustomMatrix();
          })
      }
      .padding({ left: 16, right: 16 })
    }
    .width('100%')
    .height('100%')
    .backgroundColor('#FFFFFF')
  }
}关键点说明:
- 页面初始化时从
AppStorage获取上一页面传递的PixelMap,并创建副本用于滤镜处理,避免破坏原始图片。 copyPixelMap方法通过image.createPixelMap和writeBufferToPixels复制像素数据。- 滤镜列表使用
ForEach渲染,选中按钮高亮显示。 - 自定义矩阵滑块允许用户调整 RGB 三通道的权重,实时应用并预览效果。
colorMatrix方法直接作用于当前 PixelMap,因此每次应用滤镜前需要恢复为原图。
2.4 PixelMapUtils 工具类
为了便于资源管理,我们创建一个 PixelMapUtils 类来封装 PixelMap 的复制和释放操作:
typescript
// pixelMapUtils.ets
/**
 * PixelMap 工具类
 * 提供 PixelMap 复制、释放等通用操作
 */
import { image } from '@kit.ImageKit';

export class PixelMapUtils {
  /**
   * 复制 PixelMap
   * @param source 源 PixelMap
   * @returns 复制的 PixelMap
   */
  public static async copyPixelMap(source: image.PixelMap): Promise<image.PixelMap> {
    const imageInfo = await source.getImageInfo();
    const width = imageInfo.size.width;
    const height = imageInfo.size.height;

    // 创建新的 PixelMap
    const pixelMap: image.PixelMap = await image.createPixelMap({
      width: width,
      height: height,
      pixelFormat: image.PixelMapFormats.RGBA_8888,
      alphaType: image.AlphaType.PREMUL,
      scaleMode: image.ScaleMode.FIT_TARGET_SIZE
    });

    // 读取源像素并写入新 PixelMap
    const buffer = source.readPixelsToBuffer();
    await pixelMap.writeBufferToPixels(buffer);

    return pixelMap;
  }

  /**
   * 释放 PixelMap 资源
   * @param pixelMap 要释放的 PixelMap
   */
  public static releasePixelMap(pixelMap: image.PixelMap | null) {
    if (pixelMap) {
      try {
        pixelMap.release();
      } catch (error) {
        console.error('释放 PixelMap 失败:', JSON.stringify(error));
      }
    }
  }
}关键点说明:
copyPixelMap方法先创建与原图尺寸相同的 RGBA_8888 格式 PixelMap,再通过readPixelsToBuffer和writeBufferToPixels复制像素数据。releasePixelMap用于及时释放不再需要的 PixelMap 资源,避免内存泄漏。- 该工具类后续在页面切换或批量处理中非常有用。
3. 运行验证
完成上述代码后,将 FilterPage 添加到项目主页面中,例如通过 Tab 切换或页面路由跳转。运行效果如下:
- APP 启动后选择一张图片,进入滤镜模块。
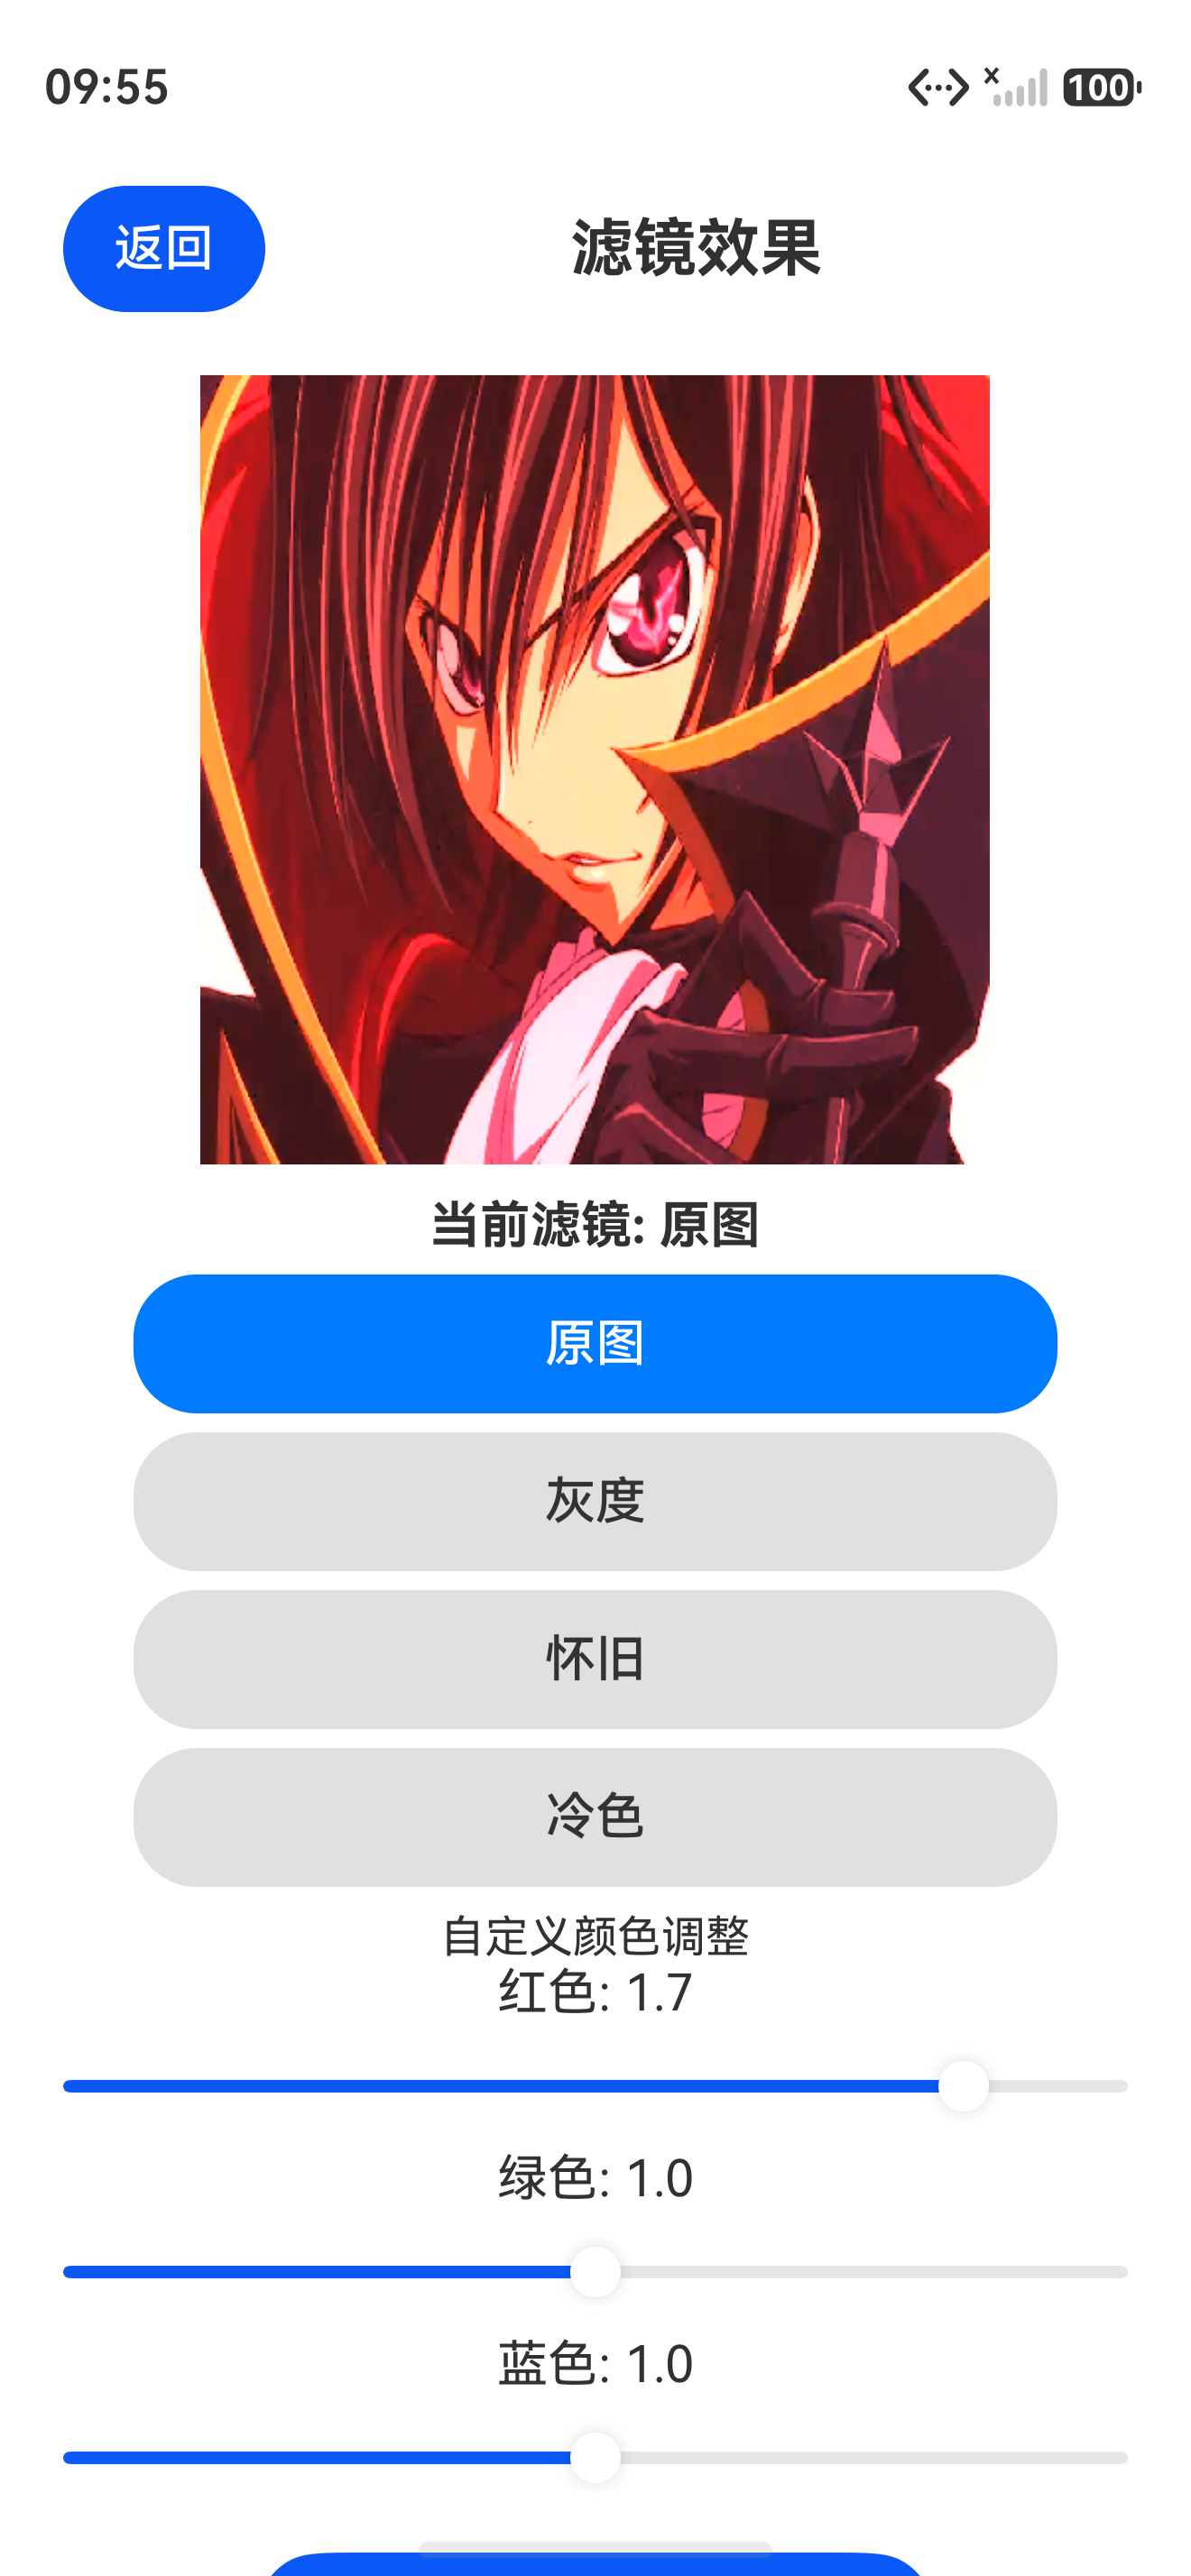
- 显示原始图片,下方列出所有预定义滤镜按钮。
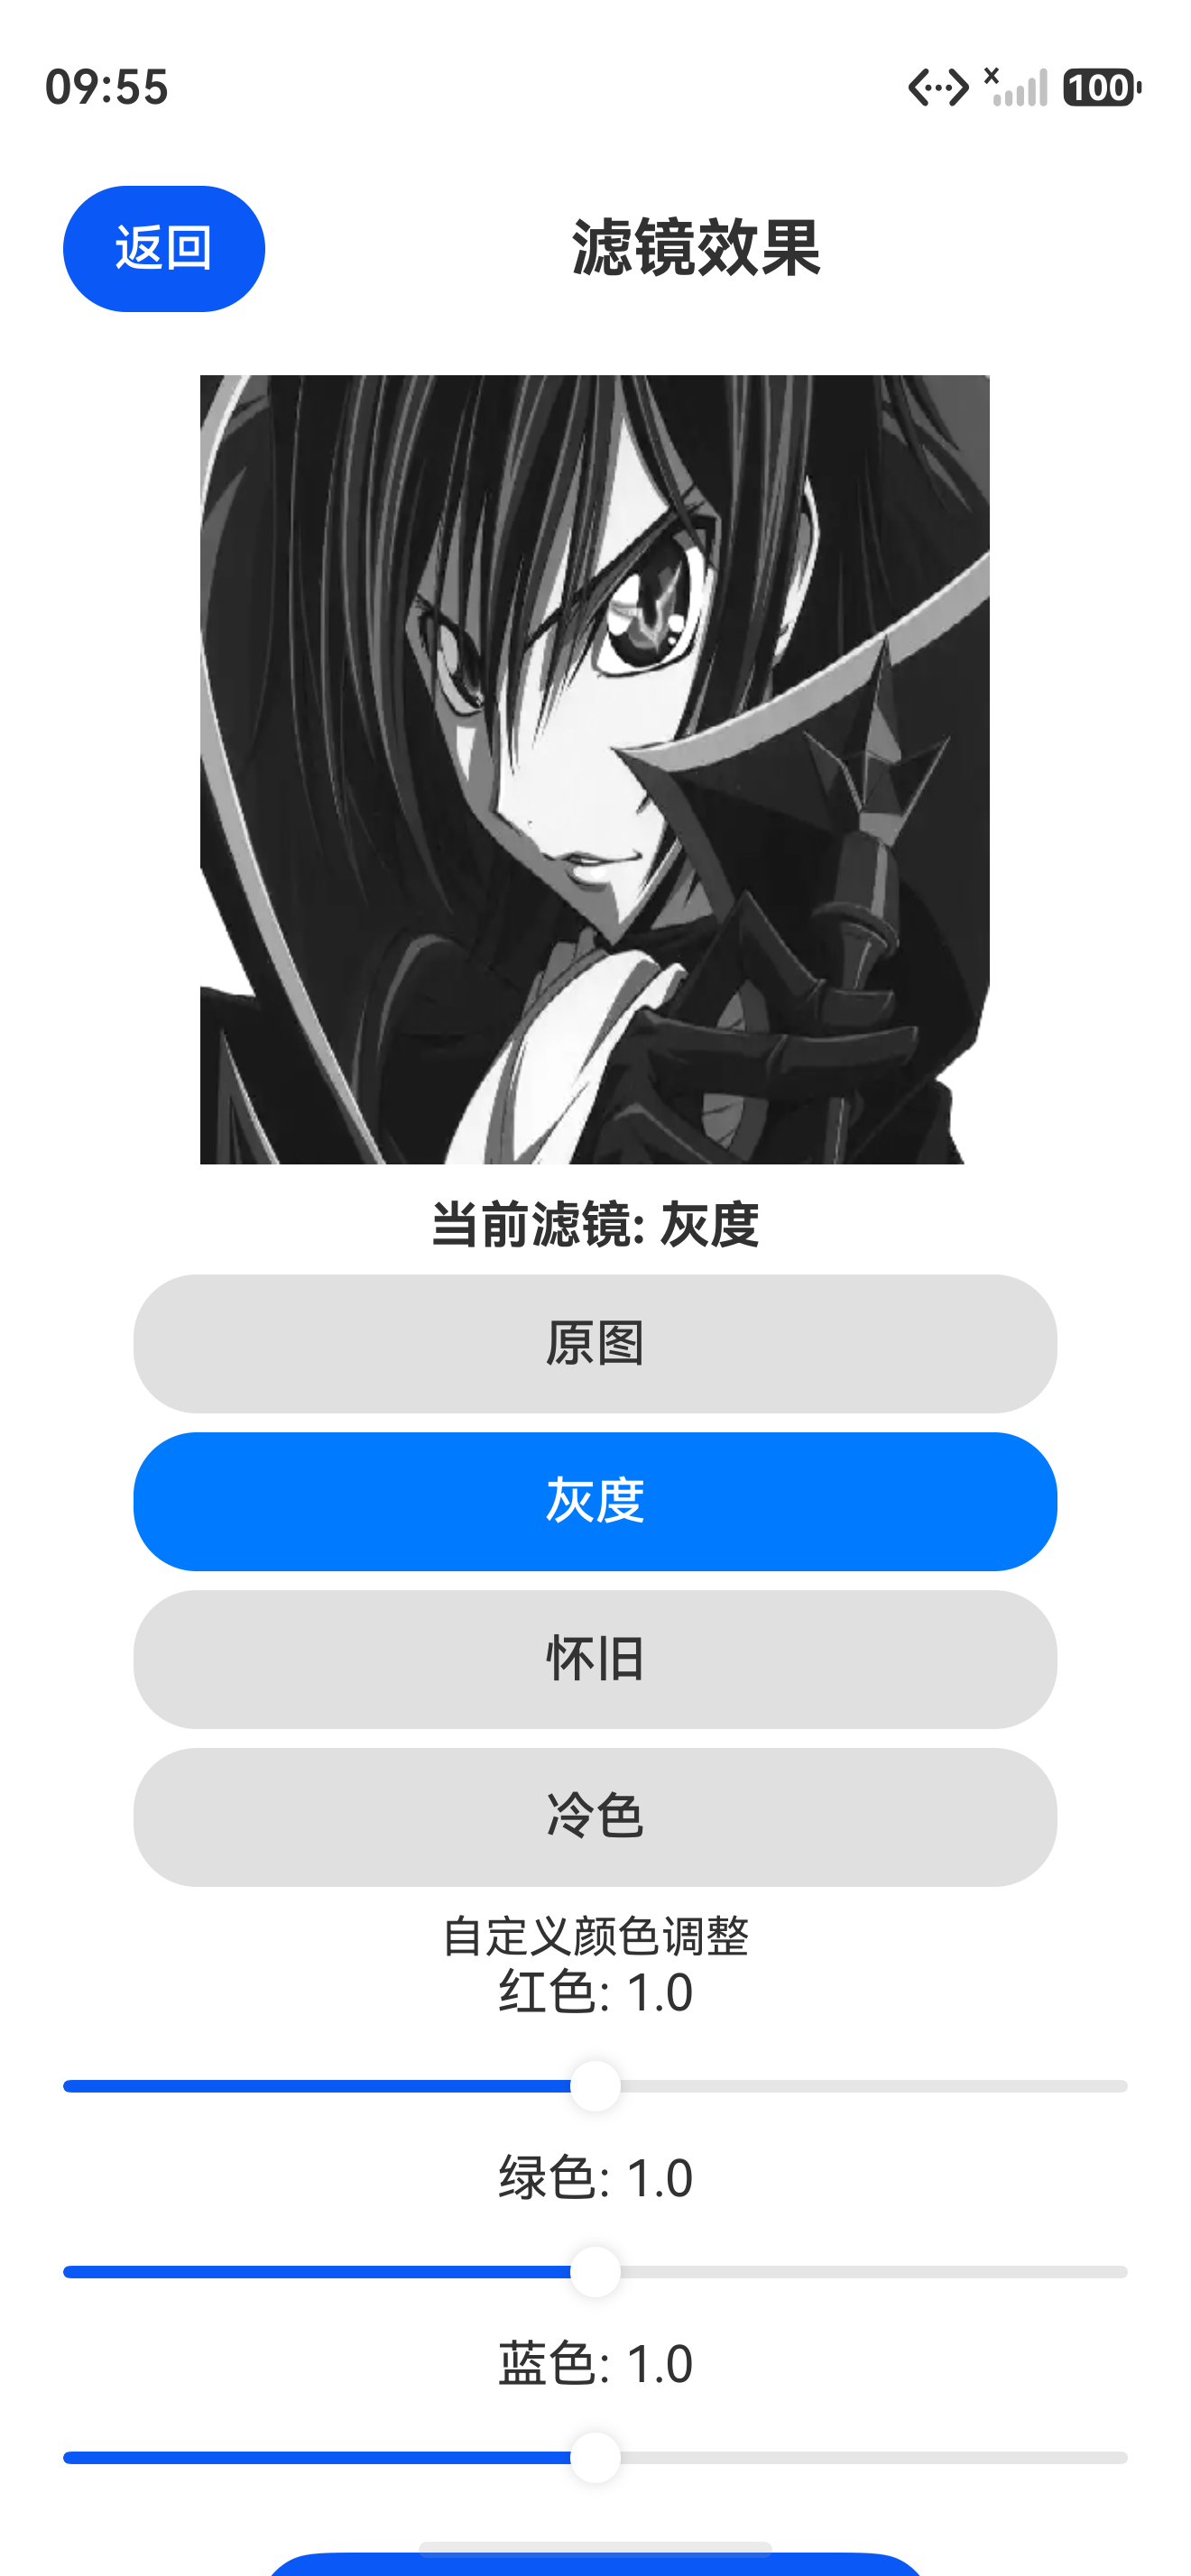
- 点击「灰度」按钮,图片变为黑白效果。
- 点击「怀旧」按钮,图片呈现泛黄的老照片风格。
- 通过底部自定义滑块调整红色/绿色/蓝色权重,图片颜色实时变化。
4. 小结与预告
本篇我们成功实现了滤镜与色彩矩阵模块,核心成果包括:
ColorMatrixManager类封装了 7 种预定义滤镜矩阵和自定义矩阵应用方法。FilterPage页面提供了完整的滤镜选择和实时预览功能,支持一键切换。PixelMapUtils工具类简化了 PixelMap 的复制和资源管理。
这些功能使 APP 的图像处理能力从基本的几何变换跃升至色彩风格调整,大幅提升了用户视觉体验和实用性。下篇我们将继续深入色彩调整领域,聚焦亮度、对比度、饱和度的精细调节,通过像素点操作和色彩矩阵组合实现更专业的图像优化。