上一篇我们把 State 和 Graph API 摸熟了:StateSchema、reducer、addNode / addEdge / addSequence。但这会儿图还是「画好就顺着走」------从 START 到 END 一条道走到黑。
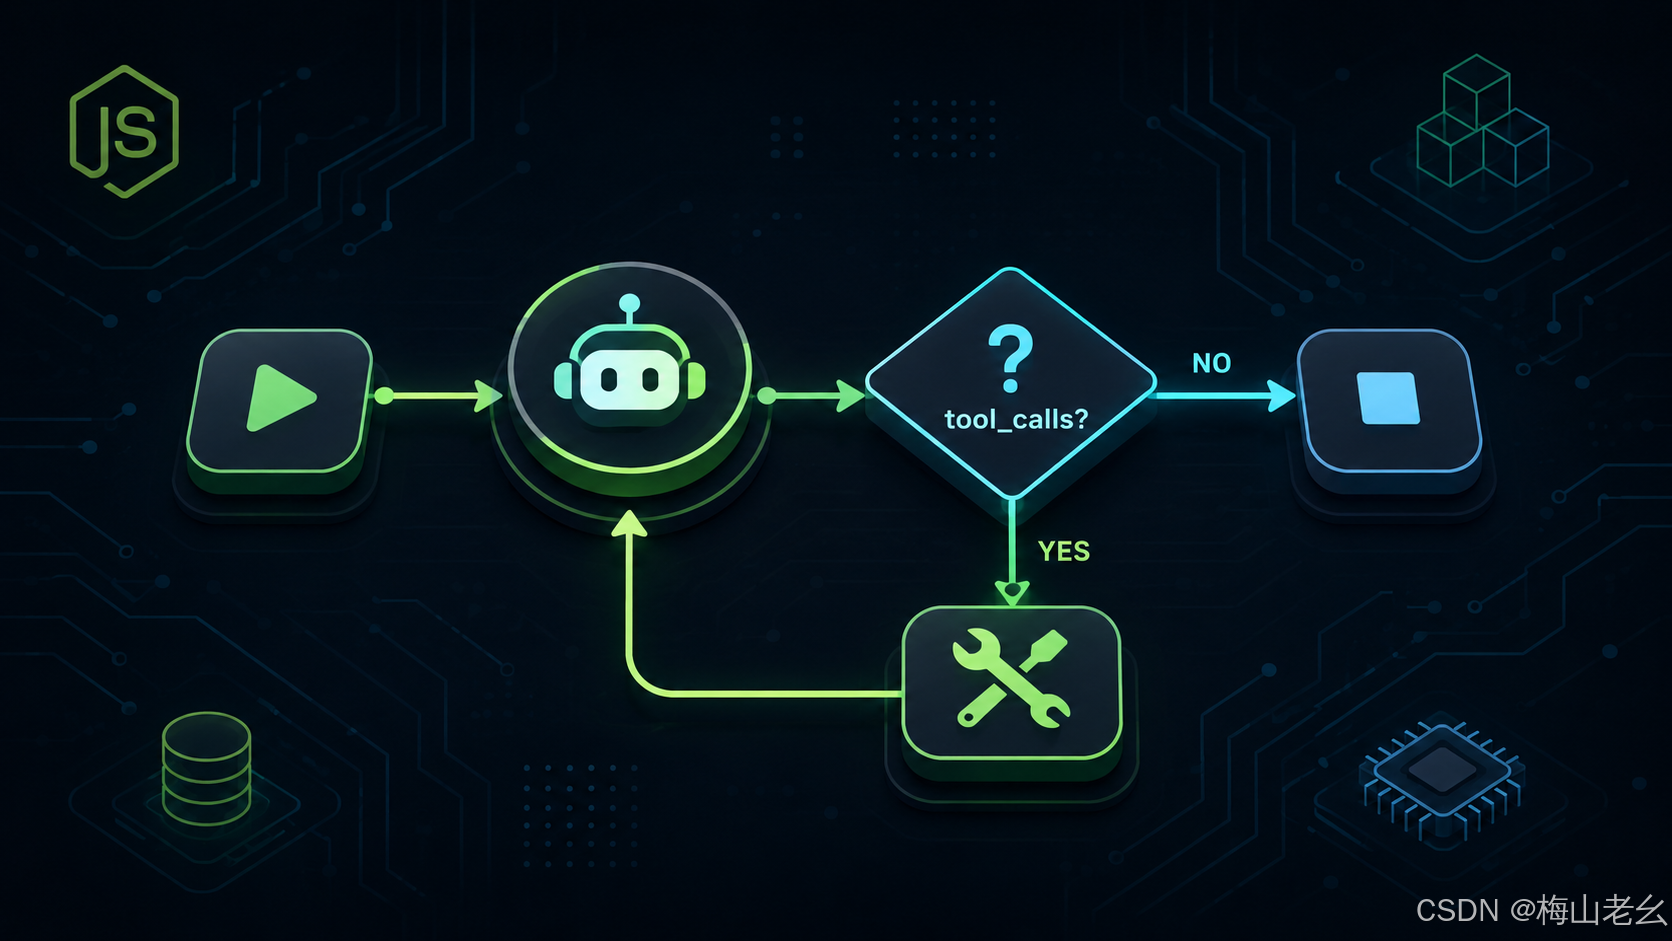
真正的 Agent 味道不在这儿。模型说「我要调天气工具」,你就得去 tools;工具跑完,还得绕回模型再想一遍;模型终于给出人话答案,才该停。固定边 addEdge 画不出这种「自己决定下一步」的戏。
这一篇我们讲三样东西:addConditionalEdges 条件边 、经典的 ReAct 环(agent ↔ tools) ,以及节点里用 Command 动态跳转。写完之后,你的图才算真正「转起来」。
老规矩,本文 API 均以官网最新文档核对过(Graph API overview、Use the graph API、Workflows and agents)。网上不少教程仍在教
Annotation.Root/MessagesAnnotation、手写 tools 节点------能跑,但是 Legacy / 啰嗦版;本篇主路径跟官网走StateSchema+ToolNode。
一、固定边的天花板
addEdge("a", "b") 的含义很死板:a 跑完,下一步永远是 b。对翻译→校验→摘要这种预定流程够用;但 Agent 要的是:
| 场景 | 固定边做不到什么 | 条件边 / 循环怎么解 |
|---|---|---|
| 根据状态选路径 | 画两条边会两边都走 | addConditionalEdges 按 State 选一条 |
| Tool calling 循环 | 没法「有调用就去执行、没有就结束」 | agent → 条件路由 → tools → 再回 agent |
| 模型边算边跳 | 路由逻辑和节点更新拆开写很散 | 节点直接 return new Command({ goto, update }) |
可以把它想成红绿灯路口:固定边是「永远直行」;条件边是「看信号灯决定直行还是转弯」;循环则是「转完一圈还能再回来」。
#mermaid-svg-5dP2xl3Obow7vAM5{font-family:"trebuchet ms",verdana,arial,sans-serif;font-size:16px;fill:#333;}@keyframes edge-animation-frame{from{stroke-dashoffset:0;}}@keyframes dash{to{stroke-dashoffset:0;}}#mermaid-svg-5dP2xl3Obow7vAM5 .edge-animation-slow{stroke-dasharray:9,5!important;stroke-dashoffset:900;animation:dash 50s linear infinite;stroke-linecap:round;}#mermaid-svg-5dP2xl3Obow7vAM5 .edge-animation-fast{stroke-dasharray:9,5!important;stroke-dashoffset:900;animation:dash 20s linear infinite;stroke-linecap:round;}#mermaid-svg-5dP2xl3Obow7vAM5 .error-icon{fill:#552222;}#mermaid-svg-5dP2xl3Obow7vAM5 .error-text{fill:#552222;stroke:#552222;}#mermaid-svg-5dP2xl3Obow7vAM5 .edge-thickness-normal{stroke-width:1px;}#mermaid-svg-5dP2xl3Obow7vAM5 .edge-thickness-thick{stroke-width:3.5px;}#mermaid-svg-5dP2xl3Obow7vAM5 .edge-pattern-solid{stroke-dasharray:0;}#mermaid-svg-5dP2xl3Obow7vAM5 .edge-thickness-invisible{stroke-width:0;fill:none;}#mermaid-svg-5dP2xl3Obow7vAM5 .edge-pattern-dashed{stroke-dasharray:3;}#mermaid-svg-5dP2xl3Obow7vAM5 .edge-pattern-dotted{stroke-dasharray:2;}#mermaid-svg-5dP2xl3Obow7vAM5 .marker{fill:#333333;stroke:#333333;}#mermaid-svg-5dP2xl3Obow7vAM5 .marker.cross{stroke:#333333;}#mermaid-svg-5dP2xl3Obow7vAM5 svg{font-family:"trebuchet ms",verdana,arial,sans-serif;font-size:16px;}#mermaid-svg-5dP2xl3Obow7vAM5 p{margin:0;}#mermaid-svg-5dP2xl3Obow7vAM5 .label{font-family:"trebuchet ms",verdana,arial,sans-serif;color:#333;}#mermaid-svg-5dP2xl3Obow7vAM5 .cluster-label text{fill:#333;}#mermaid-svg-5dP2xl3Obow7vAM5 .cluster-label span{color:#333;}#mermaid-svg-5dP2xl3Obow7vAM5 .cluster-label span p{background-color:transparent;}#mermaid-svg-5dP2xl3Obow7vAM5 .label text,#mermaid-svg-5dP2xl3Obow7vAM5 span{fill:#333;color:#333;}#mermaid-svg-5dP2xl3Obow7vAM5 .node rect,#mermaid-svg-5dP2xl3Obow7vAM5 .node circle,#mermaid-svg-5dP2xl3Obow7vAM5 .node ellipse,#mermaid-svg-5dP2xl3Obow7vAM5 .node polygon,#mermaid-svg-5dP2xl3Obow7vAM5 .node path{fill:#ECECFF;stroke:#9370DB;stroke-width:1px;}#mermaid-svg-5dP2xl3Obow7vAM5 .rough-node .label text,#mermaid-svg-5dP2xl3Obow7vAM5 .node .label text,#mermaid-svg-5dP2xl3Obow7vAM5 .image-shape .label,#mermaid-svg-5dP2xl3Obow7vAM5 .icon-shape .label{text-anchor:middle;}#mermaid-svg-5dP2xl3Obow7vAM5 .node .katex path{fill:#000;stroke:#000;stroke-width:1px;}#mermaid-svg-5dP2xl3Obow7vAM5 .rough-node .label,#mermaid-svg-5dP2xl3Obow7vAM5 .node .label,#mermaid-svg-5dP2xl3Obow7vAM5 .image-shape .label,#mermaid-svg-5dP2xl3Obow7vAM5 .icon-shape .label{text-align:center;}#mermaid-svg-5dP2xl3Obow7vAM5 .node.clickable{cursor:pointer;}#mermaid-svg-5dP2xl3Obow7vAM5 .root .anchor path{fill:#333333!important;stroke-width:0;stroke:#333333;}#mermaid-svg-5dP2xl3Obow7vAM5 .arrowheadPath{fill:#333333;}#mermaid-svg-5dP2xl3Obow7vAM5 .edgePath .path{stroke:#333333;stroke-width:2.0px;}#mermaid-svg-5dP2xl3Obow7vAM5 .flowchart-link{stroke:#333333;fill:none;}#mermaid-svg-5dP2xl3Obow7vAM5 .edgeLabel{background-color:rgba(232,232,232, 0.8);text-align:center;}#mermaid-svg-5dP2xl3Obow7vAM5 .edgeLabel p{background-color:rgba(232,232,232, 0.8);}#mermaid-svg-5dP2xl3Obow7vAM5 .edgeLabel rect{opacity:0.5;background-color:rgba(232,232,232, 0.8);fill:rgba(232,232,232, 0.8);}#mermaid-svg-5dP2xl3Obow7vAM5 .labelBkg{background-color:rgba(232, 232, 232, 0.5);}#mermaid-svg-5dP2xl3Obow7vAM5 .cluster rect{fill:#ffffde;stroke:#aaaa33;stroke-width:1px;}#mermaid-svg-5dP2xl3Obow7vAM5 .cluster text{fill:#333;}#mermaid-svg-5dP2xl3Obow7vAM5 .cluster span{color:#333;}#mermaid-svg-5dP2xl3Obow7vAM5 div.mermaidTooltip{position:absolute;text-align:center;max-width:200px;padding:2px;font-family:"trebuchet ms",verdana,arial,sans-serif;font-size:12px;background:hsl(80, 100%, 96.2745098039%);border:1px solid #aaaa33;border-radius:2px;pointer-events:none;z-index:100;}#mermaid-svg-5dP2xl3Obow7vAM5 .flowchartTitleText{text-anchor:middle;font-size:18px;fill:#333;}#mermaid-svg-5dP2xl3Obow7vAM5 rect.text{fill:none;stroke-width:0;}#mermaid-svg-5dP2xl3Obow7vAM5 .icon-shape,#mermaid-svg-5dP2xl3Obow7vAM5 .image-shape{background-color:rgba(232,232,232, 0.8);text-align:center;}#mermaid-svg-5dP2xl3Obow7vAM5 .icon-shape p,#mermaid-svg-5dP2xl3Obow7vAM5 .image-shape p{background-color:rgba(232,232,232, 0.8);padding:2px;}#mermaid-svg-5dP2xl3Obow7vAM5 .icon-shape .label rect,#mermaid-svg-5dP2xl3Obow7vAM5 .image-shape .label rect{opacity:0.5;background-color:rgba(232,232,232, 0.8);fill:rgba(232,232,232, 0.8);}#mermaid-svg-5dP2xl3Obow7vAM5 .label-icon{display:inline-block;height:1em;overflow:visible;vertical-align:-0.125em;}#mermaid-svg-5dP2xl3Obow7vAM5 .node .label-icon path{fill:currentColor;stroke:revert;stroke-width:revert;}#mermaid-svg-5dP2xl3Obow7vAM5 :root{--mermaid-font-family:"trebuchet ms",verdana,arial,sans-serif;} 是
否
START
agent
有 tool_calls?
tools
END
二、addConditionalEdges:动态选下一跳
签名长这样:
typescript
graph.addConditionalEdges(source, routingFn, pathMap?);| 参数 | 说明 |
|---|---|
source |
刚跑完的那个源节点名(也可以是 START) |
routingFn |
`(state) => string |
pathMap |
可选。把 routingFn 的返回值映射到真实节点名;也可以直接传目标节点名数组 |
官网还给了类型别名 ConditionalEdgeRouter,TypeScript 里写上它,返回值写错节点名编辑器会提醒你:
typescript
import {
  StateGraph,
  StateSchema,
  GraphNode,
  ConditionalEdgeRouter,
  START,
  END,
} from "@langchain/langgraph";
import * as z from "zod";

const State = new StateSchema({
  which: z.string(),
  result: z.string().default(""),
});

const routeAfterA: ConditionalEdgeRouter<typeof State, "b" | "c"> = (state) => {
  return state.which === "b" ? "b" : "c";
};

const graph = new StateGraph(State)
  .addNode("a", (state) => ({ which: "c" }))
  .addNode("b", () => ({ result: "B" }))
  .addNode("c", () => ({ result: "C" }))
  .addEdge(START, "a")
  .addConditionalEdges("a", routeAfterA) // 不传 pathMap:直接返回节点名
  .addEdge("b", END)
  .addEdge("c", END)
  .compile();
pathMap 的两种写法
Record 形式------routingFn 返回「逻辑标签」,再映射到真实节点:
typescript
.addConditionalEdges("check", routeFn, {
  process: "process",
  skip: "skip",
})
数组形式 ------官网 ReAct 示例更爱这种,声明「允许去哪些终点」,routingFn 直接返回节点名或 END:
typescript
.addConditionalEdges("llmCall", shouldContinue, ["toolNode", END])不传 pathMap 时,routingFn 必须直接返回 已注册的节点名或
END。返回幽灵名字,compile 不一定报错,跑起来才Node not found------属实闷坑。
从 START 也能条件分支
入口不一定死连某一个节点:
typescript
graph.addConditionalEdges(START, (state) =>
  state.mode === "fast" ? "fastPath" : "fullPath"
);
另外:routingFn 还可以返回 字符串数组,一次 fan-out 到多个节点(map-reduce 那套)。本篇先把「选一条路」和「ReAct 环」吃透;扇出留给后面进阶篇。
三、示例 1:简单条件分支
根据输入长短走不同处理节点------把「路口红绿灯」落到代码上:
typescript
import {
  StateGraph,
  StateSchema,
  GraphNode,
  ConditionalEdgeRouter,
  START,
  END,
} from "@langchain/langgraph";
import * as z from "zod";

const State = new StateSchema({
  input: z.string(),
  flag: z.boolean().default(false),
  result: z.string().default(""),
});

const checkNode: GraphNode<typeof State> = async (state) => {
  return { flag: state.input.length > 10 };
};

const processNode: GraphNode<typeof State> = async (state) => {
  return { result: `已处理:${state.input.toUpperCase()}` };
};

const skipNode: GraphNode<typeof State> = async (state) => {
  return { result: `直接返回:${state.input}` };
};

const routeFn: ConditionalEdgeRouter<typeof State, "process" | "skip"> = (
  state
) => {
  return state.flag ? "process" : "skip";
};

const graph = new StateGraph(State)
  .addNode("check", checkNode)
  .addNode("process", processNode)
  .addNode("skip", skipNode)
  .addEdge(START, "check")
  .addConditionalEdges("check", routeFn, {
    process: "process",
    skip: "skip",
  })
  .addEdge("process", END)
  .addEdge("skip", END)
  .compile();

const out1 = await graph.invoke({ input: "hello" });
// → result: "直接返回:hello"

const out2 = await graph.invoke({ input: "this is a long input string" });
// → result: "已处理:THIS IS A LONG INPUT STRING"流程很直白:check 只负责把判断结果写进 State;真正「往哪走」交给条件边。节点保持「只干一件事」,路由逻辑独立------后面改策略时不用把节点函数撕开重写。
四、ReAct 循环:Agent 自己转起来
ReAct = Reasoning + Acting:模型思考 → 决定要不要调工具 → 执行工具 → 再思考......直到给出最终答案。这是绝大多数 Tool-calling Agent 的骨架。
四个职责:
- agent / llmCall 节点 :
llm.bindTools(tools)调模型,往messages里塞一条 AIMessage(可能带tool_calls) - routing 函数 :看最后一条消息有没有
tool_calls - tools 节点 :执行工具,回写
ToolMessage - tools → agent 的固定边:形成环,直到模型不再要工具
终止条件:最后一条 AIMessage 没有 tool_calls,routing 返回 END。
主推
ToolNode,别再人人手写一遍工具循环。 官网 Workflows and agents 的 Agent 示例就是new ToolNode(tools)------它自带并行执行、错误处理,工具若返回Command也能自动往上冒泡。手写当然可以,但你必须自己保证:返回的是ToolMessage,且tool_call_id和模型发出的 call id 对得上。
完整可跑示例(本地 Ollama + qwen2.5:7b):
typescript
import {
  StateGraph,
  StateSchema,
  MessagesValue,
  GraphNode,
  ConditionalEdgeRouter,
  START,
  END,
} from "@langchain/langgraph";
import { ToolNode } from "@langchain/langgraph/prebuilt";
import { ChatOllama } from "@langchain/ollama";
import { tool } from "@langchain/core/tools";
import { HumanMessage } from "@langchain/core/messages";
import * as z from "zod";

const getWeather = tool(
  async ({ city }: { city: string }) => `${city}:晴,25°C`,
  {
    name: "get_weather",
    description: "查询城市天气",
    schema: z.object({ city: z.string().describe("城市名") }),
  }
);

const tools = [getWeather];

const llm = new ChatOllama({ model: "qwen2.5:7b", temperature: 0 });
const llmWithTools = llm.bindTools(tools);

const State = new StateSchema({
  messages: MessagesValue,
});

const agentNode: GraphNode<typeof State> = async (state) => {
  const response = await llmWithTools.invoke(state.messages);
  return { messages: [response] }; // MessagesValue → append,只返回增量
};

const toolNode = new ToolNode(tools);

const shouldContinue: ConditionalEdgeRouter<typeof State, "tools"> = (state) => {
  const lastMsg = state.messages.at(-1);
  if (lastMsg?.tool_calls?.length) return "tools";
  return END;
};

const graph = new StateGraph(State)
  .addNode("agent", agentNode)
  .addNode("tools", toolNode)
  .addEdge(START, "agent")
  .addConditionalEdges("agent", shouldContinue, ["tools", END])
  .addEdge("tools", "agent") // 环:工具跑完回到模型
  .compile();

const result = await graph.invoke({
  messages: [new HumanMessage("北京天气怎么样?")],
});

console.log(result.messages.at(-1)?.content);
跑「北京天气怎么样?」时,大致会经历:
HumanMessage
  → AIMessage(tool_calls: get_weather)
  → ToolMessage("北京:晴,25°C")
  → AIMessage("北京今天晴,约 25°C......")  // 无 tool_calls → END
这就是 Agent 的心跳。链式 pipe 做不漂亮的事,在图里就是两条边 + 一个路由函数。
循环别死扛:recursionLimit
万一模型抽风,每一次都还要再调工具,环会一直转。官网提供 recursionLimit (按 super-step 计数),超限抛 GraphRecursionError:
typescript
import { GraphRecursionError } from "@langchain/langgraph";

try {
  await graph.invoke(
    { messages: [new HumanMessage("......")] },
    { recursionLimit: 25 } // 默认一般够用;调试死循环时可故意调小
  );
} catch (error) {
  if (error instanceof GraphRecursionError) {
    console.error("图递归超限,检查终止条件或模型是否一直产出 tool_calls");
  } else {
    throw error;
  }
}
生产里还可以在 State 里加个 stepCount 自己拦一层;但最低限度,先把 recursionLimit 当安全带系上。
五、Command:节点里同时更新状态 + 跳转
条件边的分工是「节点只改 State,边负责选路」。有时你想在 同一个节点函数里 既写更新、又指定下一跳------官网为此提供了 Command:
typescript
import {
  StateGraph,
  StateSchema,
  GraphNode,
  Command,
  START,
  END,
} from "@langchain/langgraph";
import * as z from "zod";

const State = new StateSchema({
  foo: z.string(),
});

// 第二个泛参声明这个节点可能 goto 哪些终点(配合 ends)
const nodeA: GraphNode<typeof State, "nodeB" | "nodeC"> = (state) => {
  const value = Math.random() > 0.5 ? "b" : "c";
  const goto = value === "b" ? "nodeB" : "nodeC";

  return new Command({
    update: { foo: value }, // 等价于普通节点返回的 Partial Update
    goto,                   // 等价于条件边的路由结果
  });
};

const nodeB: GraphNode<typeof State> = (state) => ({ foo: state.foo + "B" });
const nodeC: GraphNode<typeof State> = (state) => ({ foo: state.foo + "C" });

const graph = new StateGraph(State)
  .addNode("nodeA", nodeA, { ends: ["nodeB", "nodeC"] }) // ⚠️ 必写
  .addNode("nodeB", nodeB)
  .addNode("nodeC", nodeC)
  .addEdge(START, "nodeA")
  // 注意:nodeA 没有 addConditionalEdges,也没有 addEdge 指出边
  .compile();
为什么必须写 ends?
LangGraph 要画图、做静态分析,得知道「这个节点运行时可能跳到哪」。Command.goto 是动态的,不声明 ends,框架看不到潜在边------渲染和图校验都会缺一段。
条件边 vs Command:怎么选?
| 你想做的事 | 用谁 |
|---|---|
| 只根据 State 选下一跳,节点本身不掺和路由 | addConditionalEdges |
同一个节点 既要 update 又要决定去哪 |
Command({ update, goto }) |
从外部恢复被 interrupt 打断的图 |
Command({ resume })(下一章 Checkpointer) |
铁律:同一节点不要把
Command.goto和addEdge混着用。 官网写得很明白------Command加的是动态边 ,静态addEdge照样会执行。结果就是:你goto了myOtherNode,同时又addEdge("nodeA", "nodeB"),两边都会跑 。每个节点:要么交给边路由,要么交给Command,二选一。
Command 的四种字段(本篇先认门)
| 字段 | 作用 |
|---|---|
update |
写入 State(跟节点直接返回 Partial 一样) |
goto |
下一跳节点名(或多个 / Send) |
graph |
子图里跳到父图时用(Command.PARENT) |
resume |
配合 interrupt 恢复执行------留给下一章 |
用 Command 重写「有 tool_calls 就去 tools」也可以,但多数 Agent 用条件边更清晰:agent 节点专心调模型,路由函数一眼能看懂终止条件。Command 更适合「校验失败立刻打回某个节点」这类强耦合逻辑。
常见坑
- routingFn 返回不存在的节点名 :compile 可能放你一马,运行时报
Node not found。节点名字符串跟addNode第一个参数必须逐字一致。 - pathMap 的 key 和返回值对不上 :routing 返回
"Process",map 里写的是"process"------看起来像卡住,其实是路由迷路了。 - 无限循环没安全带 :模型一直产出
tool_calls就会空转。设recursionLimit,必要时在 State 里加步数上限。 - 手写 tools 节点忘了
ToolMessage/tool_call_id:模型协议要求「带 tool_calls 的 AIMessage 后面必须跟对应 ToolMessage」。缺一个,下一轮模型或接口会报错。能上ToolNode就上。 Command忘了ends:跳转「能跑」不代表图画得对;渲染和校验会缺边。养成addNode(name, fn, { ends: [...] })的习惯。Command.goto又叠了addEdge:两条出路同时触发,状态更新和日志都会乱成一锅粥。路由方式认准一种。- 被旧教程带去
Annotation.Root/MessagesAnnotation:本系列统一StateSchema+MessagesValue。看到 Annotation 知道是 Legacy 即可,新代码别再开倒车。
到这里,Agent 已经能在进程里自己转圈了。但一关进程,State 全没;想多轮对话、中间停下来让人审批,还缺点关键基建------Checkpointer。