Share项目总结
前言:Share作为暑期前的最后一个项目,所耗费时间较长,也遇到了很多没遇到的问题,学习了很多技术
总览
项目整体采用MVC架构,以界面为单位分出各个MVC界面,同时由于笔者在写该项目的时候对MVC的运用还不透彻导致很多UI的搭建都直接写在Controller里面,在下一个项目中会尝试单开UserView展示UI
- 可以看到,由于大体上有五个界面,就需要用TabBar为总容器,放入以五个界面为根VC的NavigationController,但是在SceneDelegate中,我们暂时还不能以TabBar作为window,我们需要搭建登陆注册,以及启动界面,最后将它们联动起来,这是大体的文件层级,接下来我们针对其中关键部分进行详细讲解
启动页及登陆
启动页
启动页是持续一段时间的图片,需要实现的效果就是点开app,图片显示几秒后切换到登陆注册界面,这里我们的实现思路是:
- 单独一个
LaunchScreenViewController放图片,在sceneDelegate以这个VC为root初始化root,用GCD提供的延迟方法在0.3秒后切换root成我们的登陆注册VC,先看代码:
objc
- (void)scene:(UIScene *)scene willConnectToSession:(UISceneSession *)session options:(UISceneConnectionOptions *)connectionOptions {
    UIWindowScene *windowScene = (UIWindowScene *)scene;
    self.window = [[UIWindow alloc] initWithWindowScene:windowScene];

    self.window.rootViewController = [[LaunchScreenViewController alloc] init];
    __weak typeof(self) weakSelf = self;//防止循环引用
    dispatch_after(dispatch_time(DISPATCH_TIME_NOW, (int64_t)(0.3 * NSEC_PER_SEC)), dispatch_get_main_queue(), ^{//延迟方法
        [UIView transitionWithView:self.window duration:0.5 options:UIViewAnimationOptionTransitionCrossDissolve animations:^{//动画方法
            UINavigationController *Nav = [[UINavigationController alloc] initWithRootViewController:[[RegisterViewController alloc] init]];
            weakSelf.window.rootViewController = Nav;
        } completion:nil];
    });
    [self.window makeKeyAndVisible];
}可以看到这里延迟了0.3秒后使用了一个UIView的动画方法把界面切换了,接下来就进入了RegisterViewController
登录注册
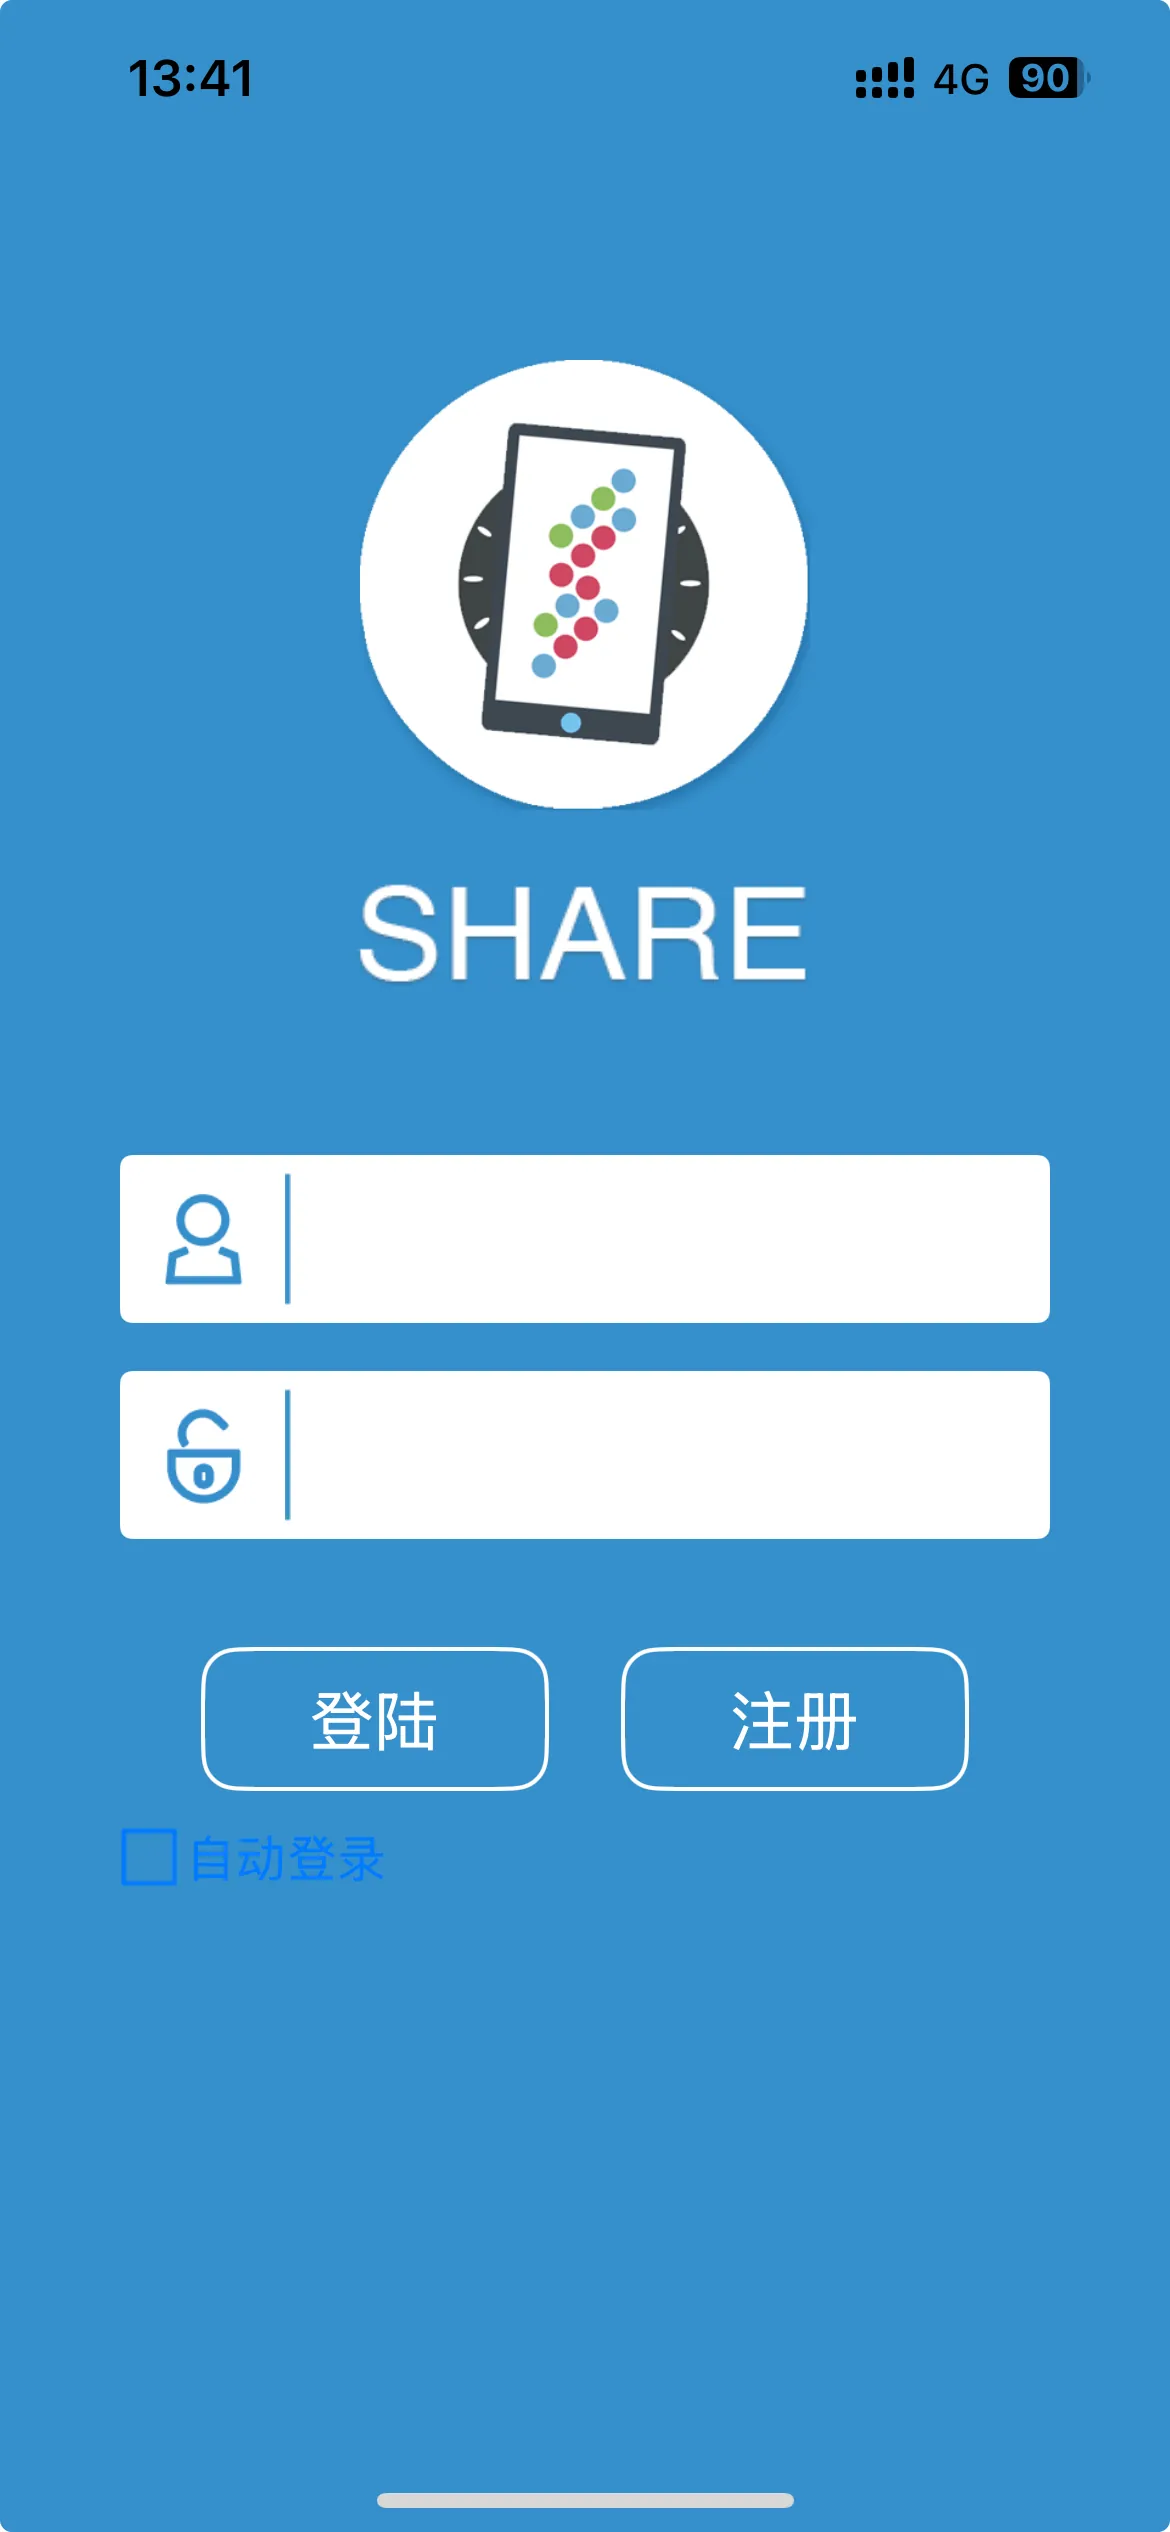
此界面的UI部分不做过多解释,正常布局即可,值得注意的是在这里我们接触到了一个键盘监听的知识点,由于点击textField会唤出键盘,而我们的一部分UI被键盘盖住,体验很差
- 所以需要监听键盘是否弹出,如果键盘弹出,把界面上移
- 监听键盘需要在创建UI的前面声明
NSNotificationCenter这是监听的核心
objc
- (void)viewDidLoad {
    [super viewDidLoad];
    [[NSNotificationCenter defaultCenter] addObserver:self selector:@selector(keyboardWillAppear:) name:UIKeyboardWillShowNotification object:nil];//***
    [[NSNotificationCenter defaultCenter] addObserver:self selector:@selector(keyboardWillhide:) name:UIKeyboardWillHideNotification object:nil];//***
    [self setupUI];
}NSNotificationCenter是一个全局单例,后面的方法中倒数第二个参数控制的是监听到键盘的什么行为触发选择器方法,第一个show就是键盘弹出调用方法,我们接下来实现两个方法
objc
- (void)keyboardWillAppear:(NSNotification *)noti {
    NSTimeInterval duration = [noti.userInfo[UIKeyboardAnimationDurationUserInfoKey] doubleValue];

    [UIView animateWithDuration:duration animations:^{
        self.view.bounds = CGRectMake(0, 180, self.view.bounds.size.width, self.view.bounds.size.height);
    }];
}

- (void)keyboardWillhide:(NSNotification *)noti {
    NSTimeInterval duration = [noti.userInfo[UIKeyboardAnimationDurationUserInfoKey] doubleValue];

    [UIView animateWithDuration:duration animations:^{
        self.view.bounds = CGRectMake(0, 0, self.view.bounds.size.width, self.view.bounds.size.height);
    }];
}
- (void)dealloc {
    [[NSNotificationCenter defaultCenter] removeObserver:self];
}//最后需要移除
其中noti的userInfo就是一个包含参数的字典,可以通过传入不同的枚举值得到信息
请注意,这里我直接修改了
self.view.bounds,这是我自己想出来的一种实现方式,很简单,但容易出现问题,比如在后面的聊天室中就出现了UI布局错乱的bug,在后面我会介绍比较合适的方法实现
首页
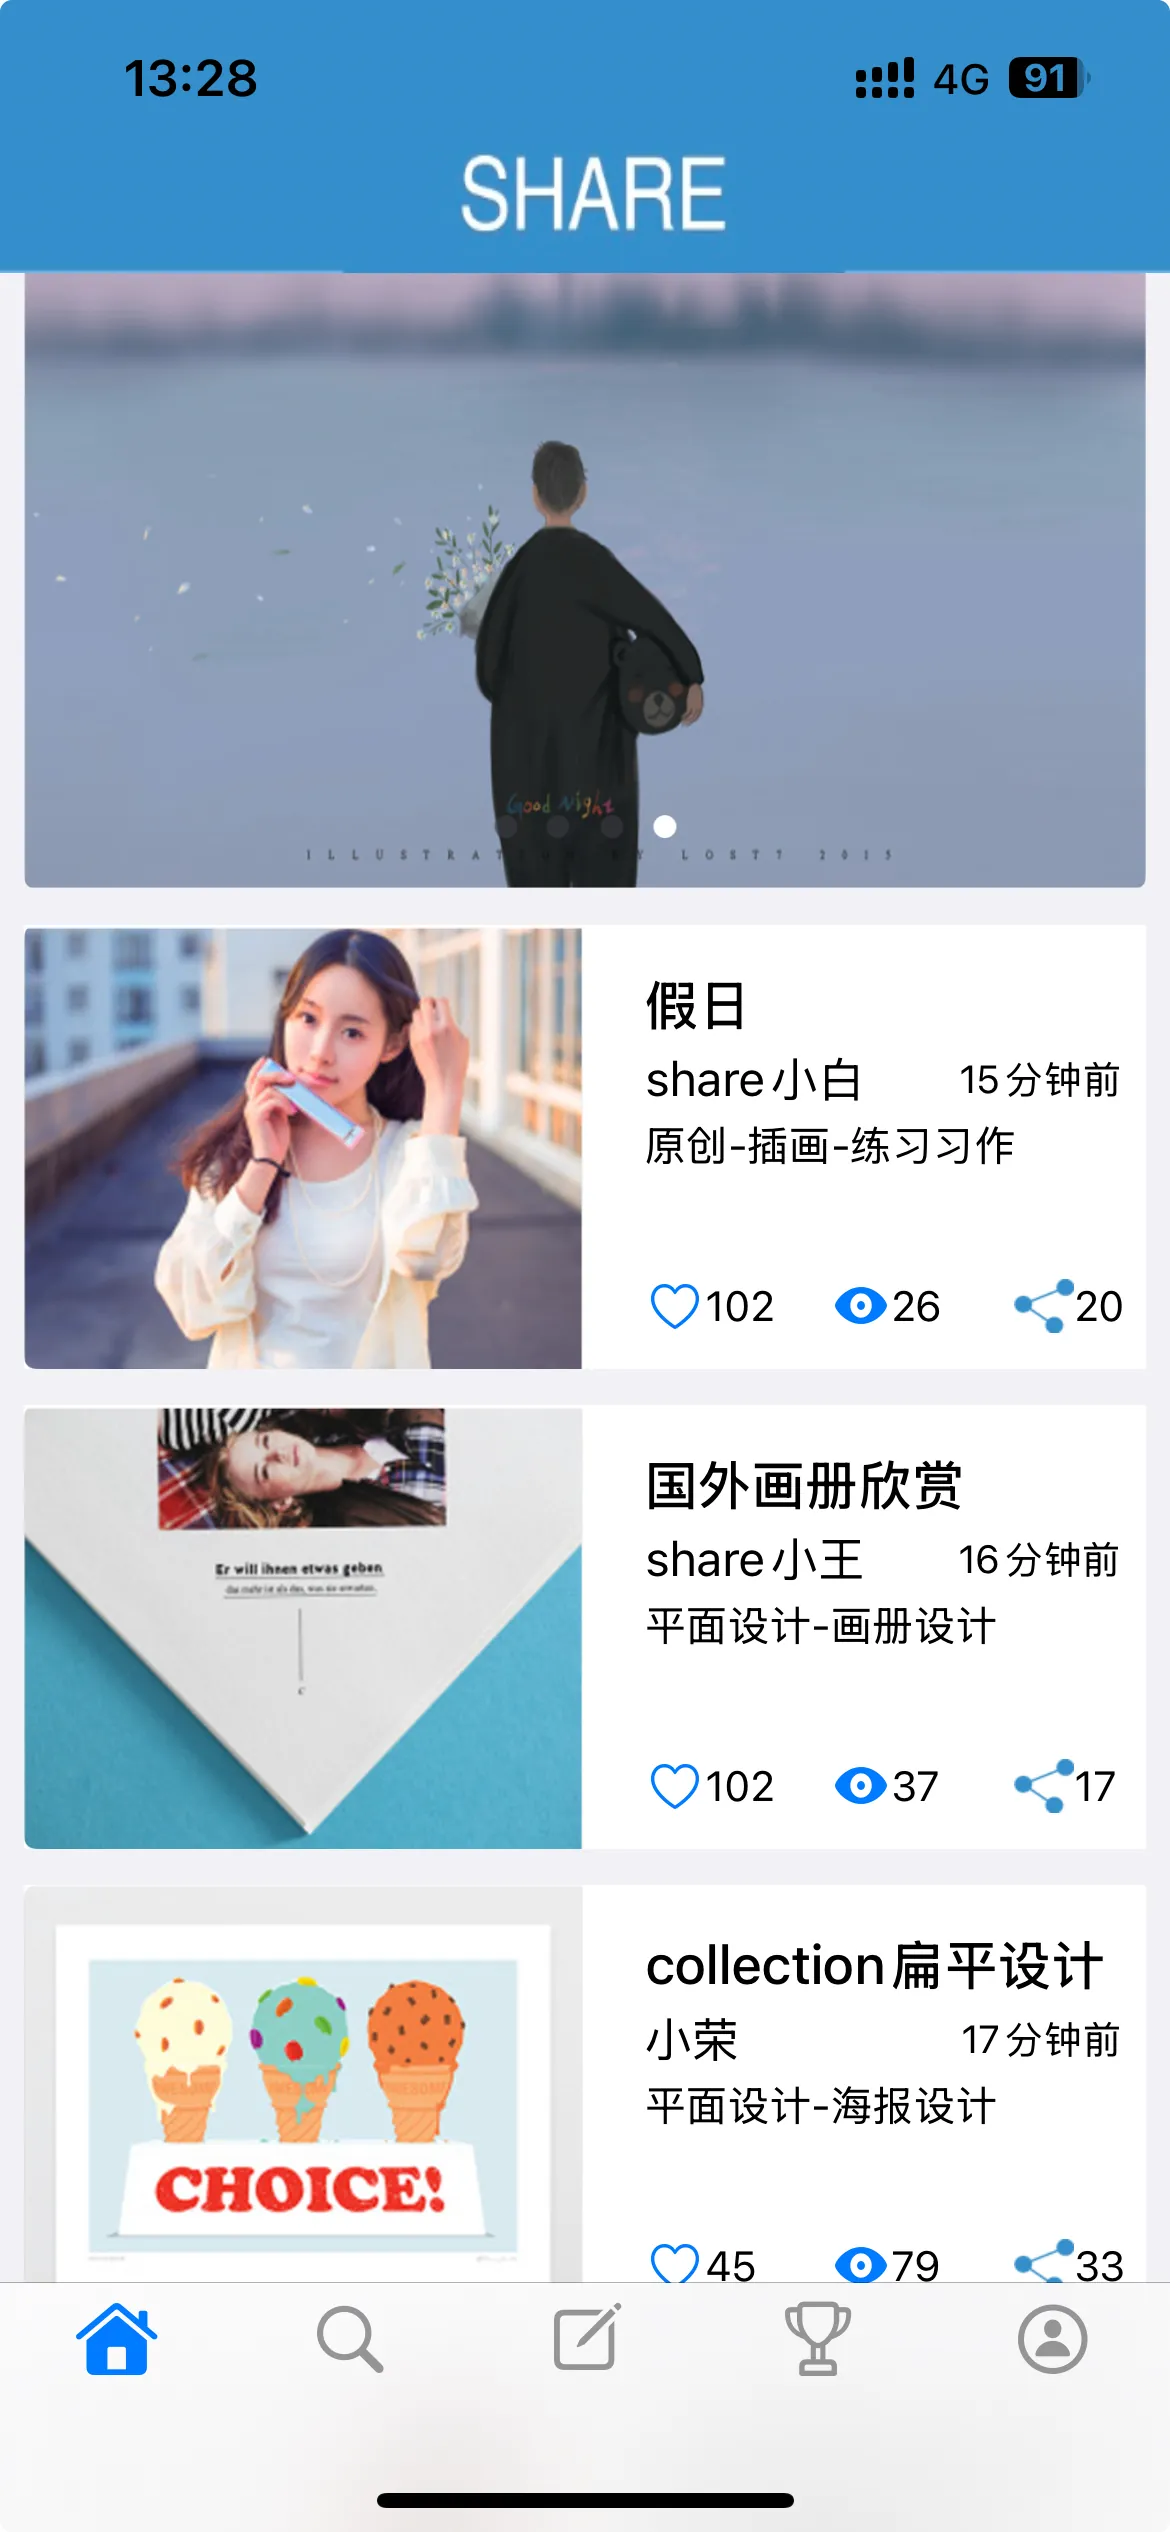
- 首页整体由一个tableView构成,上方的无限轮播图作为tableView的tableHeaderView,这一部分在笔者的其他项目中也介绍过这里不多赘述,我们注意这里需要实现一个双向点赞传值:点击cell之后在里面点赞,外面也同步变化,实现原理如下:
- 向内传值,这里就是一个简单的刷新cell,写一个configWithModel方法更新cell的model,再刷新tableView的对应行就行
objc
- (void)tableView:(UITableView *)tableView didSelectRowAtIndexPath:(NSIndexPath *)indexPath {
    [tableView deselectRowAtIndexPath:indexPath animated:YES];
    SharePassageModel *model = self.section[indexPath.row];
    model.eye++;//这个是浏览量
    [tableView reloadRowsAtIndexPaths:@[indexPath] withRowAnimation:UITableViewRowAnimationNone];
    DetailSharePassageViewController *detail = [[DetailSharePassageViewController alloc] init];
    [detail configWithModel:model];//更新cell的UI内容
    detail.pressedHeart = ^{//回调方法
        [tableView reloadRowsAtIndexPaths:@[indexPath] withRowAnimation:UITableViewRowAnimationNone];
    };
    [self.navigationController pushViewController:detail animated:YES];
}- 向外传值
事实上上面的代码也展示出来了,在里面点击点赞,由于共用了model,直接在里面更新model,再反向传值刷新VC的tableView同步内容
objc
- (void)touchHeartBtn {
    if (self.heartView.tag == 101) {
        self.heartView.tag = 102;
        self.model.isHeart = YES;
        [self.heartView setImage:[UIImage systemImageNamed:@"heart.fill"] forState:UIControlStateNormal];
        self.model.heart++;
    } else {
        self.heartView.tag = 101;
        self.model.isHeart = NO;
        [self.heartView setImage:[UIImage systemImageNamed:@"heart"] forState:UIControlStateNormal];
        self.model.heart--;
    }
    self.heart.text = [NSString stringWithFormat:@"%lu", self.model.heart];
    if (self.pressedHeart) {
        self.pressedHeart();
    }
}
这里我使用了tag标记button分辨button是否被点击,事实上放进model里面作为一个isTapped属性更好,这里可以进行优化
搜索页
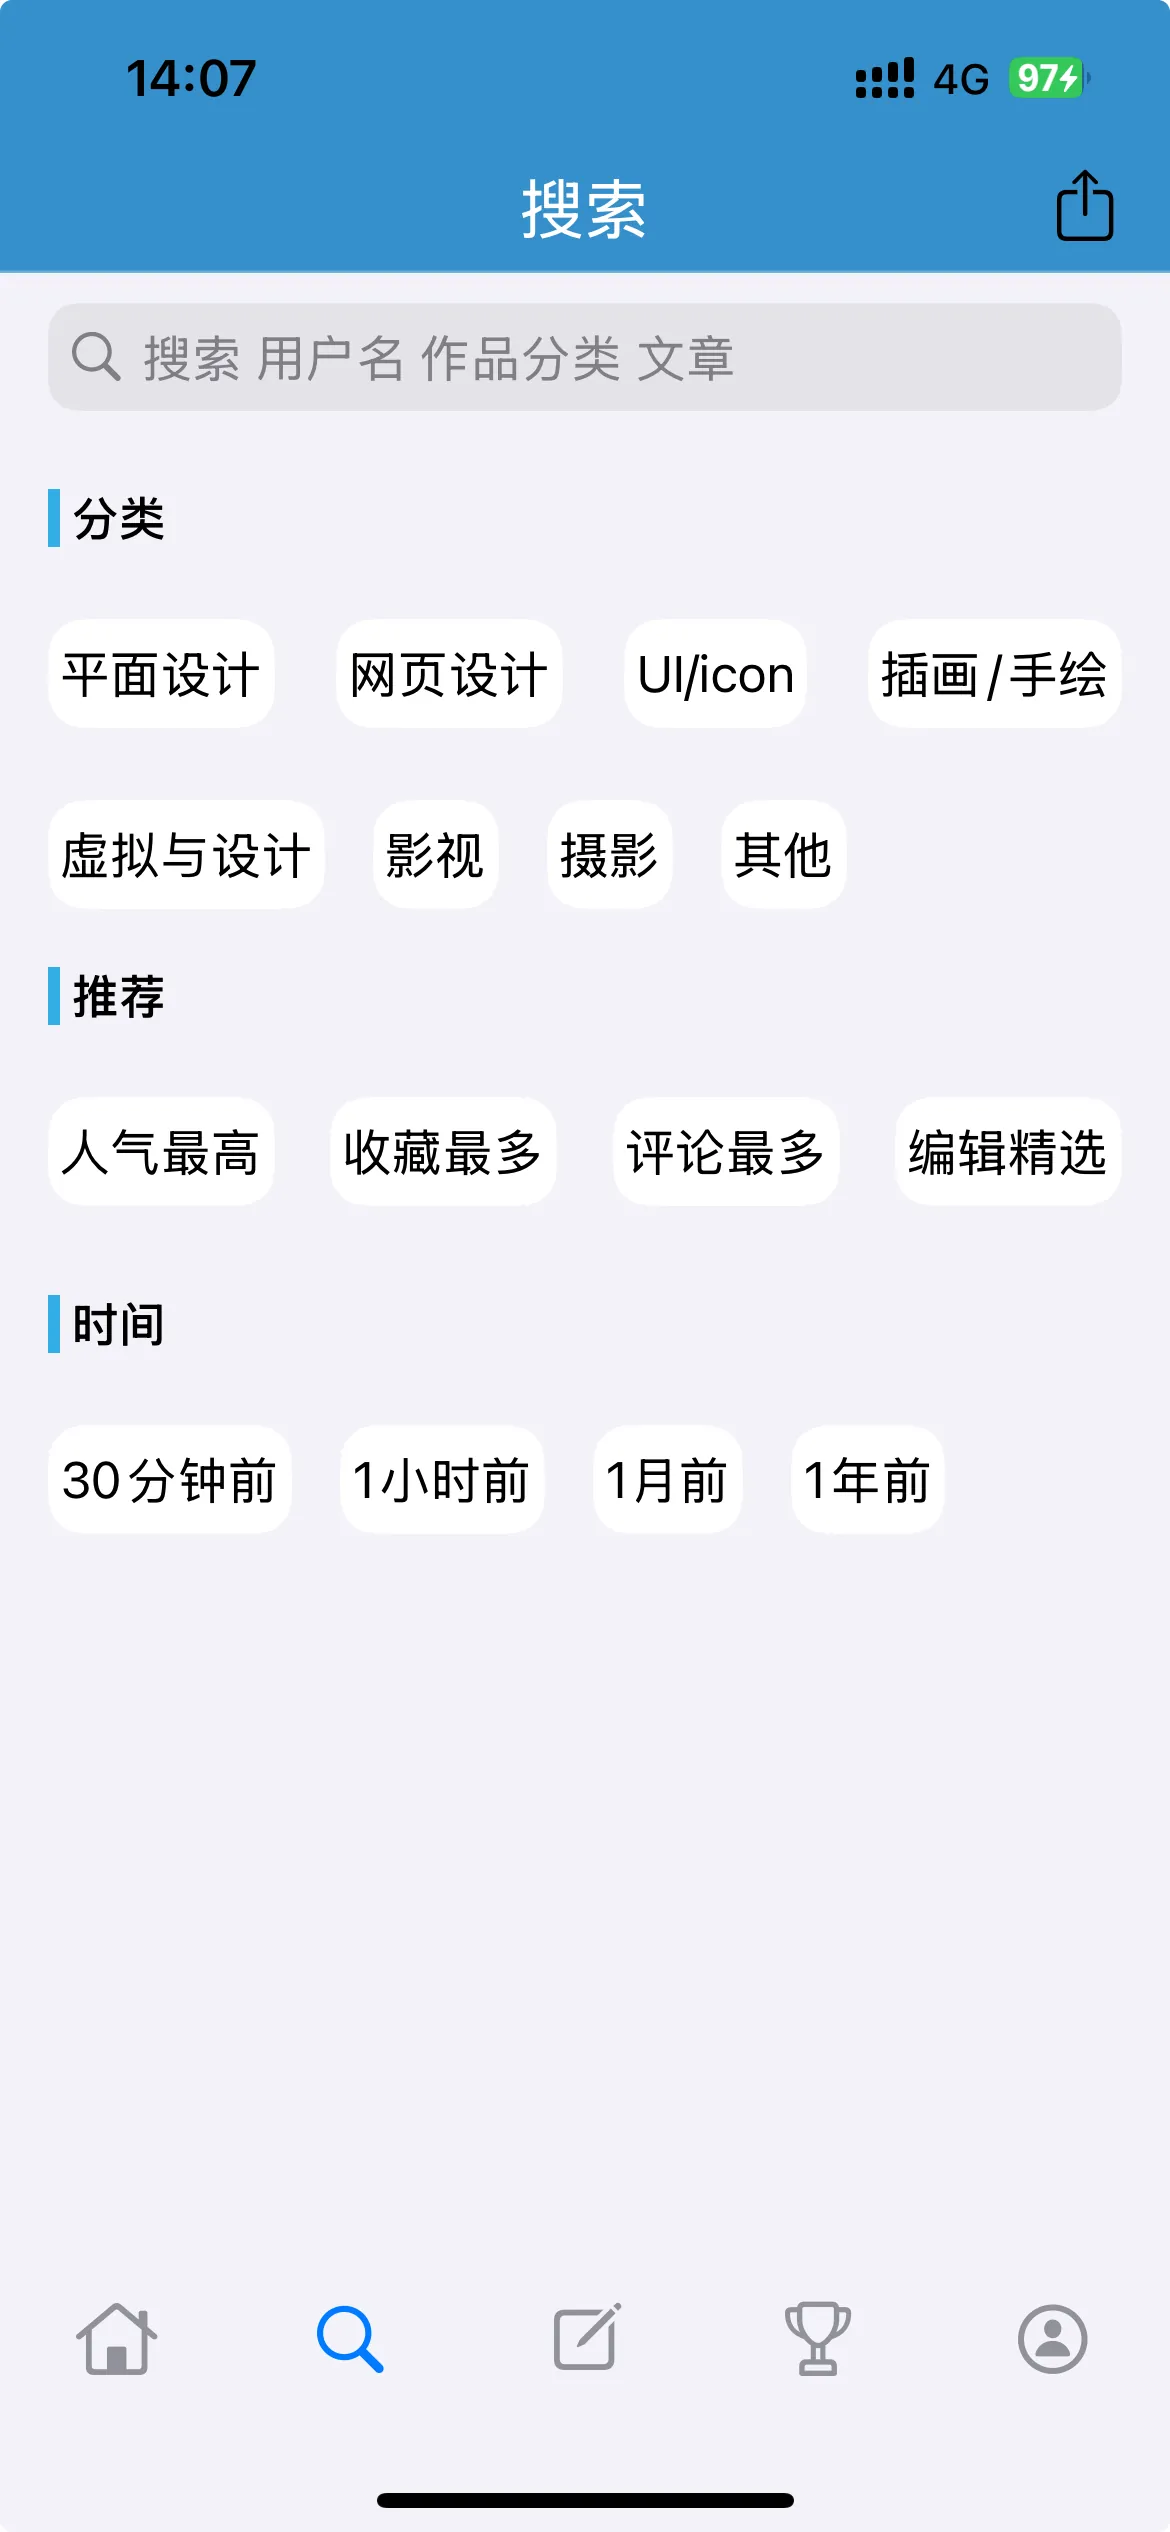
这里我使用了三个collectionView,所以也需要维护三个数组作为他们的数据源,在完成dataSource代理的时候需要对它们是哪个进行判断
objc
- (__kindof UICollectionViewCell *)collectionView:(UICollectionView *)collectionView cellForItemAtIndexPath:(NSIndexPath *)indexPath {
    int secNumber = 0;
    if (collectionView == self.collectionViewCategory) {
    } else if (collectionView == self.collectionViewSuggest) {
        secNumber = 1;
    } else {
        secNumber = 2;
    }
    SearchItemsCollectionViewCell *cell = [collectionView dequeueReusableCellWithReuseIdentifier:@"cell" forIndexPath:indexPath];
    NSArray *arr = self.section[secNumber];
    LabelSectionModel *model = arr[indexPath.item];
    [cell configWithModel:model];
    return cell;
}

- (NSInteger)collectionView:(UICollectionView *)collectionView numberOfItemsInSection:(NSInteger)section {
    int secNumber = 0;
    if (collectionView == self.collectionViewCategory) {
    } else if (collectionView == self.collectionViewSuggest) {
        secNumber = 1;
    } else {
        secNumber = 2;
    }
    NSArray *arr = self.section[secNumber];
    return arr.count;
}- 此部分UI虽繁琐,但难度不大,顶部是一个searchBar,接下来直接讲解右上角上传内容
上传
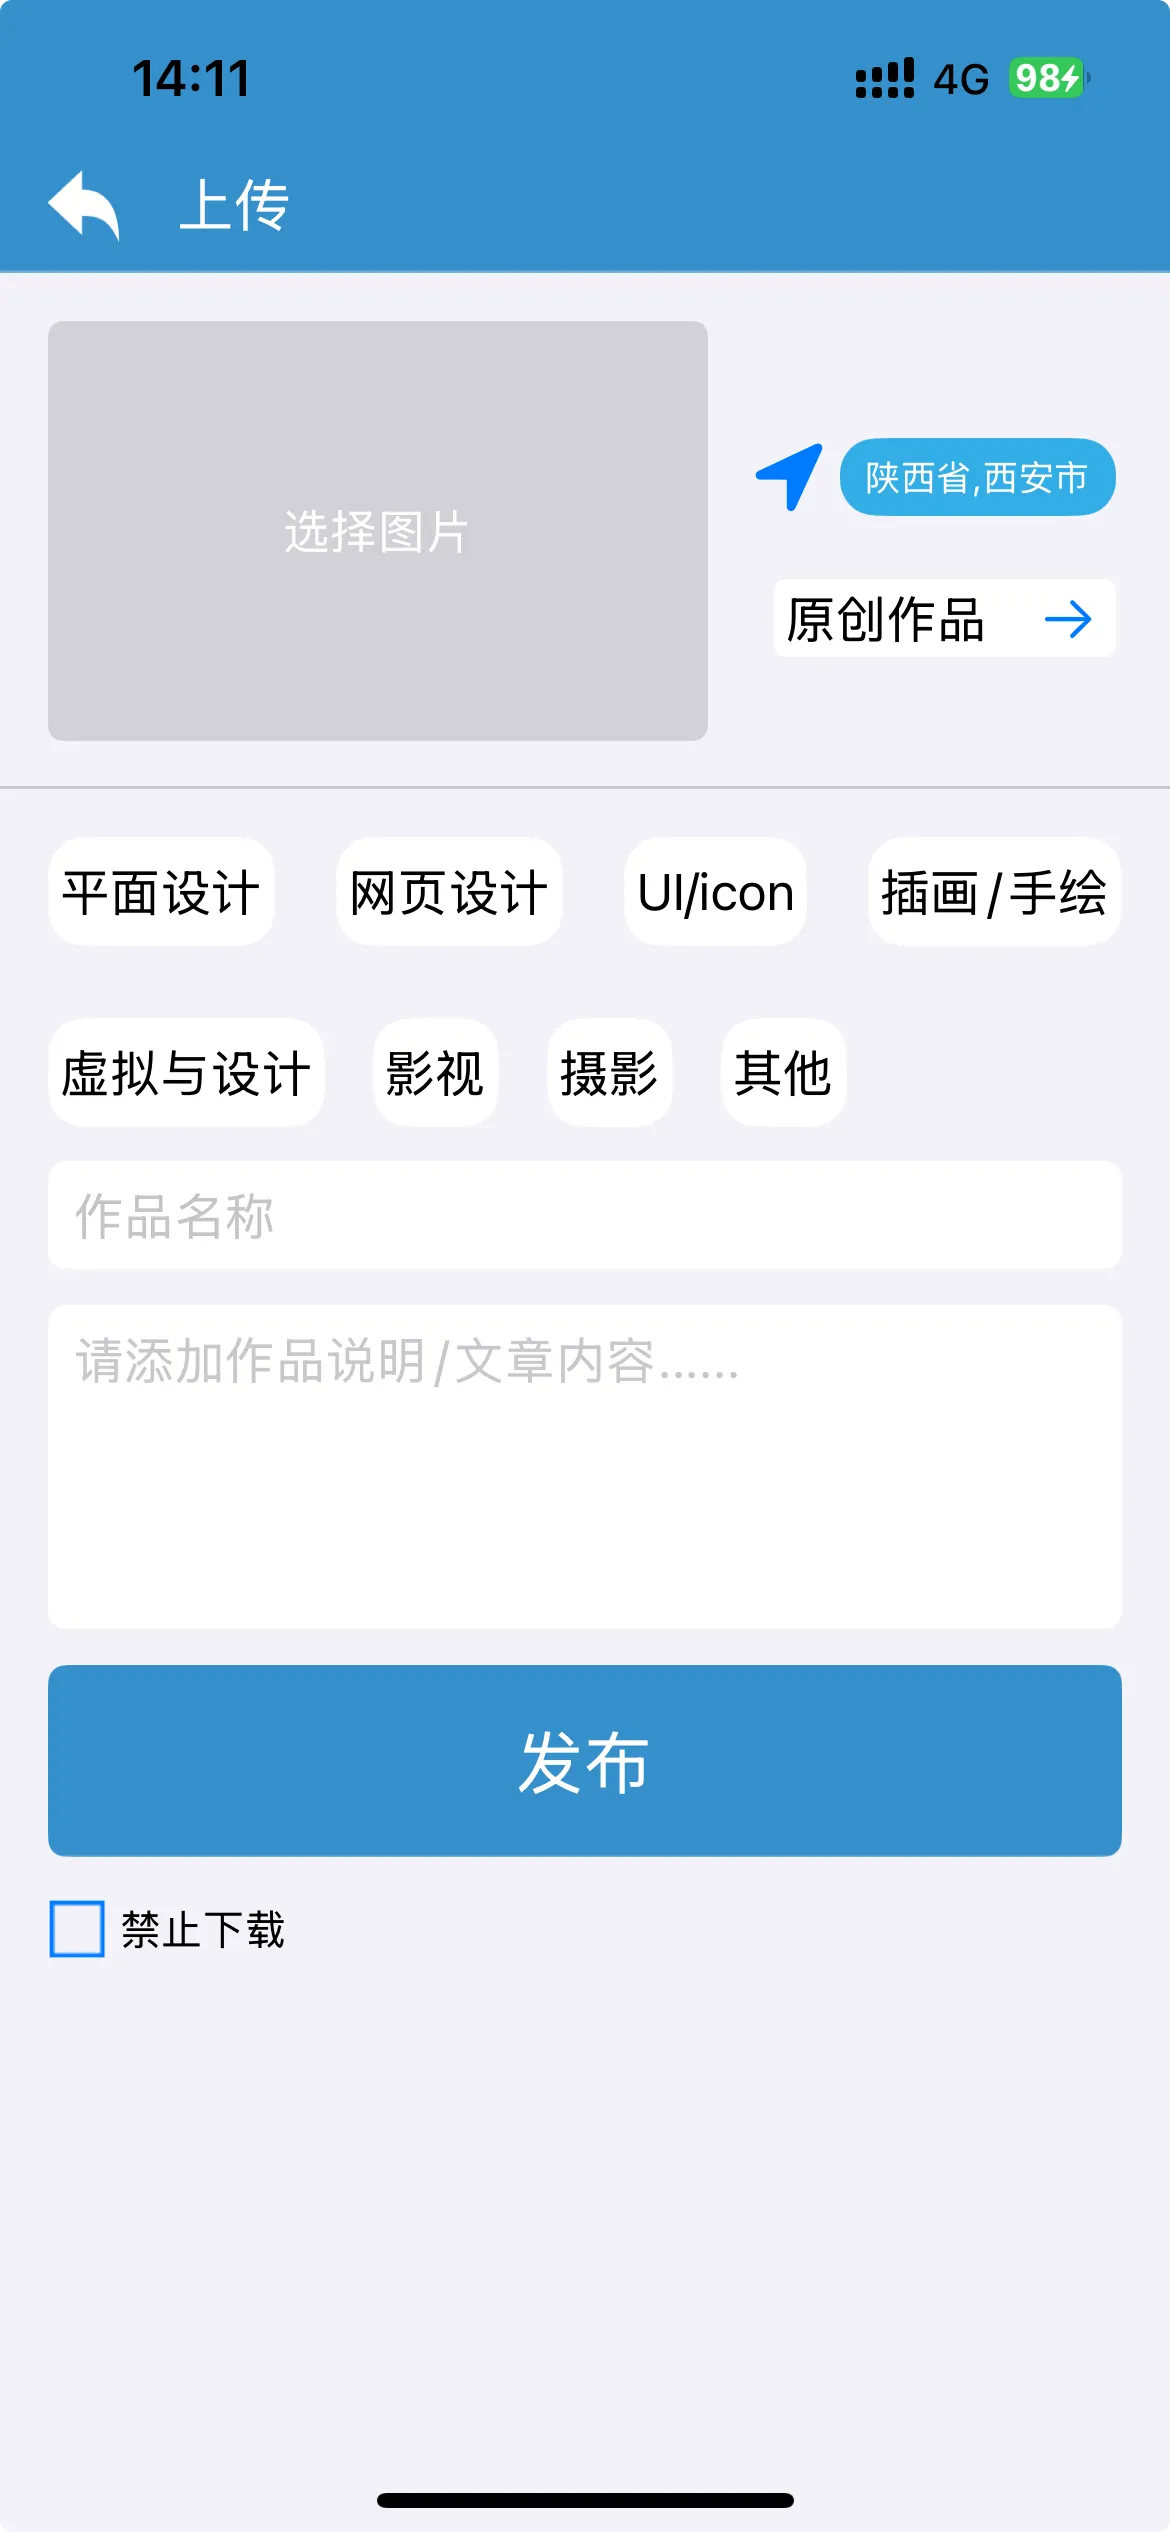
本页中重要的UI有两个,第一个是右边的tableView折叠cell,这一部分是通过headerView上面的一个tap手势接受点击,再通过反向传值给VC,VC改变Model的isFold的值,再刷新tableView达到折叠的效果,直接看代码
objc
- (UIView *)tableView:(UITableView *)tableView viewForHeaderInSection:(NSInteger)section {
    SharePushHeaderFooterView *view = [tableView dequeueReusableHeaderFooterViewWithIdentifier:@"view"];
    __weak typeof(self) weakSelf = self;
    view.changeHead = ^(BOOL isFold) {
        weakSelf.isFold = isFold;
        CGFloat newHeight = isFold ? 26 : 26 + weakSelf.Folder.count * 26;
            [weakSelf.tableView mas_updateConstraints:^(MASConstraintMaker *make) {
                make.height.mas_equalTo(newHeight);
            }];
            [weakSelf.view layoutIfNeeded];
        NSIndexSet *set = [NSIndexSet indexSetWithIndex:0];
        [weakSelf.tableView reloadSections:set withRowAnimation:UITableViewRowAnimationFade];
    };
    [view configWithTitle:self.curr andMode:self.isFold];
    return view;
}

- (UITableViewCell *)tableView:(UITableView *)tableView cellForRowAtIndexPath:(NSIndexPath *)indexPath {
    SharePushTableViewCell *cell = [tableView dequeueReusableCellWithIdentifier:@"cell" forIndexPath:indexPath];
    [cell configWithTitle:self.Folder[indexPath.row]];
    return cell;
}

- (void)tableView:(UITableView *)tableView didSelectRowAtIndexPath:(NSIndexPath *)indexPath {
    [tableView deselectRowAtIndexPath:indexPath animated:YES];
    NSString *temp = self.curr;
    self.curr = self.Folder[indexPath.row];
    NSInteger index = [self.Folder indexOfObject:self.curr];
    self.Folder[index] = temp;
    self.isFold = !self.isFold;
    CGFloat height = 26 + (self.isFold ? 0 : 26 * self.Folder.count);
    [self.tableView mas_updateConstraints:^(MASConstraintMaker *make) {
        make.height.mas_equalTo(height);
    }];
    [tableView reloadData];
}

- (NSInteger)tableView:(UITableView *)tableView numberOfRowsInSection:(NSInteger)section {
    return self.isFold ? 0 : self.Folder.count;
}-
注意看最后一个方法,我们根据维护的isFold来控制cell的个数,0个的时候效果就是折叠的
-
同时点击的时候要把headerview的值取代,所以也要对model进行更新,我这里直接对内容交换了
第二个重要的UI就是图片选择
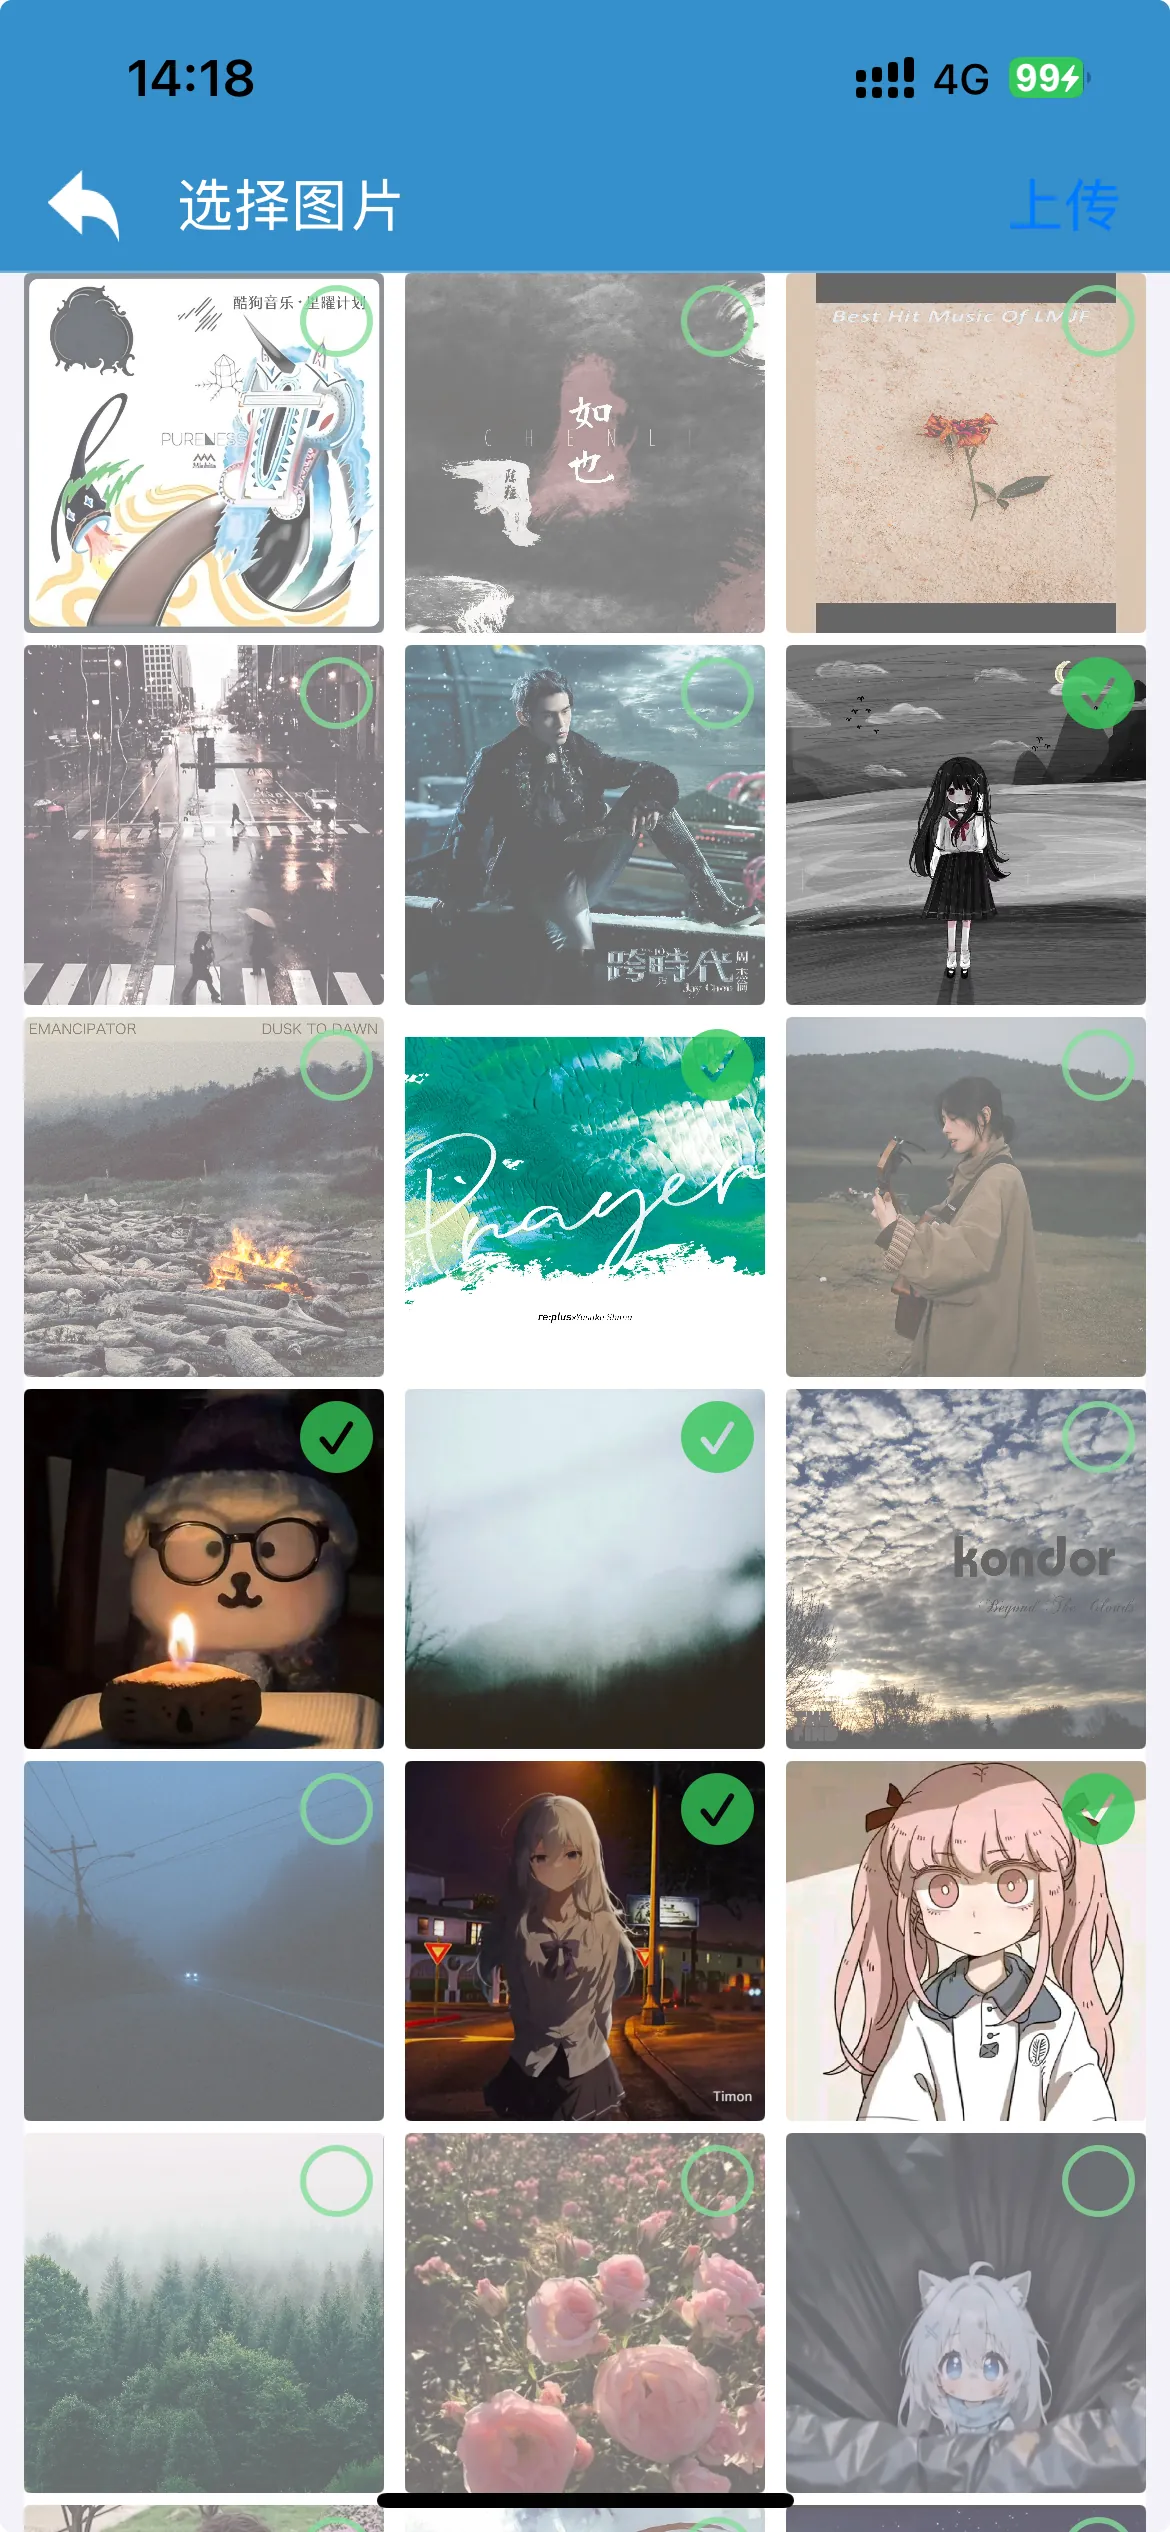
本质上和照片墙代码一样,也是UICollectionView,不同的是,我在自定义cell内部给每个cell的照片添加了虚化,添加了一个根据是否选择改变内容的✅:
objc
- (void)configWithModel:(SelectPicture *)model {
    self.model = model;
    self.picture.image = [UIImage imageNamed:model.pictureName];
    self.selectView.image = model.isChoose ? [UIImage systemImageNamed:@"checkmark.circle.fill"] : [UIImage systemImageNamed:@"circle"];
    self.picture.alpha = model.isChoose ? 1 : 0.6;
}
每次刷新调用configWithModel都会更新cell的内容,这样就做到了选中就变清晰
同时每次点击把model的状态改变,等到点击确定,遍历所有照片model,遇到被选中的就添加进临时数组,打包反向传值给上一个界面的VC,然后展示出第一张图片作为封面
文章页和活动页内容较为寡淡,只是简单UI的堆砌,我们跳过这一部分
我的页
强引用VC
假设现在有AVC,AVC会push并跳转进入BVC,那一定会先初始化BVC,而BVC中一旦要进行某种设置,由于每次都会初始化,所以事实上我们的设置并不会被保留,所以我们有两种方法能保存我们的设置(如果不使用持久化)
- 把设置的model给A持有,这样每次进入BVC的时候B可以直接修改A的model,而不是重新初始化这份model
- AVC直接强引用BVC,强行延长BVC的生命周期,这样做的好处就是代码简单,不需要进行琐碎的model跨界面传值,显然缺点就是开销大,但现在为了代码简单以及方便,我们采用这种方式
- 代码实例
objc
//本文件即为AVC
@property (nonatomic, strong) FollowFocusViewController *followVC;//示例中的BVC,被本文件即AVC强引用

if (!self.followVC) {//判断是不是存在,存在就直接用,不会重复产生
    self.followVC = [[FollowFocusViewController alloc] init];
}
[self.navigationController pushViewController:self.followVC animated:YES];
有了这个思路作为前提条件,我们就可以完成消息和设置界面内容的存储,所以后面对这一点不多介绍
消息界面
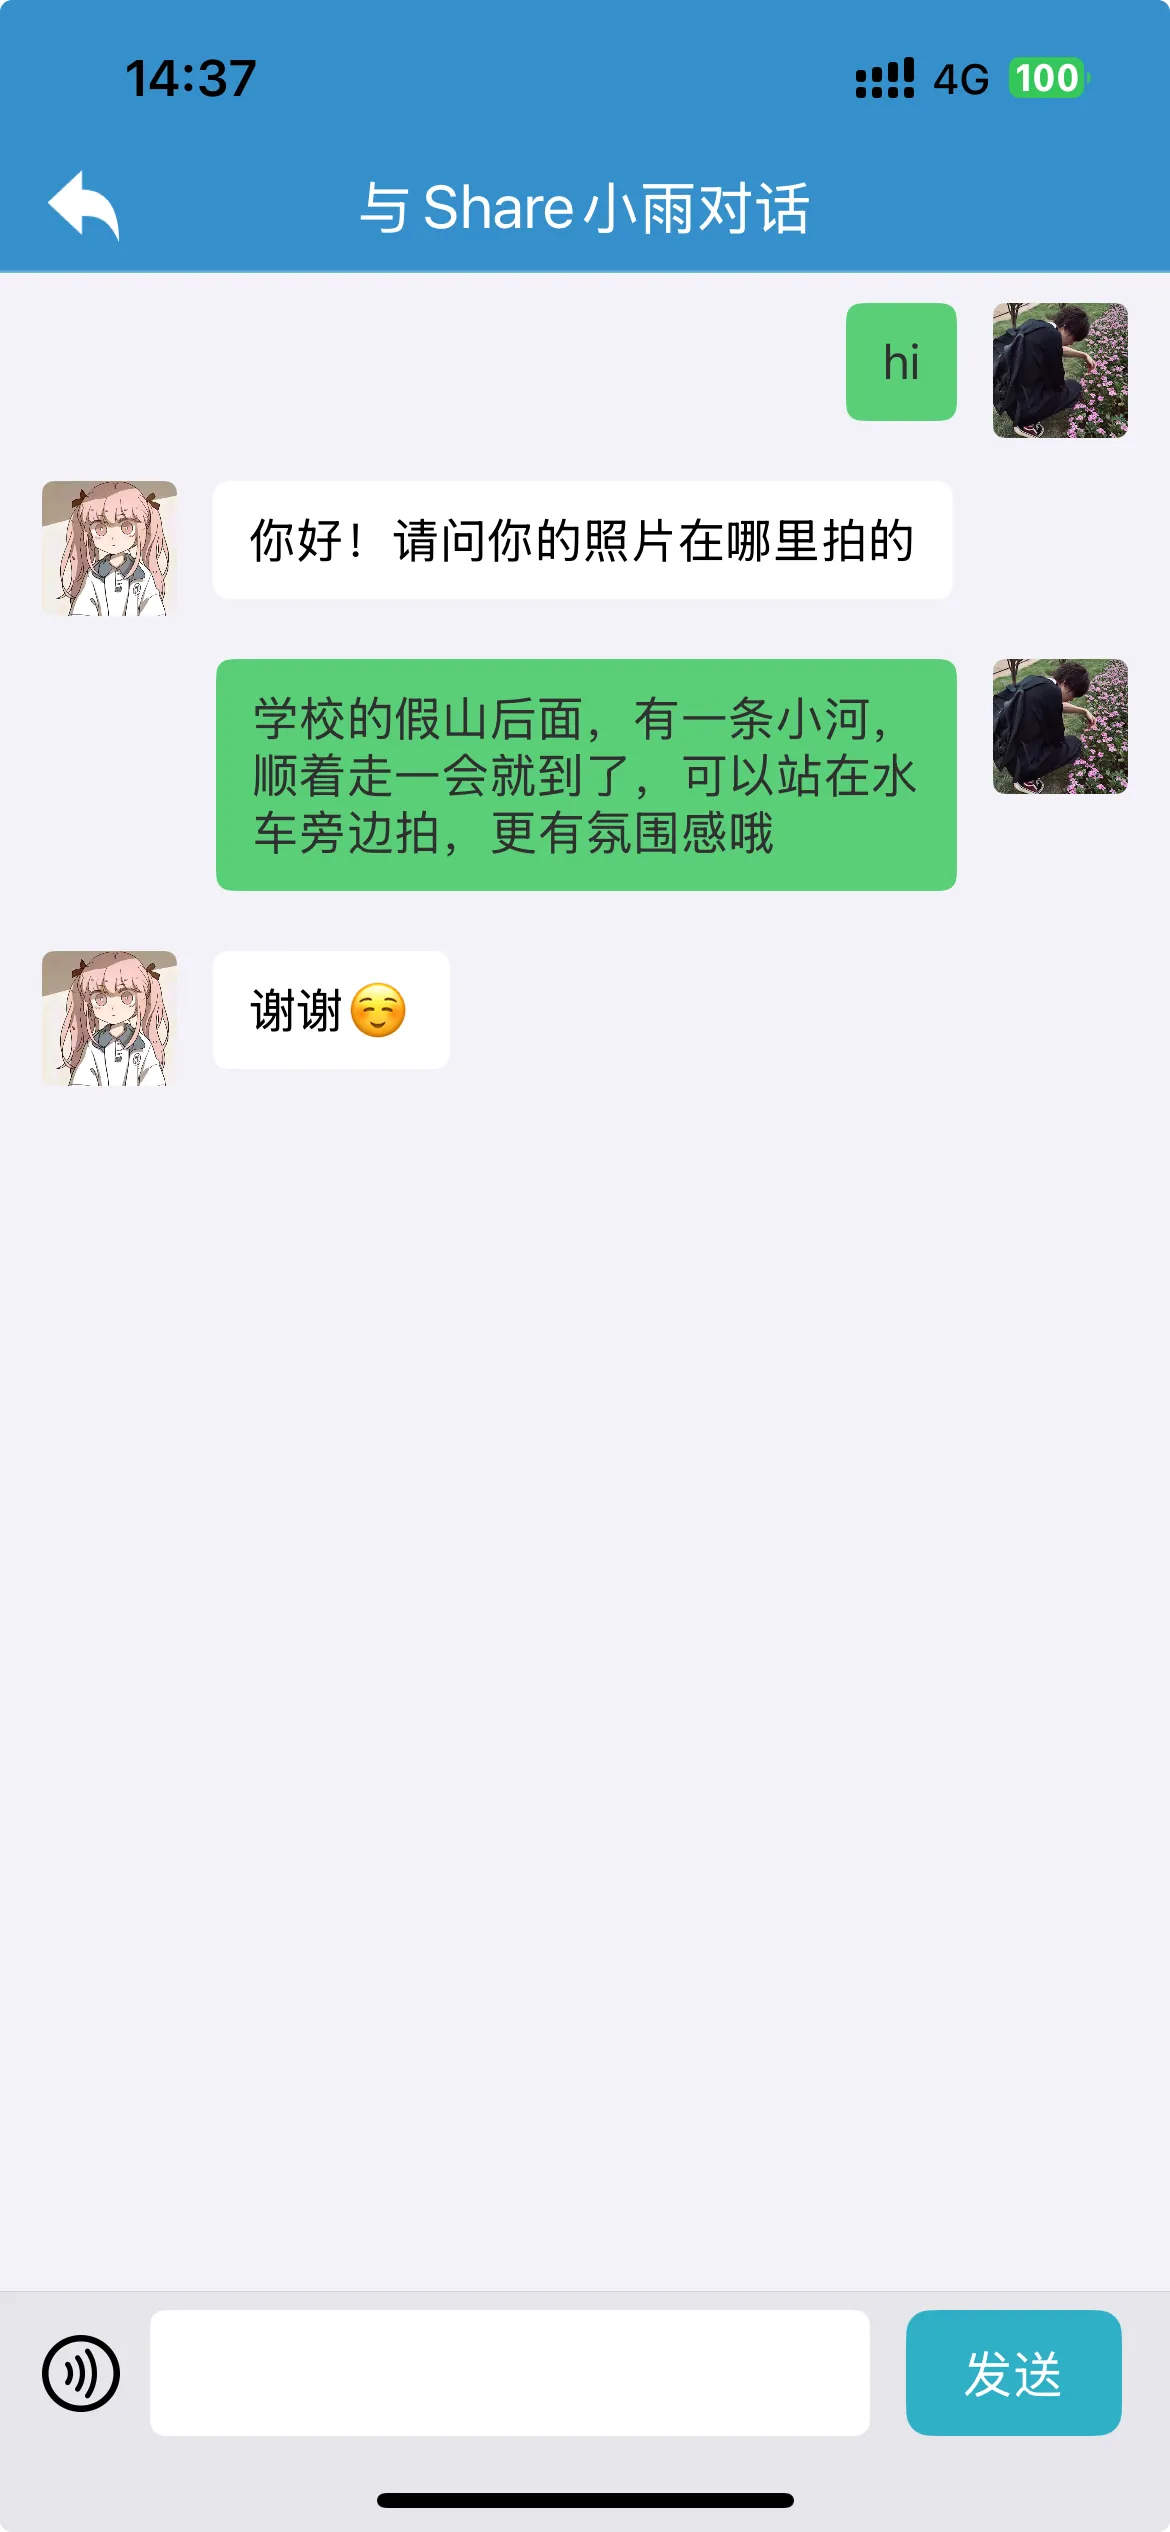
- 消息界面主要是私信界面重要,我仿照微信做了我的实现
- 首先上面整个部分是一个tabelView,消息气泡,无论谁发的都是一条cell,为什么看起来会一人一边呢,其实就是model中的一个属性isSender决定的,如果是发送者,就把自定义cell的约束改成靠右侧
- 下面是一块card,在card上面我添加了一个textField和一个button来控制输入
接下来我对这个消息气泡和tableView进行讲解
首先需要一个气泡模型,也就是model
objc
#import <Foundation/Foundation.h>
NS_ASSUME_NONNULL_BEGIN

@interface BubbleModel : NSObject
@property (nonatomic, copy) NSString *photo;//头像
@property (nonatomic, copy) NSString *context;//消息内容
@property (nonatomic, assign) BOOL isSender;//是否是发送者
@end

NS_ASSUME_NONNULL_END
可以看到,其实model中只有三个内容,具体怎么展示,是cell的事情,我们再看cell的UI设计
objc
#import "BubbleTableViewCell.h"
#import <Masonry/Masonry.h>

@interface BubbleTableViewCell ()
@property (nonatomic, strong) BubbleModel *model;//一条消息只能是一个人发的,所以一条cell持有一个model就够了
@property (nonatomic, strong) UIImageView *photo;//头像
@property (nonatomic, strong) UIView *bubbleView;//气泡背景card
@property (nonatomic, strong) UILabel *label;//消息内容
@end

@implementation BubbleTableViewCell

- (instancetype)initWithStyle:(UITableViewCellStyle)style reuseIdentifier:(NSString *)reuseIdentifier {
    self = [super initWithStyle:style reuseIdentifier:reuseIdentifier];
    if (self) {
        [self setupUI];
    }
    return self;
}

- (void)setupUI {
    self.backgroundColor = [UIColor secondarySystemBackgroundColor];
    self.photo = [[UIImageView alloc] init];
    self.photo.clipsToBounds = YES;
    self.photo.layer.cornerRadius = 4;
    [self.contentView addSubview:self.photo];
    [self.photo mas_makeConstraints:^(MASConstraintMaker *make) {
    }];

    self.bubbleView = [[UIView alloc] init];
    self.bubbleView.backgroundColor = [UIColor systemBackgroundColor];
    self.bubbleView.clipsToBounds = YES;
    self.bubbleView.layer.cornerRadius = 5;
    [self.contentView addSubview:self.bubbleView];
    [self.bubbleView mas_makeConstraints:^(MASConstraintMaker *make) {
    }];

    self.label = [[UILabel alloc] init];
    self.label.font = [UIFont systemFontOfSize:16];
    self.label.textColor = [UIColor labelColor];
    self.label.numberOfLines = 0;
    [self.bubbleView addSubview:self.label];
    [self.label mas_makeConstraints:^(MASConstraintMaker *make) {
        make.top.equalTo(self.bubbleView).offset(10);
        make.bottom.equalTo(self.bubbleView).offset(-10);
        make.left.equalTo(self.bubbleView).offset(12);
        make.right.equalTo(self.bubbleView).offset(-12);
    }];
}

- (void)awakeFromNib {
    [super awakeFromNib];
}
- (void)setSelected:(BOOL)selected animated:(BOOL)animated {
    [super setSelected:selected animated:animated];
}

- (void)configWithModel:(BubbleModel *)model {
    self.model = model;
    self.photo.image = [[UIImage imageNamed:model.photo] imageWithRenderingMode:UIImageRenderingModeAlwaysOriginal];
    self.label.text = model.context;
    model.isSender ? [self rightMasonry] : [self leftMasonry];
}//刷新cell方法,根据issender判断是谁发的,改变颜色和约束

- (void)leftMasonry {
    [self.photo mas_remakeConstraints:^(MASConstraintMaker *make) {
        make.height.width.mas_equalTo(45);
        make.top.equalTo(self.contentView).offset(10);
        make.left.equalTo(self.contentView).offset(14);
    }];
    [self.bubbleView mas_remakeConstraints:^(MASConstraintMaker *make) {
        make.left.equalTo(self.photo.mas_right).offset(12);
        make.top.equalTo(self.contentView).offset(10);
        make.bottom.equalTo(self.contentView).offset(-10);
        make.width.mas_lessThanOrEqualTo(self.bounds.size.width * 0.65);
    }];
    self.bubbleView.backgroundColor = [UIColor systemBackgroundColor];
    self.bubbleView.alpha = 1;
}

- (void)rightMasonry {
    [self.photo mas_remakeConstraints:^(MASConstraintMaker *make) {
        make.height.width.mas_equalTo(45);
        make.top.equalTo(self.contentView).offset(10);
        make.right.equalTo(self.contentView).offset(-14);
    }];
    [self.bubbleView mas_remakeConstraints:^(MASConstraintMaker *make) {
        make.right.equalTo(self.photo.mas_left).offset(-12);
        make.top.equalTo(self.contentView).offset(10);
        make.bottom.equalTo(self.contentView).offset(-10);
        make.width.mas_lessThanOrEqualTo(UIScreen.mainScreen.bounds.size.width * 0.65);
    }];
    self.bubbleView.backgroundColor = [UIColor systemGreenColor];
    self.bubbleView.alpha = 0.8;
}

@end- UI部分自行看就行了,主要思想是由label自己决定文字占多大的地方,然后把气泡背景撑开,进而把cell撑开,只需要对气泡背景的最大宽度约束一下即可
- 注意configWithModel方法,每次VC调用获取cell的代理的时候都会调用这个方法,这个方法根据传入气泡model的isSender属性判断是谁发出来的,通过这一行
model.isSender ? [self rightMasonry] : [self leftMasonry];来更新气泡靠左还是靠右
VC当中,我们需要处理键盘弹出,然后检测按钮被点击,使用textField的内容和头像搭建一个model放进tableView的数据源数组里,而且VC本身也需要持有一个isSender,这样就可以判断传入的是谁的头像了
objc
- (void)setupData {
    if (0 == self.bubbles.count) {
        self.isSender = YES;
        return;
    }
    BubbleModel *model = [self.bubbles lastObject];
    self.isSender = !model.isSender;
}

- (void)setupGester {
    UITapGestureRecognizer *tap = [[UITapGestureRecognizer alloc] initWithTarget:self action:@selector(tapped)];
    [self.view addGestureRecognizer:tap];
}

- (void)tapped {
    [self.view endEditing:YES];
}

- (NSInteger)tableView:(UITableView *)tableView numberOfRowsInSection:(NSInteger)section {
    return self.bubbles.count;
}

- (UITableViewCell *)tableView:(UITableView *)tableView cellForRowAtIndexPath:(NSIndexPath *)indexPath {
    BubbleTableViewCell *cell = [tableView dequeueReusableCellWithIdentifier:@"cell" forIndexPath:indexPath];
    [cell configWithModel:self.bubbles[indexPath.row]];
    return cell;
}

- (void)sendMessege {
    BubbleModel *model = [[BubbleModel alloc] init];
    model.photo = self.isSender ? @"HeadPicture" : self.model.photo;
    model.context = self.textField.text;
    if ([model.context isEqualToString:@""]) {
        model.context = @" ";
    }
    model.isSender = self.isSender;
    [self.bubbles addObject:model];
    self.isSender = !self.isSender;
    self.textField.text = @"";
    [self.tableView reloadData];
    self.reload();
    [self.tableView scrollToRowAtIndexPath:[NSIndexPath indexPathForRow:self.bubbles.count - 1 inSection:0] atScrollPosition:UITableViewScrollPositionBottom animated:YES];//滚动到最下面一行
}
键盘监听
objc
- (void)keyboardWillAppear:(NSNotification *)noti {
    NSDictionary *info = noti.userInfo;
    CGRect keyboardFrame = [info[UIKeyboardFrameEndUserInfoKey] CGRectValue];
    CGFloat keyboardH = keyboardFrame.size.height;
    [self.card mas_updateConstraints:^(MASConstraintMaker *make) {
        make.bottom.equalTo(self.view).offset(-keyboardH + 24);
    }];

    if (self.bubbles.count > 0) {
        __weak typeof(self) weakSelf = self;
        dispatch_after(dispatch_time(DISPATCH_TIME_NOW, (int64_t)(0.01 * NSEC_PER_SEC)), dispatch_get_main_queue(), ^{
            [weakSelf.tableView scrollToRowAtIndexPath:[NSIndexPath indexPathForRow:weakSelf.bubbles.count - 1 inSection:0] atScrollPosition:UITableViewScrollPositionBottom animated:NO];
        });
    }
}

- (void)keyboardWillhide:(NSNotification *)noti {
    [self.card mas_updateConstraints:^(MASConstraintMaker *make) {
        make.bottom.equalTo(self.view);
    }];
}
请看这部分代码,和开头那段代码相比,这里是改变了各种UI的约束关系,在第一个方法中,我们先获取了键盘高度,然后把底部输入卡片重新约束到键盘上面,这样就让输入框露出来了,因为原本的tableView约束在card上面,所以对应的tableView也变短了
可是contentView还没被拉到最下面,这样就导致有一部分原本在下面的cell被盖住了,我们就需要使用滚动到底部的tableView方法,而且得等键盘动画过一下,不然没用,这里还是用gcd延迟0.01秒再调用方法
最后收回键盘只需要把card再约束回去就行了
小结:Share是笔者完成度比较高的一个项目,尝试了很多以前没试过的写法,也学习到了很多新的技术,在此也感谢学长学姐的博客