NAS + Tailscale + WebDAV:安全对接云服务器 Spring Boot
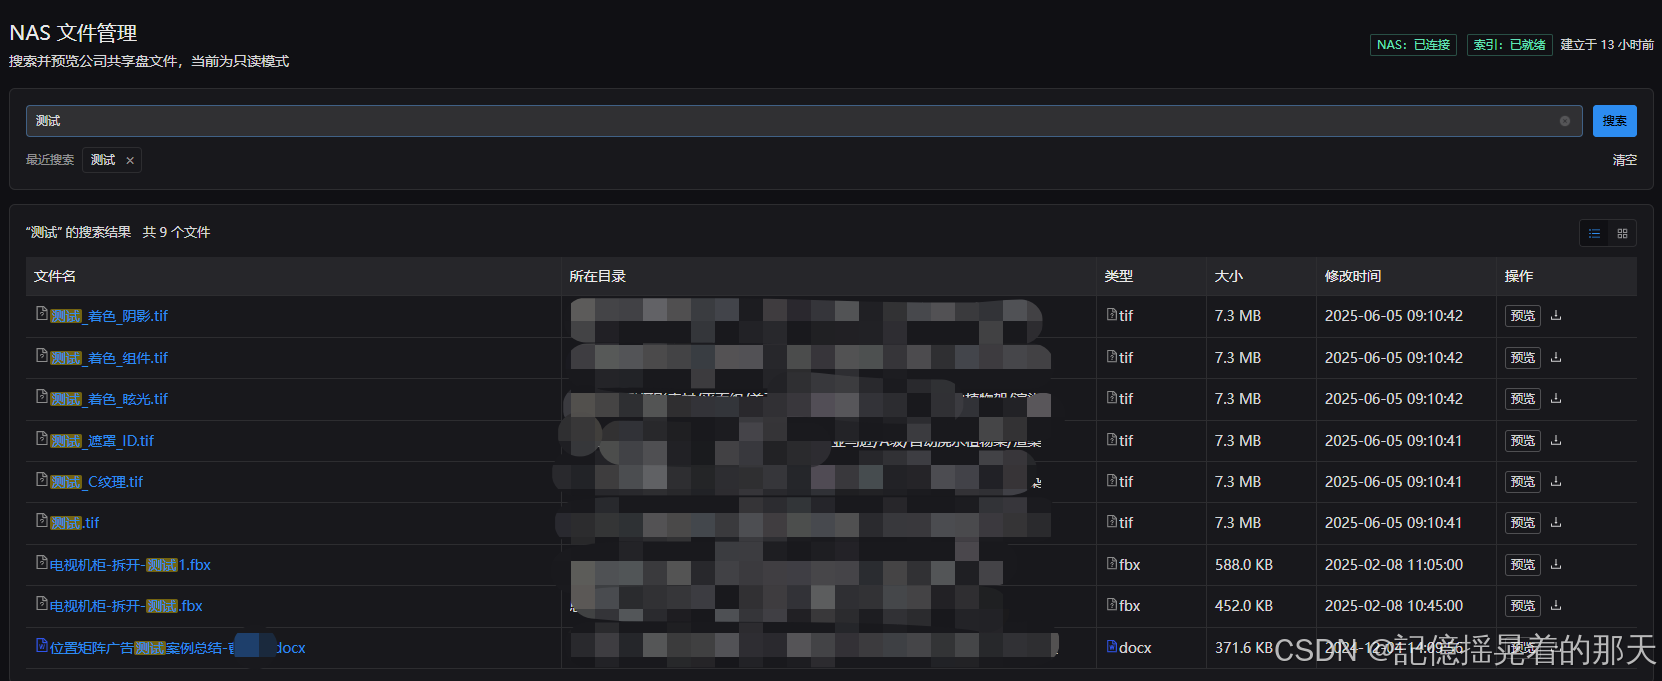
本文介绍如何利用 Tailscale 组建加密虚拟局域网,让云服务器上的 Spring Boot 应用通过 WebDAV 访问家庭 NAS。整个方案无需将 NAS 的 WebDAV 端口暴露到公网,并支持 UDP 打洞直连。
一、方案背景
常见需求是:Spring Boot 部署在云服务器,图片、视频、备份等大文件存储在家庭 NAS,希望应用可以像访问普通 HTTP 服务一样上传、下载和管理文件。
直接映射 NAS WebDAV 端口存在几个问题:
- 家庭宽带可能没有固定公网 IP;
- 端口暴露到公网会增加安全风险;
- 路由器端口转发和 HTTPS 证书配置比较烦琐;
- 两地网络环境变化后容易失联。
Tailscale 基于 WireGuard,可将 NAS 和云服务器加入同一个加密网络。Spring Boot 只需访问 NAS 的 Tailscale IP,无需关心家庭公网 IP变化。
二、整体架构
#mermaid-svg-YSD43zoZd2grpwJb{font-family:"trebuchet ms",verdana,arial,sans-serif;font-size:16px;fill:#333;}@keyframes edge-animation-frame{from{stroke-dashoffset:0;}}@keyframes dash{to{stroke-dashoffset:0;}}#mermaid-svg-YSD43zoZd2grpwJb .edge-animation-slow{stroke-dasharray:9,5!important;stroke-dashoffset:900;animation:dash 50s linear infinite;stroke-linecap:round;}#mermaid-svg-YSD43zoZd2grpwJb .edge-animation-fast{stroke-dasharray:9,5!important;stroke-dashoffset:900;animation:dash 20s linear infinite;stroke-linecap:round;}#mermaid-svg-YSD43zoZd2grpwJb .error-icon{fill:#552222;}#mermaid-svg-YSD43zoZd2grpwJb .error-text{fill:#552222;stroke:#552222;}#mermaid-svg-YSD43zoZd2grpwJb .edge-thickness-normal{stroke-width:1px;}#mermaid-svg-YSD43zoZd2grpwJb .edge-thickness-thick{stroke-width:3.5px;}#mermaid-svg-YSD43zoZd2grpwJb .edge-pattern-solid{stroke-dasharray:0;}#mermaid-svg-YSD43zoZd2grpwJb .edge-thickness-invisible{stroke-width:0;fill:none;}#mermaid-svg-YSD43zoZd2grpwJb .edge-pattern-dashed{stroke-dasharray:3;}#mermaid-svg-YSD43zoZd2grpwJb .edge-pattern-dotted{stroke-dasharray:2;}#mermaid-svg-YSD43zoZd2grpwJb .marker{fill:#333333;stroke:#333333;}#mermaid-svg-YSD43zoZd2grpwJb .marker.cross{stroke:#333333;}#mermaid-svg-YSD43zoZd2grpwJb svg{font-family:"trebuchet ms",verdana,arial,sans-serif;font-size:16px;}#mermaid-svg-YSD43zoZd2grpwJb p{margin:0;}#mermaid-svg-YSD43zoZd2grpwJb .label{font-family:"trebuchet ms",verdana,arial,sans-serif;color:#333;}#mermaid-svg-YSD43zoZd2grpwJb .cluster-label text{fill:#333;}#mermaid-svg-YSD43zoZd2grpwJb .cluster-label span{color:#333;}#mermaid-svg-YSD43zoZd2grpwJb .cluster-label span p{background-color:transparent;}#mermaid-svg-YSD43zoZd2grpwJb .label text,#mermaid-svg-YSD43zoZd2grpwJb span{fill:#333;color:#333;}#mermaid-svg-YSD43zoZd2grpwJb .node rect,#mermaid-svg-YSD43zoZd2grpwJb .node circle,#mermaid-svg-YSD43zoZd2grpwJb .node ellipse,#mermaid-svg-YSD43zoZd2grpwJb .node polygon,#mermaid-svg-YSD43zoZd2grpwJb .node path{fill:#ECECFF;stroke:#9370DB;stroke-width:1px;}#mermaid-svg-YSD43zoZd2grpwJb .rough-node .label text,#mermaid-svg-YSD43zoZd2grpwJb .node .label text,#mermaid-svg-YSD43zoZd2grpwJb .image-shape .label,#mermaid-svg-YSD43zoZd2grpwJb .icon-shape .label{text-anchor:middle;}#mermaid-svg-YSD43zoZd2grpwJb .node .katex path{fill:#000;stroke:#000;stroke-width:1px;}#mermaid-svg-YSD43zoZd2grpwJb .rough-node .label,#mermaid-svg-YSD43zoZd2grpwJb .node .label,#mermaid-svg-YSD43zoZd2grpwJb .image-shape .label,#mermaid-svg-YSD43zoZd2grpwJb .icon-shape .label{text-align:center;}#mermaid-svg-YSD43zoZd2grpwJb .node.clickable{cursor:pointer;}#mermaid-svg-YSD43zoZd2grpwJb .root .anchor path{fill:#333333!important;stroke-width:0;stroke:#333333;}#mermaid-svg-YSD43zoZd2grpwJb .arrowheadPath{fill:#333333;}#mermaid-svg-YSD43zoZd2grpwJb .edgePath .path{stroke:#333333;stroke-width:2.0px;}#mermaid-svg-YSD43zoZd2grpwJb .flowchart-link{stroke:#333333;fill:none;}#mermaid-svg-YSD43zoZd2grpwJb .edgeLabel{background-color:rgba(232,232,232, 0.8);text-align:center;}#mermaid-svg-YSD43zoZd2grpwJb .edgeLabel p{background-color:rgba(232,232,232, 0.8);}#mermaid-svg-YSD43zoZd2grpwJb .edgeLabel rect{opacity:0.5;background-color:rgba(232,232,232, 0.8);fill:rgba(232,232,232, 0.8);}#mermaid-svg-YSD43zoZd2grpwJb .labelBkg{background-color:rgba(232, 232, 232, 0.5);}#mermaid-svg-YSD43zoZd2grpwJb .cluster rect{fill:#ffffde;stroke:#aaaa33;stroke-width:1px;}#mermaid-svg-YSD43zoZd2grpwJb .cluster text{fill:#333;}#mermaid-svg-YSD43zoZd2grpwJb .cluster span{color:#333;}#mermaid-svg-YSD43zoZd2grpwJb div.mermaidTooltip{position:absolute;text-align:center;max-width:200px;padding:2px;font-family:"trebuchet ms",verdana,arial,sans-serif;font-size:12px;background:hsl(80, 100%, 96.2745098039%);border:1px solid #aaaa33;border-radius:2px;pointer-events:none;z-index:100;}#mermaid-svg-YSD43zoZd2grpwJb .flowchartTitleText{text-anchor:middle;font-size:18px;fill:#333;}#mermaid-svg-YSD43zoZd2grpwJb rect.text{fill:none;stroke-width:0;}#mermaid-svg-YSD43zoZd2grpwJb .icon-shape,#mermaid-svg-YSD43zoZd2grpwJb .image-shape{background-color:rgba(232,232,232, 0.8);text-align:center;}#mermaid-svg-YSD43zoZd2grpwJb .icon-shape p,#mermaid-svg-YSD43zoZd2grpwJb .image-shape p{background-color:rgba(232,232,232, 0.8);padding:2px;}#mermaid-svg-YSD43zoZd2grpwJb .icon-shape .label rect,#mermaid-svg-YSD43zoZd2grpwJb .image-shape .label rect{opacity:0.5;background-color:rgba(232,232,232, 0.8);fill:rgba(232,232,232, 0.8);}#mermaid-svg-YSD43zoZd2grpwJb .label-icon{display:inline-block;height:1em;overflow:visible;vertical-align:-0.125em;}#mermaid-svg-YSD43zoZd2grpwJb .node .label-icon path{fill:currentColor;stroke:revert;stroke-width:revert;}#mermaid-svg-YSD43zoZd2grpwJb :root{--mermaid-font-family:"trebuchet ms",verdana,arial,sans-serif;} WireGuard 加密隧道
优先 UDP 直连
Spring Boot 应用
云服务器 Tailscale
NAS Tailscale
NAS WebDAV 服务
NAS 存储目录
示例环境:
| 节点 | 作用 | Tailscale 设备名 | 示例 Tailnet IP |
|---|---|---|---|
| 家庭 NAS | 提供 WebDAV 文件存储 | nas-node |
100.x.x.10 |
| 云服务器 | 运行 Spring Boot | cloud-node |
100.x.x.20 |
本文中的 IP、用户名和密码均为示例,请替换为自己的配置。
三、NAS 部署 Tailscale
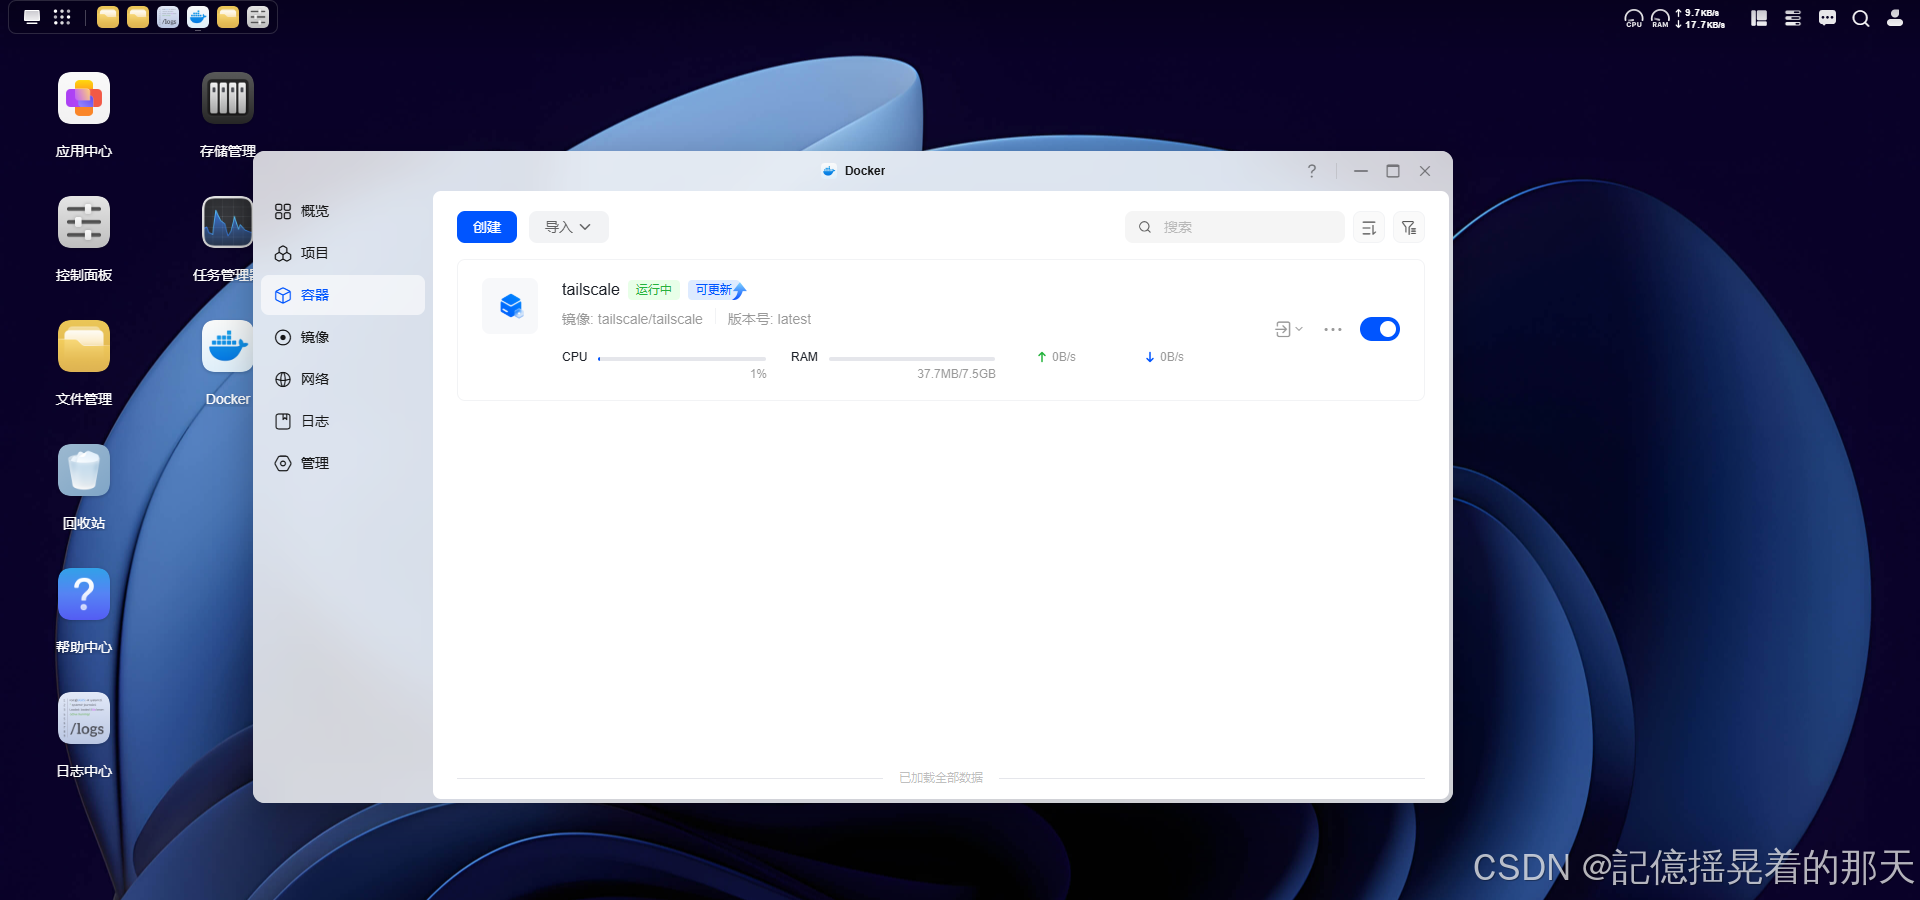
建议使用 Docker 的 host 网络模式,让 Tailscale 直接使用 NAS 的网络命名空间,减少 Docker bridge 带来的额外 NAT。
bash
docker volume create tailscale-nas-state

docker run -d \
  --name tailscale-nas \
  --hostname nas-node \
  --network host \
  --restart unless-stopped \
  --cap-add NET_ADMIN \
  --cap-add NET_RAW \
  --device /dev/net/tun:/dev/net/tun \
  -e TS_STATE_DIR=/var/lib/tailscale \
  -e TS_USERSPACE=false \
  -e TS_HOSTNAME=nas-node \
  -e TS_AUTH_ONCE=true \
  -e TS_TAILSCALED_EXTRA_ARGS="--port=41641" \
  -v tailscale-nas-state:/var/lib/tailscale \
  tailscale/tailscale:latest
首次启动时,如果未提供 Auth Key,可从日志中取得登录地址:
bash
docker logs tailscale-nas为什么要持久化状态目录
/var/lib/tailscale 保存设备身份和登录状态。正确挂载状态卷后,删除并重建容器不会生成新的 Tailscale 设备,也通常不需要重新获取 Auth Key。
是否必须开启特权模式
一般不需要 privileged: true。本文只授予:
/dev/net/tun:创建 Tailscale 虚拟网卡;NET_ADMIN:配置路由和防火墙;NET_RAW:处理底层网络数据包。
只有 NAS 的容器管理系统无法精细授予这些权限时,才考虑开启特权模式。特权容器权限接近宿主机 root,应仅运行可信的官方镜像。
四、云服务器部署 Tailscale
云端同样使用 host 网络并固定 UDP 41641:
bash
docker volume create tailscale-cloud-state

docker run -d \
  --name tailscale-cloud \
  --hostname cloud-node \
  --network host \
  --restart unless-stopped \
  --cap-add NET_ADMIN \
  --cap-add NET_RAW \
  --device /dev/net/tun:/dev/net/tun \
  -e TS_STATE_DIR=/var/lib/tailscale \
  -e TS_USERSPACE=false \
  -e TS_HOSTNAME=cloud-node \
  -e TS_ACCEPT_DNS=false \
  -e TS_AUTH_ONCE=true \
  -e TS_TAILSCALED_EXTRA_ARGS="--port=41641" \
  -v tailscale-cloud-state:/var/lib/tailscale \
  tailscale/tailscale:latest
如果设备以前启用过 --accept-routes,重建时还应加入:
bash
-e TS_EXTRA_ARGS="--accept-routes"否则 containerboot 可能提示:
text
changing settings via 'tailscale up' requires mentioning all non-default flags这是因为状态卷保存了非默认参数,而新容器启动时没有完整声明。按照日志提示补齐参数即可,无需删除状态卷。
云安全组配置
建议在云平台安全组中允许:
text
协议:UDP
端口:41641
来源:0.0.0.0/0
如果云服务器使用 NAT 公网地址,还需确认公网 UDP 41641 能映射到服务器内网 IP 的 UDP 41641。
五、验证是否 UDP 直连
先查看两台设备:
bash
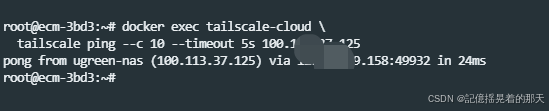
docker exec tailscale-cloud tailscale status从云服务器测试 NAS:
bash
docker exec tailscale-cloud \
  tailscale ping --c 10 --timeout 5s 100.x.x.10
如果输出公网 IP 和端口,代表已经直连:
text
pong from nas-node (100.x.x.10) via 116.x.x.x:41641 in 25ms如果显示以下内容,则仍通过 DERP 中继:
text
pong from nas-node (100.x.x.10) via DERP(lax) in 360ms连接刚建立时,前几次请求可能暂时经过 DERP,随后完成 UDP 打洞并切换为直连,这是正常现象。
查看当前网络条件:
bash
docker exec tailscale-cloud tailscale netcheck重点关注:
text
UDP: true
MappingVariesByDestIP: false
若想提高冷启动直连速度,可在家庭路由器设置端口转发:
text
公网 UDP 41641 → NAS局域网IP:41641六、在 NAS 开启 WebDAV
不同品牌 NAS 的入口名称不同,一般位于"文件服务"或"应用中心"中。建议:
- 新建一个专用 WebDAV 用户,例如
springboot-dav; - 只授予业务目录的读写权限;
- 不使用 NAS 管理员账号;
- 不在路由器上公开映射 WebDAV 端口;
- 确保 WebDAV 监听 NAS 主机网络,而非仅监听回环地址。
假设 WebDAV 地址为:
text
http://100.x.x.10:5005/dav/在云服务器上先进行连通性测试:
bash
curl -u 'springboot-dav:你的密码' \
  -X PROPFIND \
  -H 'Depth: 1' \
  'http://100.x.x.10:5005/dav/'
返回 HTTP 207 Multi-Status 通常表示 WebDAV 工作正常。
虽然 Tailscale 隧道本身已经端到端加密,但条件允许时仍建议为 WebDAV 配置 HTTPS。
七、Spring Boot 对接 WebDAV
1. Maven 依赖
下面使用 Apache HttpClient 5 发送 WebDAV 请求:
xml
<dependency>
    <groupId>org.apache.httpcomponents.client5</groupId>
    <artifactId>httpclient5</artifactId>
</dependency>
2. 配置文件
application.yml:
yaml
storage:
  webdav:
    base-url: http://100.x.x.10:5005/dav/
    username: ${WEBDAV_USERNAME}
    password: ${WEBDAV_PASSWORD}
不要将真实密码提交到 Git,生产环境通过环境变量或密钥管理服务注入:
bash
export WEBDAV_USERNAME='springboot-dav'
export WEBDAV_PASSWORD='请替换为真实密码'
3. WebDAV 配置类
java
package com.example.storage;

import org.springframework.boot.context.properties.ConfigurationProperties;

@ConfigurationProperties(prefix = "storage.webdav")
public record WebDavProperties(
        String baseUrl,
        String username,
        String password
) {
}
java
package com.example.storage;

import org.apache.hc.client5.http.auth.AuthScope;
import org.apache.hc.client5.http.auth.UsernamePasswordCredentials;
import org.apache.hc.client5.http.impl.auth.BasicCredentialsProvider;
import org.apache.hc.client5.http.impl.classic.CloseableHttpClient;
import org.apache.hc.client5.http.impl.classic.HttpClients;
import org.springframework.boot.context.properties.EnableConfigurationProperties;
import org.springframework.context.annotation.Bean;
import org.springframework.context.annotation.Configuration;

import java.net.URI;

@Configuration
@EnableConfigurationProperties(WebDavProperties.class)
public class WebDavConfiguration {

    @Bean
    CloseableHttpClient webDavHttpClient(WebDavProperties properties) {
        URI uri = URI.create(properties.baseUrl());

        BasicCredentialsProvider credentials = new BasicCredentialsProvider();
        credentials.setCredentials(
                new AuthScope(uri.getHost(), uri.getPort()),
                new UsernamePasswordCredentials(
                        properties.username(),
                        properties.password().toCharArray()
                )
        );

        return HttpClients.custom()
                .setDefaultCredentialsProvider(credentials)
                .build();
    }
}
4. 上传和下载文件
java
package com.example.storage;

import org.apache.hc.client5.http.classic.methods.HttpGet;
import org.apache.hc.client5.http.classic.methods.HttpPut;
import org.apache.hc.client5.http.impl.classic.CloseableHttpClient;
import org.apache.hc.core5.http.ContentType;
import org.apache.hc.core5.http.io.entity.EntityUtils;
import org.apache.hc.core5.http.io.entity.InputStreamEntity;
import org.springframework.stereotype.Service;

import java.io.IOException;
import java.io.InputStream;
import java.net.URI;

@Service
public class WebDavStorageService {

    private final CloseableHttpClient httpClient;
    private final WebDavProperties properties;

    public WebDavStorageService(
            CloseableHttpClient httpClient,
            WebDavProperties properties
    ) {
        this.httpClient = httpClient;
        this.properties = properties;
    }

    public void upload(
            String remotePath,
            InputStream inputStream,
            long contentLength
    ) throws IOException {
        URI target = resolve(remotePath);
        HttpPut request = new HttpPut(target);
        request.setEntity(new InputStreamEntity(
                inputStream,
                contentLength,
                ContentType.APPLICATION_OCTET_STREAM
        ));

        httpClient.execute(request, response -> {
            int status = response.getCode();
            EntityUtils.consume(response.getEntity());
            if (status < 200 || status >= 300) {
                throw new IOException("WebDAV 上传失败,HTTP " + status);
            }
            return null;
        });
    }

    public byte[] download(String remotePath) throws IOException {
        HttpGet request = new HttpGet(resolve(remotePath));

        return httpClient.execute(request, response -> {
            int status = response.getCode();
            if (status != 200) {
                EntityUtils.consume(response.getEntity());
                throw new IOException("WebDAV 下载失败,HTTP " + status);
            }
            return EntityUtils.toByteArray(response.getEntity());
        });
    }

    private URI resolve(String remotePath) {
        String normalized = remotePath.startsWith("/")
                ? remotePath.substring(1)
                : remotePath;
        return URI.create(properties.baseUrl()).resolve(normalized);
    }
}
上述下载示例适合小文件。视频、压缩包等大文件应将响应流直接写入 HTTP Response 或目标文件,避免一次性载入内存。
5. 上传接口示例
java
package com.example.storage;

import org.springframework.http.ResponseEntity;
import org.springframework.web.bind.annotation.PostMapping;
import org.springframework.web.bind.annotation.RequestMapping;
import org.springframework.web.bind.annotation.RequestParam;
import org.springframework.web.bind.annotation.RestController;
import org.springframework.web.multipart.MultipartFile;

import java.io.IOException;

@RestController
@RequestMapping("/files")
public class FileController {

    private final WebDavStorageService storageService;

    public FileController(WebDavStorageService storageService) {
        this.storageService = storageService;
    }

    @PostMapping
    public ResponseEntity<Void> upload(
            @RequestParam("path") String path,
            @RequestParam("file") MultipartFile file
    ) throws IOException {
        storageService.upload(path, file.getInputStream(), file.getSize());
        return ResponseEntity.noContent().build();
    }
}
实际项目中必须校验 path,禁止 ../ 等目录穿越输入,并限制文件大小和允许的文件类型。
八、Spring Boot 运行在 Docker 中的注意事项
如果 Spring Boot 直接运行在云服务器宿主机,可直接访问 NAS 的 100.x.x.x 地址。
如果 Spring Boot 也运行在 Docker bridge 网络中,先进入容器测试:
bash
docker exec springboot-app \
  curl -I http://100.x.x.10:5005/dav/
若 bridge 容器无法访问 Tailnet,可选择:
- 将 Spring Boot 容器改为
network_mode: host; - 使用 Tailscale sidecar,让应用容器共享 Tailscale 网络;
- 在宿主机正确配置 Docker 到
tailscale0的转发规则。
最简单的云服务器部署通常是 Spring Boot 与 Tailscale 都使用 host 网络,但要提前检查端口冲突。
九、安全建议
- WebDAV 不暴露到公网,只允许通过 Tailnet 访问;
- 使用专用低权限 WebDAV 用户;
- 密码使用环境变量或密钥管理工具,不写入代码;
- 通过 Tailscale Access Controls 仅允许云服务器访问 NAS WebDAV 端口;
- 持久化 Tailscale 状态目录,但不要把状态文件打包进镜像;
- 定期更新 Tailscale 和 NAS 系统;
- 对上传路径做目录穿越、文件类型和容量校验;
- 大文件采用流式传输,并设置合理的连接、读取超时和重试策略。
十、常见故障排查
1. 一直显示 DERP
检查:
bash
docker exec tailscale-cloud tailscale netcheck
docker exec tailscale-cloud tailscale ping nas-node
ss -lunp | grep 41641
重点确认两端 UDP: true、容器使用 host 网络、UDP 41641 未被防火墙阻止。
2. 容器不断重启
查看日志:
bash
docker logs --tail 200 tailscale-cloud如果提示必须声明全部非默认参数,需要根据提示补齐 TS_ACCEPT_DNS、TS_EXTRA_ARGS 或 TS_HOSTNAME。
3. Tailscale 能 ping,WebDAV 访问失败
说明隧道正常,问题通常位于 WebDAV:
- WebDAV 服务未启动;
- 端口填写错误;
- 服务只监听
127.0.0.1; - NAS 防火墙拒绝来自
tailscale0的流量; - WebDAV 用户没有目标目录权限。
4. 中文文件名或空格路径失败
不要直接拼接原始字符串,应按 URL path segment 进行 UTF-8 百分号编码,同时避免对整个 URL 重复编码。
十一、总结
这套方案的核心链路是:
text
Spring Boot → 云服务器 Tailscale → WireGuard 隧道 → NAS Tailscale → WebDAV它兼顾了安全性与维护成本:WebDAV 无需暴露公网,NAS 公网 IP变化不影响应用配置,UDP 打洞成功后还能获得接近点对点网络的传输性能。
相关资料: