天气预报仿写总结
本次项目是仿照iOS原生的天气预报进行仿写, 主要功能包括城市管理, 城市天气数据的展示, 城市搜索,收藏夹页面收藏城市滑动浏览等
在这仿写中, 主要采用了MVC的设计模式,笔者认识到了之前对于MVC的应用有很多错误的地方,这次仿写也做了改正
天气预报项目是笔者第一次接触网络请求的相关知识,所以开始的时候没有头绪,用好长时间去理解网络请求的步骤, 具体可以看笔者的上一篇博客.
在天气预报项目中, 笔者调用的是Open‑Meteo 天气 API, 这个API查询天气不能直接通过城市名称查询, 而是需要通过经纬度查询, 所以我们在查询的时候, 需要先通过城市名称来获取对应城市的经纬度,然后再根据经纬度来定位城市进而获取天气信息
搜索
这里是根据城市名获取经纬度的API
objc
https://geocoding-api.open-meteo.com/v1/search?name=Xi%27an&count=10&language=zh&format=json通过这个API可以对进行模糊搜索, 可以得到城市的名称,经纬度以及所在省份等信息
这里搜索笔者是采用了UISearchController, 单独创建了结果更新的视图控制器, 来展示搜索结果, 并在每一次搜索之后更新用于展示结果的UITableView, 关于UISearchController的具体功能笔者之前写过一篇博客专门学习
创建UISearchController, 设置搜索结果控制器,
objc
homeView.h

- (void)setUpNavigation {

    SearchViewController* vc = [[SearchViewController alloc] init];
    self.searchController = [[UISearchController alloc] initWithSearchResultsController: vc];
    self.searchController.searchResultsUpdater = vc;
    // 模糊背景
    self.searchController.obscuresBackgroundDuringPresentation = YES;
    // 隐藏导航栏
    self.searchController.hidesNavigationBarDuringPresentation = YES;
    // 占位文字
    self.searchController.searchBar.placeholder = @"输入城市名进行搜索";
    self.searchController.searchBar.delegate = self;
    // 将searchBar 添加到导航栏
    self.navigationItem.searchController = self.searchController;
    // 搜索成一个按钮,点击展开搜索栏
//    self.navigationItem.preferredSearchBarPlacement = UINavigationItemSearchBarPlacementIntegratedButton;
    self.searchController.delegate = self;
}在搜索框中输入字符,就会调用搜索结果控制器的- (void)updateSearchResultsForSearchController:(UISearchController *)searchController 方法来更新用于结果显示的UITableView,
objc
SearchViewController.m

- (void)updateSearchResultsForSearchController:(UISearchController *)searchController {
    self.searchText = searchController.searchBar.text;

    if (self.searchText.length == 0) {
        [self.searchModel.cityArray removeAllObjects];
        [self.searchView.tableView reloadData];
    }
//    // 取消之前尚未执行的延迟调用
       [NSObject cancelPreviousPerformRequestsWithTarget:self selector:@selector(performSearch) object:nil];
       // 延迟 0.5 秒后执行实际搜索
       [self performSelector:@selector(performSearch) withObject:nil afterDelay:0.5];
}

- (void) performSearch {
    if (self.searchText.length == 0) {
        [self.searchModel.cityArray removeAllObjects];
        [self.searchView.tableView reloadData];
    } else {
        [self createURL];
    }
    return;
}
在这里取消之前的延迟和延迟调用是为了给搜索添加防抖处理
用户在搜索框连续输入时,会频繁触发 updateSearchResultsForSearchController: 方法。为防止网络请求过载及响应数据错乱,项目中采取了双重防护策略:
- 延迟执行 :使用
performSelector:withObject:afterDelay:延迟 0.5 秒执行搜索。若在 0.5 秒内用户继续输入,通过cancelPreviousPerformRequests取消前一次未执行的计划任务,从而只发起最后一次有效请求。 - 请求 ID 比对(忽略过期响应) :在
createURL中生成递增的currentRequestID,并在网络请求回调中比对当前 ID。若回调的 ID 与最新 ID 不符,则直接丢弃该结果
例如,在搜索框中连续输入,每次输入搜索框中的内容发生变化,都会触发搜索结果控制器的UISearchResultsUpdaing 协议的 - (void)updateSearchResultsForSearchController:(UISearchController *)searchController 方法 , 在方法中进行网络请求获取数据从而刷新用于结果显示的UITableView, 但是网络请求是异步并发的, 在搜索的时候, 先请求城市A, 后请求城市B, 如果B的服务器响应更快, (比如缓存命中, 数据库查询更简单), B结果会比A更早返回, 于是就会导致A结果后返回覆盖A结果
objc
//    // 取消之前尚未执行的延迟调用
       [NSObject cancelPreviousPerformRequestsWithTarget:self selector:@selector(performSearch) object:nil];
       // 延迟 0.5 秒后执行实际搜索
       [self performSelector:@selector(performSearch) withObject:nil afterDelay:0.5];
这两段代码中 [NSObject cancelPreviousPerformRequestsWithTarget:self selector:@selector(performSearch) object:nil]; 的作用是取消还没有发出的请求操作
假设 当输入"北京"后,这行代码会将
performSearch这个任务延迟 0.5 秒 放入一个本地定时器(RunLoop) 。此时,网络请求并没有真正发出。
- 如果 0.3 秒后你又输入了"京"字(变成"北京"),
cancelPreviousPerformRequests就会把上一个还没到 0.5 秒的定时任务从本地直接删掉。- 结果 :第一个
performSearch永远不会被执行,网络请求也就不会被创建和发送。所以这句话的本质是:"取消即将要执行的操作,省下这次不必要的网络请求",而不是"忽略已经发出去的回调"。
而[self performSelector:@selector(performSearch) withObject:nil afterDelay:0.5]; 的作用是忽略已经发出的但是返回较晚的旧请求
下面是调用自定义的网络管理单例创建网络请求, 然后用请求到的数据刷新结果显示
objc
- (void) createURL {
   // 增加请求ID
   self.currentRequestID++;
   // 保存本次请求的 ID
   NSInteger requestID = self.currentRequestID;

   [[NetworkManager sharedManager] GET: @"https://geocoding-api.open-meteo.com/v1/search" parameters: @{
           @"name": self.searchText,
           @"count": @10,
           @"language": @"zh",
           @"format": @"json"
       }
                                completion:^(NSDictionary * _Nullable json, NSError * _Nullable error) {
           // 检查本次回调是否属于当前的最新请求
       if (requestID != self.currentRequestID) {
           // 与本次请求不一致, 不响应
           return;
       }

       if (!error && json) {
           NSArray* results = json[@"results"];
           [self.searchModel.cityArray removeAllObjects];
           if (results) {
               [self.searchModel.cityArray addObjectsFromArray: results];
           }
           [self.searchView.tableView reloadData];
       }
   }];
}调用API返回的结果是JSON 格式的数据(网络响应体中的字符串), NetworkManager 会将数据解析为 NSDictionary对象, 并以回调参数 JSON 的形式返回给调用方 , 在代码块中再对解析后的数据进行操作,更新数据源dataSource
objc
- (UITableViewCell *)tableView:(UITableView *)tableView cellForRowAtIndexPath:(NSIndexPath *)indexPath {
    UITableViewCell* cell = [tableView dequeueReusableCellWithIdentifier: @"UITableViewCellID" forIndexPath: indexPath];

    NSDictionary* cityInfo = self.searchModel.cityArray[indexPath.row];
    cell.textLabel.text = [NSString stringWithFormat: @"%@ -- %@", cityInfo[@"name"], cityInfo[@"admin1"]];
//    cell.textLabel.text = self.searchText;
    return cell;
}
这是cell根据更新的数据源显示的数据,包括城市的名称和所在省份
这里我调用自定义的网络管理单例的GET方法, 并处理了UI的更新
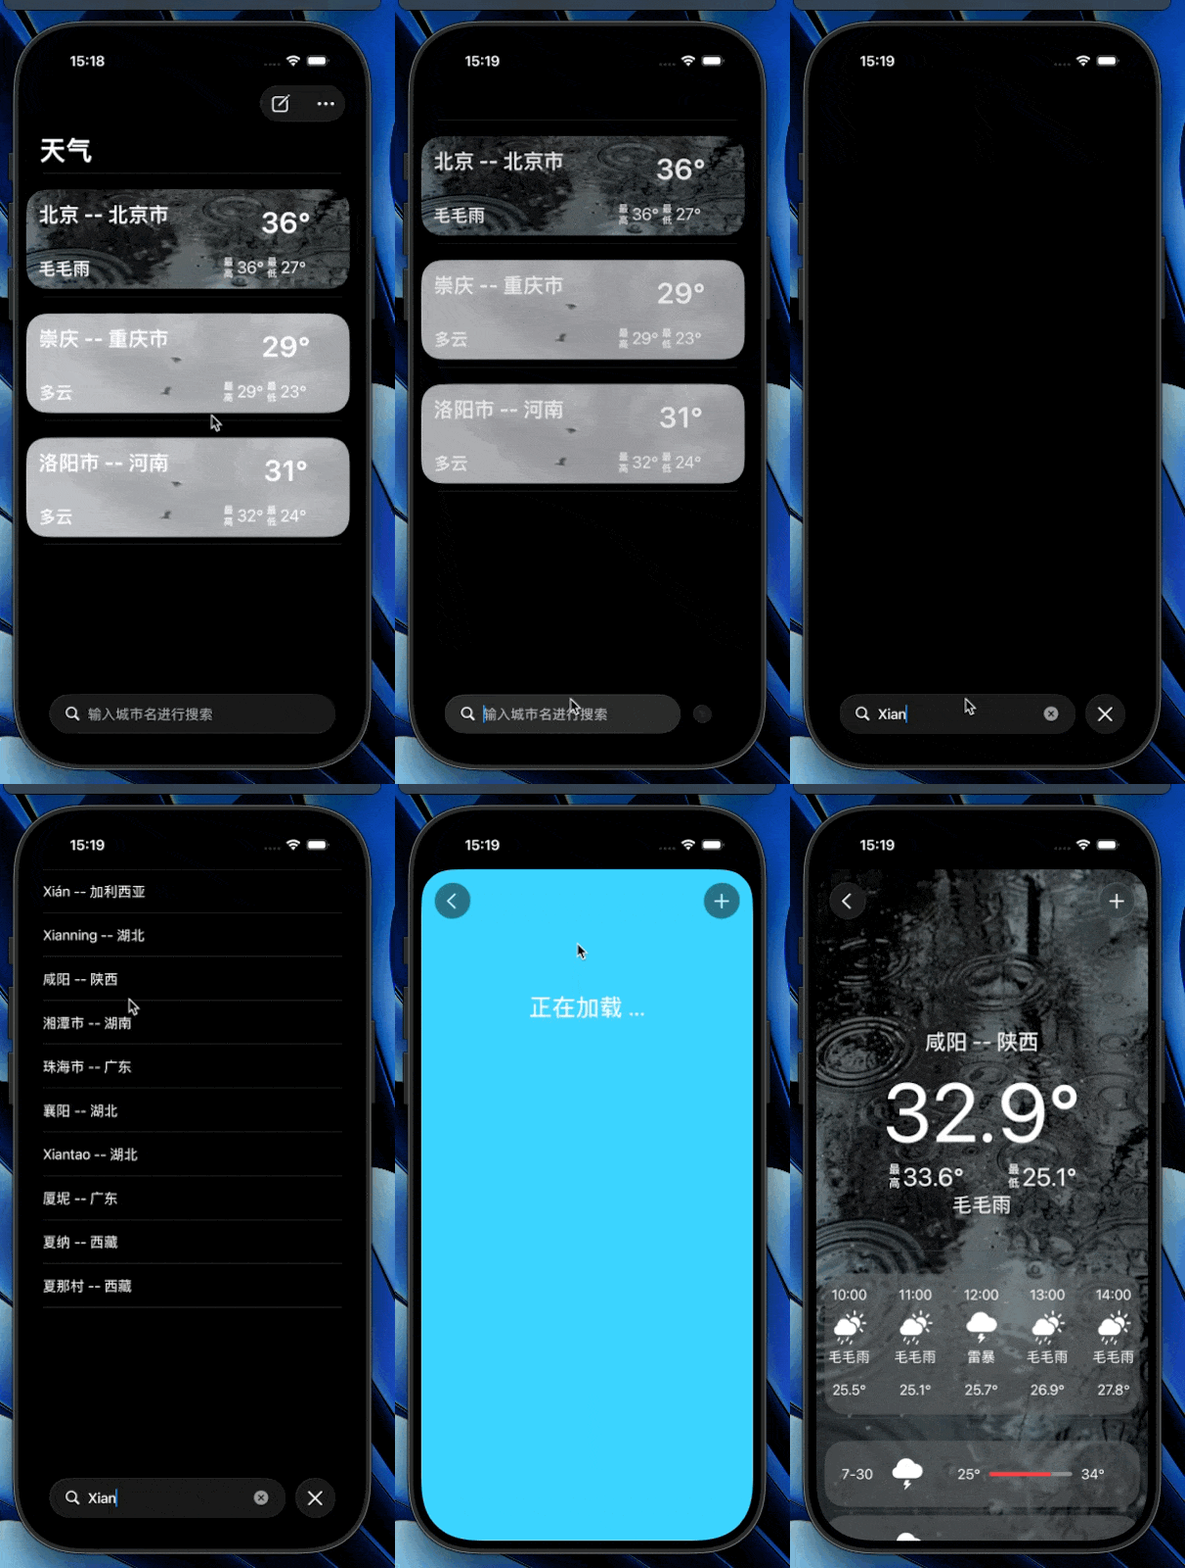
然后点击搜索结果的cell可以进行跳转;
objc
- (void) tableView:(UITableView *)tableView didSelectRowAtIndexPath:(NSIndexPath *)indexPath {
    [tableView deselectRowAtIndexPath: indexPath animated: YES];

    NSDictionary* cityInfo = self.searchModel.cityArray[indexPath.row];
    CGFloat latitude = [cityInfo[@"latitude"] doubleValue];
    CGFloat longitude = [cityInfo[@"longitude"] doubleValue];

    UITableViewCell* cell = [tableView cellForRowAtIndexPath: indexPath];

    CityModel* city = [[CityModel alloc] initWithName: cell.textLabel.text Latitude: @(latitude) Longitude: @(longitude)];

    WeatherController* vc = [[WeatherController alloc] init];
    vc.city = city;
    UINavigationController* Nav = [[UINavigationController alloc] initWithRootViewController: vc];

    self.navigationItem.searchController.searchBar.text = @"";

    [self presentViewController: Nav animated: YES completion: nil];
}
当点击cell的时候,就会获取对应城市的经纬度, 传值到天气详情界面并跳转
详情展示
在天气详情界面,通过获取到的经纬度继续创建网络请求, 查询城市天气
objc
WeatherPageController.m

- (void) createURL {
    NSLog(@"weather 发出了网络请求");
    [[NetworkManager sharedManager] GET: @"https://api.open-meteo.com/v1/forecast" parameters: @{
            @"latitude": @(self.city.latitude),
            @"longitude": @(self.city.longitude),
            @"daily" : @"temperature_2m_max,temperature_2m_min,sunrise,sunset,precipitation_sum,wind_speed_10m_max,wind_direction_10m_dominant,weather_code,uv_index_max",

                @"hourly" : @"temperature_2m,precipitation,snowfall,weather_code,wind_speed_10m,wind_direction_10m",

                @"current" : @"temperature_2m,is_day,precipitation,weather_code,wind_speed_10m,wind_direction_10m",

                @"timezone" : @"Europe/Moscow"
        }
                                 completion:^(NSDictionary * _Nullable json, NSError * _Nullable error) {


        if (json[@"current"] && json[@"daily"] && json[@"hourly"]) {
            NSLog(@"请求到了数据");

            self.weatherModel.CurrentWeatherModel = json[@"current"];
            self.weatherModel.DailyWeatherModel = json[@"daily"];
            self.weatherModel.HourlyWeatherModel = json[@"hourly"];

            [self setUpInterface];
            [self.weatherView configWithCurrentWeather: self.weatherModel.CurrentWeatherModel];
            [self.weatherView.tableView reloadData];

        } else {
            NSLog(@"加载失败");
            NSLog(@"%@", error);
            UIAlertController* alertController = [UIAlertController alertControllerWithTitle: nil message: @"加载失败, 请检查网络" preferredStyle: UIAlertControllerStyleAlert];
            UIAlertAction* okAction = [UIAlertAction actionWithTitle: @"确定" style: UIAlertActionStyleDefault handler:^(UIAlertAction * _Nonnull action) {
                [self pressBack];
            }];
            [alertController addAction: okAction];
            [self presentViewController: alertController animated: YES completion: nil];
        }
    }];
}
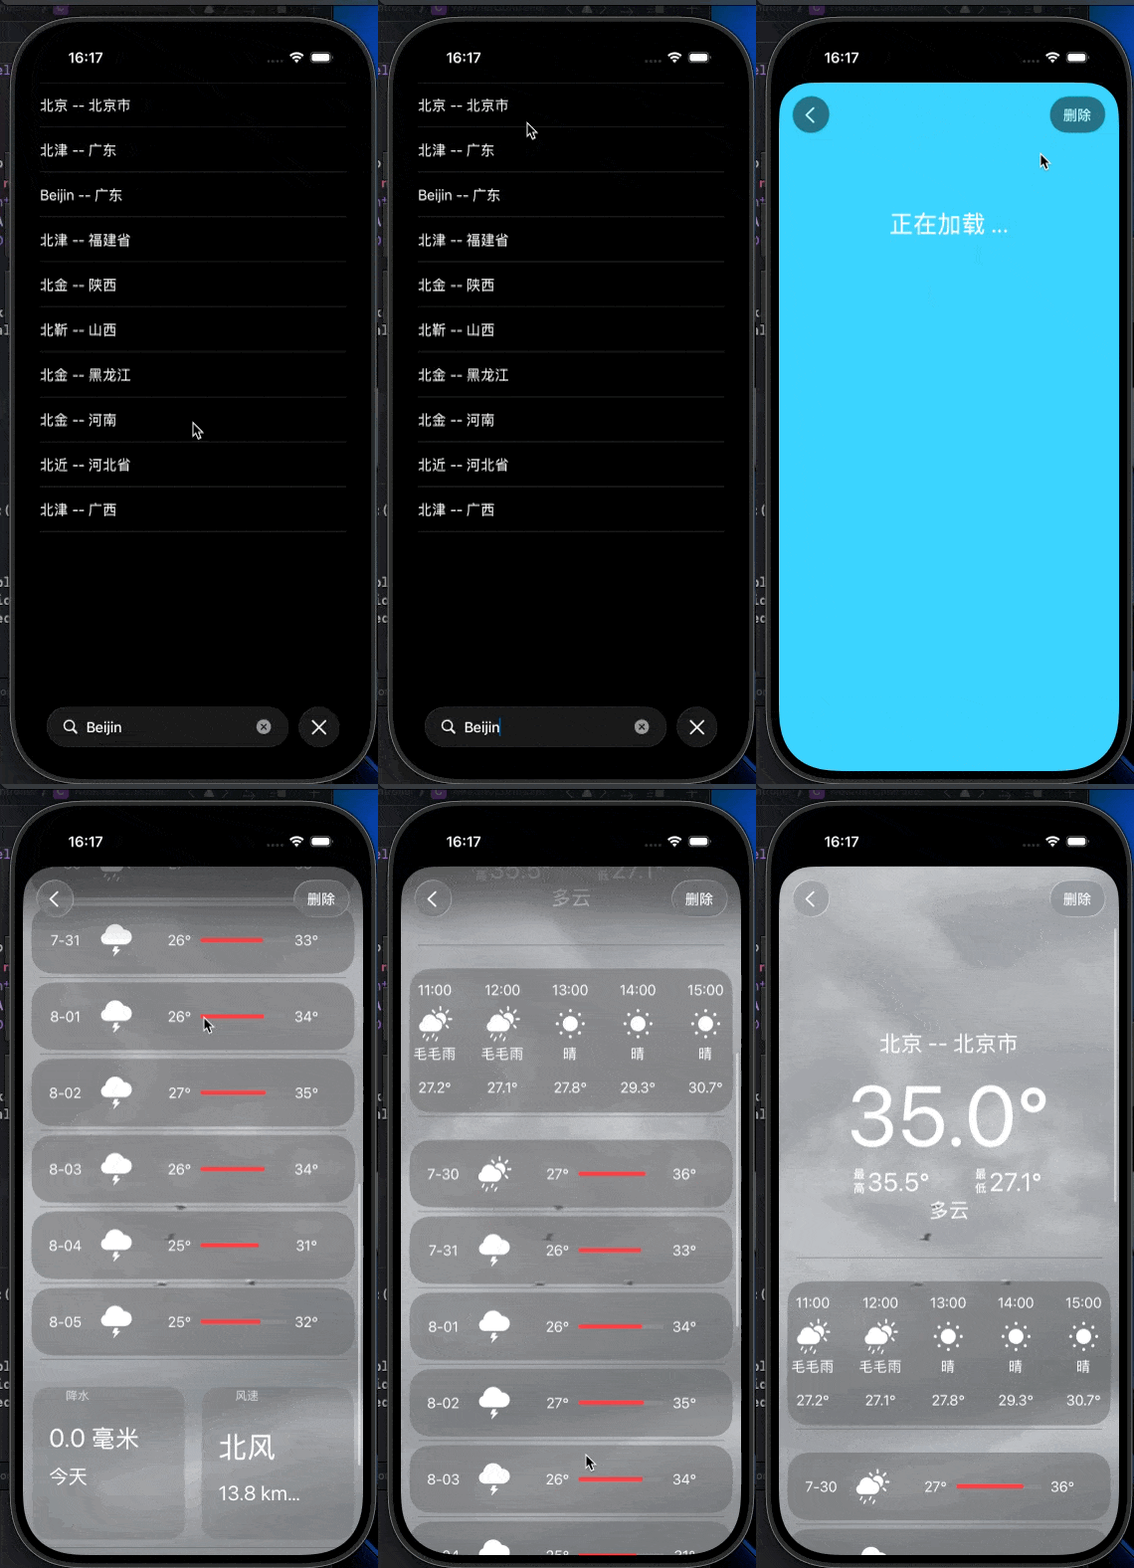
在展示页面,笔者使用UITableView自定义cell来显示, 主要分为几个板块
当前天气, 未来24小时天气, 未来7天天气
这些数据都是通过API返回的,NetworkManage将返回的JSON数据解析为NSDictionary对象, 我们可以直接接收并直接从字典中获取
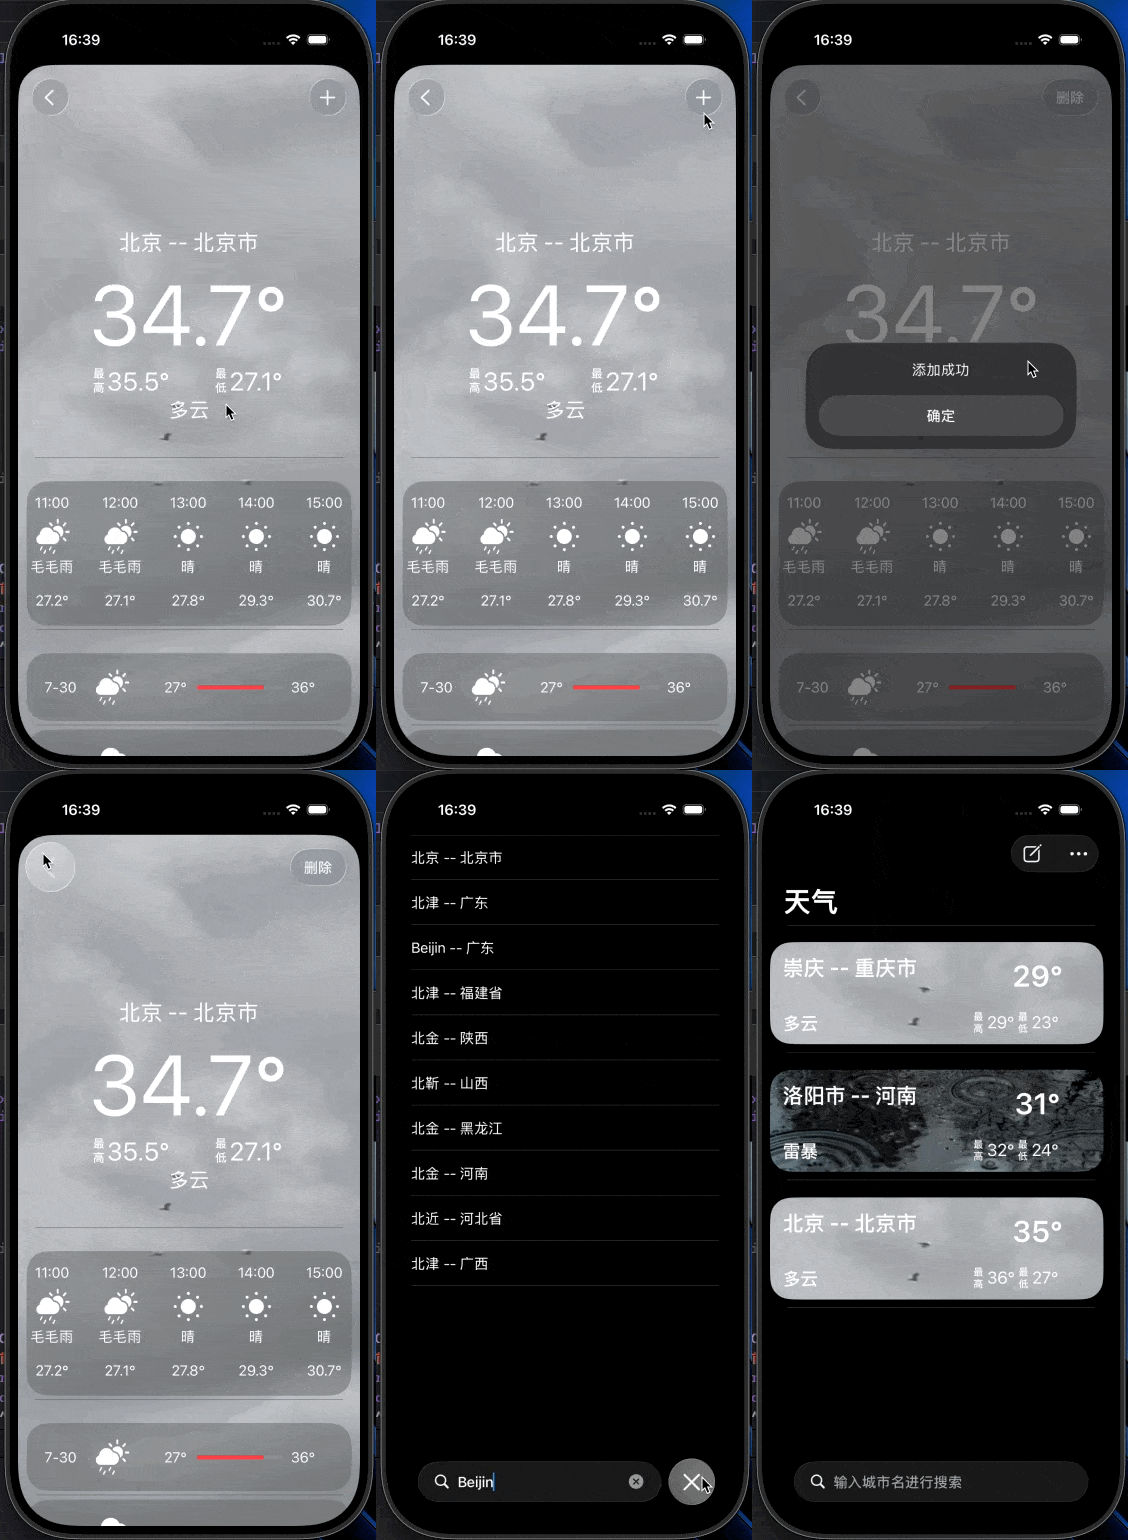
收藏城市的添加和展示
要做到在详情展示界面可以添加城市到收藏栏,还要在首页显示收藏的城市信息, 这里笔者使用了全局单例,创建了一个收藏夹类来存储收藏的城市
当在详情界面点击添加按钮的时候,就会在收藏夹中添加一个城市信息,包括城市的名称, 所在省份以及经纬度
同时在点击添加按钮的时候就会通过通知传值让首页显示添加的城市,避免了返回首页再进行网络请求获取数据导致显示异常
objc
- (void) pressAdd {
    HomeModel* homeModel = [HomeModel shareInstance];

    if (!homeModel.homeCities) {
        homeModel.homeCities = [[NSMutableArray alloc] init];
    }
    if ([homeModel.homeCities indexOfObject: self.city] == NSNotFound) {

        [homeModel addCityToSave: self.city];

        self.navigationItem.rightBarButtonItem = self.deleteButton;

        UIAlertController* alertController = [UIAlertController alertControllerWithTitle: nil  message: @"添加成功" preferredStyle: UIAlertControllerStyleAlert];
        UIAlertAction* okAction = [UIAlertAction actionWithTitle: @"确定" style: UIAlertActionStyleDefault handler:^(UIAlertAction * _Nonnull action) {
            [[NSNotificationCenter defaultCenter] postNotificationName: ReleadNotification object: self userInfo: nil];
            NSLog(@"OK");
        }];
        [alertController addAction: okAction];
        [self presentViewController: alertController animated: YES completion: nil];
    } else {
        UIAlertController* alertController = [UIAlertController alertControllerWithTitle: nil  message: @"该城市已经添加收藏夹, 重复添加" preferredStyle: UIAlertControllerStyleAlert];
        UIAlertAction* okAction = [UIAlertAction actionWithTitle: @"确定" style: UIAlertActionStyleDefault handler:^(UIAlertAction * _Nonnull action) {
            NSLog(@"OK");
        }];
        [alertController addAction: okAction];
        [self presentViewController: alertController animated: YES completion: nil];
    }
}