文章着重于新手学习,保持足够的存储空间,后面需要越来越多的虚机,做完实验之后,及时删除不必要的虚机,以免影响下一次学习。但是记得保存好母机哦!!!
Nginx 服务器
Nginx(发音:engine‑x)是一款高性能、事件驱动的开源 Web 服务器,同时也可做反向代理、负载均衡、HTTP 缓存、静态资源服务器。由俄罗斯工程师 Igor Sysoev 开发,现在是互联网主流服务组件。在高连接并发的情况下,能够支持高达5万个并发连接数的响应,而内存、CPU等系统资源消耗却非常低,运行非常稳定。
核心特点
1. 事件驱动模型(epoll/kqueue)
采用异步非阻塞 IO,单进程可以处理大量并发连接,高并发消耗资源少,万级并发很轻松,远优于传统 Apache 多进程模型。
传统 Apache:一连接一进程 / 线程,1 万并发就要 1 万个进程,内存暴涨,上下文切换开销巨大。
Nginx:少量 worker 进程,依靠操作系统 IO 多路复用,一个 worker 可以同时成千上万个连接,大部分连接处于空闲等待,几乎不消耗 CPU。**
优势:万级并发内存占用很低。
2. 轻量
占用内存、CPU 低,部署简单,配置文件简洁。
3. 多角色能力(不止 web 服务器)
● Web 服务器:直接托管静态文件 (html/js/css/ 图片)
● 反向代理:把客户端请求转发给后端服务(Tomcat、SpringBoot、Node、PHP‑FPM)
● 负载均衡:多台后端服务器分发流量,做集群
● HTTP 缓存:缓存后端响应,减轻后端压力
● SSL/TLS 终端:处理 https 证书解密加密
● 限流、防盗链、gzip 压缩、静态资源压缩、访问控制
● 虚拟主机:一台服务器跑多个网站
Nginx 架构
Nginx 是多进程模型,master‑worker 架构
master 主进程(root 权限运行)
● 读取、解析配置文件
● 管理所有 worker 子进程
● 接收系统信号:启动、停止、reload、重新打开日志
● 不处理业务请求,只做管理。
worker 工作进程(业务处理)
● 真正处理网络请求,执行 TCP 连接、http 解析、转发、读写文件。
● 每个 worker 是单线程,异步非阻塞 IO 模型。
● 建议配置:worker_processes auto;,自动等于 CPU 物理核心数。
● worker 之间互相独立,不共享内存。
cache loader / cache manager(缓存进程,可选)
● cache manager:管理磁盘缓存,清理过期缓存文件
● cache loader:启动时加载磁盘缓存元数据
信号机制 & 热重载原理 nginx -s reload
-
master 读取新配置,校验语法;
-
启动一批新 worker 进程,新 worker 加载新配置处理新请求;
- 向旧 worker 发送信号,旧 worker 不再接收新连接,处理完已有的连接后退出; ✅ 整个过程服务不中断,无宕机。
-
常用命令(Linux)
nginx                 #启动
nginx -s stop         #快速停止
nginx -s quit         #优雅停止,处理完现有连接再退出
nginx -s reload       #重载配置(最常用)
nginx -t              #校验配置文件语法是否正确
Nginx 部署
节点规划
| 节点名称 | 节点IP | 作用 |
|---|---|---|
| nginx-server | 10.1.8.10/24 | 搭建 nginx |
| nginx-client | 10.1.8.11/24 | 客户端访问 |
nginx-server:
[root@localhost ~]# hostnamectl set-hostname nginx-server
[root@localhost ~]# nmcli connection modify ens33 ipv4.method manual
ipv4.addresses 10.1.8.10/24 ipv4.gateway 10.1.8.2 ipv4.dns 10.1.8.2 autoconnect yes
[root@localhost ~]# nmcli connection up ens33
nginx-client:
[root@localhost ~]# hostnamectl set-hostname nginx-client
[root@localhost ~]# nmcli connection modify ens33 ipv4.method manual
ipv4.addresses 10.1.8.11/24 ipv4.gateway 10.1.8.2 ipv4.dns 10.1.8.2 autoconnect yes
[root@localhost ~]# nmcli connection up ens33
安装步骤
# 安装 nginx
[root@nginx-server ~]# wget -O /etc/yum.repos.d/epel.repo http://mirrors.aliyun.com/repo/epel-7.repo
[root@nginx-server ~]# yum -y install nginx
# 启动 nginx
[root@nginx-server ~]# systemctl enable nginx --now
# 准备主页
[root@nginx-server ~]# mv /usr/share/nginx/html/index.html{,.ori}
[root@nginx-server ~]# echo Hello World From Nginx > /usr/share/nginx/html/index.html
# 防火墙放行
[root@nginx-server ~]# firewall-cmd --add-service=http --permanent
[root@nginx-server ~]# firewall-cmd --reload
# windows客户端修改 C:\Windows\System32\drivers\etc\hosts
# Linux或Unix修改 /etc/hosts
# 添加如下记录
10.1.8.10 www.fengkai.cloud
# 客户端测试
[root@nginx-client ~]# curl http://www.fengkai.cloud
Hello World From Nginx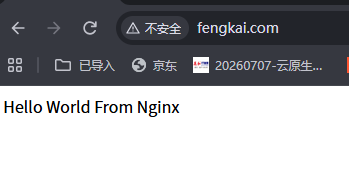
Nginx 配置
nginx 的配置文件:/etc/nginx/nginx.conf
配置结构
Nginx 配置采用层级化、模块化的组织方式,Nginx 配置由 全局块 → events 块 → http 块 → server 块 → location 块,层级依次嵌套。
1. 全局配置块
作用于 Nginx 整个进程的基础配置,【全局块】全局生效,不属于任何块。
# 全局配置示例
user nginx;                          # 运行Nginx的用户/用户组
worker_processes auto;               # 工作进程数(核心参数,建议设为CPU核心数)
error_log /var/log/nginx/error.log;  # 错误日志路径
pid /run/nginx.pid;                  # 主进程PID文件路径
include /usr/share/nginx/modules/*.conf;  # 加载外部模块配置(全局级引入)
2. 核心模块 块
Nginx 的核心功能模块 events 块,用于处理网络连接相关配置。
3. 业务模块 块
处理具体业务的核心配置块,最核心的是 http 块 (HTTP/HTTPS 服务),可以包含多个 server 块(虚拟主机)。
# http块:所有HTTP/HTTPS服务的公共配置,可嵌套多个server块
http {
# HTTP全局通用参数
include /etc/nginx/mime.types; # 加载MIME类型映射
default_type application/octet-stream; # 默认响应类型
log_format main '$remote_addr - $remote_user [$time_local] "$request"'; # 日志格式
access_log /var/log/nginx/access.log main; # 访问日志
sendfile on; # 高效发送文件,静态文件性能优化
keepalive_timeout 65; # http长连接超时
# server块:虚拟主机配置(一个http块可包含多个server),一个server对应一个网站
server {
listen 80; # 监听端口(80=HTTP,443=HTTPS)
server_name localhost; # 域名/IP(可配置多个,用空格分隔)
root /usr/share/nginx/html; # 网站根目录
# location块:匹配uri路径,处理请求(一个server块可包含多个location)
location / {
index index.html index.htm; # 默认首页
try_files $uri $uri/ /index.html; # 路径匹配规则
}
# 错误页面配置
error_page 404 /404.html;
error_page 500 502 503 504 /50x.html;
}
# 第二个虚拟主机(示例)
server {
listen 8080;
server_name test.example.com;
# ... 其他配置
}
}4.特殊配置:HTTPS 专属块
如果配置 HTTPS,会在 server 块内增加 SSL 相关配置:
server {
listen 443 ssl; # 监听HTTPS端口并启用SSL
server_name example.com;
# SSL证书配置
ssl_certificate /etc/nginx/cert/server.crt; # 公钥文件
ssl_certificate_key /etc/nginx/cert/server.key; # 私钥文件
ssl_session_cache shared:SSL:1m;
ssl_session_timeout 5m;
ssl_ciphers HIGH:!aNULL:!MD5;
ssl_prefer_server_ciphers on;
# ... 其他配置(如root、location等)
}各块作用总结
| 配置块 | 作用范围 |
|---|---|
| 全局块 | 整个 nginx 实例 |
| events | 网络连接、并发参数 |
| http | 所有 http 协议、所有网站共用 |
| server | 单个虚拟主机(站点) |
| location | 站点内部不同 URI 路径规则 |
location 匹配规则(优先级从高到低)
-
location = /uri--- 精确匹配,最高优先级 -
location ^~ /uri--- 前缀匹配,不执行正则 -
location ~ regex--- 大小写敏感正则 -
location ~* regex--- 大小写不敏感正则 -
location /uri--- 普通前缀匹配 -
location /--- 默认兜底匹配
Nginx 内置常用变量
日常写 location、proxy_pass 经常使用:
| 变量 | 含义 |
|---|---|
$uri |
请求的 uri,不带参数 |
$args |
url 后面 get 查询参数 |
$request_uri |
完整 uri + 参数 |
$remote_addr |
客户端真实 IP |
$http_host |
请求头 Host |
$http_user_agent |
客户端浏览器 UA |
$scheme |
协议 http / https |
$server_name |
当前 server 的域名 |
$request_method |
请求方法 GET POST |
五大核心功能详解
1. 静态 Web 服务器
直接读取磁盘 html、js、css、图片、下载文件。
sendfile 机制绕过用户态拷贝,内核直接发送文件,性能极强。
server {
    listen 80;
    server_name static.test.com;
    root /data/static;
    index index.html;
}
2. 反向代理(Proxy)
正向代理:代理客户端(翻墙代理);反向代理:代理后端服务器,客户端无感知。
客户端访问 Nginx,Nginx 把请求转发给后端 Java/Python/PHP 服务,后端服务对外不暴露公网。
核心指令:proxy_pass http://ip:port; 配套常用代理头,把客户端真实信息传给后端:
location /api/ {
    proxy_pass http://127.0.0.1:8080;
    proxy_set_header Host $http_host;
    proxy_set_header X-Real-IP $remote_addr;
    proxy_set_header X-Forwarded-For $proxy_add_x_forwarded_for;
}
3. 负载均衡 upstream
把流量分发到多台后端实例,实现集群扩容、故障摘除。
upstream backend_pool {
    server 192.168.1.10:8080 weight=3;   #权重,数值越大流量越多
    server 192.168.1.11:8080 weight=2;
    server 192.168.1.12:8080 backup;     #备份节点,只有其他全部挂掉才启用
    server 192.168.1.13:8080 down;       #标记下线
}
负载均衡策略:
-
round_robin --- 默认轮询,依次分发
-
weight --- 权重轮询
-
ip_hash --- 根据客户端 ip 哈希,同一个客户固定打到同一后端,解决 session 会话问题
-
least_conn --- 最少连接,分配给当前连接数少的后端
4. HTTPS/SSL 终端
Nginx 承担证书解密加密工作,后端内部继续走 http 协议。
server {
    listen 443 ssl;
    server_name www.test.com;
    ssl_certificate /etc/nginx/cert/fullchain.pem;
    ssl_certificate_key /etc/nginx/cert/privkey.key;
    ssl_protocols TLSv1.2 TLSv1.3;
}
# 80端口强制跳转https
server {
    listen 80;
    server_name www.test.com;
    return 301 https://$host$request_uri;
}
5. 其他实用功能
1. gzip 压缩:压缩返回文本,减小传输带宽
gzip on;
gzip_types text/plain text/css application/json application/javascript;
2. 访问控制 allow/deny:IP 黑白名单
location /admin {
    allow 192.168.1.0/24;
    deny all;
}
3. 限流 limit_req:限制单 IP 请求频率,防 CC 攻击
4. 防盗链 valid_referers:防止图片被其他网站盗链
5. HTTP 缓存 proxy_cache:缓存后端返回结果,降低后端压力
6. 重写 rewrite:url 地址改写、跳转
配置加载机制
-
include 指令 :Nginx 支持通过 include 引入外部配置文件,实现模块化管理。 ○ 把不同虚拟主机配置拆到
/etc/nginx/conf.d/*.conf○ 把不同代理配置拆到/etc/nginx/default.d/*.conf -
配置优先级: ○ 同层级:后定义的配置覆盖先定义的; ○ 不同层级:子级(如 location)覆盖父级(如 server/http); ○ location 匹配:精准匹配(=)> 正则匹配(~ / ~*)> 普通前缀匹配。
Nginx 常见日志
- **access.log:**访问日志,记录每一次 http 请求
log_format main '$remote_addr - $remote_user [$time_local] "$request" '
				'$status $body_bytes_sent "$http_referer" '
				'"$http_user_agent" "$http_x_forwarded_for"';
access_log /var/log/nginx/access.log main;
字段含义:客户端 ip,时间,请求行,状态码,响应大小,referer 来源,浏览器 UA。
- **error.log:**错误日志,502、配置错误、连接失败都在这里排查。
生产常见问题
-
502 Bad Gateway:Nginx 无法连接后端服务,后端挂了、端口不对、防火墙拦截。
-
504 Gateway Timeout:后端处理请求太慢,代理超时。
-
499:客户端主动断开连接。
-
403:权限不足,目录不存在,没有 index 文件。
-
并发上不去:检查
worker_processes、worker_connections、系统文件句柄数ulimit。
nginx.conf 配置详解
# 更多配置详情参考官方文档:
# * 英文官方文档: http://nginx.org/en/docs/
# * 俄文官方文档: http://nginx.org/ru/docs/

# 指定Nginx工作进程的运行用户为nginx
user nginx;

# 工作进程数,设置为auto时会自动根据CPU核心数调整
worker_processes auto;

# 错误日志文件路径及存储位置
error_log /var/log/nginx/error.log;

# Nginx主进程PID文件路径,用于标识进程ID
pid /run/nginx.pid;

# 加载动态模块,详细说明可查看/usr/share/doc/nginx/README.dynamic文件
include /usr/share/nginx/modules/*.conf;

# 事件模块配置块,用于设置网络连接相关参数
events {
    # 每个工作进程的最大并发连接数,默认1024
    worker_connections 1024;
}

# HTTP核心模块配置块,包含HTTP服务的主要配置
http {
    # 定义访问日志的格式,命名为main
    # 日志字段说明:客户端IP - 远程用户 [访问时间] "请求信息" 状态码 发送字节数 "来源页面"
    # "用户代理" "代理IP"
    log_format  main  '$remote_addr - $remote_user [$time_local] "$request" '
                      '$status $body_bytes_sent "$http_referer" '
                      '"$http_user_agent" "$http_x_forwarded_for"';

    # 启用访问日志,使用main格式,日志文件存储路径
    access_log  /var/log/nginx/access.log  main;

    # 启用高效文件传输模式,减少磁盘I/O和CPU消耗
    sendfile            on;
    # 启用TCP_NOPUSH选项,在发送响应时累积数据后一次性发送,提高网络效率(需配合sendfile使用)
    tcp_nopush          on;
    # 启用TCP_NODELAY选项,禁用Nagle算法,减少数据传输延迟(适用于实时性要求高的场景)
    tcp_nodelay         on;
    # HTTP长连接超时时间,超过65秒无活动则关闭连接
    keepalive_timeout   65;
    # 文件类型哈希表的最大容量,增大可提高文件类型查找效率
    types_hash_max_size 4096;

    # 引入MIME类型配置文件,定义不同文件后缀对应的响应类型
    include             /etc/nginx/mime.types;
    # 默认MIME类型,当无法识别文件类型时使用(二进制流格式)
    default_type        application/octet-stream;

    # 加载/etc/nginx/conf.d目录下的所有.conf后缀配置文件(模块化配置)
    # 更多说明参考http://nginx.org/en/docs/ngx_core_module.html#include
    include /etc/nginx/conf.d/*.conf;

    # 虚拟主机配置块(默认HTTP服务)
    server {
        # 监听IPv4的80端口(HTTP默认端口)
        listen       80;
        # 监听IPv6的80端口
        listen       [::]:80;
        # 虚拟主机域名,_表示匹配所有未明确指定的域名
        server_name  _;
        # 网站根目录,存放静态资源的路径
        root         /usr/share/nginx/html;
        # 加载默认虚拟主机的额外配置文件(来自/etc/nginx/default.d/*.conf)
        include /etc/nginx/default.d/*.conf;
        # 配置404错误页面,当请求资源不存在时返回/404.html
        error_page 404 /404.html;
        # 精确匹配/404.html的访问路径(无额外配置,直接返回文件)
        location = /404.html {
        }
        # 配置500/502/503/504服务器错误页面,返回/50x.html
        error_page 500 502 503 504 /50x.html;
        # 精确匹配/50x.html的访问路径(无额外配置,直接返回文件)
        location = /50x.html {
        }
    }

    # TLS/SSL加密服务配置(默认注释,启用需取消注释并配置证书)
    # server {
    #     listen       443 ssl http2;
    #     listen       [::]:443 ssl http2;
    #     server_name  _;
    #     root         /usr/share/nginx/html;
    #     ssl_certificate "/etc/pki/nginx/server.crt";
    #     ssl_certificate_key "/etc/pki/nginx/private/server.key";
    #     ssl_session_cache shared:SSL:1m;
    #     ssl_session_timeout  10m;
    #     ssl_ciphers HIGH:!aNULL:!MD5;
    #     ssl_prefer_server_ciphers on;
    #     include /etc/nginx/default.d/*.conf;
    #     error_page 404 /404.html;
    #     location = /40x.html {
    #     }
    #     error_page 500 502 503 504 /50x.html;
    #     location = /50x.html {
    #     }
    # }
}
虚拟主机
同一个 web 服务器提供多个站点。虚拟主机支持多种方式:
-
主机名
-
端口号
-
IP地址(基本不用)
根据名称
# 参考主配置文件/etc/nginx/nginx.conf中server块配置
[root@nginx-server ~]# cp /etc/nginx/nginx.conf /etc/nginx/conf.d/vhost-name.conf
[root@nginx-server ~]# vim /etc/nginx/conf.d/vhost-name.conf

server {
    server_name  web1.fengkai.cloud;
    root         /usr/share/nginx/web1;
}

server {
    server_name  web2.fengkai.cloud;
    root         /usr/share/nginx/web2;
}

[root@nginx-server ~]# mkdir /usr/share/nginx/web{1,2}
[root@nginx-server ~]# echo web1.fengkai.cloud > /usr/share/nginx/web1/index.html
[root@nginx-server ~]# echo web2.fengkai.cloud > /usr/share/nginx/web2/index.html
[root@nginx-server ~]# systemctl restart nginx
客户端测试:
# 配置名称解析,假设web服务器ip地址为10.1.8.10
[root@nginx-client ~]# vim /etc/hosts
10.1.8.10 web1.fengkai.cloud
10.1.8.10 web2.fengkai.cloud

[root@nginx-client ~]# curl http://web1.fengkai.cloud/
web1.fengkai.cloud

[root@nginx-client ~]# curl http://web2.fengkai.cloud/
web2.fengkai.cloud
**提示:**清理环境,避免影响后续实验。
[root@nginx-server ~]# mkdir /etc/nginx/conf.d/vhosts
[root@nginx-server ~]# mv /etc/nginx/conf.d/vhost-name.conf /etc/nginx/conf.d/vhosts
根据 port
[root@nginx-server ~]# vim /etc/nginx/conf.d/vhost-port.conf

server {
    listen       8081;
    server_name  www.fengkai.cloud;
    root         /usr/share/nginx/8081;
}

server {
    listen       8082;
    server_name  www.fengkai.cloud;
    root         /usr/share/nginx/8082;
}

[root@nginx-server ~]# mkdir /usr/share/nginx/808{1,2}
[root@nginx-server ~]# echo 8081 > /usr/share/nginx/8081/index.html
[root@nginx-server ~]# echo 8082 > /usr/share/nginx/8082/index.html
[root@nginx-server ~]# systemctl restart nginx
客户端测试:
# 配置名称解析,假设web服务器ip地址为10.1.8.10
[root@nginx-client ~]# vim /etc/hosts
10.1.8.10 www.fengkai.cloud

[root@nginx-client ~]# curl http://www.fengkai.cloud:8081
8081

[root@nginx-client ~]# curl http://www.fengkai.cloud:8082
8082
**提示:**清理环境,避免影响后续实验。
[root@nginx-server ~]# mv /etc/nginx/conf.d/vhost-port.conf /etc/nginx/conf.d/vhosts配置 SSL/TLS
生成证书
https = http + ssl/tls
# --1--生成私钥
[root@nginx-server ~]# mkdir certs && cd certs
[root@nginx-server certs]# openssl genrsa -out www.key 2048

# --2--生成请求文件csr
[root@nginx-server certs]# openssl req -new -key www.key -out www.csr -subj "/C=CN/ST=JS/L=NJ/O=LG/OU=DEVOPS/CN=www.fengkai.cloud/emailAddress=webadmin@fengkai.cloud"
# CN的值必须是网站域名

# --3--使用自己的私钥对请求文件签名,以生成证书
[root@nginx-server certs]# openssl x509 -req -days 3650 -in www.csr -signkey www.key -out www.crt
www.key --- 私钥(必须保密)
www.csr --- 证书请求(中间文件)
www.crt --- 公钥证书(配置 HTTPS 用)
配置站点
[root@nginx-server certs]# mkdir /etc/ssl/certs/www.fengkai.cloud
[root@nginx-server certs]# mv www* /etc/ssl/certs/www.fengkai.cloud

# 参照默认配置修改
[root@nginx-server ~]# cp /etc/nginx/nginx.conf /etc/nginx/conf.d/vhost-www.fengkai.cloud-ssl.conf
[root@nginx-server ~]# vim /etc/nginx/conf.d/vhost-www.fengkai.cloud-ssl.conf

server {
    listen       443 ssl http2;
    listen       [::]:443 ssl http2;
    server_name  www.fengkai.cloud;
    root         /usr/share/nginx/html;

    # 证书
    ssl_certificate "/etc/ssl/certs/www.fengkai.cloud/www.crt";
    # 私钥
    ssl_certificate_key "/etc/ssl/certs/www.fengkai.cloud/www.key";
}

[root@nginx-server ~]# systemctl restart nginx

# 防火墙设置
[root@nginx-server ~]# firewall-cmd --add-service=https --permanent
[root@nginx-server ~]# firewall-cmd --reload
测试:
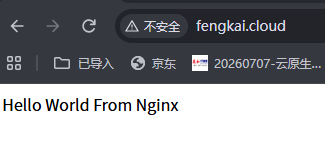
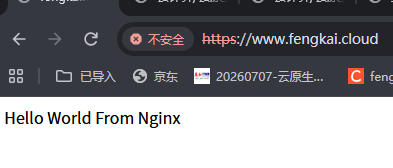
配置HTTP重定向到https
[root@nginx-server ~]# vim /etc/nginx/conf.d/vhost-www.fengkai.cloud-ssl.conf

server {
    listen       443 ssl http2;
    listen       [::]:443 ssl http2;
    server_name  www.fengkai.cloud;
    root         /usr/share/nginx/html;

    # 证书
    ssl_certificate "/etc/ssl/certs/www.fengkai.cloud/www.crt";
    # 私钥
    ssl_certificate_key "/etc/ssl/certs/www.fengkai.cloud/www.key";

    # 配置HTTP重定向到https
    server {
        listen       80;
        listen       [::]:80;
        server_name  www.fengkai.cloud;
        root         /usr/share/nginx/html;
        # 添加重定向
        return       301 https://$host$request_uri;
    }
}

[root@nginx-server ~]# systemctl restart nginx

# 防火墙设置
[root@nginx-server ~]# firewall-cmd --add-service=https --permanent
[root@nginx-server ~]# firewall-cmd --reload

# 测试
[root@nginx-client ~]# curl http://www.fengkai.cloud/
<html>
<head><title>301 Moved Permanently</title></head>
<body>
<center><h1>301 Moved Permanently</h1></center>
<hr><center>nginx/1.20.1</center>
</body>
</html>

# 使用-k指明目标站点不是一个安全站点
[root@nginx-client ~]# curl -k https://www.fengkai.cloud
Hello World From Nginx

# 使用-L指明跟随重定向
[root@nginx-client ~]# curl -Lk http://www.fengkai.cloud
Hello World From Nginx
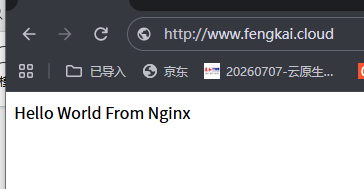
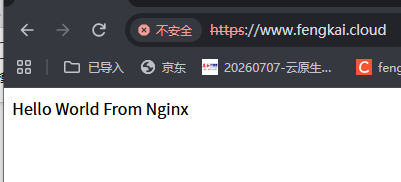
测试:
http://www.fengkai.cloud 访问直接跳转 https://www.fengkai.cloud
配置基本认证
用户名和密码使用 plain text 发送,所以最好配置 SSL/TLS。
# 安装工具
[root@nginx-server ~]# yum -y install httpd-tools

[root@nginx-server ~]# vim /etc/nginx/conf.d/vhost-www.fengkai.cloud-ssl.conf

# add into the [server] section
server {
    .....
    location /auth-basic/ {
        auth_basic            "Basic Auth";
        auth_basic_user_file  "/etc/nginx/.htpasswd";
    }
}

# 加完效果
server {
    listen       443 ssl http2;
    listen       [::]:443 ssl http2;
    server_name  www.fengkai.cloud;
    root         /usr/share/nginx/html;

    ssl_certificate "/etc/ssl/certs/www.fengkai.cloud/www.crt";
    ssl_certificate_key "/etc/ssl/certs/www.fengkai.cloud/www.key";

    location /auth-basic/ {
        auth_basic            "Basic Auth";
        auth_basic_user_file  "/etc/nginx/.htpasswd";
    }
}

# 配置HTTP重定向到https
server {
    listen       80;
    listen       [::]:80;
    server_name  www.fengkai.cloud;
    root         /usr/share/nginx/html;
    return       301 https://$host$request_uri;
}

[root@nginx-server ~]# systemctl restart nginx

# add user for Basic authentication
[root@nginx-server ~]# htpasswd -b -c /etc/nginx/.htpasswd fengkai 123456

# create a test page
[root@nginx-server ~]# mkdir /usr/share/nginx/html/auth-basic
[root@nginx-server ~]# vim /usr/share/nginx/html/auth-basic/index.html

<html>
<body>
<div style="width: 100%; font-size: 40px; font-weight: bold; text-align: center;">
Test Page for Basic Authentication
</div>
</body>
</html>

# 测试,通过-u选项指定用户名和密码
[root@nginx-client ~]# curl -ku fengkai:123456 https://www.fengkai.cloud/auth-basic/

<html>
<body>
<div style="width: 100%; font-size: 40px; font-weight: bold; text-align: center;">
Test Page for Basic Authentication
</div>
</body>
</html>
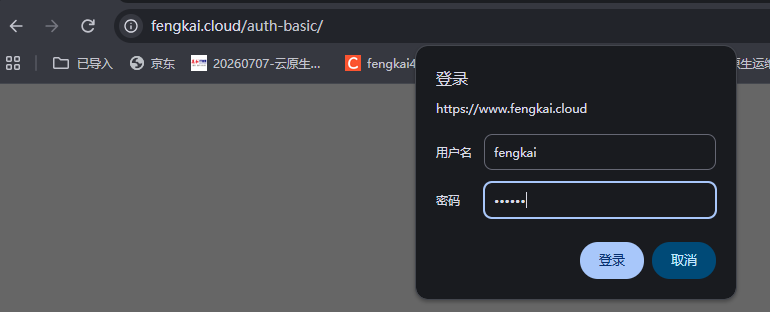
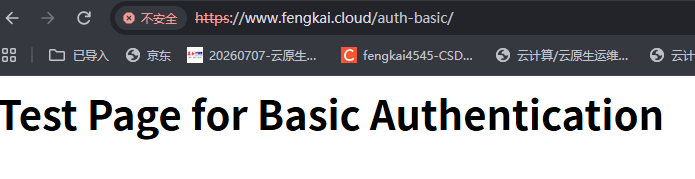
windows 测试:
PHP 站点
网站分类:
● 静态网页
页面内容提前写好存在服务器 ,用户访问时直接下载,内容不会变。 后缀常见:.html、.htm
● 动态网页
页面不是现成文件 ,访问时服务器实时拼接数据生成 ,内容可随用户、时间、操作变化。后缀常见:.php、.jsp、.asp、.aspx、.py 等
# 安装PHP和php-fpm,建议把其他的扩展包一起安装
[root@nginx-server ~]# yum install -y php php-fpm

# php-fpm: 负责接收web程序发来的php代码
# php:负责解析和执行php代码,并将结果返回给php-fpm
# 当客户端访问 php 站点时,web站点接收用户请求
# 并转发 php 代码给php-fpm服务
# php-fpm 服务调用php解析php网页,然后将结果返回给web程序
# web 程序将结果返回给客户端

# 启用并启动php-fpm服务
[root@nginx-server ~]# systemctl enable php-fpm --now

# 建议把其他的扩展包一起安装
[root@nginx-server ~]# yum install -y php-gd php-common php-pear php-mbstring php-mcrypt

# 查看 php 版本
[root@nginx-server ~]# php -v

# 测试 php 是否正常
# 直接运行一段PHP代码
[root@nginx-server ~]# php -r "echo 'Hello PHP';"
Hello PHP

# 运行一个PHP文件
[root@nginx-server ~]# echo "<?php echo 'PHP Test Page'.\"\n\"; ?>" > php_test.php
[root@nginx-server ~]# php php_test.php
PHP Test Page

# 准备测试页,使用phpinfo查看详细信息
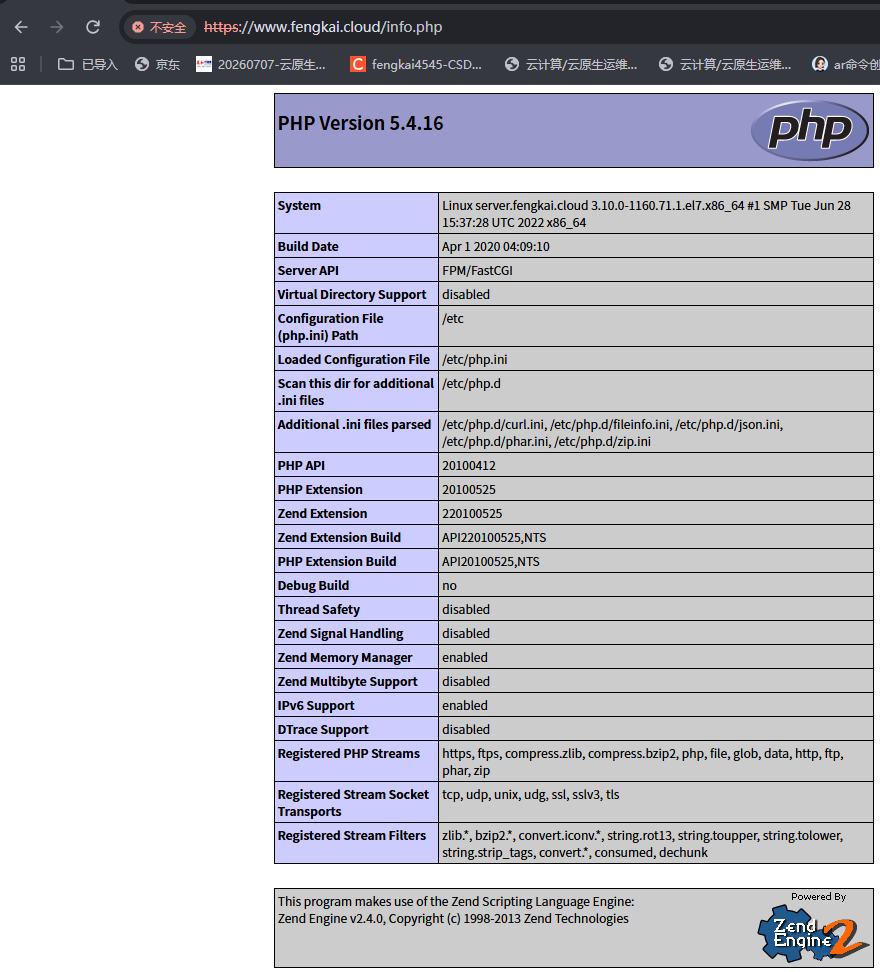
[root@nginx-server ~]# echo "<?php phpinfo(); ?>" > /usr/share/nginx/html/info.php
配置虚拟机主机支持php
# 修改配置文件
[root@nginx-server ~]# vim /etc/nginx/conf.d/vhost-www.fengkai.cloud-ssl.conf
# add into the [server] section
server {
    listen       443 ssl http2;
    listen       [::]:443 ssl http2;
    server_name  www.fengkai.cloud;
    root         /usr/share/nginx/html;

    ssl_certificate "/etc/ssl/certs/www.fengkai.cloud/www.crt";
    ssl_certificate_key "/etc/ssl/certs/www.fengkai.cloud/www.key";

    # 参考/etc/nginx/nginx.conf.default
    # 匹配所有以.php结尾的URL请求,验证PHP文件是否存在
    # 存在则转发给本地9000端口的PHP-FPM处理,不存在则返回404
    location ~ \.php$ {
        # try_files:检测请求的PHP文件($uri)是否存在,不存在直接返回404错误
        # 作用:防止伪造PHP路径的恶意请求(如/xxx.php/yyy.jpg)被PHP-FPM解析,是重要的安全防护
        try_files $uri =404;

        # fastcgi_pass:指定FastCGI服务地址,将PHP请求转发到本地9000端口的PHP-FPM进程
        # 还可以将php的配置与虚拟主机配置分离配置(和上面方法二选一)
        fastcgi_pass 127.0.0.1:9000;

        # fastcgi_index:定义FastCGI默认索引文件,请求目录时默认使用index.php
        fastcgi_index index.php;

        # fastcgi_param:设置传递给PHP-FPM的核心环境变量
        # SCRIPT_FILENAME:指定要执行的PHP文件绝对路径,
        # $document_root是网站根目录,$fastcgi_script_name是请求的脚本名
        fastcgi_param SCRIPT_FILENAME $document_root$fastcgi_script_name;

        # include:引入Nginx默认的FastCGI参数配置文件,包含QUERY_STRING、REQUEST_METHOD等PHP运行必需的环境变量
        include fastcgi_params;
    }
}

# 配置HTTP重定向到https
server {
    listen       80;
    listen       [::]:80;
    server_name  www.fengkai.cloud;
    root         /usr/share/nginx/html;
    # 添加重定向
    return       301 https://$host$request_uri;
}
还可以将 php 的配置与虚拟主机配置分离配置(和上面方法二选一)
[root@nginx-server ~]# vim /etc/nginx/conf.d/vhost-www.fengkai.cloud-ssl.conf
server {
    listen       443 ssl http2;
    listen       [::]:443 ssl http2;
    server_name  www.fengkai.cloud;
    root         /usr/share/nginx/html;

    ssl_certificate "/etc/ssl/certs/www.fengkai.cloud/www.crt";
    ssl_certificate_key "/etc/ssl/certs/www.fengkai.cloud/www.key";

    # Load configuration files for the default server block.
    include /etc/nginx/default.d/*.conf;
}

# 配置HTTP重定向到https
server {
    listen       80;
    listen       [::]:80;
    server_name  www.fengkai.cloud;
    root         /usr/share/nginx/html;
    # 添加重定向
    return       301 https://$host$request_uri;
}

# 参考/etc/nginx/nginx.conf.default
[root@nginx-server ~]# vim /etc/nginx/default.d/php.conf

location ~ \.php$ {
    try_files $uri =404;
    fastcgi_pass 127.0.0.1:9000;
    fastcgi_index index.php;
    fastcgi_param SCRIPT_FILENAME $document_root$fastcgi_script_name;
    include fastcgi_params;
}
配置完成后,务必要重启 nginx 服务:
[root@nginx-server ~]# systemctl restart nginx客户端测试:
linux客户端测试:
[root@nginx-client ~]# curl -k https://www.fengkai.cloud/info.phpwindows客户端测试:
反向代理
反向代理介绍
正向代理:替客户端办事,隐藏客户端
反向代理:替服务器办事,隐藏服务器
正向代理生活案例:代买奶茶
● 你:客户端
● 室友:正向代理
● 奶茶店:服务器
你懒得下楼/小区不让出去,让室友帮你去买奶茶。
奶茶店只知道是你室友来买的,不知道背后真正买的人是你。
🤣 这就是正向代理 :代理代表客户端。
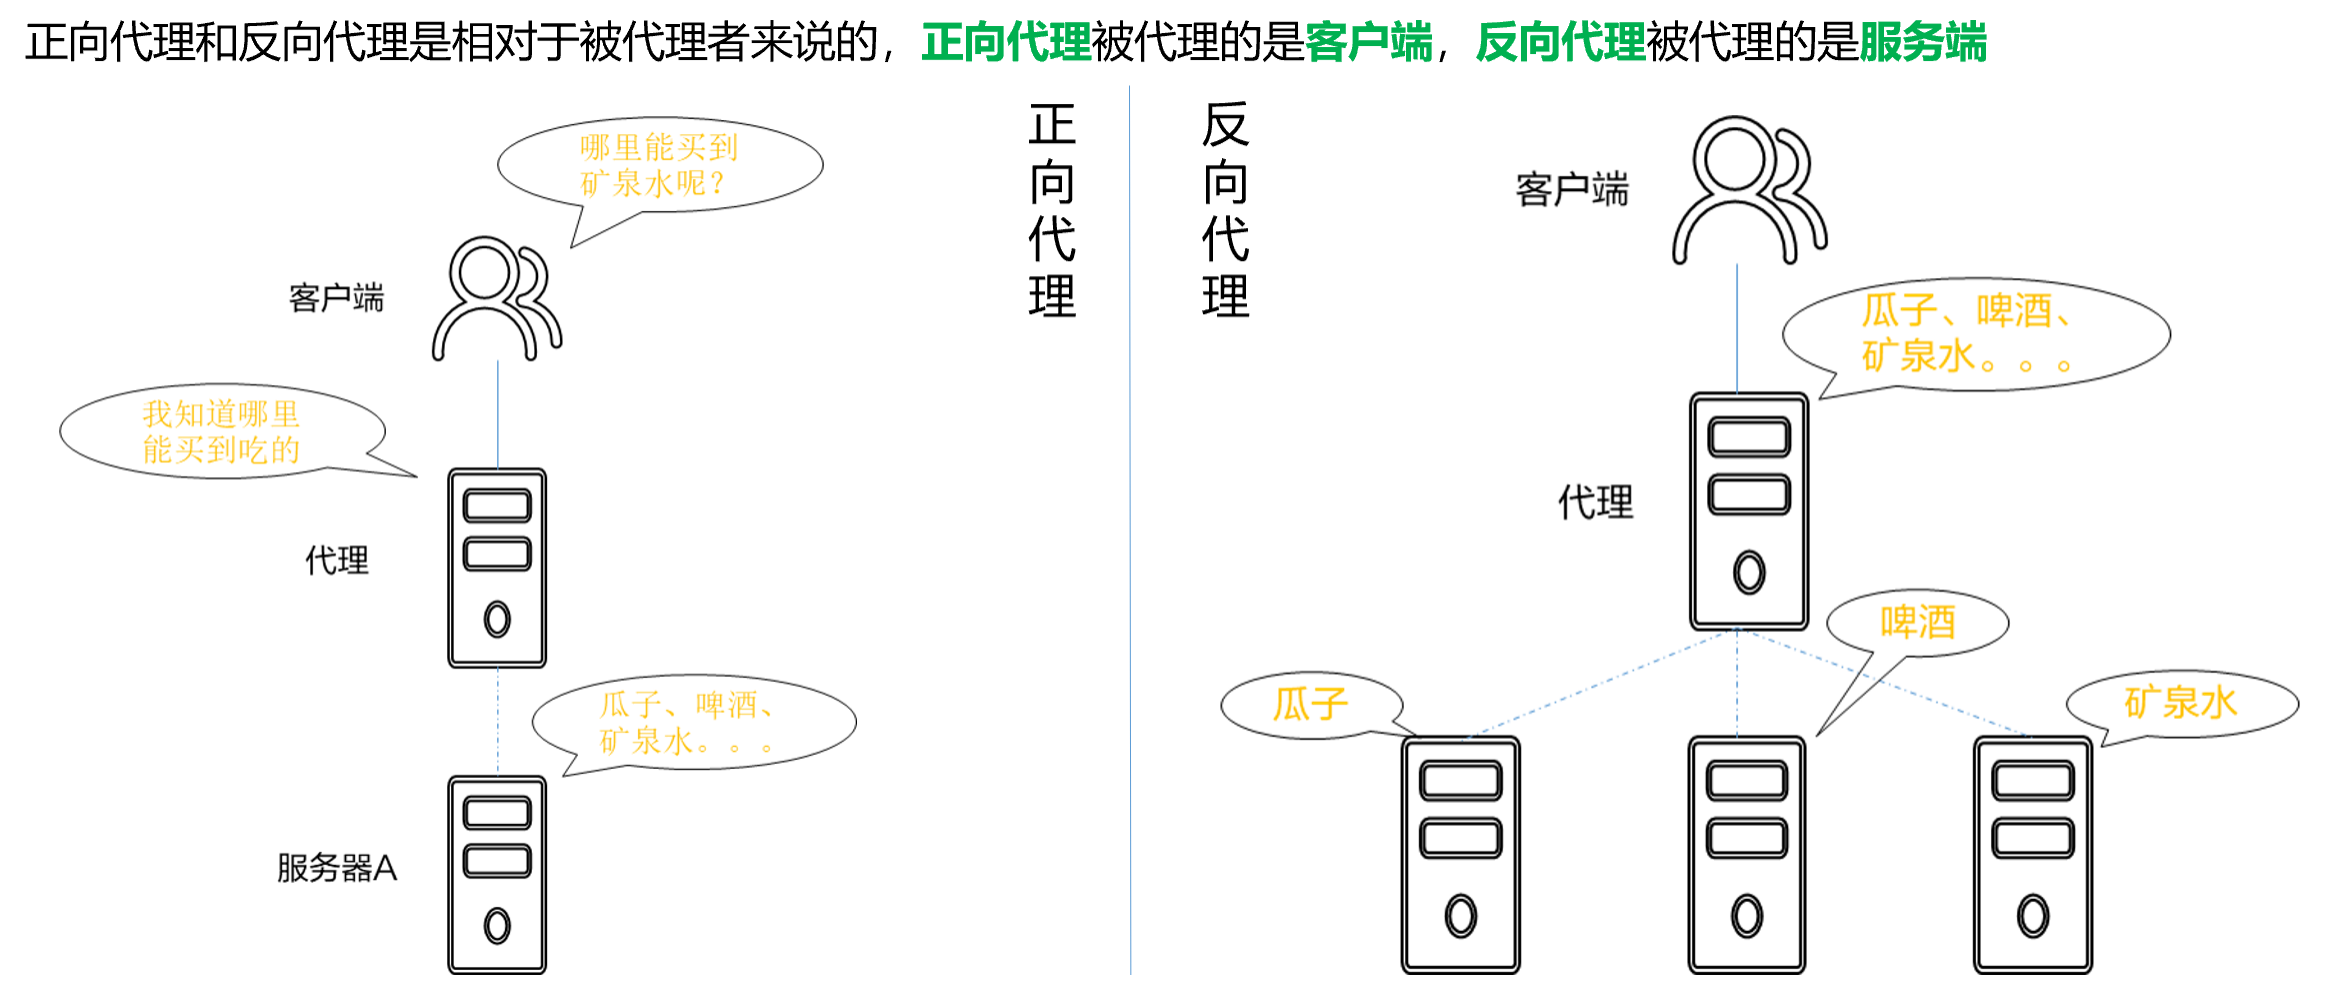
反向代理生活案例:餐厅前台点餐
● 你:客户端
● 前台小姐姐:反向代理
● 后厨厨师们:真实服务器
你进店只跟前台点餐,不用管是哪个厨师做的。
前台把单子传给后厨,做好了再端给你。
你全程只面对前台,不知道、也不用关心背后是哪个厨师在干活。
😊 这就是反向代理:代理代表服务器。
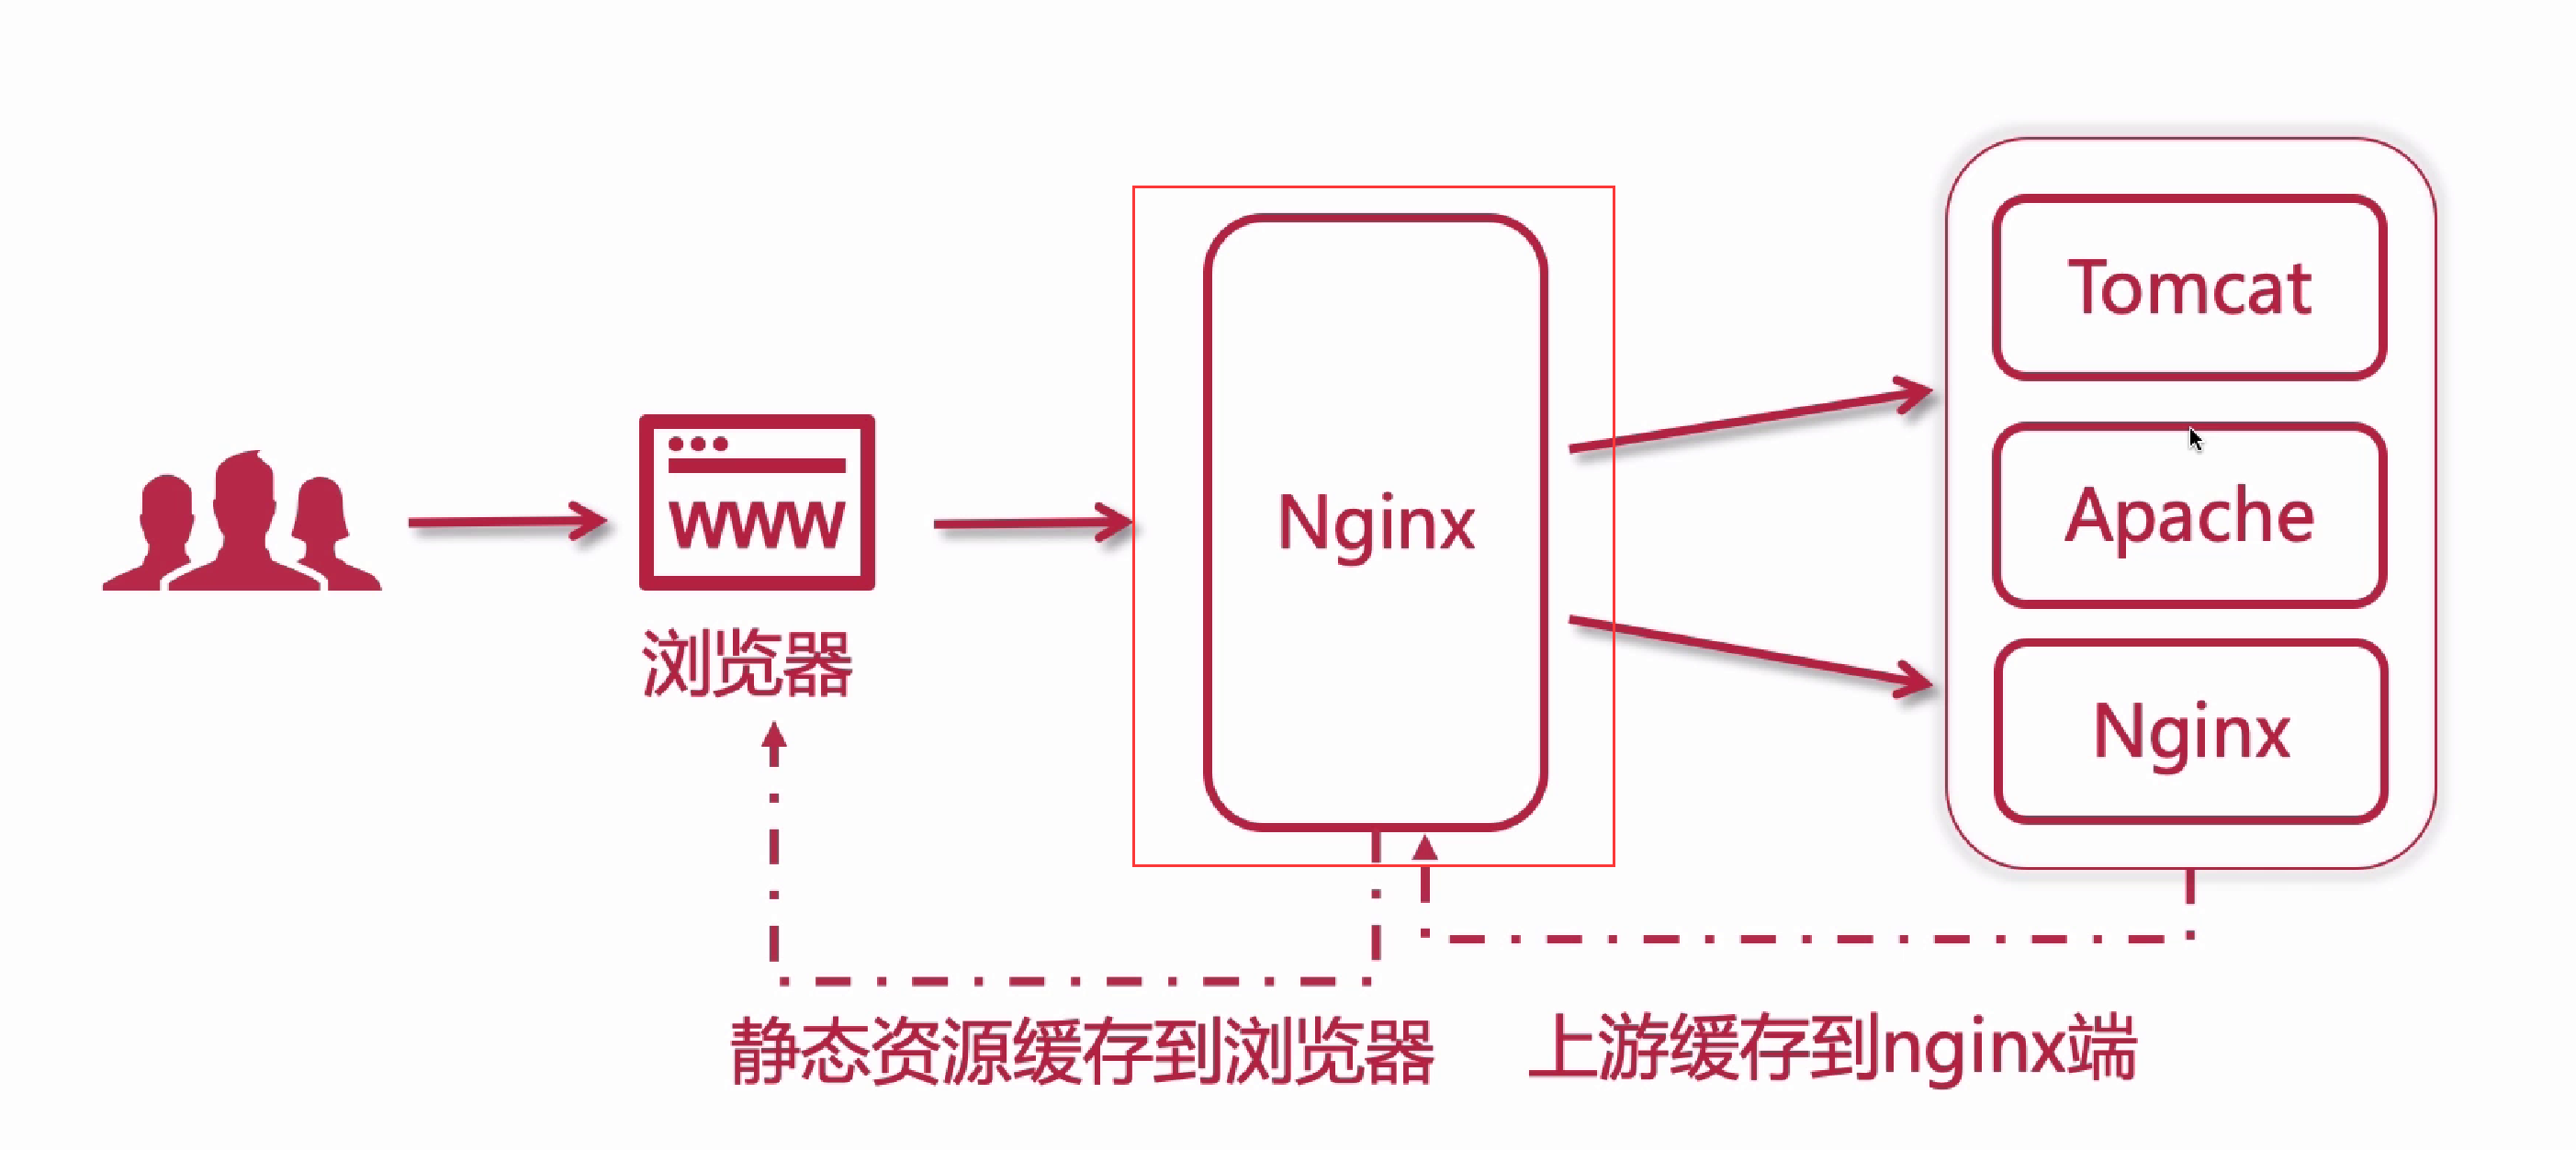
反向代理(reverse proxy),指的是代理外网用户的请求到内部的指定的服务器,并将数据返回给用户。客户端不直接与后端服务器进行通信,而是与反向代理服务器进行通信,隐藏了后端服务器的 IP 地址。
反向代理的主要作用是提供负载均衡和高可用性:
● **负载均衡:**Nginx 可以将传入的请求分发给多个后端服务器,以平衡服务器的负载,提高系统性能和可靠性。
● **缓存功能:**Nginx 可以缓存静态文件或动态页面,减轻服务器的负载,提高响应速度
● **动静分离:**将动态生成的内容(如 PHP、Python、Node.js 等)和静态资源(如 HTML、CSS、JavaScript、图片、视频等)分别存放在不同的服务器或路径上。
● **多站点代理:**Nginx 可以代理多个域名或虚拟主机,将不同的请求转发到不同的后端服务器上,实现多个站点的共享端口。
Location 配置
Location 配置语法
Nginx 使用 location 匹配规则 + proxy_pass 反向代理指令实现反向代理功能,匹配本质是 "URL 路径匹配 → 命中对应规则 → 转发至指定后端地址"。
● location --- 定义匹配路径
● proxy_pass --- 指定后端服务地址
http {
    # 后端服务可配置 upstream 集群(推荐,支持负载均衡)
    upstream backend_nginx {
        server 192.168.1.100:8080;  # 后端服务1
        server 192.168.1.101:8080;  # 后端服务2(多节点自动轮询负载均衡)
    }

    server {
        listen 80;  # Nginx 监听端口
        server_name localhost;  # 访问域名/IP

        # 1. 匹配所有请求(兜底规则)
        location / {
            proxy_pass http://backend_nginx;  # 转发至 upstream 集群

            # 必加的反向代理核心参数(传递客户端真实信息、适配后端服务)
            proxy_set_header Host $host;                        # 传递客户端访问的域名
            proxy_set_header X-Real-IP $remote_addr;            # 传递客户端真实IP
            proxy_set_header X-Forwarded-For $proxy_add_x_forwarded_for;  # 传递IP链路
            proxy_set_header X-Forwarded-Proto $scheme;        # 传递请求协议(http/https)
        }

        # 2. 匹配特定路径(如 /api 开头的请求,单独转发)
        location /api/ {
            proxy_pass http://192.168.1.102:9090/;  # 后端地址末尾带 /,会剔除匹配的 /api/
            proxy_set_header Host $host;
            proxy_set_header X-Real-IP $remote_addr;
        }
    }
}
Location 匹配规则
1.后端匹配逻辑:URL 路径 → 按 location 优先级命中规则 → 由规则内的 proxy_pass 转发至对应后端;
2.优先级:精确匹配(=)> 前缀匹配(^~)> 正则匹配(~/~*)> 普通前缀 > 兜底(/);
3.URL 重构关键:proxy_pass 末尾是否带 /,决定是否剔除 location 匹配的路径前缀。
1. 精确匹配(=)
● 语法:location = /path { ... }
● 逻辑:仅当请求 URL 与 /path 完全一致时命中,优先级最高。
● 示例:
# 仅匹配 http://localhost/login,不匹配 /login?a=1、/login/
location = /login {
    proxy_pass http://backend_login:8080;
}
2. 前缀匹配(^~)
● 语法:location ^~ /path { ... }
● 逻辑:URL 以 /path 开头即命中,优先级仅次于精确匹配,会跳过正则匹配。
● 用途:优先匹配静态资源(如 /static、/img)或特定业务路径,避免被正则规则拦截。
● 示例:
# 匹配所有 /static 开头的请求(如 /static/css/main.css、/static/img/1.jpg)
location ^~ /static/ {
    proxy_pass http://backend_static:80;
}
3. 正则匹配(~ / ~*)
● 语法: ○ 区分大小写:location ~ /regex { ... }(如 /API 不匹配 /api 规则)
○ 不区分大小写:location ~* /regex { ... }(如 /API、/api 均匹配)
● 逻辑:URL 符合正则表达式即命中,优先级低于前缀匹配(^~),多个正则规则按定义顺序匹配,先命中先生效。
● 示例:
# 匹配所有 .jpg、.png、.gif 结尾的图片请求(不区分大小写)
location ~* \.(jpg|png|gif)$ {
    proxy_pass http://backend_img:80;
}
4. 普通前缀匹配(无符号)
● 语法:location /path { ... }
● 逻辑:URL 以 /path 开头即命中,优先级低于正则匹配,多个普通前缀规则按 "路径最长" 优先命中。
● 示例:
# 规则1:匹配 /api/xxx(路径长度3)
location /api/ {
    proxy_pass http://backend_api:9090;
}

# 规则2:匹配 /api/user/xxx(路径长度7,比规则1长,优先命中)
location /api/user/ {
    proxy_pass http://backend_user:9090;
}
5. 通用匹配(/)
● 语法:location / { ... }
● 逻辑:所有未被上述规则命中的请求,都会匹配此规则(兜底),优先级最低。
● 用途:通常作为全局反向代理,转发所有默认请求到主后端服务。
proxy_pass 后端地址细节
proxy_pass 末尾是否带 /,会直接改变转发到后端的 URL 路径,这是后端匹配后 "URL 重构" 的核心,分 2 种场景:
场景 1:proxy_pass 末尾带 / ● 逻辑:转发时,会剔除 location 匹配的路径前缀,将剩余路径拼接在后端地址后。
● 示例:
# location 匹配 /api/,proxy_pass 末尾带 /
location /api/ {
    proxy_pass http://192.168.1.102:9090/;
}

# 实际转发逻辑:
# 客户端请求 http://localhost/api/user/list → 后端接收
# http://192.168.1.102:9090/user/list
场景 2:proxy_pass 末尾不带 / ● 逻辑:转发时,会保留 location 匹配的路径前缀,直接拼接在后端地址后。
● 示例:
# location 匹配 /api/,proxy_pass 末尾不带 /
location /api/ {
    proxy_pass http://192.168.1.102:9090;
}

# 实际转发逻辑:
# 客户端请求 http://localhost/api/user/list → 后端接收
# http://192.168.1.102:9090/api/user/list
综合示例
配置文件
http {
    upstream backend_main { server 192.168.1.200:8080; }
    upstream backend_api { server 192.168.1.201:9090; }
    upstream backend_static { server 192.168.1.202:80; }
    upstream backend_login { server 192.168.1.203:8080; }

    server {
        listen 80;
        server_name localhost;

        # 1. 精确匹配:仅 /login → 后端 login 服务
        location = /login {
            proxy_pass http://backend_login;
            proxy_set_header Host $host;
        }

        # 2. 前缀匹配:/static/ 开头 → 后端静态服务(跳过正则)
        location ^~ /static/ {
            proxy_pass http://backend_static/;
            proxy_set_header Host $host;
        }

        # 3. 正则匹配:图片后缀 → 后端静态服务
        location ~* \.(jpg|png|gif)$ {
            proxy_pass http://backend_static;
            proxy_set_header Host $host;
        }

        # 4. 普通前缀:/api/ 开头 → 后端 api 服务
        location /api/ {
            proxy_pass http://backend_api/;
            proxy_set_header Host $host;
            proxy_set_header X-Real-IP $remote_addr;
        }

        # 5. 兜底匹配:所有未命中的请求 → 主后端服务
        location / {
            proxy_pass http://backend_main;
            proxy_set_header Host $host;
            proxy_set_header X-Real-IP $remote_addr;
        }
    }
}
匹配流程:
| 客户端请求 URL | 命中的 location 规则 | 转发至后端的 URL | 对应后端服务 |
|---|---|---|---|
http://localhost/login |
= /login |
http://192.168.1.203:8080/login |
backend_login |
http://localhost/static/css/main.css |
^~ /static/ |
http://192.168.1.202:80/css/main.css |
backend_static |
http://localhost/img/1.jpg |
`~* .(jpg | png | gif)$` |
http://localhost/api/user/info |
/api/ |
http://192.168.1.201:9090/user/info |
backend_api |
http://localhost/index |
/ |
http://192.168.1.200:8080/index |
backend_main |
反向代理实践环境
环境架构
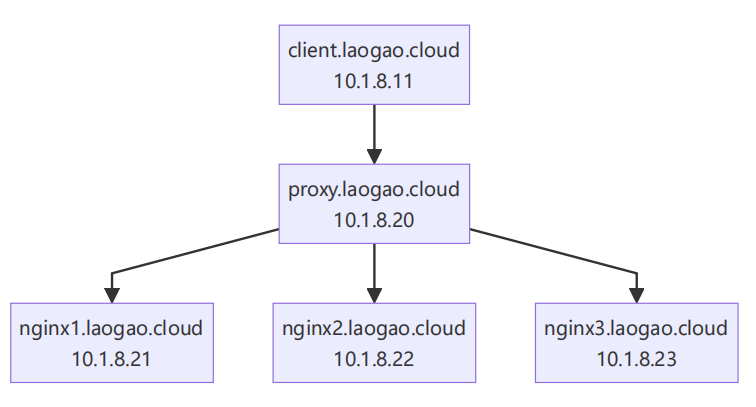
节点规划
使用 centos7 模板克隆下面 5 台:
| 主机名 | IP地址 | 服务器 | 服务器角色 |
|---|---|---|---|
| client.fengkai.cloud | 10.1.8.11 | 客户端 | 测试服务器 |
| proxy.fengkai.cloud | 10.1.8.20 | Nginx 服务器 | 代理服务器 |
| nginx1.fengkai.cloud | 10.1.8.21 | Nginx 服务器 | Web 服务器 |
| nginx2.fengkai.cloud | 10.1.8.22 | Nginx 服务器 | Web 服务器 |
| nginx3.fengkai.cloud | 10.1.8.23 | Nginx 服务器 | Web 服务器 |
基础配置
配置 /etc/hosts
# client
hostnamectl set-hostname client.fengkai.cloud
nmcli connection modify ens33 ipv4.method manual ipv4.addresses 10.1.8.11/24 ipv4.gateway 10.1.8.2 ipv4.dns 10.1.8.2 autoconnect yes
nmcli connection up ens33

# proxy
hostnamectl set-hostname proxy.fengkai.cloud
nmcli connection modify ens33 ipv4.method manual ipv4.addresses 10.1.8.20/24 ipv4.gateway 10.1.8.2 ipv4.dns 10.1.8.2 autoconnect yes
nmcli connection up ens33

# nginx1
hostnamectl set-hostname nginx1.fengkai.cloud
nmcli connection modify ens33 ipv4.method manual ipv4.addresses 10.1.8.21/24 ipv4.gateway 10.1.8.2 ipv4.dns 10.1.8.2 autoconnect yes
nmcli connection up ens33

# nginx2
hostnamectl set-hostname nginx2.fengkai.cloud
nmcli connection modify ens33 ipv4.method manual ipv4.addresses 10.1.8.22/24 ipv4.gateway 10.1.8.2 ipv4.dns 10.1.8.2 autoconnect yes
nmcli connection up ens33

# nginx3
hostnamectl set-hostname nginx3.fengkai.cloud
nmcli connection modify ens33 ipv4.method manual ipv4.addresses 10.1.8.23/24 ipv4.gateway 10.1.8.2 ipv4.dns 10.1.8.2 autoconnect yes
nmcli connection up ens33
配置/etc/hosts
# 所有节点
[root@所有节点 ~]# vim /etc/hosts

127.0.0.1   localhost localhost.localdomain localhost4 localhost4.localdomain4
::1         localhost localhost.localdomain localhost6 localhost6.localdomain6

############ proxy ##################
10.1.8.11 client.fengkai.cloud client
10.1.8.20 www.fengkai.cloud www
10.1.8.20 proxy.fengkai.cloud proxy
10.1.8.21 nginx1.fengkai.cloud nginx1
10.1.8.22 nginx2.fengkai.cloud nginx2
10.1.8.23 nginx3.fengkai.cloud nginx3
后端 nginx 服务器配置
# 除了客户端,所有节点安装nginx并启动nginx服务。
[root@proxy,nginx1,nginx2,nginx3 ~]# wget -O /etc/yum.repos.d/epel.repo http://mirrors.aliyun.com/repo/epel-7.repo
[root@proxy,nginx1,nginx2,nginx3 ~]# yum -y install nginx

# 启动并启用服务
[root@proxy,nginx1,nginx2,nginx3 ~]# systemctl enable nginx --now

# 防火墙设置
[root@proxy,nginx1,nginx2,nginx3 ~]# firewall-cmd --add-service=http --permanent
[root@proxy,nginx1,nginx2,nginx3 ~]# firewall-cmd --add-service=http

# 准备主页-其他节点
[root@nginx1 ~]# echo Welcome to $(hostname) > /usr/share/nginx/html/index.html
[root@nginx2 ~]# echo Welcome to $(hostname) > /usr/share/nginx/html/index.html
[root@nginx3 ~]# echo Welcome to $(hostname) > /usr/share/nginx/html/index.html

# 客户端测试
[root@nginx-client ~]# curl http://nginx1.fengkai.cloud/
Welcome to nginx1.fengkai.cloud

[root@nginx-client ~]# curl http://nginx2.fengkai.cloud/
Welcome to nginx2.fengkai.cloud

[root@nginx-client ~]# curl http://nginx3.fengkai.cloud/
Welcome to nginx3.fengkai.cloud
前端 proxy 服务器配置
# 准备主页-代理节点
[root@proxy ~]# echo Welcome to www.fengkai.cloud > /usr/share/nginx/html/index.html
[root@proxy ~]# mkdir /var/nginx
[root@proxy ~]# echo "Hello, Nginx" > /var/nginx/index.html
[root@proxy ~]# echo "Hello, fengkai" > /var/nginx/test.txt
[root@proxy ~]# cp /usr/share/nginx/html/nginx-logo.png /var/nginx/
[root@proxy ~]# ls /var/nginx/
index.html  nginx-logo.png  test.txt

[root@proxy ~]# vim /etc/nginx/conf.d/proxy.conf

server {
    listen  80;
    server_name www.fengkai.cloud;
    # 匹配根位置
    location / {
        root /var/nginx;
        index index.html;
    }
}

# 重新加载nginx配置
[root@proxy ~]# nginx -s reload
测试:
[root@nginx-client ~]# curl http://www.fengkai.cloud/
Hello, Nginx

[root@nginx-client ~]# curl http://www.fengkai.cloud/test.txt
Hello, fengkai
访问 www.fengkai.cloud/nginx-logo.png,系统会返回以下页面:

思考: 如果在 Nginx 目录中创建一个 test.nn 的文件,通过 www.fengkai.cloud/test.nn 访问该文件时,系统是否会返回对应文件内容?为什么?
答:不可以,因为 "nn" 类型的文件不在 mime.type 中,因此 nginx 无法对该文件进行解析,此时将下载文件到本地。
反向代理基础实践-代理本地
环境准备
[root@proxy ~]# mkdir /var/nginx/nginx{1,2}
[root@proxy ~]# echo "Hello, I'm here /var/nginx/nginx1" > /var/nginx/nginx1/index.html
[root@proxy ~]# echo "Hello, I'm here /var/nginx/nginx2" > /var/nginx/nginx2/index.html

[root@proxy ~]# mkdir /var/nginx{1,2}
[root@proxy ~]# echo "Hello, Nginx1" > /var/nginx1/index.html
[root@proxy ~]# echo "Hello, Nginx2" > /var/nginx2/index.html

[root@proxy ~]# tree /var/nginx*
/var/nginx
├── index.html
├── nginx1
│   └── index.html
├── nginx2
│   └── index.html
├── nginx-logo.png
└── test.txt
/var/nginx1
└── index.html
/var/nginx2
└── index.html

2 directories, 7 files
[root@proxy ~]# \
for path1 in www{1..2}
do
    for path2 in nginx{1..2}
    do
        mkdir -p /var/$path1/$path2
        echo "Hello, I'm here /var/$path1/$path2" > /var/$path1/$path2/index.html
    done
done

[root@proxy ~]# tree /var/www*
/var/www1
├── nginx1
│   └── index.html
└── nginx2
    └── index.html
/var/www2
├── nginx1
│   └── index.html
└── nginx2
    └── index.html

4 directories, 4 files
基本测试
[root@nginx-client ~]# curl http://www.fengkai.cloud/
Hello, Nginx

# 显示结果是目录/var/nginx/nginx1中内容
[root@nginx-client ~]# curl http://www.laogao.cloud/nginx1/
Hello, I'm here /var/nginx/nginx1

# 显示结果是目录/var/nginx/nginx2中内容
[root@nginx-client ~]# curl http://www.laogao.cloud/nginx2/
Hello, I'm here /var/nginx/nginx2
实践1:无符号匹配
[root@proxy ~]# vim /etc/nginx/conf.d/proxy.conf

server {
    listen  80;
    server_name www.fengkai.cloud;
    # 匹配根位置
    location / {
        root /var/nginx;
        index index.html;
    }
    # 匹配/nginx1时,/var目录下找nginx1,完整路径是/var/nginx1
    location /nginx1 {
        root /var;
        # 等效于下面的 alias 语句,必须使用绝对路径
        # alias /var/nginx1;
        index index.html;
    }
}

# 重新加载nginx配置
[root@proxy ~]# nginx -s reload
访问测试:
# nginx1 后面必须添加 / 符号
[root@nginx-client ~]# curl http://www.laogao.cloud/nginx1/
Hello, Nginx1
# 显示结果是目录/var/nginx1中内容

# nginx2 后面必须添加 / 符号
[root@nginx-client ~]# curl http://www.laogao.cloud/nginx2/
Hello, I'm here /var/nginx/nginx2
# 显示结果是目录/var/nginx/nginx2中内容
实验结果: 无符号匹配优先级高于默认的 /。
实践2:正则表达式匹配
[root@proxy ~]# vim /etc/nginx/conf.d/proxy.conf

server {
    listen  80;
    server_name www.fengkai.cloud;
    # 匹配根位置
    location / {
        root /var/nginx;
        index index.html;
    }
    # 匹配/nginx1时,/var目录下找nginx1,完整路径是/var/nginx1
    location /nginx1 {
        root /var;
        # 等效于下面的 alias 语句,必须使用绝对路径
        # alias /var/nginx1;
        index index.html;
    }
    # 正则表达式匹配 /nginx.*
    location ~ /nginx.* {
        root /var/www1;
        index index.html;
    }
}

# 重新加载nginx配置
[root@proxy ~]# nginx -s reload
访问测试:
# nginx1 后面必须添加 / 符号
[root@nginx-client ~]# curl http://www.fengkai.cloud/nginx1/
Hello, I'm here /var/www1/nginx1
# 显示结果是目录/var/www1/nginx1中内容

# nginx2 后面必须添加 / 符号
[root@nginx-client ~]# curl http://www.fengkai.cloud/nginx2/
Hello, I'm here /var/www1/nginx2
# 显示结果是目录/var/www1/nginx2中内容
**实验结果:**正则表达式匹配优先级高于无符号。
实践3:精确匹配
[root@proxy ~]# vim /etc/nginx/conf.d/proxy.conf

server {
    listen  80;
    server_name www.fengkai.cloud;
    # 匹配根位置
    location / {
        root /var/nginx;
        index index.html;
    }
    # 匹配/nginx1时,/var目录下找nginx1,完整路径是/var/nginx1
    location /nginx1 {
        root /var;
        # 等效于下面的 alias 语句,必须使用绝对路径
        # alias /var/nginx1;
        index index.html;
    }
    # 正则表达式匹配 /nginx.*
    location ~ /nginx.* {
        root /var/www1;
        index index.html;
    }
    # 精确匹配
    location = /nginx2/index.html {
        root /var/www2;
        index index.html;
    }
}

# 重新加载nginx配置
[root@proxy ~]# nginx -s reload
访问测试:
# nginx1 后面必须添加 / 符号
[root@nginx-client ~]# curl http://www.fengkai.cloud/nginx1/
Hello, I'm here /var/www1/nginx1
# 显示结果是目录/var/www1/nginx1中内容

# nginx2 后面必须添加 / 符号
[root@nginx-client ~]# curl http://www.fengkai.cloud/nginx2/
Hello, I'm here /var/www2/nginx2
# 显示结果是目录/var/www2/nginx2中内容
**实验结果:**精确匹配优先级高于正则表达式。
反向代理基础实践-代理远端
实践1:无符号匹配
[root@proxy ~]# vim /etc/nginx/conf.d/proxy.conf

server {
    listen  80;
    server_name www.fengkai.cloud;
    # 匹配根位置
    location / {
        root /var/nginx;
        index index.html;
    }
    # 匹配 /nginx1/ 开头,代理到nginx1.fengkai.cloud,/nginx1/不组合到后端服务器
    # 访问 /nginx1/ 开头,相当于直接访问http://nginx1.fengkai.cloud/
    location /nginx1/ {
        # 后端服务
        proxy_pass http://nginx1.fengkai.cloud/;  # 注意:代理后端后面有 /。
        index index.html;
    }
}

# 重新加载nginx配置
[root@proxy ~]# nginx -s reload
访问测试:
# nginx1 后面必须添加 / 符号
[root@nginx-client ~]# curl http://www.fengkai.cloud/nginx1/
Welcome to nginx1.fengkai.cloud
# 显示结果是服务器 nginx1.fengkai.cloud 内容

# nginx2 后面必须添加 / 符号
[root@nginx-client ~]# curl http://www.fengkai.cloud/nginx2/
Hello, I'm here /var/nginx/nginx2
# 显示结果是目录/var/nginx/nginx2中内容
实验结果: 无符号匹配优先级高于默认的 /。
实践2:正则表达式匹配
[root@proxy ~]# vim /etc/nginx/conf.d/proxy.conf

server {
    listen  80;
    server_name www.fengkai.cloud;
    # 匹配根位置
    location / {
        root /var/nginx;
        index index.html;
    }
    # 匹配 /nginx1/ 开头,代理到nginx1.fengkai.cloud,/nginx1/不组合到后端服务器
    # 访问 /nginx1/ 开头,相当于直接访问http://nginx1.fengkai.cloud/
    location /nginx1/ {
        # 后端服务
        proxy_pass http://nginx1.fengkai.cloud/;  # 注意:代理后端后面有 /。
        index index.html;
    }
    # 正则表达式匹配 /nginx.*
    location ~ /nginx[12].* {
        # 手动重写路径:去掉 /nginx 前缀,转发到目标服务器
        # ^/nginx[12](.*)$ 匹配 /nginx[12] 开头的完整路径,$1表示 /nginx[12] 后的所有内容
        # break 表示重写后不再匹配其他 rewrite 规则
        rewrite ^/nginx[12](.*)$ $1 break;
        # proxy_pass 不带 URI(无末尾的 /),配合 rewrite 实现路径替换
        proxy_pass http://nginx2.fengkai.cloud;
        index index.html;
    }
}

# 重新加载nginx配置
[root@proxy ~]# nginx -s reload
访问测试:
# nginx 后面必须添加 / 符号
[root@nginx-client ~]# curl http://www.fengkai.cloud/nginx1/
Welcome to nginx2.fengkai.cloud
# 显示结果是服务器 nginx2.fengkai.cloud 内容

# nginx 后面必须添加 / 符号
[root@nginx-client ~]# curl http://www.fengkai.cloud/nginx2/
Welcome to nginx2.fengkai.cloud
# 显示结果是服务器 nginx2.fengkai.cloud 内容
**实验结果:**正则表达式匹配优先级高于无符号。
实践3:精确匹配
[root@proxy ~]# vim /etc/nginx/conf.d/proxy.conf

server {
    listen  80;
    server_name www.fengkai.cloud;
    # 匹配根位置
    location / {
        root /var/nginx;
        index index.html;
    }
    # 匹配 /nginx1/ 开头,代理到nginx1.fengkai.cloud,/nginx1/不组合到后端服务器
    # 访问 /nginx1/ 开头,相当于直接访问http://nginx1.fengkai.cloud/
    location /nginx1/ {
        # 后端服务
        proxy_pass http://nginx1.fengkai.cloud/;  # 注意:代理后端后面有 /。
        index index.html;
    }
    # 正则表达式匹配 /nginx.*
    location ~ /nginx[12].* {
        # 手动重写路径:去掉 /nginx 前缀,转发到目标服务器
        # ^/nginx[12](.*)$ 匹配 /nginx[12] 开头的完整路径,$1表示 /nginx[12] 后的所有内容
        # break 表示重写后不再匹配其他 rewrite 规则
        rewrite ^/nginx[12](.*)$ $1 break;
        # proxy_pass 不带 URI(无末尾的 /),配合 rewrite 实现路径替换
        proxy_pass http://nginx2.fengkai.cloud;
        index index.html;
    }
    # 精确匹配
    location = /nginx1/ {
        proxy_pass http://nginx1.fengkai.cloud/;
        index index.html;
    }
}

# 重新加载nginx配置
[root@proxy ~]# nginx -s reload
访问测试:
# nginx1 后面必须添加 / 符号
[root@nginx-client ~]# curl http://www.fengkai.cloud/nginx1/
Welcome to nginx1.fengkai.cloud
# 显示结果是服务器 nginx1.fengkai.cloud 内容

# nginx2 后面必须添加 / 符号
[root@nginx-client ~]# curl http://www.fengkai.cloud/nginx2/
Welcome to nginx2.fengkai.cloud
# 显示结果是服务器 nginx2.fengkai.cloud 内容
**实验结果:**精确匹配优先级高于正则表达式。
负载均衡-七层
Nginx 反向代理支持七层 http/https 代理和四层 TCP/UDP 代理。
通过 Nginx 反向代理实现 Nginx 服务器负载均衡。
代理服务器配置
# 配置nginx
[root@proxy ~]# vim /etc/nginx/conf.d/proxy.conf

server {
    listen  80;
    server_name www.fengkai.cloud;
    location / {
        proxy_pass http://backends/;
    }
}

upstream backends {
    server nginx1.fengkai.cloud:80;
    server nginx2.fengkai.cloud:80;
    server nginx3.fengkai.cloud:80;
}

# 重新加载nginx配置
[root@proxy ~]# nginx -s reload

# 防火墙设置
[root@proxy ~]# firewall-cmd --add-service=http --permanent
[root@proxy ~]# firewall-cmd --add-service=http
测试:
[root@client ~]# for n in {1..90}; do curl http://10.1.8.20 -s; done | sort |uniq -c
30 Welcome to nginx1.fengkai.cloud
30 Welcome to nginx2.fengkai.cloud
30 Welcome to nginx3.fengkai.cloud
负载均衡-upstream
Nginx 的 upstream 模块声明一组可以被 proxy_pass 和 fastcgi_pass 引用的服务器。这些服务器既可以使用不同的端口,也可以使用 Unix Socket。这些服务器可被赋予了不同的权重、不同的类型甚至可以基于维护等原因被标记为 down。
upstream 语法:
upstream name {
    ....
}
例如:
upstream backend {
    server backend1.example.com weight=5 down backup;
    server 127.0.0.1:8080 max_fails=3 fail_timeout=30s;
    server unix:/tmp/backend2;
}
upstream 模块常用的指令有:
● keepalive --- 每个 worker 进程为发送到 upstream 服务器的连接所缓存的个数。
● server --- 定义一个 upstream 服务器的地址,还可包括一系列可选参数。
○ weight:权重,默认值为1;
○ max_fails:最大失败连接次数,失败连接的超时时长由 fail_timeout 指定;
○ fail_timeout:等待请求的目标服务器发送响应的时长;
○ backup:用于 fallback 的目的,所有服务均故障时才启动此服务器;
○ down:手动标记其不再处理任何请求;
示例:
upstream backends {
keepalive 32;
server nginx1.laogao.cloud:80 max_fails=3 fail_timeout=30s;
server nginx2.laogao.cloud:80 max_fails=3 fail_timeout=30s weight=2;
server nginx3.laogao.cloud:80 max_fails=3 fail_timeout=30s backup;
server nginx4.laogao.cloud:80 max_fails=3 fail_timeout=30s down;
}
upstream 模块调度算法一般分为两类:
● 静态调度算法,即负载均衡器根据自身设定的规则进行分配,不需要考虑后端节点服务器的情况。例如:rr、ip_hash 等都属于静态调度算法。
● 动态调度算法,即负载均衡器会根据后端节点的当前状态来决定是否分发请求,例如:连接数少(least_conn)的服务器优先获得请求,响应时间短(least_time)的服务器优先获得请求。
轮询(round-robin)
nginx 默认的调度算法,按客户端请求顺序把客户端的请求逐一分配到不同的后端节点服务器。如果后端节点服务器宕机(默认情况下 Nginx 只检测80端口),宕机的服务器会被自动从节点服务器池中剔除,以使客户端的用户访问不受影响。新的请求会分配给正常的服务器。
示例:
[root@proxy ~]# vim /etc/nginx/conf.d/proxy.conf

upstream backends {
    server nginx1.fengkai.cloud:80;
    server nginx2.fengkai.cloud:80;
    server nginx3.fengkai.cloud:80;
}
测试结果:
[root@client ~]# for i in {1..60}; do curl http://www.fengkai.cloud -s; done |sort |uniq -c
20 Welcome to nginx1.fengkai.cloud
20 Welcome to nginx2.fengkai.cloud
20 Welcome to nginx3.fengkai.cloud
权重(weight)
还可以在 rr 轮询算法的基础上为服务器加上权重 。权重和用户访问成正比,权重值越大,被转发的请求也就越多。可以根据服务器的配置和性能指定权重值大小,有效解决新旧服务器性能不均带来的请求分配问题。在配置的 nginx 后面加个 weight=number,number 值越高,分配的概率越大。
示例:
[root@proxy ~]# vim /etc/nginx/conf.d/proxy.conf

upstream backends {
    server nginx1.fengkai.cloud:80 weight=10;
    server nginx2.fengkai.cloud:80 weight=20;
    server nginx3.fengkai.cloud:80 weight=30;
}

[root@proxy ~]# nginx -s reload
测试结果:
[root@client ~]# for i in {1..60}; do curl http://www.fengkai.cloud -s; done |sort |uniq -c
10 Welcome to nginx1.fengkai.cloud
20 Welcome to nginx2.fengkai.cloud
30 Welcome to nginx3.fengkai.cloud
IP哈希(ip_hash)
每个请求按客户端 IP 的 hash 结果分配。当新的请求到达时,先将其客户端 IP 通过哈希算法哈希出一个值,在随后的客户端请求中,客户 IP 的哈希值只要相同,就会被分配至同一台服务器。
该调度算法可以解决动态网页的 session 共享问题,但有时会导致请求分配不均,即无法保证1:1的负载均衡,因为在国内大多数公司都是 NAT 上网模式,多个客户端会对应一个外部 IP,所以这些客户端都会被分配到同一节点服务器,从而导致请求分配不均。
LVS 负载均衡的 -p 参数、Keepalived 配置里的 persistence_timeout 50 参数都类似这个 Nginx 里的 ip_hash 参数,其功能都可以解决动态网页的 session 共享问题。
示例:
[root@proxy ~]# vim /etc/nginx/conf.d/proxy.conf

upstream backends {
    ip_hash;
    server nginx1.fengkai.cloud:80;
    server nginx2.fengkai.cloud:80;
    server nginx3.fengkai.cloud:80;
}

[root@proxy ~]# nginx -s reload
测试结果:
[root@client ~]# for i in {1..60}; do curl http://www.fengkai.cloud -s; done |sort |uniq -c
60 Welcome to nginx2.fengkai.cloud
通用哈希(generic Hash)
请求发送到的服务器由用户定义的键确定,该键可以是文本字符串、变量或组合。例如,密钥可以是配对的源 IP 地址和端口,或者是 URI。
在 upstream 中加入 hash 语句,nginx 语句中不能写入 weight 等其他的参数,hash_method 使用的是 hash 算法。url_hash 按访问 URL 的 hash 结果来分配请求,使每个 URL 定向到同一个后端服务器,可以进一步提高后端缓存服务器的效率命中率。
Nginx 本身是不支持 url_hash 的,如果需要使用这种调度算法,必须安装 Nginx 的 hash 模块软件包。
示例:
[root@proxy ~]# vim /etc/nginx/conf.d/proxy.conf

upstream backends {
    hash $request_uri;
    #hash_method crc32;
    server nginx1.fengkai.cloud:80;
    server nginx2.fengkai.cloud:80;
    server nginx3.fengkai.cloud:80;
}

[root@proxy ~]# nginx -s reload
测试结果:
[root@client ~]# for i in {1..60}; do curl http://www.fengkai.cloud -s; done |sort |uniq -c
60 Welcome to nginx3.fengkai.cloud
最少连接数(least_conn)
最少连接数,将请求分发给后端节点服务器连接数最少的那个机器。最少连接数也支持权重。
[root@proxy ~]# vim /etc/nginx/conf.d/proxy.conf

upstream backends {
    least_conn;
    server nginx1.fengkai.cloud:80;
    server nginx2.fengkai.cloud:80;
    server nginx3.fengkai.cloud:80;
}

[root@proxy ~]# nginx -s reload
测试结果:
[root@client ~]# for i in {1..60}; do curl http://www.fengkai.cloud -s; done |sort |uniq -c
20 Welcome to nginx1.fengkai.cloud
20 Welcome to nginx2.fengkai.cloud
20 Welcome to nginx3.fengkai.cloud
最少连接数也支持权重。
最少时间(Least Time)
Least Time(仅限 NGINX Plus),对于每个请求,NGINX Plus 选择具有最低平均延迟和最少活动连接数的服务器,其中最低平均延迟是根据 least_time 指令中包含的以下参数来计算的:
● header --- 从服务器接收第一个字节的时间。
● last_byte --- 从服务器接收完整响应的时间。
● last_byte inflight --- 从服务器接收完整响应的时间,考虑到不完整的请求。
示例:
[root@proxy ~]# vim /etc/nginx/conf.d/proxy.conf

upstream backends {
    least_time header;
    server nginx1.fengkai.cloud:80;
    server nginx2.fengkai.cloud:80;
    server nginx3.fengkai.cloud:80;
}

[root@proxy ~]# nginx -s reload
调度算法总结
| 算法 | 配置写法 | 核心逻辑 | 使用场景 | 特点 |
|---|---|---|---|---|
| 轮询 round-robin(默认) | 不写任何策略 | 请求依次分配给后端服务器 | 后端性能差不多,无会话保持需求 | 默认策略,请求逐个轮转;后端故障自动剔除;不做会话绑定 |
| 权重 weight | server x weight=N; |
按权重比例分配流量 | 后端机器性能不一样,性能好的多承担流量 | 权重越大分到请求越多;权重仅轮询模式生效;ip_hash 模式 weight 无效 |
| ip_hash | ip_hash; |
根据客户端 TCP 源 IP 哈希,同一个 IP 永远落到同一台后端 | 需要会话保持,无前置代理 | 基于 TCP 源 IP,不读取 http 头;前面有 SLB/CDN 会全部打到同一台;不支持 backup 节点 |
| 通用哈希 generic hash | hash $变量 [consistent]; |
自定义变量做哈希(ip、cookie、header、url 等) | 需要基于 cookie、url 做会话绑定;前置代理环境 | nginx 1.7.2+;加 consistent 开启一致性哈希,后端上下线流量抖动变小 |
| 最少连接 least_conn | least_conn; |
把请求分给当前活跃连接数最少的后端 | 后端处理请求耗时差异大,长连接场景 | 优先找连接数少的机器;weight 权重依然生效 |
| 最少时间 least_time | least_time header; |
分配给响应时间最短的后端 | Nginx-Plus 商业版,根据历史响应速度调度 | 开源 Nginx 没有,根据后端历史响应速度择优分配 |
快速记忆口诀:
● 轮询:挨个来(默认)
● weight:能力强多干活
● ip_hash:同一个 IP 锁一台后端(TCP 源 IP)
● hash:想拿什么就哈希什么(cookie/header/url),consistent 保稳定
● least_conn:谁闲分给谁(看活跃连接)
● least_time:谁响应快分给谁(商业版)