Kubernetes 实战笔记(一):Pod 管理与 kubectl 核心命令
环境说明
项目 版本/参数 Kubernetes v1.35.7(kubeadm 部署) 集群拓扑 1 Master(172.25.254.100)+ 2 Node(k8s-node1 / k8s-node2) 网络插件 flannel 镜像仓库 reg.timinglee.org(Harbor,library 项目) 测试镜像 myapp:v1 / myapp:v2(nginx 衍生测试镜像)
一、命令式对象管理
命令式管理即直接通过 kubectl 命令操作对象,适合快速验证场景。
1. 命名空间管理
bash
# 查看命名空间
[root@k8s-master ~]# kubectl get namespaces
NAME              STATUS   AGE
default           Active   4h20m
kube-flannel      Active   3h31m
kube-node-lease   Active   4h20m
kube-public       Active   4h20m
kube-system       Active   4h20m

# 创建命名空间
[root@k8s-master ~]# kubectl create namespaces timinglee
namespace/timinglee created

# 删除命名空间(其中所有资源一并删除)
[root@k8s-master ~]# kubectl delete namespaces timinglee
namespace "timinglee" deleted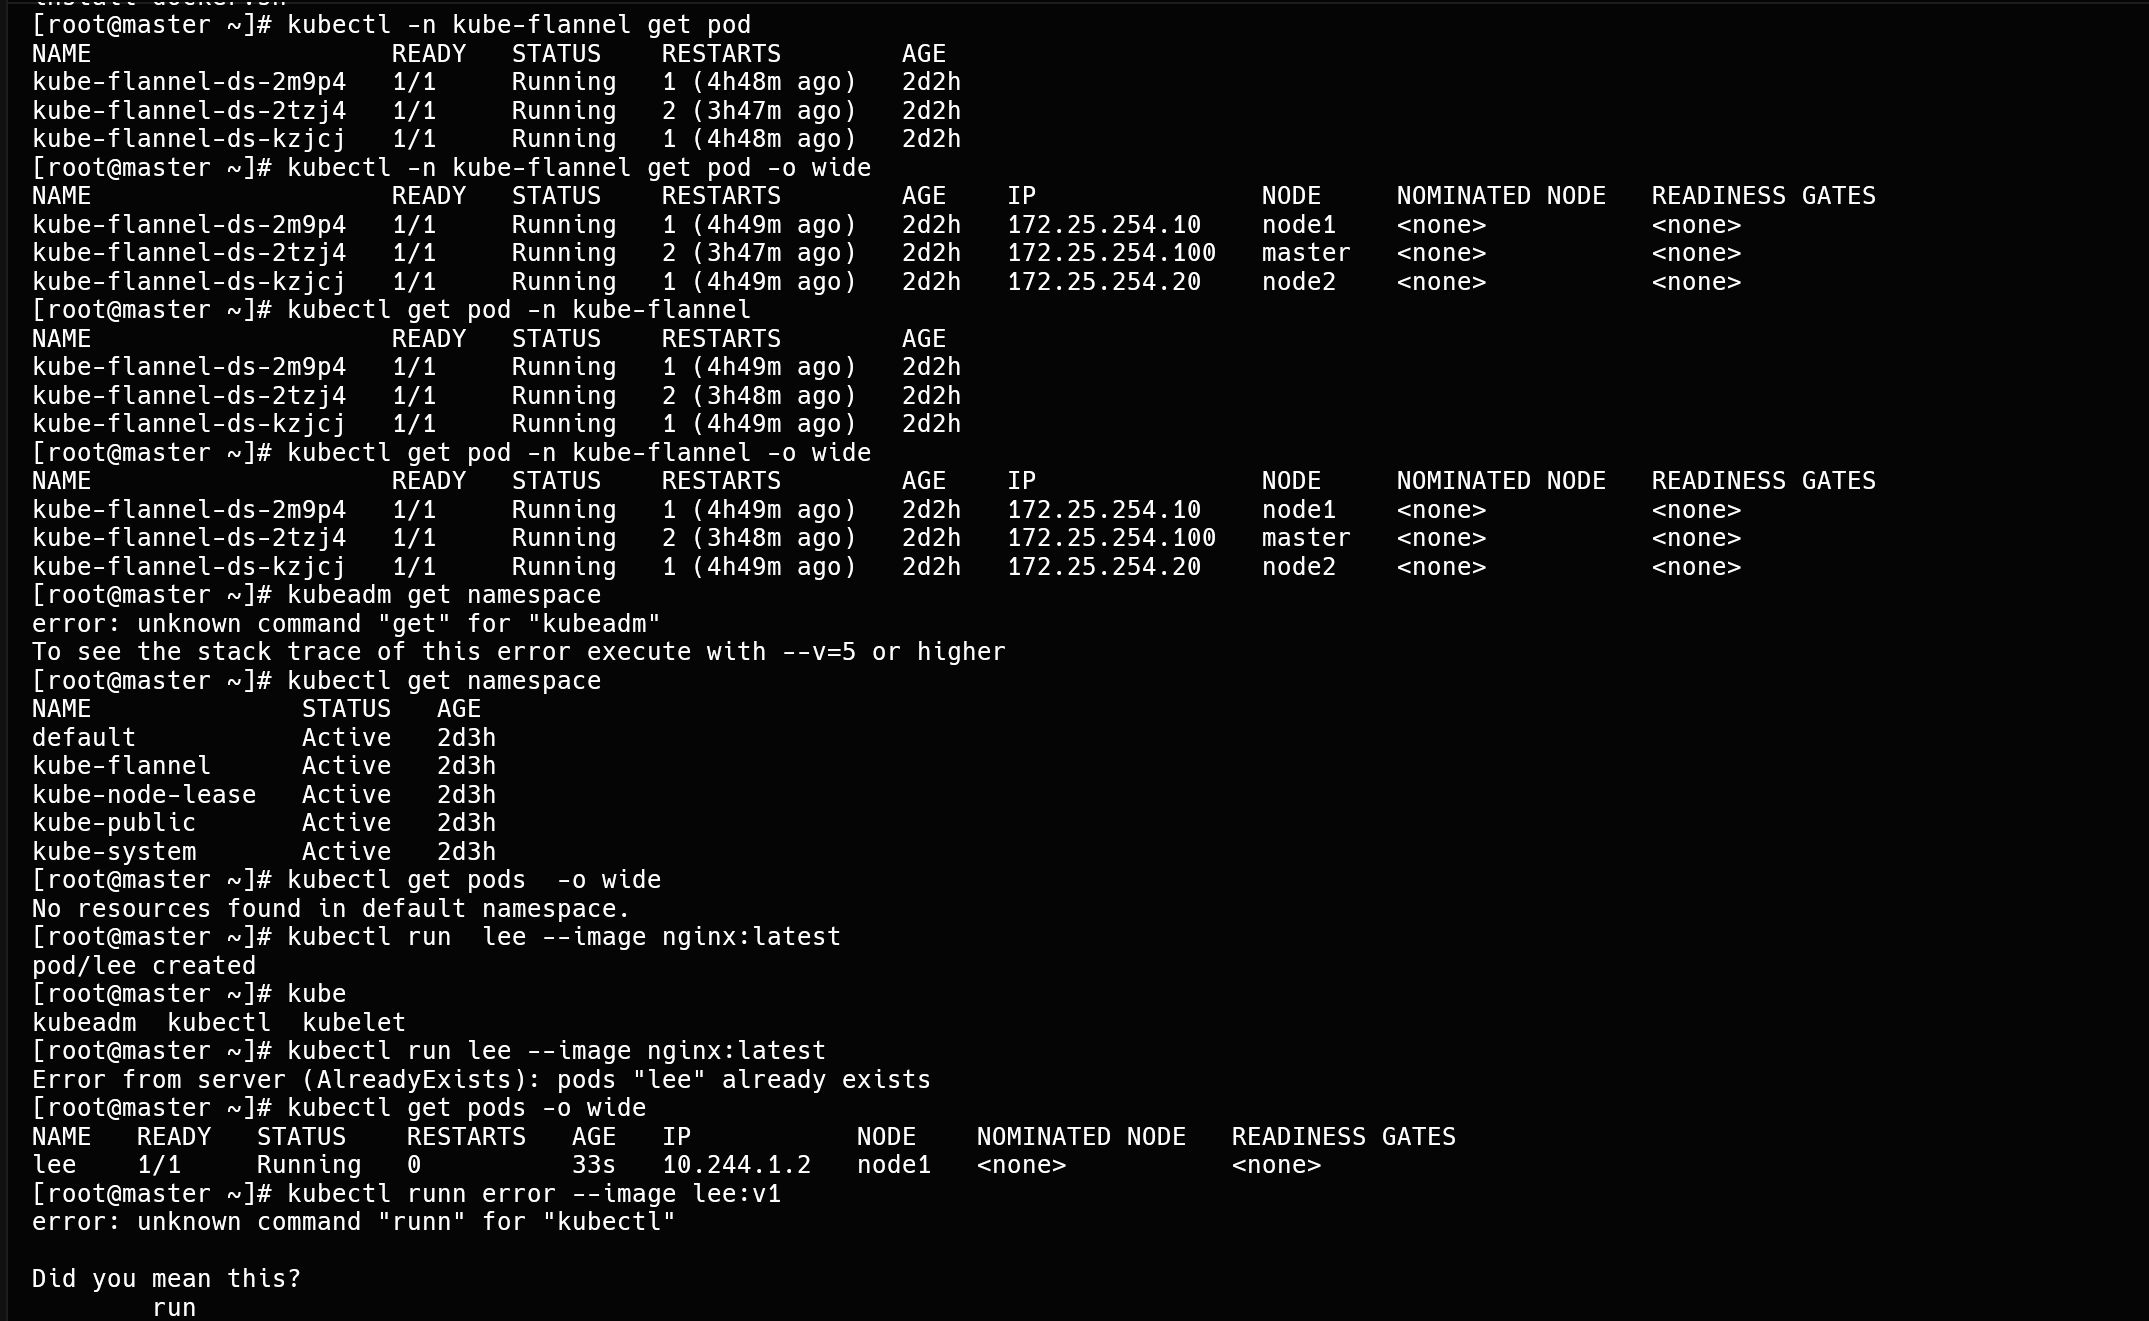
2. Pod 管理
bash
# 查看 pod 运行情况及所在节点
[root@k8s-master ~]# kubectl get pods -o wide
No resources found in default namespace.

# 创建 pod
[root@k8s-master ~]# kubectl run lee --image nginx:latest
pod/lee created

[root@k8s-master ~]# kubectl get pods -o wide
NAME   READY   STATUS    RESTARTS   AGE   IP            NODE        NOMINATED NODE   READINESS GATES
lee    1/1     Running   0          25s   10.244.1.10   k8s-node1   <none>           <none>

# 创建一个镜像不存在的 pod 复现异常
[root@k8s-master ~]# kubectl run error --image lee:v1
[root@k8s-master ~]# kubectl get pods -o wide
NAME    READY   STATUS             RESTARTS   AGE   IP            NODE        NOMINATED NODE   READINESS GATES
error   0/1     ImagePullBackOff   0          38s   10.244.2.3    k8s-node2   <none>           <none>
lee     1/1     Running            0          91s   10.244.1.10   k8s-node1   <none>           <none>
ImagePullBackOff 表示镜像拉取失败并处于退避重试状态。通过 describe 查看 Events 定位原因:
bash
[root@k8s-master ~]# kubectl describe pods error
Name:             error
Namespace:        default
Priority:         0
Service Account:  default
Node:             k8s-node2/172.25.254.20
Status:           Pending
IP:               10.244.2.3
Containers:
  error:
    Image:          lee:v1
    State:          Waiting
      Reason:       ImagePullBackOff
    Ready:          False
Conditions:
  Type                        Status
  PodReadyToStartContainers   True
  Initialized                 True
  Ready                       False
  ContainersReady             False
  PodScheduled                True
Events:
  Type     Reason     Age                From               Message
  ----     ------     ----               ----               -------
  Normal   Scheduled  87s                default-scheduler  Successfully assigned default/error to k8s-node2
  Warning  Failed     28s (x2 over 65s)  kubelet            spec.containers{error}: Failed to pull image "lee:v1": Error response from daemon: failed to resolve reference "docker.io/library/lee:v1": docker.io/library/lee:v1: not found
  Warning  Failed     28s (x2 over 65s)  kubelet            spec.containers{error}: Error: ErrImagePull
  Normal   BackOff    16s (x2 over 64s)  kubelet            spec.containers{error}: Back-off pulling image "lee:v1"
Events 中明确显示失败原因:docker.io/library/lee:v1: not found,镜像不存在。
bash
# 删除 pod
[root@k8s-master ~]# kubectl delete pods error
pod "error" deleted from default namespace

# 删除全部 pod
[root@k8s-master ~]# kubectl delete pods --all
pod "lee" deleted from default namespace
二、kubectl 命令实操
0. 准备:上传实验镜像到 Harbor 的 library 项目
bash
[root@k8s-master ~]# docker load -i myapp.tar.gz
[root@k8s-master ~]# docker tag timinglee/myapp:v1 reg.timinglee.org/library/myapp:v1
[root@k8s-master ~]# docker push reg.timinglee.org/library/myapp:v1
[root@k8s-master ~]# docker tag timinglee/myapp:v2 reg.timinglee.org/library/myapp:v2
[root@k8s-master ~]# docker push reg.timinglee.org/library/myapp:v2
后续实验统一使用 myapp:v1 与 myapp:v2 两个镜像。
1. 用 YAML 描述一个 ReplicaSet(声明式的雏形)
bash
[root@k8s-master ~]# vim replica.yml
apiVersion: apps/v1
kind: ReplicaSet
metadata:
  labels:
    app: replica	# 设定控制器标签
  name: replica
spec:
  replicas: 2		# 启动 pod 数量
  selector:
    matchLabels:
      app: replica	# 控制器标签选择器
  template:
    metadata:
      labels:
        app: replica	# 开启 pod 的属性模板
    spec:
      containers:
      - image: myapp:v1
name: myapp三个关键字段:metadata.labels(控制器自身标签)、selector.matchLabels(控制器靠它关联 pod)、template(pod 模板,其中的标签必须能被 selector 匹配到)。
2. create ------ 创建资源
bash
[root@k8s-master ~]# kubectl create deployment webcluster --replicas 2 --image myapp:v1
deployment.apps/webcluster created

[root@k8s-master ~]# kubectl get deployments.apps
NAME         READY   UP-TO-DATE   AVAILABLE   AGE
webcluster   2/2     2            2           15s

[root@k8s-master ~]# kubectl get pods
NAME                          READY   STATUS    RESTARTS   AGE
webcluster-77c87d9946-28thm   1/1     Running   0          24s
webcluster-77c87d9946-vwrsq   1/1     Running   0          24s

[root@k8s-master ~]# kubectl delete deployments.apps webcluster
deployment.apps/webcluster deleted
3. edit ------ 在线编辑修改
bash
[root@k8s-master ~]# kubectl create deployment webcluster --image myapp:v1
[root@k8s-master ~]# kubectl get pods
NAME                          READY   STATUS    RESTARTS   AGE
webcluster-77c87d9946-2cgr7   1/1     Running   0          36s

# 将 spec.replicas 由 1 改为 2 后保存退出
[root@k8s-master ~]# kubectl edit deployments.apps webcluster
  replicas: 2

[root@k8s-master ~]# kubectl get pods
NAME                          READY   STATUS    RESTARTS   AGE
webcluster-77c87d9946-2cgr7   1/1     Running   0          36s
webcluster-77c87d9946-2wqn7   1/1     Running   0          103s
4. patch ------ 局部字段修改
bash
[root@k8s-master ~]# kubectl patch deployments.apps webcluster -p '{"spec":{"replicas":1}}'
deployment.apps/webcluster patched

[root@k8s-master ~]# kubectl get pods
NAME                          READY   STATUS    RESTARTS   AGE
webcluster-77c87d9946-2wqn7   1/1     Running   0          6m20s
edit 打开完整清单,patch 只改动指定字段,脚本化运维首选 patch。
5. expose ------ 发布服务
bash
[root@k8s-master ~]# kubectl expose deployment webcluster --port 80 --target-port 80
service/webcluster exposed

[root@k8s-master ~]# kubectl get service
NAME         TYPE        CLUSTER-IP     EXTERNAL-IP   PORT(S)   AGE
kubernetes   ClusterIP   10.96.0.1      <none>        443/TCP   6h
webcluster   ClusterIP   10.97.61.108   <none>        80/TCP    18s

[root@k8s-master ~]# kubectl describe svc webcluster
Name:                     webcluster
Namespace:                default
Labels:                   app=webcluster
Selector:                 app=webcluster
Type:                     ClusterIP
IP:                       10.97.61.108
Port:                     <unset>  80/TCP
TargetPort:               80/TCP
Endpoints:                10.244.1.11:80,10.244.5.10:80,10.244.5.9:80 + 1 more...
Session Affinity:         None

# Service 对后端 pod 做负载均衡
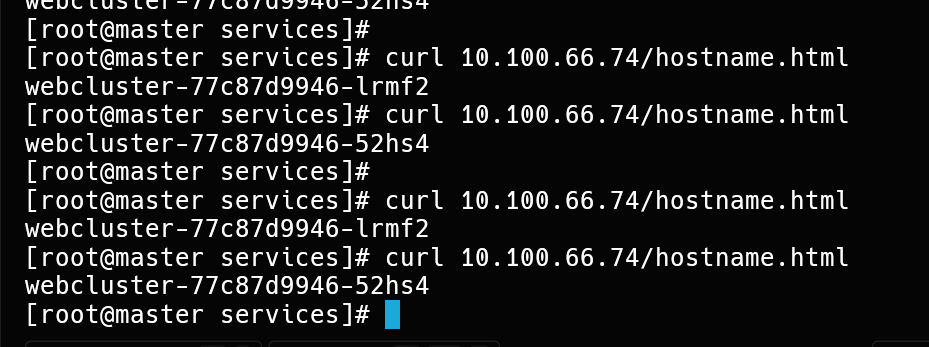
[root@k8s-master ~]# curl 10.97.61.108/hostname.html
webcluster-77c87d9946-gh9v7
[root@k8s-master ~]# curl 10.97.61.108/hostname.html
webcluster-77c87d9946-m69wl
[root@k8s-master ~]# curl 10.97.61.108/hostname.html
webcluster-77c87d9946-2wqn7
多次访问返回不同 pod 名,证明 Service 按 Endpoints 列表轮询分发流量。
6. logs ------ 查看容器日志
bash
[root@k8s-master ~]# kubectl logs pods/webcluster-77c87d9946-gh9v7
10.244.0.0 - - [20/Aug/2026:08:43:52 +0000] "GET /hostname.html HTTP/1.1" 200 28 "-" "curl/7.76.1" "-"
10.244.0.0 - - [20/Aug/2026:08:43:52 +0000] "GET /hostname.html HTTP/1.1" 200 28 "-" "curl/7.76.1" "-"
7. attach ------ 连接容器标准输入输出
bash
# 准备 busybox 镜像
[root@k8s-master ~]# docker load -i busybox-latest.tar.gz
Loaded image: busybox:latest
[root@k8s-master ~]# docker tag busybox:latest reg.timinglee.org/library/busybox:latest

# 以交互方式创建 pod
[root@k8s-master ~]# kubectl run -it testpod --image busybox:latest
If you don't see a command prompt, try pressing enter.
/ #
/ # 		<ctrl+p + ctrl+q> 退出但不关闭容器

[root@k8s-master ~]# kubectl get pods
NAME      READY   STATUS    RESTARTS   AGE
testpod   1/1     Running   0          55s

# attach 重新连接到同一容器的输入输出流
[root@k8s-master ~]# kubectl attach pods/testpod -it
If you don't see a command prompt, try pressing enter.
/ #
exec 是新开一个进程进入容器;attach 是重新接入容器 PID 1 的主进程,退出方式不同(attach 直接 exit 会结束主进程导致容器重建)。
8. exec ------ 在容器内执行命令
bash
[root@k8s-master ~]# kubectl run testpod --image nginx:latest
pod/testpod created

[root@k8s-master ~]# kubectl exec -it pods/testpod -c testpod -- /bin/bash
root@testpod:/#
多容器 pod 必须用 -c 指定容器名。
9. cp ------ 宿主机与容器间拷贝文件
bash
# 从容器拷出文件
[root@k8s-master ~]# kubectl cp testpod:/usr/share/nginx/html/index.html /mnt/test
tar: Removing leading `/' from member names

# 从容器拷出整个目录
[root@k8s-master ~]# kubectl cp testpod:/usr/share/nginx/html /mnt/
tar: Removing leading `/' from member names

# 修改后拷回容器
[root@k8s-master ~]# echo timinglee > /mnt/index.html
[root@k8s-master ~]# kubectl cp /mnt/index.html testpod:/usr/share/nginx/html/index.html

# 验证生效
[root@k8s-master ~]# kubectl get pods -o wide
NAME      READY   STATUS    RESTARTS   AGE    IP            NODE        NOMINATED NODE   READINESS GATES
testpod   1/1     Running   0          6m3s   10.244.1.12   k8s-node1   <none>           <none>
[root@k8s-master ~]# curl 10.244.1.12
timinglee
10. rollout ------ 部署状态与重启
bash
# 生成 deployment 的 yaml 并应用
[root@k8s-master pod]# kubectl create deployment webcluster --image myapp:v1 --replicas 2 --dry-run=client -o yaml > webcluster.yml
apiVersion: apps/v1
kind: Deployment
metadata:
  labels:
    app: webcluster
  name: webcluster
spec:
  replicas: 2
  selector:
    matchLabels:
      app: webcluster
  template:
    metadata:
      labels:
        app: webcluster
    spec:
      containers:
      - image: myapp:v1
        name: myapp

[root@k8s-master pod]# kubectl apply -f webcluster.yml

# 查看滚动更新状态
[root@k8s-master pod]# kubectl rollout status deployment webcluster
deployment "webcluster" successfully rolled out

# 滚动重启:逐个替换旧 pod,不中断服务
[root@k8s-master pod]# kubectl rollout restart deployment webcluster
deployment.apps/webcluster restarted

[root@k8s-master pod]# kubectl get pods
NAME                          READY   STATUS              RESTARTS   AGE
webcluster-7bfd865747-jmhwl   1/1     Running             0          19s
webcluster-9787d97f6-zl6q2    1/1     Running             0          1s
webcluster-9787d97f6-z7xv5    0/1     ContainerCreating   0          0s
新旧两组 pod-template-hash 同时存在,正是滚动更新的过程体现。
11. scale ------ 手动扩缩容
bash
[root@k8s-master pod]# kubectl scale deployment webcluster --replicas 4
deployment.apps/webcluster scaled

[root@k8s-master pod]# kubectl get pods
NAME                         READY   STATUS    RESTARTS   AGE
webcluster-9787d97f6-bh796   1/1     Running   0          2s
webcluster-9787d97f6-bh8jd   1/1     Running   0          2s
webcluster-9787d97f6-z7xv5   1/1     Running   0          89s
webcluster-9787d97f6-zl6q2   1/1     Running   0          88s

[root@k8s-master pod]# kubectl scale deployment webcluster --replicas 1
deployment.apps/webcluster scaled
12. label ------ 标签管理
bash
# 查看标签
[root@k8s-master pod]# kubectl get pods --show-labels
NAME                         READY   STATUS    RESTARTS   AGE     LABELS
webcluster-9787d97f6-zl6q2   1/1     Running   0          6m57s   app=webcluster,pod-template-hash=9787d97f6

# 删除标签(键后面加减号)
[root@k8s-master pod]# kubectl label pods webcluster-9787d97f6-zl6q2 app-
pod/webcluster-9787d97f6-zl6q2 unlabeled

# 添加/覆盖标签
[root@k8s-master pod]# kubectl label pods webcluster-9787d97f6-zl6q2 app=webcluster
pod/webcluster-9787d97f6-zl6q2 labeled
标签是 K8s 中一切关联关系的基石:控制器靠 selector 匹配 pod,Service 靠 selector 转发流量。
三、利用控制器实现版本更替
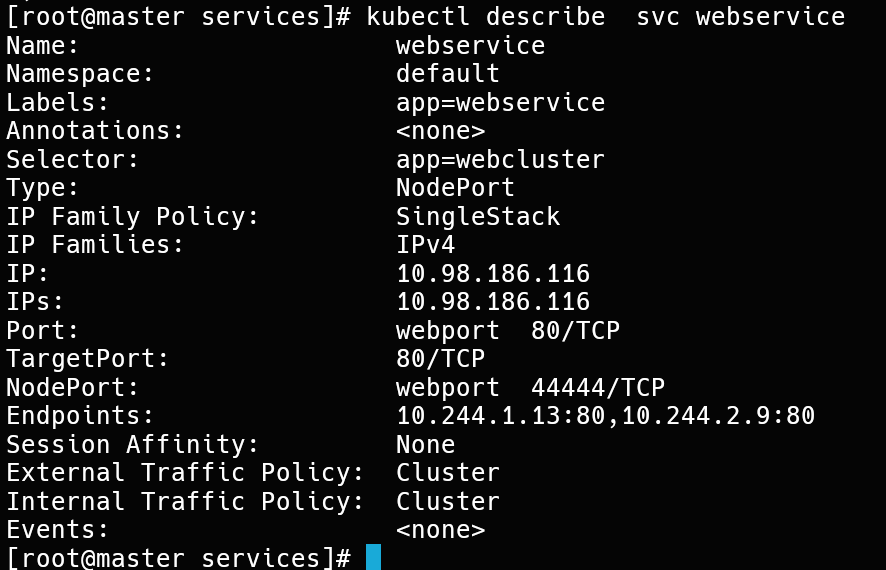
1. 建立控制器并通过 NodePort 发布
bash
[root@k8s-master ~]# kubectl create deployment webcluster --image myapp:v1 --replicas 2 --dry-run=client -o yaml > webcluster.yml
[root@k8s-master ~]# kubectl apply -f webcluster.yml

[root@k8s-master ~]# kubectl rollout history deployment webcluster
deployment.apps/webcluster
REVISION  CHANGE-CAUSE
1         <none>

# 以 NodePort 类型对外发布
[root@k8s-master ~]# kubectl expose deployment webcluster --port 80 --target-port 80 --type NodePort

[root@k8s-master ~]# kubectl get svc
NAME         TYPE        CLUSTER-IP   EXTERNAL-IP   PORT(S)        AGE
kubernetes   ClusterIP   10.96.0.1    <none>        443/TCP        24h
webcluster   NodePort    10.99.3.32   <none>        80:30713/TCP   2m54s

# 集群外访问任意节点 IP:30713
[Administrator.DESKTOP-VJ307M3] ➤ curl http://172.25.254.100:30713/hostname.html
webcluster-77c87d9946-2xl44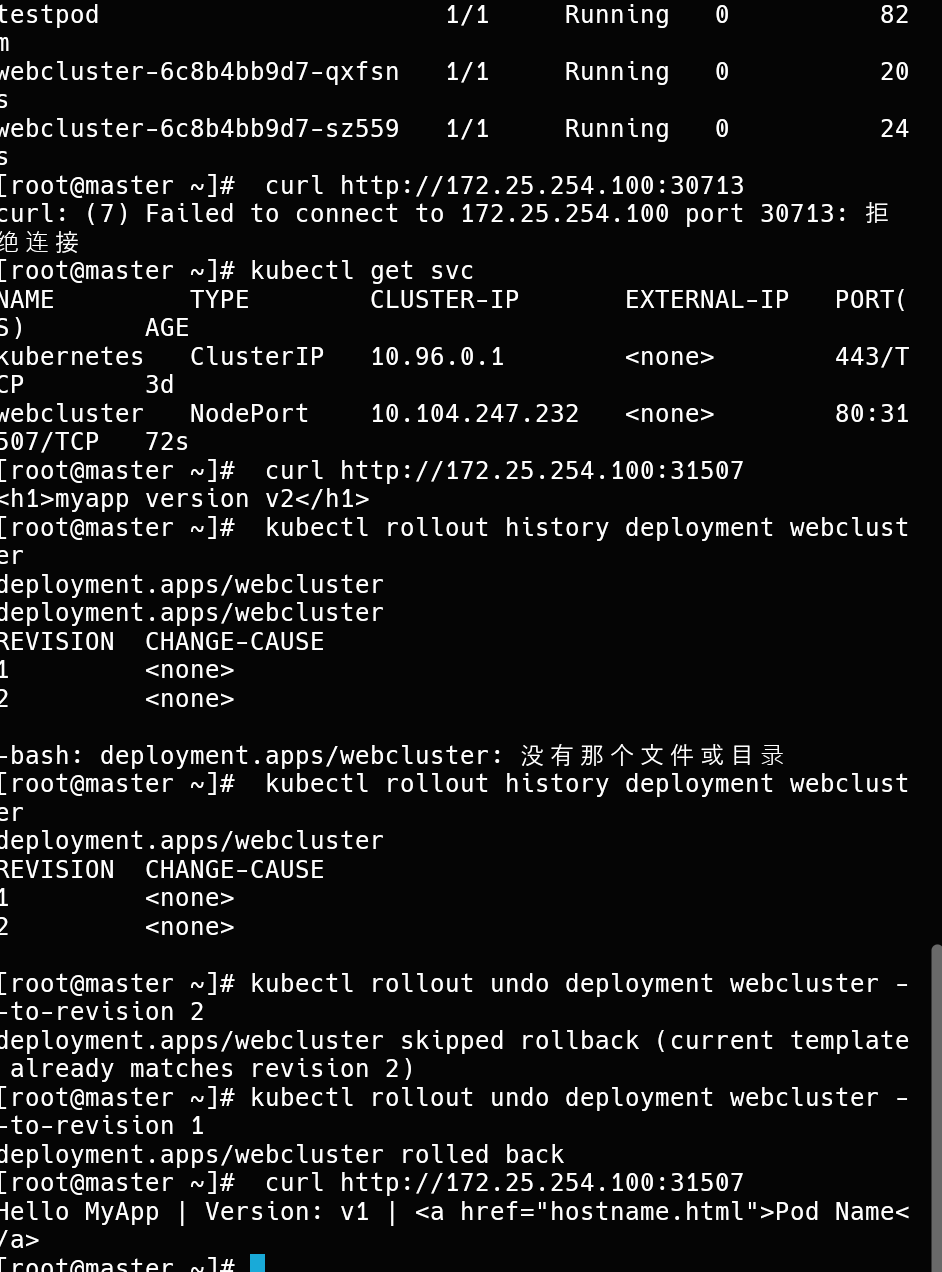
2. 更新业务版本
bash
# 更新镜像版本
[root@k8s-master ~]# kubectl set image deployments webcluster myapp=myapp:v2
deployment.apps/webcluster image updated

# 为本次更新写入变更说明(会显示在 history 的 CHANGE-CAUSE 列)
[root@k8s-master ~]# kubectl annotate deployment webcluster kubernetes.io/change-cause="myappv2" --overwrite

[root@k8s-master ~]# kubectl rollout history deployment webcluster
deployment.apps/webcluster
REVISION  CHANGE-CAUSE
1         <none>
2         myappv2

# 业务已切换到 v2
[Administrator.DESKTOP-VJ307M3] ➤ curl http://172.25.254.100:30713
Hello MyApp | Version: v2 | <a href="hostname.html">Pod Name</a>
3. 版本回退
bash
[root@k8s-master ~]# kubectl rollout history deployment webcluster
REVISION  CHANGE-CAUSE
2         <none>
3         <none>

# 回退到指定版本
[root@k8s-master ~]# kubectl rollout undo deployment webcluster --to-revision 3
deployment.apps/webcluster rolled back

[Administrator.DESKTOP-VJ307M3] ➤ curl http://172.25.254.100:30713
Hello MyApp | Version: v1 | <a href="hostname.html">Pod Name</a>
--to-revision 指定目标版本;省略该参数则回退到上一个版本。
四、利用 YAML 文件声明 Pod 资源
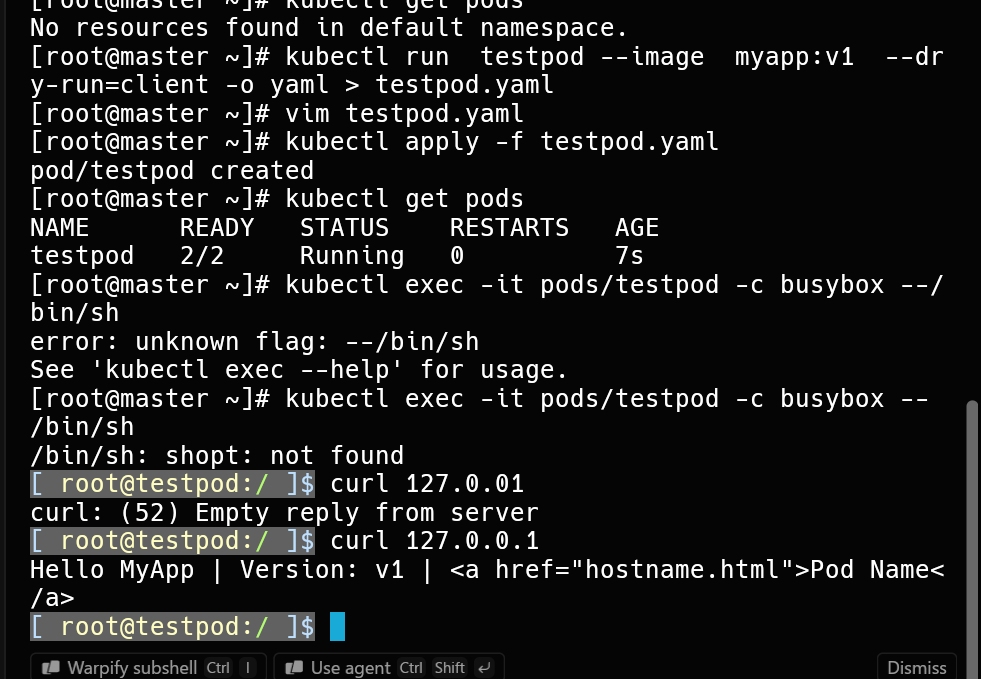
1. 一个 Pod 运行多个容器
bash
[root@k8s-master ~]# kubectl run testpod --image myapp:v1 --dry-run=client -o yaml > testpod.yaml
apiVersion: v1
kind: Pod
metadata:
  labels:
    run: testpod
  name: testpod
spec:
  containers:
  - image: myapp:v1
    name: myapp1
  - image: busyboxplus:latest
    name: busybox
    command:
    - /bin/sh
    - -c
    - sleep 10000

[root@k8s-master ~]# kubectl apply -f testpod.yaml
[root@k8s-master ~]# kubectl get pods
NAME      READY   STATUS    RESTARTS   AGE
testpod   2/2     Running   0          2m41s

# 在 busybox 容器内访问本机 127.0.0.1,命中了另一容器的 nginx
[root@k8s-master ~]# kubectl exec -it pods/testpod -c busybox -- /bin/sh
/ # curl 127.0.0.1
Hello MyApp | Version: v1 | <a href="hostname.html">Pod Name</a>
同一 Pod 内的容器共享网络与存储,彼此可直接通过 127.0.0.1 通信。
2. 在 Pod 所在节点暴露端口(hostPort)
yaml
apiVersion: v1
kind: Pod
metadata:
  labels:
    run: testpod
  name: testpod
spec:
  containers:
  - image: myapp:v1
    name: myapp1
    ports:
    - name: http
      containerPort: 80		# pod 内部容器端口
      hostPort: 80			# pod 所在节点端口
      protocol: TCP			# 端口所用协议
bash
[root@k8s-master pod]# kubectl apply -f testpod.yaml
[root@k8s-master pod]# kubectl get pods -o wide
NAME      READY   STATUS    RESTARTS   AGE     IP            NODE        NOMINATED NODE   READINESS GATES
testpod   1/1     Running   0          3m33s   10.244.5.43   k8s-node2   <none>           <none>

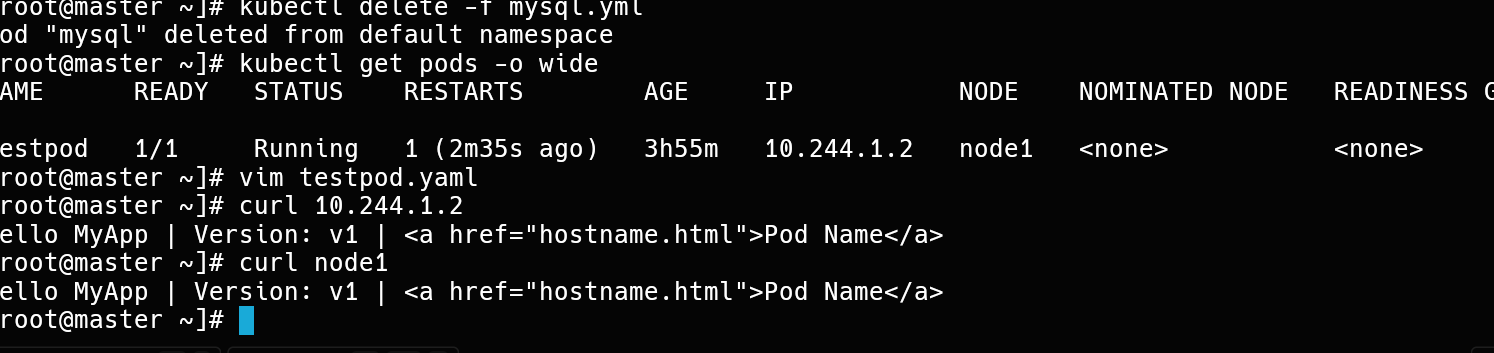
# 直接访问节点 IP 即可命中 pod
[root@k8s-master pod]# curl k8s-node2
Hello MyApp | Version: v1 | <a href="hostname.html">Pod Name</a>
注意:hostPort 占用的是节点真实端口,同一节点重复占用会调度失败。
3. 为容器指定环境变量
yaml
apiVersion: v1
kind: Pod
metadata:
  labels:
    run: mysql
  name: mysql
spec:
  containers:
  - image: mysql:8.0
    name: mysql8
    env:
    - name: MYSQL_ROOT_PASSWORD
      value: lee

  - image: phpmyadmin:latest
    name: mysqladmin
    env:
    - name: PMA_ARBITRARY
      value: "1"
    ports:
    - name: phpadminport
      containerPort: 80
      hostPort: 80
      protocol: TCP
bash
[root@k8s-master pod]# kubectl apply -f mysql.yml
[root@k8s-master pod]# kubectl get pods -o wide
NAME    READY   STATUS    RESTARTS   AGE   IP            NODE        NOMINATED NODE   READINESS GATES
mysql   2/2     Running   0          36s   10.244.1.44   k8s-node1   <none>           <none>

# 浏览器访问节点 IP:80 进入 phpMyAdmin,可直连同 Pod 内的 MySQL
4. 选择运行节点(nodeSelector)
bash
# 先查看节点的现有标签
[root@k8s-master ~]# kubectl get nodes --show-labels
NAME         STATUS   ROLES           AGE   VERSION   LABELS
k8s-master   Ready    control-plane   29h   v1.35.7   kubernetes.io/hostname=k8s-master,...
k8s-node1    Ready    <none>          29h   v1.35.7   kubernetes.io/hostname=k8s-node1,...
k8s-node2    Ready    <none>          24h   v1.35.7   kubernetes.io/hostname=k8s-node2,...
yaml
apiVersion: v1
kind: Pod
metadata:
  labels:
    run: mysql
  name: mysql
spec:
  nodeSelector:
    kubernetes.io/hostname: k8s-node2	# 强制调度到 k8s-node2
  containers:
  - image: mysql:8.0
    name: mysql8
    env:
    - name: MYSQL_ROOT_PASSWORD
      value: lee
  - image: phpmyadmin:latest
    name: mysqladmin
    env:
    - name: PMA_ARBITRARY
      value: "1"
    ports:
    - name: phpadminport
      containerPort: 80
      hostPort: 80
      protocol: TCP
bash
[root@k8s-master pod]# kubectl apply -f mysql.yml
[root@k8s-master pod]# kubectl get pods -o wide
NAME    READY   STATUS              RESTARTS   AGE   IP       NODE        NOMINATED NODE   READINESS GATES
mysql   0/2     ContainerCreating   0          11s   <none>   k8s-node2   <none>           <none>
5. 共享宿主机网络(hostNetwork)
yaml
apiVersion: v1
kind: Pod
metadata:
  labels:
    run: testpod
  name: testpod
spec:
  hostNetwork: true		# 使用节点网络命名空间
  containers:
  - image: busybox:latest
    name: busybox
    command:
    - /bin/sh
    - -c
    - sleep 10000
bash
[root@k8s-master pod]# kubectl apply -f testpod.yaml
[root@k8s-master pod]# kubectl exec -it pods/testpod -c busybox -- /bin/sh
/ # ifconfig
cni0      Link encap:Ethernet  HWaddr 16:CB:58:6A:2A:5D
          inet addr:10.244.5.1  Bcast:10.244.5.255  Mask:255.255.255.0

docker0   Link encap:Ethernet  HWaddr 0E:46:B9:8F:F4:B1
          inet addr:172.17.0.1  Bcast:172.17.255.255  Mask:255.255.0.0

eth0      Link encap:Ethernet  HWaddr 00:0C:29:E9:E3:90
          inet addr:172.25.254.20  Bcast:172.25.254.255  Mask:255.255.255.0

flannel.1 Link encap:Ethernet  HWaddr DE:5A:26:1C:E5:A0
          inet addr:10.244.5.0  Bcast:0.0.0.0  Mask:255.255.255.255
容器内看到的全是节点网卡(cni0 / eth0 / flannel.1),证明 Pod 直接使用宿主机网络栈,不再分配独立 Pod IP。
6. 资源限制与服务质量等级(QoS)
Kubernetes 按容器的 resources 配置把 Pod 划分为三个服务质量等级:
| QoS 等级 | 判定条件 | 资源优先级 |
|---|---|---|
| BestEffort | 未设置任何资源限制 | 最低 |
| Burstable | 设置了限制,且 requests ≠ limits | 次之 |
| Guaranteed | requests = limits | 最高 |
BestEffort:
yaml
spec:
  containers:
  - image: busybox:latest
    name: busybox
    command: ["/bin/sh", "-c", "sleep 10000"]
    # 不配置任何 resources 字段
Burstable:
yaml
    resources:
      limits:				# 最大可用上限
        cpu: 700m
        memory: 200M
      requests:				# 调度时保障的期望值
        cpu: 500m
        memory: 100M
Guaranteed:
yaml
    resources:
      limits:
        cpu: 500m
        memory: 100M
      requests:				# 与 limits 完全一致
        cpu: 500m
        memory: 100M
验证方式:
bash
[root@k8s-master pod]# kubectl describe pods testpod | grep "QoS Class:"
QoS Class:                   Guaranteed
节点资源紧张时,K8s 优先驱逐低等级 Pod:先杀 BestEffort,再杀 Burstable,最后才动 Guaranteed。
7. 容器重启规则(restartPolicy)
| 策略 | 行为 |
|---|---|
| Always(默认) | 无论容器因何原因退出都重新运行 |
| OnFailure | 仅容器非正常退出(非 0 退出码)时重启 |
| Never | 容器退出后不再重启 |
yaml
spec:
  hostNetwork: true
  restartPolicy: Always		# Always / OnFailure / Never
  containers:
  - image: busybox:latest
    name: busybox
    command:
    - /bin/sh
    - -c
    - sleep 60
验证方法:master 上开监控,到节点上强制删除容器,观察行为差异。
bash
[root@k8s-master pod]# kubectl get pods -o wide -w
# 到 pod 所在节点执行:
[root@k8s-node2 ~]# docker rm -f <容器ID>

# Always:容器立即重建,RESTARTS 加 1
# OnFailure:等待 sleep 正常结束后 Pod 变 Completed 不再拉起;docker rm -f 强杀则会重启
# Never:无论何种退出都不再拉起
五、Pod 的生命周期
Pod 从创建到销毁要经历:调度 → Init 容器 → 主容器启动 → 存活/就绪探测 → 运行 → 销毁。
1. Init 容器
Init 容器在主容器启动前按顺序串行执行,全部成功后主容器才会启动;任一 Init 容器失败则不断重试。
bash
[root@k8s-master pod]# kubectl run webserver --image myapp:v1 --dry-run=client -o yaml > init-example.yml
apiVersion: v1
kind: Pod
metadata:
  labels:
    run: webserver
  name: webserver
spec:
  initContainers:
  - name: busybox
    image: busybox:latest
    command:
    - /bin/sh
    - -c
    - "until test -e /testfile;do echo wating for myservice; sleep 2;done"	# 文件不存在就一直等待
  containers:
  - image: myapp:v1
    name: webserver
  restartPolicy: Always
bash
[root@k8s-master pod]# kubectl apply -f init-example.yml
pod/webserver created

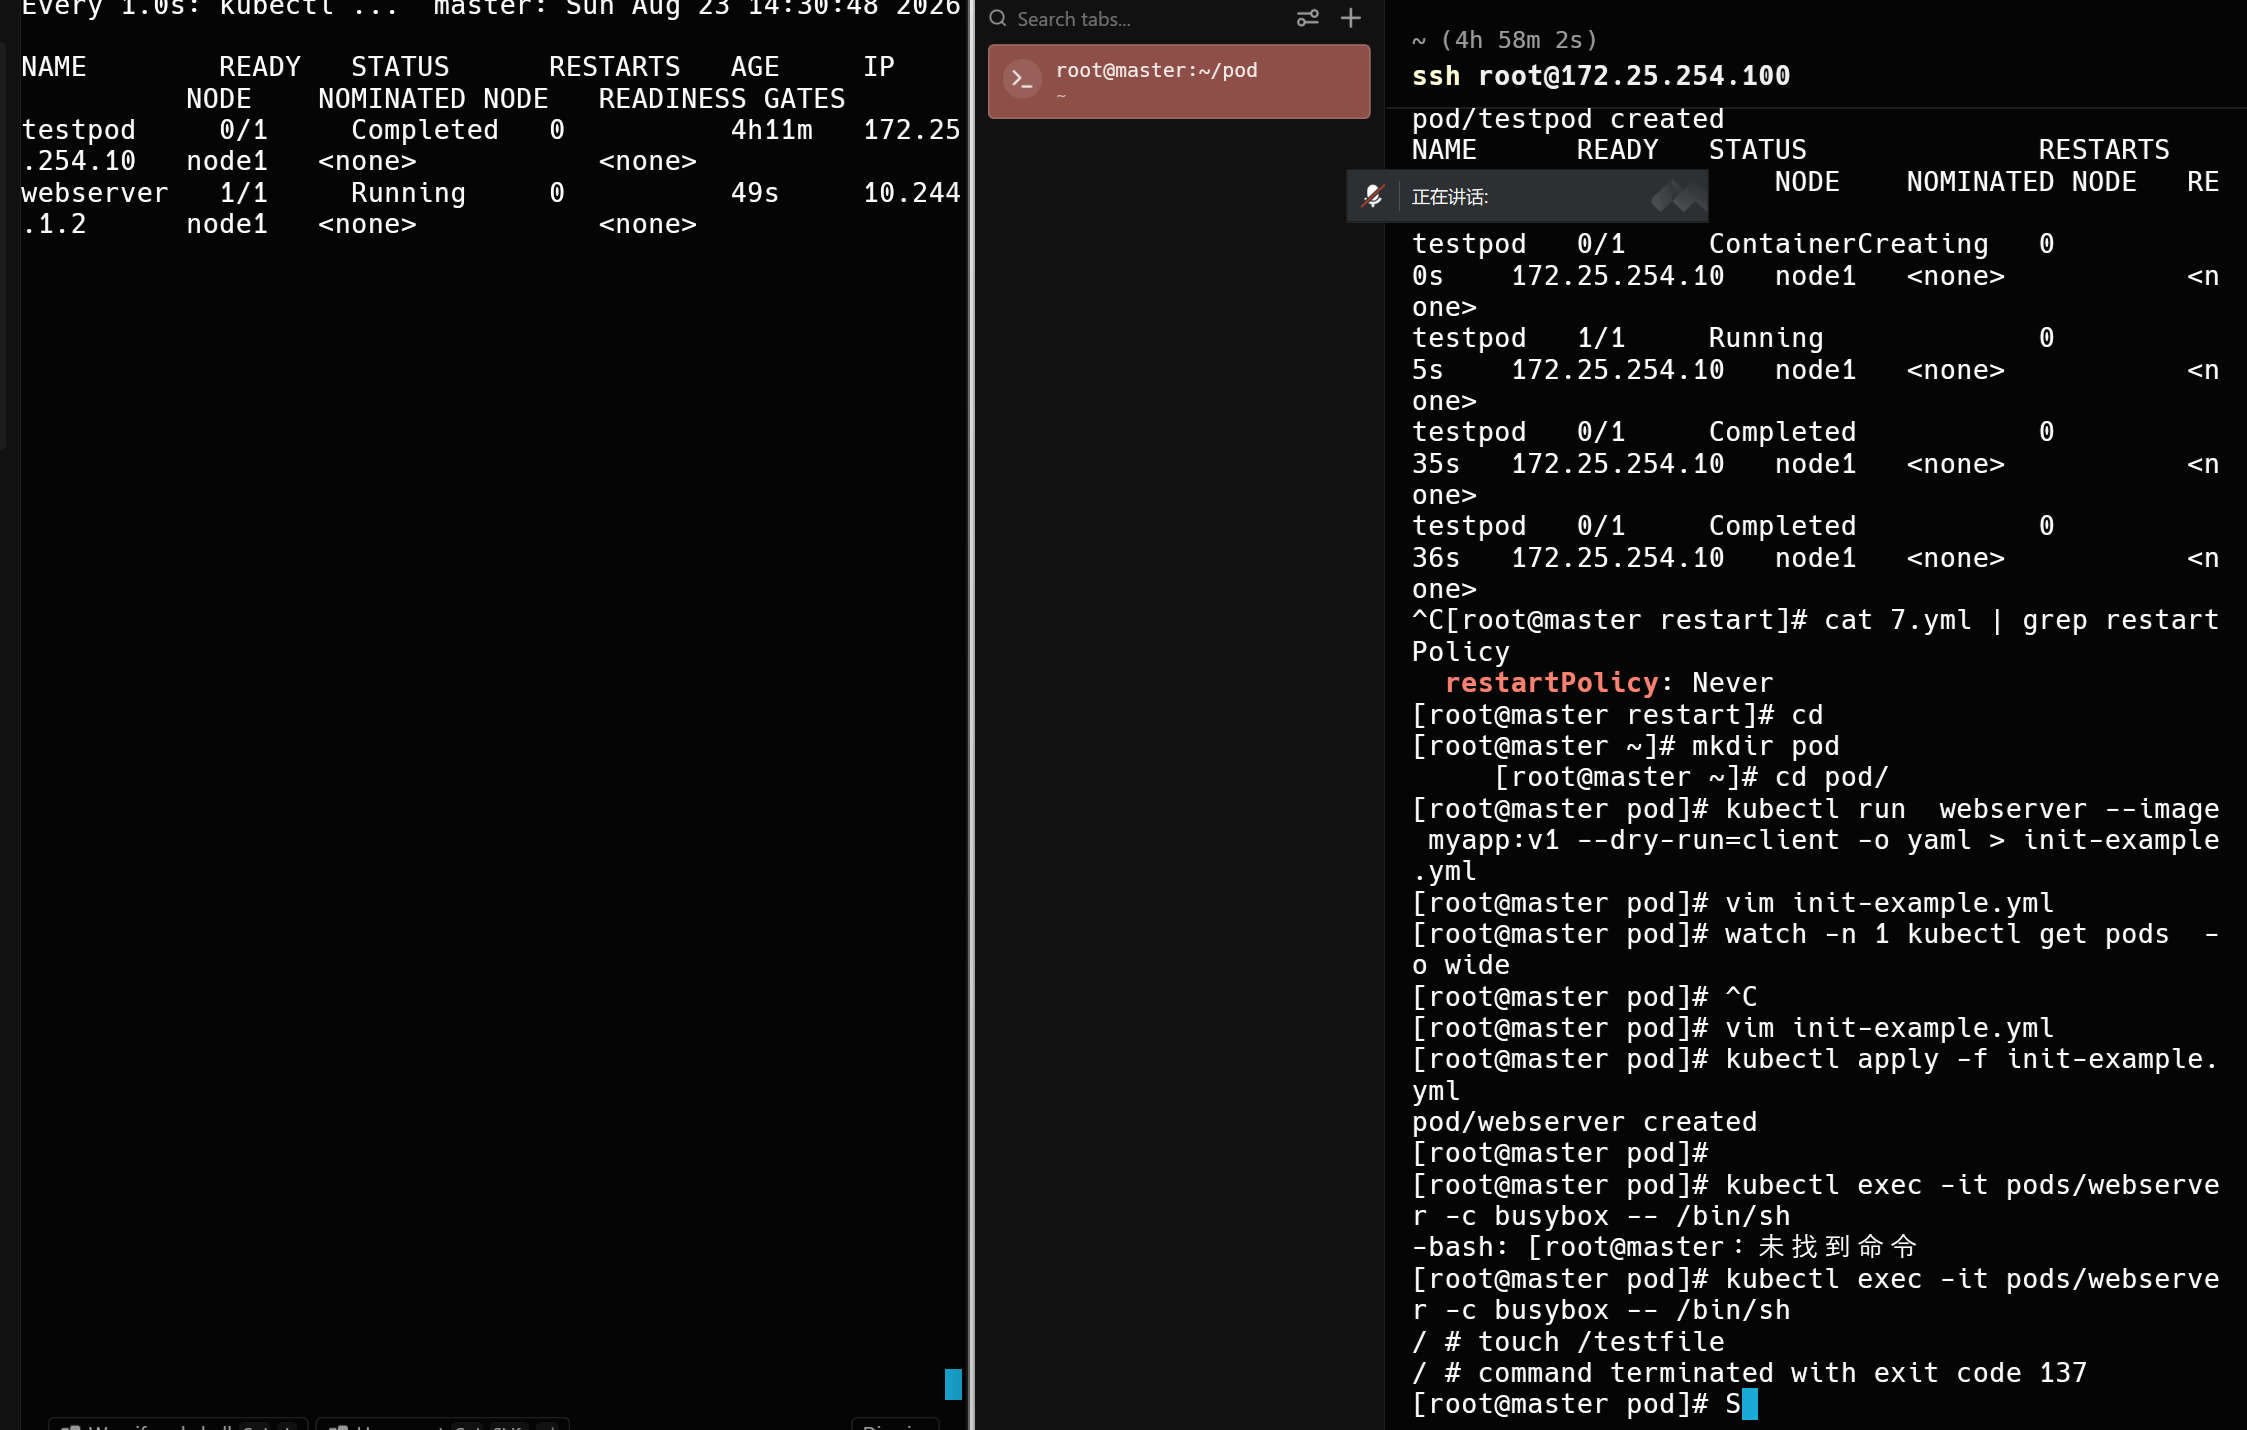
# watch 观察:Pod 长期停留在 Init 状态,主容器不启动
[root@k8s-master pod]# watch -n 1 kubectl get pods -o wide

# 手动补齐条件
[root@k8s-master pod]# kubectl exec -it pods/webserver -c busybox -- /bin/sh
/ # touch /testfile

# Init 容器检测到文件存在而退出,主容器立即启动,Pod 进入 Running
典型用途:等待依赖服务就绪、初始化配置文件、延迟主容器启动。
2. 存活探针(livenessProbe)
对照组:不加存活探针。 让主进程被杀掉后容器仍显示 Running:
yaml
apiVersion: v1
kind: Pod
metadata:
  labels:
    run: webserver
  name: webserver
spec:
  containers:
  - image: myapp:v1
    name: webserver
    command: ["/bin/sh", "-c"]
    args:
    - |
      nginx -g "daemon off;"
      sleep 10000
  restartPolicy: Always
bash
# 进容器手动停掉 nginx
[root@k8s-master pod]# kubectl exec -it pods/webserver -c webserver -- /bin/sh
# nginx -s stop

# Pod 状态仍是 Running,但服务实际已经挂了
[root@k8s-node2 ~]# curl 10.244.5.47
curl: (7) Failed to connect to 10.244.5.47 port 80: 拒绝连接
实验组:加上存活探针。
yaml
spec:
  containers:
  - image: myapp:v1
    name: testpod
    command: ["/bin/sh", "-c"]
    args:
    - |
      nginx -g "daemon off;"
      sleep 10000
    livenessProbe:
      tcpSocket:
        port: 80			# 探测容器 80 端口
      initialDelaySeconds: 3	# 容器启动后延迟 3 秒开始探测
      periodSeconds: 1		# 每 1 秒探测一次
      timeoutSeconds: 1		# 单次探测超时 1 秒
  restartPolicy: Always
bash
# 再次停掉 nginx
/ # nginx -s stop

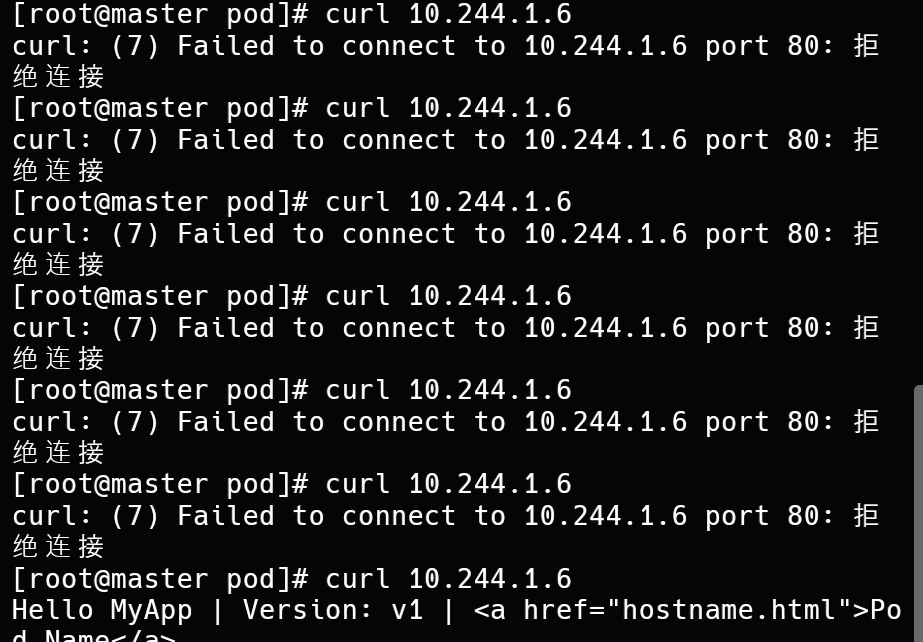
# 探针检测失败 → kubelet 自动重启容器,服务很快自愈
[root@k8s-master pod]# curl 10.244.5.66
curl: (7) Failed to connect to 10.244.5.66 port 80: 拒绝连接
...连续几次失败...
[root@k8s-master pod]# curl 10.244.5.66
Hello MyApp | Version: v1 | <a href="hostname.html">Pod Name</a>
存活探针解决"进程假活"问题:探测失败即重启容器。
3. 就绪探针(readinessProbe)
对照组:不加就绪探针。
yaml
apiVersion: v1
kind: Pod
metadata:
  labels:
    run: webserver
  name: webserver
spec:
  containers:
  - image: myapp:v1
    name: webserver
  restartPolicy: Always
---
apiVersion: v1
kind: Service
metadata:
  labels:
    run: webserver
  name: webserver
spec:
  ports:
  - port: 80
    protocol: TCP
    targetPort: 80
  selector:
    run: webserver
bash
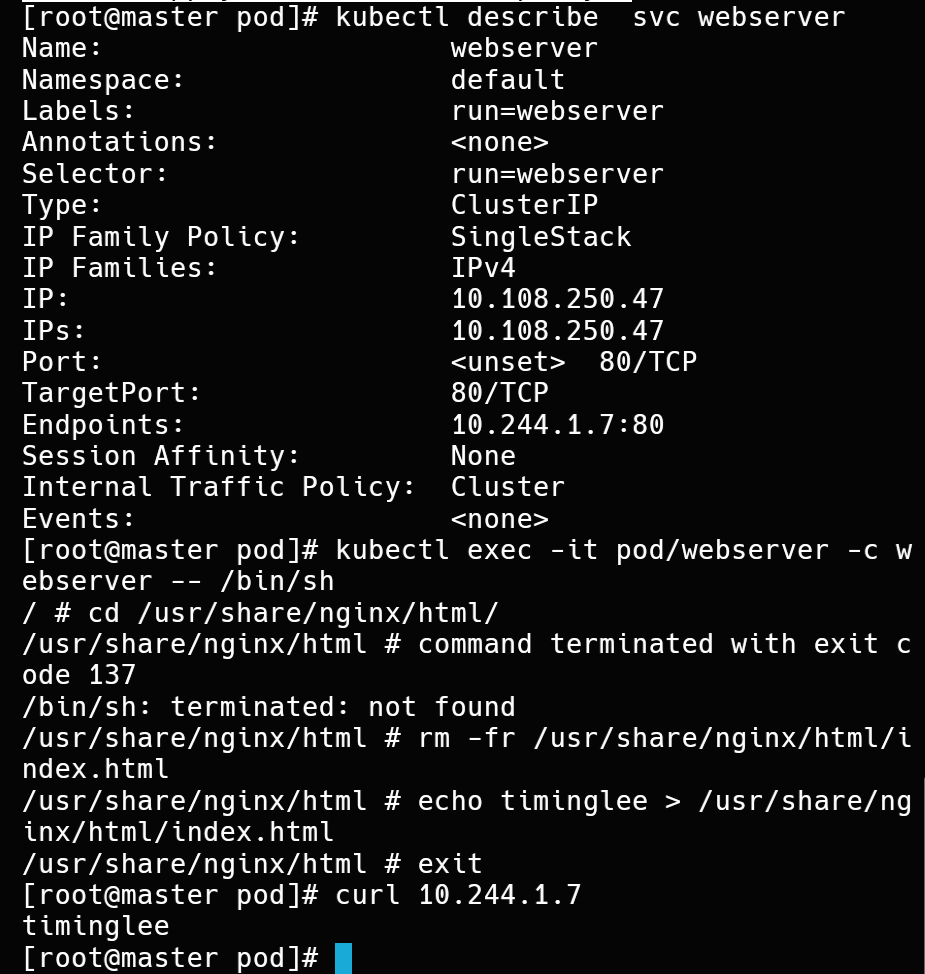
# 删除 nginx 默认发布页面,制造"业务不可用但进程活着"的场景
/ # cd /usr/share/nginx/html/
/ # rm -fr index.html

# Service 的 Endpoints 中该 pod 仍然在列,流量照常打过来,用户拿到 403
[root@k8s-master pod]# kubectl describe svc webserver
Endpoints:                10.244.5.67:80		# 还在

[root@k8s-master pod]# curl 10.102.162.217
<html><head><title>403 Forbidden</title></head></html>
实验组:加上就绪探针。
yaml
spec:
  containers:
  - image: myapp:v1
    name: webserver
    readinessProbe:
      httpGet:
        path: /index.html	# 通过 GET 该路径判断业务是否就绪
        port: 80
      initialDelaySeconds: 3
      periodSeconds: 2
      timeoutSeconds: 1
  restartPolicy: Always
再次删除 index.html 后,httpGet 返回 404/403,探测失败,Pod 被从 Endpoints 下架,Service 不再向其转发流量;恢复文件后又自动上架。业务故障期间用户请求被隔离,而不是收到错误页。
两者区别总结:
| 探针 | 探测失败的动作 | 解决的问题 |
|---|---|---|
| livenessProbe | 重启容器 | 进程假死、死锁 |
| readinessProbe | 从 Service Endpoints 摘除 | 业务未就绪/暂时不可用时切断流量 |
小结
- 命令式(run/create/expose/scale)适合调试,声明式(apply -f)适合交付;
edit/patch/set image分别覆盖全量编辑、局部修改、镜像变更三类场景;- Deployment 的版本历史由 Revision 记录,配合
annotate change-cause可追溯每次变更; - Pod 级核心配置:多容器共享网络、hostPort/hostNetwork 直通节点、env 注入配置、nodeSelector 控制调度、resources 决定 QoS、restartPolicy 决定重生策略;
- Init 容器管启动依赖,liveness 管"该不该重启",readiness 管"该不该接客",三者共同保证业务全生命周期的健康。
下一篇:《Kubernetes 实战笔记(二):五大 Pod 控制器详解》,覆盖 ReplicaSet / Deployment / DaemonSet / Job / CronJob。