《SpringBoot 3:入门与应用实战》第 9 章 使用 WebMvc 开发应用 阅读笔记 2
9.3 热部署的使用
9.2 节每次 HTML 页面变动时都需要重启应用。在实际的项目开发过程中,也会出现应用开发的代码需要频繁修改和调试,默认情况下当代码变动时,Spring Boot 应用不会立即重新加载变更后的代码,而是需要重启 Spring Boot 应用才会重新加载,这样的开发效率相对较低。为此,Spring Boot 提供了一套用于开发阶段的开发者工具,它可以实现程序的热部署(热加载)、自动禁用缓存等功能,使用开发者工具可以在一定程度上提高开发效率。
9.3.1 使用devtools
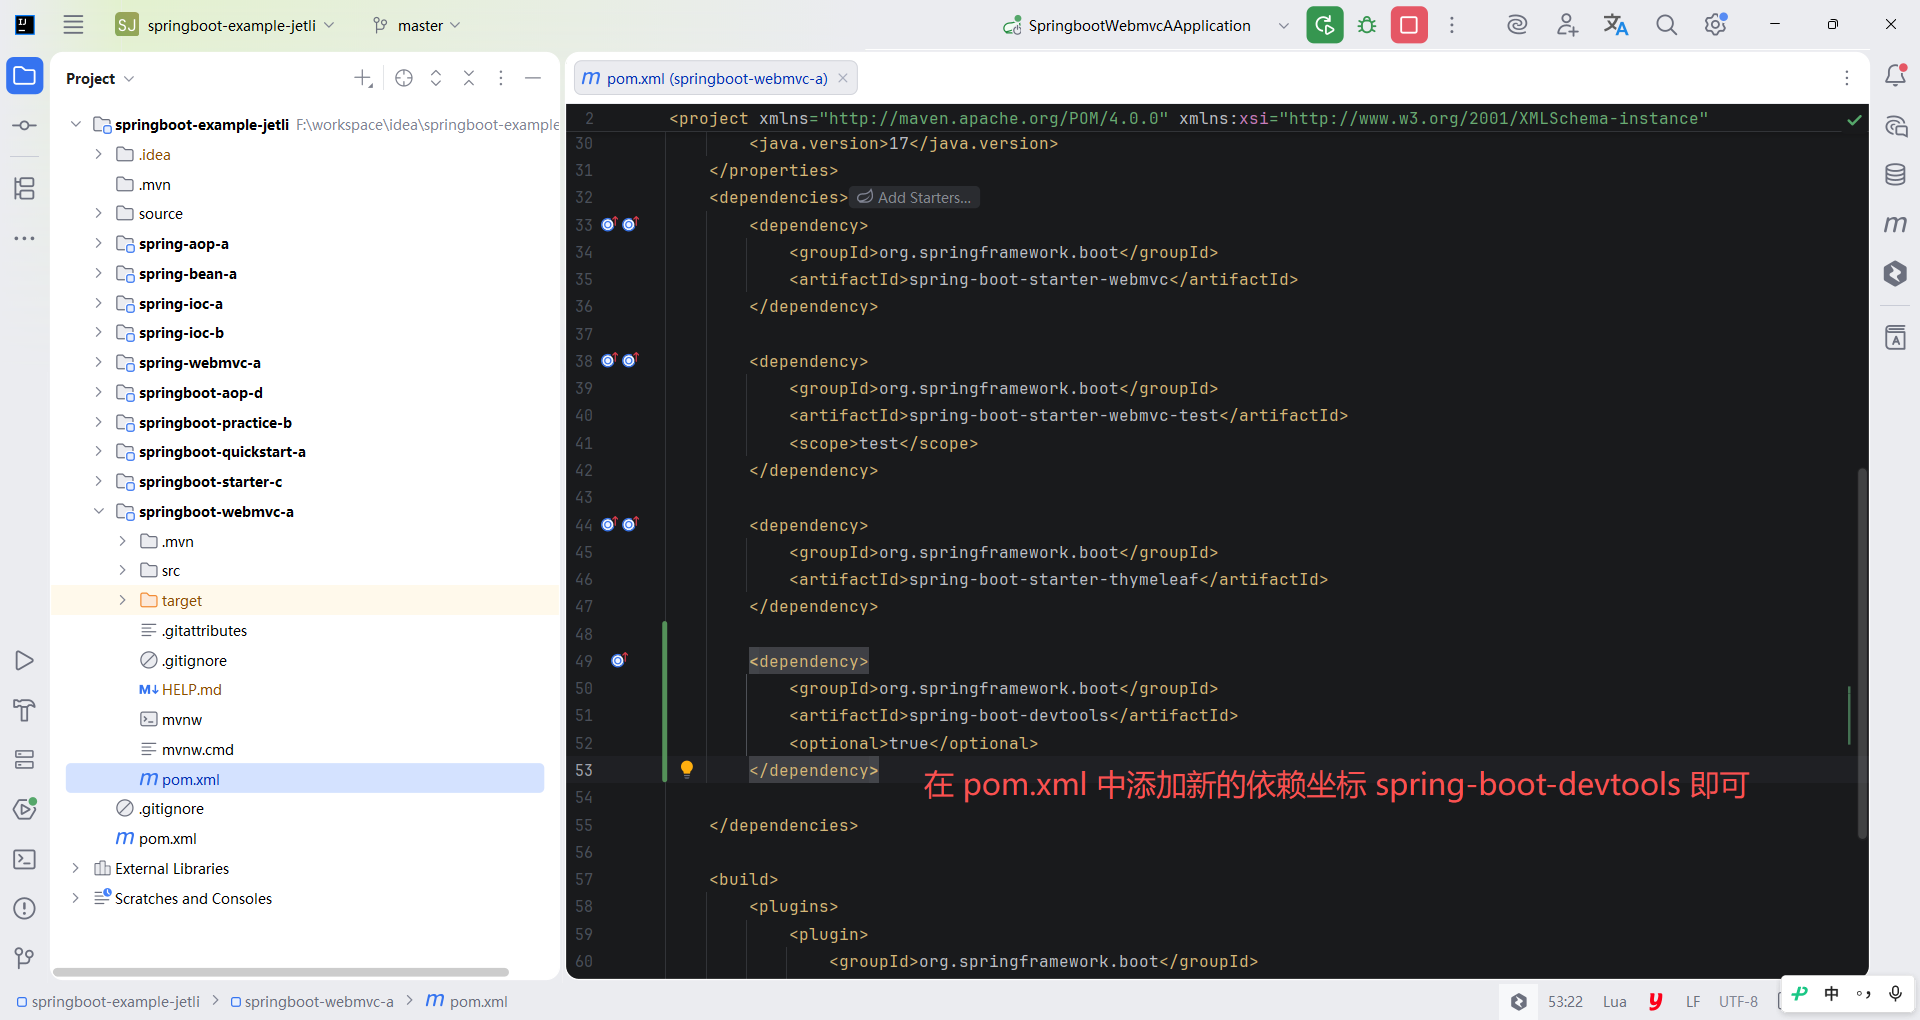
使用开发者工具的方式很简单,在 pom.xml 中添加新的依赖坐标 spring-boot-devtools 即可。请读者注意引入坐标中的 标签,该标签设置为 true 代表该依赖只能在当前项目及子项目中传递,而不会发生引用项目的依赖传递,换言之,引用当前项目的新项目中不会包含 spring-boot-devtools 依赖,如果需要使用,就要显式导入。
xml
<?xml version="1.0" encoding="UTF-8"?>
<project xmlns="http://maven.apache.org/POM/4.0.0" xmlns:xsi="http://www.w3.org/2001/XMLSchema-instance"
         xsi:schemaLocation="http://maven.apache.org/POM/4.0.0 https://maven.apache.org/xsd/maven-4.0.0.xsd">
    <modelVersion>4.0.0</modelVersion>
    <parent>
        <groupId>org.springframework.boot</groupId>
        <artifactId>spring-boot-starter-parent</artifactId>
        <version>4.1.1</version>
        <relativePath/> <!-- lookup parent from repository -->
    </parent>
    <groupId>com.yangjunbo</groupId>
    <artifactId>springboot-webmvc-a</artifactId>
    <version>0.0.1-SNAPSHOT</version>
    <name>springboot-webmvc-a</name>
    <description>springboot-webmvc-a</description>
    <url/>
    <licenses>
        <license/>
    </licenses>
    <developers>
        <developer/>
    </developers>
    <scm>
        <connection/>
        <developerConnection/>
        <tag/>
        <url/>
    </scm>
    <properties>
        <java.version>17</java.version>
    </properties>
    <dependencies>
        <dependency>
            <groupId>org.springframework.boot</groupId>
            <artifactId>spring-boot-starter-webmvc</artifactId>
        </dependency>

        <dependency>
            <groupId>org.springframework.boot</groupId>
            <artifactId>spring-boot-starter-webmvc-test</artifactId>
            <scope>test</scope>
        </dependency>

        <dependency>
            <groupId>org.springframework.boot</groupId>
            <artifactId>spring-boot-starter-thymeleaf</artifactId>
        </dependency>

        <dependency>
            <groupId>org.springframework.boot</groupId>
            <artifactId>spring-boot-devtools</artifactId>
            <optional>true</optional>
        </dependency>

    </dependencies>

    <build>
        <plugins>
            <plugin>
                <groupId>org.springframework.boot</groupId>
                <artifactId>spring-boot-maven-plugin</artifactId>
            </plugin>
        </plugins>
    </build>

</project>
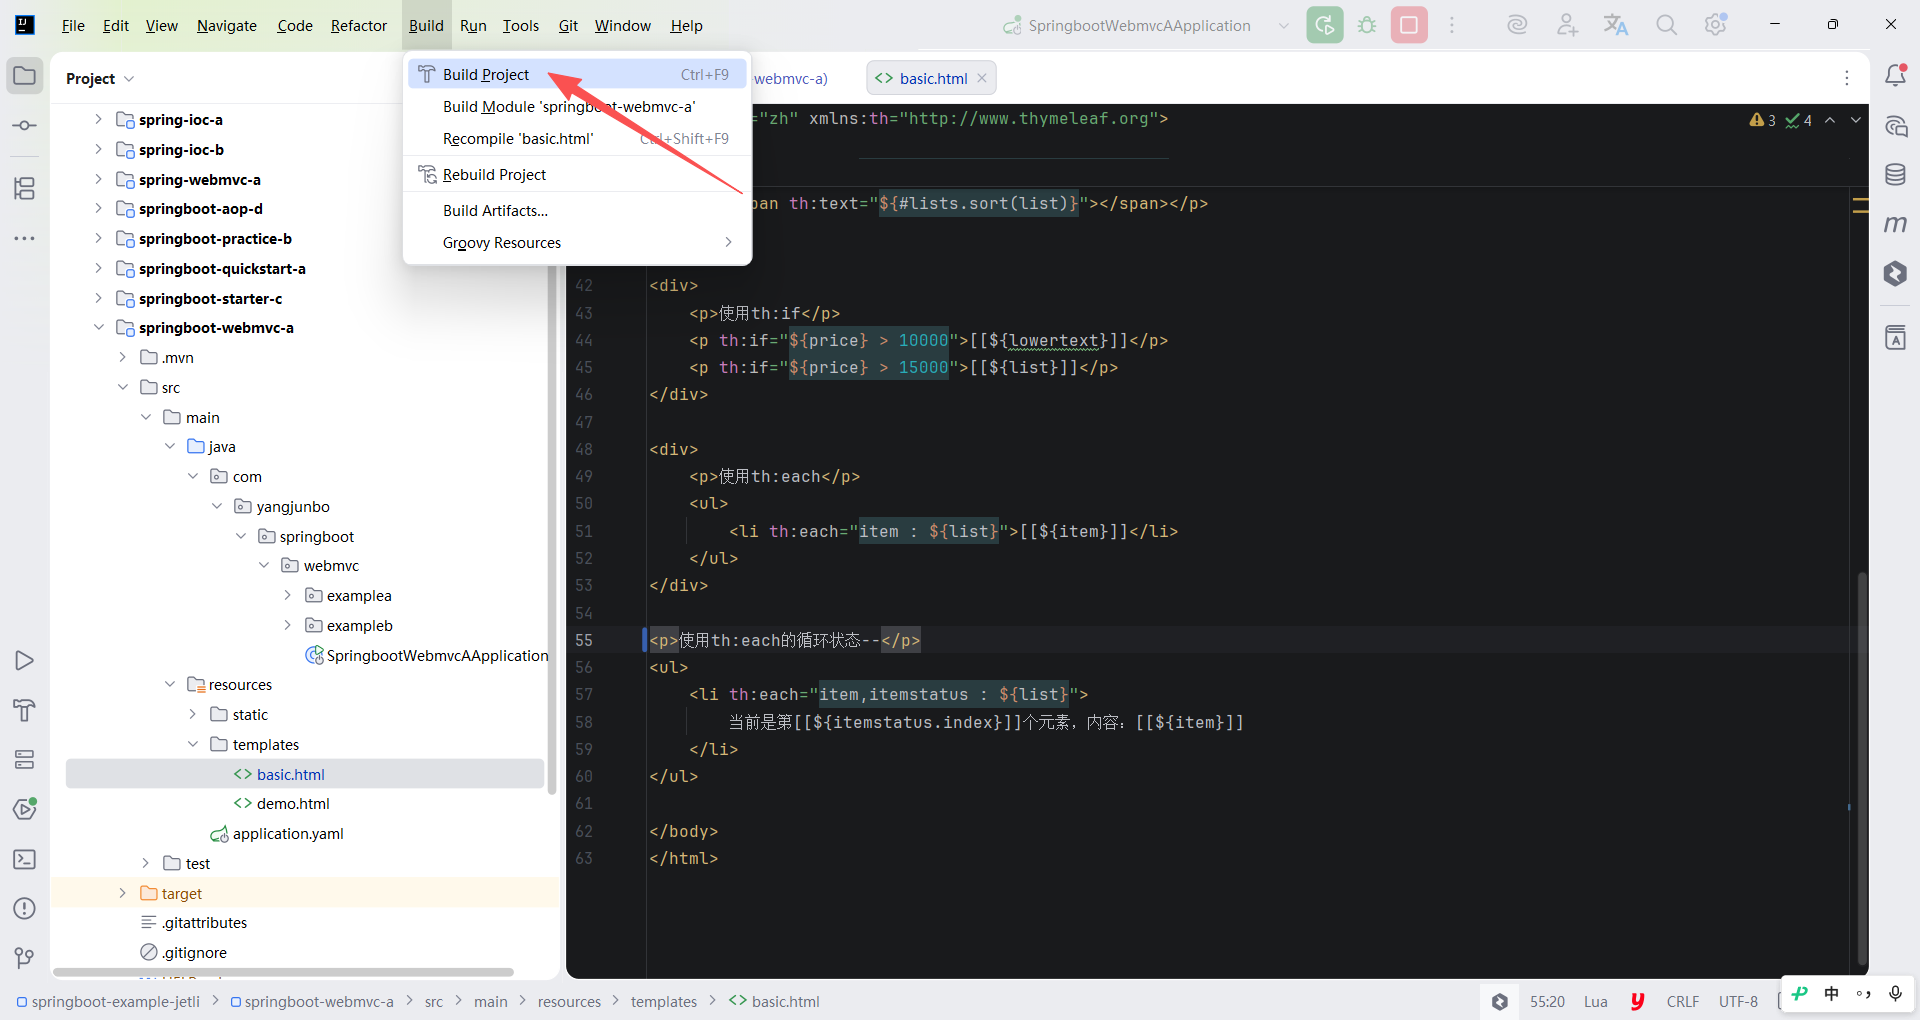
导入后,在实际的项目编写过程中,如果修改了 HTML 代码、静态资源等,可以单击 IDEA 工具栏中的 "构建项目" 按钮或使用快捷键 Ctrl+F9 重新编译项目,编译项目后 devtools 会感知到项目文件发生变动,从而重新初始化项目,使修改的代码生效。
以个人使用经验来看,笔者更推荐读者仅在修改前端资源时使用 devtools 热更新,而修改配置项、后端代码等场景中最好直接重启工程,避免因 devtools 某些功能的局限性导致工程出现意料之外的异常。
9.3.2 配置自动热部署
如果读者对每次手动编译项目仍有抵触,可以借助 IDEA 的自动构建项目特性来代替手动构建。
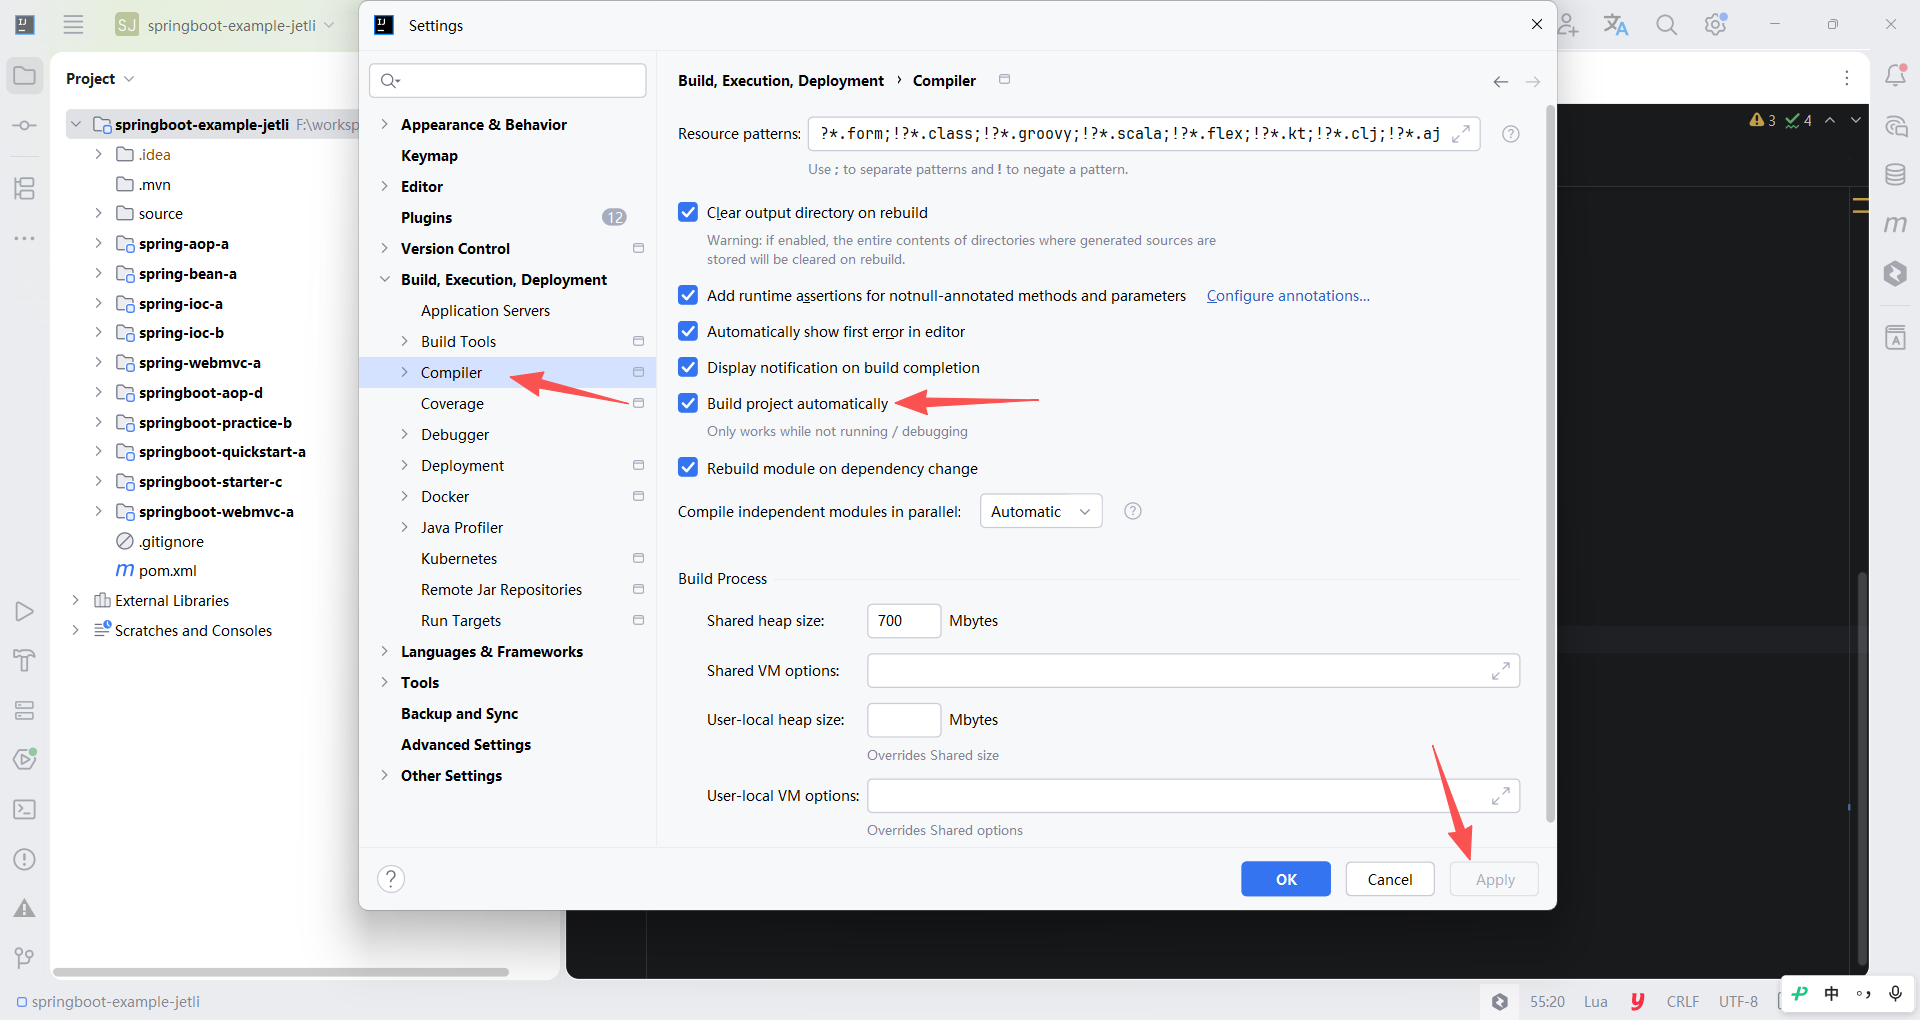
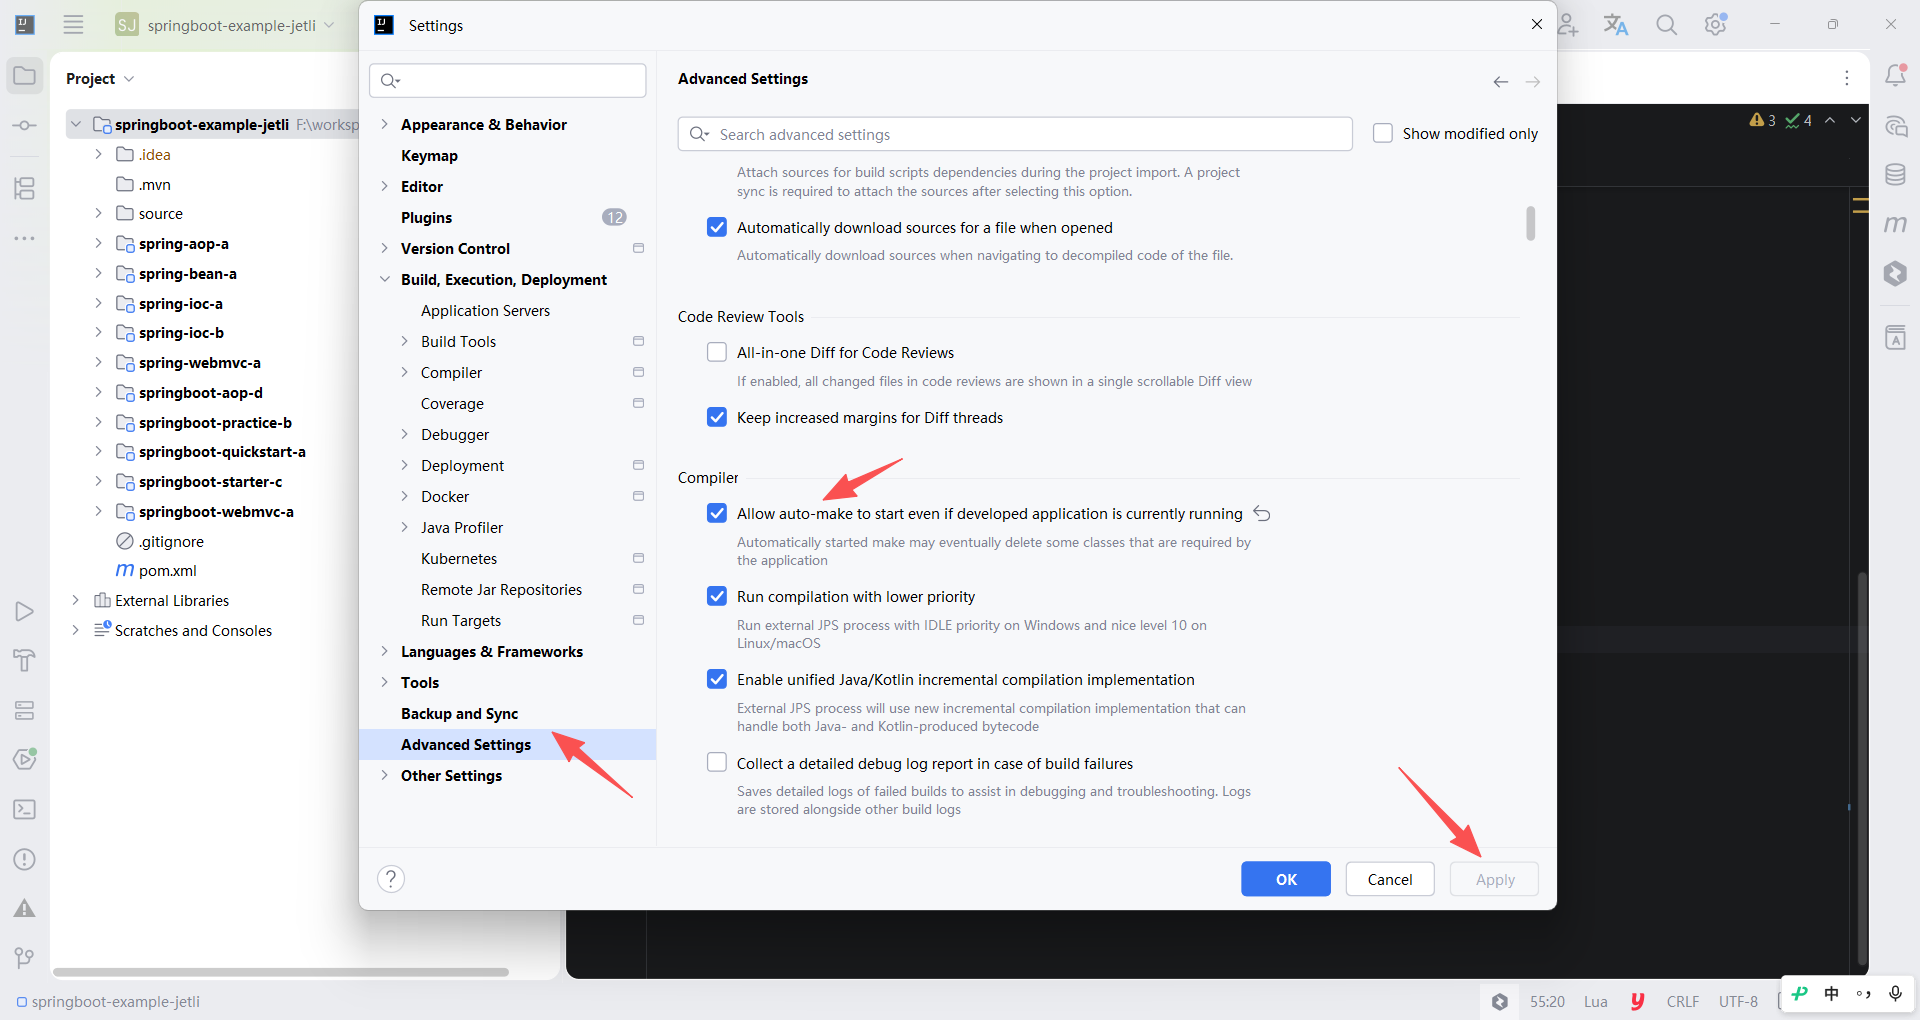
将上述两个配置项启用后,每次修改代码后,IDEA 都会自动识别这些改动的代码并热更新代码,不需要执行任何编译和构建的动作,刷新浏览器之后就能看到修改之后的效果。
9.4 页面数据传递
了解 Thymeleaf 的基础语法和指令后,下面使用 Thymeleaf 完成一个简单的页面开发。本节的需求是完成一个部门列表的加载和展示,以及能按照部门名称进行条件查询。
9.4.1 页面编写
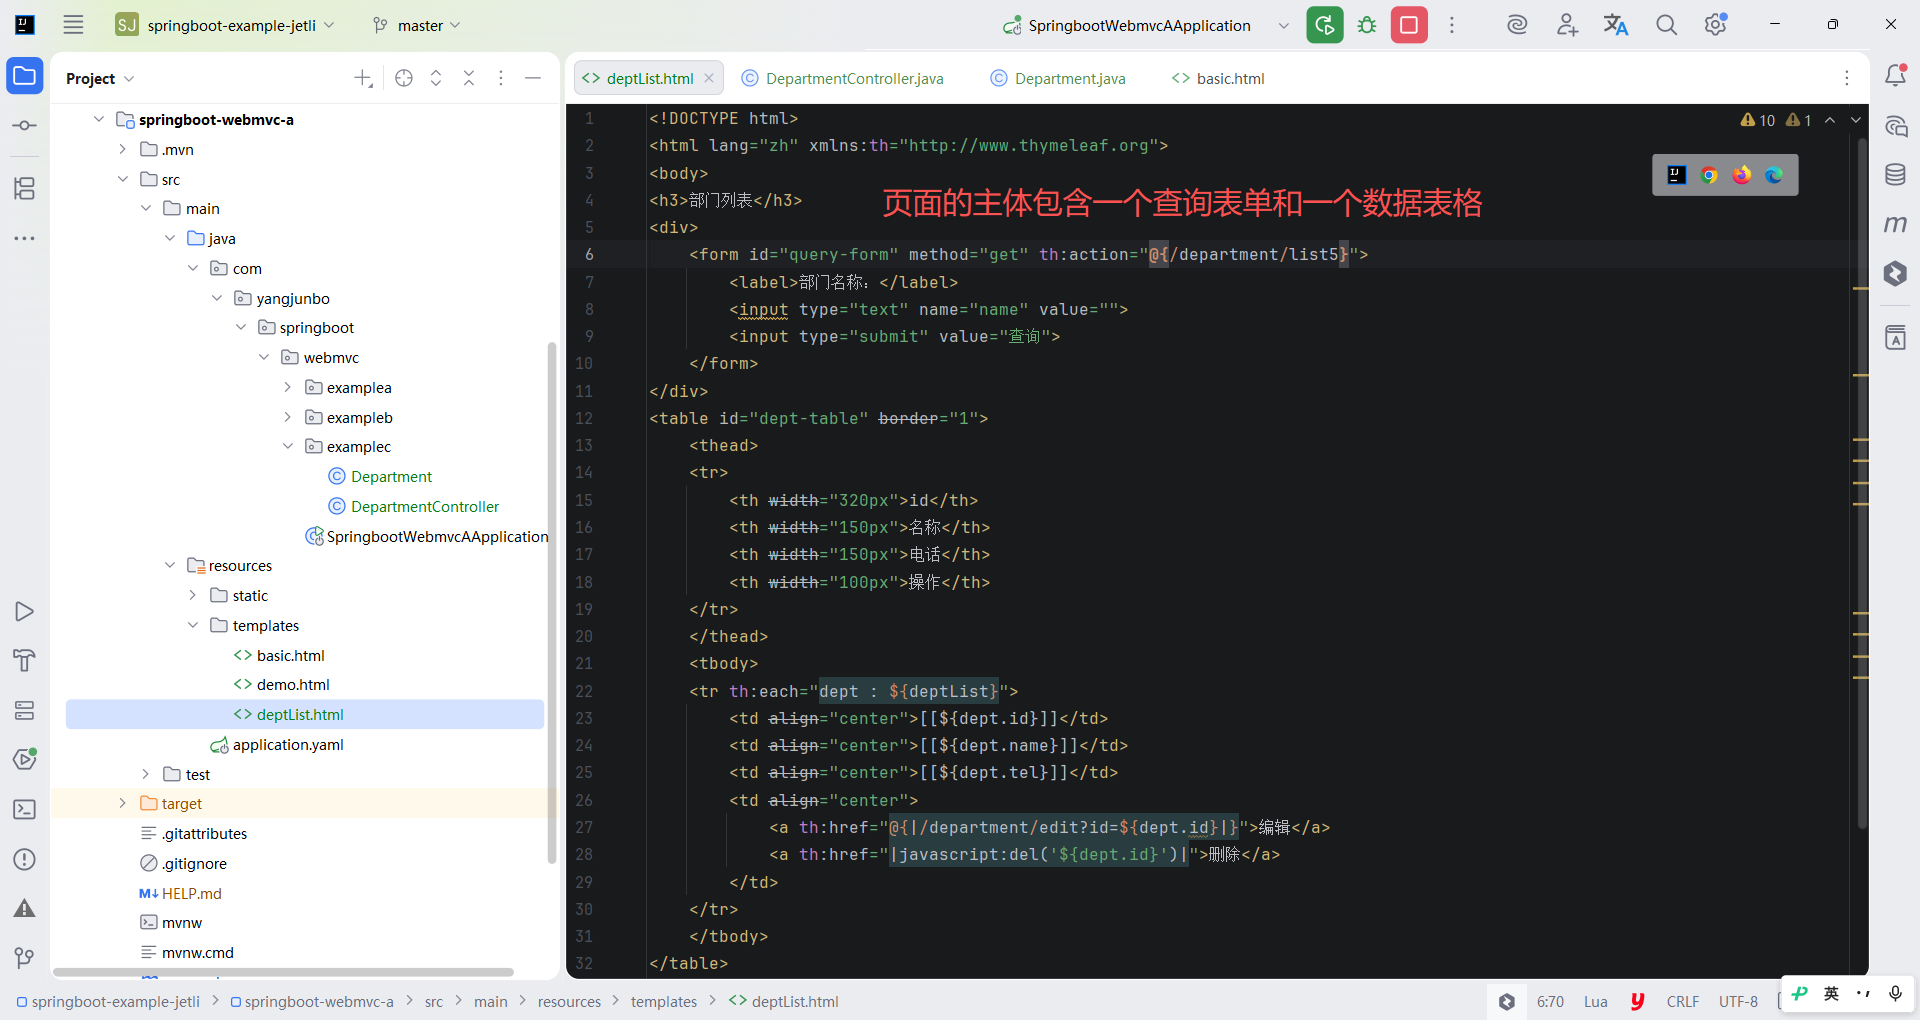
简单阅读 deptList.html 中的内容,页面的主体包含一个查询表单和一个数据表格,其中对于数据表格中的数据,使用 th:each 指令循环一个名为deptList 的集合,并在循环体内部取出相应的属性进行展示。对页面中用到的链接均使用 @{} 表达式配合 th 指令完成动态计算,编辑和删除按钮中使用了 Thymeleaf 中的字符串拼接机制,在指令内部的前后各加一条竖线,整个字符串将会变为类似模板字符串的性质,Thymeleaf 会将其中的 ${} 表达式解析后替换到指令内的字符串中。
html
<!DOCTYPE html>
<html lang="zh" xmlns:th="http://www.thymeleaf.org">
<body>
<h3>部门列表</h3>
<div>
    <form id="query-form" method="get" th:action="@{/department/list5}">
        <label>部门名称:</label>
        <input type="text" name="name" value="">
        <input type="submit" value="查询">
    </form>
</div>
<table id="dept-table" border="1">
    <thead>
    <tr>
        <th width="320px">id</th>
        <th width="150px">名称</th>
        <th width="150px">电话</th>
        <th width="100px">操作</th>
    </tr>
    </thead>
    <tbody>
    <tr th:each="dept : ${deptList}">
        <td align="center">[[${dept.id}]]</td>
        <td align="center">[[${dept.name}]]</td>
        <td align="center">[[${dept.tel}]]</td>
        <td align="center">
            <a th:href="@{|/department/edit?id=${dept.id}|}">编辑</a>
            <a th:href="|javascript:del('${dept.id}')|">删除</a>
        </td>
    </tr>
    </tbody>
</table>
</body>
</html>
9.4.2 页面跳转
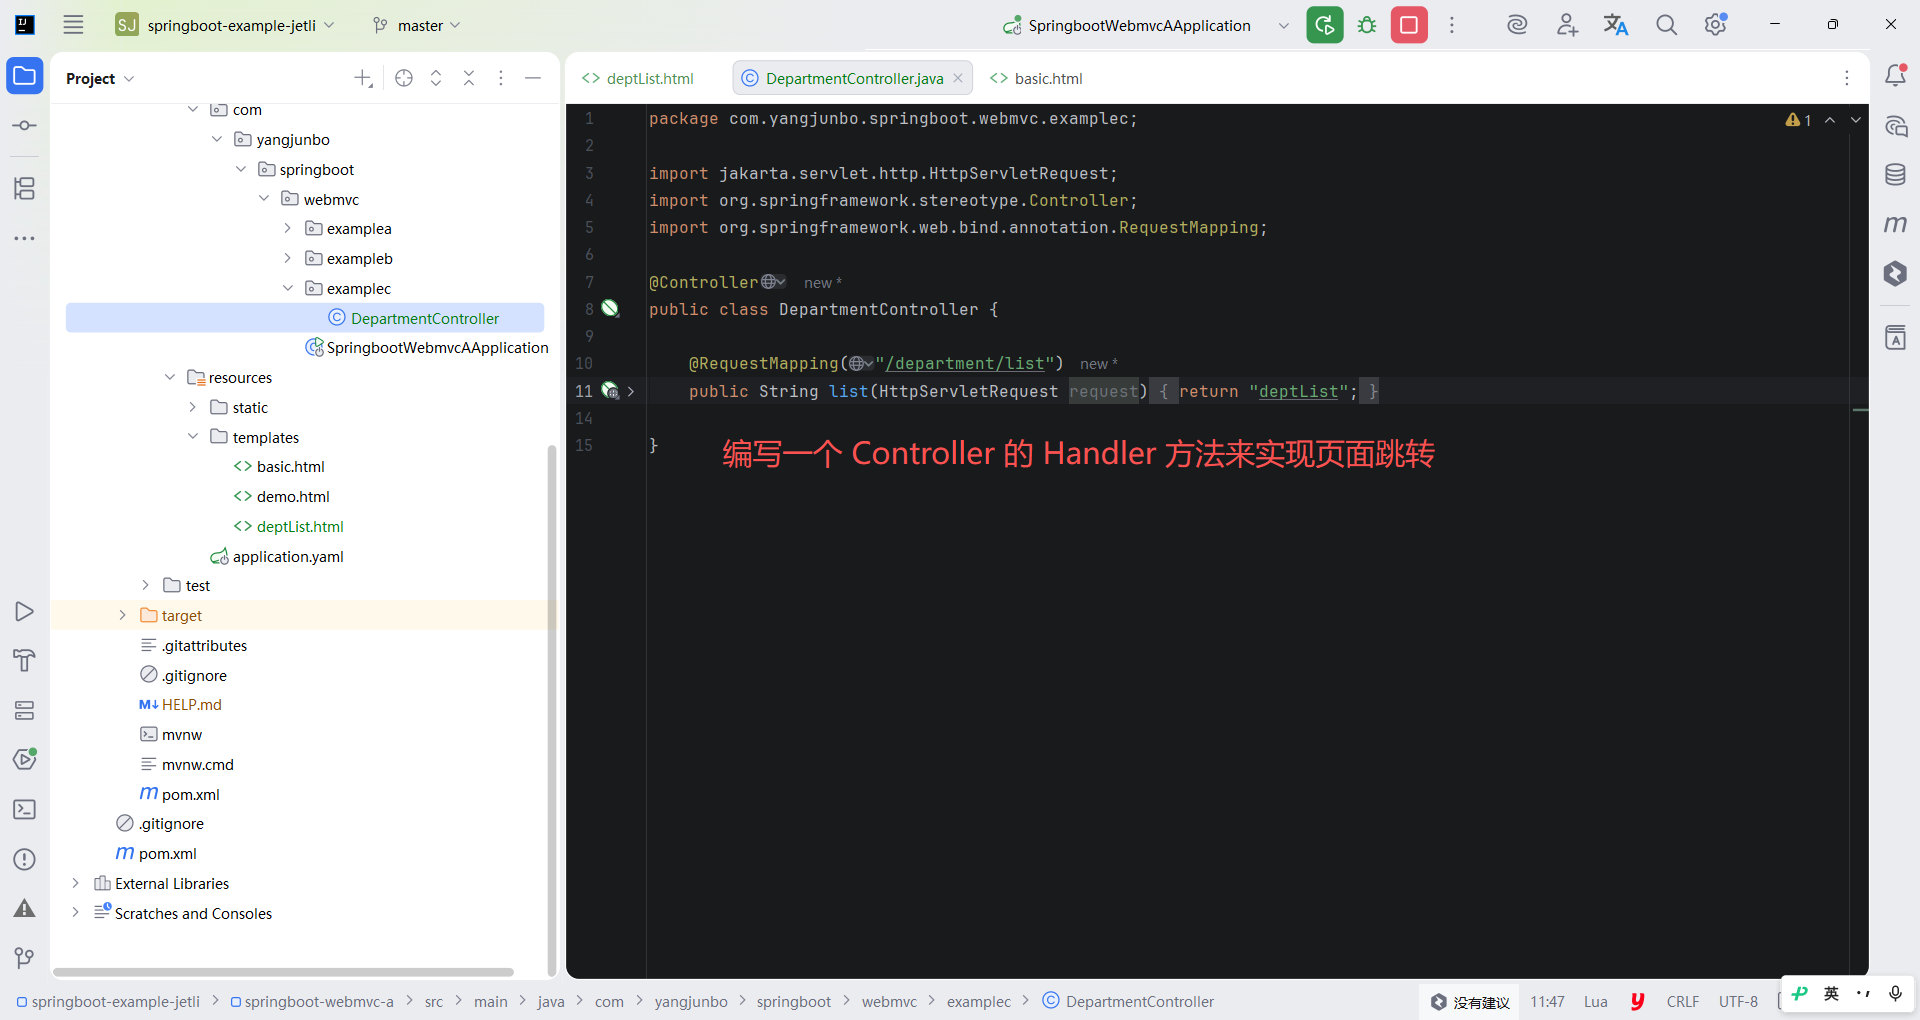
要想跳转到 deptList.html 页面,就需要编写一个 Controller 的 Handler 方法来实现页面跳转,基本的页面跳转非常简单,在 9.1 节中已经学习过,这里快速编写即可。
java
package com.yangjunbo.springboot.webmvc.examplec;

import jakarta.servlet.http.HttpServletRequest;
import org.springframework.stereotype.Controller;
import org.springframework.web.bind.annotation.RequestMapping;

@Controller
public class DepartmentController {

    @RequestMapping("/department/list")
    public String list(HttpServletRequest request) {
        return "deptList";
    }

}
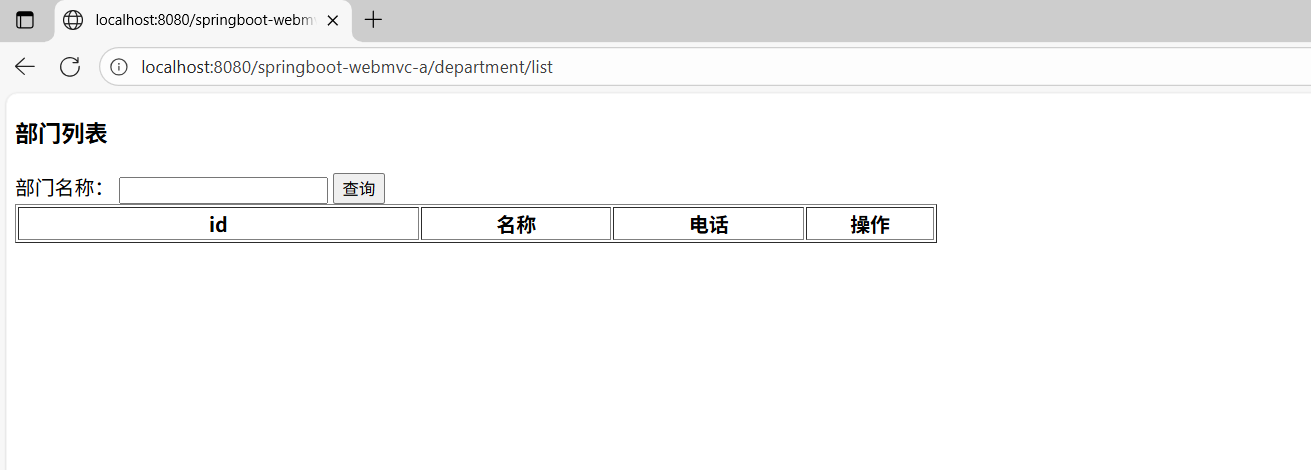
如此编写之后,启动 Spring Boot 工程,随后在浏览器访问 http://localhost:8080/springboot-webmvc-a/department/list 即可看到页面的全貌。
9.4.3 数据传递的方式
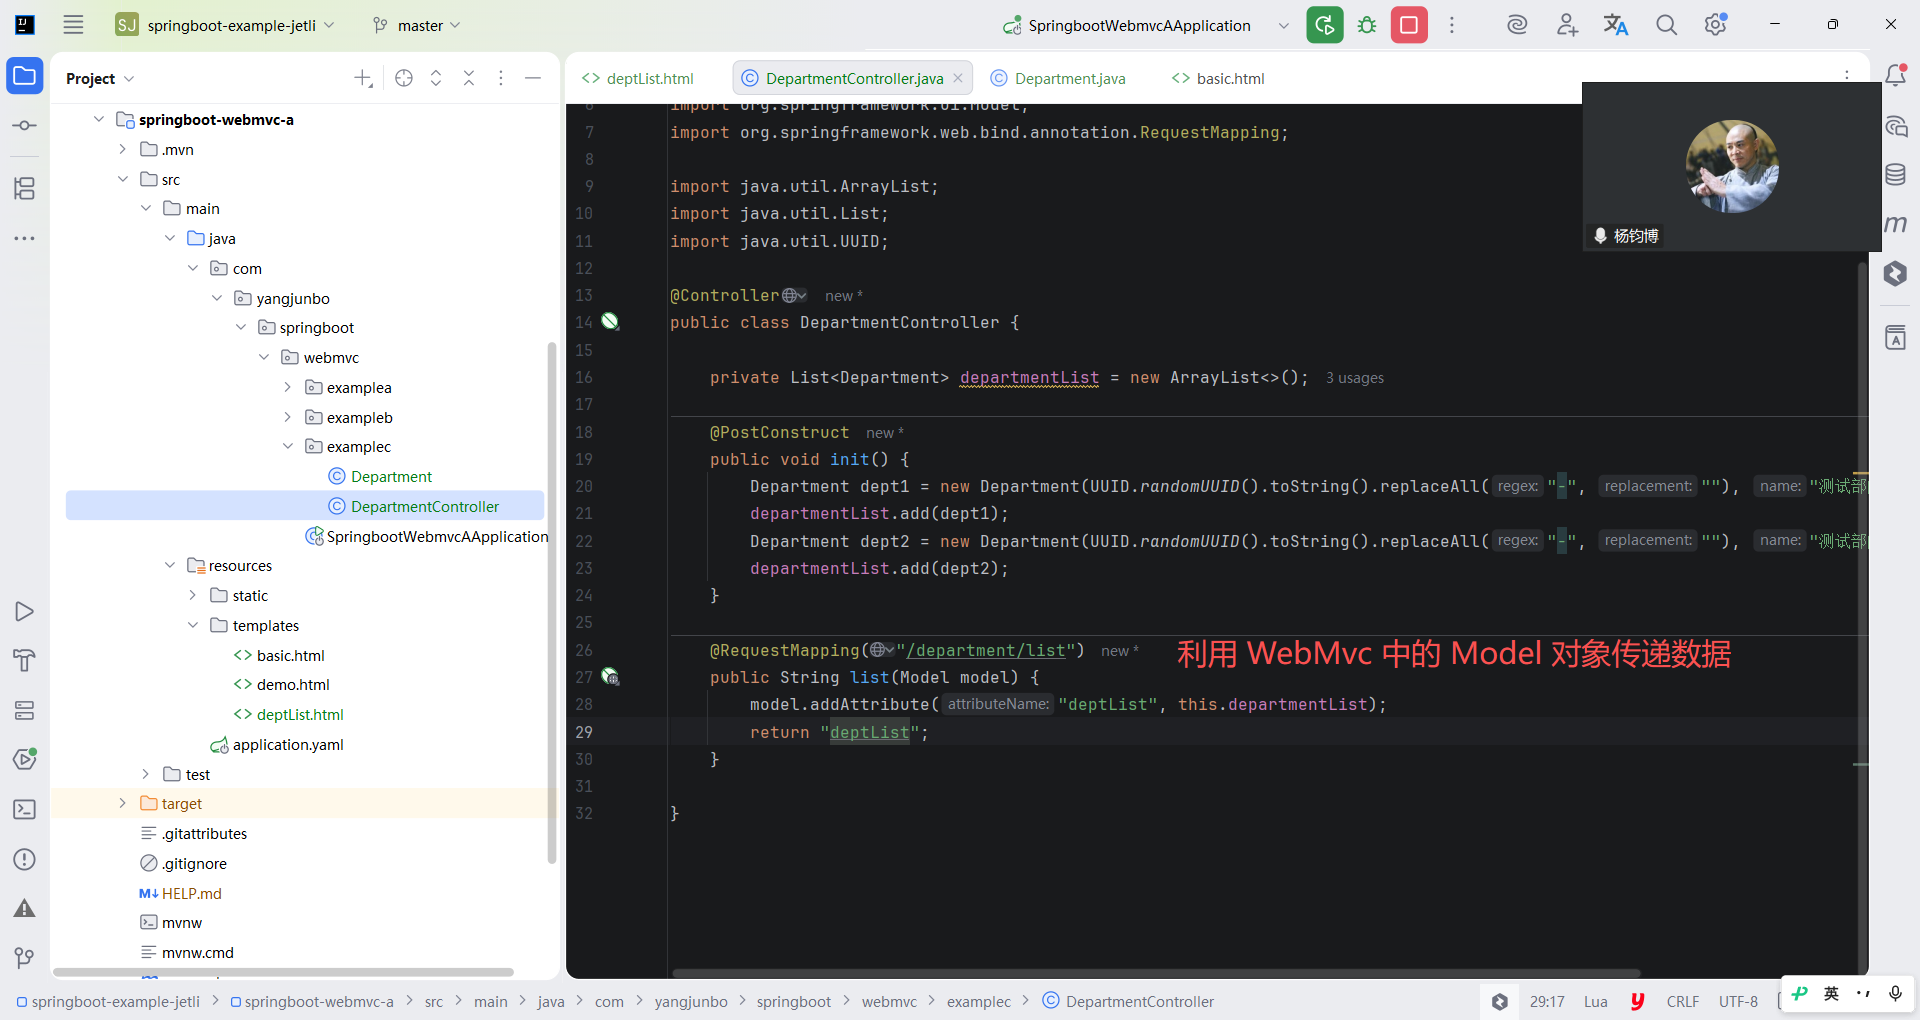
deptList.html 已被正确跳转和渲染,下一步是将数据传递到页面中。在 9.2 节的 Thymeleaf 语法介绍中已经了解了一种数据传递的方式,那就是利用 WebMvc 中的 Model 对象传递数据。
java
package com.yangjunbo.springboot.webmvc.examplec;

public class Department {

    private String id;
    private String name;
    private String tel;

    public Department(String id, String name, String tel) {
        this.id = id;
        this.name = name;
        this.tel = tel;
    }

    public String getId() {
        return id;
    }

    public void setId(String id) {
        this.id = id;
    }

    public String getName() {
        return name;
    }

    public void setName(String name) {
        this.name = name;
    }

    public String getTel() {
        return tel;
    }

    public void setTel(String tel) {
        this.tel = tel;
    }

    @Override
    public String toString() {
        return "Department{" +
                "id='" + id + '\'' +
                ", name='" + name + '\'' +
                ", tel='" + tel + '\'' +
                '}';
    }

}
java
package com.yangjunbo.springboot.webmvc.examplec;

import jakarta.annotation.PostConstruct;
import jakarta.servlet.http.HttpServletRequest;
import org.springframework.stereotype.Controller;
import org.springframework.ui.Model;
import org.springframework.web.bind.annotation.RequestMapping;

import java.util.ArrayList;
import java.util.List;
import java.util.UUID;

@Controller
public class DepartmentController {

    private List<Department> departmentList = new ArrayList<>();

    @PostConstruct
    public void init() {
        Department dept1 = new Department(UUID.randomUUID().toString().replaceAll("-", ""), "测试部门1", "123321");
        departmentList.add(dept1);
        Department dept2 = new Department(UUID.randomUUID().toString().replaceAll("-", ""), "测试部门2", "1234567");
        departmentList.add(dept2);
    }

    @RequestMapping("/department/list")
    public String list(Model model) {
        model.addAttribute("deptList", this.departmentList);
        return "deptList";
    }

}
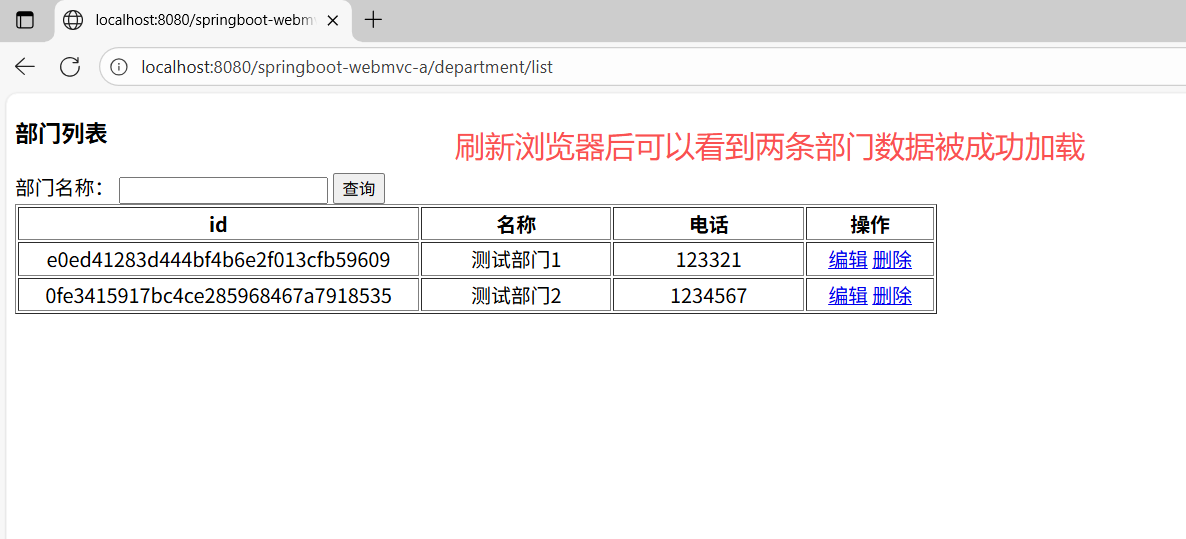
使用 Model 传递数据的方式非常简单,只需要执行 addAttribute 方法,指定数据的名称和数据本身。编写完代码后可以重启应用,刷新浏览器后可以看到两条部门数据被成功加载。
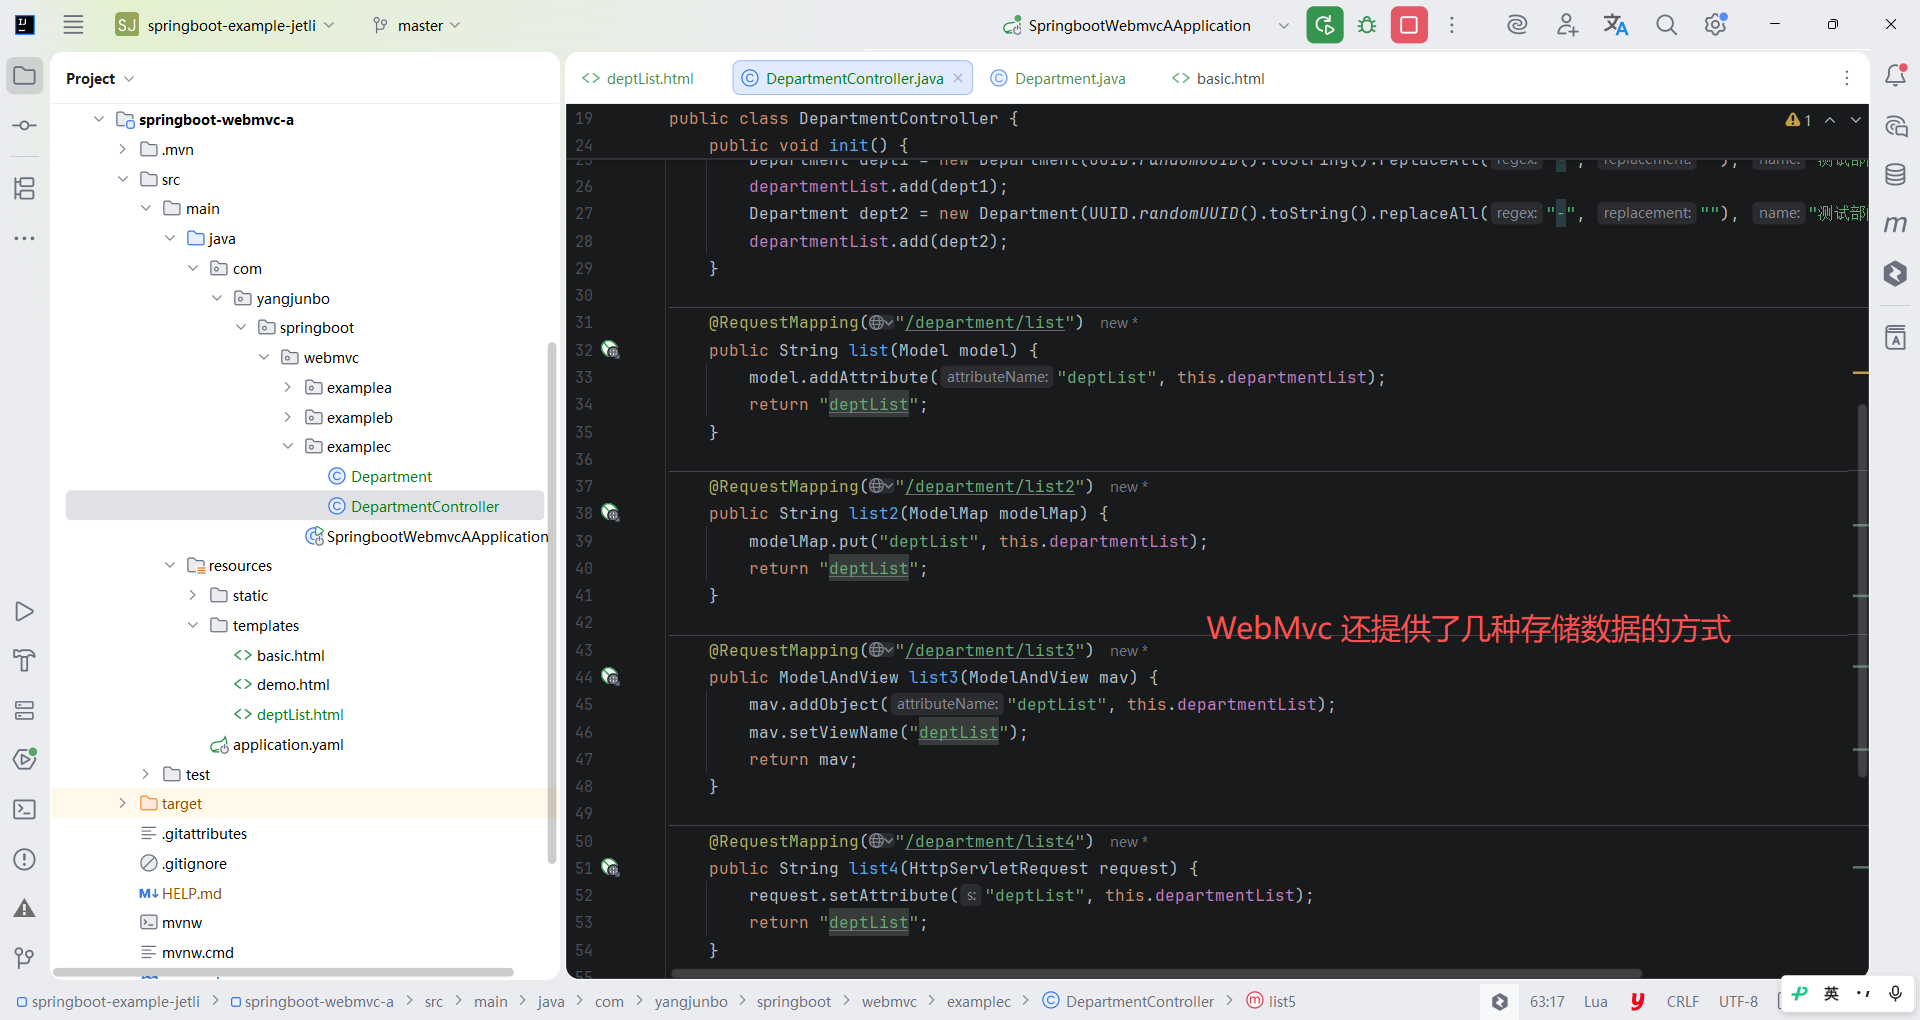
除了 Model,WebMvc 还提供了几种存储数据的方式,可以选择使用 ModelMap 或者 WebMvc 比较原始的 ModelAndView,它们同样可以作为Handler 方法的入参,封装数据并传递到页面中。此外,还可以借助 Servlet 的原生 API,即 HttpServletRequest 存储数据。
java
package com.yangjunbo.springboot.webmvc.examplec;

import jakarta.annotation.PostConstruct;
import jakarta.servlet.http.HttpServletRequest;
import org.springframework.stereotype.Controller;
import org.springframework.ui.Model;
import org.springframework.ui.ModelMap;
import org.springframework.web.bind.annotation.RequestMapping;
import org.springframework.web.servlet.ModelAndView;

import java.util.ArrayList;
import java.util.List;
import java.util.UUID;

@Controller
public class DepartmentController {

    private List<Department> departmentList = new ArrayList<>();

    @PostConstruct
    public void init() {
        Department dept1 = new Department(UUID.randomUUID().toString().replaceAll("-", ""), "测试部门1", "123321");
        departmentList.add(dept1);
        Department dept2 = new Department(UUID.randomUUID().toString().replaceAll("-", ""), "测试部门2", "1234567");
        departmentList.add(dept2);
    }

    @RequestMapping("/department/list")
    public String list(Model model) {
        model.addAttribute("deptList", this.departmentList);
        return "deptList";
    }

    @RequestMapping("/department/list2")
    public String list2(ModelMap modelMap) {
        modelMap.put("deptList", this.departmentList);
        return "deptList";
    }

    @RequestMapping("/department/list3")
    public ModelAndView list3(ModelAndView mav) {
        mav.addObject("deptList", this.departmentList);
        mav.setViewName("deptList");
        return mav;
    }

    @RequestMapping("/department/list4")
    public String list4(HttpServletRequest request) {
        request.setAttribute("deptList", this.departmentList);
        return "deptList";
    }

}
9.5 请求参数绑定
承接 9.4 节的内容,部门数据展示完毕后,下面要实现另一个需求:部门名称的模糊搜索。在页面的上方有一个搜索表单,输入部门名称即可实现模糊搜索。为了与 9.4 节的内容进行区分,此处的表单 action 路径改为 /department/list5。
9.5.1 收集参数的方式
对于 Controller 而言,收集请求参数有多种方式,即便没有学习 WebMvc 的内容,在原生的 Servlet 环境开发时也知道,使用HttpServletRequest 的 getParameter 方法就可以获取请求参数。本节先讲解 WebMvc 中常用的 2 种方式,分别是基于原生数据类型的收集和模型类的参数收集。
1.基于原生数据类型的参数收集
基于原生数据类型的收集方式,只需要在 Handler 方法参数上声明参数名称和需要收集的类型,参数类型的转换完全由 WebMvc 负责。
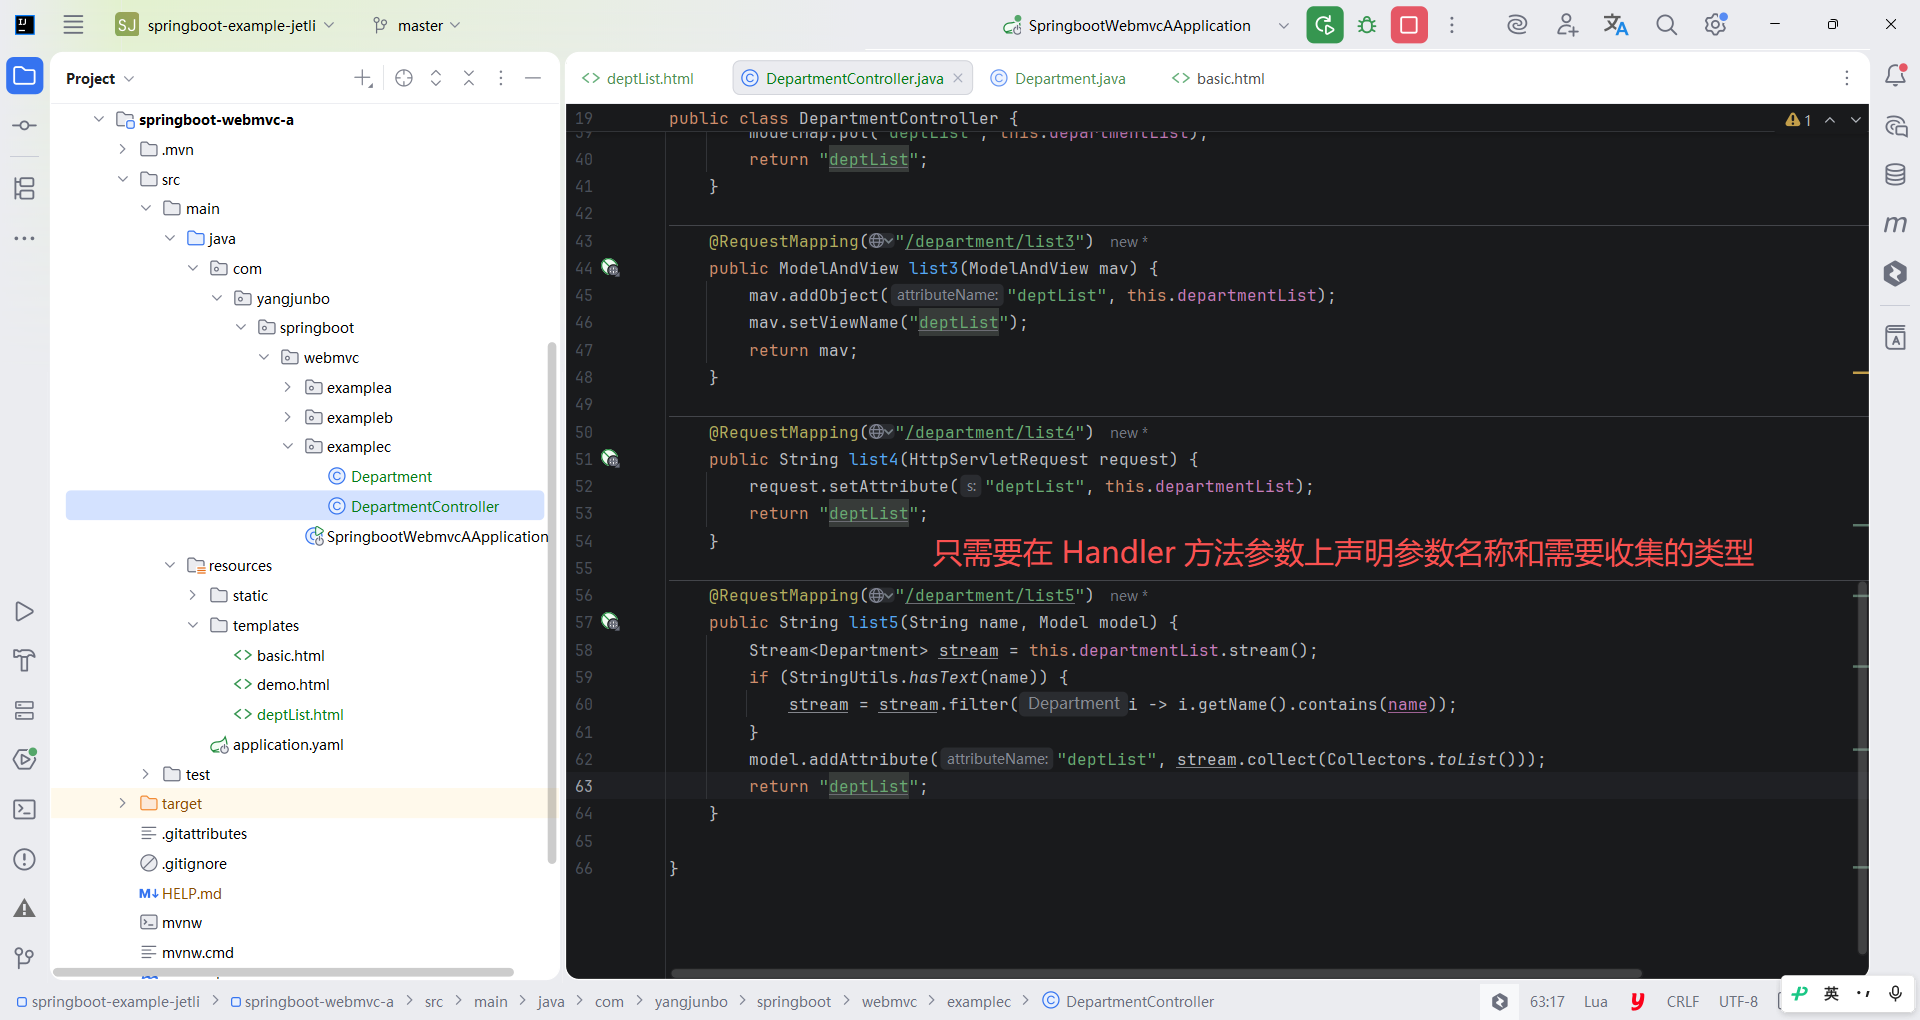
java
package com.yangjunbo.springboot.webmvc.examplec;

import jakarta.annotation.PostConstruct;
import jakarta.servlet.http.HttpServletRequest;
import org.springframework.stereotype.Controller;
import org.springframework.ui.Model;
import org.springframework.ui.ModelMap;
import org.springframework.util.StringUtils;
import org.springframework.web.bind.annotation.RequestMapping;
import org.springframework.web.servlet.ModelAndView;

import java.util.ArrayList;
import java.util.List;
import java.util.UUID;
import java.util.stream.Collectors;
import java.util.stream.Stream;

@Controller
public class DepartmentController {

    private List<Department> departmentList = new ArrayList<>();

    @PostConstruct
    public void init() {
        Department dept1 = new Department(UUID.randomUUID().toString().replaceAll("-", ""), "测试部门1", "123321");
        departmentList.add(dept1);
        Department dept2 = new Department(UUID.randomUUID().toString().replaceAll("-", ""), "测试部门2", "1234567");
        departmentList.add(dept2);
    }

    @RequestMapping("/department/list")
    public String list(Model model) {
        model.addAttribute("deptList", this.departmentList);
        return "deptList";
    }

    @RequestMapping("/department/list2")
    public String list2(ModelMap modelMap) {
        modelMap.put("deptList", this.departmentList);
        return "deptList";
    }

    @RequestMapping("/department/list3")
    public ModelAndView list3(ModelAndView mav) {
        mav.addObject("deptList", this.departmentList);
        mav.setViewName("deptList");
        return mav;
    }

    @RequestMapping("/department/list4")
    public String list4(HttpServletRequest request) {
        request.setAttribute("deptList", this.departmentList);
        return "deptList";
    }

    @RequestMapping("/department/list5")
    public String list5(String name, Model model) {
        Stream<Department> stream = this.departmentList.stream();
        if (StringUtils.hasText(name)) {
            stream = stream.filter(i -> i.getName().contains(name));
        }
        model.addAttribute("deptList", stream.collect(Collectors.toList()));
        return "deptList";
    }

}
2.基于模型类的参数收集
如果收集的参数变多,Handler 方法的参数列表会变得非常长,可以将这些参数都封装到一个模型对象中。直接将 Department 的类型声明到Handler 方法上,WebMvc 会遍历 Department 中的所有属性,依次从请求参数中获取,并将获取的参数设置到 Department 对象中。
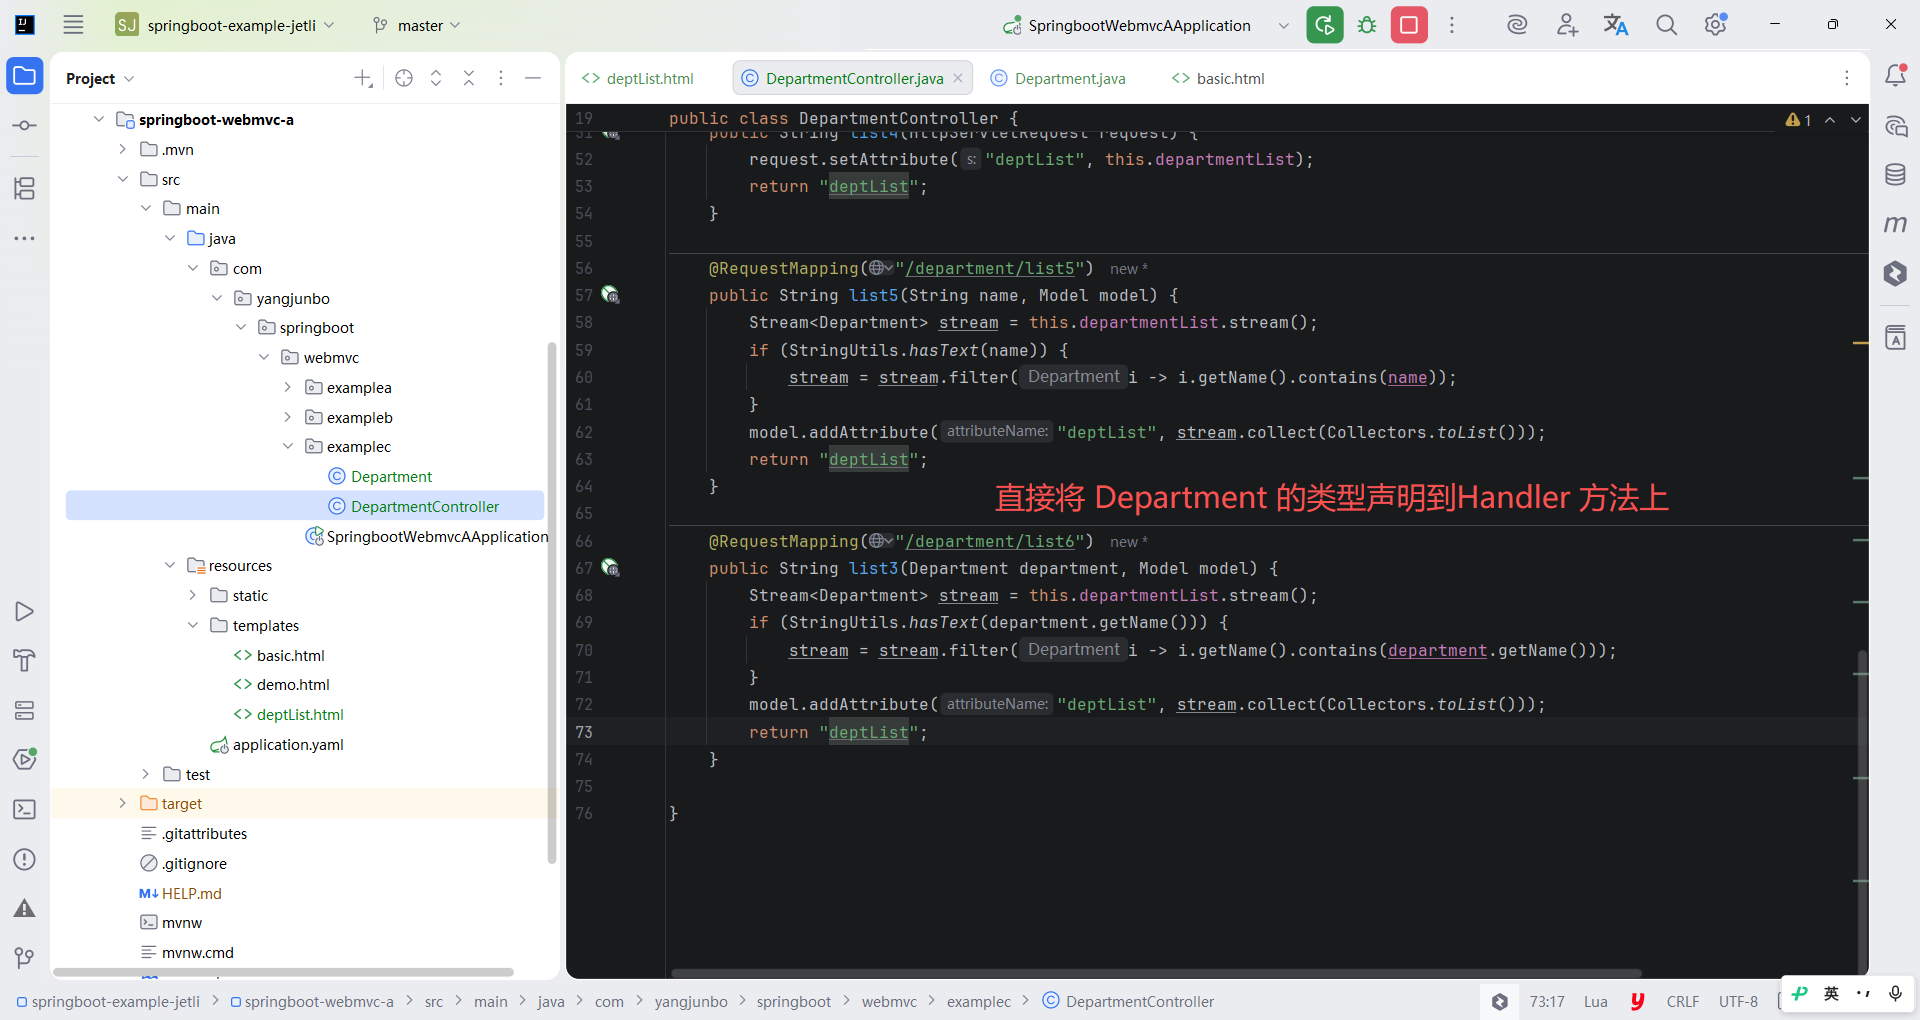
java
package com.yangjunbo.springboot.webmvc.examplec;

import jakarta.annotation.PostConstruct;
import jakarta.servlet.http.HttpServletRequest;
import org.springframework.stereotype.Controller;
import org.springframework.ui.Model;
import org.springframework.ui.ModelMap;
import org.springframework.util.StringUtils;
import org.springframework.web.bind.annotation.RequestMapping;
import org.springframework.web.servlet.ModelAndView;

import java.util.ArrayList;
import java.util.List;
import java.util.UUID;
import java.util.stream.Collectors;
import java.util.stream.Stream;

@Controller
public class DepartmentController {

    private List<Department> departmentList = new ArrayList<>();

    @PostConstruct
    public void init() {
        Department dept1 = new Department(UUID.randomUUID().toString().replaceAll("-", ""), "测试部门1", "123321");
        departmentList.add(dept1);
        Department dept2 = new Department(UUID.randomUUID().toString().replaceAll("-", ""), "测试部门2", "1234567");
        departmentList.add(dept2);
    }

    @RequestMapping("/department/list")
    public String list(Model model) {
        model.addAttribute("deptList", this.departmentList);
        return "deptList";
    }

    @RequestMapping("/department/list2")
    public String list2(ModelMap modelMap) {
        modelMap.put("deptList", this.departmentList);
        return "deptList";
    }

    @RequestMapping("/department/list3")
    public ModelAndView list3(ModelAndView mav) {
        mav.addObject("deptList", this.departmentList);
        mav.setViewName("deptList");
        return mav;
    }

    @RequestMapping("/department/list4")
    public String list4(HttpServletRequest request) {
        request.setAttribute("deptList", this.departmentList);
        return "deptList";
    }

    @RequestMapping("/department/list5")
    public String list5(String name, Model model) {
        Stream<Department> stream = this.departmentList.stream();
        if (StringUtils.hasText(name)) {
            stream = stream.filter(i -> i.getName().contains(name));
        }
        model.addAttribute("deptList", stream.collect(Collectors.toList()));
        return "deptList";
    }

    @RequestMapping("/department/list6")
    public String list3(Department department, Model model) {
        Stream<Department> stream = this.departmentList.stream();
        if (StringUtils.hasText(department.getName())) {
            stream = stream.filter(i -> i.getName().contains(department.getName()));
        }
        model.addAttribute("deptList", stream.collect(Collectors.toList()));
        return "deptList";
    }

}
3.使用 @RequestParam
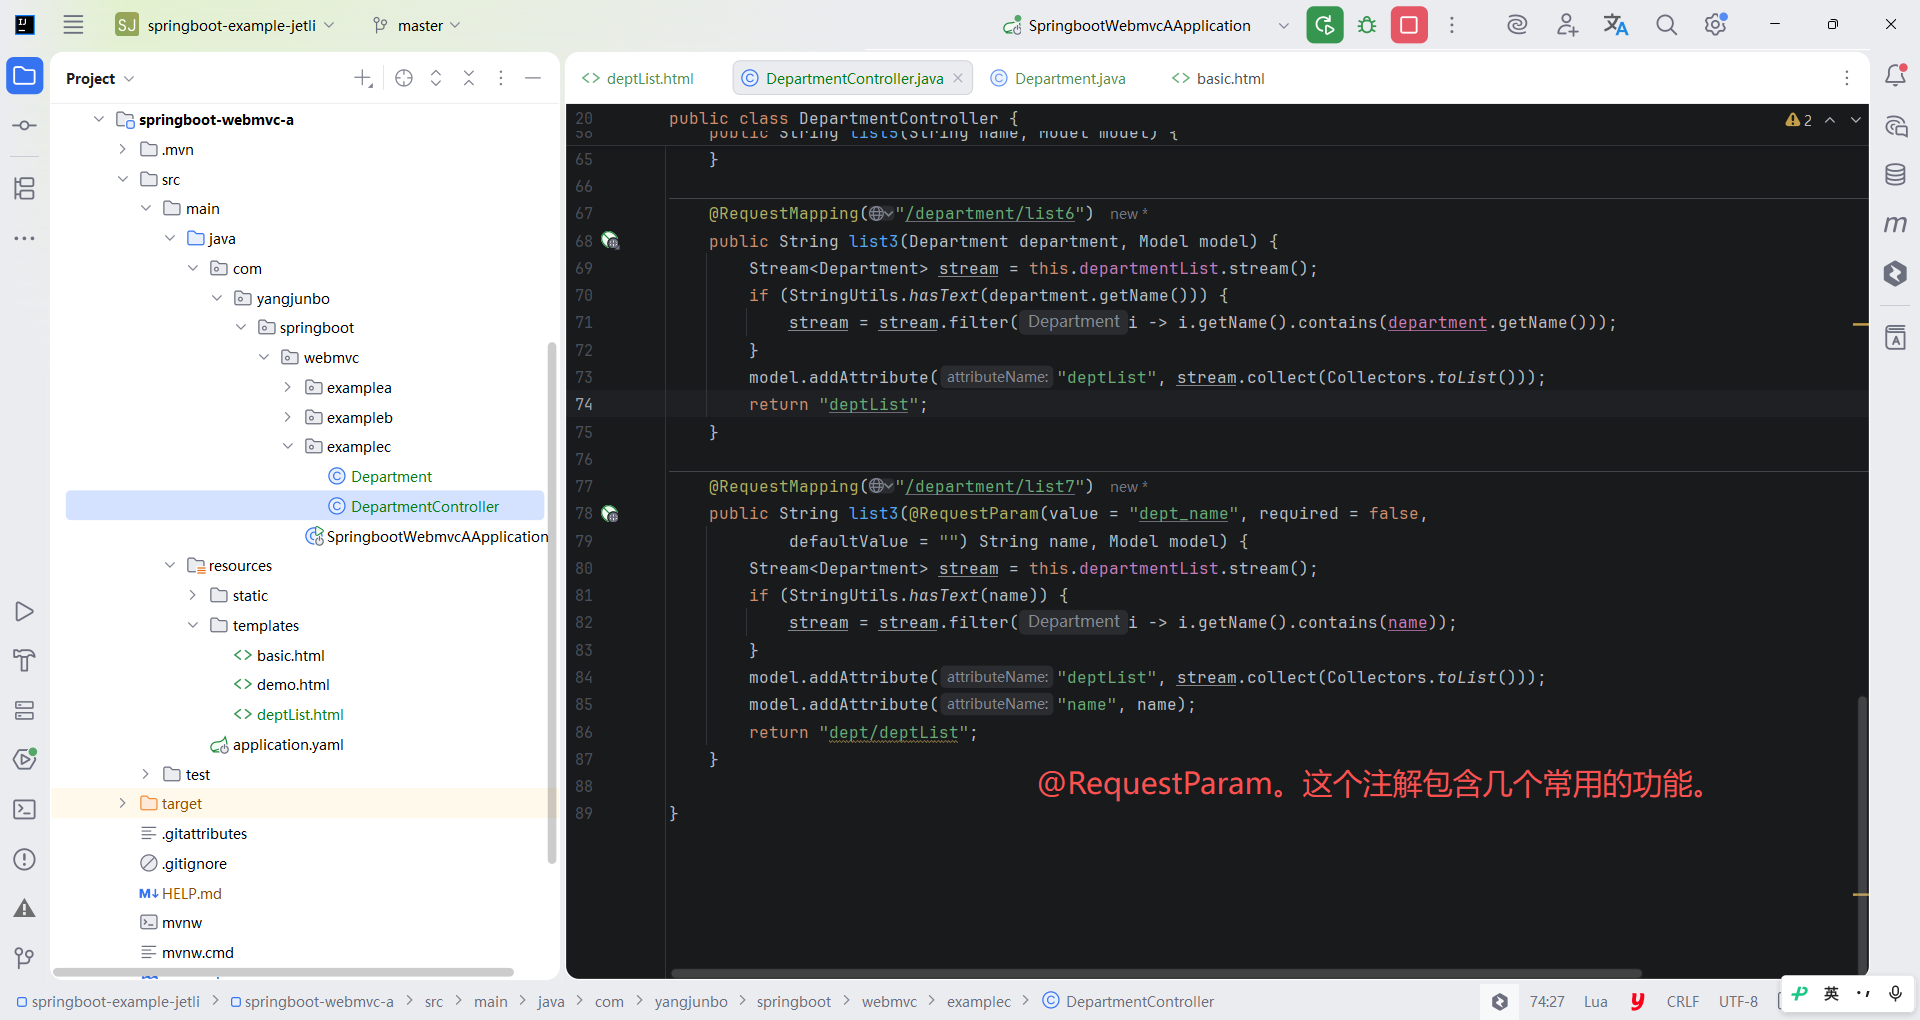
在参数绑定和收集阶段,有一个很重要的注解需要读者了解:@RequestParam。这个注解包含几个常用的功能。在 Handler 方法参数中收集的参数名称与请求的名称不同时,可以使用 @RequestParam 指定映射关系;当一个方法参数上标注 @RequestParam 后,该参数默认必须在请求中传递,可以指定 required = false 将对应的参数设置为非必填项;使用 @RequestParam 时还可以使用 defaultValue 属性给方法参数设置默认值,当请求对应方法时没有指定参数值,则 WebMvc 会使用 @RequestParam 中设置的默认值。
java
package com.yangjunbo.springboot.webmvc.examplec;

import jakarta.annotation.PostConstruct;
import jakarta.servlet.http.HttpServletRequest;
import org.springframework.stereotype.Controller;
import org.springframework.ui.Model;
import org.springframework.ui.ModelMap;
import org.springframework.util.StringUtils;
import org.springframework.web.bind.annotation.RequestMapping;
import org.springframework.web.bind.annotation.RequestParam;
import org.springframework.web.servlet.ModelAndView;

import java.util.ArrayList;
import java.util.List;
import java.util.UUID;
import java.util.stream.Collectors;
import java.util.stream.Stream;

@Controller
public class DepartmentController {

    private List<Department> departmentList = new ArrayList<>();

    @PostConstruct
    public void init() {
        Department dept1 = new Department(UUID.randomUUID().toString().replaceAll("-", ""), "测试部门1", "123321");
        departmentList.add(dept1);
        Department dept2 = new Department(UUID.randomUUID().toString().replaceAll("-", ""), "测试部门2", "1234567");
        departmentList.add(dept2);
    }

    @RequestMapping("/department/list")
    public String list(Model model) {
        model.addAttribute("deptList", this.departmentList);
        return "deptList";
    }

    @RequestMapping("/department/list2")
    public String list2(ModelMap modelMap) {
        modelMap.put("deptList", this.departmentList);
        return "deptList";
    }

    @RequestMapping("/department/list3")
    public ModelAndView list3(ModelAndView mav) {
        mav.addObject("deptList", this.departmentList);
        mav.setViewName("deptList");
        return mav;
    }

    @RequestMapping("/department/list4")
    public String list4(HttpServletRequest request) {
        request.setAttribute("deptList", this.departmentList);
        return "deptList";
    }

    @RequestMapping("/department/list5")
    public String list5(String name, Model model) {
        Stream<Department> stream = this.departmentList.stream();
        if (StringUtils.hasText(name)) {
            stream = stream.filter(i -> i.getName().contains(name));
        }
        model.addAttribute("deptList", stream.collect(Collectors.toList()));
        return "deptList";
    }

    @RequestMapping("/department/list6")
    public String list3(Department department, Model model) {
        Stream<Department> stream = this.departmentList.stream();
        if (StringUtils.hasText(department.getName())) {
            stream = stream.filter(i -> i.getName().contains(department.getName()));
        }
        model.addAttribute("deptList", stream.collect(Collectors.toList()));
        return "deptList";
    }

    @RequestMapping("/department/list7")
    public String list3(@RequestParam(value = "dept_name", required = false,
            defaultValue = "") String name, Model model) {
        Stream<Department> stream = this.departmentList.stream();
        if (StringUtils.hasText(name)) {
            stream = stream.filter(i -> i.getName().contains(name));
        }
        model.addAttribute("deptList", stream.collect(Collectors.toList()));
        model.addAttribute("name", name);
        return "dept/deptList";
    }

}
9.5.2 复杂类型参数收集
基于部门的信息定义相对简单,为了演示相对复杂的数据结构和复杂参数收集,下面再来制作一个用户信息的模型和用户列表。
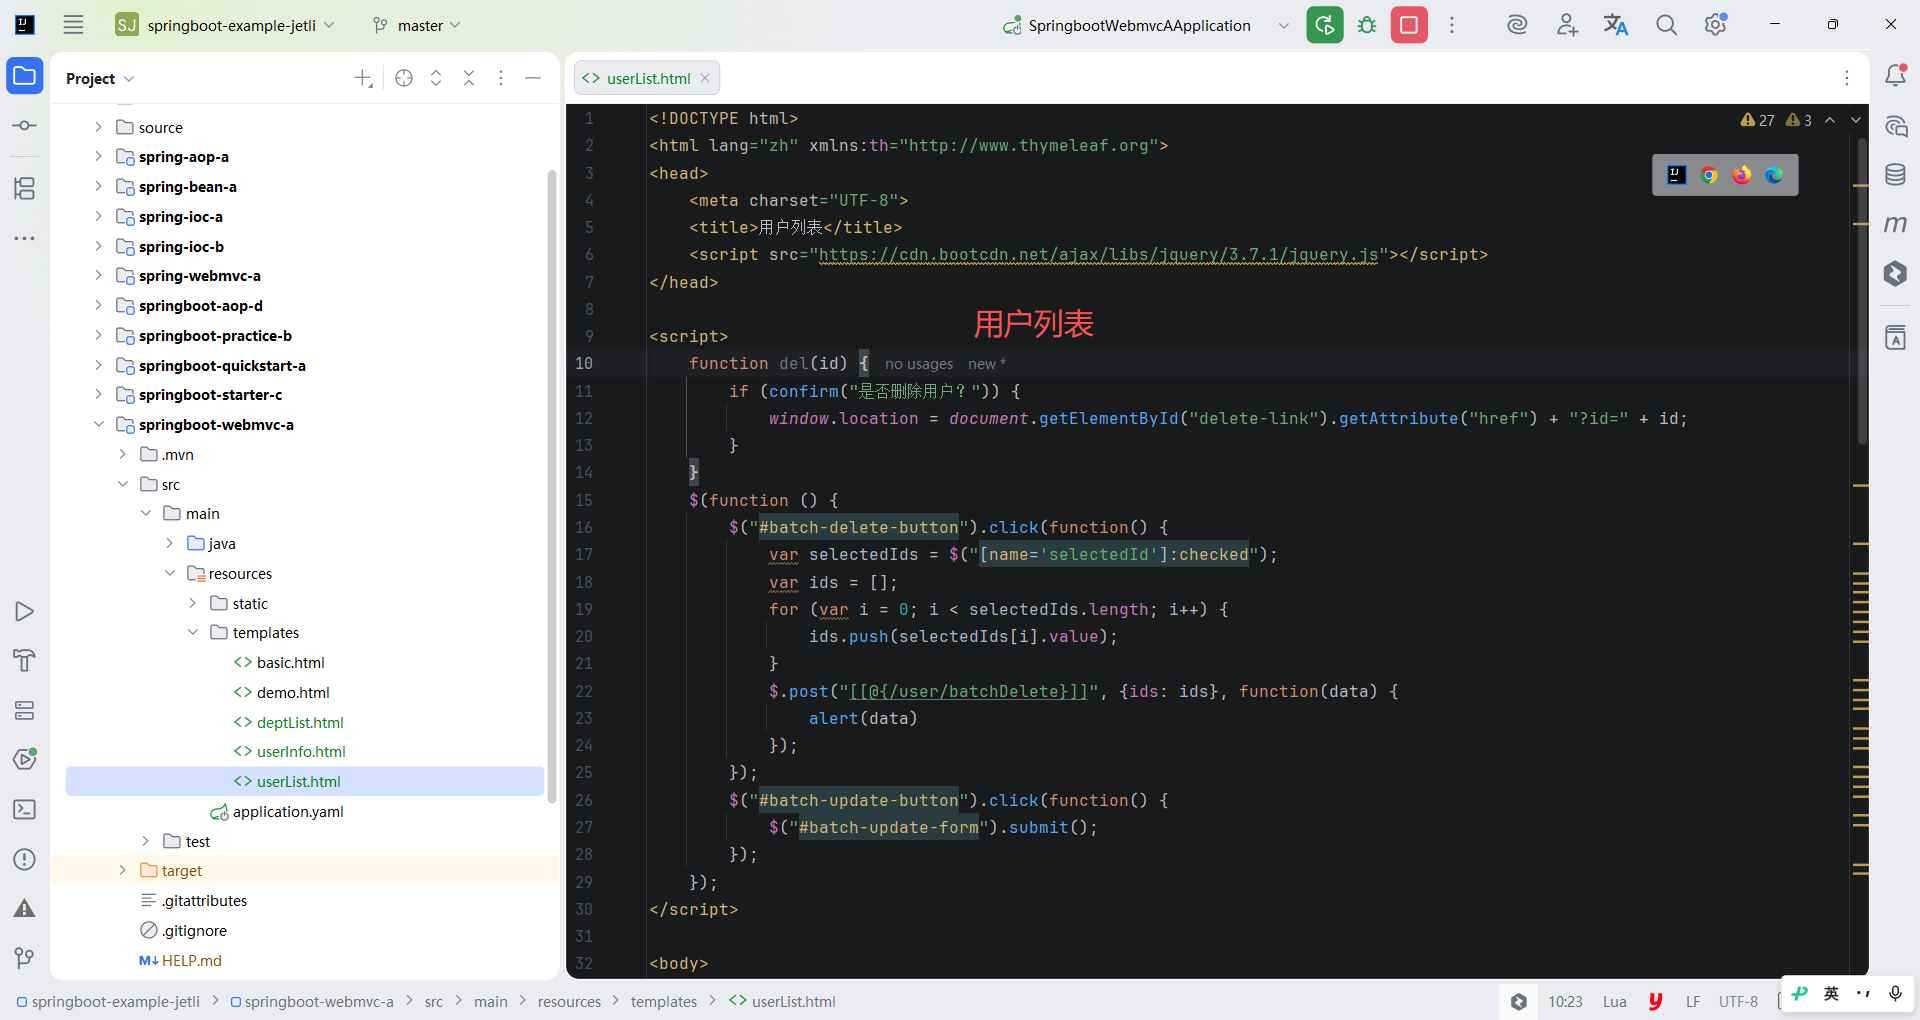
总体来看 userList.html 的内容结构与 deptList.html 基本相同,上方为搜索表单和几个操作按钮,中间的主体部分是带有复选框的数据表格。注意数据表格中的两个特殊的列,一个是生日列,代码中已经使用 Thymeleaf 的内置工具类 #dates 将其格式化;另一个是所属部门,使用xxx.yyy.zzz 这样的表达式级联获取属性值。
java
<!DOCTYPE html>
<html lang="zh" xmlns:th="http://www.thymeleaf.org">
<head>
    <meta charset="UTF-8">
    <title>用户列表</title>
    <script src="https://cdn.bootcdn.net/ajax/libs/jquery/3.7.1/jquery.js"></script>
</head>

<script>
    function del(id) {
        if (confirm("是否删除用户?")) {
            window.location = document.getElementById("delete-link").getAttribute("href") + "?id=" + id;
        }
    }
    $(function () {
        $("#batch-delete-button").click(function() {
            var selectedIds = $("[name='selectedId']:checked");
            var ids = [];
            for (var i = 0; i < selectedIds.length; i++) {
                ids.push(selectedIds[i].value);
            }
            $.post("[[@{/user/batchDelete}]]", {ids: ids}, function(data) {
                alert(data)
            });
        });
        $("#batch-update-button").click(function() {
            $("#batch-update-form").submit();
        });
    });
</script>

<body>
<h3>用户列表</h3>
<div>
    <form id="query-form" method="get" th:action="@{/user/list}">
        <label>用户名:</label>
        <input type="text" name="username" value="">
        <input type="submit" value="查询">
    </form>
    <button id="batch-delete-button">批量删除</button>
    <button id="batch-update-button">批量修改用户名</button>
</div>
<table id="user-table" border="1">
    <thead>
    <tr>
        <th width="40px"></th>
        <th width="320px">id</th>
        <th width="150px">用户名</th>
        <th width="100px">姓名</th>
        <th width="150px">生日</th>
        <th width="150px">头像</th>
        <th width="150px">所属部门</th>
        <th width="100px">操作</th>
    </tr>
    </thead>
    <tbody>
    <form id="batch-update-form" th:action="@{/user/batchUpdate}" method="post">
        <tr th:each="user,userstatus : ${userList}">
            <td align="center">
                <input type="checkbox" name="selectedId" th:value="${user.id}">
            </td>
            <td align="center">[[${user.id}]]</td>
            <td align="center">
                <input type="text" th:name="|users[${userstatus.index}].username|" th:value="${user.username}">
            </td>
            <td align="center">[[${user.name}]]</td>
            <td align="center">[[${#dates.format(user.birthday, 'yyyy-MM-dd')}]]</td>
            <td align="center">
                <img th:src="@{|/user/getPhoto?id=${user.id}|}"/>
            </td>
            <td align="center">[[${user.department.name}]]</td>
            <td align="center">
                <a th:href="@{|/user/edit?id=${user.id}|}">编辑</a>
                <a th:href="|javascript:del('${user.id}')|">删除</a>
            </td>
        </tr>
    </form>
    </tbody>
</table>
<a id="delete-link" th:href="@{/user/delete}" style="display: none"></a>
</body>
</html>
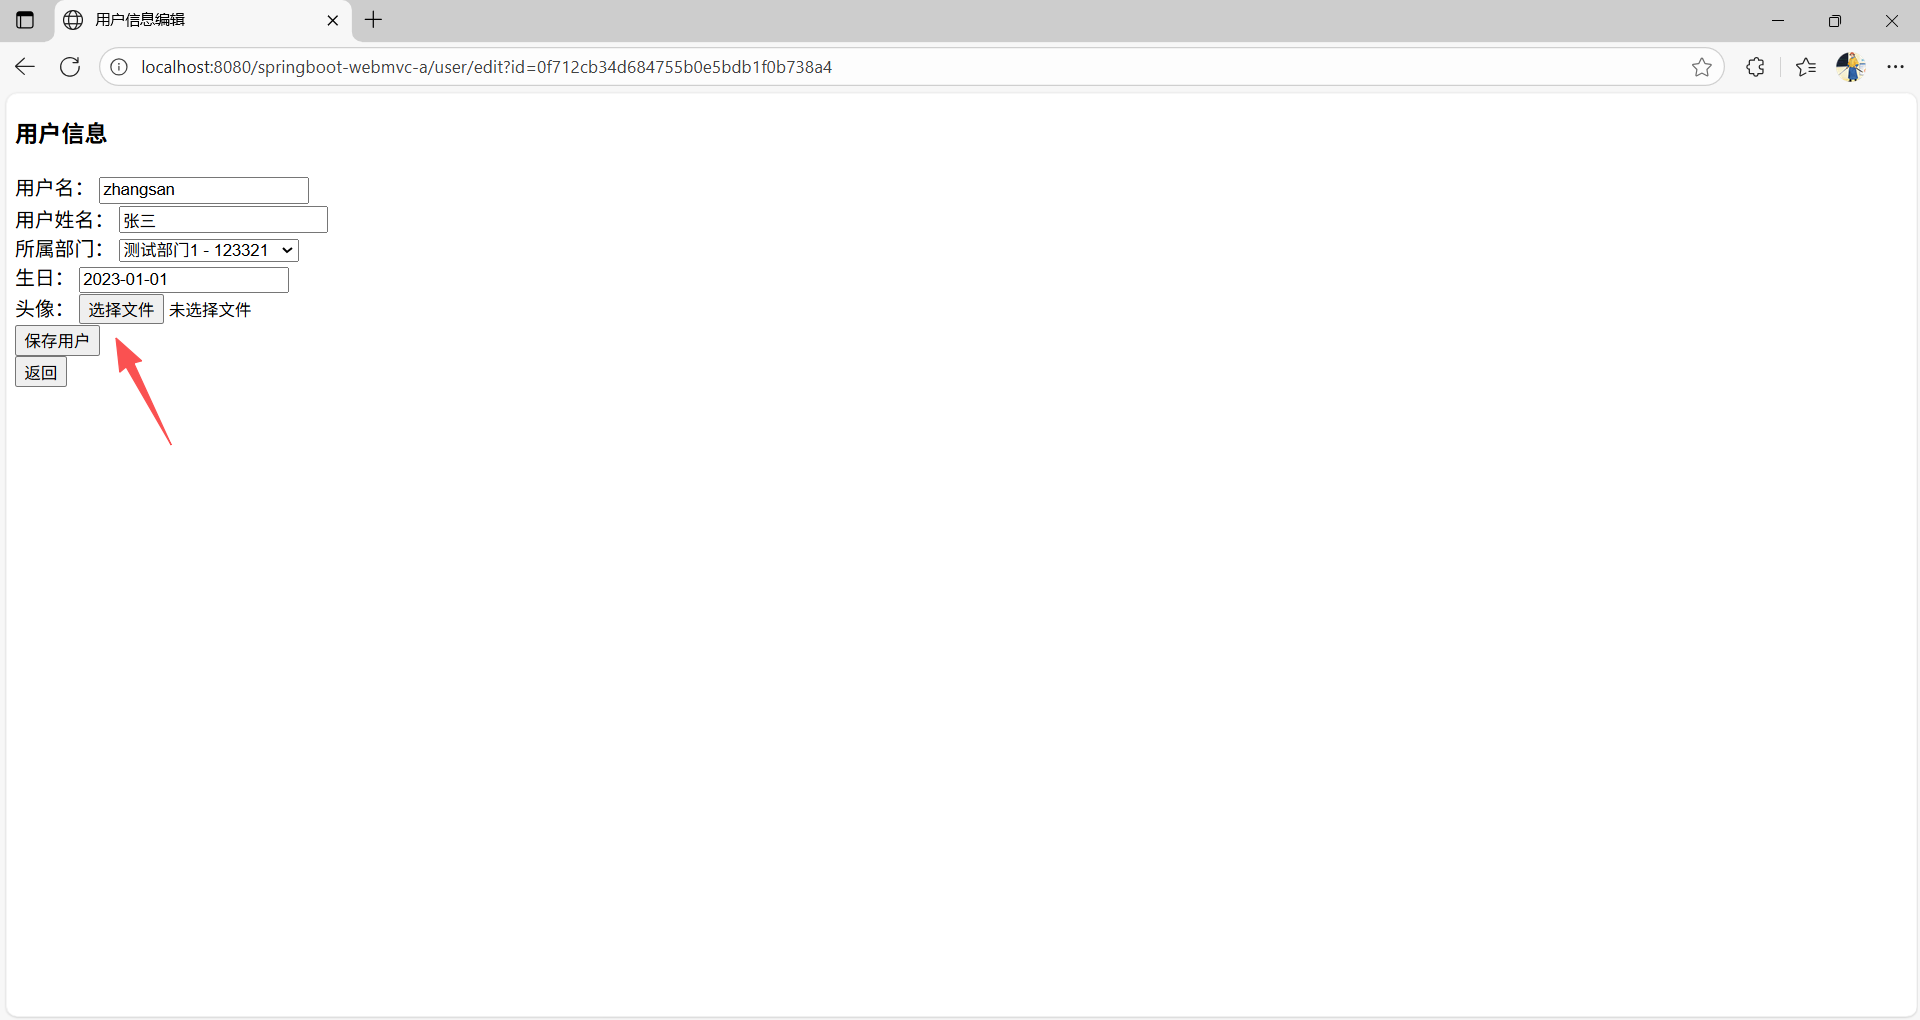
单击数据表格中任意一行的"编辑"按钮后会跳转到编辑用户信息的页面 userInfo.html,这个页面负责修改用户信息并保存到后端。目前这段HTML 的内容是不完整的,部分表单的 name 属性空缺,并且表单中暂时注释了生日和头像的表单项,这些会在接下来的内容中体现。
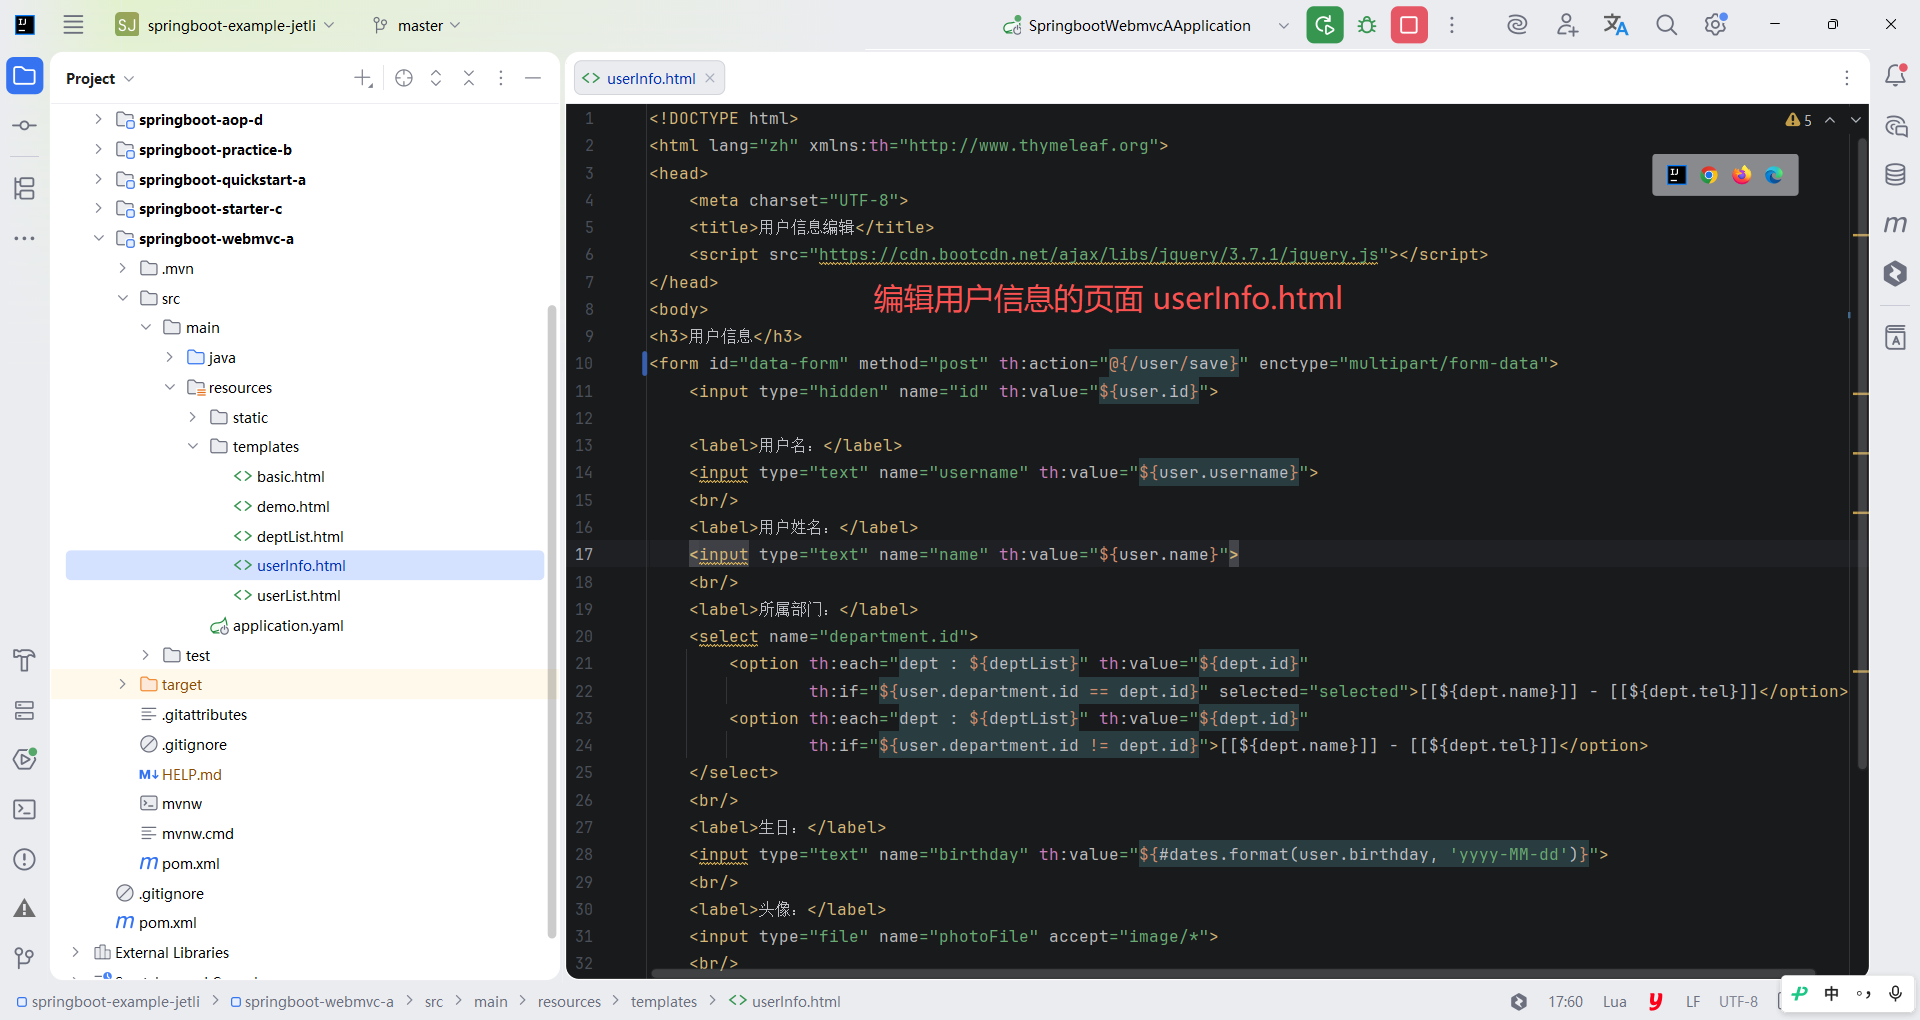
java
<!DOCTYPE html>
<html lang="zh" xmlns:th="http://www.thymeleaf.org">
<head>
    <meta charset="UTF-8">
    <title>用户信息编辑</title>
    <script src="https://cdn.bootcdn.net/ajax/libs/jquery/3.7.1/jquery.js"></script>
</head>
<body>
<h3>用户信息</h3>
<form id="data-form" method="post" th:action="@{/user/save}" enctype="multipart/form-data">
    <input type="hidden" name="id" th:value="${user.id}">

    <label>用户名:</label>
    <input type="text" name="username" th:value="${user.username}">
    <br/>
    <label>用户姓名:</label>
    <input type="text" name="name" th:value="${user.name}">
    <br/>
    <label>所属部门:</label>
    <select name="department.id">
        <option th:each="dept : ${deptList}" th:value="${dept.id}"
                th:if="${user.department.id == dept.id}" selected="selected">[[${dept.name}]] - [[${dept.tel}]]</option>
        <option th:each="dept : ${deptList}" th:value="${dept.id}"
                th:if="${user.department.id != dept.id}">[[${dept.name}]] - [[${dept.tel}]]</option>
    </select>
    <br/>
    <label>生日:</label>
    <input type="text" name="birthday" th:value="${#dates.format(user.birthday, 'yyyy-MM-dd')}">
    <br/>
    <label>头像:</label>
    <input type="file" name="photoFile" accept="image/*">
    <br/>
    <input type="submit" value="保存用户">
</form>
<button onclick="window.history.go(-1)">返回</button>
</body>
</html>
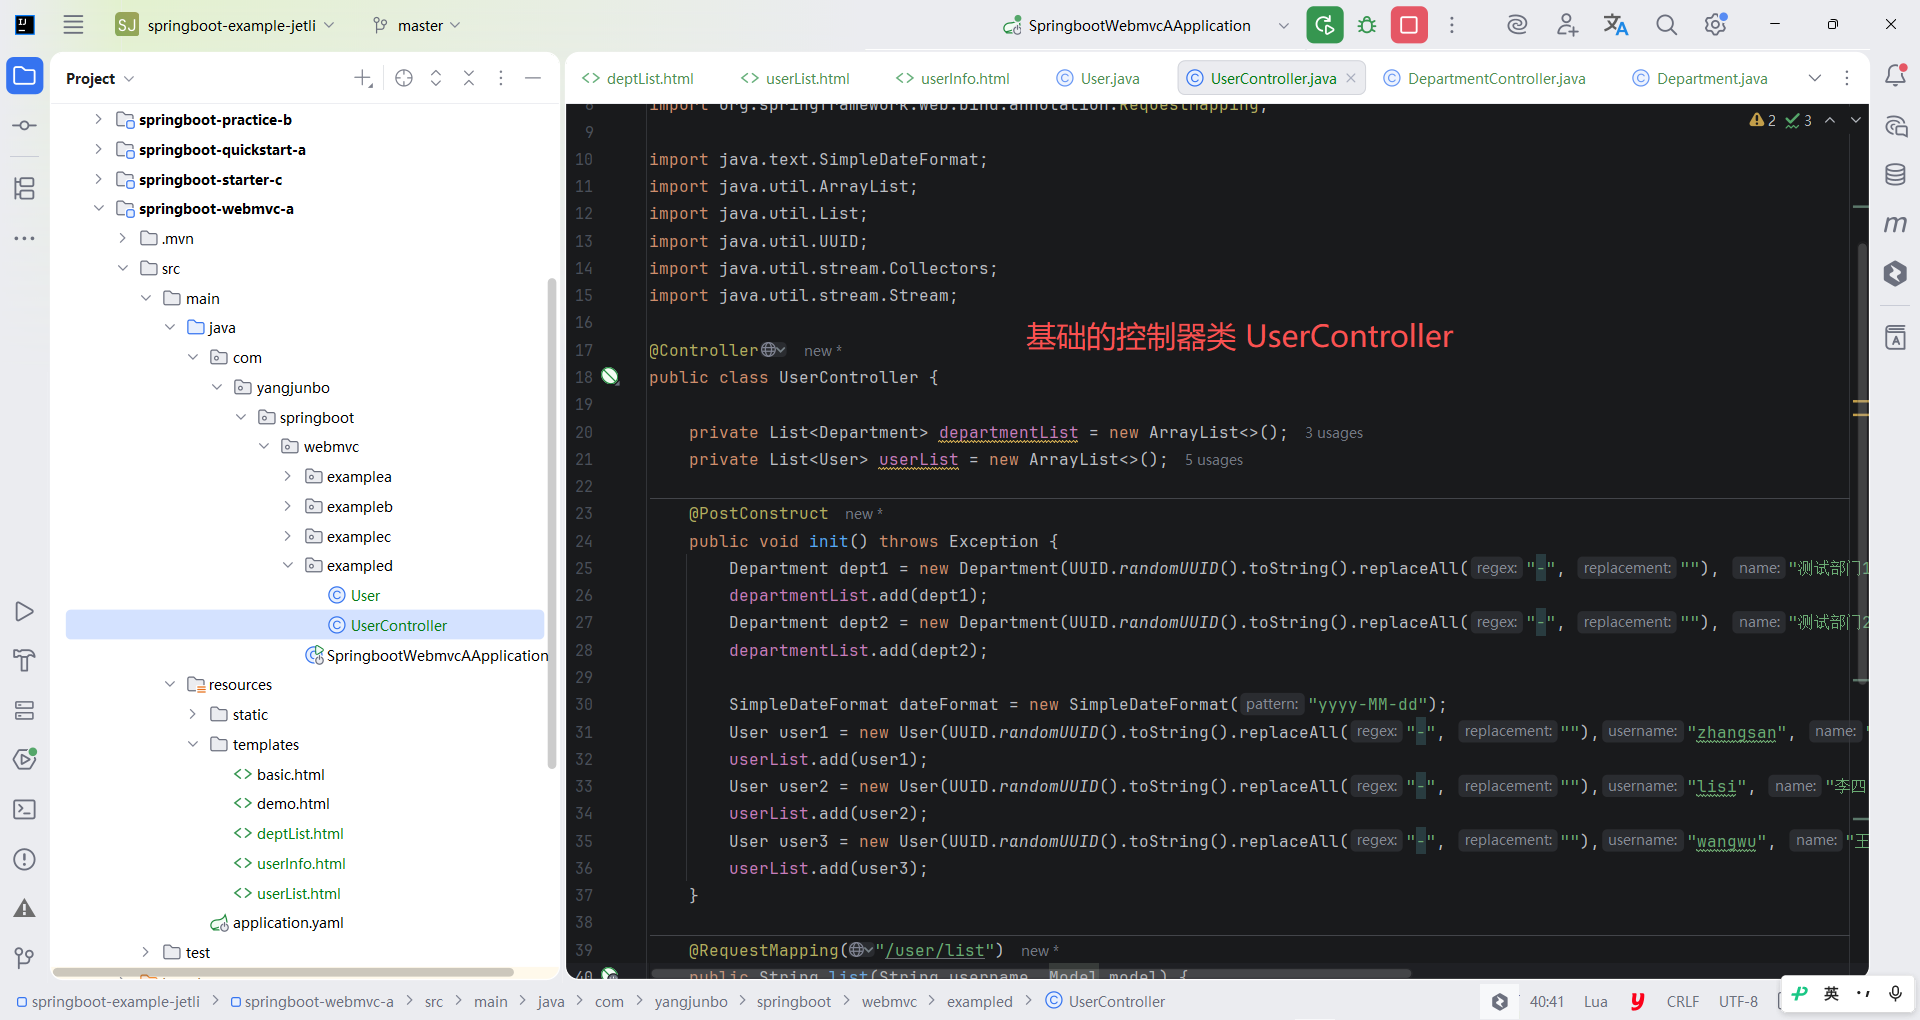
另外,为了能够正确跳转页面和展示数据,还需要提供一个 User 模型类和基础的控制器类 UserController。测试代码中准备了 2 个部门和 3 个用户信息,后续都基于这两组数据进行演示和练习。
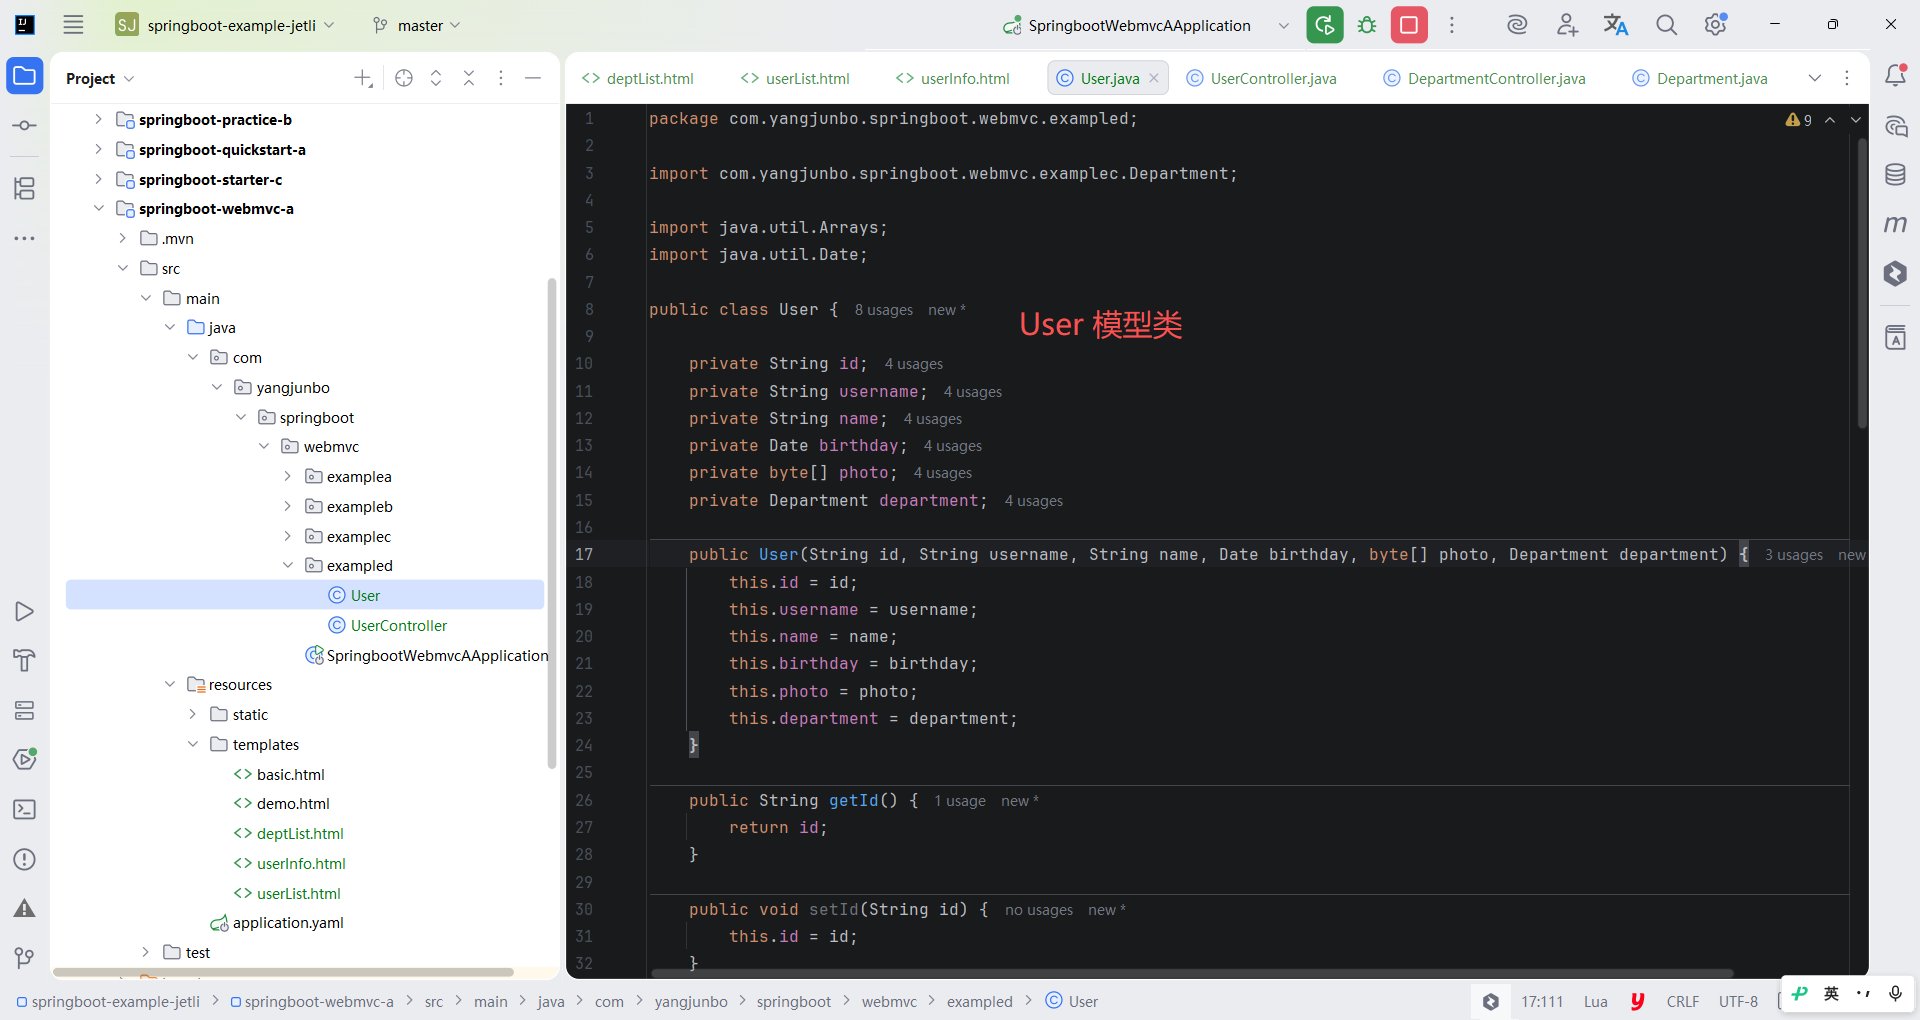
java
package com.yangjunbo.springboot.webmvc.exampled;

import com.yangjunbo.springboot.webmvc.examplec.Department;

import java.util.Arrays;
import java.util.Date;

public class User {

    private String id;
    private String username;
    private String name;
    private Date birthday;
    private byte[] photo;
    private Department department;

    public User() {
    }

    public User(String id, String username, String name, Date birthday, byte[] photo, Department department) {
        this.id = id;
        this.username = username;
        this.name = name;
        this.birthday = birthday;
        this.photo = photo;
        this.department = department;
    }

    public String getId() {
        return id;
    }

    public void setId(String id) {
        this.id = id;
    }

    public String getUsername() {
        return username;
    }

    public void setUsername(String username) {
        this.username = username;
    }

    public String getName() {
        return name;
    }

    public void setName(String name) {
        this.name = name;
    }

    public Date getBirthday() {
        return birthday;
    }

    public void setBirthday(Date birthday) {
        this.birthday = birthday;
    }

    public byte[] getPhoto() {
        return photo;
    }

    public void setPhoto(byte[] photo) {
        this.photo = photo;
    }

    public Department getDepartment() {
        return department;
    }

    public void setDepartment(Department department) {
        this.department = department;
    }

    @Override
    public String toString() {
        return "User{" +
                "id='" + id + '\'' +
                ", username='" + username + '\'' +
                ", name='" + name + '\'' +
                ", birthday=" + birthday +
                ", photo=" + Arrays.toString(photo) +
                ", department=" + department +
                '}';
    }

}
java
package com.yangjunbo.springboot.webmvc.exampled;

import com.yangjunbo.springboot.webmvc.examplec.Department;
import jakarta.annotation.PostConstruct;
import org.springframework.stereotype.Controller;
import org.springframework.ui.Model;
import org.springframework.util.StringUtils;
import org.springframework.web.bind.annotation.RequestMapping;

import java.text.SimpleDateFormat;
import java.util.ArrayList;
import java.util.List;
import java.util.UUID;
import java.util.stream.Collectors;
import java.util.stream.Stream;

@Controller
public class UserController {

    private List<Department> departmentList = new ArrayList<>();
    private List<User> userList = new ArrayList<>();

    @PostConstruct
    public void init() throws Exception {
        Department dept1 = new Department(UUID.randomUUID().toString().replaceAll("-", ""), "测试部门1", "123321");
        departmentList.add(dept1);
        Department dept2 = new Department(UUID.randomUUID().toString().replaceAll("-", ""), "测试部门2", "1234567");
        departmentList.add(dept2);

        SimpleDateFormat dateFormat = new SimpleDateFormat("yyyy-MM-dd");
        User user1 = new User(UUID.randomUUID().toString().replaceAll("-", ""),"zhangsan", "张三", dateFormat.parse("2023-01-01"), null, dept1);
        userList.add(user1);
        User user2 = new User(UUID.randomUUID().toString().replaceAll("-", ""),"lisi", "李四", dateFormat.parse("2023-02-02"), null, dept1);
        userList.add(user2);
        User user3 = new User(UUID.randomUUID().toString().replaceAll("-", ""),"wangwu", "王五", dateFormat.parse("2023-03-03"), null, dept2);
        userList.add(user3);
    }

    @RequestMapping("/user/list")
    public String list(String username, Model model) {
        Stream<User> stream = this.userList.stream();
        if (StringUtils.hasText(username)) {
            stream = stream.filter(i -> i.getUsername().contains(username));
        }
        model.addAttribute("userList", stream.collect(Collectors.toList()));
        return "userList";
    }

    @RequestMapping("/user/edit")
    public String edit(String id, Model model) {
        model.addAttribute("user", this.userList.stream().filter(i -> i.getId().equals(id)). findAny().orElse(null));
        model.addAttribute("deptList", this.departmentList);
        return "userInfo";
    }
}
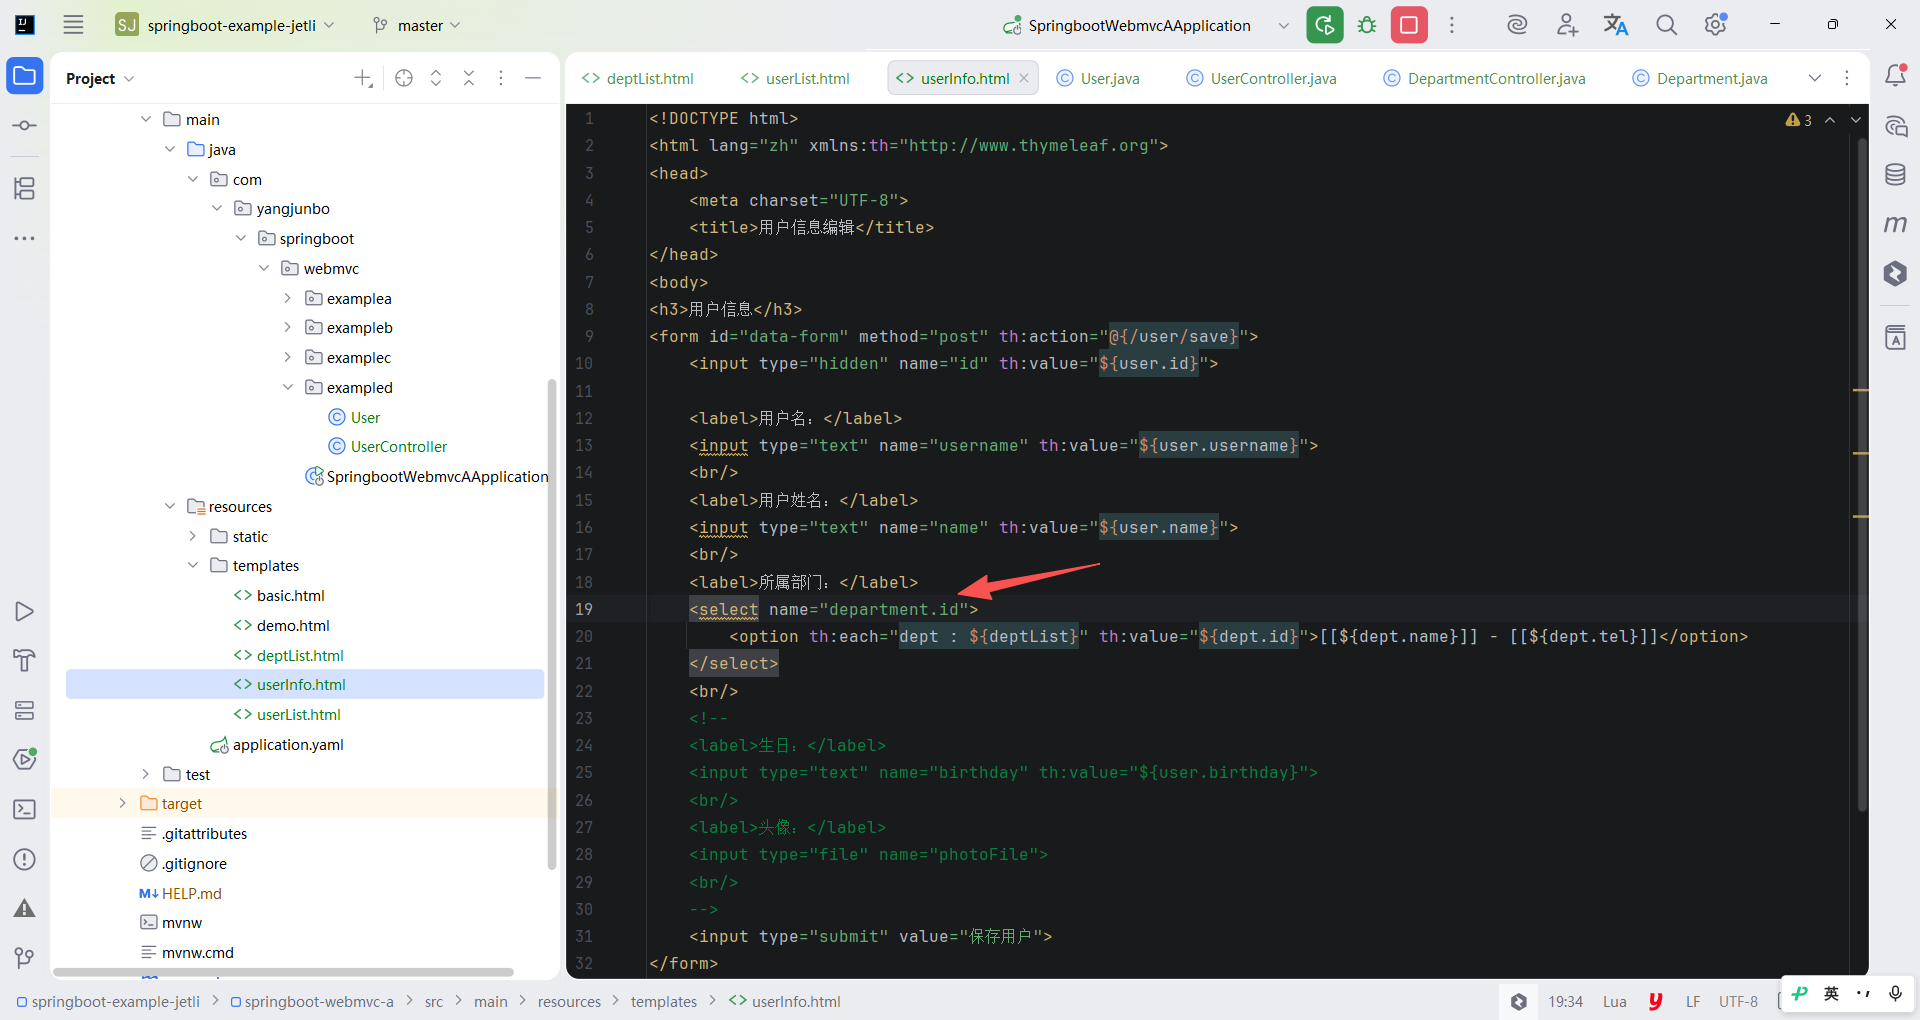
1.嵌套模型参数绑定
观察代码中的 "所属部门" 部分,希望当选中 select 标签的某个 option 后,将 value 绑定到User 对象内部的 Department 对象的 id 属性上,那么 name 属性的写法就理应写为 department.id。
2.数组集合参数绑定
下面继续完善功能,上方操作栏中有一个 "批量删除" 按钮,预期是,通过勾选数据表格左侧的复选框后单击 "批量删除" 按钮,就可以实现基于 id 的用户批量删除,显然这个功能中最重要的环节是如何将被勾选的用户信息的 id 收集起来。
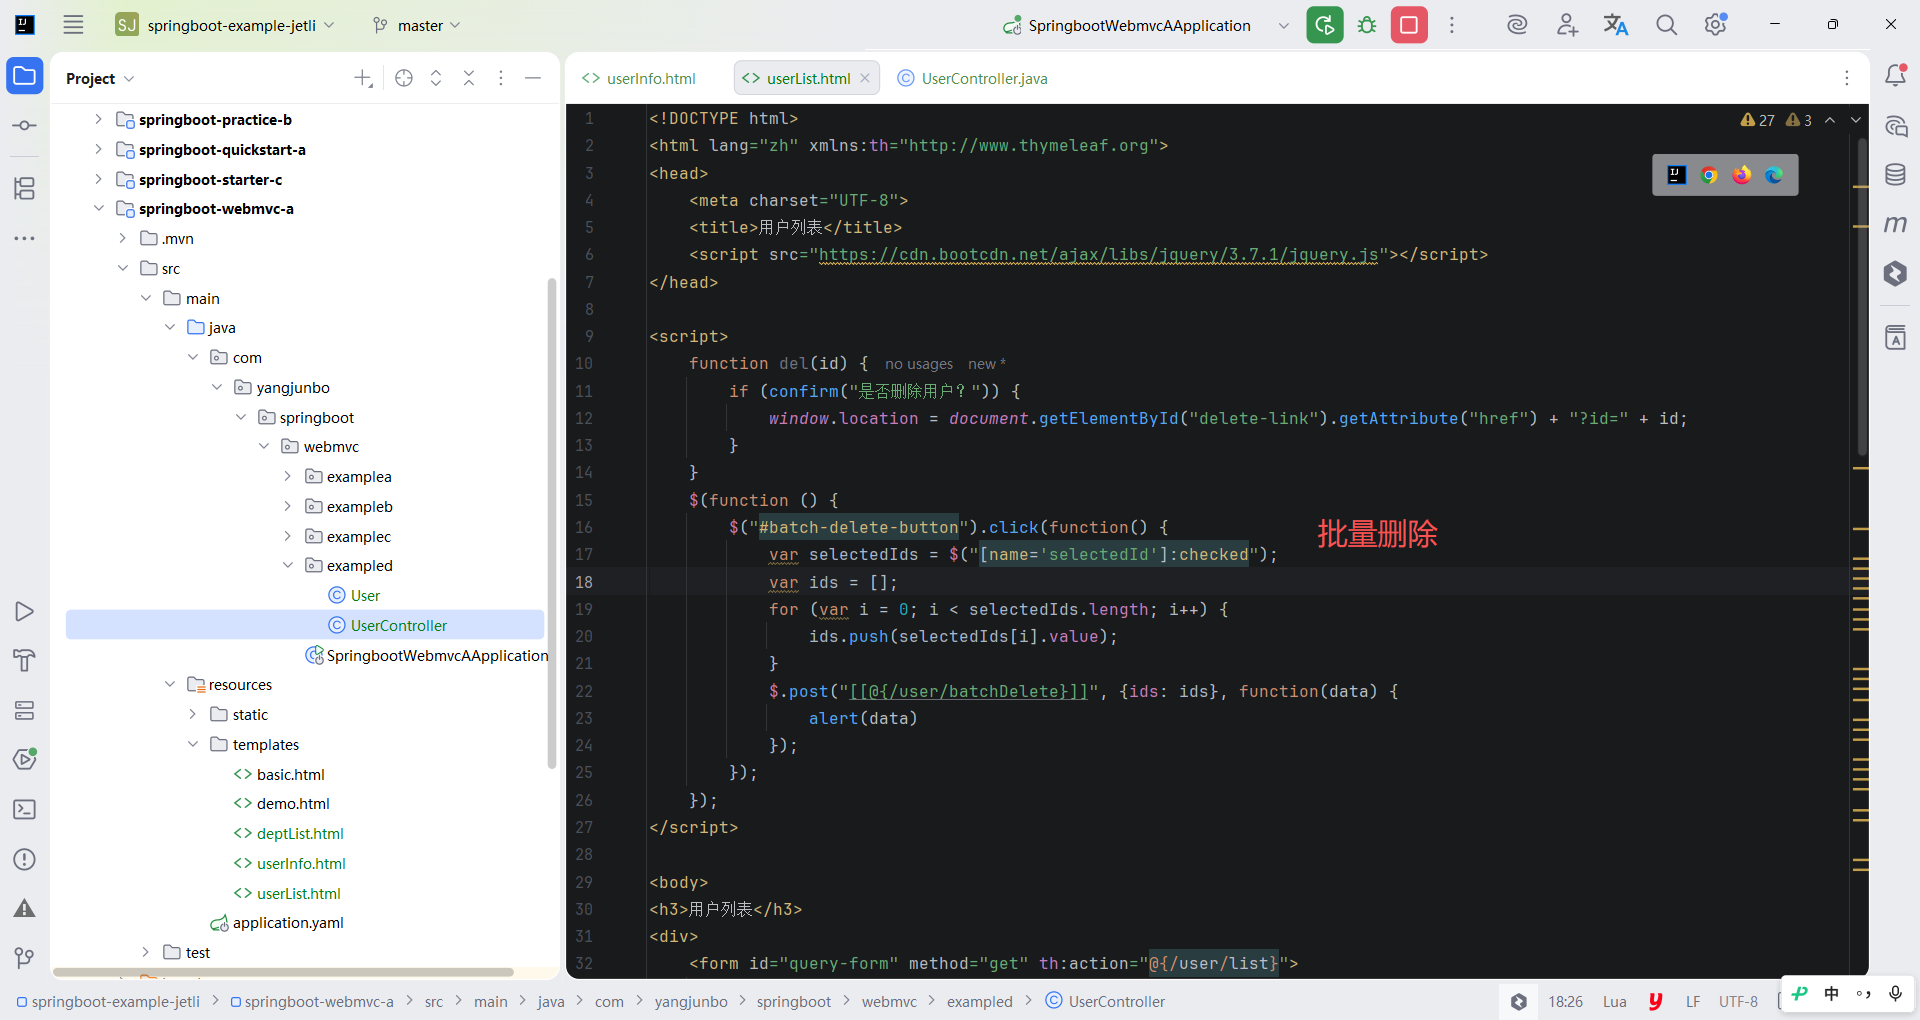
首先要实现 HTML 中的 id 收集,这里我们可以借助 jQuery 的属性选择器来辅助获取,之后使用 jQuery 的 Ajax 请求方式发送 POST 请求即可。注意,Thymeleaf 与 jQuery 发送 Ajax 请求时,需要使用内联表达式 \[] 与 @{} 表达式共同配合才能计算出正确的相对路径。
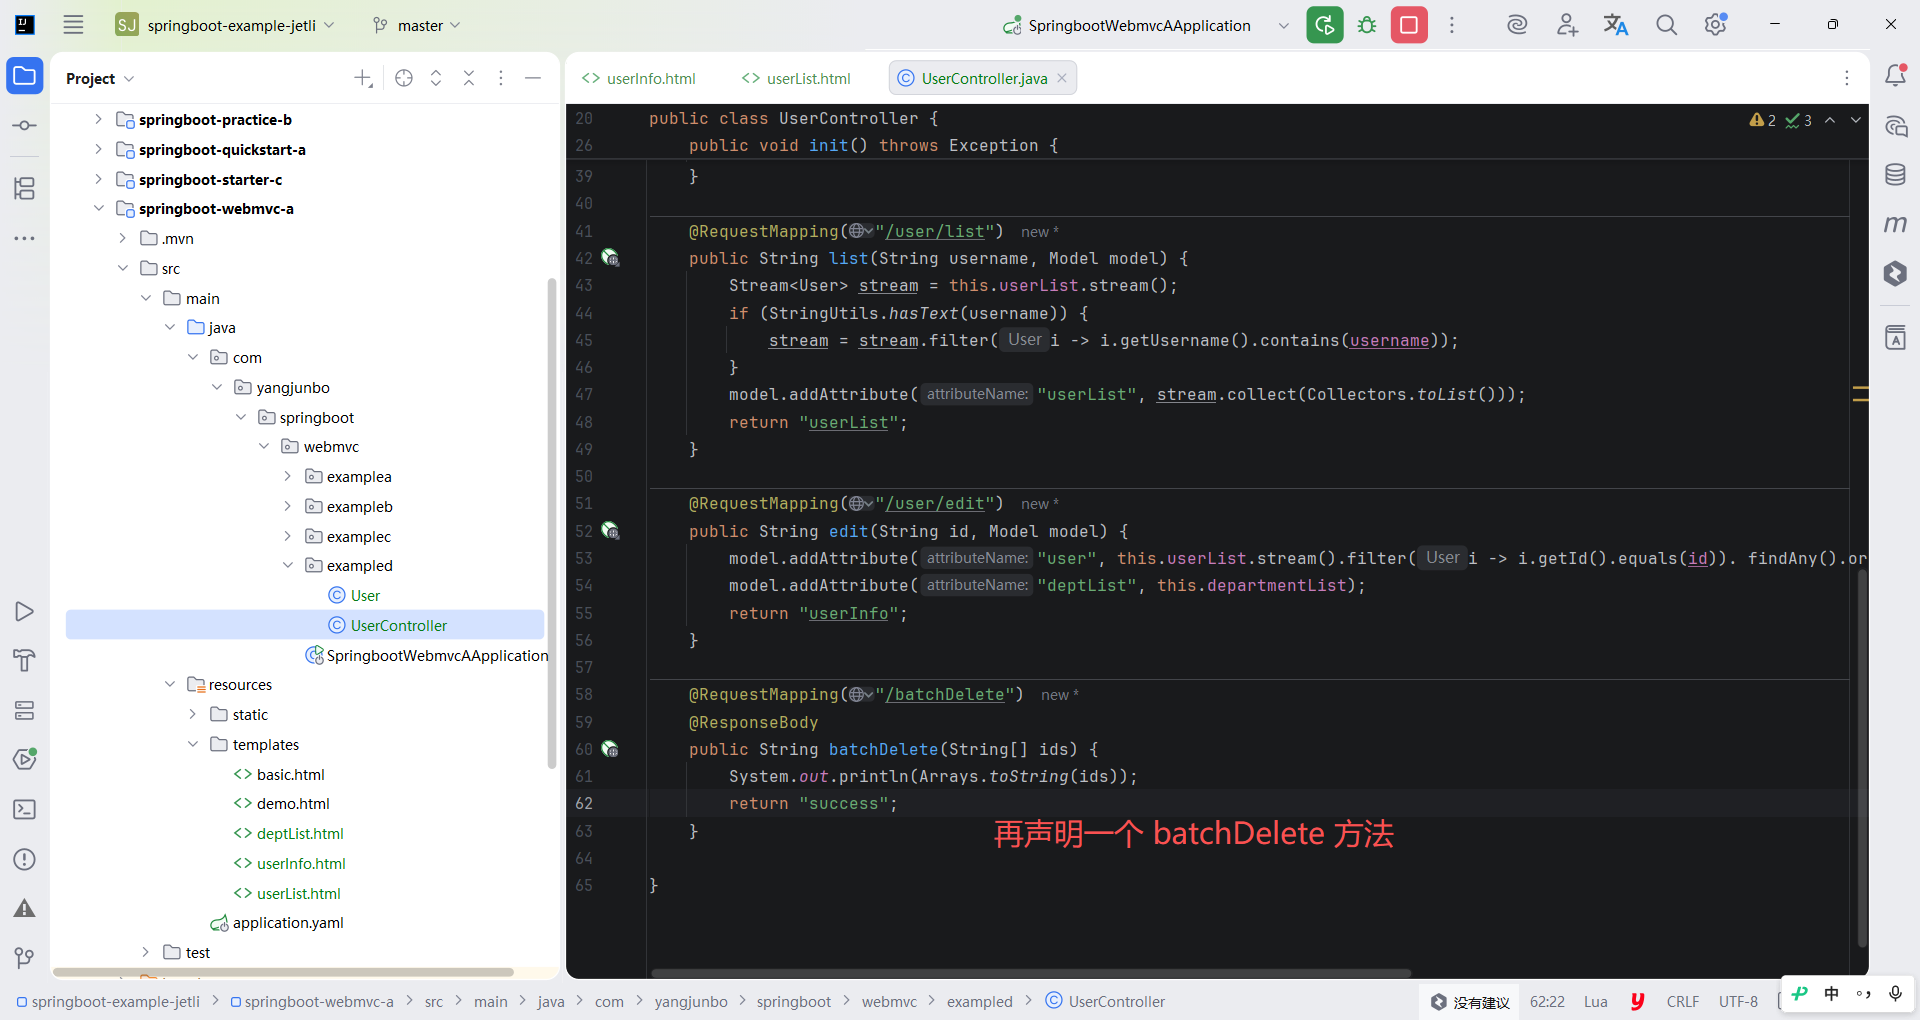
接下来是后端逻辑的编写,在 UserController 类中再声明一个 batchDelete 方法,使用 String\[\] 接收页面中传递的 ids 参数;另外注意当前请求是一个 Ajax 请求,需要在方法上标注一个 @ResponseBody 注解,标注该注解后使用 batchDelete 方法将不再跳转页面,而是将方法的返回值作为响应体传递给浏览器。
java
package com.yangjunbo.springboot.webmvc.exampled;

import com.yangjunbo.springboot.webmvc.examplec.Department;
import jakarta.annotation.PostConstruct;
import org.springframework.stereotype.Controller;
import org.springframework.ui.Model;
import org.springframework.util.StringUtils;
import org.springframework.web.bind.annotation.RequestMapping;
import org.springframework.web.bind.annotation.ResponseBody;

import java.text.SimpleDateFormat;
import java.util.ArrayList;
import java.util.Arrays;
import java.util.List;
import java.util.UUID;
import java.util.stream.Collectors;
import java.util.stream.Stream;

@Controller
public class UserController {

    private List<Department> departmentList = new ArrayList<>();
    private List<User> userList = new ArrayList<>();

    @PostConstruct
    public void init() throws Exception {
        Department dept1 = new Department(UUID.randomUUID().toString().replaceAll("-", ""), "测试部门1", "123321");
        departmentList.add(dept1);
        Department dept2 = new Department(UUID.randomUUID().toString().replaceAll("-", ""), "测试部门2", "1234567");
        departmentList.add(dept2);

        SimpleDateFormat dateFormat = new SimpleDateFormat("yyyy-MM-dd");
        User user1 = new User(UUID.randomUUID().toString().replaceAll("-", ""),"zhangsan", "张三", dateFormat.parse("2023-01-01"), null, dept1);
        userList.add(user1);
        User user2 = new User(UUID.randomUUID().toString().replaceAll("-", ""),"lisi", "李四", dateFormat.parse("2023-02-02"), null, dept1);
        userList.add(user2);
        User user3 = new User(UUID.randomUUID().toString().replaceAll("-", ""),"wangwu", "王五", dateFormat.parse("2023-03-03"), null, dept2);
        userList.add(user3);
    }

    @RequestMapping("/user/list")
    public String list(String username, Model model) {
        Stream<User> stream = this.userList.stream();
        if (StringUtils.hasText(username)) {
            stream = stream.filter(i -> i.getUsername().contains(username));
        }
        model.addAttribute("userList", stream.collect(Collectors.toList()));
        return "userList";
    }

    @RequestMapping("/user/edit")
    public String edit(String id, Model model) {
        model.addAttribute("user", this.userList.stream().filter(i -> i.getId().equals(id)). findAny().orElse(null));
        model.addAttribute("deptList", this.departmentList);
        return "userInfo";
    }

    @RequestMapping("/user/batchDelete")
    @ResponseBody
    public String batchDelete(String[] ids) {
        System.out.println(Arrays.toString(ids));
        return "success";
    }

}
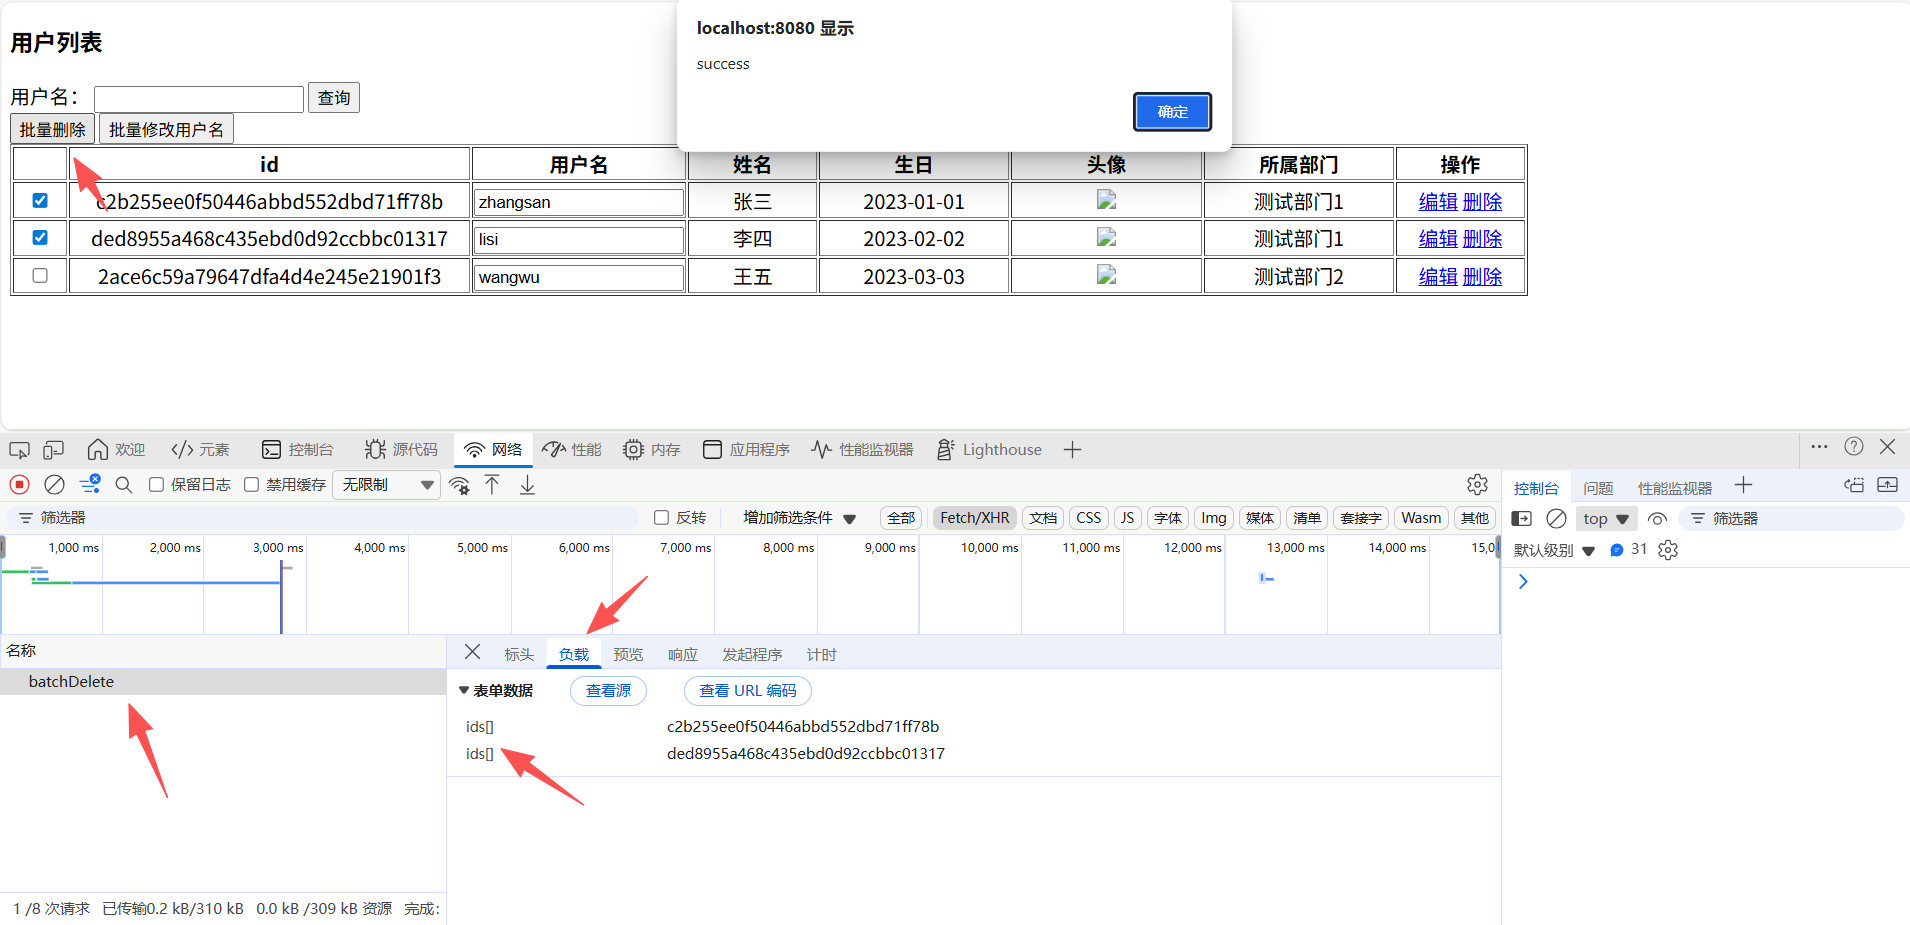
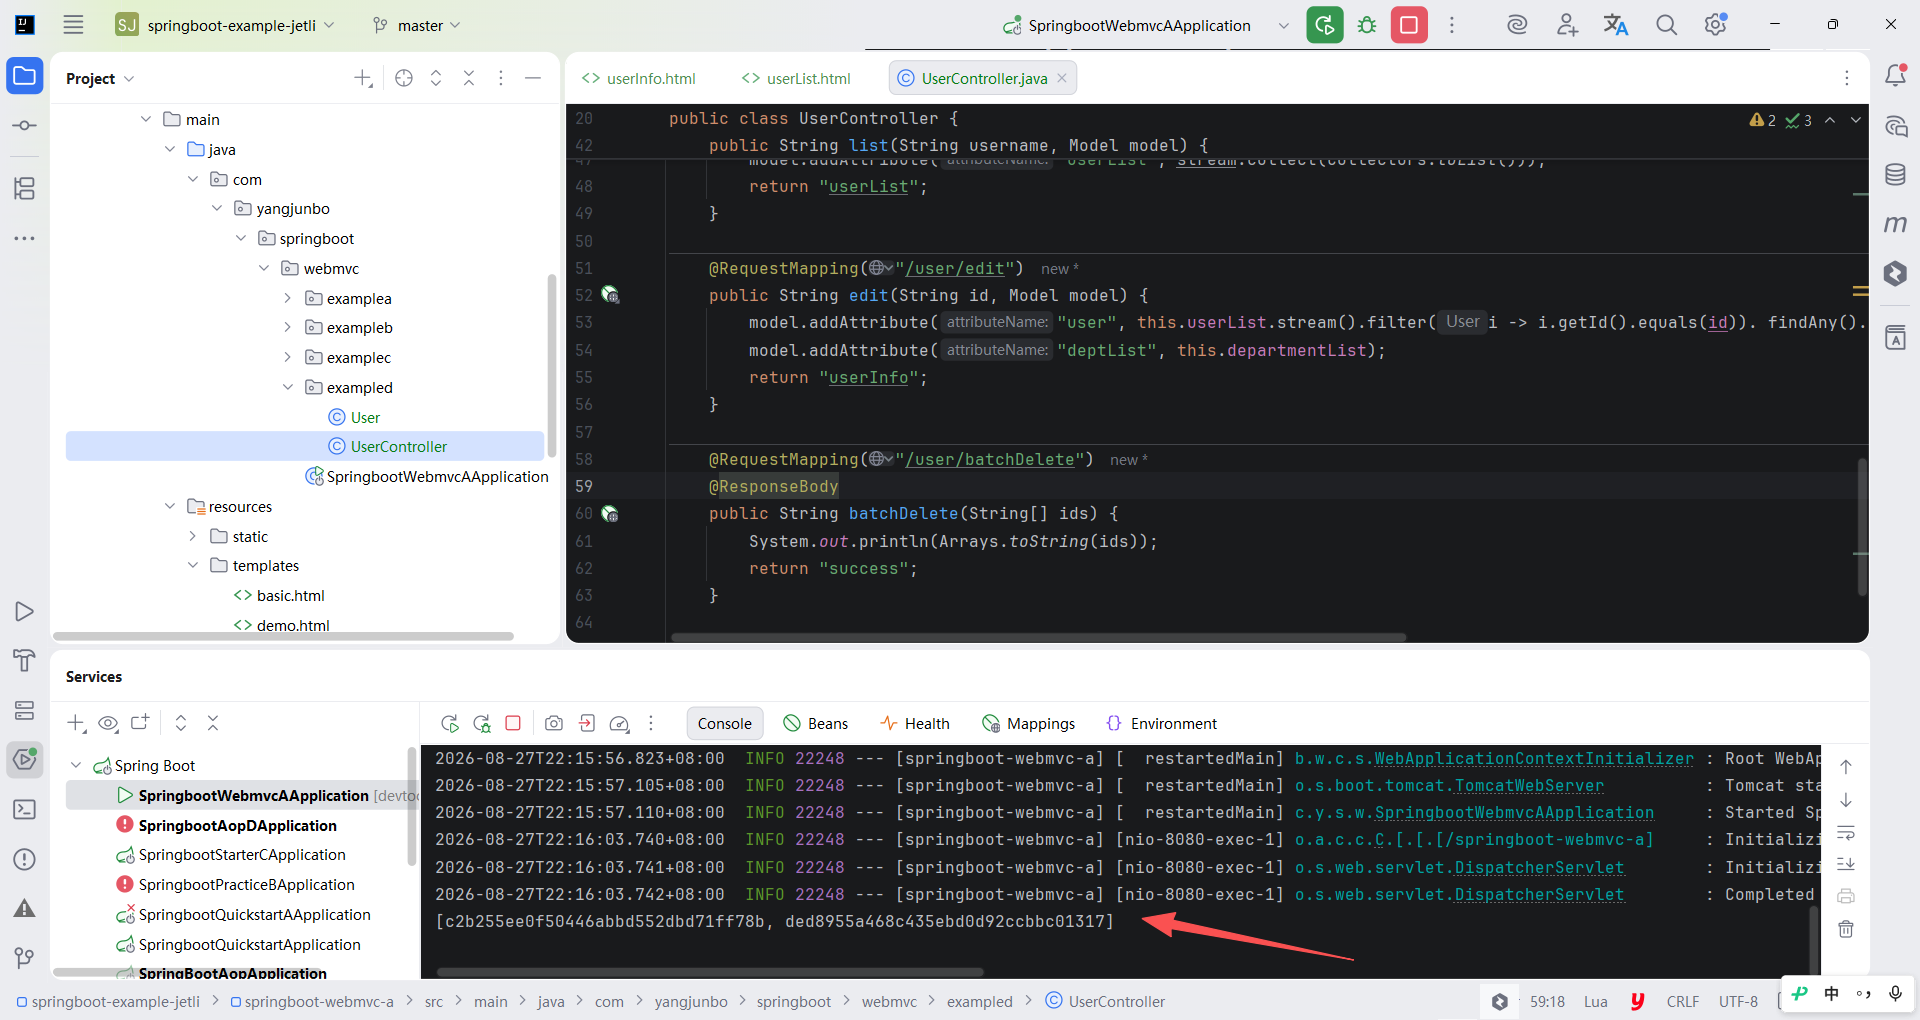
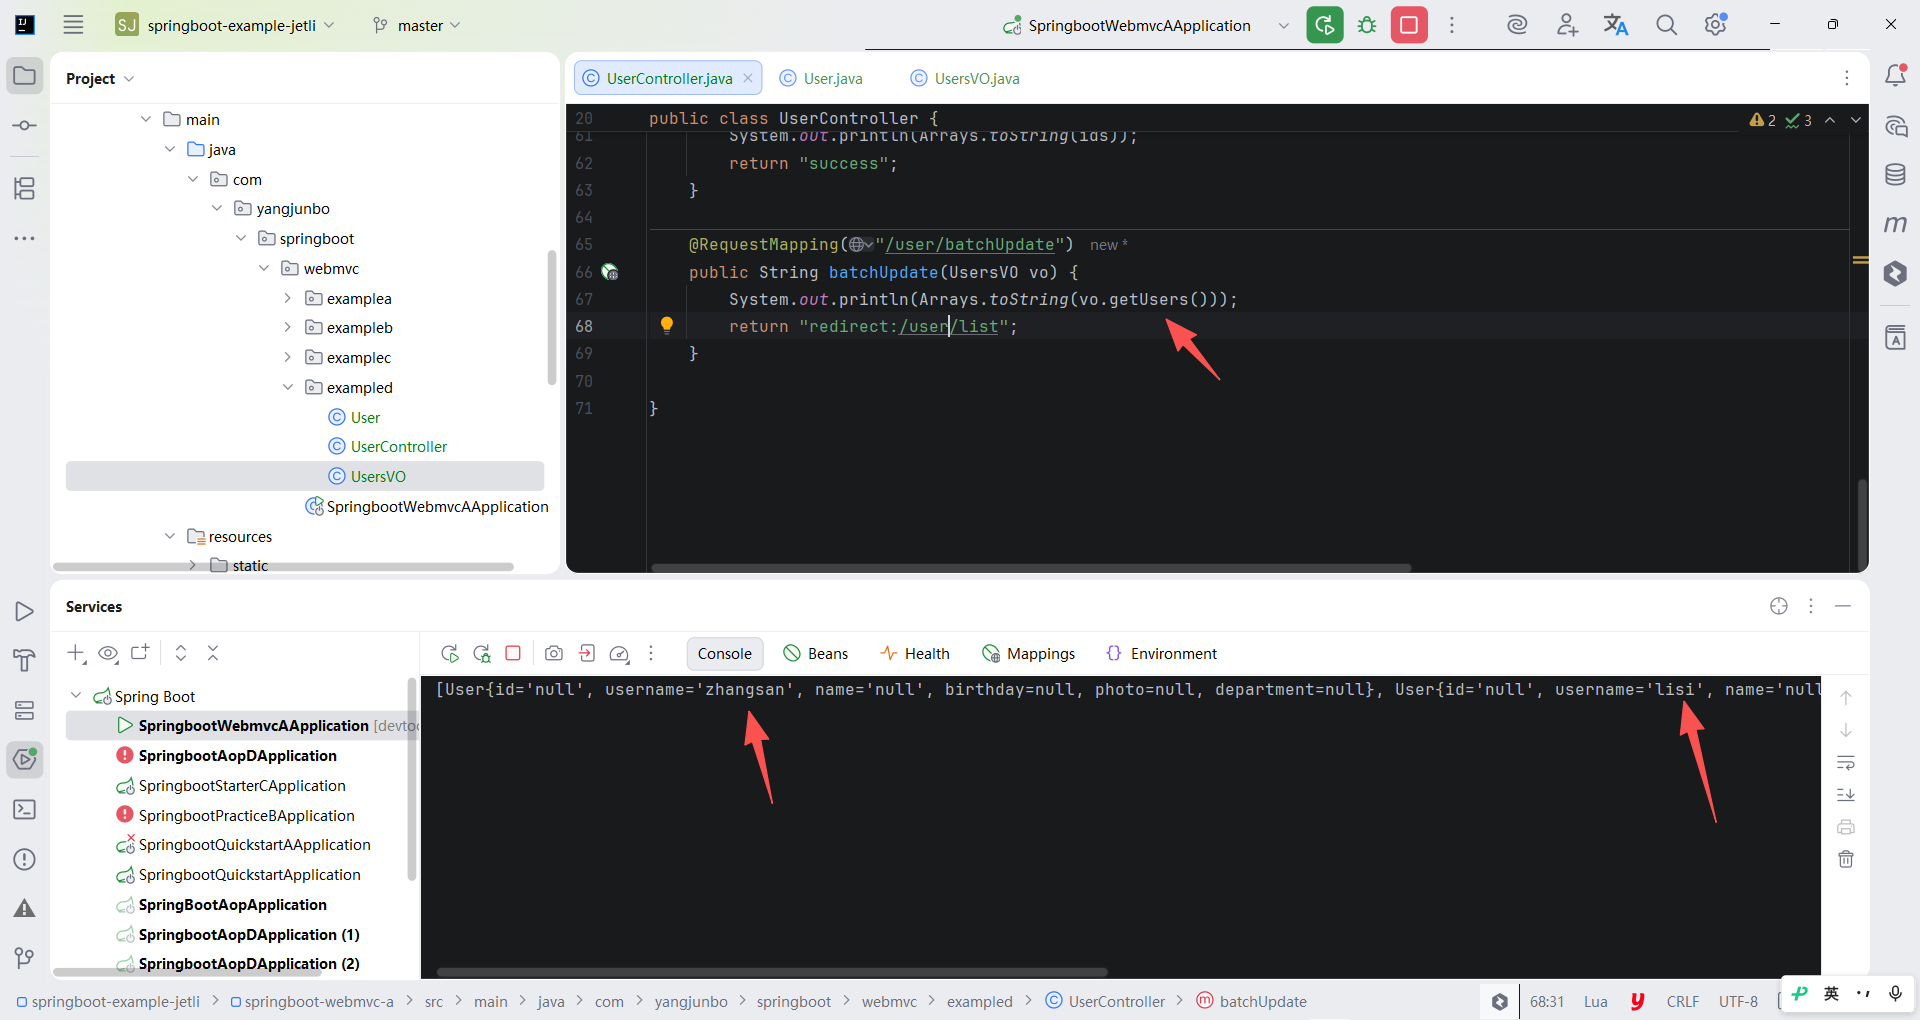
编写完毕后重启应用,勾选数据表格中的 "张三" 与 "李四" 后单击 "批量删除" 按钮,从 IDEA 的控制台中可以看到收集的参数。
3.对象数组参数绑定
对象数组的参数绑定是所有参数绑定中复杂度相对高的,这种参数绑定的场景多见于一次性编辑多行数据或者动态添加行。
整个数据表格的 tbody 中添加一个 form 表单,表格的 "用户名" 列为 input 输入框,并给它们设置一个 name 属性,注意这个 name 属性是有讲究的,类似于 users0.username 的形式,这样可以保证每一行的数据都拥有同一组索引,从而使传递到后端时依然能保持数据不乱套。
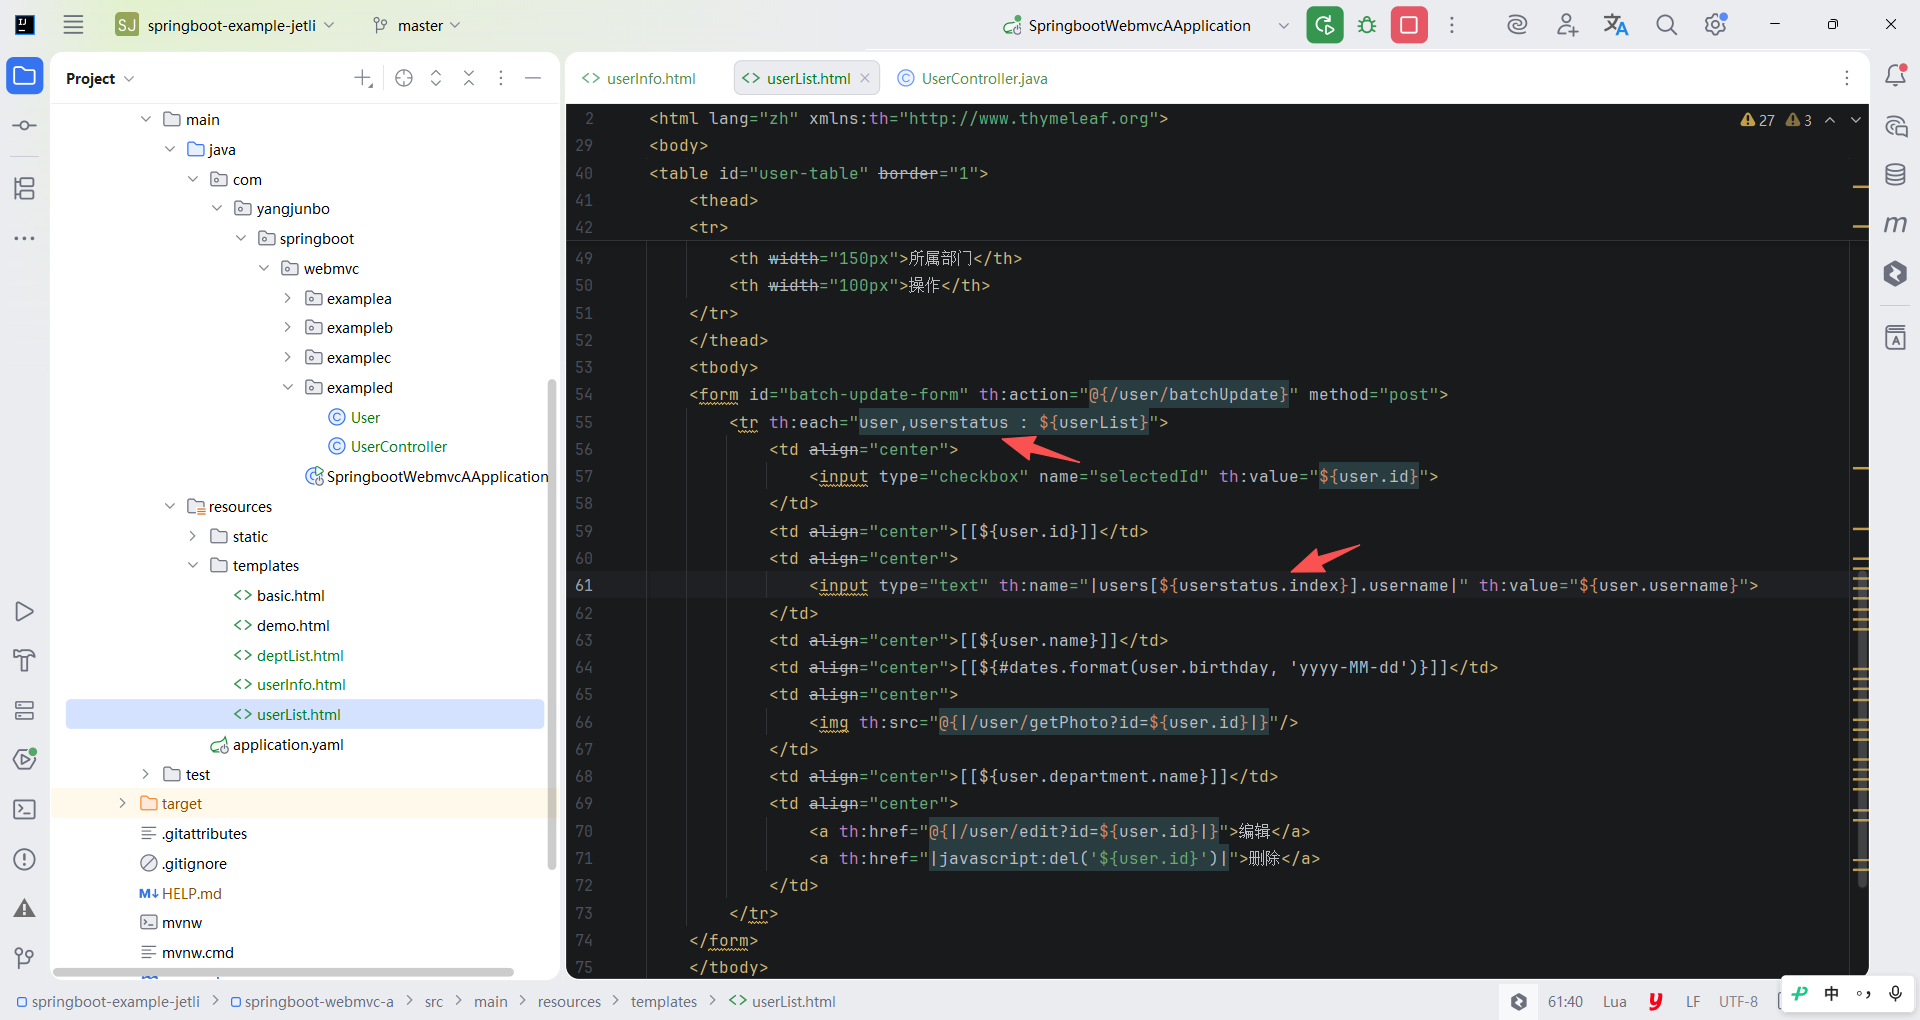
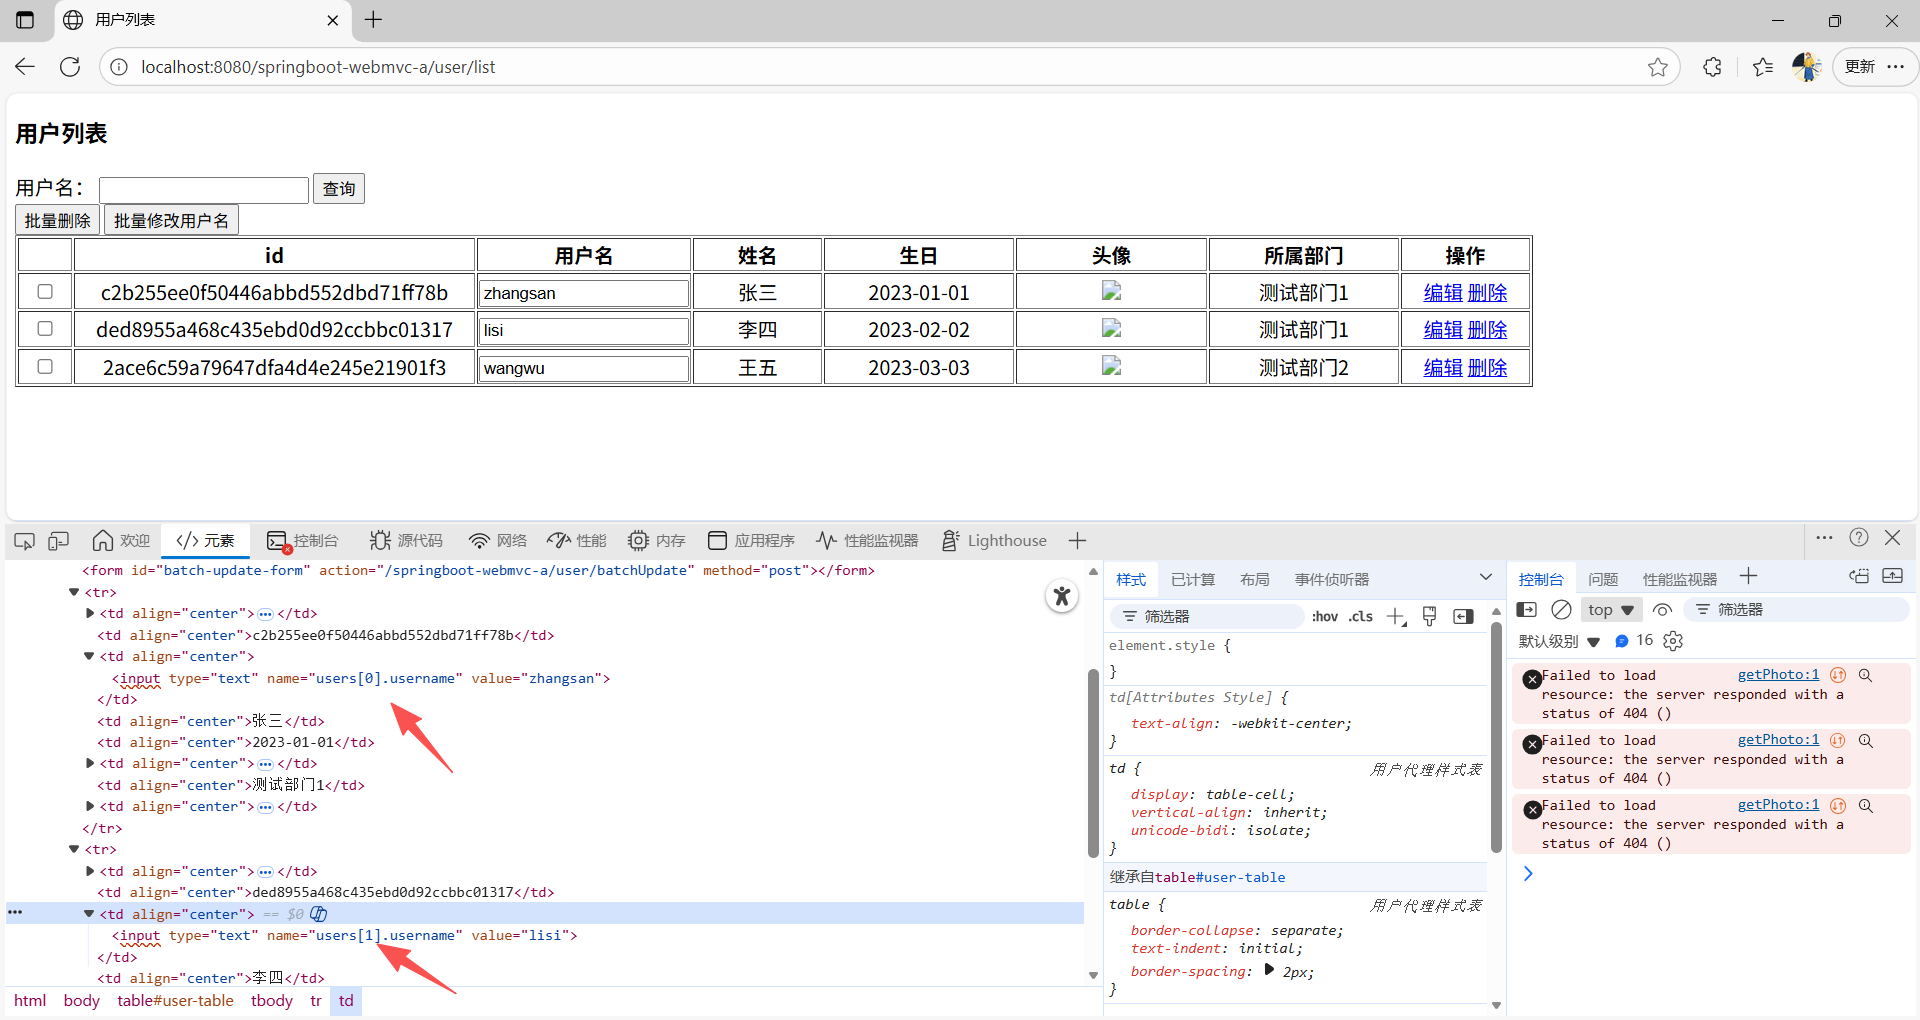
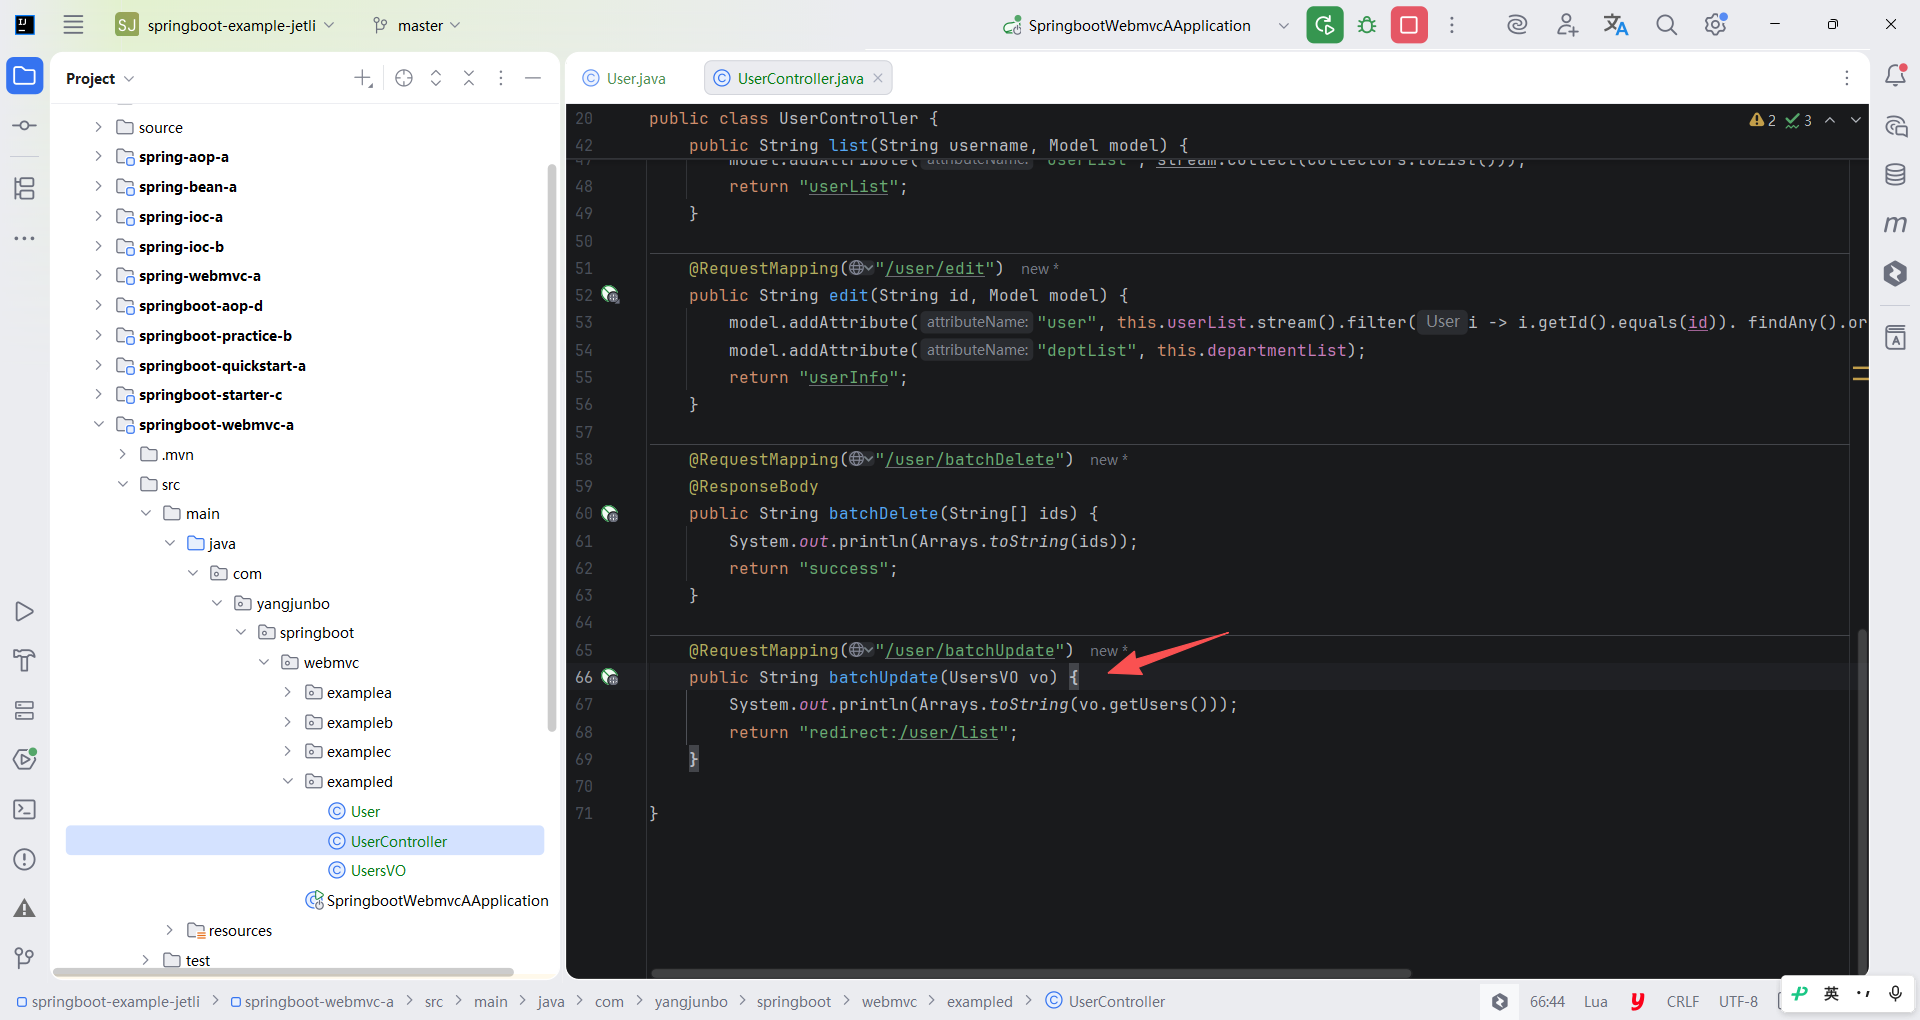
接下来是后端的代码修改,由于上面使用的是表单提交而且是一次性收集一组对象,因此在收集时需要借助一个额外的包装类组合 User\[\] 数组或 List 集合。
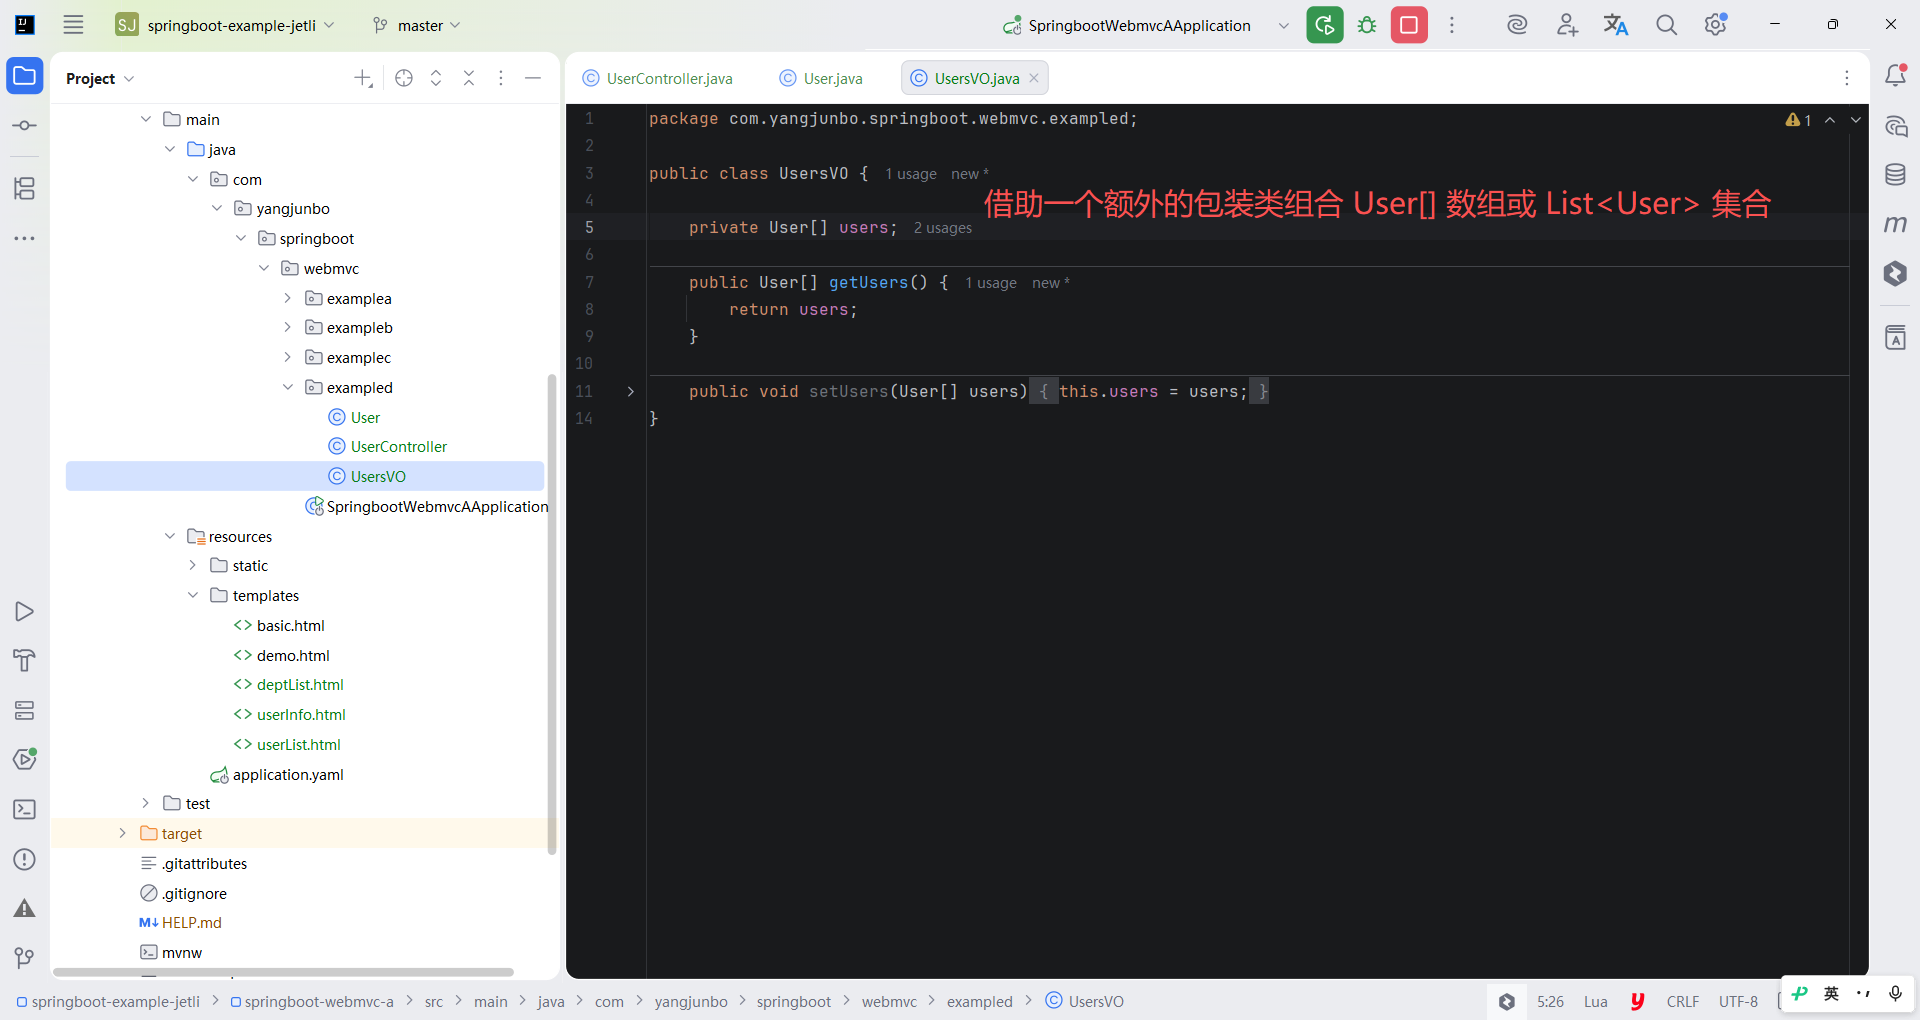
java
package com.yangjunbo.springboot.webmvc.exampled;

public class UsersVO {

    private User[] users;

    public User[] getUsers() {
        return users;
    }

    public void setUsers(User[] users) {
        this.users = users;
    }
}
java
package com.yangjunbo.springboot.webmvc.exampled;

import com.yangjunbo.springboot.webmvc.examplec.Department;
import jakarta.annotation.PostConstruct;
import org.springframework.stereotype.Controller;
import org.springframework.ui.Model;
import org.springframework.util.StringUtils;
import org.springframework.web.bind.annotation.RequestMapping;
import org.springframework.web.bind.annotation.ResponseBody;

import java.text.SimpleDateFormat;
import java.util.ArrayList;
import java.util.Arrays;
import java.util.List;
import java.util.UUID;
import java.util.stream.Collectors;
import java.util.stream.Stream;

@Controller
public class UserController {

    private List<Department> departmentList = new ArrayList<>();
    private List<User> userList = new ArrayList<>();

    @PostConstruct
    public void init() throws Exception {
        Department dept1 = new Department(UUID.randomUUID().toString().replaceAll("-", ""), "测试部门1", "123321");
        departmentList.add(dept1);
        Department dept2 = new Department(UUID.randomUUID().toString().replaceAll("-", ""), "测试部门2", "1234567");
        departmentList.add(dept2);

        SimpleDateFormat dateFormat = new SimpleDateFormat("yyyy-MM-dd");
        User user1 = new User(UUID.randomUUID().toString().replaceAll("-", ""),"zhangsan", "张三", dateFormat.parse("2023-01-01"), null, dept1);
        userList.add(user1);
        User user2 = new User(UUID.randomUUID().toString().replaceAll("-", ""),"lisi", "李四", dateFormat.parse("2023-02-02"), null, dept1);
        userList.add(user2);
        User user3 = new User(UUID.randomUUID().toString().replaceAll("-", ""),"wangwu", "王五", dateFormat.parse("2023-03-03"), null, dept2);
        userList.add(user3);
    }

    @RequestMapping("/user/list")
    public String list(String username, Model model) {
        Stream<User> stream = this.userList.stream();
        if (StringUtils.hasText(username)) {
            stream = stream.filter(i -> i.getUsername().contains(username));
        }
        model.addAttribute("userList", stream.collect(Collectors.toList()));
        return "userList";
    }

    @RequestMapping("/user/edit")
    public String edit(String id, Model model) {
        model.addAttribute("user", this.userList.stream().filter(i -> i.getId().equals(id)). findAny().orElse(null));
        model.addAttribute("deptList", this.departmentList);
        return "userInfo";
    }

    @RequestMapping("/user/batchDelete")
    @ResponseBody
    public String batchDelete(String[] ids) {
        System.out.println(Arrays.toString(ids));
        return "success";
    }

    @RequestMapping("/user/batchUpdate")
    public String batchUpdate(UsersVO vo) {
        System.out.println(Arrays.toString(vo.getUsers()));
        return "redirect:/user/list";
    }

}
9.5.3 自定义参数类型转换
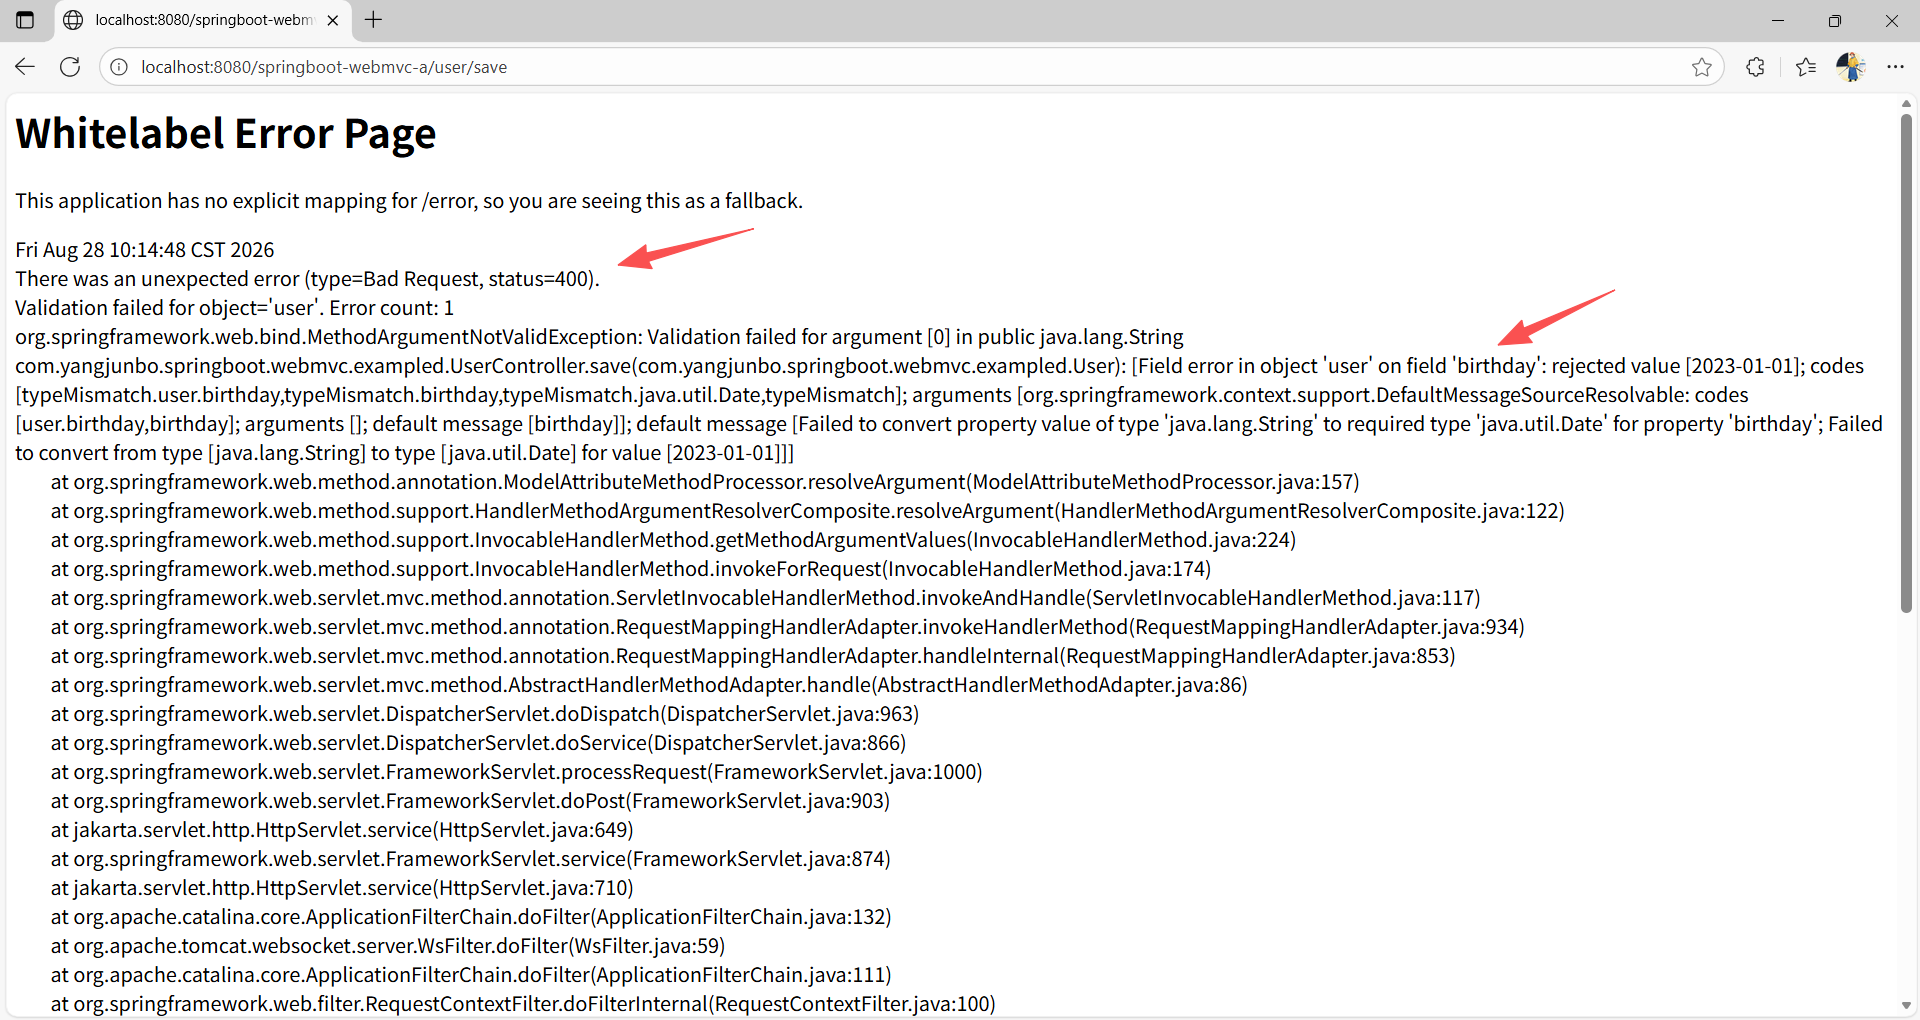
回到用户信息的编辑页面,有一个生日的表单项,单击 "保存" 时会提示 400 错误,引发错误的原因是表单提交的 birthday 是字符串类型,而User 类中的 birthday 属性是 Date 类型,WebMvc 无法解析 "yyyy-MM-dd" 格式的时间。实际开发中这种格式往往占比很高,通常日期和时间都是使用日期时间控件选择而不是键盘输入,且一个项目中的日期时间格式相对固定和统一,所以一个有针对性的日期时间格式转换器就显得很有必要。WebMvc 开放了自定义参数类型转换的扩展接口,可以基于这个扩展机制实现一个 String 到 Date 的参数类型转换器。
部分读者看到这里会联想到使用 @DateTimeFormat 注解解决该问题,笔者希望读者先稍安勿躁,本节希望读者学会的是自定义参数类型转换的方法,而不是找到一个简单的替代方案后放弃学习本节内容。
首先编写一个类型转换器,WebMvc 提供的扩展接口是来自 spring-core 核心包的 Converter,注意实现接口时不要导错包。
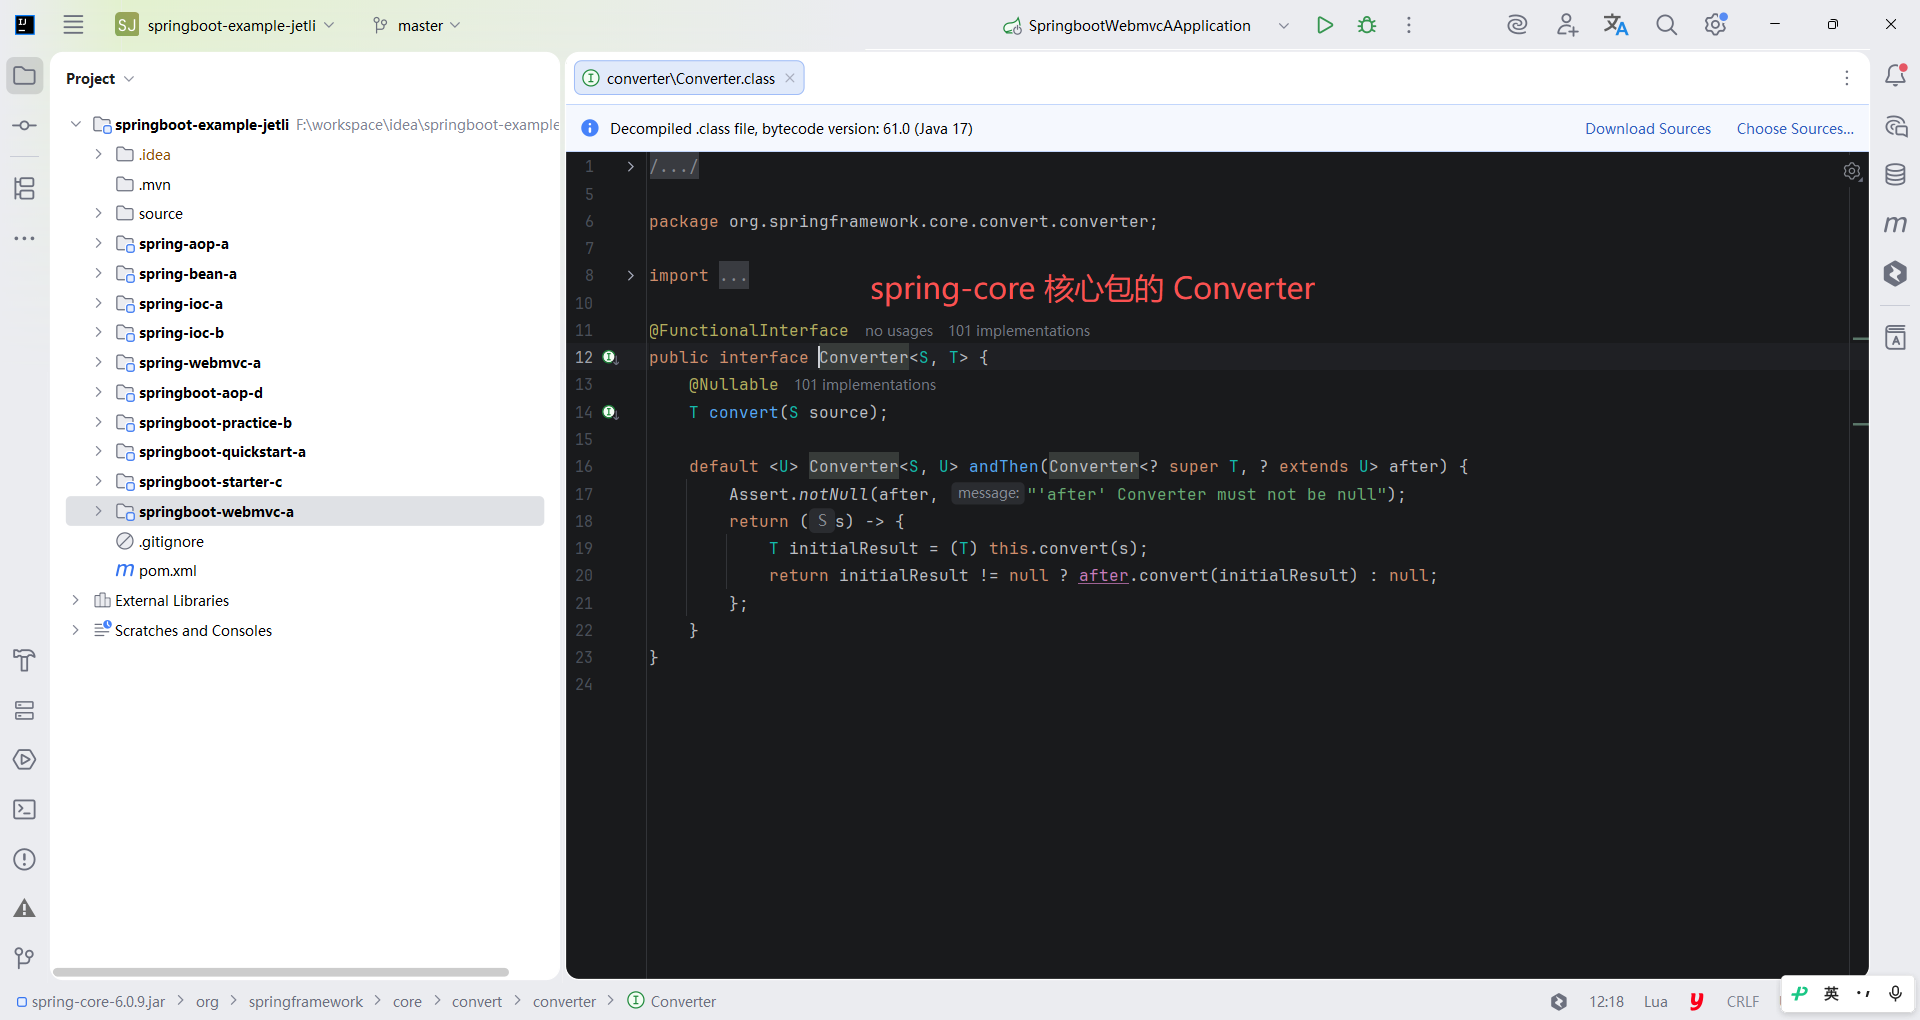
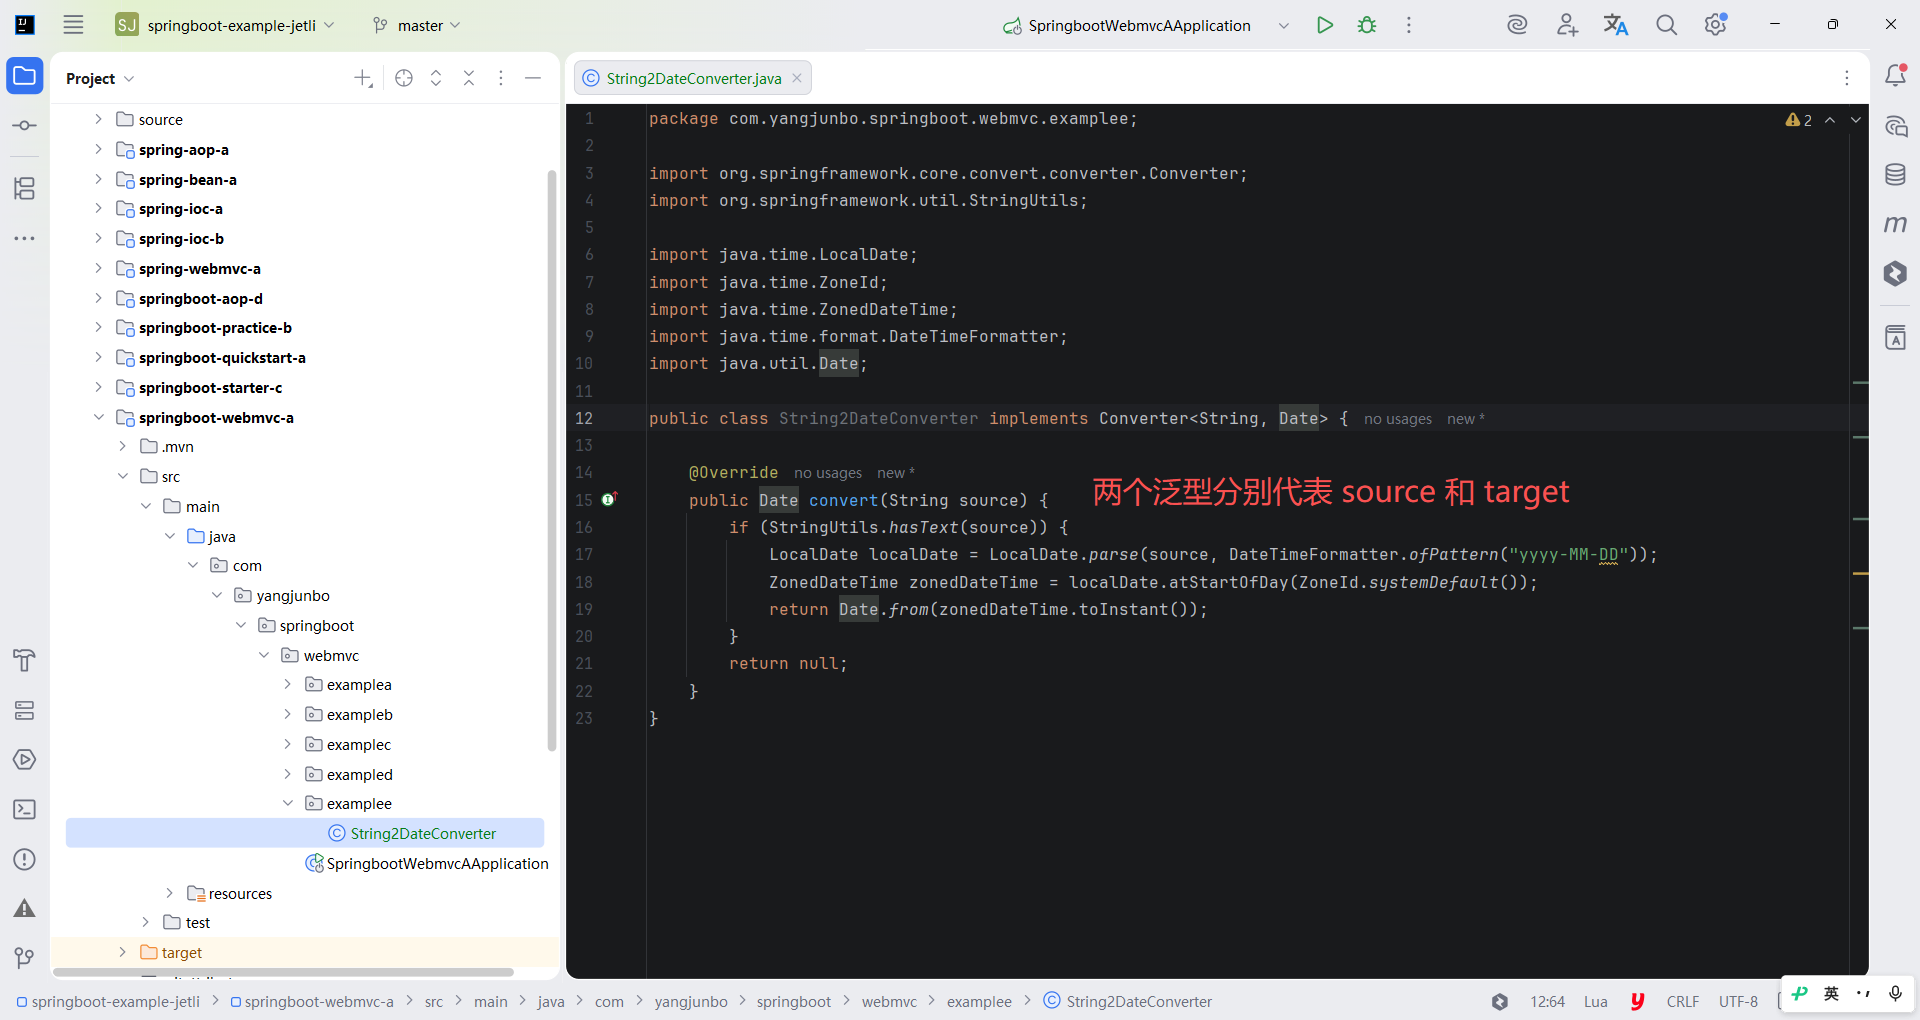
实现 Converter 接口后,两个泛型分别代表 source 和 target,即源类型和目标类型,对应到本节就是 String 转换为 Date,所以这里声明好即可。随后就是实现 Converter 接口的 convert 方法,使用 JDK 8 中的日期时间 API 完成转换。
java
package com.yangjunbo.springboot.webmvc.examplee;

import org.springframework.core.convert.converter.Converter;
import org.springframework.util.StringUtils;

import java.time.LocalDate;
import java.time.ZoneId;
import java.time.ZonedDateTime;
import java.time.format.DateTimeFormatter;
import java.util.Date;

public class String2DateConverter implements Converter<String, Date> {

    @Override
    public Date convert(String source) {
        if (StringUtils.hasText(source)) {
            LocalDate localDate = LocalDate.parse(source, DateTimeFormatter.ofPattern("yyyy-MM-DD"));
            ZonedDateTime zonedDateTime = localDate.atStartOfDay(ZoneId.systemDefault());
            return Date.from(zonedDateTime.toInstant());
        }
        return null;
    }
}
配置类型转换器使其生效。
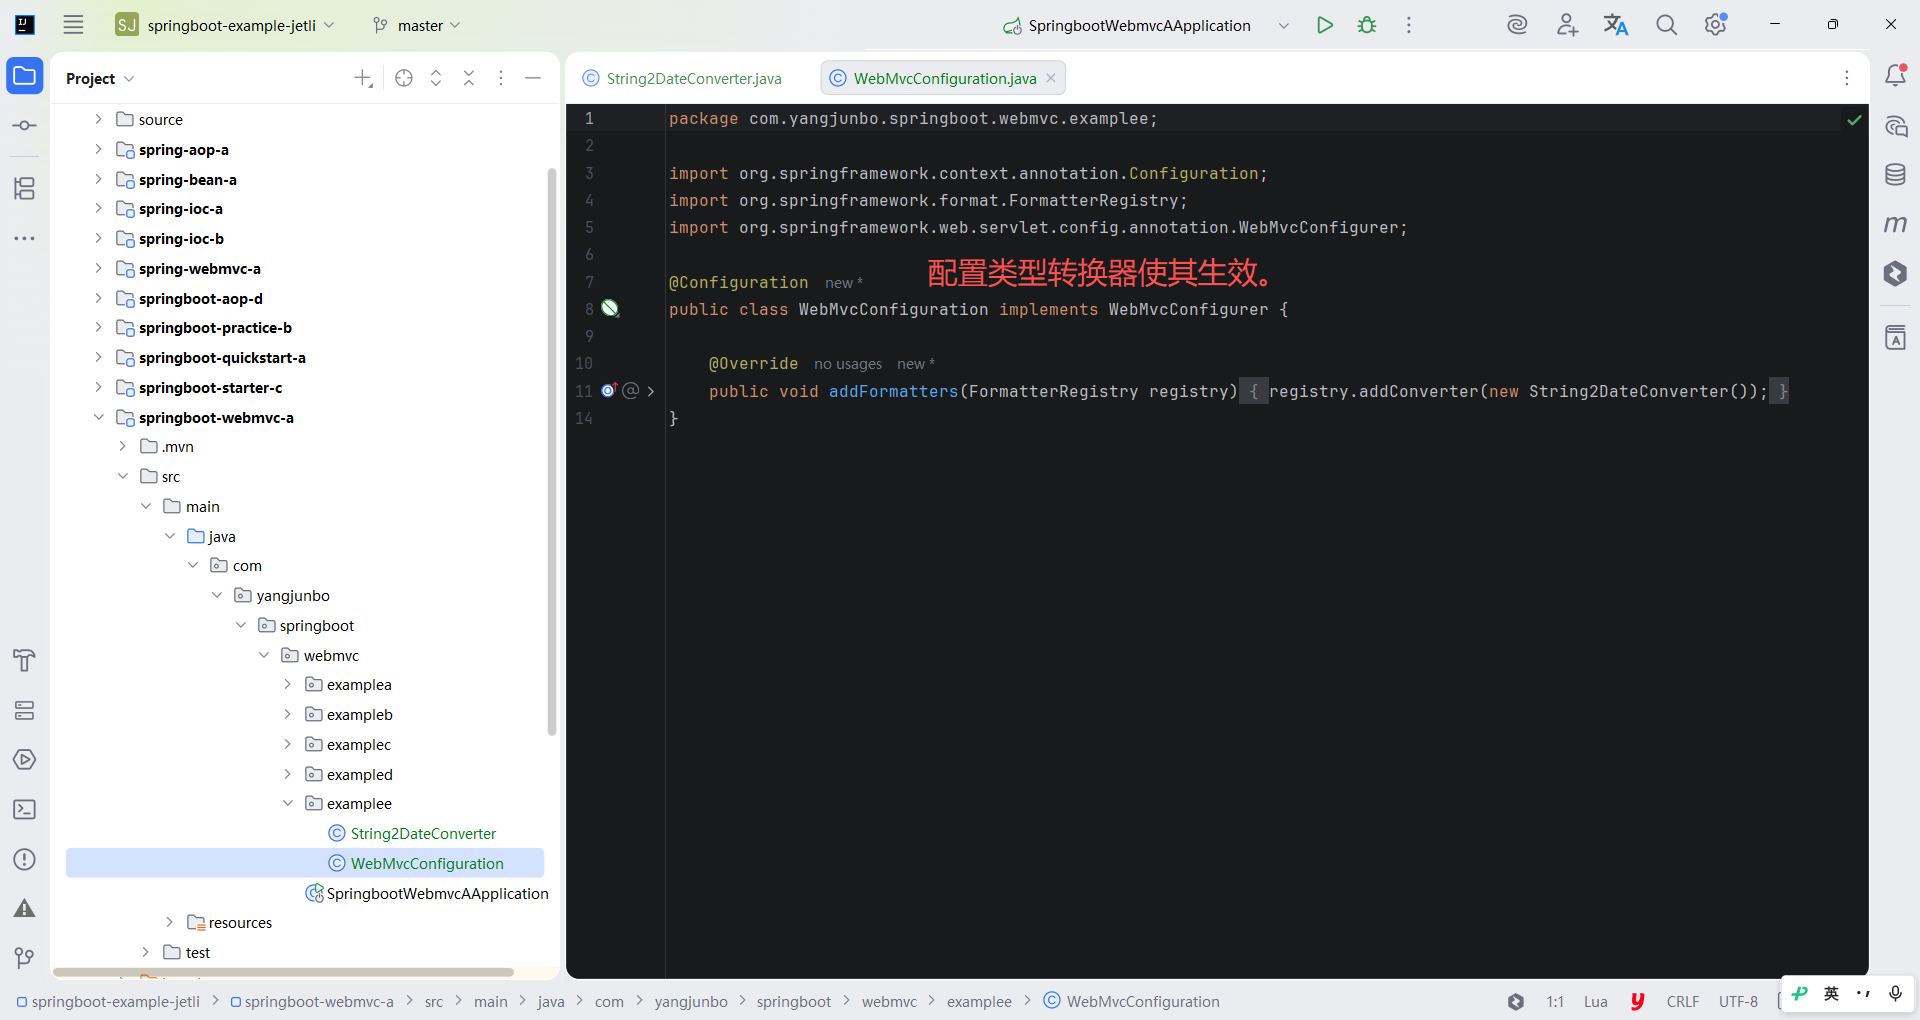
java
package com.yangjunbo.springboot.webmvc.examplee;

import org.springframework.context.annotation.Configuration;
import org.springframework.format.FormatterRegistry;
import org.springframework.web.servlet.config.annotation.WebMvcConfigurer;

@Configuration
public class WebMvcConfiguration implements WebMvcConfigurer {

    @Override
    public void addFormatters(FormatterRegistry registry) {
        registry.addConverter(new String2DateConverter());
    }
}
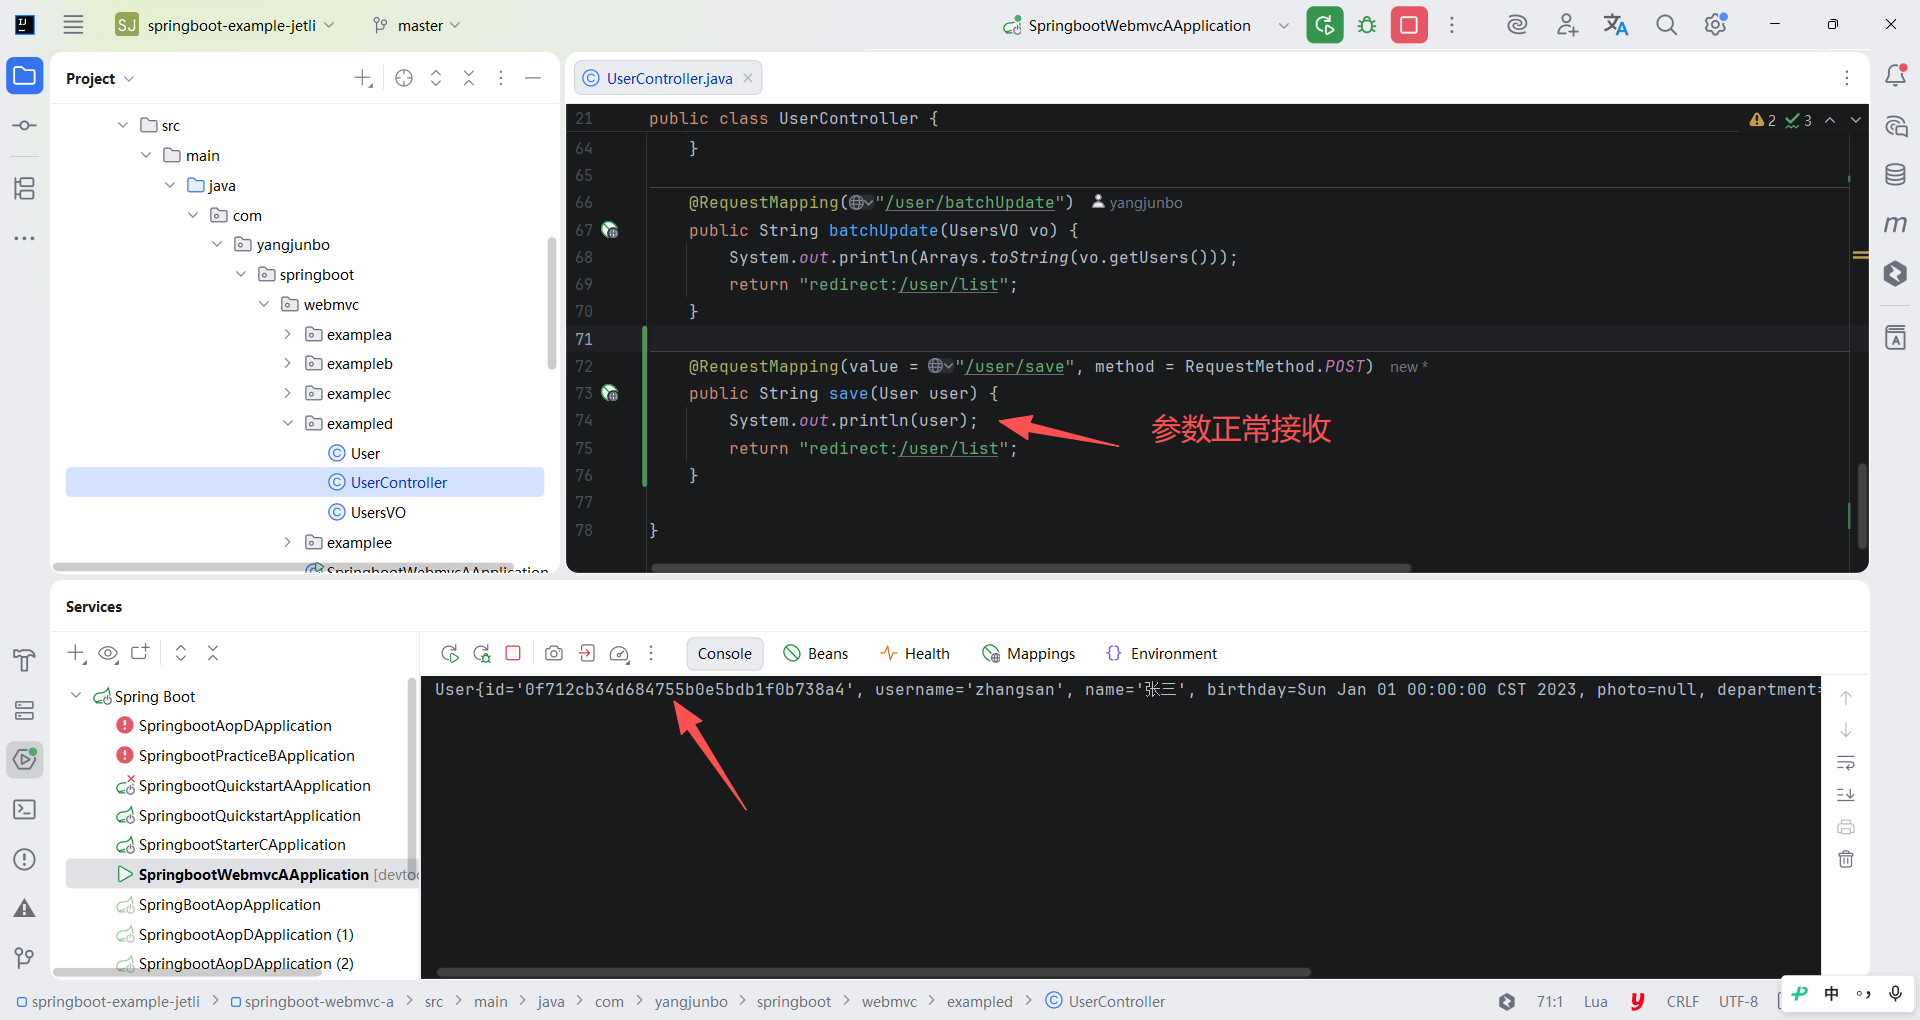
编码完毕后重启应用,重新访问用户信息编辑页面,将生日的输入框值改为 2024-01-01 后单击 "保存用户",观察后端控制台中可以正确打印birthday 的值,说明自定义类型转换器已经生效。
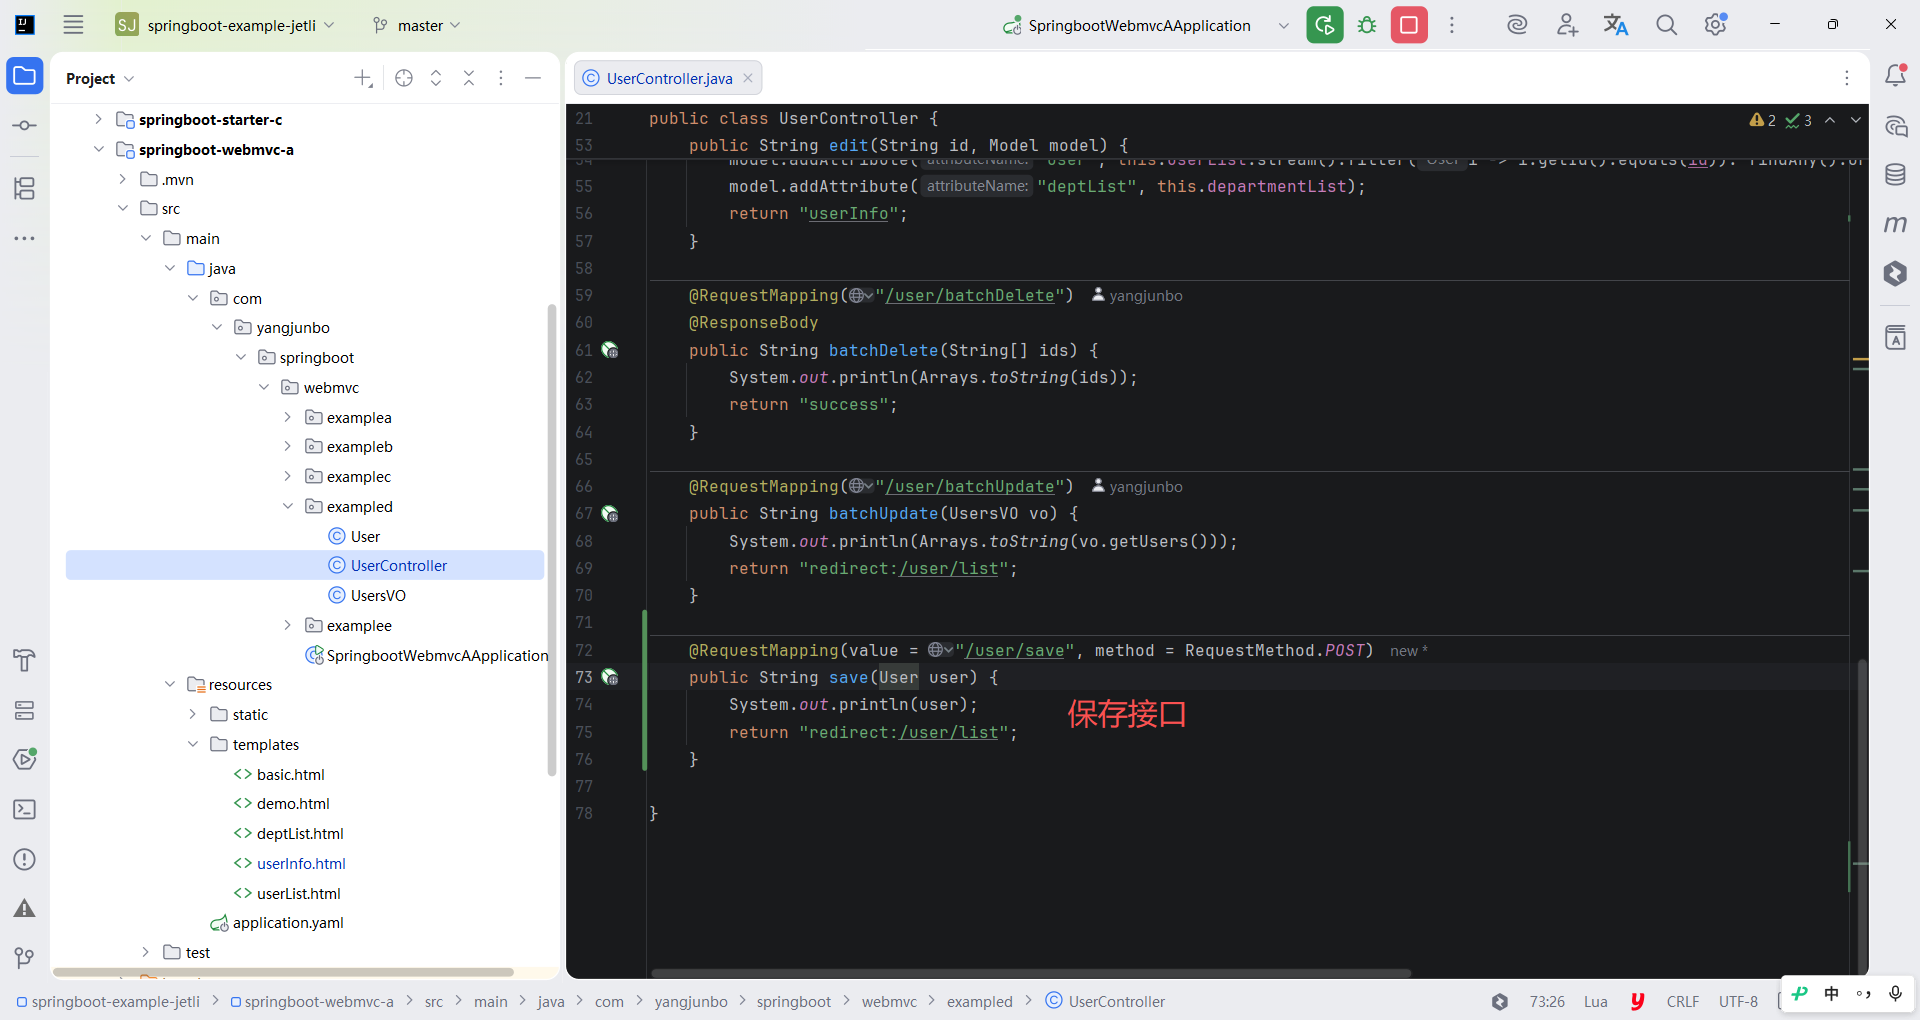
java
package com.yangjunbo.springboot.webmvc.exampled;

import com.yangjunbo.springboot.webmvc.examplec.Department;
import jakarta.annotation.PostConstruct;
import org.springframework.stereotype.Controller;
import org.springframework.ui.Model;
import org.springframework.util.StringUtils;
import org.springframework.web.bind.annotation.RequestMapping;
import org.springframework.web.bind.annotation.RequestMethod;
import org.springframework.web.bind.annotation.ResponseBody;

import java.text.SimpleDateFormat;
import java.util.ArrayList;
import java.util.Arrays;
import java.util.List;
import java.util.UUID;
import java.util.stream.Collectors;
import java.util.stream.Stream;

@Controller
public class UserController {

    private List<Department> departmentList = new ArrayList<>();
    private List<User> userList = new ArrayList<>();

    @PostConstruct
    public void init() throws Exception {
        Department dept1 = new Department(UUID.randomUUID().toString().replaceAll("-", ""), "测试部门1", "123321");
        departmentList.add(dept1);
        Department dept2 = new Department(UUID.randomUUID().toString().replaceAll("-", ""), "测试部门2", "1234567");
        departmentList.add(dept2);

        SimpleDateFormat dateFormat = new SimpleDateFormat("yyyy-MM-dd");
        User user1 = new User(UUID.randomUUID().toString().replaceAll("-", ""),"zhangsan", "张三", dateFormat.parse("2023-01-01"), null, dept1);
        userList.add(user1);
        User user2 = new User(UUID.randomUUID().toString().replaceAll("-", ""),"lisi", "李四", dateFormat.parse("2023-02-02"), null, dept1);
        userList.add(user2);
        User user3 = new User(UUID.randomUUID().toString().replaceAll("-", ""),"wangwu", "王五", dateFormat.parse("2023-03-03"), null, dept2);
        userList.add(user3);
    }

    @RequestMapping("/user/list")
    public String list(String username, Model model) {
        Stream<User> stream = this.userList.stream();
        if (StringUtils.hasText(username)) {
            stream = stream.filter(i -> i.getUsername().contains(username));
        }
        model.addAttribute("userList", stream.collect(Collectors.toList()));
        return "userList";
    }

    @RequestMapping("/user/edit")
    public String edit(String id, Model model) {
        model.addAttribute("user", this.userList.stream().filter(i -> i.getId().equals(id)). findAny().orElse(null));
        model.addAttribute("deptList", this.departmentList);
        return "userInfo";
    }

    @RequestMapping("/user/batchDelete")
    @ResponseBody
    public String batchDelete(String[] ids) {
        System.out.println(Arrays.toString(ids));
        return "success";
    }

    @RequestMapping("/user/batchUpdate")
    public String batchUpdate(UsersVO vo) {
        System.out.println(Arrays.toString(vo.getUsers()));
        return "redirect:/user/list";
    }

    @RequestMapping(value = "/user/save", method = RequestMethod.POST)
    public String save(User user) {
        System.out.println(user);
        return "redirect:/user/list";
    }

}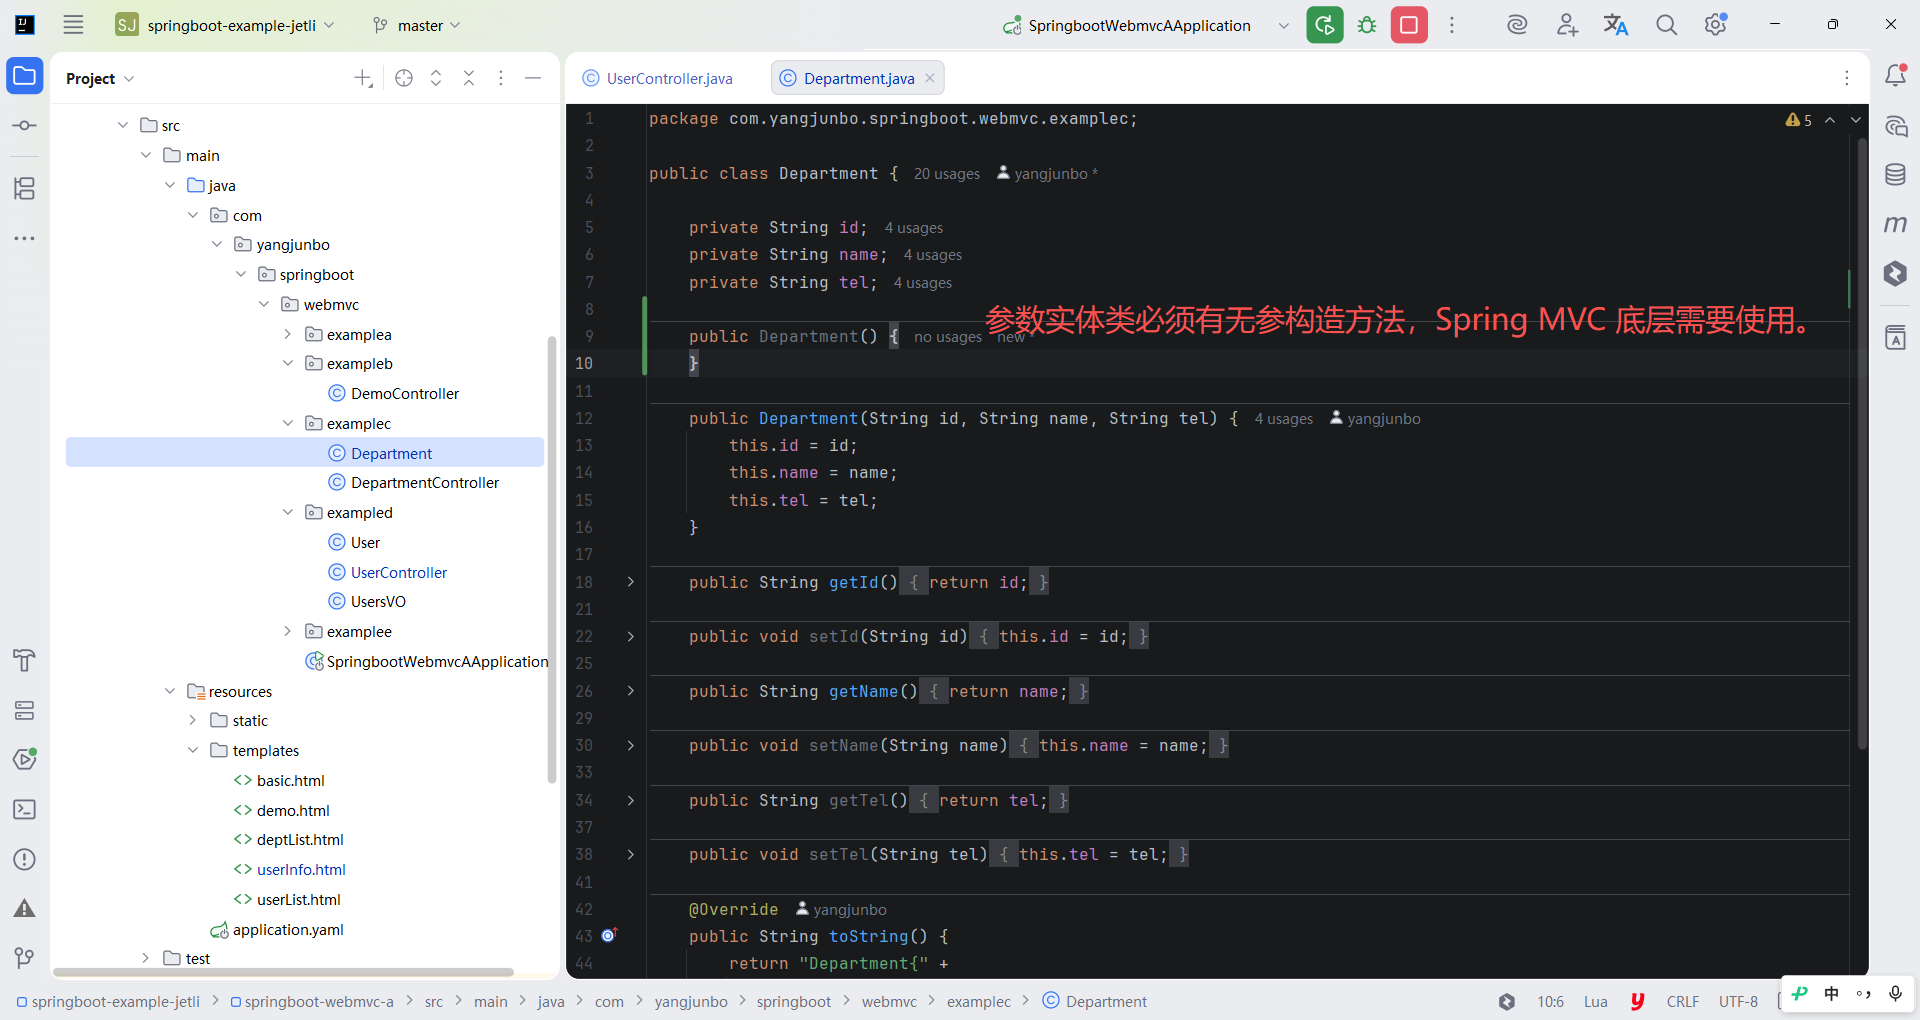
java
package com.yangjunbo.springboot.webmvc.examplec;

public class Department {

    private String id;
    private String name;
    private String tel;

    public Department() {
    }

    public Department(String id, String name, String tel) {
        this.id = id;
        this.name = name;
        this.tel = tel;
    }

    public String getId() {
        return id;
    }

    public void setId(String id) {
        this.id = id;
    }

    public String getName() {
        return name;
    }

    public void setName(String name) {
        this.name = name;
    }

    public String getTel() {
        return tel;
    }

    public void setTel(String tel) {
        this.tel = tel;
    }

    @Override
    public String toString() {
        return "Department{" +
                "id='" + id + '\'' +
                ", name='" + name + '\'' +
                ", tel='" + tel + '\'' +
                '}';
    }

}