源码地址:
1. 本文目标
前两篇我们已经让 VM 能执行:
javascript
1 + 2不过它还是栈式 VM,临时值都放在 stack 里。本篇要把它升级成寄存器式 VM:
plaintext
LOAD_CONST r0, const[0]
LOAD_CONST r1, const[1]
BINARY r2, r0, r1, '+'
RETURN r2
这一步很重要,因为正式项目 jsvmp-next 是 register-based JavaScript virtualization prototype,使用 register-based bytecode 与 per-function register frames.
2. 为什么需要寄存器式 VM
栈式 VM 很适合入门:
plaintext
LOAD_CONST 1
LOAD_CONST 2
ADD
RETURN
但栈式 VM 的数据流是隐式的:ADD 默认从栈顶取两个值,读者必须一直记住"当前栈顶是什么"。
寄存器式 VM 会把数据流写清楚:
plaintext
r0 = 1
r1 = 2
r2 = r0 + r1
return r2
3. 形象化比喻:从叠盘子到编号工作台
栈式 VM:盘子叠叠乐
栈像一摞盘子,后放上去的先被拿走。执行 ADD 时,VM 从最上面拿两个盘子,相加后再放回一个新盘子。
寄存器式 VM:编号工作台
寄存器像一排编号工作台:
plaintext
r0 工作台
r1 工作台
r2 工作台
执行加法时,VM 不再说"拿栈顶两个值",而是说:
plaintext
从 r0 和 r1 取材料,把结果放到 r2。这让数据流更直观,也更接近 jsvmp-next 的真实设计。

4. 前置知识
| 概念 | 说明 |
|---|---|
| Stack VM | 临时值放在操作数栈中 |
| Register VM | 临时值放在寄存器数组中 |
| Register | 一个编号位置,例如 r0 |
| Register Frame | 一个函数执行时拥有的一组寄存器 |
| Bytecode Operand | opcode 后面的参数,例如目标寄存器、源寄存器、常量索引 |
| Program Counter | 当前读取 bytecode 的位置 |
5. 源码中的对应位置
| 概念 | 源码位置 | 说明 |
|---|---|---|
| Register-based 定位 | README.md |
项目采用寄存器式 bytecode |
| Opcode | src/runtime/opcodes.ts |
LOAD_CONST、BINARY、RETURN 等指令定义 |
| Binary Operator | src/runtime/opcodes.ts |
BINARY_OPS['+'] 表示加法 |
| Register Frame | src/compiler/runtime-gen.ts |
regs = new Array(meta.registerCount) |
| Emit | src/compiler/emit.ts |
把 IR 编成带寄存器参数的 bytecode |
6. 核心数据结构
Register
它解决什么问题
Register 用来保存表达式计算中的临时值。
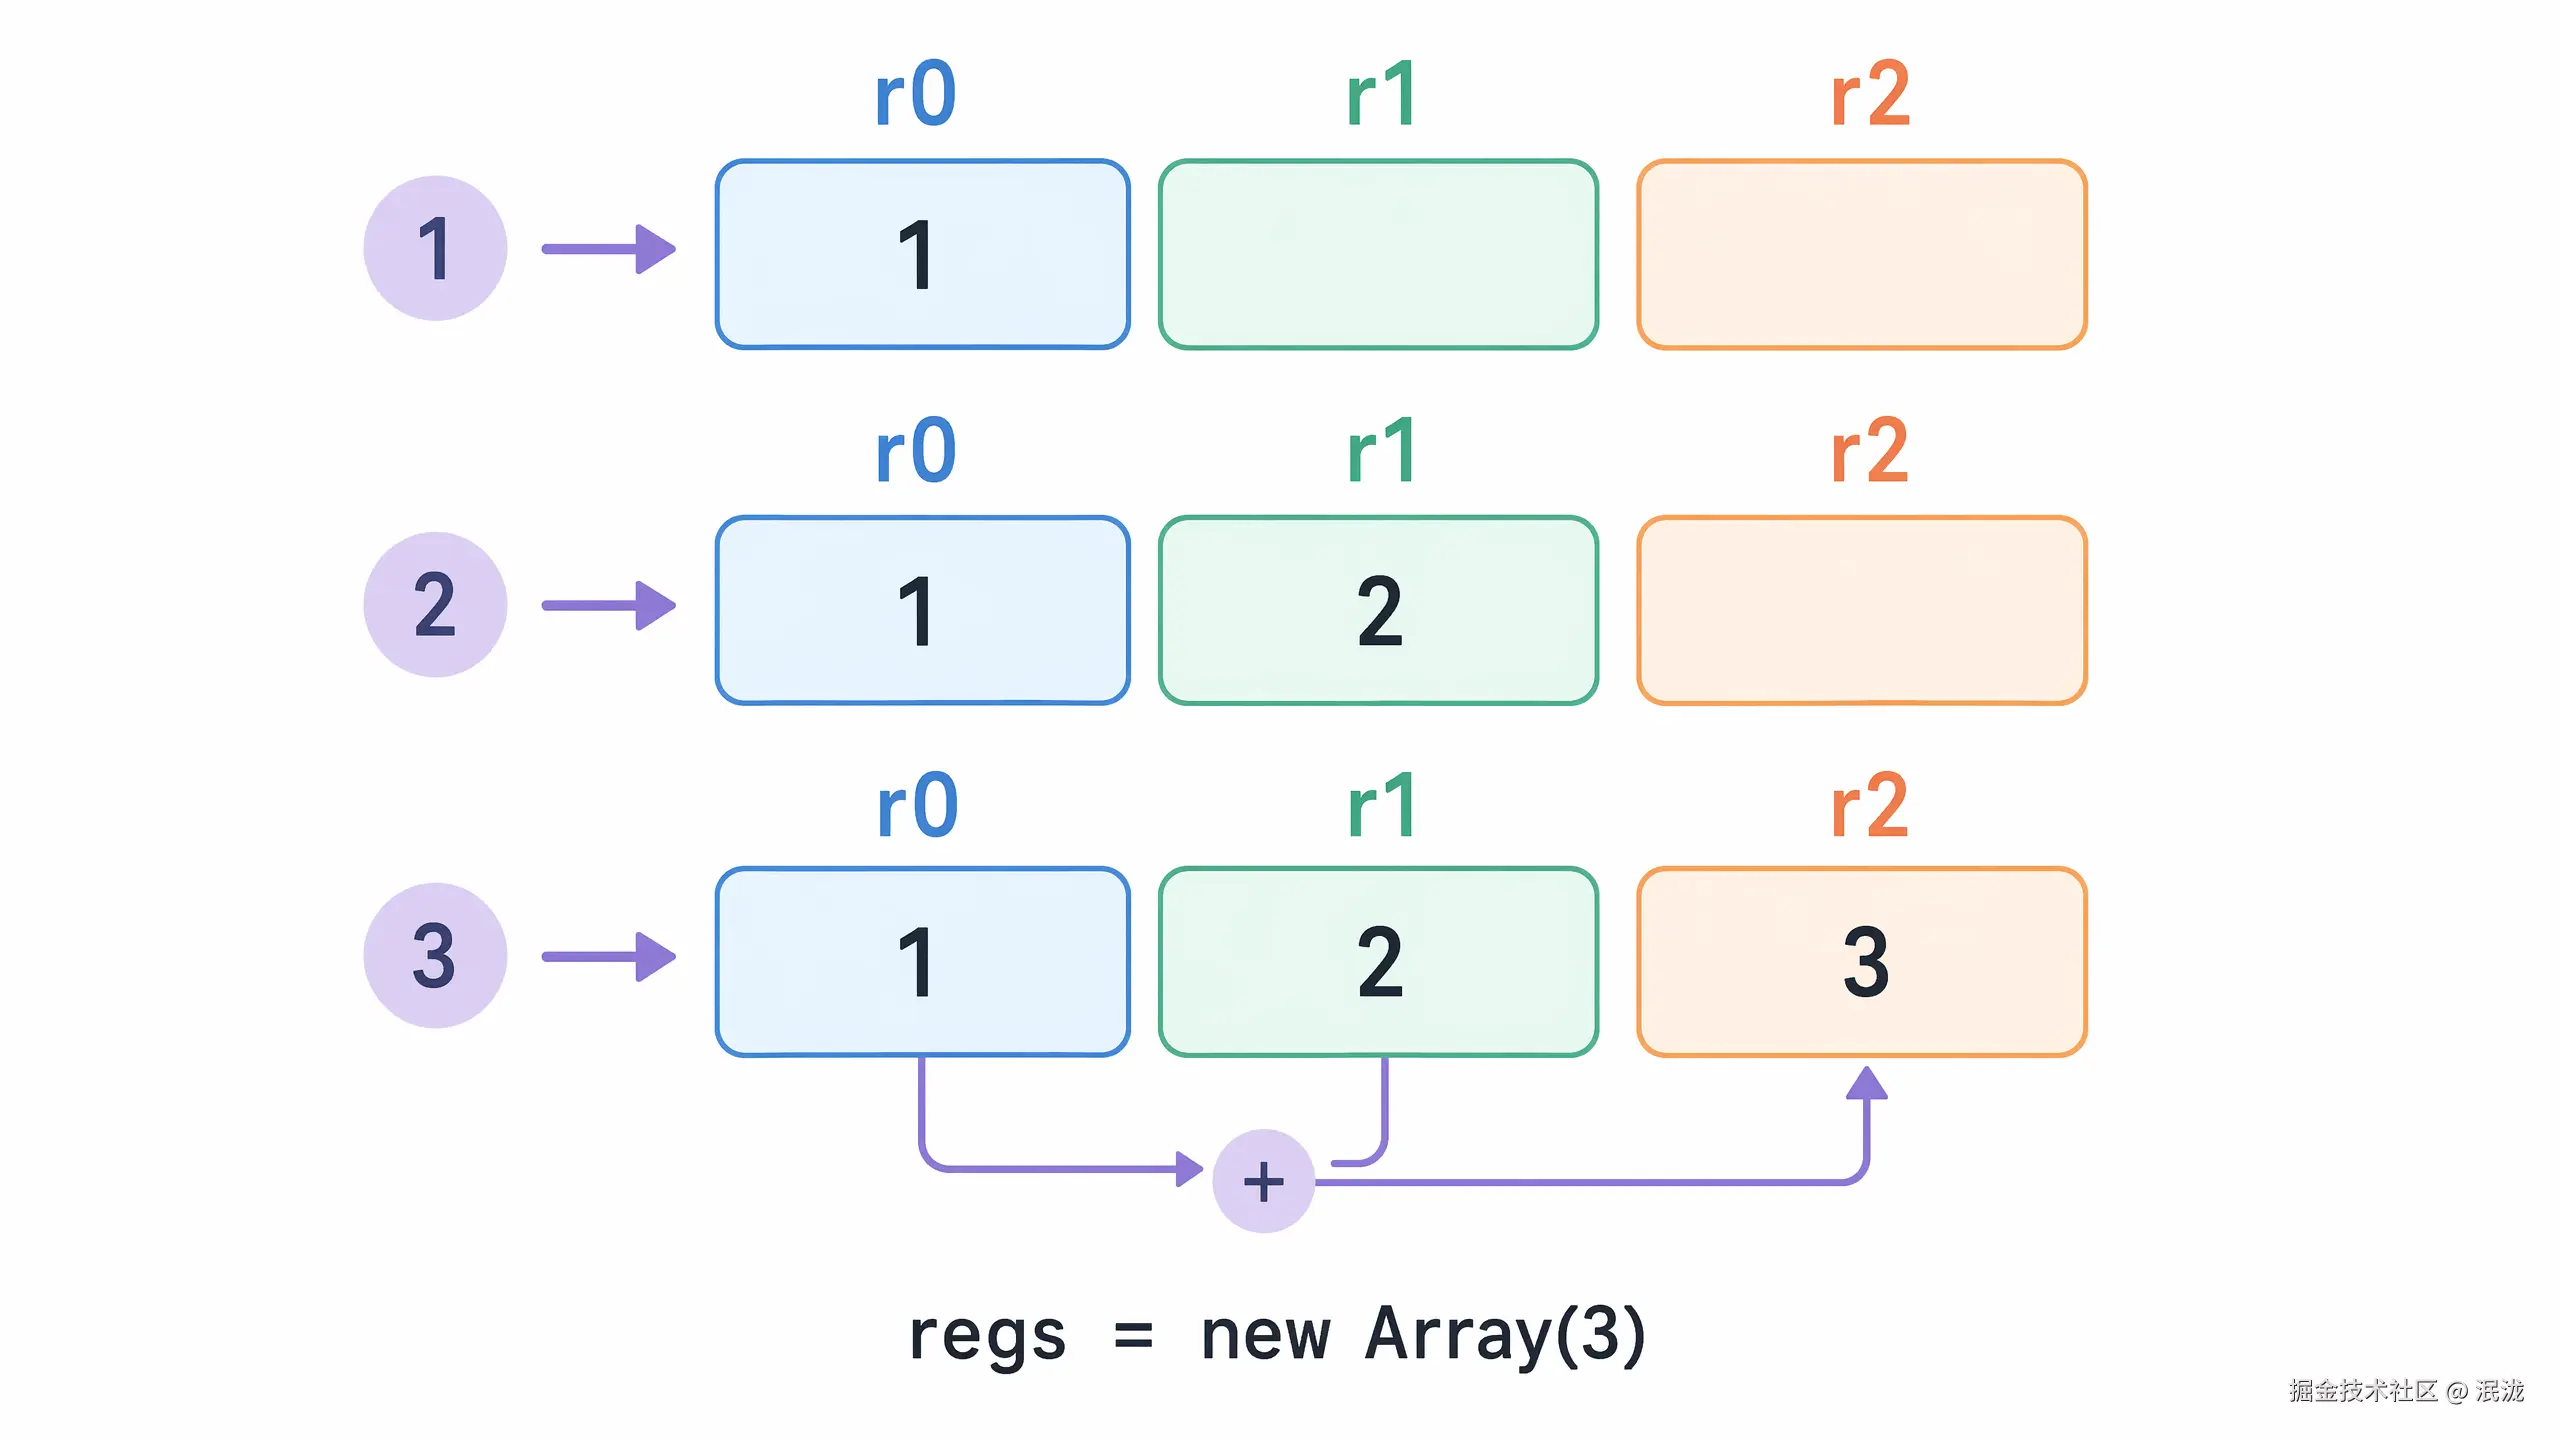
它的数据结构
javascript
const regs = new Array(3);它在源码中的对应位置
正式运行时会根据函数元信息创建 regs。
教学版简化实现
javascript
regs[0] = 1;
regs[1] = 2;
regs[2] = regs[0] + regs[1];
使用示例
javascript
console.log(regs[2]); // 3Register Frame
它解决什么问题
每个函数执行时都应拥有自己的寄存器空间,避免不同函数互相污染。
它的数据结构
javascript
function createFrame(registerCount) {
  return {
    regs: new Array(registerCount),
  };
}
它在源码中的对应位置
正式源码通过 FunctionMeta.registerCount 决定当前函数需要多少寄存器。
教学版简化实现
javascript
const frame = createFrame(3);使用示例
javascript
frame.regs[0] = 1;Register Bytecode
它解决什么问题
寄存器式 bytecode 把目标位置和源位置都写在指令里。
它的数据结构
javascript
[
  OPCODES.LOAD_CONST, 0, 0,
  OPCODES.LOAD_CONST, 1, 1,
  OPCODES.BINARY, 2, 0, 1, BINARY_OPS['+'],
  OPCODES.RETURN, 2,
]
它在源码中的对应位置
正式源码中的 load_const 会被编码为 LOAD_CONST, dst, constantIndex,binary 会被编码为 BINARY, dst, left, right, operator。
教学版简化实现
javascript
const bytecode = [1, 0, 0, 1, 1, 1, 2, 2, 0, 1, 1, 3, 2];使用示例
javascript
const opcode = bytecode[0];7. Mermaid 图解
栈式 VM 与寄存器式 VM 对比
1 + 2 的寄存器变化
8. 伪代码
plaintext
function run(bytecode, constantPool, registerCount):
    regs = new Array(registerCount)
    pc = 0

    while pc < bytecode.length:
        opcode = bytecode[pc]
        pc = pc + 1

        switch opcode:
            case LOAD_CONST:
                dst = bytecode[pc]
                constIndex = bytecode[pc + 1]
                pc = pc + 2
                regs[dst] = constantPool[constIndex]

            case BINARY:
                dst = bytecode[pc]
                left = bytecode[pc + 1]
                right = bytecode[pc + 2]
                operator = bytecode[pc + 3]
                pc = pc + 4
                regs[dst] = binary(operator, regs[left], regs[right])

            case RETURN:
                src = bytecode[pc]
                return regs[src]
9. 教学版实现代码
javascript
const OPCODES = {
  LOAD_CONST: 1,
  BINARY: 2,
  RETURN: 3,
};

const BINARY_OPS = {
  '+': 1,
  '-': 2,
  '*': 3,
  '/': 4,
};

function binary(operator, left, right) {
  switch (operator) {
    case BINARY_OPS['+']:
      return left + right;
    case BINARY_OPS['-']:
      return left - right;
    case BINARY_OPS['*']:
      return left * right;
    case BINARY_OPS['/']:
      return left / right;
    default:
      throw new Error(`Unknown binary operator: ${operator}`);
  }
}

function run(bytecode, constantPool, registerCount) {
  const regs = new Array(registerCount);
  let pc = 0;

  while (pc < bytecode.length) {
    const opcode = bytecode[pc++];

    switch (opcode) {
      case OPCODES.LOAD_CONST: {
        const dst = bytecode[pc++];
        const constIndex = bytecode[pc++];
        regs[dst] = constantPool[constIndex];
        break;
      }

      case OPCODES.BINARY: {
        const dst = bytecode[pc++];
        const left = bytecode[pc++];
        const right = bytecode[pc++];
        const operator = bytecode[pc++];
        regs[dst] = binary(operator, regs[left], regs[right]);
        break;
      }

      case OPCODES.RETURN: {
        const src = bytecode[pc++];
        return regs[src];
      }

      default:
        throw new Error(`Unknown opcode: ${opcode}`);
    }
  }
}

const constantPool = [1, 2];
const bytecode = [
  OPCODES.LOAD_CONST, 0, 0,
  OPCODES.LOAD_CONST, 1, 1,
  OPCODES.BINARY, 2, 0, 1, BINARY_OPS['+'],
  OPCODES.RETURN, 2,
];

console.log(run(bytecode, constantPool, 3)); // 3
10. 示例输入与输出
示例输入
javascript
1 + 2Register Bytecode
plaintext
LOAD_CONST r0, const[0]
LOAD_CONST r1, const[1]
BINARY r2, r0, r1, '+'
RETURN r2
输出结果
javascript
311. 执行过程拆解
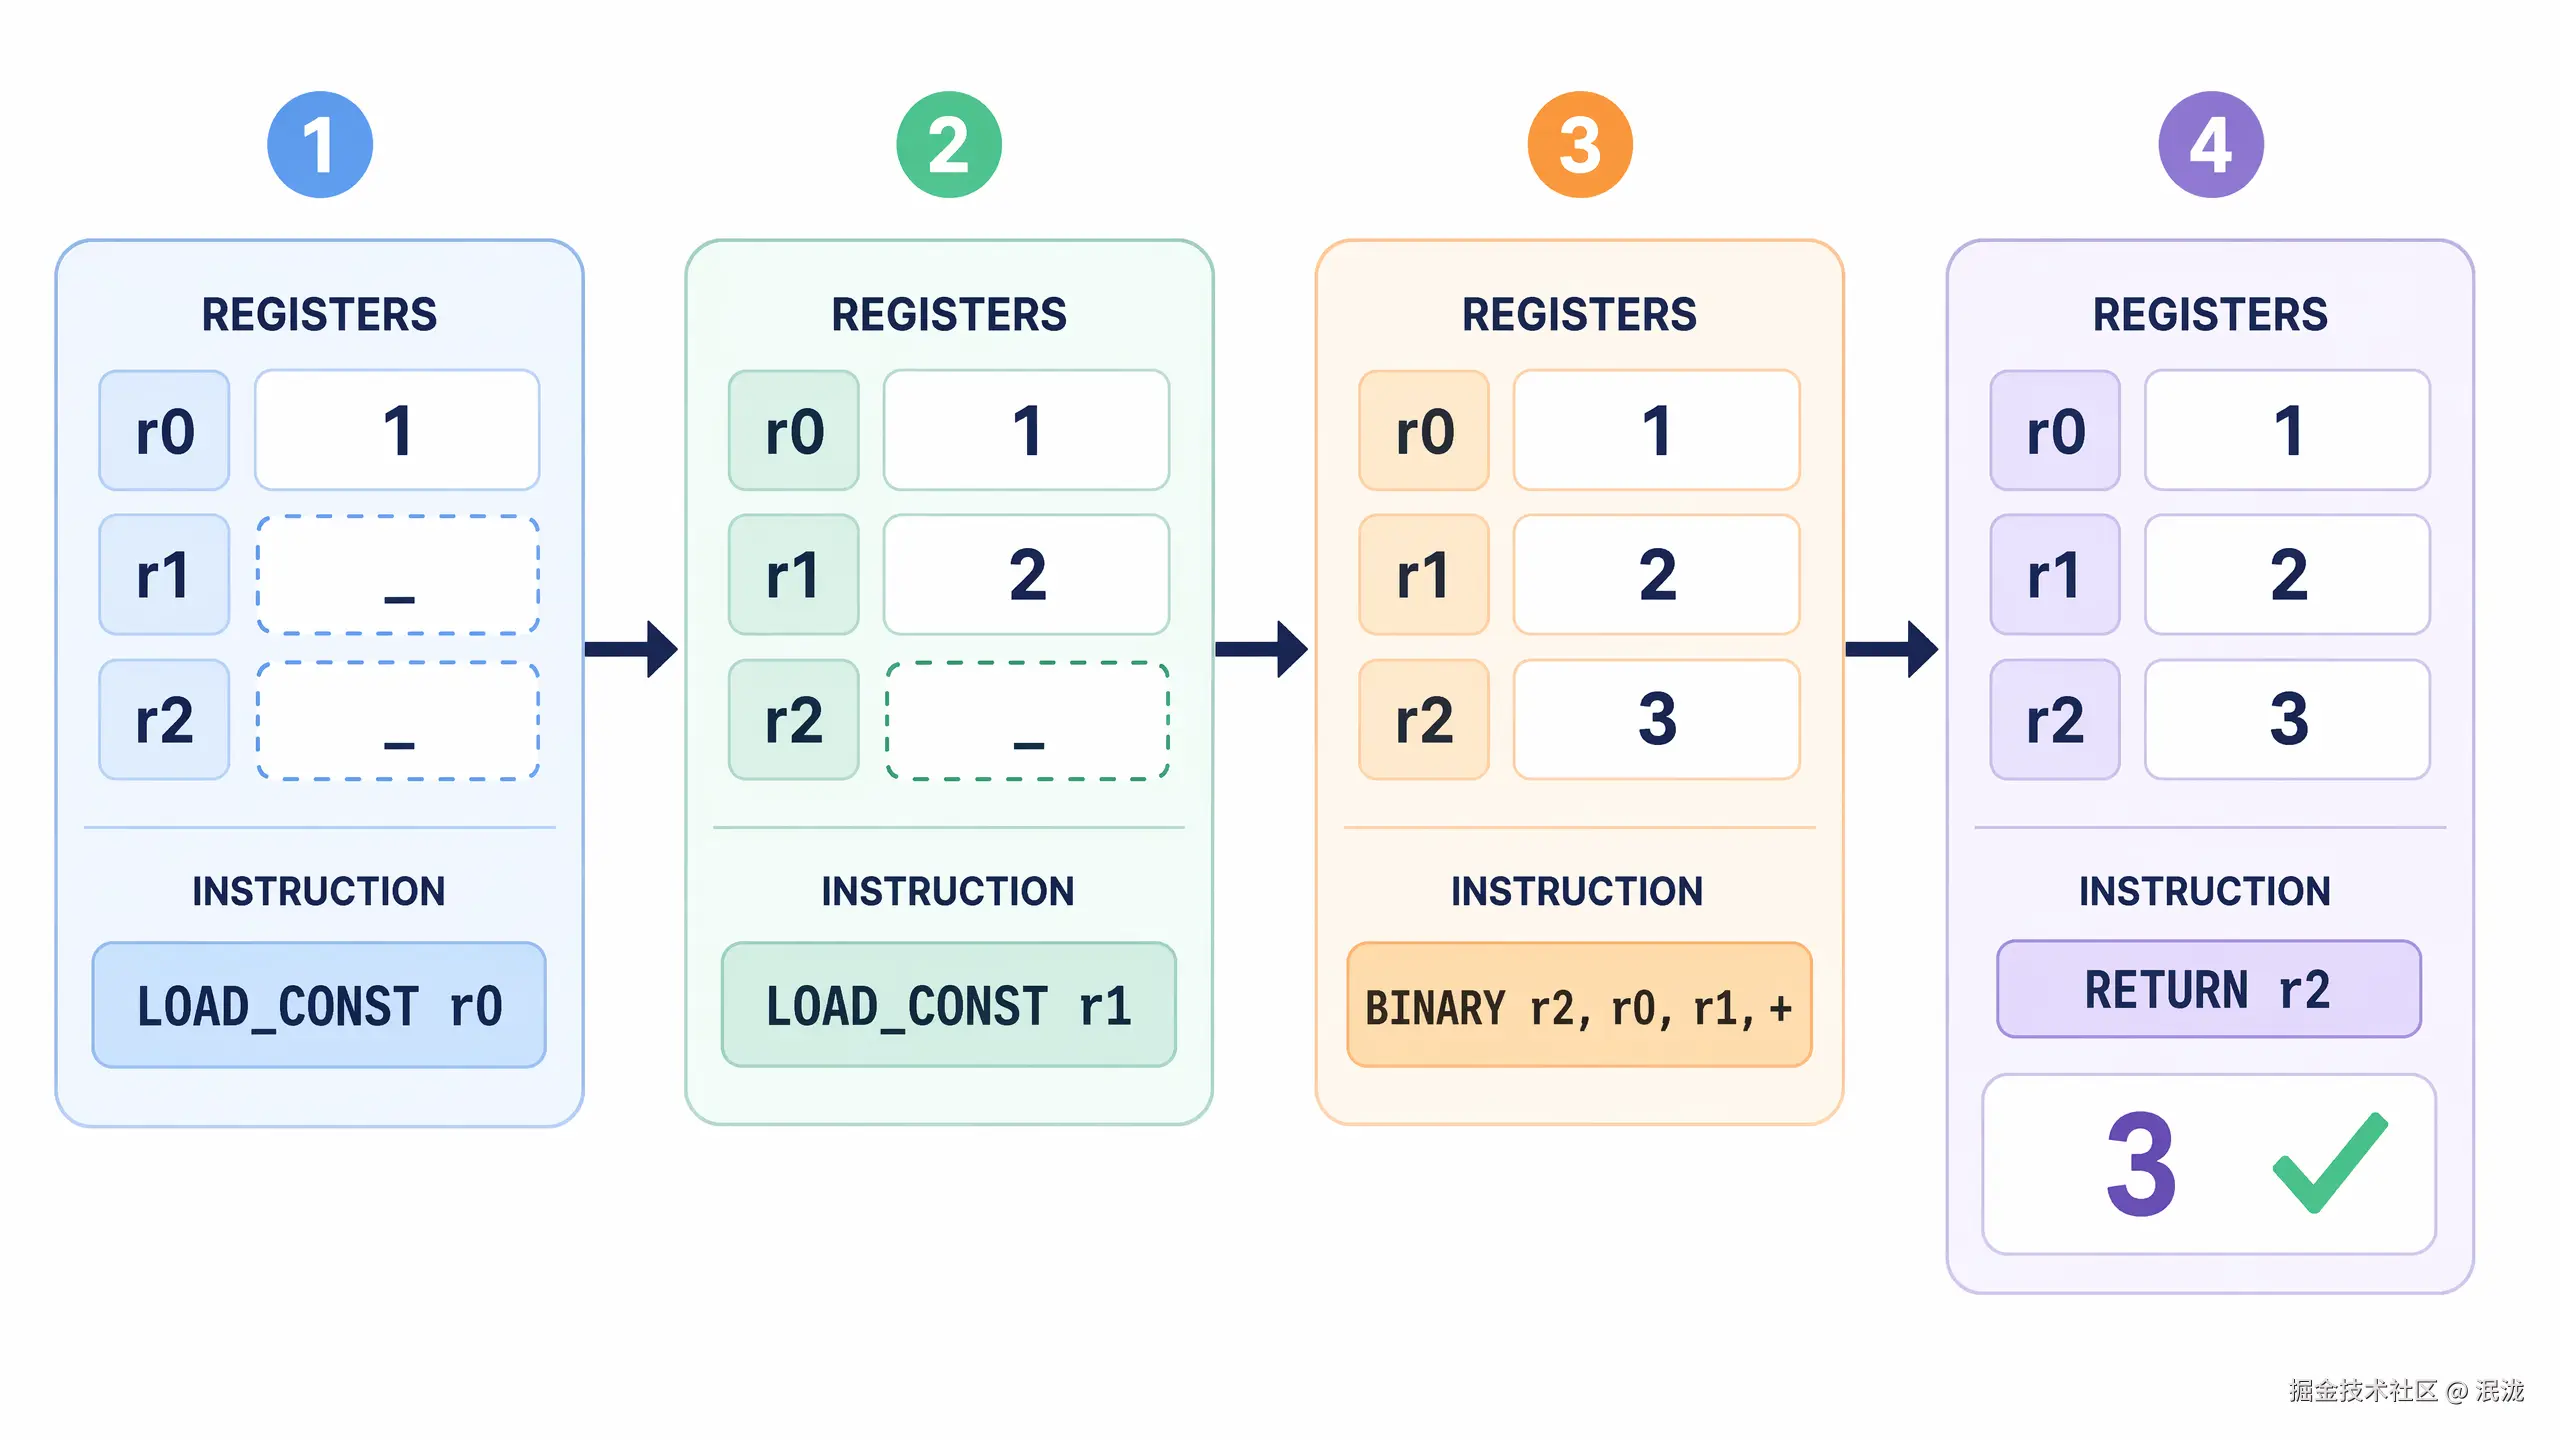
| Step | PC | Instruction | Registers Before | Registers After |
|---|---|---|---|---|
| 1 | 0 | LOAD_CONST r0, const[0] |
[_, _, _] |
[1, _, _] |
| 2 | 3 | LOAD_CONST r1, const[1] |
[1, _, _] |
[1, 2, _] |
| 3 | 6 | BINARY r2, r0, r1, '+' |
[1, 2, _] |
[1, 2, 3] |
| 4 | 11 | RETURN r2 |
[1, 2, 3] |
[1, 2, 3] |
12. 与原始源码的差异
| 主题 | 教学版 | 正式源码 |
|---|---|---|
| opcode 编码 | 从 1 开始简化 | 使用 src/runtime/opcodes.ts 中的正式编号 |
| 二元运算 | BINARY 支持四则运算 |
BINARY_OPS 支持更多 JS 运算符 |
| 寄存器数量 | 手动传入 | 来自函数元信息 registerCount |
| bytecode 范围 | 整个数组 | 每个函数有 entry 和 end |
| 环境 | 不支持变量 | 后续通过 slot/env 支持变量 |
13. 常见问题
Q1:寄存器是 CPU 的真实寄存器吗?
不是。这里的寄存器只是 VM 自己模拟出来的数组位置。
Q2:寄存器式 VM 一定比栈式 VM 快吗?
不一定。本文重点不是证明性能,而是说明寄存器式 VM 的数据流更显式,更适合后续的编译和调试。
Q3:为什么正式源码不用 ADD?
因为 ADD 只是二元运算的一种。正式源码用 BINARY + operatorCode 统一表示多种二元操作。
14. 本文小结
这一篇我们完成了关键升级:
plaintext
栈式 VM -> 寄存器式 VM现在临时值不再只依赖隐式的栈顶,而是有了明确的寄存器位置。
下一篇将继续讲:
plaintext
第 4 篇:让 VM 支持变量:Slot、Environment 与 TDZ